Plan de montage - CRD
Plan de montage - CRD
Plan de montage - CRD
- No tags were found...
Create successful ePaper yourself
Turn your PDF publications into a flip-book with our unique Google optimized e-Paper software.
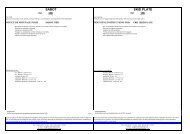
X-Race TITANEX-Race TITANERéf. 9791GPT Réf. 9791GPTCher client,Nous vous remercions d’avoir acheté ce produit <strong>CRD</strong> qui, nous l’espérons, vous apportera entière satisfaction.NOTICE DE MONTAGE POUR X-Race TITANE <strong>CRD</strong>Déposer l'habillage du véhicule si nécessaireDesserrer le collier <strong>de</strong> raccor<strong>de</strong>ment et déposer lea ligne complète d'échappementEngager le collecteur <strong>CRD</strong> et le visser légèrement, juste pour le maintenirPrésenter le tube <strong>de</strong> raccor<strong>de</strong>ment <strong>CRD</strong> sur le collecteur <strong>CRD</strong>Engager la vis du point <strong>de</strong> fixation au cadre pour le maintenirEquiper le silencieux avec son collier à l'ai<strong>de</strong> <strong>de</strong>s accessoires fournis (voir <strong>de</strong>ssin)Orienter le collier correctementEmboiter le silencieux sur le tube <strong>de</strong> raccor<strong>de</strong>ment et poser les ressorts <strong>de</strong> maintienFixer le silencieux sur le cadreSerrer correctement le collecteur sur la culasse (utiliser une clé dynamométrique)Serrer le point <strong>de</strong> fixation au cadre et poser le ressort <strong>de</strong> maintien entre le collecteur <strong>CRD</strong> et le tube raccord <strong>CRD</strong>Monter le déflecteur <strong>de</strong> chaleur sur le collecteur <strong>CRD</strong> à l'ai<strong>de</strong> <strong>de</strong>s ACC fournis (cf <strong>de</strong>ssin)Remettre l'habillage du véhiculeDear customer,We thank you for having bought this <strong>CRD</strong> product and hope you will be happy with it.MOUNTING INSTRUCTIONS FOR <strong>CRD</strong> X-Race TITANERemove the vehicle casing if necessaryRemove the original exhaust systemEngage (and screw a little just to maintain it) the <strong>CRD</strong> head pipePresent the <strong>CRD</strong> connecting tube on the <strong>CRD</strong> head pipeEngage the screw from the fixing point to the framework to maintain itEquip the silencer with its collar using the accessories provi<strong>de</strong>d (see drawing)Direct the collar correctlyEncase the silencer on the tube of connection and add the springs of maintainFix the silencer on the frameworkScrew correctly (use a torque wrench) the <strong>CRD</strong> head pipe on the cylin<strong>de</strong>rTighten the fixing point to the framework and lock the head pipe using the spring provi<strong>de</strong>dFix the Carbon heat shield on the <strong>CRD</strong> head pipe using the accessories provi<strong>de</strong>d (see drawing)Put again the vehicle casingEléments livrés:Accessories provi<strong>de</strong>d:Astuce <strong>de</strong> 1<strong>montage</strong>:vis M6 L45 mm X 2 screw(s) M6 L45 mm X 2entretoise Ø6.5 mm L16 mm X 1 spacer(s) Ø6.5 mm L16 mm X 1entretoise Ø6.5 mm L24 mm X 1 spacer(s) Ø6.5 mm L24 mm X 1clip M8 X 1 clip M8 X 1Clip M6 x 2 Clip M6 x 2Patte <strong>de</strong> fixation en Alumiminium I x 1 Aluminium attachment unit I x 1Patte <strong>de</strong> fixation en Alumiminium R x 1 Aluminium attachment unit R x 1vis Ø5 mm L16 mm X 4 screw(s) Ø5 mm L16 mm X 4clip M5 X 4 clip M5 X 4Ressort x 3 Spring x 3gomme pour ressorts x 3 springs rubber x 3Collier <strong>de</strong> fixation silencieux x 2 Clamp for muffler x 2Protection <strong>de</strong> chaleur carbone Carbon heat shield x 1ron<strong>de</strong>lle Ø6 mm X 4 washer(s) Ø6 mm X 4vis M6 L10 mm X 2 screw(s) M6 L10 mm X 2Carburation:Gicleur principal:Gicleur <strong>de</strong> ralenti:Aiguille:Clips:Boîte à air:standardstandardstandardstandardstandardMounting tips:Carburation:Main jet:Pilot jet:Needle:Clip:Air box:standardstandardstandardstandardstandardENTRETIEN:Vérifier avant chaque sortie les systèmes <strong>de</strong> fixations <strong>de</strong>s produits <strong>CRD</strong>MAINTENANCE:Check before each exit the attachment units of <strong>CRD</strong> productsToutes les pièces ont été inspectées avant expédition. Notre garantie se limite au remplacement <strong>de</strong>s pièces défectueuses avant <strong>montage</strong>. Eneffet, ne contrôlant pas le <strong>montage</strong> <strong>de</strong> ces produits, nous ne pouvons assumer les dommages, tant physiques que techniques, résultant d’unmauvais assemblage <strong>de</strong> votre part ou <strong>de</strong> celui d’une tierce personne.TEL : (33) 04 68 11 47 43 – FAX : (33) 04 68 11 32 24E-mail : sav@crd-international.comhttp://www.<strong>CRD</strong>-INTERNATIONAL.comAll the parts have been inspected before dispatch. We guarantee only parts that may prove <strong>de</strong>fective before installation. As we do not controlthe mounting of our products, we cannot be held responsible for personal injuries or technical damage resulting from a wrong assembly carriedout by yourself or a third party.TEL : (33) 04 68 11 47 43 – FAX : (33) 04 68 11 32 24E-mail : sav@crd-international.comhttp://www.<strong>CRD</strong>-INTERNATIONAL.com
X-Race TITANEX-Race TITANERéf. 9791GPT Réf. 9791GPTSehr geehrter Kun<strong>de</strong>,Wir freuen uns, daß Sie sich für ein Produkt von <strong>CRD</strong> entschie<strong>de</strong>n haben und wünschen Inhen viel Spaß damit.MONTAGEANLEITUNG FÜR <strong>CRD</strong> X-Race TITANEWenn nötig, Motorrad-Verkleidungsteile abmontierenLegen Sie die Komplettauspuffanlage abSchrauben Sie <strong>de</strong>n <strong>CRD</strong> Krümmer leicht an, nur so, dass er von alleine hältDer <strong>CRD</strong>-Verbindungsrohr auf <strong>de</strong>m <strong>CRD</strong> Krümmer vorstellenDie Schraube <strong>de</strong>s Befestigungspunktes zum Rahmen verpflichten, um es aufrechtzuerhaltenDen Schalldämpfer mit seiner Schelle mittels <strong>de</strong>s gelieferten Zubehörs ausstatten siehe Zeichnung)Die Schelle richtig richtenDen Schalldämpfer auf <strong>de</strong>m Verbindungsrohr montieren und die Befestigungsfe<strong>de</strong>rn montierenDen Schalldämpfer auf <strong>de</strong>m Rahmen festlegenDer Krümmer muss korrekt auf <strong>de</strong>n Zylin<strong>de</strong>rkopf eingespannt wer<strong>de</strong>n (benutzen Sie einen Dynamometer-Schlüssel)Ziehen Sie die Befestigungsstelle am Rahmen fest. Legen Sie die Fe<strong>de</strong>r zwischen <strong>de</strong>n <strong>CRD</strong> Krümmer und <strong>de</strong>m <strong>CRD</strong>Verbindungsrohr.Montieren Sie das Hitzeschutzblech auf <strong>de</strong>n <strong>CRD</strong> Krümmer, mit Hilfe <strong>de</strong>s mitgelieferten Zubehör (siehe Skizze)Motorrad-Verkleidungsteile wie<strong>de</strong>r montierenApreciado Cliente,Le agra<strong>de</strong>cemos su <strong>de</strong>ferencia al adquirir este producto <strong>CRD</strong> y esperamos que esté satisfecho <strong>de</strong> su compra.INSTRUCCIONES DE MONTAJE PARA X-Race TITANE <strong>CRD</strong>Quitar el conjunto <strong>de</strong> carenados <strong>de</strong>l vehículoAflojar el collar <strong>de</strong> conexión y quitar el sistema <strong>de</strong> escape <strong>de</strong> origenApretar ligeramente el colector <strong>CRD</strong>Presentar el tubo <strong>de</strong> union <strong>CRD</strong> sobre el colector <strong>CRD</strong>Meter el tornillo <strong>de</strong>l punto <strong>de</strong> fijacion al chassis para mantenerloPoner el silencioso con su collar con los acesorios entregadosOrientar el collar corectamenteEncajar el silencioso al tubo <strong>de</strong> union y poner los muellesFijar el silencioso al chasisApretar correctamente el colector sobre el cilindro (uso <strong>de</strong> una llave <strong>de</strong> par)Apretar el punto <strong>de</strong> fijacion al chasis y cerrar el colector con el muelle entregadoFijar el protector <strong>de</strong> calor <strong>de</strong> carbono sobre el colector <strong>CRD</strong> con los acesorios entregadosReponer el conjunto <strong>de</strong> carenados <strong>de</strong>l vehículoGelieferte Teile:schrauben M6 L45 mm X 2 tornillo(s) M6 L45 mm X 2stege Ø6.5 mm L16 mm X 1 separadore(s) Ø6.5 mm L16 mm X 1stege Ø6.5 mm L24 mm X 1 separadore(s) Ø6.5 mm L16 mm X 1clip M8 X 1 clip M8 X 1Clip M6 x 2 Clip M6 x 2Klebstoff aus Aluminium I x 1Pata <strong>de</strong> fijación <strong>de</strong> aluminio I x1Klebstoff aus Aluminium R x 1Pata <strong>de</strong> fijación <strong>de</strong> aluminio R x1schrauben Ø5 mm L16 mm X 4 tornillo(s) Ø5 mm L16 mm X 4clip M5 X 4 clip M5 X 4Fe<strong>de</strong>r x 3 muelle x 3Gummi-Gummi für Fe<strong>de</strong>rn x 3 goma <strong>de</strong> caucho por muelles x 3Schelle x 2 Abraza<strong>de</strong>ra x 2Carbon Hitzeschild x 1 Protector <strong>de</strong> calor <strong>de</strong> carbono x 1unterlegsheiben Ø6 mm X 4 aran<strong>de</strong>la(s) Ø6 mm X 4schrauben M6 L10 mm X 2 tornillo(s) M6 L10 mm X 2für Montajetip: SUPERMOTO-Einsatz Reifenfreiheit kontrollierenVergasereinstellHauptdüse:ung:Leerlaufdüse:Na<strong>de</strong>l:Na<strong>de</strong>lkerbe:Offene Luftkiste:standardstandardstandardstandardstandardElementos suministrados:Para Astucia un <strong>de</strong> uso montaje: en SUPERMOTARD comprobar el pasaje <strong>de</strong>l neumático Carburación:Jet principal:Surtidor <strong>de</strong> ralentí:Aguja:Muesca <strong>de</strong> aguja:Caja a aire:originaleoriginaleoriginaleoriginaleoriginaleWARTUNG:Cor je<strong>de</strong>r Benutzung die Befestigungen <strong>de</strong>r crd-Produkte prüfenMANTENIMIENTO:Comprobar antes <strong>de</strong> cada salida los sistemas <strong>de</strong> fijacion <strong>de</strong> los productos <strong>CRD</strong>Alle Teile wur<strong>de</strong>n vor <strong>de</strong>m Versand geprüft. Wir garantieren nur Teile, die vor <strong>de</strong>m Montieren fehlhaft sein könnten. Da wir das Montierendieser Teile nicht kontrollieren, können wir die Verantwortung für technische Schä<strong>de</strong>n o<strong>de</strong>r auch persönliche Verletzungen infolge einesfalschen Zusammensetzung Ihrerseits o<strong>de</strong>r von seiten eines Dritters selbstverständlich nicht übernehmen.TEL : (33) 04 68 11 47 43 – FAX : (33) 04 68 11 32 24E-mail : sav@crd-international.comhttp://www.<strong>CRD</strong>-INTERNATIONAL.comTodas las piezas han sido verificadas antes <strong>de</strong> expedirlas. Nuestra garantía se limita a la substitución <strong>de</strong> las piezas <strong>de</strong>fectuosas antes <strong>de</strong>haberlas montado. En efecto, dado que no controlamos el montaje <strong>de</strong> estos productos, no po<strong>de</strong>mos asumir los daños, tanto físicos comotécnicos, resultantes <strong>de</strong> un ensamblaje incorrecto por parte <strong>de</strong>l montador o <strong>de</strong> terceros.TEL : (33) 04 68 11 47 43 – FAX : (33) 04 68 11 32 24E-mail : sav@crd-international.comhttp://www.<strong>CRD</strong>-INTERNATIONAL.com
X-Race TITANERéf. 9791GPTGentile Cliente,La ringraziamo per aver acquistato questo prodotto <strong>CRD</strong> certi che ne rimarra soddisfatto.INSTRUZIONI DI MONTAGGIO PER X-Race TITANE <strong>CRD</strong>Togliere il rivestimento <strong>de</strong>l veicolo se è necessarioRimuovere il sistema di scarico originaleCoinvolgere il collettore <strong>CRD</strong> vite (e un po ', solo per mantenere)Presentare il tubo di raccordo <strong>CRD</strong> sul collettore <strong>CRD</strong>Impegnare la vite dal punto di fissazione al telaio per mantenerloFornire il silenziatore con il suo collare per mezzo <strong>de</strong>gli accessori forniti (ve<strong>de</strong>re disegno)Orientare il collare correttamenteInserire il silenziatore sul tubo di raccordo e porre le molle di mantieneFissare il silenziatore sul quadroStringere il collettore sulla testa <strong>de</strong>l cilindro (utilizzare una chiave dinamometrica)Stringere il punto di fissazione al telaio e chiu<strong>de</strong>re il collettore per mezzo <strong>de</strong>l molla fornitoSollevare il <strong>de</strong>flettore di calore sul collettore <strong>CRD</strong> utilizzando gli accessori forniti (vedi schema)Rimettere il rivestimento <strong>de</strong>l veicoloElementi forniti:vite(i) M6 L45 mm X 2traversa(e) Ø6.5 mm L16 mm X 1traversa(e) Ø6.5 mm L24 mm X 1clip M8 X 1Clip M6 x 2Elemento di fissaggio I x 1Elemento di fissaggio R x 1vite(i) Ø5 mm L16 mm X 4clip M5 X 4molla x 3gum goma per molle x 3Cravatta per silenciatore x 2scudo termico di carbonio x 1disco(chi) Ø6 mm X 4vite(i) M6 L10 mm X 2per Astuzia un di uso montaggio: in supermotard verificare il passaggio <strong>de</strong>l pneumaticoCarburazione:Getto principale:Getto di minimo:Ago:Tacca:Scatola ad aria :standardstandardstandardstandardstandardMANUTENZIONE:Verificare prima di ogni uscita i sistemi di fissazioni <strong>de</strong>i prodotti <strong>CRD</strong>Tutte le parti sono state ispezionate prima <strong>de</strong>lla spedizione. La nostra garanzia si limita alla sostituzione <strong>de</strong>lle parti difettose prima <strong>de</strong>lmontaggio. In effetti, non controllando il montaggio di questi prodotti, non possiamo assumere i danni, sia fisici che tecnici che potrebbero<strong>de</strong>rivare da un montaggio difettoso da parte vostra o da quello effettuato da una terza personaTEL : (33) 04 68 11 47 43 – FAX : (33) 04 68 11 32 24E-mail : sav@crd-international.comhttp://www.<strong>CRD</strong>-INTERNATIONAL.com


