Manual de Instalación y Mantenimiento - Ferromar
Manual de Instalación y Mantenimiento - Ferromar
Manual de Instalación y Mantenimiento - Ferromar

You also want an ePaper? Increase the reach of your titles
YUMPU automatically turns print PDFs into web optimized ePapers that Google loves.
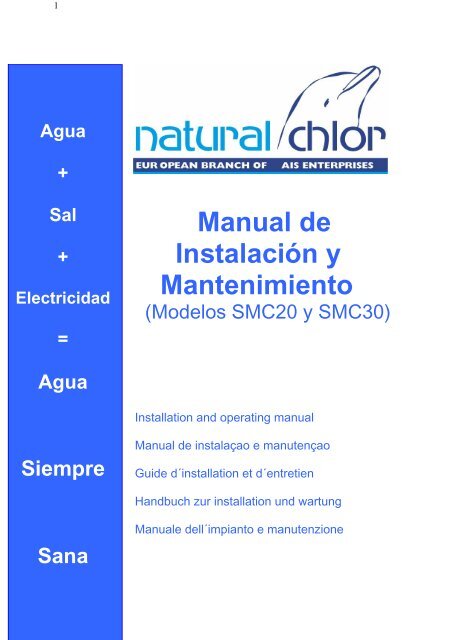
1Agua+Sal+Electricidad=<strong>Manual</strong> <strong>de</strong>Instalación y<strong>Mantenimiento</strong>(Mo<strong>de</strong>los SMC20 y SMC30)AguaInstallation and operating manualSiempre<strong>Manual</strong> <strong>de</strong> instalaçao e manutençaoGui<strong>de</strong> d´installation et d´entretienHandbuch zur installation und wartungSana<strong>Manual</strong>e <strong>de</strong>ll´impianto e manutenzione
Texto manual en Español.....................................3<strong>Manual</strong> text in English.......................................16Texto do <strong>Manual</strong> em Português..........................29Gui<strong>de</strong> d´installation en Français.........................42Text <strong>de</strong>s Handbuches auf Deutsch.....................55Testo <strong>de</strong>l manuale in Italiano.............................682
INDICE1. Clorador Salino “Natural Chlor”......................….42. Adición <strong>de</strong> Sal....................................……….53. Instrucciones <strong>de</strong> montaje............................….64. <strong>Mantenimiento</strong>........................................…..85. Funciones <strong>de</strong>l Rectificador ..........................….116. Guía para atajar los problemas .....…............……137. Garantía ...........................................……..148. Gráfico <strong>de</strong> instalación <strong>de</strong>l clorador salino.......…....153
1. CLORADOR SALINO “NATURAL CHLOR”Enhorabuena por la elección <strong>de</strong> un clorador salino “Natural Chlor”.Su clorador ha sido fabricado bajo las más estrictas especificaciones <strong>de</strong>Naturalchlor, S.L y con un uso y mantenimiento correctos, clorará a<strong>de</strong>cuadamentecualquier piscina con unas condiciones <strong>de</strong> uso normales.Por favor, lea <strong>de</strong>tenidamente estas instrucciones para un mayorconocimiento <strong>de</strong> la capacidad, funcionamiento y correcto mantenimiento <strong>de</strong> suclorador “Natural Chlor”.PREPARACION DEL AGUA DE SU PISCINAEl agua estará limpia y transparente si su análisis apunta lo siguiente:Cloro0,6-1,2 mg/lPH 7,2-7,6 Piscinas fibra <strong>de</strong> vidrio 6,8-7,0T.A. (Alcalinidad)60-100 p.p.m.Sal5-6 gr/lDureza <strong>de</strong>l Agua100-200 p.p.m.La estabilidad <strong>de</strong>l agua resi<strong>de</strong> en la relación entre pH, dureza, alcalinidad,sólidos disueltos y temperatura <strong>de</strong>l agua. Le sugerimos que equilibre el agua antes<strong>de</strong> conectar su clorador.!El Kit <strong>de</strong> análisis es la única forma <strong>de</strong> comprobar el cloro y elequilibrio químico <strong>de</strong> su piscina.Recomendamos revisar y ajustar <strong>de</strong>bidamente el agua <strong>de</strong> su piscina <strong>de</strong> una formaperiódica para mantenerla clara y transparente.4
2. ADICION DE SALLa sal hay que ponerla en la piscina en una proporción <strong>de</strong> 50 a 60 Kg <strong>de</strong> salpor cada 10 m 3 <strong>de</strong> agua. Se vierte la sal en la piscina para facilitar su disolución.Como la sal es más pesada que el agua permanecerá en el fondo, aunque pareceráestar disuelta. Para procurar una distribución más regular es aconsejable pasar ellimpiafondos y hacer funcionar la <strong>de</strong>puradora 24 horas. Todo esto antes <strong>de</strong>poner en funcionamiento el clorador.Contrariamente a lo que pueda pensar, su clorador “Natural Chlor” noconsumirá la sal en su producción <strong>de</strong> cloro. Lo que ocurre es que la sal eselectrolizada y convertida en hipoclorito sódico y <strong>de</strong>spués <strong>de</strong> <strong>de</strong>sinfectar el agua<strong>de</strong> la piscina, se vuelve a convertir en sal común. Sin embargo, el uso y la limpieza<strong>de</strong>l filtro, así como la lluvia reducirán el nivel <strong>de</strong>l agua y al rellenar la piscina elagua verá reducida su concentración <strong>de</strong> sal.!Durante el proceso <strong>de</strong> adición <strong>de</strong> sal, su clorador “ Natural Chlor”<strong>de</strong>berá estar apagado hasta que toda la sal esté completamentedisuelta y distribuida por todo el agua <strong>de</strong> la piscina, si esto no se cumple podríaocasionar un costoso <strong>de</strong>sperfecto a los electrodos y al rectificador.5
3. INSTRUCCIONES DE MONTAJE1. Calcular la capacidad <strong>de</strong> agua <strong>de</strong> la piscina. Echar <strong>de</strong> 5 a 6 Kg <strong>de</strong> sal por m 3 .2. Equilibrar el pH entre 7,2 y 7,6. En piscinas <strong>de</strong> fibra <strong>de</strong> vidrio entre 6,8 y7,0.3. Si el agua es nueva, echar 1 Kg <strong>de</strong> ESTABILIZADOR DE CLORO POR CADA25 m 3 .4. Abrir el filtro. Limpiarlo y añadir arena, 2 o 3 cm. por encima <strong>de</strong>l tubosuperior (si el filtro es <strong>de</strong> diatomeas no tocar).5. Instalación eléctrica. REVISAR TOMA DE CORRIENTE a 220 V , suclorador “Natural Chlor” trabaja a una corriente <strong>de</strong> 210-230 V CON TOMA DETIERRA. Haga la conexión a través <strong>de</strong>l reloj para permitir un apagado yencendido automático <strong>de</strong>l clorador y la bomba <strong>de</strong> la <strong>de</strong>puradora.La célula <strong>de</strong>be instalarse a la salida <strong>de</strong>l filtro, <strong>de</strong>spués <strong>de</strong>l calentadorconvencional o sistemas solares, válvulas,... Deberá haber sitio suficiente parapermitir <strong>de</strong>smontar la célula para su limpieza, véase el dibujo que aparece acontinuación y el gráfico <strong>de</strong> instalación página 15.6
DESDEPISCINAFILTROCÉLULARETORNO A LAPISCINADESDEPISCINAFILTROCALENTADORCÉLULARETORNOA LA PISCINABY-PASS1 Esquema <strong>de</strong> montajeEl rectificador <strong>de</strong> mandos <strong>de</strong>berá instalarse muy cerca <strong>de</strong>l sistema <strong>de</strong><strong>de</strong>puración. El sitio i<strong>de</strong>al es en una pared que ofrezca protección <strong>de</strong> la lluvia,salpicaduras y <strong>de</strong>sbordamientos acci<strong>de</strong>ntales.Nota: La carcasa <strong>de</strong> la célula viene adaptada a tuberías <strong>de</strong> 50 mm.Asegúrese <strong>de</strong> que el cable <strong>de</strong>l rectificador se conecta correctamente a lacélula.Monte el rectificador <strong>de</strong> mandos más arriba <strong>de</strong> la célula, pero no a más <strong>de</strong> 1metro (el cable que une el rectificador con la célula no <strong>de</strong>be alargarse a no serque se aumente la sección <strong>de</strong>l mismo, para evitar la caída <strong>de</strong> tensión). Igualmente,pue<strong>de</strong> colocarlo en el suelo, en posición vertical.No instale la célula encima <strong>de</strong> la bomba. Intercálela en el retorno o tubería<strong>de</strong> impulsiones.7
4. MANTENIMIENTO1) LIMPIEZALos cloradores con cambio <strong>de</strong> polaridad tienen células autolimpiables, lo querequiere un mantenimiento mínimo. En casos excepcionales, cuando el contenido encal sea excesivamente alto, el clorador pue<strong>de</strong> no eliminar todos los <strong>de</strong>pósitos. Eneste caso, el nivel <strong>de</strong> cal <strong>de</strong>be ser ajustado a los niveles normales y <strong>de</strong>be limpiarsela célula.Proceso: Apagar el clorador, <strong>de</strong>sconectar el cable <strong>de</strong> la célula y quitar lacélula. La célula sucia ha <strong>de</strong> colocarse en un cubo con una disolución <strong>de</strong> AguaFuerte al 20% (8 partes <strong>de</strong> agua y 2 <strong>de</strong> agua fuerte). Deberá realizar la disoluciónsuficiente para po<strong>de</strong>r sumergir la célula completamente (no sumergir la tapa,don<strong>de</strong> están las conexiones) por seguridad, recuer<strong>de</strong> añadir primero el agua y<strong>de</strong>spués el agua fuerte. También se pue<strong>de</strong> limpiar la célula con una manguera <strong>de</strong>agua a presión. No usar elementos metálicos para eliminar el calcio que queda enlas láminas.SISALIDA DE CORRIENTEDE AGUANO----------------------- -------------------------SALIDA DEDE CORRIENTE DEAGUA2Esquema <strong>de</strong> limpieza8
Los <strong>de</strong>pósitos <strong>de</strong> cal reaccionan con el HCl produciendo gas. Cuando laproducción <strong>de</strong> gas termine, quiere <strong>de</strong>cir que la célula está completamente limpia,toda la cal queda disuelta y hay que enjuagar la célula en agua dulce lo antesposible, porque si <strong>de</strong>jamos la célula en la solución <strong>de</strong> HCl durante más tiempodañaríamos la célula. Cuando el proceso <strong>de</strong> limpieza finalice, se <strong>de</strong>ben secar lasconexiones y volver a instalar la célula.Nota: No mantener la célula en la disolución con ácido más <strong>de</strong> 5 minutos.!En el caso en que la célula funcionase sin corriente <strong>de</strong> agua, podríanacumularse gases en el filtro. Lo que resultaría muy peligroso a<strong>de</strong>más <strong>de</strong> causarimportantes daños al aparato.STOPEn casos excepcionales (temperaturas altas), si observamos laformación <strong>de</strong> algas, <strong>de</strong>purar tres o cuatro horas más diarias.Debe hacer funcionar la <strong>de</strong>puradora el tiempo necesario para queel agua <strong>de</strong> su piscina sea filtrada una vez al día. El tiempo <strong>de</strong>pen<strong>de</strong>rá <strong>de</strong> los litrosque volteen su filtro y bomba a la hora. Como guía lo siguiente le pue<strong>de</strong> ayudar:VERANOOTOÑO YPRIMAVERAINVIERNO8 a 12 horas al día4 a 6 horas al día1 a 2 hora al díaPiscinasUnifamiliaresSi su piscina tuviera un uso muy intenso fuera <strong>de</strong> las horasajustadas en su reloj automático, es recomendable que su sistema <strong>de</strong> cloración y<strong>de</strong> filtración funcione también esas horas.Nota: Para piscinas públicas (hoteles...) <strong>de</strong>berá funcionar las horasnecesarias para mantener el nivel <strong>de</strong> cloro según la normativa.9
2) FUNCIONAMIENTO DE LA DEPURADORAEs necesaria una buena circulación <strong>de</strong>l agua para una eficientedistribución <strong>de</strong>l cloro. Es importante usar los correspondientes <strong>de</strong>sagües enconjunción con los Skimmers para mejorar la circulación.! Controlar y ajustar los niveles <strong>de</strong> pH entre 7,2 y 7,4 (en piscinas <strong>de</strong>fibra <strong>de</strong> vidrio entre 6,8 y 7,0) y <strong>de</strong> cloro entre 0,6 y 1,2 ppm. Dos o tres vecespor semana, revisar el nivel <strong>de</strong> arena cada dos años y limpiar el filtroquincenalmente.Apagar el equipo cuando:• No circule el agua• Se lave el filtro• Se vacíe la piscina• EL AGUA ESTE HELADA• Se limpie la célula3) SERVICIO Y PIEZAS DE REPUESTONaturalchlor, S.L. o su distribuidor dispone <strong>de</strong> piezas <strong>de</strong> repuesto a sudisposición. El uso <strong>de</strong> piezas no originales, así como la manipulación <strong>de</strong>l equipo porpersonal no autorizado por “Natural Chlor” pue<strong>de</strong> ocasionar serios problemas a suclorador y anulará su garantía.10
5.FUNCIONES DEL RECTIFICADOREl clorador “Natural Chlor” está equipado con un sofisticado sistemaelectrónico <strong>de</strong> diagnóstico, que maximiza la vida <strong>de</strong> la célula electrolítica eincorpora un display <strong>de</strong> luces <strong>de</strong> fácil comprensión, aconsejándole la acción que ha<strong>de</strong> tomar en cada momento.A continuación damos unos resúmenes, con indicación <strong>de</strong> la acción a seguir,cuando cualquiera <strong>de</strong> estas luces se encienda <strong>de</strong>ntro <strong>de</strong>l panel <strong>de</strong> control <strong>de</strong>lrectificador.1) Una simple presión en el botón MIN (3) reduce la producción <strong>de</strong> cloro un10%. Para apagar el clorador es necesario presionar el botón varias vecespara asegurarse <strong>de</strong> que todos los indicadores <strong>de</strong> producción estánapagados.Nota: El clorador siempre produce al 100%. Al presionar el botón, lo que sehace es disminuir el tiempo <strong>de</strong> producción <strong>de</strong> cloro, no la cantidad <strong>de</strong> cloroproducida.2) Indicador preventivo <strong>de</strong> Nivel <strong>de</strong> Sal (Nacl) bajo. La concentración <strong>de</strong> sal<strong>de</strong>be aumentarse a 5000-6000 ppm para satisfacer la producción <strong>de</strong> cloro.Si la luz parpa<strong>de</strong>a, el clorador se apagará lentamente <strong>de</strong> forma automática<strong>de</strong>bido a que el nivel <strong>de</strong> sal está por <strong>de</strong>bajo <strong>de</strong>l mínimo.3) Indicadores <strong>de</strong> Producción <strong>de</strong> Cloro. Hay 10 indicadores. Cada indicadorcorrespon<strong>de</strong> a un 10% <strong>de</strong> Cl 2.4) Indicador Preventivo <strong>de</strong> Nivel <strong>de</strong> Sal (Nacl) Alto. Cuando el nivel <strong>de</strong> sal esalto, esta luz se encen<strong>de</strong>rá, habrá que añadir agua dulce. Si la luz parpa<strong>de</strong>ael clorador se apagará lentamente <strong>de</strong> manera automática <strong>de</strong>bido a que elnivel <strong>de</strong> sal exce<strong>de</strong> <strong>de</strong>l máximo. La concentración <strong>de</strong> sal <strong>de</strong>be reducirse a5000-6000 ppm.11
5) Si el indicador está encendido, el clorador tiene corriente.6) Si el nivel <strong>de</strong> flujo parpa<strong>de</strong>a, el clorador está en modo stand-by y no hayflujo <strong>de</strong> agua en la célula. Por favor, asegúrese <strong>de</strong> que la bomba esté enfuncionamiento y <strong>de</strong> que el agua esté pasando por la célula.7) Una simple presión en el botón MAX (4) aumenta la producción <strong>de</strong> cloro enun 10%. Cuando todas las luces están encendidas la producción <strong>de</strong> cloroestá al 100%.1 2 3 4 5 6 73 Funciones <strong>de</strong>l rectificador12
6. GUIA PARA ATAJAR LOS PROBLEMAS1) No hay corriente:a) Comprobar si está enchufado.2) Baja lectura <strong>de</strong>l medidor <strong>de</strong> producción <strong>de</strong> cloro:a) Nivel insuficiente <strong>de</strong> sal en la piscina.b) Electrodos requieren limpieza.c) Electrodos están <strong>de</strong>sgastados.3) El cloro residual en la piscinas está bajo:a) Tiempo <strong>de</strong>l clorador funcionando insuficiente.b) El nivel <strong>de</strong> estabilizador <strong>de</strong> cloro está bajo.c) Los electrodos necesitan limpieza.d) PH <strong>de</strong>l agua <strong>de</strong>masiado alto.Nota: En una situación en la que se <strong>de</strong>tecte un nivel <strong>de</strong> cloro bajo, po<strong>de</strong>moscomprobar rápidamente el clorador, tomando una muestra <strong>de</strong> agua <strong>de</strong> Skimmer yrealizar una comprobación <strong>de</strong>l nivel <strong>de</strong> cloro con el kit <strong>de</strong> análisis. Luego coger unamuestra directamente <strong>de</strong> uno <strong>de</strong> los impulsores. La lectura <strong>de</strong> cloro <strong>de</strong>l impulsor<strong>de</strong>be ser consi<strong>de</strong>rablemente mayor que la <strong>de</strong>l Skimmer al menos en un 1%.13
7. GARANTIA1. Célula electrolítica y rectificador 2 años2. El ven<strong>de</strong>dor <strong>de</strong>clina toda responsabilidad en los siguientes casos:a) No respetar las instrucciones <strong>de</strong> este manual.b) Errores en conexiones eléctricas.c) Daños acci<strong>de</strong>ntales.d) Daños por agua en el rectificadore) Bomba <strong>de</strong> más <strong>de</strong> 1,5 C.V. sin instalación <strong>de</strong> un “By-Pass” (segúnesquema <strong>de</strong> montaje página 7).f) Si se vierten ácidos en los Skimmers sin <strong>de</strong>sconectar el rectificador.3. Los gastos <strong>de</strong> <strong>de</strong>splazamiento serán abonados por el usuario.4. Queremos aclarar que la instalación <strong>de</strong>l clorador “Natural Chlor” esabsolutamente in<strong>de</strong>pendiente <strong>de</strong>l equipo <strong>de</strong> <strong>de</strong>puración, tanto <strong>de</strong> la bombacomo <strong>de</strong>l filtro o <strong>de</strong> la multiválvula. Lo único que tienen en común es la conexiónal reloj automático <strong>de</strong> su <strong>de</strong>puradora.Nota importanteSi el cloro residual en la piscina es bajo, por favor comprobar:a. El clorador no funciona las horas necesarias.b. El nivel <strong>de</strong> estabilizador <strong>de</strong> cloro es bajo.c. La célula necesita una limpieza.d. El pH está alto.e. El nivel <strong>de</strong> sal es bajo.14
8. GRAFICO DE INSTALACION4Gráfico <strong>de</strong> Instalación15
CONTENTS1. “Natural Chlor” Salt Chlorinator......................172. Addition of salt.........................................183. Assembly Instructions..............................….194. Maintenance..............................................215. Control panel functions...........................…...246. Troubleshooting gui<strong>de</strong> .................................267. Warranty ...…………...…………………...………278. Graphic for the installation of the chlorinator......2816
1.“NATURAL CHLOR” SALT CHLORINATORCongratulation on choosing an “Natural Chlor” chlorinator.Your «Natural Chlor» chlorinator has been manufactured to the strictestand will correctly maintain the chlorine connect of any swimming pool un<strong>de</strong>rnormal use.Please read the following instructions carefully in or<strong>de</strong>r to learn moreabout the features, operation and correct maintenance of your «Natural Chlor»chlorinator.PREPARATION OF THE WATER IN YOUR POOLThe water in your pool will be clear and clean if the corresponding analysisgives the following results:Chlorine0,6-1,2 mg/lPH 7,2-7,6 Glass fibre pools 6,8-7,0T.A. (Alkalinity Content)60-100 p.p.m.Salt5-6 grs/lHardness of water100-200 p.p.m.The stability of the water <strong>de</strong>pends on the relationship between its PH,hardness, alkalinity, solids in solution and the water temperature. It is necessaryto establish the correct balance before connecting the chlorinator to the waterin your pool.!The analytical kit is the only way to verify the level of residualchlorine and the chemical balance of your pool. We recommend you check thewater in your pool regularly and adjust it as necessary in or<strong>de</strong>r to keep it clearand transparent.17
2. ADDITION OF SALTSalt has to be ad<strong>de</strong>d to your pool in the proportion of 50-60 Kg of saltfor every 10 m 3 of water. The salt is ad<strong>de</strong>d all around the water’s edge inor<strong>de</strong>r to facilitate dissolution. As salt is heavier than water, it will lie at thebottom even though it will seem to have dissolved. In or<strong>de</strong>r to ensure a<strong>de</strong>quatedistribution it is a good i<strong>de</strong>a to sweep the bottom of the pool and keep the waterfilter operating for 24 hours. All of this must be done before the chlorinatoris switched on.Contrary to what you might think, ”Natural Chlor” chlorinator will not useuo the salt as it produces chlorine. What happens is that the salt is electrolyzedand converted back into ordinary salt once your pool has been disinfected.Nonetheless, the use of a filter and its subsequent cleaning showers will reducethe level of salt in the water and whenever the water level in the pool isincreased, the salt concentration will be reduced.! While salt is being ad<strong>de</strong>d to your pool, your “Natural Chlor” chlorinatormust be switched off until all of the salt is completely dissolved anddistributed throughout the pool water in or<strong>de</strong>r to prevent costly damage to theelectro<strong>de</strong>s and your chlorinator.18
3. ASSEMBLY INSTRUCTIONS1. Calculate the pool’s capacity. Add 5-6 Kg of salt per m 3 .2. Balance the Ph between 7.2 and 7.6. In fibreglass pools, 6.8 – 7.0.3. If the water has been newly ad<strong>de</strong>d, use 1 Kg of CHLORINE STABILISER FOREVERY 25 CUBIC METRES.4. Open the filter. Clean it and add sand, 2 or 3 centimeters above the uppertube (if it is a diatomaceous filter, do not touch it).5. Electrical wiring. Check the 220 V power socket, your «Natural Chlor»chlorinator operates at 210-230 V and requires earthing. Connect the chlorinatorthrough the timer in or<strong>de</strong>r to allow the chlorinator to switch itself on and offautomatically with the water filter.The cell should be installed at the filter outlet, after the heater (solarheating) valves, etc… There must be enough room to allow the cell to bedismantled for cleaning (see diagram below and graphic on page 28).19
FROMPOOLFILTERCELLPOOLRETURNSFROMPOOLFILTERHEATERCELLPOOLRETURNSBY-PASS1Assembly graphicThe control panel must be installed close to the water filteringsystem. The i<strong>de</strong>al location is on a wall offering protection against rainfall,splashing or acci<strong>de</strong>ntal overflow.Note: The housing of the cell is adapted for pipes of 50 mmPlease ensure that the cable from the control panel is correctly attachedto the cell in accordance with the colour coding.Place the control panel higher than the cell but not more than 1 meteraway so as not to stretch the cable between the panel and the cell. Similarly, itcan be placed upright on the ground.Do not install the cell above the pump. Place it in the water return circuitor returns pipes.20
4. MAINTENANCE1) CLEANINGReverse Polarity Chlorinators have self-cleaning cells which means themaintenance required is minimal. In exceptional cases, when the calcium contentis abnormally high, the chlorination may not totally remove all of the <strong>de</strong>posit. Inthis case, the calcium level must be adjusted to normal levels and the cell mustbe cleaned.Procedure: Turn off the chlorinator, disconnect cell cable, and removecell. The dirty cell should be placed in a 20% solution of hydrochloric acid (8parts of water to 2 parts of hydrochloric acid) You should makesufficientdisolution to be able to immerse the cell completely. Don´t immerse the capwhere the connections are located. For safety please remember to add the poolacid to the required amount of water, not the water to the acid. The cell can alsobe cleaned using a pressurised water hose. Do not use metal tools to scrape offany remaining on the plates.O.K.WATER FLOW OUTLETNO----------------------- -------------------------WATER FLOW OUTLET2Cleaning graphic.21
Calcium <strong>de</strong>posits will react with the Hcl producing gas. When gasproduction has stopped, it means that the cell is completely cleaned and all thecalcium has dissolved. Rinse in fresh water as soon as possible- leaving the cell inHcl solution for a longer period will damage the cell! When cleaning is complete,dry the connections and reinstall the cell.Note: Do not mantain the cell in the dissolution of acid more than 5minutes.!The operation of the cell without water flowing through it may bedangerous due to the creation of gases, which can accumulate in the filter andcause damage.STOPIn exceptional cases (high temperatures), filter the water for threeor four hours more every day if the formation of algae is observed.Operate the water filter as long as necessary in or<strong>de</strong>r to ensure that the waterin the pool is filtered once a day. The time required will <strong>de</strong>pend on the number ofliters processed by the filter and the pump every hour. As a rule of thumb, thefollowing may be helpful:SUMMERAUTUMN ANDSPRINGWINTER8 to 12 hours perday4 to 6 hours perday1 to 2 hours per dayDomesticPools22
If your pool is used intensively outsi<strong>de</strong> the normal hours indicatedon the automatic filtering system, we recommend you operate the water filteringand chlorinating system during these additional periods.Note: For public pools (Hotels…) it would have to work the hoursnecessary to maintain the chlorine level according to rules.2) OPERATION OF THE WATER-FILTERIt is necessary to have proper circulation of water in or<strong>de</strong>r toensure the efficient distribution of chlorine. It is important to use thecorresponding skimmers and drain outlets to improve the water flow.!Check and adjust the Ph levels between 7.2 and 7.4 (fibreglasspools, 6.8 – 7.0) and the chlorine levels to between 0.6 and 1.2 ppm two or threetimes per week. Check the level of sand in the filter every two years and cleanthe filter every fortnight.Switch off the system whenever:• Water is not circulating.• The filter is being washed.• The pool is emptied.• THE WATER IS FROZEN.• You are cleaning the cell.3) TECHNICAL SERVICE AND SPARE PARTSNaturalchlor, S.L. or your local distributor have spares available for yourchlorinator. The use of unauthorized spare parts and the manipulation of theapparatus by personnel not approved by “Natural Chlor” may lead to severedamage to your chlorinator and it would cancel your warranty.23
5. EXPLANATIONS OF FUNCTIONS OF POWERSUPPLYThe «Natural Chlor» chlorinator is fitted with sophisticated electronicdiagnostic system to maximize the life of the electrolytic cell. This systemincorporates an easily - un<strong>de</strong>rstood LED display panel, indicating the action to betaken at all times.A summary of the action to be taken whenever any of the lights on thecasing control panel are on is given below.1) Single press of the button <strong>de</strong>creases chlorine (Cl 2 ) production by10%. In or<strong>de</strong>r to turn OFF the chlorinator it is necessary to press thebutton several times to make sure all Chlorine Production Indicatorsare OFF.Note:The chlorinator produces always to 100% When you press thebuttom what you do is <strong>de</strong>crease the time of chlorine production no thequantity of chlorine.2) Low Salt (Nacl) Warning indicator. Salt concentration should beincreased to 5000 - 6000 ppm to satisfy chlorine production. If thelight flashes, the level of salt is below the minimum, the chlorinator willturn off slowly automatically.3) Chlorine Production Indicators. There are 10 indicators. Eachindicator corresponds to 10% of Cl 2 production.4) High Salt (Nacl) Warning indicator. When the salt level is high thislight will go on- add fresh water. If light is flashing the chlorinator willshortly turn off automatically as salt levels exceed maximum. Saltconcentration must be <strong>de</strong>creased to 5000 - 6000 ppm.24
5) The Chlorinator has power.6) If the water flow indicator is flashing, the chlorinator is in theStand By mo<strong>de</strong> and there are no water flows through the cell. Pleasemake sure the pump is running and there is water passing through thecell.7) Single press of the button MAX (8) increases Cl 2 production by10%. When all lights are ON the Cl 2 production is 100%.1 2 3 4 5 6 73Functions of power supply installation.25
6. TROUBLESHOOTING GUIDE1) There is no current:a) Check that the meter is plugged in.2) Low reading on the chlorine production indicator.a) Insufficient salt level in the pool.b) Electro<strong>de</strong>s need to be cleaned.c) Electro<strong>de</strong>s worn down.3) The residual chlorine in the pool is low:a) Chlorinator is not working long enough.b) The level of the chlorine stabilizer is too low.c) The electro<strong>de</strong>s need to be cleaned.d) The Ph of the water is too high.Note: In situations where low chlorine is <strong>de</strong>tected, the chlorinator can bevery quickly tested by taking a water sample from the skimmer box andconducting a chlorine test. Then conduct a chlorine test by taking a water samplefrom the eyeball return. The chlorine reading from the pool eyeball should beconsi<strong>de</strong>rably higher than in the skimmer box at least 1%.26
7. WARRANTY1. Electrolytic cell and rectifier for domestic and industrial units, 2 years.2. The seller <strong>de</strong>clines all liability in the following cases:a) The instructions contained in the present operating manual are notrespected.b) Mistakes in the electrical connections.c) Acci<strong>de</strong>ntal damage.d) Damage caused by water in the electric casing.e) Pump of more than 1.5 HP without installing a by-pass (see assemblydiagram on page 20).f) If acid is poured into the skimmers without switching off theelectric panel.3. All travel expenses shall be paid by the user.4. We should like to point out that the installation of the “Natural Chlor”chlorinator is absolutely in<strong>de</strong>pen<strong>de</strong>nt of the water-filtering system includingboth the pumps and the multiple valves or filters. The only thing they have incommon is the connection to the water-filter’s automatic timer mechanism.Special NoteIf the residual chlorine in the pool is low, check:a) Chlorinator is not working long enough.b) The level of the chlorine stabilizer is too low.c) The cell needs to be cleaned.d) The pH of the water is too high.e) Salt level is too low.27
8. INSTALLATION OF THE CHLORINATORELECTROLYTIC CELLOUTLETAUTOMATICVALVE TIMER CONTROL PANELFILTER PUMP RETURN TO THE POOL4Graphic for the installation of the “Natural Chlor» chlorinator.28
INDICE1. Clorador Salino “Natural Chlor” ......................302. Adição <strong>de</strong> sal............................................313. Instruções <strong>de</strong> Instalação ..............................324. Manutenção..................................……......345. Funçoes do Rectificador...............................376. Guia <strong>de</strong> resolução <strong>de</strong> problemas.......................397. Garantia.................................................408. Esquema <strong>de</strong> instalação do clorador salino............4129
1. CLORADOR SALINO “NATURAL CHLOR”Parabéns pela escolha <strong>de</strong> um clorador “Natural Chlor”.Seu clorador foi fabricado sob as mais estritas especifições <strong>de</strong>Naturalchlor, S.L. Com um uso e uma manutenção correcta, garantirá a<strong>de</strong>sinfecção a<strong>de</strong>quada <strong>de</strong> qualquer piscina em condições <strong>de</strong> uso normais.Por favor, leia com atenção estas instruções para maior conhecimento <strong>de</strong>capacida<strong>de</strong>, funcionamento e manutenção correcta do seu clorador “NaturalChlor”.EQUILIBRIO DA ÁGUA DA SUA PISCINAA água estará <strong>de</strong>sinfectada, apresentando-se transparente, se sua análiseindicar o siguinte:Cloro0,6-1,2 mg/lPH 7,2-7,6 (Piscinas fibra <strong>de</strong> vidro 6,8-7,0)T.A. (Alcalinida<strong>de</strong>)60-100 p.p.m.Sal5-6 gr/lDureza da água100-200 p.p.m.A stabilida<strong>de</strong> da água está na relação existente entre PH, dureza,alcalinida<strong>de</strong>, sólidos dissolvidos e temperatura da água. Deve corrigir, senecessário, os valores acima mencionados para obter o equilíbrio da água antes <strong>de</strong>ligar o seu clorador.!O Kit <strong>de</strong> análise é a única forma <strong>de</strong> comprovar o cloro residual e oequilíbrio químico da sua piscina.Recomendamos que analise e ajuste bem os valores da água da sua piscinaperiodicamente para que se mantenha <strong>de</strong>sinfectada e transparente.30
2. ADIÇÃO DE SALA quantida<strong>de</strong> que <strong>de</strong>ve ser adicionada na piscina é <strong>de</strong> 50-60 Kg. <strong>de</strong> salpor cada 10 m 3 <strong>de</strong> agua. Coloque o sal ao redor <strong>de</strong> toda a piscina para facilitar asua dissolução. Como o sal é mais pesado do que a água, permanecerá no fundo,mesmo parecendo estar dissolvido. No entanto, para o sal se dissolva mais<strong>de</strong>pressa, é aconselhável que se passe com o aspirador da piscina, e com o filtrona posição <strong>de</strong> recirculação. Após essa operação, ro<strong>de</strong> novamente a válvulaselectora para a posição <strong>de</strong> filtração. Tudo isto <strong>de</strong>ve ser feito antes <strong>de</strong>colocar o clorador em funcionamento.Ao contrário do que se po<strong>de</strong> pensar, o seu clorador “Natural Chlor” nãoconsumirá o sal na sua produção <strong>de</strong> cloro. O que acontece é que o sal éelectrolisado e convertido em hipoclorito sódico. Depois <strong>de</strong> <strong>de</strong>sinfectar a água dapiscina, volta a converter-se em sal comum. No entanto, as lavagens eenxaguamentos ao filtro, além da chuva, reduzirão aconcentração <strong>de</strong> sal na água.!Durante o processo <strong>de</strong> adição <strong>de</strong> sal, o seu clorador “Natural Chlor”<strong>de</strong>verá estar <strong>de</strong>sligado, até que o sal esteja completamente dissolvido edistribuído por toda a água da piscina. Se não cumprir este procedimento, oselectrodos e o rectificador fiçarão gravemente danificados.31
3. INSTRUÇÕES DE INSTALAÇÃO1) Calcular a capacida<strong>de</strong> <strong>de</strong> água da piscina. Coloque 5-6 Kg <strong>de</strong> sal por m 3 .2) Equilibrar o pH entre 7,2 e 7,6. Em piscinas <strong>de</strong> fibra <strong>de</strong> vidro <strong>de</strong> 6,8 -7,0.3) Se a água é nova, adicionar 1 Kg <strong>de</strong> ESTABILIZADOR DE CLORO PORCADA 25 M 3 .4) Abrir e limpar o filtro, e acrescentar areia, 2 ou 3 cm por cima do tubosuperior (se o filtro é <strong>de</strong> diatomeáceas, não é necessário).5) Instalação eléctrica: VERIFICAR SE A TOMADA DE CORRENTE é <strong>de</strong> 220V. O clorador “Natural Chlor” trabalha com uma corrente <strong>de</strong> 210-230 V . COMTOMADA DE TERRA. Faça a ligação através do relógio para po<strong>de</strong>r ligar e<strong>de</strong>sligar conjuntamente o clorador e a bomba <strong>de</strong> filtração.A célula <strong>de</strong>ve ser instalada na saída do filtro, <strong>de</strong>pois do aquecedorconvencional ou sistemas solares (caso existam na instalação), válvulas, ...etc.Deverá haver espaço suficiente para permitir <strong>de</strong>smontar a célula para a sualimpeza. Ver <strong>de</strong>senho a seguir e gráfico pagina 41.32
A PARTIRDA PISCINAFILTROCÉLULARETORNO ÀPISCINAA PARTIRDA PISCINAFILTROAQUECEDORCÉLULARETORNOÀ PISCINABY-PASS1 Gráfico da montagemO rectificador <strong>de</strong> controle le <strong>de</strong>verá ser instalado perto do sistema <strong>de</strong>filtração. O lugar i<strong>de</strong>al é uma pare<strong>de</strong> que ofereça protecção da chuva, salpicos ou<strong>de</strong>sbordamento aci<strong>de</strong>ntal.mm.Nota: A carcaça da célula vem adaptada para se acoplar a tubagem <strong>de</strong> 50Certifique-se que o cabo do rectificador está ligado correctamente àcélula, segundo as cores correspon<strong>de</strong>ntes.Instale o rectificador <strong>de</strong> controle por cima da célula, com uma distancianão superior a 1 metro (o cabo que une o rectificador com a célula não <strong>de</strong>vealongar-se a não ser que se aumente a secção do mesmo, para evitar queda <strong>de</strong>tensão).Não instale a celula por cima da bomba. Intercale-a no retorno ou natubagem que liga aos bicos impulsores.33
4. MANUTENÇÃO1) LIMPIEZA DA CÉLULAOs cloradores com mudança <strong>de</strong> polarida<strong>de</strong> têm células auto-limpáveis, o querequer uma manutenção mínima. Em casos excepcionais, quando a nível <strong>de</strong> calcáriona água é excessivamente alto, o clorador po<strong>de</strong> não eliminar todas as quantida<strong>de</strong>s<strong>de</strong>positadas na célula. Neste caso, o nível <strong>de</strong> calcário <strong>de</strong>verá ser ajustado até aosníveis normas e <strong>de</strong>ve limpar a célula manualmente.Processo: Desligar o clorador, <strong>de</strong>sapertar o cabo da célula e retirar esta.Coloque a célula suja <strong>de</strong>ntro <strong>de</strong> um bal<strong>de</strong>, imersa numa dissolução <strong>de</strong> Água-Forteao 20% (8 partes <strong>de</strong> água e 2 <strong>de</strong> água-forte). Deverá realizar a dissoluçãosuficiente para po<strong>de</strong> submergir a célulaa completamente (não submergir a tampa,on<strong>de</strong> estão as conexões). Por segurança, lembre-se <strong>de</strong> colocar primeiramente aágua e <strong>de</strong>pois a água-forte. Também po<strong>de</strong>-se limpar a célula com uma mangeira <strong>de</strong>agua a pressão. Não usra elementos metálicos para eliminar o cálcio quepermanece nas lâminas.SIMSAÍDA DO FLUXODA ÁGUANÃO----------------------- -------------------------SAÍDA DO FLUXO DAÁGUA2 Esquema <strong>de</strong> limpeza34
Os <strong>de</strong>pósitos <strong>de</strong> calcário reagem com Hcl produzindo gás. Quando aprodução <strong>de</strong> gás termina, significa que a célula está completamente limpa, e todoo calcário dissolvido. Nesse momento, é nesessário enxaguar a célula com águadoce o mais rapidamente possível porque se a célula fica na solução <strong>de</strong> Hcldurante mais tempo, po<strong>de</strong> avariar. Quando o processo <strong>de</strong> limpeza finalize, <strong>de</strong>vemsecar-se as ligações da tampa da célula e voltar a instalar a célula.Nota : Não manter a célula na dissolução com ácido mais <strong>de</strong> 5 minutos.!Uma formação <strong>de</strong> gases po<strong>de</strong> ser perigosa, e po<strong>de</strong>rá acontecer se acélula funciona sem passagem <strong>de</strong> água. Isto produziria uma acumulação <strong>de</strong> gasesno filtro e po<strong>de</strong>ria causar doenças graves para a saú<strong>de</strong>.STOPEm casos excepcionais (temperaturas altas), se verificar que existea formação <strong>de</strong> algas, <strong>de</strong>ve aumentar a filtração diária em mais 3 a 4 horas eregular o pH.Ponha em funcionamento a bomba <strong>de</strong> filtração o tempo que fornecessário para que toda a água <strong>de</strong> sua piscina seja filtrada uma vez por dia. Otempo <strong>de</strong>pen<strong>de</strong>rá do caudal <strong>de</strong> água que passa no filtro e na bomba por cada hora.Como orientação po<strong>de</strong> seguir o quadro abaixo indicaVERÃOOUTONO EPRIMAVERAINVERNO8 a 12 horas por día4 a 6 horas por día1 a 2 horas por díaPiscinasUnifamiliares35
Se sua piscina for <strong>de</strong> uso muito intenso fora das horas <strong>de</strong>finidas no seu relógioautomático, é recomendável que o clorador e equipamento <strong>de</strong> filtração funcionemtambém durante esse periodo.Nota: Para piscinas públicas (hoteléis...) <strong>de</strong>verá funcionar as horasnecessárias para manter o nível <strong>de</strong> cloro conforme a normativa.2) FUNCIONAMENTO DO EQUIPAMENTO DE FILTRAÇÃOÉ necessária uma boa circulação (filtração) <strong>de</strong> água para queexista uma eficiente distribução <strong>de</strong> cloro na piscina.! Deve controlar e ajustar os níveis <strong>de</strong> pH para 7,2-7,4 (em piscinas <strong>de</strong>fibra <strong>de</strong> vidro <strong>de</strong>ve ser <strong>de</strong> 6,8-7,0) e do cloro em 0,6 a 1,2 ppm., duas ou trêsvezes por semana, além <strong>de</strong> verificar o nível <strong>de</strong> areia cada dois anos (e suasubstituição cada 4 anos) e lavar e enxaguar o filtro pelo menos <strong>de</strong> 15 em 15 dias<strong>de</strong> utilização.Deve <strong>de</strong>sligar o seu Clorador quando:• Não circula água• Lavar e enxaguar o filtro• Esvaziar a piscina• A ÁGUA ESTEJA CONGELADA• Se limpa a célula3) SERVIÇO E PEÇAS DE SUBSTITUIÇÃONaturalchlor, S.L. ou seu distribuidor dispõem <strong>de</strong> peças <strong>de</strong> substitução à suadisposição. O uso <strong>de</strong> peças não originais assim como a manipulação do equipamentopor pessoal não autorizado pelo fabricante, po<strong>de</strong> provocar sérios problemas aoseu clorador e anulará a garantia <strong>de</strong>ste.36
5. FUNÇÕES DO RECTIFICADORO clorador “Natural Chlor” está equipado com um sofisticado sistemaelectrónico <strong>de</strong> diagnóstico, que aumenta ao máximo a vida da célula electrolítica eincorpora um display <strong>de</strong> luzes <strong>de</strong> fácil compreensão, informando-o sempre daaccão que <strong>de</strong>ve a realizar a cada momento.Da seguida, apresentamos um resumo, com indicação do procedimento aefectuar em cada caso, quando alguma das luzes se acen<strong>de</strong> <strong>de</strong>ntro do painel dorectificador.1) Ao pressionar apenas uma vez na tecla MIN (3), reduz a produção <strong>de</strong> cloroem 10%. Para <strong>de</strong>sligar o clorador, é necessário pressionar a mesma teclavárias vezes para confirmar que todos os indicadores <strong>de</strong> produção estãoapagados.Nota: O clorador produz sempre a 100%. Ao pressionar a tecla MIN,diminui-se o tempo <strong>de</strong> produção <strong>de</strong> cloro, e não a quantida<strong>de</strong> <strong>de</strong> cloroproduzida.2) O indicador preventivo do nível <strong>de</strong> sal (Nacl) baixo está aceso- Deveaumentar a concentração <strong>de</strong> sal até 5000-6000 ppm para que o cloradorpossa produzir novamente a quantida<strong>de</strong> normal <strong>de</strong> cloro pretendido na água.Se a luz está intermitente, o clorador apagar-se-á lentamente e <strong>de</strong> modoautomático, <strong>de</strong>vido a que o nível <strong>de</strong> sal está abaixo do mínimo.3) Indicadores <strong>de</strong> produção <strong>de</strong> cloro. – Existem 10 indicadores. Cada umcorrespon<strong>de</strong> a 10% <strong>de</strong> produção <strong>de</strong> cloro .4) O indicador preventivo do nível <strong>de</strong> sal (Nacl) alto está aceso – Quando nível<strong>de</strong> sal está alto, tem que se acrescentar agua à piscina. Se a luz estiverintermitente, o clorador apagar-se-á lentamente em modo automático, poiso nível <strong>de</strong> sal exce<strong>de</strong> o máximo permitido. Nesse caso, a concentrão <strong>de</strong> sal<strong>de</strong>ve reduzir-se a 5000-6000 ppm.37
5) Se o clorador tem apenas a luz <strong>de</strong> ligado acesa, significa que tem correntee está a funcionar normalmente.6) Se o indicador <strong>de</strong> nível <strong>de</strong> passagem <strong>de</strong> água está intermitente, o cloradorestá en modo stand-by e não há passagem <strong>de</strong> água na célula. Neste caso,certifique-se imediatamente que a bomba funciona correctamente e quenão está <strong>de</strong>sferrada (sem passagem <strong>de</strong> água).7) Ao pressionar uma vez a tecla MAX (4), aumenta a produção <strong>de</strong> cloro em10%. Quando todas as luzes indicadoras <strong>de</strong> produção estão acesas, aprodução <strong>de</strong> cloro está a 100%.1 2 3 4 5 6 73 .Funções do Rectificador.38
6. GUIA DE SOLUÇAO DE PROBLEMAS1) O clorador não acen<strong>de</strong>:a) Comprovar se está bem ligado e se o cabo que liga à célula estábem colocado.2) Valor baixo no medidor <strong>de</strong> produção <strong>de</strong> cloro:a) Nível insuficiente <strong>de</strong> sal na piscina.b) Eléctrodos necessitam <strong>de</strong> uma limpeza.c) Eléctrodos estão gastos.3) O cloro residual na piscina está baixo:a) Poucas horas <strong>de</strong> funcionamento diário do clorador.b) O nível do estabilizador <strong>de</strong> cloro está baixoc) Os eléctrodos necessitam <strong>de</strong> uma limpeza.d) O pH da água está <strong>de</strong>masiado alto.Nota: Caso se <strong>de</strong>tecte um baixo nível <strong>de</strong> cloro, po<strong>de</strong> comprovar rapidamentese o clorador está funcionar bem, retirando uma amostra <strong>de</strong> água do skimmer everificar o nível <strong>de</strong> cloro com o kit <strong>de</strong> análises. Depois, realizar a mesma operação,retirando uma outra amostra <strong>de</strong> água directamente <strong>de</strong> um dos bicos impulsores <strong>de</strong>água. A leitura do cloro no impulsor <strong>de</strong>ve ser consi<strong>de</strong>ravelmente maior que noskimmer, no mínimo em 1%.39
7. GARANTIA1. Célula electrolítica e rectificador 2 anos2. O fabricante <strong>de</strong>clina todas as responsabilida<strong>de</strong> nos siguintes casos:a) Não respeitar as instruções <strong>de</strong>ste manual.b) Erros em ligações eléctricas.c) Avarias por negligência.d) Avarias <strong>de</strong>vido a entrada <strong>de</strong> água no rectificador.e) Bomba com potência superior a 1.5 C.V., sem instalação <strong>de</strong> um “bypass”(conforme esquema <strong>de</strong> montagem página 33).f) Caso se adicionem ácidos directamente no skimmer sem <strong>de</strong>sligarpreviamente o clorador.3. Os custos <strong>de</strong> <strong>de</strong>slocação serão inteiramente suportados pelo cliente.4. É necessário esclarecer que a instalação do clorador “Natural Chlor” éabsolutamente in<strong>de</strong>pen<strong>de</strong>nte do equipamento <strong>de</strong> filtração, tanto a bombacom o filtro ou a válvula selectora. O único que têm em comum é a sualigação em paralelo ao relógio do quadro <strong>de</strong> comando que os faz ligar e<strong>de</strong>sligar ao mesmo tempo.Nota importanteSe o valor do cloro residual na piscina está baixo, <strong>de</strong>ve comprovar se:a) O clorador não funciona as horas necessárias.b) O nível <strong>de</strong> estabilizador <strong>de</strong> cloro está baixo.c) A célula necessita <strong>de</strong> uma limpeza.d) O nível <strong>de</strong> pH está alto.e) O nível <strong>de</strong> sal está baixo.40
8. ESQUEMA DE INSTALAÇÃO DO CLORADOR SALINOCÉLULA ELECTROLÍTICAVALVULA DERELÓGIOCORTE AUTOMÁTICO QUADRO DE COMANDOFILTRO BOMBA RETORNO À PISCINA4Gráfico <strong>de</strong> instalação do clorador «Natural Chlor»41
TABLE DES MATIERES1. Electrolyseur à sel “Natural Chlor” ..................432. Adjonction <strong>de</strong> sel.......................................443. Instructions d´assemblage.............................454.Entretien.................................................475. Fonctions du redresseur...............................506. Solution rapi<strong>de</strong> <strong>de</strong>s pannes............................527.Garantie .................................................538. Illustration pour l´installation<strong>de</strong> l´électrolyseur à sel .................................5442
1. ELECTROLYSEUR À SEL “NATURAL CHLOR”Nos félicitations pour avoir choisi un électrolyseur “Natural Chlor”.Cet électrolyseur a été fabriqué suivant les plus strictes spécifications <strong>de</strong>Naturalchlor, S.L en respectant une utilisation et un entretien corrects, il vouspermettra <strong>de</strong> chlorer <strong>de</strong> façon adéquate n´importe quelle piscine dans <strong>de</strong>sconditions d´utilisation normales.Nous vous prions <strong>de</strong> lire avec attention les instructions suivantes pouraméliorer vos connaissances sur les prestations, le fonctionnement et l´entretiencorrect <strong>de</strong> votre électrolyseur “Natural Chlor”.PRÉPARATION DE L ´EAU DE VOTRE PISCINEUne eau propre et transparente est signalée à l´analyse par les valeurssuivants:ChlorePHT.A. (Taux d´Alcalinité)SelDureté <strong>de</strong> l´eau0,6-1,2 mg/l7,2-7,6 Piscines en fibre <strong>de</strong> verre6,8-7,060-100 p.p.m.5-6 grs/l100-200 p.p.m.La stabilité <strong>de</strong> l´eau dépend du rapport entre son pH, sa dureté, sonalcalinité, les soli<strong>de</strong>s en dissolution et sa température. Avant <strong>de</strong> mettre enmarche votre électrolyseur, il est nécessaire <strong>de</strong> procé<strong>de</strong>r à l´équilibrage <strong>de</strong>l´eau.!L´usage du kit d´analyse est la seule façon <strong>de</strong> tester la présence <strong>de</strong>résidus <strong>de</strong> chlore et l´équilibre chimique <strong>de</strong> votre piscine. Pour maintenir l´eau <strong>de</strong>votre piscine claire et transparente, <strong>de</strong>s révisions périodiques et <strong>de</strong>s mises àniveau correctes sont recommandées.43
2. ADJONCTION DE SELLe sel doit être ajouté dans la piscine dans une proportion <strong>de</strong> 50-60 Kg <strong>de</strong>sel pour 10 m 3 d´eau. Il faut éparpiller le sel sur toute la piscine pour facilitersa dissolution. Le sel étant plus lourd que l´eau, il restera au fond, même s´ilsemble avoir été dissout. Il est recommandé <strong>de</strong> nettoyer le fond <strong>de</strong> la piscinepour obtenir une répartition plus régulière, et <strong>de</strong> faire fonctionner lepurificateur d´eau pendant 24 heures. Tout ceci, avant <strong>de</strong> mettre en marchel´électrolyseur.Contrairement à ce qu´on pourrait penser, votre électrolyseur ”NaturalChlor” ne consommera pas le sel pendant la production <strong>de</strong> chlore. En réalité, le selest transformé par électrolyse en hypochlorite sodique, puis, à nouveau en selcommun après avoir désinfecté l´eau <strong>de</strong> la piscine. L´utilisation et le nettoyagedu filtre ainsi que la pluie contribueront cependant à réduire le niveau <strong>de</strong> l´eau,et la concentration <strong>de</strong> sel baissera à mesure que l´on remplira la piscine.! Votre électrolyseur «Natural Chlor» doit rester éteint pendant leprocessus d´adjonction <strong>de</strong> sel, jusqu´à ce que tout le sel soit dissout etreparti complètement dans l´eau <strong>de</strong> la piscine, faute <strong>de</strong> quoi <strong>de</strong>s dommagescoûteux au niveau <strong>de</strong>s électro<strong>de</strong>s et du redresseur.44
3. INSTRUCTIONS D´ASSEMBLAGECalculez la capacité en m 3 d´eau <strong>de</strong> la piscine. Ajoutez 5-6 Kg <strong>de</strong> sel par m 3 .1. Equilibrez le pH entre 7,2 et 7,6. Pour piscines en fibre <strong>de</strong> verre entre 6,8et 7,0.2. Si l´eau est récente, ajoutez 1 Kg <strong>de</strong> STABILISATEUR DE CHLORE PAR25 M 3 .3. Ouvrez le filtre. Nettoyez-le et ajoutez du sable 2 ou 3 cm. par <strong>de</strong>ssus letube supérieur ( le laissez intact si le filtre est à diatomées).4. Installation électrique. VERIFIER LA PRISE DE COURANT à 220 V. Votreélectrolyseur “Natural Chlor” utilise une tension <strong>de</strong> 210-230 V avec PRISEDE TERRE. Faites la connexion en utilisant le temporisateur automatiquepour permettre la mise en marche et l´arrêt automatiques <strong>de</strong>l´électrolyseur et <strong>de</strong> la pompe du purificateur.La cellule doit être installée à la sortie du filtre, à la suite du chauffe-eauclassique ou <strong>de</strong>s systèmes solaires, <strong>de</strong>s valves, etc. Il convient <strong>de</strong> laissersuffisamment <strong>de</strong> place pour permettre le désassemblage <strong>de</strong> la cellule lors <strong>de</strong>son entretien. Observez l´illustration suivante et l´illustration page 54.Il est recommandé d´installer le coffre à instruments à proximité dusystème <strong>de</strong> purification. L´emplacement idéal est une paroi protégée contre lesintempéries, les éclaboussures ou un débor<strong>de</strong>ment acci<strong>de</strong>ntel.45
DE LAPISCINEFILTRECELLULERETOUR APISCINEDE LAPISCINEFILTRECHAUFFE-EAUCELLULERETOURA PISCINEBY-PASS1 Diagramme d´assemblageRemarque: La carcasse <strong>de</strong> la cellule est adaptée pour tuyaux <strong>de</strong> 50 mm.Vérifier que le raccor<strong>de</strong>ment du coffre à la cellule se fait correctementd´après les couleurs correspondantes du câble.Procé<strong>de</strong>z au montage du coffre à instruments au-<strong>de</strong>ssus <strong>de</strong> la cellule, à unmètre au plus. (N´utilisez pas <strong>de</strong> rallonge pour le câble unissant le coffre à lacellule, à moins d´augmenter la section <strong>de</strong> celle-ci pour éviter une chute <strong>de</strong>tension). Vous pouvez également le disposer à la verticale, à même le sol.N´installez pas la cellule au-<strong>de</strong>ssus <strong>de</strong> la pompe. Placez-la plutôt entre leretour et la tuyauterie d´impulsion.46
4. ENTRETIEN1) NETTOYAGE DES ELECTRODES (CELLULE)Les électrolyseurs qui changent <strong>de</strong> polarité ont <strong>de</strong>s cellules autonettoyantes,ce qui requiert un entretien minimum. Dans certaines situationsexceptionnelles, quand le niveau <strong>de</strong> chaux soit extrêmement élevé,l´électrolyseur à sel ne pourra pas nettoyer tous les résidus. Dans ce cas, leniveau <strong>de</strong> chaux doit être ajusté au niveau normal et vous <strong>de</strong>vrez pour cela,nettoyez la cellule manuellement.Processus: éteignez l´électrolyseur, débranchez le câble <strong>de</strong> la cellule etretirez la cellule. La cellule sale doit être introduite dans un seau avec unesolution d´aci<strong>de</strong> chlorhydrique à 20%, 8 Volumes d´eau pour 2 volumes d´aci<strong>de</strong>chlorydrique . Il faudra réaliser une dissolution suffisante pour pouvoir immergercomplètement la cellule (ne pas immerger le couvercle à l´endroit où se trouventles connexions). Pour <strong>de</strong>s raisons <strong>de</strong> sécurité il ne faut pas oublier d´ajouterpremièrement l´eau et à la suite, l´eau-forte. Vous pouvez aussi nettoyer lacellule avec un tuyau d´arrosage et <strong>de</strong> l´eau sous pression. Ne jamais utiliser <strong>de</strong>matériaux métalliques pour éliminer le calcium restant entre les lames.OUISORTIE DE COURANTD´EAUNON----------------------- -------------------------SORTIE DE COURANTD´EAU2 Schéma <strong>de</strong> nettoyage47
Les résidus <strong>de</strong> chaux font réaction avec le Hcl produisant du gaz. Quandcette production <strong>de</strong> gaz finisse, cela voudra dire que la cellule et absolumentpropre, tout le chaux reste dissout et il faudra rincer la cellule avec <strong>de</strong> l´eaudouce le plus tôt que possible, car si la cellule reste dans la solution <strong>de</strong> Hcl plus<strong>de</strong> temps, la cellule pourrait s´abîmer. Ne pas maintenir la cellule dans la solutionaci<strong>de</strong> plus <strong>de</strong> 5 minutes. Quand le processus <strong>de</strong> nettoyage finit, vérifiez que lesconnexions <strong>de</strong> la cellule sont sèches avant d´ assembler la cellule.Remarque : Ne pas maintenir la cellule dans la dissolution aci<strong>de</strong> plus <strong>de</strong> 5 minutes.!Une accumulation dangereuse <strong>de</strong> gaz peut se former si vous laissezfonctionner la cellule sans circulation d´eau. Ceci pourrait entraîner uneaccumulation <strong>de</strong> gaz au niveau du filtre ainsi que <strong>de</strong>s dommages matériels.STOPDans certaines situations exceptionnelles, (températures élevées) oùil est possible d´observer l´apparition d´algues, il convient <strong>de</strong> purifier l´eauchaque jour pendant trois ou quatre heures supplémentaires.Faites fonctionner le purificateur le temps nécessaire pour quel´eau <strong>de</strong> votre piscine soit filtrée une fois par jour. La durée dépendra du nombre<strong>de</strong> litres débités à l´heure par le filtre et la pompe. Gui<strong>de</strong>z-vous d´après lesindications suivantes:ETEAUTOMNE ETPRINTEMPSHIVER8 à 12 heures parjour4 à 6 heures parjour1 à 2 heures parjourPiscinesUnifamilialesDans le cas où il y aurait un usage intensif <strong>de</strong> votre piscine en<strong>de</strong>hors <strong>de</strong>s heures programmées par le temporisateur automatique, il estrecommandé <strong>de</strong> faire fonctionner en même temps les systèmes <strong>de</strong> chloration et<strong>de</strong> filtrage.48
Remarque: pour les piscines publiques (hôtels, etc…) l´électrolyseur <strong>de</strong>vrafonctionner les heures nécessaires pour maintenir le niveau <strong>de</strong> chlore selon laréglementation.2) FONCTIONNEMENT DU PURIFICATEURUne bonne circulation <strong>de</strong> l´eau est nécessaire pour assurer unerépartition efficace du chlore. L´usage combiné <strong>de</strong>s Skimmers et <strong>de</strong>s bon<strong>de</strong>scorrespondantes est important pour améliorer la circulation.! Vérifiez et contrôlez les niveaux <strong>de</strong> pH entre 7,2 et 7,4 (pour <strong>de</strong>spiscines <strong>de</strong> fibre <strong>de</strong> verre entre 6,8 et 7,0) et le niveau <strong>de</strong> chlore entre 0,6 et1,2 ppm. Révisez le niveau <strong>de</strong> sable tous les <strong>de</strong>ux ans, et nettoyez le filtre unefois tous les quinze jours.Eteignez l´installation si:• L´eau ne circule pas.• Vous procé<strong>de</strong>z au nettoyage du filtre.• Vous vi<strong>de</strong>z la piscine.• DE LA GLACE S´EST FORMÉE.• Si vous nettoyez la cellule.3) ASSISTANCE ET PIECES DE RECHANGENaturalchlor, S.L. ou son distributeur sont à votre disposition pour les pièces<strong>de</strong> rechange. L´électrolyseur peut être sérieusement endommagée par l´usage <strong>de</strong>pièces qui ne sont pas d´origine, ou par la manipulation <strong>de</strong> l´appareil par <strong>de</strong>stechniciens non agrées par “Natural Chlor”, ce qui entraînerait la perte <strong>de</strong> lagarantie.49
5. FONCTIONS DU REDRESSEURL´électrolyseur «Natural Chlor» est équipé d´un système <strong>de</strong> diagnosticélectronique sophistiqué qui allonge au maximum la durée <strong>de</strong> vie <strong>de</strong> la celluleélectrolytique. Il incorpore un panneau <strong>de</strong> voyants lumineux faciles à interpréter,qui vous oriente sur la meilleure action à prendre à chaque moment.À la suite, nous présentons <strong>de</strong>s résumés, en indiquant l´actionrecommandée chaque fois qu´un voyant lumineux quelconque s´allume àl´intérieur du panneau <strong>de</strong> contrôle du coffre.1) Une pression sur le bouton MIN (3) réduit la production <strong>de</strong> chlore un 10%.Pour éteindre l´électrolyseur il est nécessaire d´appuyer sur le boutonplusieurs fois, assurez-vous que les voyeurs <strong>de</strong> production restent éteints.Remarque: L´électrolyseur produit toujours au 100%. Lorsqu´on appuie sur lebouton ce qu´on fait c´est diminuer le temps <strong>de</strong> production, pas la quantité<strong>de</strong> production <strong>de</strong> chlore.2) Indicateur préventif <strong>de</strong> Niveau <strong>de</strong> Sel (Nacl) bas. La concentration <strong>de</strong> seldoit augmenter à 5000 - 6000 ppm pour satisfaire la production <strong>de</strong> chlore. Sile voyant clignote, l´électrolyseur s´éteindra lentement <strong>de</strong> façonautomatique en raison du fait que le niveau <strong>de</strong> sel est au-<strong>de</strong>ssous du minimum.3) Indicateurs <strong>de</strong> Production <strong>de</strong> Chlore: Il y a 10 voyants. Chaque voyantreprésente le 10% (un voyant) <strong>de</strong> production .4) Indicateur préventif <strong>de</strong> Niveau <strong>de</strong> Sel (Nacl) élevé. Quand le niveau <strong>de</strong> selest élevé ce voyant s´allumera, alors, il faudra ajouter <strong>de</strong> l´eau douce. Si levoyant clignote, alors l´électrolyseur s´éteindra automatiquement car leniveau <strong>de</strong> sel excè<strong>de</strong> le maximum. La concentration <strong>de</strong> sel doit se réduire à5000-6000 ppm.5) Lorsque ce voyant s´allume, il indique que l´électrolyseur a courant.50
6) Si ce voyant clignote, l´électrolyseur est en mo<strong>de</strong> stand-by et il n´y a pas <strong>de</strong>circulation d´eau dans la cellule. S´il vous plait, assurez-vous que la pompeest en fonctionnement et que l´eau circule par la cellule.7) Lorsqu´on appuie sur le bouton MAX (8), la production <strong>de</strong> chlore augmente un10% quand tous les voyants sont allumés, la production <strong>de</strong> chlore est du 100%.1 2 3 4 5 6 73Fonctions du redresseur51
6. SOLUTION RAPIDE DE PANNES1) Il n´y a pas <strong>de</strong> courant:a) Vérifiez que l´appareil va jusqu´à la prise.2) Relevés <strong>de</strong> faibles niveaux <strong>de</strong> production <strong>de</strong> chlore:a) Le niveau <strong>de</strong> sel dans la piscine est insuffisant.b) Les électro<strong>de</strong>s ont besoin d´être nettoyés.c) Usure <strong>de</strong>s électro<strong>de</strong>s.3) Le niveau <strong>de</strong> résidus <strong>de</strong> chlore dans la piscine est faible:a) Durée insuffisante <strong>de</strong> fonctionnement <strong>de</strong> l´électrolyseur.b) Le niveau <strong>de</strong> stabilisateur <strong>de</strong> chlore est faible.c) Les électro<strong>de</strong>s ont besoin d´être nettoyés.d) Niveau trop élevé <strong>de</strong> Ph <strong>de</strong> l´eau.Remarque: Lorsque l´on détecte un niveau <strong>de</strong> chlore faible, nous pouvonsvérifier rapi<strong>de</strong>ment l´électrolyseur, prenant un échantillon d´eau du Skimmer.Nous pouvons aussi réaliser une vérification du niveau <strong>de</strong> chlore avec le kitd´analyse. A la suite on procé<strong>de</strong>ra au prélèvement d´un échantillon directement<strong>de</strong> l´un <strong>de</strong>s impulseurs, la lecture <strong>de</strong>s impulseurs doit être considérablement plusélevée que celle du Skimmer, au moins un 1%.52
7. GARANTIE1. Cellule électrolytique et redresseur 2 ans2. Le reven<strong>de</strong>ur décline toute responsabilité dans les cas suivants:a) Le non-respect <strong>de</strong>s instructions données dans cette gui<strong>de</strong>.b) Erreurs dans le raccor<strong>de</strong>ment électrique.c) Dommages acci<strong>de</strong>ntels.d) Dommages par inondation du coffre électrique (redresseur).e) Pompe <strong>de</strong> plus <strong>de</strong> 1,5 CV sans installation <strong>de</strong> By-Pass (d´après lediagramme d´assemblage page 46).f) Versement d´aci<strong>de</strong>s dans les Skimmers sans déconnexion préalabledu coffre électrique.3. Les frais <strong>de</strong> déplacement seront à la charge <strong>de</strong> l´utilisateur.4. Il convient <strong>de</strong> préciser que l´installation <strong>de</strong> l´électrolyseur “NaturalChlor” est absolument indépendante <strong>de</strong>s équipements purificateurs, aussibien <strong>de</strong> la pompe que du filtre ou <strong>de</strong> la multi-soupape. Le seul point communest la connexion au temporisateur automatique du purificateur.Remarque ImportanteSi le chlore résiduel <strong>de</strong> la piscine est bas, s´il vous plait vérifiez que:a. L´électrolyseur ne fonctionne pas les heures nécessaires.b. Le niveau <strong>de</strong> stabilisateur <strong>de</strong> chlore est bas.c. La cellule a besoin d´être nettoyé.d. Niveau trop élevé <strong>de</strong> Ph <strong>de</strong> l´eau.e. Niveau <strong>de</strong> sel trop bas.53
8. ILLUSTRATION POUR L´INSTALLATION DEL´ELECTROLYSEUR À SELCELLULE ELECTROLYTIQUESOUPAPETEMPORISATEURDE FERMETURE AUTOMATIQUE TABLEAU DE COMMANDEFILTRE POMPE RETOUR A LA PISCINE4Illustration pour l´installation <strong>de</strong> l´électrolyseur «Natural Chlor».54
INHALT1. “Natural Chlor”Salzchlorung...........................562. Salzbeigabe.............................................573. Montageanleitung .......................................584.Wartung..................................................605. Funktionen und Aufgaben <strong>de</strong>sSachaltkastens.....................…………………..636. Richtlinien zur Problembehebung……….............657. Garantie.................................................668.Abbildung zur Installation <strong>de</strong>s „Naturalchlor“-Chlorierers.................................................6755
1. “NATURAL CHLOR”-SALZCHLORUNGHerzlichen Glückwunsch zu Ihrer Wahl eines “Natural Chlor”- Chlorierers!Ihr Chlorierer wur<strong>de</strong> nach <strong>de</strong>n strengsten Bestimmungen von Naturalchlor,S.L. hergestellt und kann bei richtiger Benutzung und Wartung je<strong>de</strong>s beliebigeSchwimmbecken mit normalen Benutzungsbedingungen entsprechend chlorieren.Lesen Sie bitte genau diese Anweisungen, um die Leistungsfähigkeit, dieFunktionsweise und die richtige. Wartung Ihres “Natural Chlor” – Chlorierersbesser kennenzulernen.VORBEREITUNG DES WASSERS IN IHREM SHWIMMBECKENDas Wasser wird stets klar und transparent sein, wenn bei <strong>de</strong>r Analysefolgen<strong>de</strong> Werte erreicht wer<strong>de</strong>n:ChorPH- WertT.A. (Alkalische Eigenshaft)SalzWasserhärte0,6-1,2 mg/l7,2-7,6 Schwimmbecken aus Glasfaser6,8-7,060-100 p.p.m.5-6 gr/l100-200 p.p.m.Die Haltbarkeit <strong>de</strong>s wassers hängt vorwiegend vom pH-Wert, <strong>de</strong>rWasserhärte, <strong>de</strong>r alkalischen Eigenschaft, <strong>de</strong>n darin aufgelösten festen Stoffenund <strong>de</strong>r Wassertemperatur ab. Es ist erfor<strong>de</strong>rlich, das chemiste Gleichgewicht<strong>de</strong>s Wassers wie<strong>de</strong>rherzustellen, bevor Sie Ihren Chlorierer anschließen.!Das einzige Mittel zur Überprüfung <strong>de</strong>s restlichen Chlorgehalts und<strong>de</strong>s chemischen Gleichgewichts <strong>de</strong>s Wassers in Ihrem Schwimmbecken ist dasAnalyse-kit. Es wird empfohlen, das Wasser in Ihrem Schwimmbecken regelmäßïgzu überprüfen und das chemische Gleichgewicht jeweils wie<strong>de</strong>rherzustellen, umdas Wasser stets klar und transparent zu halten.56
2. SALZBEIGABEDas Salz ist <strong>de</strong>m Wasser in einem Verhältnis von 50-60 Kg Salz je 10Kubikmeter Wasser beizufügen. Zur besseren Auflösung sollte das Salz rund umdas ganze Schwimmbecken herum in das Wasser eingeschüttet wer<strong>de</strong>n. Da dasSalz schwerer als das Wasser ist, wird es sich teilweise am Grund absetzen,obwohl es so aussieht, als ob es bereits aufgelöst wäre. Es wird emphohlen, zurbesseren Verteilung <strong>de</strong>n Bo<strong>de</strong>nsauger zu betätigen und die Umwälzanlage 24Stun<strong>de</strong>n lang einzuschalten. All das, bevor Sie <strong>de</strong>n Chlorierer anschließen.Ihr “Natural Chlor“ – Chlorierer braucht das Salz bei <strong>de</strong>r Chlorherstellungnicht auf, obwohl man das eventuell vermuten könte. Das Salz wird zwarelektrolysiert und in Chlorsoda (Natriumhypochlorit) verwan<strong>de</strong>lt, nach <strong>de</strong>rDesinfektion <strong>de</strong>s Wassers aber wie<strong>de</strong>r in gewöhnliches Salz zurückverwan<strong>de</strong>lt.Allerdings ist zu beachten, dass sich dadurch die Wasserspiegel verän<strong>de</strong>rt undbeim Wie<strong>de</strong>rauffüllen <strong>de</strong>s Schwimmbeckens <strong>de</strong>r Salzgehalt entsprechendvermin<strong>de</strong>rt wird.!wärend <strong>de</strong>r Salzzugabe sollte Ihr “Natural Chlor” Chlororierer solangeausgeschaltet wer<strong>de</strong>n, bis das Salz vollständig im Wasser <strong>de</strong>sSchwimmbeckens aufgelöst und verteilt ist. Falls diese Vorschrift nicht beachtetwird, kann es zu einer kostspieligen Beschädigung an <strong>de</strong>n Elektro<strong>de</strong>n und amelektrischen Schaltkasten kommen.57
3. MONTEGEANLEITUNGBerechnen Sie das Fassungsvermogen <strong>de</strong>s Schwimmmbeckens und fügen Sie 5-6Kg. Salz pro Kubikmeter Wasser bei.1) Den pH-Wert zwischen 7,2 und 7,6 einstellen. Bei Fiberglas-Becken solltedieser zwischen 6,8 und 7,0 betragen.2) Wenn das Wasser neu eingelassen wird, sollte man 1 KgCHLORSTABILISATOR PRO 25 KUBIKMETER hinzufügen.3) Den Filter öffnen, reinigen und Sand einfüllen, 2 o<strong>de</strong>r 3 cm oberhalb <strong>de</strong>soberen Rohres (nicht zutreffend bei Kieselfiltern).4) Elektrische Installation: ÜBERPRÜFEN SIE, OB DIE SPANNUNG 220 VOLTBETRÄGT. Ihr „Natural Chlor“- Chlorierer benötigt eine Spannung von 210-230Volt MIT ERDUNG. Stellen Sie <strong>de</strong>n Anschluß über eine Zeitschaltung her, um <strong>de</strong>nChlorierer und die Filterpumpe automatisch ein- und ausschalten zu können.Die Zelle muß am Filterausgang installiert wer<strong>de</strong>n, nach <strong>de</strong>r konventionellenHeizung bzw. Den Sonnenenergiesystemen, Ventilen...etc. Es sollte genügendPlatz vorhan<strong>de</strong>n sein, um die Zelle zur Reinigung abmontieren zu können, siehefolgen<strong>de</strong> Abbildung und Abbildung Seite 67.Der Schaltkasten sollte in unmittelbarer Nähe <strong>de</strong>r Kläranlageinstalliert wer<strong>de</strong>n. Hierfür bietet sich i<strong>de</strong>alerweise eine Wand an, die Schutz vorRegen, Bespritzen o<strong>de</strong>r zuffälligem Überlaufen bietet.58
VOMSCHIWIMMBECKENFILTERZELLERÜCKLEITUNG ZUMSCHWIMMBECKENVOMSCHWIMMBECKENFILTER HEIZUNG ZELLERÜCKLEITUNG ZUMSCHWIMMBECKEN1 MontageschemaBY-PASSHinweis: Das Zellengehäuse wird zum Anschluss an 50 mm dicke Rohregeliefert.Vergewissern Sie sich, dass Kabel <strong>de</strong>s Schaltkastens korrekt an die Zelleund <strong>de</strong>n Farben entsprechend angeschlossen wird.Bringen Sie , <strong>de</strong>n Schaltkasten oberhalb <strong>de</strong>r Zelle, aber nicht mehr als 1Meter davon entfernt an (das Kabel, das <strong>de</strong>n Schaltkasten mit <strong>de</strong>r Zelleverbin<strong>de</strong>t, darf nicht verlängert wer<strong>de</strong>n, es sei <strong>de</strong>nn, es wird auch <strong>de</strong>rQuerschnitt <strong>de</strong>s Kabels verlängert, damit ein Sinken <strong>de</strong>r Spannung vermie<strong>de</strong>nwird).Installiert Sie die Zelle nicht überhalb <strong>de</strong>r Pumpe. Bauen Sie sie in <strong>de</strong>nRücklauf o<strong>de</strong>r in die Druckwasserleitung ein.59
4. WARTUNG1) SAUBERKEITDie umpolbaren Chlorierer haben sich selbst reinigen<strong>de</strong> Zellen, so dass nureine sehr geringe Wartung nötig ist. In Ausnahmenfällen, in <strong>de</strong>nen <strong>de</strong>nen <strong>de</strong>erKalkgehalt sehr hoch ist, kann <strong>de</strong>r Chlorierer nicht alle Ablagerungen beseitigen.In diesem Fall muss <strong>de</strong>r Kalkgehalt an <strong>de</strong>n Normalwert angepasst wer<strong>de</strong>n und dieZelle gereinigt wer<strong>de</strong>n.Reinigungsverfahren: Den Chlorierer ausschalten, das Kabel von <strong>de</strong>r Zelleenfernen und die Zelle abmontieren. Die schmutzige Zelle muss dann in einenEimer mit einer Chlorwasserstoffsauerenlösung (Hcl) gelegt wer<strong>de</strong>n. DieReinigung wird miteiner 20%- igen Schei<strong>de</strong>wasser-Lösung durchgefürt (8 TeilenWasser und Zwei Teilen Schei<strong>de</strong>wasser. Stellen Sie genügend Lösung her, um dieZelle ganz in die Lösung eintauchen zu können (nicht <strong>de</strong>n Deckel mit <strong>de</strong>nAnschlüssen eintauchen). Achten Sie aus Sicherheitsgrün<strong>de</strong>n darauf, zuerst dasWasser und dann das Schei<strong>de</strong>wasser beizugeben.Man kann die Zelle auch mit einem Druckwasserschlauch reinigen. Esdürfen keine Metallplatten verwen<strong>de</strong>t wer<strong>de</strong>n.JAVORHANDENERAUSSTROM VONWASSERNICHT----------------------- -------------------------VORHANDENERAUSSTROMVON WASSER2Reinungsschema60
Die kalkablagerungen reagieren mit <strong>de</strong>m Hcl und produzieren Gas. Das En<strong>de</strong><strong>de</strong>r Gasproduktion be<strong>de</strong>utet das die Zelle vollokommen gereinigt ist. Der gesamtekalk löst sich im Wasser auf. Man muss die Zelle so schnell als möglich mitSüsswasser abspülen. Wenn wir die Zelle länger in <strong>de</strong>r HCl-lösung liessen, wür<strong>de</strong>sie beschädugt wer<strong>de</strong>n. Wenn <strong>de</strong>r Reinigungspozess vollzogen ist, muss <strong>de</strong>rAnschlüsse trocknen und die Zelle wie<strong>de</strong>r installiert wer<strong>de</strong>n.Hinweis: Die Zelle darf sich nicht länger als 5 Minuten in <strong>de</strong>r saurenLösung befin<strong>de</strong>n.!Es besteht Gasbildungsgefahr, falls die Zelle ohne Wasserzufuhrläuft. Dadurch kann es im Filter zu einer Ansammlung von Gasen kommen, dieSchä<strong>de</strong>n verursachen können..STOPIn beson<strong>de</strong>ren Fällen (bei hohen Temperaturen) sollte die Kläranlagebei Algenbildung täglich 3 o<strong>de</strong>r 4 Stun<strong>de</strong>n länger eingeschaltet wer<strong>de</strong>n.Die Kläranlage sollte lange genug eingeshaltet wer<strong>de</strong>n, damit dasWasser Ihres Schwimmbeckens einmal täglich gefiltert wird. Die Zeit hängtdavon ab, wie viele Liter Wasser <strong>de</strong>r Filter und die Pumpe pro Stun<strong>de</strong> umwälzen.Als Richtwerte sind folgen<strong>de</strong> Zeiten angemessen:SOMMERHERBST UNDFRÜHJAHRWINTER8 bis 12 Stun<strong>de</strong>ntäglich4 bis 6 Stun<strong>de</strong>ntäglich1 bis 2 Stun<strong>de</strong>ntäglichEinfamilienSchwimmbeckenFalls Ihr Schwimmbecken außerhalb <strong>de</strong>r in Ihrer automatischenZeitschaltung eingestellten Stun<strong>de</strong>n häufig benutz wird, ist es empfehlenswert,Ihr Chlorierungs-und Filtersystem auch in diesen Zeiten einzuschalten.61
Hinweis: In öffentlichen Schwimmbä<strong>de</strong>rn (Hotels, etc...) sollte <strong>de</strong>rChlorierer lange genug eingeschaltet wer<strong>de</strong>n, damit <strong>de</strong>r jeweils vorgeschriebeneChlorgehalt beibehalten wird.2) FUNKTIONSWEISE DER KLÄRANLAGEUm eine wirksame Chlorverteilung zu erreichen, ist ein guterWasserkreislauf erfor<strong>de</strong>rlich. Es ist wichtig, die entsprechen<strong>de</strong>nWasserabflüsse zusammen mit <strong>de</strong>n Skimmer zu verwen<strong>de</strong>n, um <strong>de</strong>nWasserkreislauf zu verbessern.!Zwei – bis dreimal pro Woche sollten die pH-Werte von 7,2 – 7,4 (beiGlas Glasfiber- Becken 6,8 – 7,0) sowie die Chlorwerte von 0,6 bis 1,2 ppmkontrolliert und eingestellt wer<strong>de</strong>n. Die Sandhöhe sollte alle zwei Jahreeinmal überprüft und <strong>de</strong>r Filter sollte alle zwei Wochen gereinigt wer<strong>de</strong>n.Das Gerät sollte abgeschaltet wer<strong>de</strong>n, wenn:• Kein Wasserkreislauf besteht.• Der Filter gewaschen wird.• Das Wasser aus <strong>de</strong>m Schwimmbecken ausgelassen wird.• DAS WASSER GEFROREN IST.• Die Zelle gereinigt wird3)SERVICE UND ERSATZTEILENaturalchlor, S.L. und seine Vertreter können Ihnen die erfor<strong>de</strong>rlichenErsatzteile zur Verfügung stellen. Die Verwendung von nicht Originalteilen sowiedie Handhabung <strong>de</strong>s Geräts durch Personen, die von “Natural Chlor” dazu nichtberechtigt wur<strong>de</strong>n, können an Ihrem Chlorierer große Schä<strong>de</strong>n verursachen undführen zum Verlust <strong>de</strong>r Garantie.62
5.FUNKTIONEN UND AUFGABEN DESSCHALTKASTENDer “Natural Chlor”- Chlorierer ist mit einem kompizierten, elektronischenDiagnose-System ausgestattet, das die Lebensdauer <strong>de</strong>r electrolytischen Zelleverlängert und eine leicht verständliche Anzeige über Kontroll-Lämpchen enthält,mit <strong>de</strong>ren Hilfe Sie ablesen können, was jeweils zu tun ist.Im Folgen<strong>de</strong>n fin<strong>de</strong>n Sie eine Zusammenfassung <strong>de</strong>r verschie<strong>de</strong>nenKontrollanzeigen auf <strong>de</strong>m Schaltbrett und Hinweise dazu, welche Aktionendurchgeführt wer<strong>de</strong>n müssen.1) Einmaliges Drücken <strong>de</strong>r Taste MIN (3), verringert dieChlorproduktion um 10%. Um <strong>de</strong>n Chlorierer auszuschalten muss mandie Taste mehrmals drücken um sicherzustellen, dass alleProduktionsanzeigen aus sind.Hinweis: Der Chlorierer produziert immer auf 100- prozentigemNiveau. Durch Knopfdruck verringert sich die Chlor –Produktionszeit, nicht die produzierte Chlormenge.2) Vorbeugen<strong>de</strong> Anzeige für niedriges Salzgehalt (Nacl). DasSalzgehalt muss auf 5000-6000 ppm erhöht wer<strong>de</strong>n, um <strong>de</strong>n Bedarffür die Chlorproduktion zu <strong>de</strong>cken. Wenn die Leuchte blinkt, wird<strong>de</strong>r Chlorierer sich langsam automatisch ausschalten, da dassalzgehalt unter das Min<strong>de</strong>stniveau gesunken ist.3) Anzeigen bezuelglich <strong>de</strong>r Chlorproduktion. Es gibt 10 Anzeigen,wovon je<strong>de</strong> einzelne 10% <strong>de</strong>s Cl 2 entspricht.4) Vorbeugen<strong>de</strong> Anzeige für uberhöhtes Salzgehalt (NaCl). Wenn dasSalz zu hoch ist, erleuchtet diese Anzeige. Man muss folglich mehrSüsswasser einlassen. Wenn das Licht blinkt, wird <strong>de</strong>r Chlorierersich aufgrund <strong>de</strong>s überschrittenen Salzmaximums langsamautomatisch ausschalten. Das Salzgehalt muss auf 5000-6000 ppmverringert wer<strong>de</strong>n.63
5) Wenn die Anzeige leuchtet, läefft Wasser durch die Zelle.6) Wenn das Fliessniveau blinkt, ist <strong>de</strong>r Chlorierer auf Stand-By und esfliesst kein Wasser durch die Zelle. Stellen Sie bitte sicher, dassdie Pumpe in Betrieb ist und dass dass Wasser durch die Zelle läuft7) Einmaliges betätigen <strong>de</strong>r Taste MAX (8) erhöht sie Chlorproduktionum 10% . Wenn alle Anzeigen leuchten ist die Produktion auf 100%.1 2 3 4 5 6 73 Schaltkasten funktions64
6. RICHTLINIEN ZUM BEHEBEN VONPROBLEMEN1) Kein Strom vorhan<strong>de</strong>n:a) Überprüfen, ob das Gerät angeschlossen ist.2) Das Messergerät <strong>de</strong>r Chlorbereitung zeigt niedrige Werte an:a) Ungenügen<strong>de</strong>r Salzgehalt in Schwimmbecken.b) Die Elektro<strong>de</strong>n müssen gereinigt wer<strong>de</strong>n.c) Die Elektro<strong>de</strong>n sind abgenutzt.3) Der Restchlorgehalt im Schwimmbecken ist niedrig.a) Der Chlorierer war nicht lang genug eingeschaltet.b) Der Wert <strong>de</strong>s Chlorstabilisators ist niedrig eingestellt.c) Die Elektro<strong>de</strong>n müssen gereinigt wer<strong>de</strong>n.d) Der pH-Wert <strong>de</strong>s Wassers ist zu hoch.Hinweis: Falls ein niedriger Chlorgehalt festgestellt wird, können Sie <strong>de</strong>nChlorierer überprüfen, in<strong>de</strong>m Sie eine Wasserprobe aus <strong>de</strong>n Skimmer entnehmenund mit Hilfe <strong>de</strong>s Analyse-Kits <strong>de</strong>n Chlorgehalt feststellen. Danach entnehmenSie eine Wasserprobe direkt aus einem <strong>de</strong>r Antriebsvorrichtungen. DerChlorwert <strong>de</strong>r Probe aus <strong>de</strong>r Antriebsvorrichtung muss min<strong>de</strong>stens um 1% höhersein als <strong>de</strong>r Skimmers.65
7. GARANTIE1. Zelle und Schaltkasten 2 Jahre2. Der Verkäufer übernimmt keine Verantwortung in folgen<strong>de</strong>n Fällen:a) Wenn die Anweisungen dieses Handbuches nicht befolgt wur<strong>de</strong>n.b) Bei Fehlern in <strong>de</strong>n elektrischen Anschlüssen.c) Bei Schä<strong>de</strong>n durch Unfälle.d) Bei Schä<strong>de</strong>n durch Wasser im elektrischen Schaltkasten.e) Wenn eine Pumpe mit über 1,5 C.V. ohne „By-Pass“ installierte wur<strong>de</strong>(siehe Montageschema auf Seite 59).f) Wenn Saüren in die Skimmer geschüttet wur<strong>de</strong>n und dabei <strong>de</strong>relektrische Schaltkasten nicht abgeschaltet wur<strong>de</strong>.3. Die fahrtkosten sind vom Benutzer zu tragen.4. Wir möchten beson<strong>de</strong>rs darauf hinweisen, dass die Installation <strong>de</strong>s„Natural Chlor“ Chlorierers unabhängig von <strong>de</strong>r Kläranlage ist, sowohl was diePumpe, als auch <strong>de</strong>n Filter o<strong>de</strong>r das Mehrfachventil betrifft. Sie habenlediglich <strong>de</strong>n gleichen Anschluß an die automatische Schaltuhr.Wichtiger HinweisWenn das ins Schwimmbecken abgegebene Chlor zu gering ist, uberprüfen Siebitte:a) Der Chlorierer läuft nicht die nötige Anzahl von Stun<strong>de</strong>nb) Der Anteil <strong>de</strong>s Chlorstabilisators ist zu gering.c) Die Zelle muss gereinigt wer<strong>de</strong>n.d) Der pH-Wert ist zu hoch.e) Der Salzgehalt ist zu gering.66
8. ABBILDUNG ZUR INSTALLATION DESCHLORIERERSZELLEVERSCHLUSSVENTILAUTOMATISCHEZEITSCHALTURSCHALTTAFFELFILTERPUMPERÜCKLAUF ZUM SCHWIMMBECKEN4Abbildung zur installation <strong>de</strong>s „NATURALCHLOR“ chlorierers.67
INDICE1. Cloratore Salino “NaturalChlor” .......................692. Aggiunta di Sale.........................................703. Istruzioni di montaggio.................................714. Manutenzione............................................735 Funzioni <strong>de</strong>l Rettificatore..............................766. Guida per rilevare i problemi ….......................787. Garanzia .................................................798. Grafico <strong>de</strong>ll’impianto cloratore salino “NaturalChlor”.......................................................801. CLORATORE SALINO “NATURALCHLOR”68
Congratulazioni per la scelta di un cloratore salino “Natural Chlor”.Il cloratore è stato prodotto sotto le più strette specificazioni diNaturalchlor, S.L e con un uso e manutenzione corretti, la clorazione di qualunquepiscina potrà essere effettuata in modo a<strong>de</strong>guato nonché con <strong>de</strong>lle condizionid’uso normali.Leggere molto attentamente queste istruzioni per una maggiore conoscenza<strong>de</strong>lla portata, funzionamento e corretta manutenzione <strong>de</strong>l cloratore "NaturalChlor.".PREPARAZIONE DELL'ACQUA DELLA PISCINAPer avere l'acqua limpida e trasparente l’analisi <strong>de</strong>l campione prelevatodovrà presentare le seguenti caratteristiche:Cloro0,6-1,2 mg/lPH 7,2-7,6 Piscine fibra di vetro 6,8-7,0T.A (Alcalinità)60-100 p.p.m.Sale5-6 gr/lDurezza <strong>de</strong>ll'Acqua100-200 p.p.m.La stabilità <strong>de</strong>ll'acqua risie<strong>de</strong> nel rapporto tra Ph, durezza, alcalinità, solidisciolti e temperatura <strong>de</strong>ll'acqua. Vi suggeriamo di equilibrare l'acqua prima dicollegare il cloratore.! Il Kit di analisi è l'unica forma di verificare il cloro e l'equilibriochimico <strong>de</strong>lla piscina.Per mantenere limpida e trasparente l’acqua vi raccomandiamo dicontrollarla e regolarla <strong>de</strong>bitamente in modo periodico.69
2. AGGIUNTA DI SALEIl sale va messo nella piscina in una proporzione da 50 a 60 Kg di sale perogni 10 m3 di acqua. Si versa il sale nella piscina per agevolarne la dissoluzione.Poiché il sale è più pesante <strong>de</strong>ll'acqua esso rimarrà nel fondo <strong>de</strong>lla piscina dandol'impressione di essersi già sciolto. Per una distribuzione più regolare èconsigliabile passare il puliscifondo e lasciar funzionare il <strong>de</strong>puratore per 24 ore.Tutto ciò prima di avviare il cloratore.Contrariamente a ciò che si pensa, il cloratore "Natural Chlor" non consumail sale per produrre <strong>de</strong>l cloro. Ciò che avviene normalmente è l’elettrolisi <strong>de</strong>l saleche si converte in ipoclorito sodico e che dopo aver disinfettato l'acqua <strong>de</strong>llapiscina si ritrasforma in sale comune. Tuttavia, l’uso e la pulizia <strong>de</strong>l filtro, cosìcome la pioggia ridurranno il livello <strong>de</strong>ll’acqua e nel riempire la piscina l’acquavedrà ridotta anche la propria concentrazione di sale.! Durante il processo di aggiunta di sale, il cloratore "Natural Chlor"dovrà essere spento fino a quando tutto il sale si sarà completamentesciolto e distribuito per tutta l'acqua <strong>de</strong>lla piscina; se ciò non avvenisse potrebbecausare un costoso difetto agli elettrodi ed al rettificatore.70
3. ISTRUZIONI DI MONTAGGIO1. Calcolare la capienza <strong>de</strong>ll’acqua <strong>de</strong>lla piscina. Versare da 5 a 6 Kg di saleper m 3 .2. Equilibrare il pH tra 7,2 e 7,6. In piscine di fibra di vetro tra 6,8 e7,0.3. Se l'acqua è nuova, versare 1 Kg di STABILIZZATORE DI CLORO PEROGNI 25 m 3 .4. Aprire il filtro. Pulirlo ed aggiungere sabbia, 2 o 3 cm. al di sopra <strong>de</strong>l tubosuperiore (se il filtro è di diatomee non toccare).5. Impianto elettrico. RIVEDERE PRESA DI CORRENTE a 220 V, il cloratore"Natural Chlor" lavora ad una corrente di 210-230 V CON PRESA DI TERRA.Programmare in automatico mediante l'orologio lo spegnimento e l’accensione<strong>de</strong>l cloratore e la bomba <strong>de</strong>l <strong>de</strong>puratore.La cellula <strong>de</strong>ve essere sistemata all'uscita <strong>de</strong>l filtro, dopo il riscaldatoreconvenzionale o sistemi solari, valvole,... Lasciare lo spazio necessario perrimuovere la cellula per l’eventuale pulizia: ve<strong>de</strong>re disegno che appare diseguito e grafico <strong>de</strong>ll'impianto pagina 80).71
DALLAPISCINAFILTROCELLULARITORNO ALLAPISCINADALLAPISCINAFILTRORISCALDATORECELULARITORNOALLA PISCINABY-PASS1 Schema di montaggioIl rettificatore <strong>de</strong>i comandi dovrà essere montato molto vicino alsistema di <strong>de</strong>purazione. Il posto idoneo sarebbe in una parete che offraprotezione dalla pioggia, spruzzi e straripamenti acci<strong>de</strong>ntali.Nota: Il vano <strong>de</strong>lla cellula è adattato a tubature di 50 mm.Verificare che il cavo <strong>de</strong>l rettificatore sia correttamente collegato allacellula.Montare il rettificatore <strong>de</strong>i comandi più in alto <strong>de</strong>lla cellula, ma non oltre a1 metro (il cavo che unisce il rettificatore alla cellula non <strong>de</strong>ve allungarsi, a menoche non si aumenti la sezione <strong>de</strong>llo stesso, on<strong>de</strong> evitare cadute di tensione).Ugualmente, può essere sistemato sul suolo, in posizione verticale.Non montare la cellula sopra la bomba. Intercalarla sul ritorno o sullatubatura a pressione.72
4. MANUTENZIONE1) PULIZIAI cloratori con cambiamento di polarità sono dotati di cellule autopulenti equindi con una manutenzione minima. In casi eccezionali, quando i <strong>de</strong>positi calcareisi presentino eccessivamente alti, il cloratore non potrà eliminare tutti i residui.In questo caso, il livello di calce dovrà essere assestato ai livelli normali e dovràessere rimossa e ripulita la cellula.Processo: Spegnere il cloratore, sconnettere il cavo <strong>de</strong>lla cellula erimuovere la cellula. La cellula sporca <strong>de</strong>ve essere collocata in un cubo con unadissoluzione di Acqua al 20% (8 parti di acqua e 2 di acqua forte). Bisogneràeffettuare la dissoluzione adatta per sommergere completamente la cellula (nonsommergere il coperchio, dove sono alloggiate le connessioni) per sicurezza,ricordare di aggiungere prima l'acqua e dopo l'acqua forte. La cellula potrà ancheessere pulita con un tubo di acqua a pressione. Non usare elementi metallici perrimuovere il <strong>de</strong>posito calcareo rimasto sulle lamiere.SIUSCITA CORRENTED'ACQUANO----------------------- -------------------------USCITACORRENTE D’AGUA2Schema di Pulizia73
I <strong>de</strong>positi calcarei reagiscono col HCl producendo gas. Finita l'emissione digas, vuol dire che anche la cellula è completamente pulita. Tutta la calce rimanesciolta ed è necessario risciacquare nel più breve tempo possibile la cellula inacqua dolce per evitare che, lasciandola più tempo nella soluzione di HCl, possasubire <strong>de</strong>i danni. Finalizzato il processo di pulizia, asciugare le connessioni erisistemare la cellula.Nota: non lasciare la cellula nella dissoluzione con acido più di 5 minuti.!Nel caso in cui la cellula funzionasse senza corrente d'acqua, potrebberoaccumularsi gas nel filtro. Ciò risulterebbe molto pericoloso oltre a causareimportanti danni all'apparecchio.STOPIn casi eccezionali (temperature alte), se osserviamo la formazione dialghe, è necessario <strong>de</strong>purare tre o quattro ore in più al giorno.Bisogna fare funzionare il <strong>de</strong>puratore il tempo necessarioaffinché l'acqua <strong>de</strong>lla piscina sia filtrata una volta al giorno. Il tempo dipen<strong>de</strong>ràdai litri che scorrono all'ora tra il filtro e la bomba. La seguente guida potràaiutarvi:ESTATEAUTUNNO EPRIMAVERAINVERNO8 a 12 ore al giorno4 a 6 ore al giorno1 a 2 ore al giornoPiscineUnifamiliari74
Se la vostra piscina avesse un uso molto intenso fuori dalle oreprogrammate nell’orologio automatico, si raccomanda di fare funzionare il sistemadi clorazione e di filtrazione anche in queste ore.Nota: Per piscine pubbliche (hotel...) dovrà funzionare le ore necessarie permantenere il livello di cloro secondo la normativa vigente.2) FUNZIONAMIENTO DEL DEPURATOREÈ necessaria una buona circolazione <strong>de</strong>ll'acqua per un'efficientedistribuzione <strong>de</strong>l cloro. È importante usare i corrispon<strong>de</strong>nti scarichi incongiunzione con gli Skimmers per migliorare la circolazione.! Verificare e regolare i livelli di pH tra 7,2 e 7,4 (in piscine di fibra divetro tra 6,8 e 7,0) e di cloro tra 0,6 e 1,2 ppm. Due o tre volte per settimana,controllare il livello di sabbia ogni due anni e pulire il filtro ogni quindici giorni.Spegnere l'impianto quando:• Non circoli l’acqua• Si lavi il filtro• Si svuoti la piscina• L’ACQUA SIA GELATA• Si pulisca la cellula3) SERVIZIO E PEZZI DI RICAMBIONaturalchlor, S.L o il suo distributore dispone di pezzi di ricambio a vostradisposizione. L'uso di pezzi non originali, come la manipolazione <strong>de</strong>ll’impiantoeffettuato da personale non autorizzato dalla ditta "Natural Chlor" potrà causareseri problemi al cloratore e ne annullerà la garanzia.75
5.FUNZIONI DEL RETTIFICATOREIl cloratore "Natural Chlor" è dotato di un sofisticato sistema elettronicodi diagnosi che massimizza la vita <strong>de</strong>lla cellula elettrolitica ed incorpora un displaydi facile comprensione, suggerendo l'azione da avviare in ogni momento.Riportiamo di seguito alcuni riepiloghi, con le indicazioni da seguire espiegazioni riguardanti le luci <strong>de</strong>l pannello di controllo <strong>de</strong>l rettificatore.1) Una semplice pressione sul tasto MIN (3) riduce la produzione di cloro inun 10%. Per spegnere il cloratore è necessario premere il tasto varie voltee assicurandosi che tutti gli indicatori di produzione siano spenti.Nota: Il cloratore produce sempre al 100%. Premendo il tasto, ciò che sifa è diminuire il tempo di produzione di cloro ma non la quantità di cloroprodotta.2) Indicatore preventivo di Livello di Sale (Nacl) basso. La concentrazione disale va aumentata a 5000-6000 ppm per ottimizzare la produzione di cloro.Se la luce lampeggia, il cloratore si spegnerà lentamente in modoautomatico poiché il livello di sale si posiziona sotto il minimo.3) Indicatori di Produzione di Cloro. Ci sono 10 indicatori. Ciascun indicatorecorrispon<strong>de</strong> ad un 10% di Cl2.4) Indicatore Preventivo di Livello di Sale (Nacl) Alto. Quando il livello di saleè alto, questa luce si accen<strong>de</strong>rà, bisognerà aggiungere acqua dolce. Se laluce lampeggia il cloratore si spegnerà lentamente e in modo automaticopoiché il livello di sale supera il massimo. La concentrazione di sale <strong>de</strong>veessere ridotta a 5000-6000 ppm.76
5) Se l'indicatore è acceso, il cloratore ha corrente.6) Se il livello di flusso lampeggia, il cloratore si posiziona in modo stand-by enon c'è flusso di acqua nella cellula. Per favore, verificare che la bomba stafunzionando e che l'acqua sta passando per la cellula.7) Una semplice pressione sul tasto MAX (4) aumenta la produzione di cloroin un 10%. Quando tutte le luci sono accese la produzione di cloro è al100%.1 2 3 4 5 6 73Funzioni <strong>de</strong>l rettificatore77
6. GUIDA PER RILEVARE I PROBLEMI1) Non c'è corrente:a) Comprovare se è collegato.2) Bassa lettura <strong>de</strong>l misuratore di produzione di cloro:a) Livello insufficiente di sale nella piscina.b) Elettrodi richiedono pulizia.c) Usura <strong>de</strong>gli elettrodi.3) Il cloro residuale nelle piscine è basso:a) Tempo <strong>de</strong>l cloratore in funzionamento insufficiente.b) Il livello di stabilizzatore di cloro è basso.c) Gli elettrodi hanno bisogno di pulizia.d) PH <strong>de</strong>ll'acqua troppo alto.Nota: In una situazione in cui si rilevi un livello di cloro basso, possiamoverificare rapidamente il cloratore, prelevando un campione di acqua di Skimmere realizzare un accertamento <strong>de</strong>l livello di cloro con il kit di analisi. Quindiprelevare direttamente un campione da uno <strong>de</strong>gli propulsori. La lettura di cloro<strong>de</strong>l impulsore <strong>de</strong>ve essere consi<strong>de</strong>revolmente maggiore a quella <strong>de</strong>llo Skimmeralmeno in un 1%.78
7. GARANZIA1. Cellula elettrolitica e rettificatore 2 anni2. Il venditore <strong>de</strong>clina ogni responsabilità nei seguenti casi:a) Non rispettare le istruzioni <strong>de</strong>l manuale riportato.b) Errori in connessioni elettriche.c) Danni acci<strong>de</strong>ntali.d) Danni per acqua nel rettificatore.e) Bomba con più di 1,5 C.V. senza installazione di un "By-pass"(secondo schema di montaggio pagina 72).f) Se si versano acidi negli Skimmers senza sconnettere ilrettificatore.3. Le spese di trasloco saranno abbonate dall'utente.4. Vogliamo chiarire che l'installazione <strong>de</strong>l cloratore "Natural Chlor" èassolutamente indipen<strong>de</strong>nte dall'impianto di <strong>de</strong>purazione, sia <strong>de</strong>lla bomba sia<strong>de</strong>l filtro o <strong>de</strong>lla multivalvola. Ciò che hanno in comune è la connessioneall'orologio automatico <strong>de</strong>l <strong>de</strong>puratore.Nota importanteSe il cloro residuale nella piscina è basso, per favore verificare:a. Il cloratore non funziona le ore necessarie.b. Il livello di stabilizzatore di cloro è basso.c. La cellula ha bisogno di pulizia.d. Il pH è alto.e. Il livello di sale è basso.79
8. GRAFICO DELL’IMPIANTOCELLA ELECTROLITICAVALVOLA ATENUTA TEMPORIZZATORE QUADRO COMANDIFILTRO POMPA RITTORNO ALLA PISCINA4Grafico <strong>de</strong>ll’impianto80
Distribuidor autorizado Authorized distribuitorDistribuidor autorizado Reven<strong>de</strong>ur authoriséBevollmächtigter Vertreter Distribuitore autorizzatowww.naturalchlor.com81