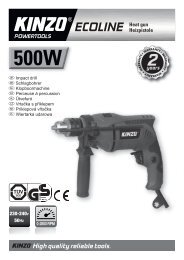
High quality reliable tools. ECOLINE Impact drill Schlagbohrer - kinzo
High quality reliable tools. ECOLINE Impact drill Schlagbohrer - kinzo
High quality reliable tools. ECOLINE Impact drill Schlagbohrer - kinzo
You also want an ePaper? Increase the reach of your titles
YUMPU automatically turns print PDFs into web optimized ePapers that Google loves.
Warning: If the <strong>drill</strong> stalls, release the trigger immediately, remove the <strong>drill</strong> from the work and determine the<br />
cause of the stalling. Do not click the switch on and off as this can damage the motor.<br />
• To minimize the chance of stalling and breaking through the material, reduce the pressure on the <strong>drill</strong> and<br />
ease the bit through the last part of the hole.<br />
• Keep the motor running when pulling the bit back out of a <strong>drill</strong>ed hole. This will help prevent jamming.<br />
A<br />
Metal <strong>drill</strong>ing<br />
• For maximum performance, use high speed steel bits for metal or steel <strong>drill</strong>ing.<br />
• Push <strong>drill</strong>ing mode selector to <strong>drill</strong>ing mode<br />
• Use a center punch to mark the hole location on the work-piece.<br />
• Begin <strong>drill</strong>ing at a very low speed to prevent the bit from slipping off the starting point.<br />
• Maintain a speed and pressure which allows cutting without overheating the bit. Applying too much<br />
pressure will: overheat the <strong>drill</strong>; wear the bearing, bend or burn bits, produce off-center or irregular shaped<br />
holes.<br />
• When <strong>drill</strong>ing large holes in metal it is recommended to <strong>drill</strong> with a small bit at first, then finish with a larger<br />
bit, also, lubricate the bit with oil to improve <strong>drill</strong>ing action and increase bit life.<br />
Wood <strong>drill</strong>ing<br />
• For maximum performance, use high speed steel bits for wood <strong>drill</strong>ing.<br />
• Push the <strong>drill</strong>ing mode selector to <strong>drill</strong>ing mode<br />
• Secure the work-piece to prevent it from turning when <strong>drill</strong>ing.<br />
• Begin <strong>drill</strong>ing at a very low speed to prevent the bit from slipping off the starting point. Increase the speed<br />
as the <strong>drill</strong> bit bites into the material.<br />
• When <strong>drill</strong>ing through holes, place a block of wood behind the work-piece to prevent ragged or splintered<br />
edges on the back side of the hole.<br />
• Do not lock the trigger in the “on” position when the <strong>drill</strong> may need to be stopped suddenly.<br />
Masonry <strong>drill</strong>ing<br />
• For maximum performance use tungsten carbide-tipped masonry impact bits when <strong>drill</strong>ing holes in brick,<br />
tile, concrete, etc.<br />
• Push the <strong>drill</strong>ing mode selector to impact mode<br />
• Apply light pressure and medium speed for best results in brick.<br />
• Apply additional pressure and high speed for hard materials such as concrete.<br />
• When <strong>drill</strong>ing in tile, practice on a scrap piece to determine the best speed and pressure.<br />
CAUTION!<br />
Always be sure that the tool is switched off and unplugged before attempting to perform inspection or<br />
maintenance.<br />
• Inspecting the mounting screws regularly inspect all mounting screws and ensure that they are properly<br />
tightened.<br />
• Regularly clean the tool’s air vents with compressed dry air. Do not attempt to clean by inserting pointed<br />
objects through openings.<br />
CAUTION! Certain cleaning agents and solvents damage plastic parts. Some of these are: gasoline, carbon<br />
tetrachloride, chlorinated cleaning solvents, ammonia and household detergents that contain ammonia.<br />
• The brushes should be checked periodically and worn-out brushes should be replaced in time.<br />
WARNING!<br />
If any of the following events occur during normal operation, the power supply should be shut off at once<br />
and tool thoroughly inspected by a qualified person and repaired if necessary:<br />
• The rotating parts get stuck or speed drops abnormally low.<br />
• The tool shakes abnormal accompanied by some unusual noise<br />
• The motor housing gets abnormal hot.<br />
• Heavy sparks occur around the motor area.<br />
7<br />
71777 76067 manual.indd 7 03-01-11 14:40


