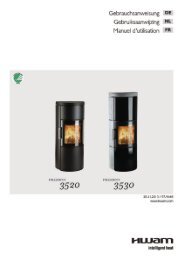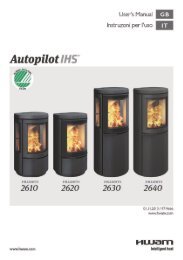
Monteringsvejledning for friskluftsystem ... - Hwam.de
Monteringsvejledning for friskluftsystem ... - Hwam.de
Monteringsvejledning for friskluftsystem ... - Hwam.de

Create successful ePaper yourself
Turn your PDF publications into a flip-book with our unique Google optimized e-Paper software.
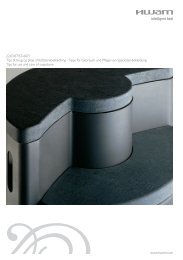
DeutschEinbauanleitung für das VerbrennungsluftsystemAnschluss durch <strong>de</strong>n Bo<strong>de</strong>n1. Die 4 Schrauben (1) an <strong>de</strong>r Mitte <strong>de</strong>r Rückwand <strong>de</strong>s Kaminofens abschrauben. Rückwand anhebenund vom Kaminofen wegziehen, sodass die Rück¬wand aus <strong>de</strong>n Führungszapfen <strong>de</strong>r Bo<strong>de</strong>nplatte<strong>de</strong>s Kaminofens gehoben wer<strong>de</strong>n kann.2. Den Blind<strong>de</strong>ckel (2) an <strong>de</strong>r Innenseite <strong>de</strong>r Rückwand mit <strong>de</strong>n 3 mitgelieferten Schneidschraubenanschrauben (3).3. Die mitgelieferte Dichtung an <strong>de</strong>n Rand <strong>de</strong>r Automatikkassette kleben (4).4. Die Rückwand in die Führungszapfen an <strong>de</strong>r Rückseite <strong>de</strong>r Bo<strong>de</strong>nplatte <strong>de</strong>s Kaminofens einsetzenund dann an <strong>de</strong>n Kaminofen andrücken. Rückwand anheben und leicht nach innen drücken, sodasssie einrastet. Die 4 Schrauben an <strong>de</strong>r Mitte <strong>de</strong>r Rückwand <strong>de</strong>s Kaminofens festschrauben.5. Den Kaminofen über die Frischluftöffnung im Bo<strong>de</strong>n stellen (5).EnglishAssembly Instructions <strong>for</strong> combustion air systemFresh air connection through the base1. Remove the four screws (1) in the middle of the rear plate. Lift the rear plate and pull it awayfrom the stove so that it disengages from the gui<strong>de</strong> pins on the bottom plate of the stove.2. Fasten the cover plate (2) to the insi<strong>de</strong> of the rear plate using the 3 accompanying self-tappingscrews (3).3. Attach the accompanying gasket to the frame of the automatic cassette (4).4. Place the rear plate on the gui<strong>de</strong> pins at the back of the bottom plate of the stove; then press itin towards the stove. Lift the rear plate and press it lightly inwards until it engages with the gui<strong>de</strong>pins. Fasten the four screws in the middle of the rear plate again.5. Place the stove on top of the fresh-air hole in the floor (5).Ne<strong>de</strong>rlandsMontage-instructies voor het verbrandingsluchtsysteemAansluiting luchtverversing door <strong>de</strong> bo<strong>de</strong>m1. Schroef <strong>de</strong> 4 schroeven (1) mid<strong>de</strong>n op <strong>de</strong> achterplaat eraf. Til <strong>de</strong> achterplaat naar boven en trek<strong>de</strong>ze weg van <strong>de</strong> kachel, zodat <strong>de</strong> achterplaat los komt van <strong>de</strong> gelei<strong>de</strong>pennen in <strong>de</strong> bo<strong>de</strong>mplaatvan <strong>de</strong> kachel.2. Schroef <strong>de</strong> afschermkap (2) vast aan <strong>de</strong> binnenkant van <strong>de</strong> achterplaat met behulp van <strong>de</strong> bijgelever<strong>de</strong>drie zelftappen<strong>de</strong> schroeven (3).3. Lijm <strong>de</strong> bijgelever<strong>de</strong> pakking aan <strong>de</strong> zijkant van <strong>de</strong> automatische cassette (4).4. Plaats <strong>de</strong> achterplaat op <strong>de</strong> gelei<strong>de</strong>pennen achter op <strong>de</strong> bo<strong>de</strong>mplaat van <strong>de</strong> kachel. Druk <strong>de</strong>achterplaat vervolgens naar <strong>de</strong> kachel toe. Til <strong>de</strong> achterplaat op en druk <strong>de</strong>ze voorzichtig naarbinnen tot hij op zijn plaats valt. Schroef <strong>de</strong> 4 schroeven vast op het mid<strong>de</strong>n van <strong>de</strong> achterplaat.5. Plaats <strong>de</strong> kachel over <strong>de</strong> luchtverversingsopening in <strong>de</strong> vloer (5).5