Manual - Hardware
Manual - Hardware
Manual - Hardware

Create successful ePaper yourself
Turn your PDF publications into a flip-book with our unique Google optimized e-Paper software.
ENGLISH<br />
<strong>Manual</strong><br />
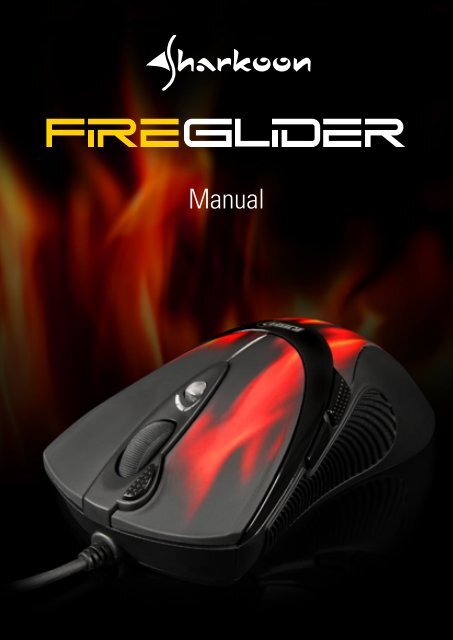
Rush Fireglider
Content<br />
1. Features<br />
2. Specifications<br />
3. Package content<br />
4. The Mouse at a glance<br />
5. Connecting to a PC<br />
6. Installing the software<br />
7. The mouse editor<br />
ENGLISH<br />
7.1 Launching the mouse editor<br />
7.2 The user interface (main window)<br />
7.3 The further menus<br />
7.3.1 DPI settings<br />
7.3.2 Pulldown menus<br />
7.3.3 Mouse gestures<br />
7.3.4 Macro manager<br />
7.3.4.1 Overview<br />
7.3.4.2 The tabs “Loop”, “Key”, “If” and<br />
“Equ”<br />
7.3.4.3 Command icons<br />
7.3.4.4 The record function<br />
7.3.4.5 Macro play back mode<br />
7.3.4.6 Time control<br />
7.3.4.7 Absolute/relative movements<br />
7.3.5 Further functions<br />
Rush Fireglider
Dear customer!<br />
Congratulations for purchasing one premium quality<br />
SHARKOON product.<br />
For a long life time and to take full advantage of this product we<br />
recommend that you read this manual completely.<br />
ENGLISH<br />
Have a good time with our product!<br />
SHARKOON Technologies GmbH<br />
1. Features<br />
• Laser mouse with 7 buttons (6 of them freely<br />
programmable)<br />
• DPI switch with color display (6 steps)<br />
• Weight tuning system (max. 19.5 g)<br />
• On-board memory for macros<br />
• Smooth running and finely adjustable scroll wheel<br />
• Ergonomic design for convenient handling<br />
• Special grip areas offer maximum control<br />
• Ideal for professional applications and gaming<br />
• Supported operating systems: Windows 2000, XP,<br />
XP (x64) and VISTA x86<br />
2. Specifications<br />
Max. DPI/CPI: 3600<br />
DPI/CPI stepping: 600 – 800 – 1200 – 1600 – 2000 – 3600<br />
Max. acceleration: 20 G<br />
Mouse weight max.: 135 g<br />
Mouse weight min.: 118 g<br />
Laser sensor: Agilent ADNS-6010<br />
Connector: USB (cable length: 1.8 m)<br />
Power input: 5V - 60 mA<br />
Rush Fireglider
3. Package content<br />
• Rush Fireglider<br />
• CD with software and manual (as PDF)<br />
ENGLISH<br />
Note:<br />
If you are missing any of the items listed above, please contact<br />
customer service via e-mail at support@sharkoon.com or call:<br />
+ 49 (0) 6403 – 775 6100<br />
Caution laser!<br />
Avoid direct eye contact with the laser beam!<br />
4. The mouse at a glance<br />
A – Button 1: left mouse button<br />
B – Button 2: double-click button<br />
(freely programmable)<br />
C – Button 3: right mouse button<br />
(freely programmable)<br />
D – Button 4: middle mouse<br />
button and scroll wheel<br />
(freely programmable)<br />
E – Button 5: DPI selector<br />
(freely programmable)<br />
F – Button 6: freely programmable<br />
G – Button 7: freely programmable<br />
F<br />
A<br />
G<br />
B<br />
D<br />
E<br />
C<br />
Rush Fireglider
A<br />
B<br />
ENGLISH<br />
C<br />
A – Button 6: freely programmable<br />
B – Button 7: freely programmable<br />
C – Grip area<br />
B<br />
B<br />
B<br />
A<br />
A<br />
A<br />
A – Weight tuning system<br />
(max. 19.5 g)<br />
B – Mouse slides<br />
Rush Fireglider
5. Connecting to a PC<br />
1. Plug the mouse’s USB connector to an available USB<br />
connector of your PC.<br />
2. The operating system will automatically recognize the mouse<br />
and install all needed drivers.<br />
3. If your mouse is not recognized, disconnect it and try<br />
another of your PC’s USB connectors.<br />
ENGLISH<br />
6. Installing the software<br />
1. Before installing the included software, remove all other<br />
installed mouse software from your system.<br />
2. Put the included Tools CD into your CD/DVD drive.<br />
3. Open the CD/DVD drive’s folder (e.g. D:).<br />
4. Choose the directory “MouseGeneral…” and start<br />
“setup.exe” (fig. 1).<br />
5. The InstallShield Wizard will be launched (fig. 1).<br />
fig. 1<br />
Continue by clicking “Next” or press “Cancel” to abort the<br />
installation.<br />
Rush Fireglider
6. Start the installation process by clicking “Install” (fig. 2).<br />
ENGLISH<br />
fig. 2<br />
“Back” brings you to the previous window, “Cancel” stops<br />
the installation process.<br />
7. After the installation is successfully completed, the following<br />
window will be displayed (fig. 3).<br />
fig. 3<br />
Rush Fireglider
By choosing “Launch Mouse Editor” the mouse editor will<br />
be launched right after completing the installation process<br />
by clicking “Finish”.<br />
7. The mouse editor<br />
ENGLISH<br />
7.1 Launching the mouse editor<br />
1. Start the application by double-clicking the symbol on the<br />
desktop or the respective icon in the task bar (fig. 4).<br />
fig. 4<br />
Rush Fireglider
7.2 The user interface (main window)<br />
ENGLISH<br />
A<br />
B<br />
C<br />
D<br />
F<br />
E<br />
E<br />
F<br />
G<br />
A – File menu: see below fig. 5<br />
B – Profile menu: 2 scripts can be stored on the mouse’s<br />
internal memory, select them from the dropdown menu<br />
(fig. 6)<br />
C – Minimize window<br />
D – Close window/application<br />
E – Button configuration: different functions may be assigned<br />
to all the mouse buttons, select the functions from<br />
the respective dropdown menu (see below 7.3.2)<br />
F – Function description: use this text area to describe the<br />
respective button’s function<br />
G – By clicking this button transfer all adjustments made in<br />
the mouse editor to the mouse<br />
Rush Fireglider
ENGLISH<br />
fig. 5 (file menu)<br />
New – creates a new profile<br />
Open – opens/loads an existing profile<br />
Save – saves the current profile under its existing<br />
name<br />
Save as – saves the profile under a new name<br />
Rename – changes the profile’s name<br />
Read memory – reads the current profile from the internal<br />
mouse memory<br />
Exit – closes the application<br />
fig. 6 (profile menu)<br />
Open the list by clicking the arrow.<br />
Select between Profile 1 and<br />
Profile 2.<br />
Rush Fireglider
7.3 The further menus<br />
7.3.1 DPI settings<br />
ENGLISH<br />
A B C D<br />
A – Activate/deactivate the respective DPI setting<br />
B – DPI setting for the X-axis<br />
C – DPI setting for the Y-axis<br />
D – Respective color indicator<br />
Rush Fireglider
7.3.2 Pulldown menus<br />
The pulldown menus will open up when the button is pressed.<br />
The pulldown menus are similar for all mouse buttons (fig. 7).<br />
ENGLISH<br />
A<br />
B<br />
C<br />
fig. 7<br />
A – Button<br />
B – Menu items<br />
C – Flyout menus with further functions/options<br />
Rush Fireglider
2. Select between the following menu items:<br />
a) No setting: the button has no function.<br />
b) Keyboard: assign keyboard functions to the button<br />
(fig. 8).<br />
ENGLISH<br />
fig. 8<br />
c) Mouse: clicking the arrow will bring up a flyout menu<br />
(fig. 9). Assign mouse functions to the button.<br />
fig. 9<br />
Rush Fireglider
d) Office Sets: clicking the arrow will display a flyout menu<br />
(fig. 10). Assign office functions to the button.<br />
ENGLISH<br />
fig. 10<br />
e) Key combination: clicking the arrow will bring up a flyout<br />
menu. Assign a key combination from the set “Text<br />
commands” (fig. 11) resp. “File Commands” (fig. 12) to<br />
the button.<br />
fig. 11<br />
Rush Fireglider
ENGLISH<br />
fig. 12<br />
f) Multimedia: clicking the arrow will bring up a flyout<br />
menu (fig. 13). Assign multimedia functions to the<br />
button.<br />
fig. 13<br />
Rush Fireglider
g) Internet: clicking the arrow will bring up a flyout menu<br />
(fig 14). Assign a browser function to the button.<br />
ENGLISH<br />
fig. 14<br />
h) System: clicking the arrow will bring up a flyout menu<br />
(fig 15). Assign a system function to the button.<br />
fig. 15<br />
Rush Fireglider
i) 16-in-1 Mouse Gesture: activate the mouse gesture<br />
function (see below 7.3.3).<br />
j) Select Macro File: clicking the arrow will bring up a flyout<br />
menu (fig 16). Assign a pre-set macro function to the<br />
button.<br />
ENGLISH<br />
fig 16<br />
k) Macro Manager: launch the macro manager (see below<br />
7.3.4).<br />
3. By clicking the “ “ button all changes from the<br />
mouse editor will be transferred to the mouse.<br />
Rush Fireglider
7.3.3 Mouse gestures<br />
The mouse supports 16 so called mouse gestures. This functionality<br />
allows to execute various instructions by moving the<br />
mouse in a special way (gestures).<br />
Eight of these gestures are pre-set and may not be changed,<br />
the other eight gestures may be assigned with own functions<br />
(fig. 17).<br />
The mouse gesture function may be assigned to any button<br />
(see above 7.3.2 i).<br />
Activate the gesture by executing the pre-defined movement<br />
while pressing the mouse gesture button.<br />
ENGLISH<br />
fig. 17<br />
Rush Fireglider
7.3.4 Macro manager<br />
Using the macro manager allows you to create own macros<br />
which then may be assigned to any button (see above 7.3.2 k).<br />
ENGLISH<br />
There are 3 ways to create a script:<br />
1. Add the desired functions using the functions buttons<br />
and functions modules.<br />
2. Tape mouse movements and key combinations using the<br />
record function.<br />
3. Enter instructions using the input area resp. the keyboard<br />
connected to the PC.<br />
Save your settings by clicking “ “.<br />
Via the “<br />
“ button in the main window your settings<br />
will be transferred to the mouse.<br />
Rush Fireglider
7.3.4.1 Overview<br />
A<br />
B<br />
C D E<br />
ENGLISH<br />
F<br />
G<br />
H<br />
K<br />
I<br />
J<br />
L<br />
A – The tabs “Loop”, “Key”, “If” and “Equ” (see below<br />
7.3.4.2)<br />
B – Menu bar<br />
C – Command icons (see below 7.3.4.3)<br />
D – Record function (see below 7.3.4.4)<br />
E – Macro play back mode (see below 7.3.4.5)<br />
F – Insert section repeat (see below 7.3.4.6)<br />
G – Insert jump instruction (see below 7.3.4.7)<br />
H – Define delay time (see below 7.3.4.8)<br />
I – Define absolute and relative mouse cursor movements<br />
(see below 7.3.4.9)<br />
J – Define a sequence of mouse button strokes<br />
K – Code area<br />
L – Define a sequence of key strokes<br />
Rush Fireglider
7.3.4.2 The tabs “Loop”, “Key”, “If” and “Equ”<br />
The tabs “Loop”, “Key”, “If” and “Equ” allow you to define different<br />
instructions which will be copied into the script by clicking<br />
the “Plug in” button.<br />
ENGLISH<br />
1. Loop:<br />
a) Insert section repeat<br />
Use the input areas to enter the respective start and end<br />
line and define how often this area shall be inserted into<br />
the script. Pressing the “Plug in” button will copy the<br />
defined section into the script.<br />
b) Insert jump instruction<br />
This function enables to define jump instructions which<br />
will be copied to the script using the “Plug in” button<br />
afterwards.<br />
Rush Fireglider<br />
20
2. Key: define the effect of pressing/releasing a button and copy<br />
this condition into the script using the “Plug in” button.<br />
ENGLISH<br />
3. If: define different conditions and insert them into the script<br />
by clicking the “Plug in” button.<br />
Rush Fireglider
4. Equ: create different conditions and insert them into the<br />
script by clicking the “Plug in” button.<br />
ENGLISH<br />
7.3.4.3 Command icons<br />
A B C D E F G H I<br />
A – Save<br />
F – Paste<br />
B – Back<br />
G – Down<br />
C – Next<br />
H – Up<br />
D – Cut<br />
I – Erase<br />
E – Copy<br />
7.3.4.4 The record function<br />
By hitting the “ “ button you can easily create a macro<br />
by taping the complete keyboard and mouse actions. The single<br />
instructions will simultaneously be displayed in the code area.<br />
Using the “ “ button will save the created instruction code.<br />
Rush Fireglider
7.3.4.5 Macro play back mode<br />
Choose between the following menu items:<br />
1. Play Macro Once ONLY: the macro will be executed once by<br />
pressing the button.<br />
2. Play Macro Repeatedly: the macro will be executed several<br />
times. You may define if the macro is replayed until the<br />
button is released (Press to start. Release to stop) or if the<br />
macro is executed as long after hitting the button until any<br />
other button is pressed (Press to start. Re-press to stop).<br />
ENGLISH<br />
7.3.4.6 Time control<br />
Tick the check boxes to define if the time delay shall be carried<br />
out after pressing the button or after releasing it.<br />
The combo boxes allow you to set time unit and time delay.<br />
“Plug in” copies your settings to the code area.<br />
Rush Fireglider
7.3.4.7 Absolute/relative movements<br />
ENGLISH<br />
To detect the current absolute coordinates grab the crosshairs<br />
( ) by pressing (and not releasing) the mouse button and moving<br />
the crosshairs across the screen.<br />
Relative coordinates are defined using the respective input<br />
forms.<br />
With “Plug in” you copy the settings to the code area.<br />
7.3.5 Further functions<br />
More functions and configurations may be accessed by rightclicking<br />
the icon “ “ in the task bar.<br />
Rush Fireglider
The following context menu will be displayed (fig. 18):<br />
ENGLISH<br />
fig. 18<br />
Select between these menu items:<br />
1. Auto Launch on Boot: decides whether the mouse software<br />
shall be loaded and started during system’s start.<br />
2. Mouse-Control Panel: opens the user interface of the mouse<br />
software.<br />
3. Tilt Wheel Setting (fig. 19): define the scroll rate. “OK”<br />
accepts your settings, “Cancel” discards them.<br />
fig. 19<br />
Rush Fireglider
4. Button Response Time: (fig. 20): adjust the response time for<br />
the buttons.<br />
ENGLISH<br />
fig. 20<br />
5. Function/Key Reminder (fig 21): decide if the functions of<br />
every single mouse button shall be displayed on the screen.<br />
fig. 21<br />
Rush Fireglider
6. Report Rate Setting (fig. 22):<br />
ENGLISH<br />
fig. 22<br />
7. Open Mouse Editor<br />
8. Exit: closes the context menu.<br />
Rush Fireglider
Legal disclaimer:<br />
For potential loss of data, especially due to inappropriate handling,<br />
SHARKOON assumes no liability.<br />
ENGLISH<br />
All named products and descriptions are trademarks and/or registered<br />
trademarks of the respective manufacturers and are accepted<br />
as protected.<br />
As a continuing policy of product improvement at SHARKOON,<br />
the design and specifications are subject to change without prior<br />
notice. National product specifications may vary.<br />
The legal rights of the enclosed software belong to the respective<br />
owner. Please observe the license terms of the manufacturer<br />
before using the software.<br />
All rights reserved especially (also in extracts) for translation,<br />
reprinting, reproduction by copying or other technical means.<br />
Infringements will lead to compensation.<br />
All rights reserved especially in case of assignation of patent<br />
or utility patent. Means of delivery and technical modifications<br />
reserved.<br />
© SHARKOON Technologies GmbH 2008<br />
www.sharkoon.com<br />
Rush Fireglider