SUNNY WEBBOX - User Manual - SMA Solar Technology AG
SUNNY WEBBOX - User Manual - SMA Solar Technology AG
SUNNY WEBBOX - User Manual - SMA Solar Technology AG

Create successful ePaper yourself
Turn your PDF publications into a flip-book with our unique Google optimized e-Paper software.
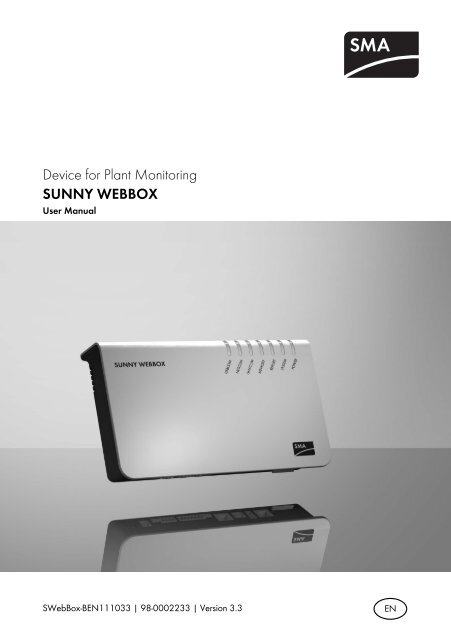
Device for Plant Monitoring<br />
<strong>SUNNY</strong> <strong>WEBBOX</strong><br />
<strong>User</strong> <strong>Manual</strong><br />
SWebBox-BEN111033 | 98-0002233 | Version 3.3 EN
<strong>SMA</strong> <strong>Solar</strong> <strong>Technology</strong> <strong>AG</strong> Table of Contents<br />
Table of Contents<br />
1 Information on this <strong>Manual</strong>. . . . . . . . . . . . . . . . . . . . . . . . . 9<br />
1.1 Validity . . . . . . . . . . . . . . . . . . . . . . . . . . . . . . . . . . . . . . . . . . . . 9<br />
1.2 Additional Information . . . . . . . . . . . . . . . . . . . . . . . . . . . . . . . . 9<br />
1.3 Symbols Used . . . . . . . . . . . . . . . . . . . . . . . . . . . . . . . . . . . . . . 10<br />
1.4 Nomenclature. . . . . . . . . . . . . . . . . . . . . . . . . . . . . . . . . . . . . . 10<br />
2 Sunny WebBox . . . . . . . . . . . . . . . . . . . . . . . . . . . . . . . . . 11<br />
3 Safety . . . . . . . . . . . . . . . . . . . . . . . . . . . . . . . . . . . . . . . . . 13<br />
3.1 Appropriate Usage. . . . . . . . . . . . . . . . . . . . . . . . . . . . . . . . . . 13<br />
3.1.1 Target Group . . . . . . . . . . . . . . . . . . . . . . . . . . . . . . . . . . . . . . . . . . . . . . . . 13<br />
3.1.2 Certified Countries . . . . . . . . . . . . . . . . . . . . . . . . . . . . . . . . . . . . . . . . . . . . 13<br />
3.2 Safety Instructions . . . . . . . . . . . . . . . . . . . . . . . . . . . . . . . . . . . 14<br />
4 Unpacking. . . . . . . . . . . . . . . . . . . . . . . . . . . . . . . . . . . . . . 15<br />
4.1 Scope of Delivery . . . . . . . . . . . . . . . . . . . . . . . . . . . . . . . . . . . 15<br />
4.2 Identifying the Sunny WebBox . . . . . . . . . . . . . . . . . . . . . . . . . 16<br />
5 Device Overview . . . . . . . . . . . . . . . . . . . . . . . . . . . . . . . . 17<br />
5.1 Overview of the Sunny WebBox LEDs . . . . . . . . . . . . . . . . . . . 17<br />
5.2 Overview of the Connection Area . . . . . . . . . . . . . . . . . . . . . . 18<br />
5.3 Overview of the LEDs on the Network Connection. . . . . . . . . . 19<br />
6 Commissioning . . . . . . . . . . . . . . . . . . . . . . . . . . . . . . . . . . 20<br />
6.1 Information on Starting up the Device. . . . . . . . . . . . . . . . . . . . 20<br />
6.2 Mounting / Installation Location Requirements. . . . . . . . . . . . . 20<br />
6.3 Connecting the Sunny WebBox Directly to the Computer . . . . 21<br />
6.4 Configuring Network Settings on the Computer. . . . . . . . . . . . 22<br />
6.4.1 Information on Network Settings on the Computer. . . . . . . . . . . . . . . . . . . . 22<br />
6.4.2 Windows 7, Windows Vista . . . . . . . . . . . . . . . . . . . . . . . . . . . . . . . . . . . . . 22<br />
6.4.3 Windows XP, Windows 2000 . . . . . . . . . . . . . . . . . . . . . . . . . . . . . . . . . . . 24<br />
<strong>User</strong> <strong>Manual</strong> SWebBox-BEN111033 3
Table of Contents <strong>SMA</strong> <strong>Solar</strong> <strong>Technology</strong> <strong>AG</strong><br />
6.5 Logging in to the Sunny WebBox for the First Time . . . . . . . . . 25<br />
6.6 Configuring Sunny WebBox for the Local Network . . . . . . . . . 27<br />
6.6.1 Information on Integrating the Sunny WebBox into a Local Network . . . . . 27<br />
6.6.2 Configuring the Static Network Settings of the Sunny WebBox . . . . . . . . . . 27<br />
6.7 Configuring the Sunny WebBox for Modem Operation . . . . . 29<br />
6.7.1 Information on Configuring the Sunny WebBox with an Analog or GSM<br />
Modem . . . . . . . . . . . . . . . . . . . . . . . . . . . . . . . . . . . . . . . . . . . . . . . . . . . . . 29<br />
6.7.2 Connect Modem Cable or GSM Antenna . . . . . . . . . . . . . . . . . . . . . . . . . . 29<br />
6.7.3 Configuring the Modem Settings for the Sunny WebBox . . . . . . . . . . . . . . . 32<br />
6.7.4 Determining the Mounting / Installation Location for the GSM Version . . . . 33<br />
6.7.5 Mounting a GSM Antenna with a Bracket or Extension Set . . . . . . . . . . . . . 33<br />
6.8 Connecting the Sunny WebBox to the Inverter. . . . . . . . . . . . . 36<br />
6.8.1 Connecting the Sunny WebBox to a Sunny Central . . . . . . . . . . . . . . . . . . . 36<br />
6.8.2 Connecting the Sunny WebBox to the RS485 Communication Bus . . . . . . . 37<br />
6.9 Mounting the Sunny WebBox (Wall or Top-Hat Rail) . . . . . . . 41<br />
7 Logging in and out of the Sunny WebBox. . . . . . . . . . . . 43<br />
7.1 Logging into the Sunny WebBox . . . . . . . . . . . . . . . . . . . . . . . 43<br />
7.2 Logging out of the Sunny WebBox. . . . . . . . . . . . . . . . . . . . . . 44<br />
8 Operation . . . . . . . . . . . . . . . . . . . . . . . . . . . . . . . . . . . . . . 45<br />
8.1 <strong>User</strong> Interface . . . . . . . . . . . . . . . . . . . . . . . . . . . . . . . . . . . . . . 45<br />
8.1.1 Explanation of the Status Symbols . . . . . . . . . . . . . . . . . . . . . . . . . . . . . . . . 46<br />
8.1.2 Structural View and Device View . . . . . . . . . . . . . . . . . . . . . . . . . . . . . . . . . 46<br />
8.1.3 Overview According to Device Type . . . . . . . . . . . . . . . . . . . . . . . . . . . . . . 47<br />
8.1.4 Overview of a Single Device . . . . . . . . . . . . . . . . . . . . . . . . . . . . . . . . . . . . 47<br />
8.2 Detecting Devices . . . . . . . . . . . . . . . . . . . . . . . . . . . . . . . . . . . 48<br />
8.3 Parameterizing Devices. . . . . . . . . . . . . . . . . . . . . . . . . . . . . . . 48<br />
8.4 Displaying the Event Report . . . . . . . . . . . . . . . . . . . . . . . . . . . 49<br />
9 Managing Plant Data . . . . . . . . . . . . . . . . . . . . . . . . . . . . 50<br />
9.1 Information on the Plant Data . . . . . . . . . . . . . . . . . . . . . . . . . . 50<br />
4 SWebBox-BEN111033 <strong>User</strong> <strong>Manual</strong>
<strong>SMA</strong> <strong>Solar</strong> <strong>Technology</strong> <strong>AG</strong> Table of Contents<br />
9.2 Plant Presentation in Sunny Portal. . . . . . . . . . . . . . . . . . . . . . . 50<br />
9.2.1 Registering Sunny WebBox in the Sunny Portal . . . . . . . . . . . . . . . . . . . . . . 51<br />
9.2.2 Activating/Deactivating Data Transmission to Sunny Portal . . . . . . . . . . . . . 52<br />
9.2.3 Adjusting the Plant ID for Sunny Portal . . . . . . . . . . . . . . . . . . . . . . . . . . . . . 52<br />
9.2.4 Deleting the Sunny Portal Buffer . . . . . . . . . . . . . . . . . . . . . . . . . . . . . . . . . . 53<br />
9.2.5 Accessing the Sunny WebBox via Sunny Portal . . . . . . . . . . . . . . . . . . . . . . 53<br />
9.3 Integrated FTP Server . . . . . . . . . . . . . . . . . . . . . . . . . . . . . . . . 54<br />
9.3.1 Defining Read and Write Access Rights for the FTP Server. . . . . . . . . . . . . . 54<br />
9.3.2 Accessing FTP Server via the Web Browser . . . . . . . . . . . . . . . . . . . . . . . . . 54<br />
9.4 FTP Push Function . . . . . . . . . . . . . . . . . . . . . . . . . . . . . . . . . . . 55<br />
9.4.1 Activating/Deactivating FTP Push Function . . . . . . . . . . . . . . . . . . . . . . . . . . 55<br />
9.4.2 Testing the FTP Push Function . . . . . . . . . . . . . . . . . . . . . . . . . . . . . . . . . . . . 56<br />
9.5 HTTP Download Via the <strong>User</strong> Interface. . . . . . . . . . . . . . . . . . . 56<br />
9.6 Storing Recorded Data on an SD Card . . . . . . . . . . . . . . . . . . 57<br />
9.6.1 Setting Data Compression. . . . . . . . . . . . . . . . . . . . . . . . . . . . . . . . . . . . . . . 58<br />
9.6.2 Displaying Available Memory Space in the Sunny WebBox . . . . . . . . . . . . 58<br />
10 Settings . . . . . . . . . . . . . . . . . . . . . . . . . . . . . . . . . . . . . . . . 59<br />
10.1 System. . . . . . . . . . . . . . . . . . . . . . . . . . . . . . . . . . . . . . . . . . . . 59<br />
10.1.1 Setting Date and Time. . . . . . . . . . . . . . . . . . . . . . . . . . . . . . . . . . . . . . . . . . 59<br />
10.1.2 Setting the Language . . . . . . . . . . . . . . . . . . . . . . . . . . . . . . . . . . . . . . . . . . 59<br />
10.1.3 Setting the Operator Name . . . . . . . . . . . . . . . . . . . . . . . . . . . . . . . . . . . . . 59<br />
10.2 Setting the Communication Type of the PV Plant . . . . . . . . . . . 60<br />
10.2.1 Setting <strong>SMA</strong>-COM . . . . . . . . . . . . . . . . . . . . . . . . . . . . . . . . . . . . . . . . . . . . 61<br />
10.2.2 Setting ETHERNET. . . . . . . . . . . . . . . . . . . . . . . . . . . . . . . . . . . . . . . . . . . . . 62<br />
10.3 Ethernet Network . . . . . . . . . . . . . . . . . . . . . . . . . . . . . . . . . . . 62<br />
10.3.1 Information on Extended Network Settings. . . . . . . . . . . . . . . . . . . . . . . . . . 62<br />
10.3.2 Activating DHCP . . . . . . . . . . . . . . . . . . . . . . . . . . . . . . . . . . . . . . . . . . . . . . 63<br />
10.3.3 Network Ports . . . . . . . . . . . . . . . . . . . . . . . . . . . . . . . . . . . . . . . . . . . . . . . . 63<br />
10.4 Enable Modem Dialup . . . . . . . . . . . . . . . . . . . . . . . . . . . . . . . 64<br />
10.4.1 Testing the Connection . . . . . . . . . . . . . . . . . . . . . . . . . . . . . . . . . . . . . . . . . 65<br />
10.4.2 Testing the Signal Strength of the GSM Modem . . . . . . . . . . . . . . . . . . . . . 65<br />
<strong>User</strong> <strong>Manual</strong> SWebBox-BEN111033 5
Table of Contents <strong>SMA</strong> <strong>Solar</strong> <strong>Technology</strong> <strong>AG</strong><br />
10.4.3 Terminating a Connection . . . . . . . . . . . . . . . . . . . . . . . . . . . . . . . . . . . . . . . 65<br />
10.5 Ensuring Access Security. . . . . . . . . . . . . . . . . . . . . . . . . . . . . . 66<br />
10.5.1 Strength of Passwords. . . . . . . . . . . . . . . . . . . . . . . . . . . . . . . . . . . . . . . . . . 66<br />
10.5.2 Change Password. . . . . . . . . . . . . . . . . . . . . . . . . . . . . . . . . . . . . . . . . . . . . 66<br />
10.6 Setting Data Upload. . . . . . . . . . . . . . . . . . . . . . . . . . . . . . . . . 67<br />
10.7 Configuring the CSV Data Format . . . . . . . . . . . . . . . . . . . . . . 68<br />
10.8 Retrieving or Requesting Data from the Device Memory . . . . . 69<br />
10.8.1 Activating/Deactivating Automatic Data Retrieval from Error Memory . . . . 69<br />
10.8.2 <strong>Manual</strong>ly Requesting Data from the Error or Event Memory . . . . . . . . . . . . 69<br />
10.9 Notification in Case of Error . . . . . . . . . . . . . . . . . . . . . . . . . . . 70<br />
10.9.1 Notes on Notification in Case of Error . . . . . . . . . . . . . . . . . . . . . . . . . . . . . 70<br />
10.9.2 Enabling/Disabling Notification in Case of Error . . . . . . . . . . . . . . . . . . . . . 71<br />
11 Service Functions . . . . . . . . . . . . . . . . . . . . . . . . . . . . . . . . 72<br />
11.1 Information on Firmware Updates . . . . . . . . . . . . . . . . . . . . . . 72<br />
11.2 Firmware Update via Sunny Portal . . . . . . . . . . . . . . . . . . . . . . 72<br />
11.2.1 Enabling Automatic Firmware Update (recommended) . . . . . . . . . . . . . . . . 72<br />
11.2.2 <strong>Manual</strong>ly Updating the Firmware . . . . . . . . . . . . . . . . . . . . . . . . . . . . . . . . . 73<br />
11.3 Firmware Update via SD Card . . . . . . . . . . . . . . . . . . . . . . . . . 73<br />
11.4 Stopping the Sunny WebBox . . . . . . . . . . . . . . . . . . . . . . . . . . 74<br />
11.5 Resetting the Sunny WebBox . . . . . . . . . . . . . . . . . . . . . . . . . . 75<br />
11.6 Deleting Device Descriptions . . . . . . . . . . . . . . . . . . . . . . . . . . 77<br />
12 Maintenance and Care . . . . . . . . . . . . . . . . . . . . . . . . . . . 78<br />
12.1 Maintenance. . . . . . . . . . . . . . . . . . . . . . . . . . . . . . . . . . . . . . . 78<br />
12.2 Care . . . . . . . . . . . . . . . . . . . . . . . . . . . . . . . . . . . . . . . . . . . . . 78<br />
13 Decommissioning . . . . . . . . . . . . . . . . . . . . . . . . . . . . . . . . 79<br />
13.1 Disassembling the Sunny WebBox . . . . . . . . . . . . . . . . . . . . . . 79<br />
13.2 Packaging the Sunny WebBox . . . . . . . . . . . . . . . . . . . . . . . . . 79<br />
13.3 Disposing of the Sunny WebBox . . . . . . . . . . . . . . . . . . . . . . . 79<br />
6 SWebBox-BEN111033 <strong>User</strong> <strong>Manual</strong>
<strong>SMA</strong> <strong>Solar</strong> <strong>Technology</strong> <strong>AG</strong> Table of Contents<br />
14 Troubleshooting . . . . . . . . . . . . . . . . . . . . . . . . . . . . . . . . . 80<br />
15 Appendix . . . . . . . . . . . . . . . . . . . . . . . . . . . . . . . . . . . . . . 85<br />
15.1 Allocating an IP Address in a Local Network . . . . . . . . . . . . . . 85<br />
15.2 Determining the Network Settings of the Sunny WebBox . . . . 85<br />
15.3 Structure of the Config.xml File . . . . . . . . . . . . . . . . . . . . . . . . . 86<br />
15.4 Structure of the Info.xml File . . . . . . . . . . . . . . . . . . . . . . . . . . . 87<br />
15.5 Structure of an XML Data File . . . . . . . . . . . . . . . . . . . . . . . . . . 88<br />
15.6 Sunny WebBox with GSM Modem . . . . . . . . . . . . . . . . . . . . . 89<br />
15.6.1 Notes on GSM Card Contract . . . . . . . . . . . . . . . . . . . . . . . . . . . . . . . . . . . 89<br />
15.6.2 Selecting the GSM Tariff. . . . . . . . . . . . . . . . . . . . . . . . . . . . . . . . . . . . . . . . 89<br />
15.6.3 GSM Card Contracts in Germany . . . . . . . . . . . . . . . . . . . . . . . . . . . . . . . . 90<br />
15.6.4 Retrofitting the SIM Card . . . . . . . . . . . . . . . . . . . . . . . . . . . . . . . . . . . . . . . 90<br />
15.6.5 Replacing the SIM card . . . . . . . . . . . . . . . . . . . . . . . . . . . . . . . . . . . . . . . . 91<br />
15.6.6 Accessing Sunny WebBox via Integrated Analog Modem . . . . . . . . . . . . . 93<br />
16 Accessories . . . . . . . . . . . . . . . . . . . . . . . . . . . . . . . . . . . . . 95<br />
16.1 Outdoor GSM Antenna . . . . . . . . . . . . . . . . . . . . . . . . . . . . . . 95<br />
16.2 SD Cards . . . . . . . . . . . . . . . . . . . . . . . . . . . . . . . . . . . . . . . . . 95<br />
16.3 RS485 Communication Cable . . . . . . . . . . . . . . . . . . . . . . . . . 95<br />
17 Technical Data . . . . . . . . . . . . . . . . . . . . . . . . . . . . . . . . . . 96<br />
17.1 Sunny WebBox. . . . . . . . . . . . . . . . . . . . . . . . . . . . . . . . . . . . . 96<br />
17.2 Plug-in Power Supply (CINCON, TRG30R 120) . . . . . . . . . . . 97<br />
18 Contact . . . . . . . . . . . . . . . . . . . . . . . . . . . . . . . . . . . . . . . . 98<br />
<strong>User</strong> <strong>Manual</strong> SWebBox-BEN111033 7
<strong>SMA</strong> <strong>Solar</strong> <strong>Technology</strong> <strong>AG</strong><br />
8 SWebBox-BEN111033 <strong>User</strong> <strong>Manual</strong>
<strong>SMA</strong> <strong>Solar</strong> <strong>Technology</strong> <strong>AG</strong> Information on this <strong>Manual</strong><br />
1 Information on this <strong>Manual</strong><br />
This manual describes how to assemble, install, commission and operate the Sunny WebBox. Keep<br />
the manual in a convenient place for future reference.<br />
This manual does not contain any detailed information about the connected devices. Detailed<br />
information about the connected devices is provided in the manuals for the devices.<br />
1.1 Validity<br />
This manual is valid for the Sunny WebBox with hardware version E1 or higher and firmware version<br />
1.52 or higher.<br />
1.2 Additional Information<br />
You will find further information on the Sunny WebBox in the download area of www.<strong>SMA</strong>.de/en.<br />
The Downloads section contains, among other things, the following:<br />
• Certificates and approvals for the Sunny WebBox.<br />
• Information on setting up a local FTP server for automatic reception of plant data via the FTP<br />
push function of the Sunny WebBox (see the Technical Information "Setting up the local FTP<br />
server").<br />
• Information on data transmission for the Sunny WebBox (see the Technical Information<br />
"GSM − Backgrounds regarding data transmission in GSM and UMTS mobile networks for<br />
Sunny WebBox / Sunny Boy Control").<br />
• Information on the Remote Procedure Call Protocol of the Sunny WebBox.<br />
• Information on the Modbus Protocol of the Sunny WebBox.<br />
<strong>User</strong> <strong>Manual</strong> SWebBox-BEN111033 9
Information on this <strong>Manual</strong> <strong>SMA</strong> <strong>Solar</strong> <strong>Technology</strong> <strong>AG</strong><br />
1.3 Symbols Used<br />
The following types of safety precautions and general information appear in this document:<br />
DANGER!<br />
"DANGER!" indicates a hazardous situation which, if not avoided, will result in death or<br />
serious injury.<br />
WARNING!<br />
"WARNING!" indicates a hazardous situation which, if not avoided, could result in death<br />
or serious injury.<br />
CAUTION!<br />
"CAUTION!" indicates a hazardous situation which, if not avoided, could result in minor or<br />
moderate injury.<br />
NOTICE!<br />
"NOTICE!" indicates a situation that can result in property damage if not avoided.<br />
Information<br />
Information provides tips that are valuable for the optimal installation and operation of<br />
your product.<br />
1.4 Nomenclature<br />
In this manual, the term "photovoltaic plant" will be abbreviated to "PV plant".<br />
Formatting Meaning<br />
[Save] Buttons are displayed in square brackets [ ].<br />
"Menu1" Menu items are displayed in quotation marks.<br />
"Menu1 > Menu2" Menu paths are displayed in quotation marks. The angle bracket ><br />
separates individual menus.<br />
Example: Examples are represented in italics.<br />
10 SWebBox-BEN111033 <strong>User</strong> <strong>Manual</strong>
<strong>SMA</strong> <strong>Solar</strong> <strong>Technology</strong> <strong>AG</strong> Sunny WebBox<br />
2 Sunny WebBox<br />
As the central communication interface, the Sunny WebBox connects the PV plant and its operator.<br />
The Sunny WebBox collects and documents all data of the connected devices, thus permitting<br />
interruption-free monitoring of the PV plant. The operator can access all the data stored in the Sunny<br />
WebBox via an Internet connection or a GSM modem.<br />
The Flashview presentation software and the Sunny Portal website can be used to edit data or<br />
graphically display stored data. Both presentation programs are freely available on the<br />
www.<strong>SMA</strong>.de/en or the www.SunnyPortal.com websites.<br />
This means that operators can see the yields from their plant both in the local network and via the<br />
Internet at any time using Flashview and the Sunny Portal. Data can also be viewed with the large<br />
Sunny Matrix display, which is suitable for both indoor and outdoor installation.<br />
The Sunny WebBox is also a powerful tool for operators when configuring plants or performing<br />
remote diagnostics via computer. It allows continuous monitoring of the PV plant and early detection<br />
of disturbances. Thus, the Sunny WebBox helps optimize PV plant yields.<br />
<strong>User</strong> <strong>Manual</strong> SWebBox-BEN111033 11
Sunny WebBox <strong>SMA</strong> <strong>Solar</strong> <strong>Technology</strong> <strong>AG</strong><br />
Operators can expand large-scale PV plants, which must contribute to the utility operator's feed-in<br />
management, accordingly using the Sunny WebBox. If the Power Reducer Box is connected, the<br />
Sunny WebBox will record the requirements of the utility operator and forward them to the inverter.<br />
The Sunny WebBox informs the operator of the requirements of the utility operator.<br />
The Sunny SensorBox allows the operator to expand their plant additionally via the Sunny WebBox.<br />
The Sunny SensorBox records the environmental data relevant to performance monitoring at the PV<br />
plant. For this purpose, the Sunny SensorBox has an integrated irradiation sensor as well as an<br />
external module temperature sensor. The operator can also connect an optional ambient temperature<br />
sensor and a wind sensor to the Sunny SensorBox. More information on PV plant monitoring and<br />
<strong>SMA</strong> <strong>Solar</strong> <strong>Technology</strong> <strong>AG</strong> products is available at www.<strong>SMA</strong>.de/en.<br />
12 SWebBox-BEN111033 <strong>User</strong> <strong>Manual</strong>
<strong>SMA</strong> <strong>Solar</strong> <strong>Technology</strong> <strong>AG</strong> Safety<br />
3 Safety<br />
3.1 Appropriate Usage<br />
The Sunny WebBox is a data logger, that records, logs and makes available the data of a PV plant.<br />
The Sunny WebBox can receive the requirements of the utility operator via the Power Reducer Box<br />
and forward them to the inverters in the PV plant. The Sunny WebBox is suitable for monitoring PV<br />
plants of any size.<br />
The data collected by the Sunny WebBox may deviate from the data provided by the electricity meter.<br />
The Sunny WebBox data must not be used for billing purposes.<br />
3.1.1 Target Group<br />
The Sunny WebBox is intended for private and industrial use. When you log in to the Sunny WebBox<br />
there are 2 user groups at your disposal, "Installer" and "<strong>User</strong>". The "Installer" user group comprises<br />
only qualified personnel who are authorized to make changes to network parameters for the<br />
connected devices. Only the installer may carry out the Sunny WebBox commissioning.<br />
3.1.2 Certified Countries<br />
The Sunny WebBox is certified for the following countries:<br />
Australia, Belgium, Germany, France, Greece, Great Britain, Italy, Korea, The Netherlands, Austria,<br />
Portugal, Switzerland, Spain, the Czech Republic, the United States of America<br />
<strong>User</strong> <strong>Manual</strong> SWebBox-BEN111033 13
Safety <strong>SMA</strong> <strong>Solar</strong> <strong>Technology</strong> <strong>AG</strong><br />
3.2 Safety Instructions<br />
Follow all operating and safety instructions in this manual. Failure to follow these instructions could<br />
result in damage to the device and cause personal injury.<br />
General safety instructions, in order to avoid physical injury.<br />
• Never open the plug-in power supply.<br />
• Install the cabling in such a way that no one can stand on or trip over it.<br />
• The Sunny WebBox is only to be operated using the supplied plug-in power supply and in the<br />
voltage range intended for this.<br />
General information in order to avoid damage to the device.<br />
• By touching electronic components you can cause damage to or destroy the device through<br />
electrostatic discharge (ESD). Do not touch component connections and plug contacts<br />
unnecessarily. Ground yourself before working on the device.<br />
• With the help of the Sunny WebBox you can change the safety-relevant parameters of <strong>SMA</strong><br />
inverters (e.g., <strong>SMA</strong> Grid Guard parameters). Incorrectly set parameters can damage or<br />
destroy the inverter. Do not alter these safety-relevant parameters without prior consultation with<br />
your electric utility company operating the grid into which your plant feeds.<br />
Data Security<br />
• The Sunny WebBox can be connected to the Internet. However, connecting to the Internet<br />
entails a security risk. <strong>SMA</strong> <strong>Solar</strong> <strong>Technology</strong> <strong>AG</strong> recommends that you change the login<br />
password after the initial installation in order to prevent unauthorized access by third parties.<br />
Select a number-letter combination with at least 8 characters for your password (see section<br />
10.5.1 "Strength of Passwords" (page 66)).<br />
14 SWebBox-BEN111033 <strong>User</strong> <strong>Manual</strong>
<strong>SMA</strong> <strong>Solar</strong> <strong>Technology</strong> <strong>AG</strong> Unpacking<br />
4 Unpacking<br />
4.1 Scope of Delivery<br />
Check the scope of supply for completeness and for any external damage. Contact your dealer if the<br />
delivery is incomplete or damaged.<br />
Item Quantity Description<br />
A 1 Sunny WebBox<br />
B 1 Plug-in power supply with socket adapter (adapter type depends<br />
on the country specified in the order)<br />
C 1 Red network cable (patch cable)<br />
D 1 Blue network cable (crossover cable)<br />
E 1 Screwdriver<br />
F 1 Plug for <strong>SMA</strong>COM (1 plug, 1 connector shell, 1 cable tie)<br />
G 10 Jumper as replacement<br />
H 2 Screws<br />
I 2 Screw anchors<br />
J 1 Operating manual with drilling template and Quick Start<br />
K 1 SD card — inserted into the SD card slot on the Sunny WebBox<br />
(only with the ordering option Sunny WebBox with SD card).<br />
L 1 Modem cable with RJ11 plug and RJ11 to TAE adapter<br />
(only with the ordering option Sunny WebBox with analog<br />
modem).<br />
<strong>User</strong> <strong>Manual</strong> SWebBox-BEN111033 15
Unpacking <strong>SMA</strong> <strong>Solar</strong> <strong>Technology</strong> <strong>AG</strong><br />
Item Quantity Description<br />
M 1 Envelope with T-Mobile contract and an information sheet<br />
including PIN and PUK. The SIM card is already installed in the<br />
Sunny WebBox. (Only with the ordering option Sunny WebBox<br />
with GSM modem including SIM card).<br />
N 1 GSM antenna with bracket and 3 meter antenna cable (only with<br />
the ordering option Sunny WebBox with GSM modem).<br />
* T-Mobile card contract only available for Germany.<br />
4.2 Identifying the Sunny WebBox<br />
Type plate<br />
You can identify the Sunny WebBox using the type plate.<br />
The type plate can be found on the back of the enclosure.<br />
Firmware Version<br />
The firmware version can be found in the user interface of the Sunny WebBox. The current firmware<br />
version is displayed on the bottom right corner of every page.<br />
16 SWebBox-BEN111033 <strong>User</strong> <strong>Manual</strong>
<strong>SMA</strong> <strong>Solar</strong> <strong>Technology</strong> <strong>AG</strong> Device Overview<br />
5 Device Overview<br />
5.1 Overview of the Sunny WebBox LEDs<br />
LED name Status Meaning<br />
USBCOM flashes green no function<br />
glows red no function<br />
off no function<br />
NETCOM flashes green The Sunny WebBox will transmit data to the Sunny Portal.<br />
glows green The most recent data transmission to Sunny Portal/FTP<br />
push has been successful.<br />
glows red The most recent data transmission to Sunny Portal/FTP<br />
push failed. The Sunny WebBox will attempt to transmit<br />
the data again according to its settings. The Sunny<br />
WebBox internal memory can retain the accumulated<br />
data for approximately 2 days.<br />
off Data transmission is deactivated.<br />
<strong>SMA</strong>COM flashes green The Sunny WebBox is communicating with a device.<br />
glows green System communication has occurred in the last 5 minutes.<br />
glows red More than one device logged into the communication<br />
bus is set as a master.<br />
off No communication has occurred on the communication<br />
bus in over 5 minutes.<br />
MEMORY glows green SD card is located in the SD card slot. The Sunny<br />
WebBox can write data to the SD card.<br />
flashes orange Sunny WebBox is writing data to the SD card.<br />
glows orange The inserted SD card is writable (available space < 10 %).<br />
glows red SD card is full<br />
off No SD card in the device.<br />
REPORT glows green no function<br />
<strong>User</strong> <strong>Manual</strong> SWebBox-BEN111033 17
Device Overview <strong>SMA</strong> <strong>Solar</strong> <strong>Technology</strong> <strong>AG</strong><br />
LED name Status Meaning<br />
SYSTEM flashes red Sunny WebBox is starting.<br />
glows red An error has occurred in the Sunny WebBox.<br />
glows green Sunny WebBox is operational.<br />
POWER glows green Sunny WebBox has power.<br />
off Sunny WebBox does not have power.<br />
5.2 Overview of the Connection Area<br />
Item Description<br />
A Connection for GSM antenna cable (optional)<br />
B Connection for the plug-in power supply<br />
C Jumper socket J1<br />
D <strong>SMA</strong>COM<br />
E AUXCOM (no function)<br />
F Jumper socket J2<br />
G Modem connection<br />
H USB connection client (no function)<br />
I USB connection host (no function)<br />
J Network connection<br />
K SD card slot<br />
18 SWebBox-BEN111033 <strong>User</strong> <strong>Manual</strong>
<strong>SMA</strong> <strong>Solar</strong> <strong>Technology</strong> <strong>AG</strong> Device Overview<br />
5.3 Overview of the LEDs on the Network Connection<br />
Item LED Status Meaning<br />
A Speed On 100 MB connection speed<br />
Off 10 MB connection speed<br />
B Link / Activity On Connection (link) established<br />
Flashing The Sunny WebBox is currently transmitting or<br />
receiving data (activity).<br />
Off No connection established<br />
<strong>User</strong> <strong>Manual</strong> SWebBox-BEN111033 19
Commissioning <strong>SMA</strong> <strong>Solar</strong> <strong>Technology</strong> <strong>AG</strong><br />
6 Commissioning<br />
6.1 Information on Starting up the Device<br />
Starting up the Sunny WebBox entails the following steps:<br />
• Connect the Sunny WebBox directly to the computer (see page 21).<br />
• Configure network settings on the computer (see page 22).<br />
• Configure Sunny WebBox for the local network (see page 27) and/or configure Sunny<br />
WebBox for modem operation (see page 29).<br />
• Connect the Sunny WebBox to the inverter (see page 36).<br />
• Set the PV plant communication mode (see page 60) and detect the PV plant devices<br />
(see page 48).<br />
6.2 Mounting / Installation Location Requirements<br />
Please note the following information on the mounting / installation location of the Sunny WebBox:<br />
• The Sunny WebBox is suited only for mounting indoors.<br />
• The ambient temperature must be between -20 °C and +65 °C.<br />
• The maximum cable length of the entire RS485 communication bus is 1,200 m.<br />
• The maximum permitted network cable length is 100 m per segment.<br />
• The maximum permitted telephone cable length is 200 m.<br />
• The Sunny WebBox requires an outlet with a grid voltage of 100 V ... 200 V.<br />
• Protect the Sunny WebBox from dust, wet conditions, corrosive substances and vapors.<br />
• Observe the minimum clearances to walls, other<br />
devices or objects as shown in the diagram in order<br />
to guarantee sufficient heat dissipation.<br />
• Do not cover the Sunny WebBox.<br />
• The distance from the Sunny WebBox to the inverters<br />
may not be greater than the maximum permitted<br />
distance of the selected communication type. Please<br />
note the specifications in the respective sections.<br />
• During installation, make sure there is optimal<br />
reception for the transmission paths. Please note the<br />
specifications in the respective sections.<br />
20 SWebBox-BEN111033 <strong>User</strong> <strong>Manual</strong>
<strong>SMA</strong> <strong>Solar</strong> <strong>Technology</strong> <strong>AG</strong> Commissioning<br />
6.3 Connecting the Sunny WebBox Directly to the Computer<br />
1. Connect the Sunny WebBox with the blue network cable (crossover cable) to the computer<br />
(see ➀ ).<br />
The connection of the computer is normally indicated by the same symbol as the Sunny WebBox<br />
network connection. If necessary, refer to the computer manual.<br />
Recommendation on network cabling<br />
If the supplied network cable is too short, please observe the following network cable<br />
requirements:<br />
• You will need a crossover cable.<br />
• Use a cable of type Cat5 or higher.<br />
• Use a shielded cable.<br />
• For a total length of no more than 100 m, observe the guidelines for structured<br />
cabling as described in EIA/TIA-568, ISO/IEC 11801 and/or EN 50173<br />
(cable for fixed layout at least AWG24).<br />
• For a cable with no more than 50 m total length, a AWG26/7 cable may be used.<br />
2. Connect the plug-in power supply to the Sunny WebBox and plug it into the socket (see ➁ ).<br />
☑ As soon as the "SYSTEM" and "POWER" LEDs glow green, the Sunny WebBox has started up<br />
and is ready for operation. The start-up procedure can take up to 90 seconds.<br />
– If the "SYSTEM" or "POWER" LEDs do not glow green, please refer to section<br />
14 "Troubleshooting" (page 80).<br />
<strong>User</strong> <strong>Manual</strong> SWebBox-BEN111033 21
Commissioning <strong>SMA</strong> <strong>Solar</strong> <strong>Technology</strong> <strong>AG</strong><br />
6.4 Configuring Network Settings on the Computer<br />
6.4.1 Information on Network Settings on the Computer<br />
Before you can use the Sunny WebBox for the first time, you need to configure your computer based<br />
on the network settings of the Sunny WebBox. The settings are described for the following operating<br />
systems:<br />
• Windows Vista/Windows 7<br />
• Windows XP, Windows 2000<br />
If you use a different operating system, refer to the manual of your operating system to find out how<br />
to set the computer IP address to 192.168.0.100 and the subnet mask to 255.255.255.0.<br />
<strong>User</strong> rights in the operating system<br />
You will need the appropriate user rights to change the computer's network settings.<br />
Without the necessary user rights, you will not be able to start up the Sunny WebBox. If<br />
you have any questions, contact your network administrator.<br />
6.4.2 Windows 7, Windows Vista<br />
1. Start the computer.<br />
2. In Windows select "Start"<br />
3. Enter "ncpa.cpl" in the search field and press Enter.<br />
☑The "Network Connections" window opens.<br />
4. Double click on the LAN connection via which the Sunny WebBox is connected.<br />
– If Windows displays several LAN connections, there are probably several network<br />
connections installed in the computer. Ensure that you select the correct network connection,<br />
with which the computer is connected to the Sunny WebBox. If necessary, refer to the<br />
computer manual.<br />
– In the event that no LAN connection is displayed, please refer to section<br />
14 "Troubleshooting" (page 80).<br />
☑The "Local Area Connection Status" window opens.<br />
5. Click [Properties] from the "General" tab.<br />
22 SWebBox-BEN111033 <strong>User</strong> <strong>Manual</strong>
<strong>SMA</strong> <strong>Solar</strong> <strong>Technology</strong> <strong>AG</strong> Commissioning<br />
☑The "Local Area Connection Properties" window<br />
appears.<br />
6. Select "Internet Protocol Version 4 (TCP/IPv4)" and<br />
then click [Properties].<br />
☑The "Internet Protocol Version 4 (TCP/IPv4)<br />
Properties" window opens.<br />
7. Note the current network settings in the "Internet<br />
Protocol Version 4 (TCP/IPv4) Properties" window.<br />
This enables you to reset the computer network<br />
settings after configuration of the Sunny WebBox.<br />
8. Enter the following static network settings for the<br />
computer in the "Internet Protocol Version 4<br />
(TCP/IPv4) Properties" window.<br />
– Activate the field "Use the following IP address".<br />
– Enter 192.168.0.100 in the "IP address:" field.<br />
– Enter 255.255.255.0 in the "Subnet mask:"<br />
field.<br />
– Delete any entries in the "Default gateway",<br />
"Preferred DNS server", and "Alternate DNS<br />
server" boxes.<br />
9. Select [OK].<br />
10. In the "Local Area Connection Properties" window,<br />
select [OK].<br />
☑ The computer is set to the network settings of the Sunny WebBox.<br />
<strong>User</strong> <strong>Manual</strong> SWebBox-BEN111033 23
Commissioning <strong>SMA</strong> <strong>Solar</strong> <strong>Technology</strong> <strong>AG</strong><br />
6.4.3 Windows XP, Windows 2000<br />
1. Start the computer.<br />
2. In Windows, select "Start > Settings > Network Connections".<br />
3. Double click on the LAN connection via which the Sunny WebBox is connected.<br />
– If Windows displays several LAN connections, there are probably several network<br />
connections installed in the computer. Ensure that you select the correct network connection,<br />
with which the computer is connected to the Sunny WebBox. If necessary, refer to the<br />
computer manual.<br />
– In the event that no LAN connection is displayed, please refer to section<br />
14 "Troubleshooting" (page 80).<br />
☑The "Local Area Connection Status" window opens.<br />
4. Select [Properties] from the "General" tab.<br />
☑The "Local Area Connection Properties" window<br />
appears.<br />
5. Select "Internet protocol (TCP/IP)" and click<br />
[Properties].<br />
☑The "Internet Protocol (TCP/IP) Properties"<br />
window appears.<br />
6. Note the current network settings in the "Internet<br />
Protocol (TCP/IP) Properties" window. This enables<br />
you to reset the computer network settings after<br />
configuration of the Sunny WebBox.<br />
7. Enter the following static network settings in the<br />
"Internet Protocol (TCP/IP) Properties" window:<br />
– Activate the field "Use the following IP address".<br />
– Enter 192.168.0.100 in the "IP address" field.<br />
– Enter 255.255.255.0 in the "Subnet mask" field.<br />
– Delete any entries in the "Default gateway",<br />
"Preferred DNS server", and "Alternate DNS<br />
server" boxes.<br />
8. Select [OK].<br />
9. In the "Local Area Connection Properties" window,<br />
select [OK].<br />
☑ The computer is set to the network settings of the<br />
Sunny WebBox.<br />
24 SWebBox-BEN111033 <strong>User</strong> <strong>Manual</strong>
<strong>SMA</strong> <strong>Solar</strong> <strong>Technology</strong> <strong>AG</strong> Commissioning<br />
6.5 Logging in to the Sunny WebBox for the First Time<br />
The Sunny WebBox distinguishes between 2 user groups: user and installer.<br />
The two user groups are distinguished by two different passwords. If the password is the same for<br />
both user groups, you will be logged in as the installer.<br />
In order to prevent two users making changes at the same time, only one user can ever be logged on<br />
to the Sunny WebBox at a time.<br />
The user groups have the following rights:<br />
<strong>User</strong> Group Right<br />
<strong>User</strong> This user group allows the user to read all display-relevant<br />
information, such as instantaneous values and parameter settings.<br />
Settings that affect functionality cannot be modified.<br />
The user can choose any plant password for the "<strong>User</strong>" user group.<br />
Installer In addition to the rights available to users, this user group may also<br />
set or change plant parameters that affect functionality.<br />
In addition, the user group may carry out the following tasks:<br />
• Resetting the Sunny WebBox to the factory settings.<br />
• Safely shutting down the Sunny WebBox.<br />
• Changing the user and installer user group passwords.<br />
• Changing the parameters of the inverters.<br />
• Logging into <strong>SMA</strong> Grid Guard.<br />
Installer with <strong>SMA</strong> Grid Guard The installer can change <strong>SMA</strong> Grid Guard parameters for devices.<br />
rights<br />
<strong>User</strong> <strong>Manual</strong> SWebBox-BEN111033 25
Commissioning <strong>SMA</strong> <strong>Solar</strong> <strong>Technology</strong> <strong>AG</strong><br />
Logging into the Sunny WebBox<br />
1. Start Web browser (e.g. Internet Explorer).<br />
Activating JavaScript in the Web browser<br />
The Sunny WebBox user interface needs JavaScript in order to be able to correctly<br />
configure and display the functions and content of the Sunny WebBox. Activate JavaScript<br />
in your Web browser If necessary, refer to the help section in your Web browser.<br />
2. Enter http://192.168.0.168 into the address bar and press Enter.<br />
☑ The Sunny WebBox login page opens.<br />
– If the page does not open, please refer to section 14 "Troubleshooting" (page 80).<br />
3. Log in as "Installer". Upon delivery the password for the installer is: "sma."<br />
Security in the local network<br />
Change the user groups standard passwords in order to prevent unauthorized access.<br />
26 SWebBox-BEN111033 <strong>User</strong> <strong>Manual</strong>
<strong>SMA</strong> <strong>Solar</strong> <strong>Technology</strong> <strong>AG</strong> Commissioning<br />
6.6 Configuring Sunny WebBox for the Local Network<br />
6.6.1 Information on Integrating the Sunny WebBox into a Local<br />
Network<br />
The next sections describe how to integrate the Sunny WebBox via static network settings into your<br />
local network with a router.<br />
In rare cases, further network settings are necessary. Examples of further network settings include<br />
integrating the Sunny WebBox via DHCP into your network, or making the Sunny WebBox accessible<br />
via the Internet. If this is the case, contact your network administrator and refer to section<br />
10.3 "Ethernet Network" (page 62).<br />
Sunny WebBox Assistant<br />
It is recommended to use the Sunny WebBox Assistant for the commissioning of the Sunny<br />
WebBox and for the integration into a network. You can download the Sunny WebBox<br />
Assistant on the Internet from www.<strong>SMA</strong>.de/en.<br />
Protecting the Ethernet network from external access<br />
Protect your Ethernet network through suitable security measures such as a firewall or the<br />
allocation of secure passwords.<br />
6.6.2 Configuring the Static Network Settings of the Sunny<br />
WebBox<br />
1. Select "WebBox > Settings > Network" in the Sunny WebBox user interface.<br />
2. In the "Obtain IP address" field, select the value "Static".<br />
3. In the "IP Address" field enter the static IP address, under which the Sunny WebBox is to be<br />
reachable in the local network (see section 15.1 "Allocating an IP Address in a Local Network"<br />
(page 85)).<br />
4. Enter the subnet mask of your network in the "Subnet mask" field. Normally, you can find this<br />
information in the router manual.<br />
5. Enter the gateway IP address of your network in the "Gateway address" field. Usually, this is the<br />
IP address of the router.<br />
6. In the "DNS server Address" field, enter the IP address of the DNS server (Domain Name System<br />
Server). Usually, this is the IP address of the router.<br />
7. Select [Save] and [Confirm].<br />
☑ The Sunny WebBox saves the network settings and will not longer be accessible from your<br />
computer.<br />
8. Remove the plug-in power supply of the Sunny WebBox from the plug socket.<br />
9. Remove the blue network cable (crossover cable).<br />
<strong>User</strong> <strong>Manual</strong> SWebBox-BEN111033 27
Commissioning <strong>SMA</strong> <strong>Solar</strong> <strong>Technology</strong> <strong>AG</strong><br />
10. Connect the Sunny WebBox directly to the receiver (e.g. router, switch or hub) of the local<br />
network using the red network cable (patch cable) (see ➀ ). The connection of the receiver is<br />
normally indicated by the same symbol as the Sunny WebBox network connection. If necessary,<br />
please refer to the receiver manual.<br />
Recommendation on network cabling<br />
If the supplied network cable is too short, please observe the following network cable<br />
requirements:<br />
• Use a cable of type Cat5 or higher.<br />
• Use a shielded cable.<br />
• For a total length of no more than 100 m, observe the guidelines for structured<br />
cabling as described in EIA/TIA-568, ISO/IEC 11801 and/or EN 50173<br />
(cable for fixed layout at least AWG24).<br />
• For a cable with no more than 50 m total length, a AWG26/7 patch cable may be<br />
used.<br />
11. Connect the plug-in power supply to the Sunny WebBox and plug it into the socket (see ➁ ).<br />
☑ The Sunny WebBox starts. As soon as the "SYSTEM" and "POWER" LEDs glow green, the<br />
Sunny WebBox has started up and is ready for operation. The start-up procedure can take<br />
up to 90 seconds.<br />
– If the "SYSTEM" or "POWER" LEDs do not glow green, please refer to section<br />
14 "Troubleshooting" (page 80).<br />
Resetting the computer to the network settings.<br />
Reset your computer to its original network settings so that it can be accessed over the local<br />
network whenever necessary (see section 22).<br />
☑ The user interface of the Sunny WebBox is now available via the new IP address.<br />
28 SWebBox-BEN111033 <strong>User</strong> <strong>Manual</strong>
<strong>SMA</strong> <strong>Solar</strong> <strong>Technology</strong> <strong>AG</strong> Commissioning<br />
6.7 Configuring the Sunny WebBox for Modem Operation<br />
6.7.1 Information on Configuring the Sunny WebBox with an<br />
Analog or GSM Modem<br />
The following sections describe how to connect and configure the Sunny WebBox to the telephone<br />
network or GSM network with an analog or GSM modem.<br />
Configuration entails the following steps:<br />
• Connect the modem cable or GSM antenna (see page 29).<br />
• Configure the modem settings of the Sunny WebBox (see page 32).<br />
• Determine the mounting/installation location for the GSM version (see page 33).<br />
• Mount the GSM antenna with the bracket or extension set (see page 33).<br />
6.7.2 Connect Modem Cable or GSM Antenna<br />
Depending on the ordered version of your Sunny WebBox, carry out the steps in the corresponding<br />
section:<br />
• For a Sunny WebBox with analog modem, see section "Connecting the Sunny WebBox to the<br />
telephone network via modem cable" (page 29).<br />
• For a Sunny WebBox with GSM modem, see section "Connecting the GSM antenna to a Sunny<br />
WebBox" (page 31).<br />
Connecting the Sunny WebBox to the telephone network via modem cable<br />
Recommendations for telephone network cabling<br />
If the provided telephone cable is not long enough, observe the following instructions when<br />
purchasing a new one, since the cable length and quality can adversely affect the signal<br />
quality.<br />
• Use a standard high-quality cable. The telephone plug on both ends is an RJ11<br />
Western plug.<br />
• The maximum permitted cable length for analog telephones is 200 m.<br />
<strong>User</strong> <strong>Manual</strong> SWebBox-BEN111033 29
Commissioning <strong>SMA</strong> <strong>Solar</strong> <strong>Technology</strong> <strong>AG</strong><br />
1. Insert one plug of the supplied modem cable into<br />
the Sunny WebBox modem connection.<br />
2. Connect the Sunny WebBox to the telephone<br />
connection:<br />
– RJ11 socket: Insert the end of the modem cable<br />
into the RJ11 socket.<br />
– TAE- or TAE-N telephone socket: Attach the<br />
provided RJ11 - TAE adapter to the modem<br />
cable and insert it into the telephone socket.<br />
☑ Check whether the Sunny WebBox is connected to<br />
the telephone network. You can now configure the<br />
modem settings in the Sunny WebBox.<br />
30 SWebBox-BEN111033 <strong>User</strong> <strong>Manual</strong>
<strong>SMA</strong> <strong>Solar</strong> <strong>Technology</strong> <strong>AG</strong> Commissioning<br />
Connecting the GSM antenna to a Sunny WebBox<br />
1. If you have ordered a Sunny WebBox without integrated GSM modem containing an<br />
integrated SIM card, then retrofit a SIM card as described in section 15 "Appendix" (page 85).<br />
2. Screw the GSM antenna cable onto the antenna<br />
terminal of the Sunny WebBox.<br />
3. Screw the antenna onto the antenna cable.<br />
☑ The GSM antenna is connected. You can now<br />
configure the modem settings in the Sunny WebBox<br />
and determine the optimal mounting location for<br />
the Sunny WebBox with GSM..<br />
<strong>User</strong> <strong>Manual</strong> SWebBox-BEN111033 31
Commissioning <strong>SMA</strong> <strong>Solar</strong> <strong>Technology</strong> <strong>AG</strong><br />
6.7.3 Configuring the Modem Settings for the Sunny WebBox<br />
The following section provides information on setting up your analog or GSM modem. You can obtain<br />
additional information about the GSM card contract and the selection of the proper GSM tariff in<br />
section 15.6 "Sunny WebBox with GSM Modem" (page 89).<br />
1. Select "WebBox > Settings > Modem" on the user interface.<br />
2. In the "Allow Modem access" field select "yes". This allows the establishment of a remote data<br />
transmission connection to the Sunny WebBox.<br />
3. Enter the telephone number of your Internet Service Provider (ISP) in the "ISP telephone number"<br />
field. In a Sunny WebBox with GSM modem: always enter *99***1# for contracts with the<br />
German providers T-Mobile, Vodafone and E-Plus. If you have a contract with other service<br />
providers, the ISP telephone number may vary. You will find this information in your service<br />
provider documentation.<br />
4. Enter the data received from the ISP in the "ISP user name" and "ISP password" fields. Please<br />
ensure that in the Sunny WebBox with GSM modem, the fields "ISP user name" and "ISP<br />
password" are not left empty, even though many service providers do allocate user names and<br />
passwords. Enter an appropriate place holder here. For examples of GSM contracts available<br />
within Germany, see page 90.<br />
5. In the Sunny WebBox with GSM modem, you must also enter the data contained in your<br />
documents in the "GSM SIM PIN" and "GPRS APN" fields.<br />
6. Test the connection as described in Section 10.4.1 "Testing the Connection" (page 65).<br />
7. Select [Save].<br />
☑ The modem is now configured.<br />
32 SWebBox-BEN111033 <strong>User</strong> <strong>Manual</strong>
<strong>SMA</strong> <strong>Solar</strong> <strong>Technology</strong> <strong>AG</strong> Commissioning<br />
6.7.4 Determining the Mounting / Installation Location for the GSM<br />
Version<br />
NOTICE!<br />
Increased electromagnetic radiation through the GSM antenna.<br />
• Note that persons may not remain closer than 20 cm to the antenna for long periods<br />
of time.<br />
Proceed as follows to determine the optimal mounting location:<br />
1. Select "WebBox > Settings > Modem" on the user interface.<br />
2. Modem settings of the Sunny WebBox are configured (see section 6.7 "Configuring the Sunny<br />
WebBox for Modem Operation" (page 29)).<br />
3. Select [Signal strength].<br />
☑ The signal strength is displayed. A signal strength of at least 30 % is necessary to ensure secure<br />
communication with all cell phone network providers.<br />
Improving signal strength<br />
If sufficient reception is not possible in the building, use the optimal GSM antenna extension<br />
set for outside installation (see section 16 "Accessories" (page 95)).<br />
4. Identify the ideal mounting location for the GSM antenna.<br />
☑ The ideal mounting location for the GSM antenna has been determined. You can now mount<br />
the GSM antenna.<br />
6.7.5 Mounting a GSM Antenna with a Bracket or Extension Set<br />
NOTICE!<br />
Improper mounting can cause damage to the antenna cable.<br />
Improper mounting can cause damage if the antenna cable is twisted or kinked.<br />
• When securing the antenna and the antenna cable with the antenna bracket, do not<br />
twist or kink the cable.<br />
• Use a suitable mounting tool.<br />
This section shows you how to mount the GSM antenna:<br />
• Mounting the GSM antenna with the supplied bracket (see page 34).<br />
• Mounting a GSM antenna with the GSM antenna extension set (see page 34).<br />
<strong>User</strong> <strong>Manual</strong> SWebBox-BEN111033 33
Commissioning <strong>SMA</strong> <strong>Solar</strong> <strong>Technology</strong> <strong>AG</strong><br />
Mounting the GSM antenna with the supplied bracket<br />
1. Hold the antenna bracket against the wall and<br />
mark the holes with a pencil.<br />
2. Drill holes with 6 mm diameter at the marked points<br />
and insert the screw anchors.<br />
3. Attach the antenna bracket to the wall with the<br />
screws.<br />
4. Connect the antenna cable to the Sunny WebBox.<br />
☑ You have now successfully mounted the antenna.<br />
Mounting a GSM Antenna with the GSM Antenna Extension Set<br />
Additional accessories available for the Sunny WebBox.<br />
Item Quantity Description<br />
A 1 Antenna with 10 m antenna cable (pre-assembled)<br />
B 1 Antenna bracket<br />
C 2 Screws<br />
D 2 Screw anchors<br />
1. Hold the antenna bracket against the wall and<br />
mark the holes with a pencil.<br />
2. Drill holes with 8 mm diameter at the marked points<br />
and insert screw anchors.<br />
3. Attach the antenna bracket to the wall with the<br />
screws.<br />
34 SWebBox-BEN111033 <strong>User</strong> <strong>Manual</strong>
<strong>SMA</strong> <strong>Solar</strong> <strong>Technology</strong> <strong>AG</strong> Commissioning<br />
4. Loosen the counternut from the antenna, and pass<br />
the antenna with the cable into the antenna bracket<br />
from the side.<br />
5. Insert the antenna into the antenna bracket from<br />
above.<br />
6. Hold the antenna to prevent the antenna cable<br />
from twisting. Tighten the antenna counternut using<br />
a wrench.<br />
7. Connect the antenna cable to the Sunny WebBox.<br />
☑ You have now successfully mounted the antenna.<br />
<strong>User</strong> <strong>Manual</strong> SWebBox-BEN111033 35
Commissioning <strong>SMA</strong> <strong>Solar</strong> <strong>Technology</strong> <strong>AG</strong><br />
6.8 Connecting the Sunny WebBox to the Inverter<br />
DANGER!<br />
Risk of lethal electric shock when opening the inverter.<br />
• All work on the inverter may only be carried out by an electrically skilled person.<br />
• Disconnect the inverter on the AC and DC sides as described in the inverter manual.<br />
This section describes the following methods for connecting the Sunny WebBox to inverters:<br />
• Connecting the Sunny WebBox to a Sunny Central via Ethernet (maximum 50 inverters)<br />
• Connecting the Sunny WebBox to an inverter via RS485 (maximum 50 inverters)<br />
6.8.1 Connecting the Sunny WebBox to a Sunny Central<br />
The Sunny WebBox is connected to the Sunny Central via Ethernet. Configure the Sunny WebBox for<br />
the local network and connect the Sunny WebBox directly to the receiver (e.g., router, switch or hub)<br />
of the Sunny Central via the red network cable (patch cable).<br />
36 SWebBox-BEN111033 <strong>User</strong> <strong>Manual</strong>
<strong>SMA</strong> <strong>Solar</strong> <strong>Technology</strong> <strong>AG</strong> Commissioning<br />
6.8.2 Connecting the Sunny WebBox to the RS485 Communication<br />
Bus<br />
This section describes how to connect the Sunny WebBox to the RS485 communication bus. It will be<br />
assumed that the Sunny WebBox is located at the end of the RS485 communication bus.<br />
RS485 cabling and pin assignment in the system<br />
See the RS485 cabling plan poster for the system cabling and pin assignment.<br />
1. Connect cables to the RS485 bus nodes as described in the bus node manual.<br />
2. Remove 40 cm from the cable sleeve of the RS485<br />
communication cable on the side of the Sunny<br />
WebBox.<br />
3. Remove shielding until flush with cable sleeve.<br />
4. Strip approx. 6 mm of insulation from the ends of the conductors.<br />
Connect the insulated conductors of the cable to the plug connector correctly<br />
Note the color of the insulated conductors of the communication cable.<br />
2 | D+ ________________________<br />
5 | GND ________________________<br />
7 | D- ________________________<br />
<strong>User</strong> <strong>Manual</strong> SWebBox-BEN111033 37
Commissioning <strong>SMA</strong> <strong>Solar</strong> <strong>Technology</strong> <strong>AG</strong><br />
5. Connect the insulated conductors to the plug<br />
connector. Observe the configurations of the<br />
insulated conductors in the RS485 communication<br />
bus.<br />
6. Shorten unused insulated conductors until flush with<br />
cable sleeve.<br />
7. Place the plug on the bottom half of the cable<br />
enclosure and use the cable tie to fix the cable<br />
jacket to the bottom half of the cable enclosure.<br />
38 SWebBox-BEN111033 <strong>User</strong> <strong>Manual</strong>
<strong>SMA</strong> <strong>Solar</strong> <strong>Technology</strong> <strong>AG</strong> Commissioning<br />
8. Press the upper half of the cable enclosure to the<br />
lower half of the cable enclosure and the plug until<br />
the terminals snap together.<br />
9. Insert the plug connector into the "<strong>SMA</strong> COM"<br />
socket of the Sunny WebBox.<br />
10. Check whether jumpers are connected to "J1B" and<br />
"J1C" on the Sunny WebBox "<strong>SMA</strong> COM"<br />
connector. The jumpers are mounted upon delivery.<br />
If the jumpers are not mounted, connect them. The<br />
jumpers enable signal biasing and ensure an<br />
adequate signal quality on the RS485<br />
communication bus.<br />
<strong>User</strong> <strong>Manual</strong> SWebBox-BEN111033 39
Commissioning <strong>SMA</strong> <strong>Solar</strong> <strong>Technology</strong> <strong>AG</strong><br />
11. Whether the Sunny WebBox is located at one of<br />
the two ends of the RS485 communication bus<br />
determines whether or not a jumper must be<br />
inserted in "J1A" of the "<strong>SMA</strong> COM" connection.<br />
The jumper is mounted upon delivery.<br />
– If the Sunny WebBox is located at either end of<br />
the RS485 communication bus, a jumper must<br />
be inserted in "J1A". If a jumper is not mounted,<br />
connect a jumper.<br />
– If the Sunny WebBox is not located at one of the<br />
two ends of the RS485 communication bus, no<br />
jumper may be inserted in "J1A". Remove the jumper from "J1A".<br />
☑ The Sunny WebBox is now connected to the RS485 communication bus.<br />
40 SWebBox-BEN111033 <strong>User</strong> <strong>Manual</strong>
<strong>SMA</strong> <strong>Solar</strong> <strong>Technology</strong> <strong>AG</strong> Commissioning<br />
6.9 Mounting the Sunny WebBox (Wall or Top-Hat Rail)<br />
This section describes how to mount the Sunny WebBox in the following ways:<br />
• Mounting the Sunny WebBox onto the wall<br />
• Mounting the Sunny WebBox on the top-hat rail<br />
Mounting the Sunny WebBox onto the wall<br />
1. Determine the mounting location taking into consideration the mounting / installation location<br />
requirements.<br />
2. Use the supplied drilling template to determine the<br />
position of the Sunny WebBox on the wall and to<br />
mark the drilling holes with a pen.<br />
3. Drill holes with 6 mm diameter at the marked points<br />
and insert screw anchors.<br />
4. Screw in the screws and leave about a 6 mm<br />
clearance between the screw head and the wall.<br />
5. Hang the Sunny WebBox onto the screws.<br />
☑ The Sunny WebBox is now mounted on the wall.<br />
<strong>User</strong> <strong>Manual</strong> SWebBox-BEN111033 41
Commissioning <strong>SMA</strong> <strong>Solar</strong> <strong>Technology</strong> <strong>AG</strong><br />
Mounting the Sunny WebBox on the top-hat rail<br />
1. Hook the two lower brackets of the Sunny WebBox<br />
onto the lower edge of the top-hat rail.<br />
2. Press the Sunny WebBox upwards and snap it into<br />
the upper brackets of the Sunny WebBox.<br />
☑ The Sunny WebBox is now mounted on the top-hat<br />
rail.<br />
42 SWebBox-BEN111033 <strong>User</strong> <strong>Manual</strong>
<strong>SMA</strong> <strong>Solar</strong> <strong>Technology</strong> <strong>AG</strong> Logging in and out of the Sunny WebBox<br />
7 Logging in and out of the Sunny WebBox<br />
7.1 Logging into the Sunny WebBox<br />
Activating JavaScript in the Web browser<br />
Activate JavaScript in your Web browser If JavaScript is not enabled, display errors may<br />
arise on the user interface.<br />
Unauthorized access to your PV plant is possible<br />
The plant password protects your plant from unauthorized access to the plant devices.<br />
• Change the default password for the user groups (user/installer) after you have<br />
logged into a new plant for the first time.<br />
Default settings of the Sunny WebBox<br />
IP address: 192.168.0.168<br />
Subnet mask: 255.255.255.0<br />
Password for installer user group: sma<br />
1. Start Web browser (e.g. Internet Explorer).<br />
2. Type the IP address of the Sunny WebBox into the address bar and press Enter.<br />
☑ The Sunny WebBox login page opens.<br />
– If the page does not open, refer to section 14 "Troubleshooting" (page 80).<br />
3. Select the desired language in the "Language" field.<br />
4. Enter the password in the "Password" field.<br />
5. Select [Login].<br />
☑ The Sunny WebBox start page appears.<br />
<strong>User</strong> <strong>Manual</strong> SWebBox-BEN111033 43
Logging in and out of the Sunny WebBox <strong>SMA</strong> <strong>Solar</strong> <strong>Technology</strong> <strong>AG</strong><br />
7.2 Logging out of the Sunny WebBox<br />
Always log out from the Sunny WebBox when you finish your work on the Sunny WebBox. To do so,<br />
select [Logout]. If you only close the Web browser, you will not be logged out of the Sunny WebBox.<br />
44 SWebBox-BEN111033 <strong>User</strong> <strong>Manual</strong>
<strong>SMA</strong> <strong>Solar</strong> <strong>Technology</strong> <strong>AG</strong> Operation<br />
8 Operation<br />
8.1 <strong>User</strong> Interface<br />
The Sunny WebBox is operated via an integrated user interface. The figure below depicts the user<br />
interface start page.<br />
Item Description<br />
A Navigation bar<br />
B Structural view or device view<br />
C Contents section<br />
D Logout button<br />
E Hardware version and firmware version<br />
Once you are logged into the Sunny WebBox, you can access the various pages using the navigation<br />
bar (A). For example, this area allows you to configure the network or change the inverter parameters.<br />
Elements such as the logout button and the hardware and firmware version of the Sunny WebBox can<br />
be viewed or used on every page. The navigation bar is always available. The submenu changes<br />
depending on which main menu item is selected.<br />
On the start page of the Sunny WebBox, there is an overview of the current output, the previous daily<br />
yield, and the previous total yield of all the connected inverters.<br />
In general, there are two different areas in the Web interface where settings can be configured:<br />
• Settings that affect the Sunny WebBox and Sunny Portal<br />
• and settings that affect the PV plant.<br />
<strong>User</strong> <strong>Manual</strong> SWebBox-BEN111033 45
Operation <strong>SMA</strong> <strong>Solar</strong> <strong>Technology</strong> <strong>AG</strong><br />
8.1.1 Explanation of the Status Symbols<br />
This section explains the meanings of the various status symbols in the Web interface of the Sunny<br />
WebBox. The symbol of a Sunny Boy appears in each of the following examples. The Sunny WebBox<br />
user interface shows other devices in the PV plant with corresponding symbols.<br />
Symbol Explanation<br />
This symbol indicates that the inverter is operational and communicates with the<br />
Sunny WebBox.<br />
8.1.2 Structural View and Device View<br />
In the structural view and the device view, you can access additional data by selecting<br />
"Plant > Devices".<br />
Structural view<br />
This symbol indicates that communication has been established with the Sunny<br />
WebBox but that the inverter has an error.<br />
This symbol is displayed in the following cases:<br />
• The inverter is unable to communicate with the Sunny WebBox.<br />
• A fault has occurred in the communication with the inverter.<br />
• It is night time and the inverter is switched off.<br />
In the structural view, the user interface shows the devices<br />
in the order in which they are connected to the data bus.<br />
Device View<br />
In the device view, the user interface shows all devices<br />
sorted by device type. Device types are, for example, all<br />
Sunny Boys. The number shown in parentheses indicates<br />
the number of devices of the device type.<br />
46 SWebBox-BEN111033 <strong>User</strong> <strong>Manual</strong>
<strong>SMA</strong> <strong>Solar</strong> <strong>Technology</strong> <strong>AG</strong> Operation<br />
8.1.3 Overview According to Device Type<br />
In the device view, the window on the right provides an overview of all devices in a group. To view<br />
all the devices of a specific type, select the device type in the device view.<br />
8.1.4 Overview of a Single Device<br />
To view the data of one specific device, select the device in the device view or the structural view.<br />
The "Overview", "Spot values" and "Parameters" tabs can be used to display and, if necessary, edit<br />
the various data on the device.<br />
<strong>User</strong> <strong>Manual</strong> SWebBox-BEN111033 47
Operation <strong>SMA</strong> <strong>Solar</strong> <strong>Technology</strong> <strong>AG</strong><br />
8.2 Detecting Devices<br />
All devices (i.e., inverters) can be detected at once. If you later wish to add additional devices to the<br />
PV plant, you can detect them using the Sunny WebBox.<br />
Before beginning detection, the communication mode of the PV system has to be set (see page 60).<br />
Re-detecting devices after changes to the PV plant<br />
Devices will need to be re-detected if you:<br />
• Exchange devices in your PV plant.<br />
• Remove devices from your PV plant.<br />
• Add devices to your PV plant.<br />
Detection of a PV plant may take several minutes<br />
Depending on the number of devices in your PV plant, the detection process might differ in<br />
duration. If the Sunny WebBox does not signal any progress for more than three minutes,<br />
cancel the search process. To do so, click the [Cancel] button. Check that all devices are<br />
connected properly to your plant and repeat the detection.<br />
1. Select "Plant > Detection" on the user interface.<br />
☑The "Plant detection" page opens.<br />
2. In the "Total number of devices to be detected" field, enter the number of devices that are<br />
connected to the Sunny WebBox.<br />
3. Select [Start detection].<br />
☑ The Sunny WebBox starts detecting all inverters and displays its progress. Once all devices<br />
have been detected, the Sunny WebBox displays "### Device detection finished ###".<br />
4. Select [OK].<br />
☑ The "Plant > Devices" page appears. The devices have been detected.<br />
8.3 Parameterizing Devices<br />
1. On the Sunny WebBox start page, log in as installer.<br />
2. Select "Plant > Devices" on the user interface.<br />
3. Select a device in the device view or structural view.<br />
4. Select the "Parameters" tab.<br />
☑ The Sunny WebBox list all the parameters that can be changed on the selected device.<br />
The displayed parameters depend on the selected device<br />
The displayed parameters depend on the device you selected and can vary significantly<br />
between the product ranges (e.g. Sunny Boy and Sunny Central).<br />
48 SWebBox-BEN111033 <strong>User</strong> <strong>Manual</strong>
<strong>SMA</strong> <strong>Solar</strong> <strong>Technology</strong> <strong>AG</strong> Operation<br />
5. Change the desired parameter via the "Value" field.<br />
6. To adopt this value for all devices of the same type and with the same firmware version, select<br />
the "Save for all devices of this device type" option. For Sunny SensorBox devices, the units for<br />
ambient temperature, module temperature and wind speed must also coincide.<br />
7. Select [Save].<br />
☑ The Sunny WebBox now adjusts the required value on the device(s). Once the value has<br />
been changed, the Sunny WebBox displays "### Parameter change finished ###".<br />
8. Select [OK].<br />
☑ The Sunny WebBox displays the page containing the parameter list on the user interface.<br />
To change additional parameters, proceed the same way. Repeat the instructions beginning from step<br />
3 in order to set the parameters for further devices.<br />
8.4 Displaying the Event Report<br />
The event report provides a log of the various events that occur in both the Sunny WebBox and the<br />
devices connected to the Sunny WebBox. For example, information on file uploads to Sunny Portal<br />
or errors, warnings or other information regarding the connected devices can be stored in the event<br />
report by the Sunny WebBox. To display the events of connected devices, the Sunny WebBox<br />
accesses the memory of those devices.<br />
It is possible to display the events of connected devices only for <strong>SMA</strong> inverters of<br />
the type Sunny Backup.<br />
The Sunny WebBox (version 1.52 or higher) currently supports displaying the events of<br />
connected devices for <strong>SMA</strong> inverters of the type Sunny Backup.<br />
1. If you have not configured the settings for retrieving data from the device memory, see section<br />
10.8 "Retrieving or Requesting Data from the Device Memory" (page 69).<br />
2. Select "WebBox > Events" on the user interface.<br />
☑ The page containing the event report appears on the user interface. The Sunny WebBox can<br />
display the last 500 events in the report.<br />
<strong>User</strong> <strong>Manual</strong> SWebBox-BEN111033 49
Managing Plant Data <strong>SMA</strong> <strong>Solar</strong> <strong>Technology</strong> <strong>AG</strong><br />
9 Managing Plant Data<br />
9.1 Information on the Plant Data<br />
The Sunny WebBox stores the data from all detected devices and provides that data in a variety of<br />
formats. Various conditions must be met depending on how you want the data to be displayed. The<br />
following sections specify the conditions and the settings required to display the data.<br />
9.2 Plant Presentation in Sunny Portal<br />
You can present data from your PV plant in Sunny Portal using the Sunny WebBox. The Sunny Portal<br />
monitors the PV plant and displays the yield and power output. In addition, Sunny Portal can send<br />
useful reports via e-mail. Depending on your Sunny WebBox version, you can transmit data to the<br />
Sunny Portal using a variety of connection types (e.g. analog, GSM or ISDN or DSL router).<br />
If the Sunny WebBox is unable to connect to the Sunny Portal, the Sunny WebBox will store the<br />
collected plant data in a ring buffer. The Sunny WebBox transmits the data to Sunny Portal with the<br />
next data upload. If the ring buffer is full, the Sunny WebBox will overwrite the oldest data. The time<br />
the ring buffer can bridge depends on the device type and number of the detected devices.<br />
Possible Delays in the Visualization<br />
Evaluating the collected data takes time. Please note that it can take several minutes for the<br />
Sunny Portal to display the data of your PV plant.<br />
50 SWebBox-BEN111033 <strong>User</strong> <strong>Manual</strong>
<strong>SMA</strong> <strong>Solar</strong> <strong>Technology</strong> <strong>AG</strong> Managing Plant Data<br />
9.2.1 Registering Sunny WebBox in the Sunny Portal<br />
1. Log into the user interface of the Sunny WebBox.<br />
2. Select "WebBox > Settings > Data transmission" in the user interface.<br />
3. Enter the name of your plant in the "Plant name" field. Sunny Portal displays the name of your<br />
plant.<br />
4. Select the transmission method in the "Interface" field. The transmission method depends on<br />
which Sunny WebBox version you have.<br />
5. Set the upload frequency (see section 10.6 "Setting Data Upload" (page 67)).<br />
6. Select "Yes" in the "Use Sunny Portal" field.<br />
The plant identifier will be entered automatically.<br />
In general, you do not have to change the preset number in the "Plant identifier" field. The<br />
Sunny Portal uses the number is a unique identifier for the plant. If you have not yet<br />
registered at Sunny Portal, the Sunny WebBox will automatically enter the preset plant<br />
identifier in Sunny Portal after the first successful data upload. Sunny Portal sends the login<br />
data to the e-mail address you entered in the "Operator e-mail" field. You are now<br />
registered at Sunny Portal.<br />
In case you have already registered at Sunny Portal with the same plant (which can be for<br />
example the case when exchanging the data logger), you have to adjust the plant identifier<br />
in the "Plant identifier" field, see section 9.2.3 "Adjusting the Plant ID for Sunny Portal"<br />
(page 52).<br />
7. Enter your e-mail address in the "Operator e-mail" field. Sunny Portal then sends your access<br />
data to the e-mail address entered.<br />
8. Make a selection in the "Use Proxyserver" field and, if necessary, enter the IP address and the<br />
port of the proxy server in the "Proxyserver address" field.<br />
9. Make a selection in the "Use authentication" field.<br />
"yes" Authentication is needed for the proxy server. Adjust further settings.<br />
"no" The proxy server does not require authentication. "<strong>User</strong> name" and<br />
"Password" do not have to be entered. Continue with step 10.<br />
10. Enter the data of your proxy server in the "<strong>User</strong> name" and "Password" fields.<br />
11. Select [Save].<br />
12. Select "WebBox > Info".<br />
13. Select [Register] in the "Last Sunny Portal registration" field. The Sunny Portal password will be<br />
sent to the entered e-mail address.<br />
☑ The Sunny WebBox data transmission to Sunny Portal is configured.<br />
On the "WebBox > Info" page, you can see when the Sunny WebBox last successfully transmitted<br />
data.<br />
<strong>User</strong> <strong>Manual</strong> SWebBox-BEN111033 51
Managing Plant Data <strong>SMA</strong> <strong>Solar</strong> <strong>Technology</strong> <strong>AG</strong><br />
9.2.2 Activating/Deactivating Data Transmission to Sunny Portal<br />
1. Log in to the user interface of the Sunny WebBox.<br />
2. Select "WebBox > Settings > Data transmission" in the user interface.<br />
3. Make a selection in the "Use Sunny Portal" field.<br />
"yes" The Sunny WebBox will transmit data to Sunny Portal. Register the Sunny<br />
WebBox in Sunny Portal as described in section 9.2.1 "Registering Sunny<br />
WebBox in the Sunny Portal" (page 51).<br />
"no" The Sunny WebBox will not transmit data to Sunny Portal.<br />
4. Select [Save].<br />
☑ This setting activates or deactivates data transmission to Sunny Portal.<br />
9.2.3 Adjusting the Plant ID for Sunny Portal<br />
Sunny Portal identifies your Sunny WebBox via the plant identifier. In the following cases, you must<br />
adjust the plant ID in the Sunny WebBox:<br />
• Data has already been sent to Sunny Portal via another communication device.<br />
• The plant ID set for the Sunny WebBox was reset using the Reset button.<br />
• The Sunny WebBox has been replaced with another Sunny WebBox.<br />
• The Sunny WebBox attempts to add a plant to Sunny Portal that is already registered.<br />
Perform the following steps to adjust the plant ID of the Sunny WebBox for Sunny Portal:<br />
1. Log into Sunny Portal (www.SunnyPortal.com).<br />
2. Go to "Configuration > Plant properties" on the Sunny Portal page.<br />
3. Copy the plant ID to the clipboard.<br />
4. Log in to your Sunny WebBox as a user/installer.<br />
5. Select "WebBox > Settings > Data transmission" in the user interface.<br />
6. Delete the content of the "Plant identifier" field.<br />
7. Paste the plant identifier from the clipboard into the "Plant identifier" field.<br />
8. Select [Save].<br />
☑ The plant ID for the Sunny WebBox is adjusted to Sunny Portal.<br />
52 SWebBox-BEN111033 <strong>User</strong> <strong>Manual</strong>
<strong>SMA</strong> <strong>Solar</strong> <strong>Technology</strong> <strong>AG</strong> Managing Plant Data<br />
9.2.4 Deleting the Sunny Portal Buffer<br />
1. Log into your Sunny WebBox as an installer.<br />
2. Select "WebBox > Info" on the user interface.<br />
3. Select [Delete] in the "Sunny Portal Buffer Load" field.<br />
☑ The Sunny Portal buffer is deleted.<br />
9.2.5 Accessing the Sunny WebBox via Sunny Portal<br />
Using Sunny Portal, you can access your Sunny WebBox via the Internet.<br />
No access to the Sunny WebBox via Sunny Portal via an analog or GSM modem<br />
If the Sunny WebBox transmits its data to Sunny Portal via a modem, you cannot access<br />
the Sunny WebBox via Sunny Portal.<br />
Every time the Sunny WebBox connects with Sunny Portal, Sunny Portal saves the current address of<br />
the Sunny WebBox or your router with which the Internet connection is established. If your router is<br />
configured accordingly, you can access your Sunny WebBox via Sunny Portal.<br />
In "Device overview > Device characteristics" in Sunny Portal, you will find the IP addresses with which<br />
the Sunny WebBox last established a connection to Sunny Portal. The IP address displayed is updated<br />
by the Sunny WebBox each time data is transmitted.<br />
If your network is permanently connected to the Internet, your Internet provider may disconnect the<br />
connection at regular intervals. This usually happens every 24 hours. When you establish a new<br />
Internet connection, your Internet provider will assign a new IP address to your network. The Sunny<br />
WebBox establishes connections to Sunny Portal via this new IP address. The IP address displayed<br />
by Sunny WebBox is always up-to-date.<br />
Accessing the Sunny WebBox via Sunny Portal after change of IP address<br />
When your Internet provider assigns a new IP address to your network, Sunny Portal<br />
cannot access the Sunny WebBox immediately. Before it can be accessed, the Sunny<br />
WebBox must first send its new IP address to the Sunny Portal. The Sunny WebBox<br />
transmits the IP address of the network every time data is transmitted. Wait until the next<br />
data transmission is performed by the Sunny WebBox.<br />
The router must forward data requests to the Sunny WebBox.<br />
To access the Sunny WebBox via Sunny Portal, your router must be configured to forward<br />
all data requests from Sunny Portal to the Sunny WebBox. If you are denied access, check<br />
your router settings.<br />
<strong>User</strong> <strong>Manual</strong> SWebBox-BEN111033 53
Managing Plant Data <strong>SMA</strong> <strong>Solar</strong> <strong>Technology</strong> <strong>AG</strong><br />
9.3 Integrated FTP Server<br />
The Sunny WebBox is equipped with an integrated FTP server. The FTP server allows you to access<br />
CSV files or compressed XML files. In order to use the FTP server, you must first assign the respective<br />
read and write access rights for the FTP server on the Sunny WebBox.<br />
9.3.1 Defining Read and Write Access Rights for the FTP Server<br />
1. Select "WebBox > Settings > Security" in the user interface.<br />
2. Make a selection in the "FTP Server" field.<br />
"Read/write" You have read and write access rights on the integrated FTP server.<br />
"Read only" You only have read access rights on the integrated FTP server.<br />
"off" The integrated FTP server is deactivated.<br />
3. Select [Save].<br />
☑ The FTP server is configured. You can access the FTP server via the Web browser, for example.<br />
9.3.2 Accessing FTP Server via the Web Browser<br />
To access the Sunny WebBox from your Web browser (e.g. Internet Explorer), perform the following<br />
steps:<br />
1. Start your Web browser.<br />
<strong>User</strong> name for logging into the Sunny WebBox.<br />
To log into the FTP server of the Sunny WebBox, you can choose either "user" or "installer"<br />
as the user name.<br />
2. Specify the IP address of the Sunny WebBox indicating the user name and password according<br />
to following example: ftp://[<strong>User</strong> name]:[Password]@[IP address].<br />
For example, when logging into the Sunny WebBox with the IP address 192.168.0.168 and<br />
the user name "user" and the password "1234", enter :ftp://user:1234@192.168.0.168<br />
3. Press Enter.<br />
☑ The Web browser displays the directory structure of the FTP server of your Sunny WebBox. You<br />
can download and display the collected data.<br />
The user name and password remain saved in the Web browser cache.<br />
After you access the FTP server of the Sunny WebBox with a Web browser, the user name<br />
and passwords remain saved in the Web browser cache. Clear the browser cache to<br />
prevent unauthorized access to the FTP server of the Sunny WebBox.<br />
54 SWebBox-BEN111033 <strong>User</strong> <strong>Manual</strong>
<strong>SMA</strong> <strong>Solar</strong> <strong>Technology</strong> <strong>AG</strong> Managing Plant Data<br />
9.4 FTP Push Function<br />
The Sunny WebBox is equipped with an FTP push function. This function means that the Sunny<br />
WebBox can load the collected data of your PV plant (as an xml file) to an FTP server.<br />
Testing the FTP push function<br />
You can also test the FTP push function using an FTP server installed locally on your<br />
computer. To learn how to install a local FTP server and use it to test the Sunny WebBox<br />
FTP push function with a local FTP server, please read the Technical Information "Setting up<br />
the local FTP server". You can find this document in the download area at<br />
www.<strong>SMA</strong>.de/en.<br />
9.4.1 Activating/Deactivating FTP Push Function<br />
1. Select "WebBox > Settings > Data transmission" in the user interface.<br />
☑The "Data transmission" page opens.<br />
2. Make a selection in the "Use FTP-Push service" field.<br />
"yes" The FTP push service is activated. Adjust further settings.<br />
"no" The FTP push service is not activated. Select [Cancel].<br />
3. Enter the URL and port of the FTP server in the "FTP server" field.<br />
4. In the "Upload directory" field, specify the desired file on the FTP server in which the data shall<br />
be saved.<br />
5. Make a selection in the "Use authentication" field.<br />
"yes" Authentication is needed for the FTP server. Adjust further settings.<br />
"no" Authentication is not required. "<strong>User</strong> name" and "Password" do not have to<br />
be entered. Proceed to step 6.<br />
6. Enter the data of your FTP server in the "<strong>User</strong> name" and "Password" fields.<br />
7. Set the upload frequency (see section 10.6 "Setting Data Upload" (page 67)).<br />
8. Select [Save].<br />
☑ The FTP push function is activated/deactivated depending on the setting.<br />
<strong>User</strong> <strong>Manual</strong> SWebBox-BEN111033 55
Managing Plant Data <strong>SMA</strong> <strong>Solar</strong> <strong>Technology</strong> <strong>AG</strong><br />
9.4.2 Testing the FTP Push Function<br />
9. Select "WebBox > Settings > Data transmission" in the user interface.<br />
☑The "Data transmission" page opens.<br />
10. Click the [test] button in the "Test FTP connection" field.<br />
☑ The Sunny WebBox sends a test file to the FTP server.<br />
11. Check whether the Sunny WebBox transferred the test file successfully to the FTP server.<br />
– FTP connection test successful: check the content of the test file (see section 9.5 "HTTP<br />
Download Via the <strong>User</strong> Interface" (page 56)) on your FTP server. The content of the test file<br />
must match the data of your Sunny WebBox.<br />
– FTP connection test failed: check the configuration of your FTP server and the Sunny<br />
WebBox. If necessary, you must adjust settings of the FTP server and the Sunny WebBox. If<br />
you have any questions, ask your network administrator and repeat the connection test.<br />
12. Select [Save].<br />
☑ The FTP push function is set and has been tested.<br />
9.5 HTTP Download Via the <strong>User</strong> Interface<br />
You can download the data collected by the Sunny WebBox via HTTP download. This function makes<br />
it possible to manually download your collected plant data in CSV or XML format to your computer.<br />
1. Select "WebBox > Recording" on the user interface.<br />
2. Make a selection in the "Format" field.<br />
3. Configure the CSV data format, if necessary, as described in section 10.7 "Configuring the CSV<br />
Data Format" (page 68)).<br />
4. Select the required month in the "Download" field. The data for the prior 12 months is available<br />
for download via the user interface.<br />
5. Select [Download].<br />
☑A window opens.<br />
6. Select [Save].<br />
7. Choose save location.<br />
8. Select [Save].<br />
☑ The data are downloaded. The download can take several minutes, depending on the data<br />
volume.<br />
56 SWebBox-BEN111033 <strong>User</strong> <strong>Manual</strong>
<strong>SMA</strong> <strong>Solar</strong> <strong>Technology</strong> <strong>AG</strong> Managing Plant Data<br />
9.6 Storing Recorded Data on an SD Card<br />
In addition to the internal ring buffer, the Sunny WebBox can also store data on an SD card.<br />
SD Card Compatibility<br />
To ensure that the SD card is functioning properly, use SD cards available from <strong>SMA</strong>.<br />
Compatibility with all SD cards available on the market cannot be guaranteed. The Sunny<br />
WebBox does not support SD cards with storage capacities of over 2 GB or SDHC cards.<br />
Formatting the SD card.<br />
Only use SD cards which have been formatted with the FAT32 file system.<br />
The Sunny WebBox converts the SD card's file system to TFAT in order to increase data<br />
security. If you wish to clear the SD card, you must format the SD card on a computer with<br />
the FAT32 file system.<br />
1. Select "WebBox > Settings > Security" in the user interface.<br />
2. Make a selection in the "External memory" field.<br />
"Enable" Plant data is saved on the SD card.<br />
"Disable" No plant data is saved on the SD card.<br />
3. Insert the SD card into the Sunny WebBox SD card slot.<br />
☑ The SD card is configured. The Sunny WebBox will now save data to the SD card.<br />
Data loss when removing the SD card<br />
Do not remove the SD card while the "MEMORY" LED is flashing green or orange. This can<br />
damage the file system of the SD card and lead to data loss. Depending on the amount of<br />
data, the saving process can take some time.<br />
When an SD card is inserted into the SD card slot, the Sunny WebBox copies all data from the internal<br />
memory to the external memory (SD card). The Sunny WebBox will save new data to the SD card<br />
until you remove it from the SD card slot. The "MEMORY" LED on the Sunny WebBox flashes orange<br />
to indicate that it is writing to the SD card.<br />
The Sunny WebBox saves data to a specific directory folder on the SD card The name of the folder<br />
is "WebBox_[SerialNumber]". "[SerialNumber]" designates the serial number of the respective Sunny<br />
WebBox. The Sunny WebBox creates a subfolder in the main folder every day. Each subfolder<br />
contains all the data collected by the Sunny WebBox on that particular day. The Sunny WebBox will<br />
save further data onto the SD card once the SD card reaches its storage capacity ("MEMORY" LED<br />
glows red). Replace the SD card or format the SD card in your computer.<br />
<strong>User</strong> <strong>Manual</strong> SWebBox-BEN111033 57
Managing Plant Data <strong>SMA</strong> <strong>Solar</strong> <strong>Technology</strong> <strong>AG</strong><br />
9.6.1 Setting Data Compression<br />
The Sunny WebBox can compress all the data it receives from connected devices. To do so, the Sunny<br />
WebBox simply averages the data over a defined time period. Averaged data takes up less memory<br />
space in the Sunny WebBox.<br />
1. Select "WebBox > Recording" on the user interface.<br />
2. In the "Averaging over" field, select the time period over which the Sunny WebBox is to calculate<br />
the average.<br />
3. Select [Save].<br />
☑ Data compression is now set.<br />
9.6.2 Displaying Available Memory Space in the Sunny WebBox<br />
You can display the ring buffer capacity of the Sunny WebBox already in use as follows:<br />
1. Log into the Sunny WebBox.<br />
2. Select "WebBox > Info" in the user interface.<br />
☑ The Sunny WebBox displays how full the ring buffer is in the "Sunny Portal Buffer Load" field on<br />
the user interface.<br />
58 SWebBox-BEN111033 <strong>User</strong> <strong>Manual</strong>
<strong>SMA</strong> <strong>Solar</strong> <strong>Technology</strong> <strong>AG</strong> Settings<br />
10 Settings<br />
10.1 System<br />
10.1.1 Setting Date and Time<br />
1. Select "WebBox > Settings > System" in the user interface.<br />
2. Select [Change] in the "Time zone (UTC offset)" field.<br />
☑The "Date / Time / Time zone settings" window opens.<br />
3. Select the time zone in the "Time zone (UTC offset)" field.<br />
4. Make a selection in the "Automatic change from summer time to winter time" field.<br />
"yes" Automatic change from summer time to winter time is active.<br />
"no" Automatic change from summer time to winter time is not active. Date and<br />
time have to be set manually.<br />
5. Enter the current date in the "New date" field.<br />
6. Enter the current time in the "New time" field.<br />
7. Select [Save].<br />
☑ The date and time are now set.<br />
10.1.2 Setting the Language<br />
1. Select "WebBox > Settings > System" in the user interface.<br />
2. Select your language in the "Language" field.<br />
3. Select [Save].<br />
☑ The language is set.<br />
10.1.3 Setting the Operator Name<br />
1. Select "WebBox > Settings > System" in the user interface.<br />
2. Enter the operator name in the "Operator name" field.<br />
3. Select [Save].<br />
☑ The operator name is now set.<br />
<strong>User</strong> <strong>Manual</strong> SWebBox-BEN111033 59
Settings <strong>SMA</strong> <strong>Solar</strong> <strong>Technology</strong> <strong>AG</strong><br />
10.2 Setting the Communication Type of the PV Plant<br />
1. Select "Plant > Settings" in the user interface.<br />
2. Select the device communication method in the "Interface" field.<br />
"<strong>SMA</strong>-COM" • All Sunny Boys<br />
• All Sunny Mini Central devices<br />
• All Sunny Island devices<br />
• All Sunny Backup devices<br />
• Sunny SensorBox<br />
• Sunny Central (US version only)<br />
"ETHERNET" • All Sunny Central devices (excluding US version)<br />
3. If "<strong>SMA</strong>-COM" is selected, click [Save] and continue with section 10.2.1 "Setting <strong>SMA</strong>-COM"<br />
(page 61).<br />
or<br />
If "ETHERNET" is selected, click [Save] and continue with section 10.2.2 "Setting ETHERNET"<br />
(page 62).<br />
60 SWebBox-BEN111033 <strong>User</strong> <strong>Manual</strong>
<strong>SMA</strong> <strong>Solar</strong> <strong>Technology</strong> <strong>AG</strong> Settings<br />
10.2.1 Setting <strong>SMA</strong>-COM<br />
If the devices of your PV plant are to communicate with the Sunny WebBox via <strong>SMA</strong>-COM, you must<br />
configure this communication method.<br />
Data transmission protocols<br />
<strong>SMA</strong> inverters use proprietary protocols for data transmission.<br />
The inverters have been using the data protocol "<strong>SMA</strong>-NET" since the year 2000. Older<br />
inverters use the data protocol "<strong>SUNNY</strong>-NET". The <strong>SMA</strong>-NET and <strong>SUNNY</strong>-NET data<br />
protocols cannot be used together in a PV plant.<br />
1. Select "Plant > Settings" in the user interface.<br />
2. Select the data protocol of the devices in the "Transfer protocol" field. The following selections<br />
are possible for the listed inverter types:<br />
"<strong>SMA</strong>-NET" • Sunny Boys of type SWR, version BFR 8.22 or above<br />
• All type SB Sunny Boys<br />
• All Sunny Mini Central devices<br />
• All Sunny Island devices<br />
• All Sunny Central devices<br />
• Sunny SensorBox<br />
"<strong>SUNNY</strong>-NET" • Sunny Boys of type SWR prior to version BFR 8.22<br />
Default Baud rate<br />
If not all devices operate using the typical <strong>SMA</strong> baud rate setting of 1200 baud,<br />
communication problems may occur. Change the baud rate to 1200 baud if necessary.<br />
Only change the baud rate from 1200 baud when absolutely necessary.<br />
3. Select the inverter baud rate in the "Baud rate" field (not if "Ethernet" is set as the communication<br />
method).<br />
"1200" All <strong>SMA</strong> devices<br />
"9600" Reserved for future developments<br />
"19200" Reserved for future developments<br />
4. Select [Save].<br />
☑ The PV plant communication has been set.<br />
<strong>User</strong> <strong>Manual</strong> SWebBox-BEN111033 61
Settings <strong>SMA</strong> <strong>Solar</strong> <strong>Technology</strong> <strong>AG</strong><br />
10.2.2 Setting ETHERNET<br />
If the devices of your PV plant are to communicate with the Sunny WebBox via Ethernet, you must<br />
configure this communication method.<br />
1. On the "PV subnet mask" of the user interface, enter the subnet mask of the communication bus<br />
of the central inverter page.<br />
PV subnet mask<br />
This subnet mask enables the separation of diverse IP address ranges on the<br />
communication bus of the central inverter side. The subnet mask is preset to 0.0.0.0 when<br />
the device is delivered.<br />
2. Select [Save].<br />
☑ The PV plant communication has been set.<br />
10.3 Ethernet Network<br />
10.3.1 Information on Extended Network Settings<br />
Changing advanced network settings<br />
Do not change any network settings in the network devices if you are not clear on the<br />
effects of the change. Changes to values could lead to the existing network not functioning<br />
or only partially functioning. If you have any questions, contact your network administrator.<br />
You can assign static network settings to the Sunny WebBox or obtain the network settings<br />
dynamically via a DHCP server.<br />
If you would like to make the Sunny WebBox available in the Internet, to allow, for example, direct<br />
access to the Sunny WebBox via the Sunny Portal, you must configure a Port rerouting in your router.<br />
Here you can adjust the network port of the Sunny WebBox if necessary.<br />
62 SWebBox-BEN111033 <strong>User</strong> <strong>Manual</strong>
<strong>SMA</strong> <strong>Solar</strong> <strong>Technology</strong> <strong>AG</strong> Settings<br />
10.3.2 Activating DHCP<br />
The Sunny WebBox can obtain its network settings via a DHCP server (Dynamic Host Configuration<br />
Protocol). With this during the start of the Sunny WebBox the IP address, subnet mask, gateway and<br />
DNS server are automatically obtained from the DHCP server.<br />
To detect the Sunny WebBox in your network, you can detect the current network settings via the<br />
SD card (see page 85).<br />
Using DHCP<br />
Before setting the Sunny WebBox to dynamic IP address assignment, check your DHCP<br />
server. The DHCP server must extend the lease of the assigned IP address. If the DHCP<br />
server assigns a new IP address after the lease has expired, we do not recommend using<br />
the DHCP server. DHCP servers can normally list all devices to which you have assigned<br />
an IP address. You can now identify the Sunny WebBox based on your MAC address. The<br />
MAC address of your Sunny WebBox is located on the type plate and the "WebBox ><br />
Info" page.<br />
1. Select "WebBox > Settings > Network" in the user interface.<br />
2. Select "Dynamic (DHCP)" in the "Obtain IP address" field.<br />
3. Select [Save].<br />
4. Under "DHCP", select "Yes" in the "Activated" field in order to receive the network settings<br />
dynamically assigned.<br />
5. Select [Save].<br />
☑ The Sunny WebBox obtains the network settings automatically via the DHCP server.<br />
10.3.3 Network Ports<br />
The Sunny WebBox uses four network ports for the various services. If these ports are reserved for<br />
other applications in your network, you can change the ports as follows:<br />
Adjusting the network ports<br />
Test the access to the Sunny WebBox Web server before you change the "Public virtual<br />
HTTP port" setting of the Sunny WebBox. In most cases, the settings do not have to be<br />
changed manually, as the router automatically forwards the queries to the correct ports via<br />
the network. Before adjusting the ports, contact your network administrator.<br />
1. In the field "Public virtual HTTP port", enter the port enabled in the router for HTTP access. This<br />
port allows the web server of the Sunny WebBox to be accessed via the Internet.<br />
2. In the "Webserver port" field, enter the port over which the Web server of the Sunny WebBox<br />
can be reached.<br />
<strong>User</strong> <strong>Manual</strong> SWebBox-BEN111033 63
Settings <strong>SMA</strong> <strong>Solar</strong> <strong>Technology</strong> <strong>AG</strong><br />
3. In the "Webservice port" field, enter the port which the Sunny WebBox uses to data to the Sunny<br />
Portal and which loads the Sunny WebBox firmware updates.<br />
4. Select "yes" in the "Use Modbus" field to use the Modbus protocol for Sunny WebBox<br />
communication. If you activate the Modbus protocol, then unauthorized access to the Sunny<br />
WebBox is possible. In this case, users without a password will be able to access the spot values<br />
of supported devices and change the Sunny WebBox system time.orSelect "no" in the<br />
"Use Modbus" field to deselect the Modbus protocol for Sunny WebBox communication.<br />
5. Enter the port in the "Modbus port" field which the Sunny WebBox should use to communicate<br />
via the Modbus protocol. Port 502 is the default port here.<br />
6. Select [Save].<br />
☑ The Ethernet network of the Sunny WebBox is now configured.<br />
10.4 Enable Modem Dialup<br />
With this function, you can enable modem dialup via a dial-up connection to the Sunny WebBox. This<br />
setting does not affect how data is transferred to Sunny Portal via a modem. You can configure<br />
transmission to Sunny Portal in the user interface via "WebBox > Settings > Data trans." on the Web<br />
interface in the "Interface" field.<br />
1. Select "WebBox > Settings > Modem" on the user interface.<br />
2. Make a selection in the "Allow modem access" field.<br />
"yes" The Sunny WebBox can be accessed over a dial-up connection. Adjust further<br />
settings.<br />
"no" The Sunny WebBox cannot be accessed over a dial-up connection.<br />
3. Enter the IP address at which the Sunny WebBox can be accessed via a dial-up connection in<br />
the "IP address" field.<br />
4. Select the number in "Pick up after ring tone" field if the Sunny WebBox should establish the<br />
connection.<br />
5. Select [Save].<br />
☑ Whether the Sunny WebBox can or cannot be accessed via a dial-up connection will depend<br />
on the settings.<br />
64 SWebBox-BEN111033 <strong>User</strong> <strong>Manual</strong>
<strong>SMA</strong> <strong>Solar</strong> <strong>Technology</strong> <strong>AG</strong> Settings<br />
10.4.1 Testing the Connection<br />
1. Select "WebBox > Settings > Modem" on the user interface.<br />
2. Select [Connection test].<br />
☑ A successful connection test means that all settings are correct.<br />
If the connection test was not successful, check the modem settings (see section 6.7 "Configuring<br />
the Sunny WebBox for Modem Operation" (page 29)). Perform the connection test once again.<br />
10.4.2 Testing the Signal Strength of the GSM Modem<br />
1. Select "WebBox > Settings > Modem" on the user interface.<br />
2. Select [Signal strength].<br />
☑ The signal strength is displayed. A signal strength of at least 35 % is necessary to ensure secure<br />
communication with all cell phone network providers.<br />
Improving signal strength<br />
If sufficient reception is not possible in the building, use the optimal GSM antenna extension<br />
set for outside installation (see section 16 "Accessories" (page 95)).<br />
10.4.3 Terminating a Connection<br />
You can terminate an existing GSM connection.<br />
1. Select "WebBox > Settings > Modem" on the user interface.<br />
2. Select [Hang up].<br />
☑ The connection is now terminated.<br />
<strong>User</strong> <strong>Manual</strong> SWebBox-BEN111033 65
Settings <strong>SMA</strong> <strong>Solar</strong> <strong>Technology</strong> <strong>AG</strong><br />
10.5 Ensuring Access Security<br />
Network security<br />
Protect your Ethernet from unauthorized access. Take suitable protective measures:<br />
• Set up secure passwords (see 10.5.1 "Strength of Passwords" (page 66)).<br />
• Change your passwords at regular intervals.<br />
• Use different passwords for different user groups.<br />
• Set up a firewall.<br />
• Close unnecessary network ports.<br />
• Never leave slips of paper with passwords lying around.<br />
Check the quality of your password. Choose a more secure password if necessary. On initial<br />
installation of the Sunny WebBox (no devices have been detected yet), the user interface prompts you<br />
to change the default password.<br />
10.5.1 Strength of Passwords<br />
To increase the security of your password, note the following when selecting a password:<br />
• Use passwords with a minimum length of 8 characters. The longer the password, the more<br />
secure it is.<br />
• Do not use names or common words (e.g. dog, cat or house).<br />
• Do not use data related to your person as passwords (for example names of persons or pets,<br />
personal numbers or identification numbers, car license plates).<br />
• Do not repeat names or words (e.g., househouse, catcat).<br />
• Use a combination of upper and lower case letters, special characters and numbers.<br />
• Do not use number and letter combinations which are consecutive on a keyboard (for example<br />
"12345", "qwerty").<br />
10.5.2 Change Password<br />
Identical passwords for the user groups.<br />
If your user password is the same as your installer password, you will automatically be<br />
logged in as an installer.<br />
1. Log into the Sunny WebBox in the appropriate user group.<br />
2. Select "WebBox -> Settings -> Security"<br />
☑ The page for security settings opens.<br />
3. Enter a secure password in the "<strong>User</strong> password" field and confirm it in the second field (see<br />
section 10.5.1 "Strength of Passwords" (page 66)).<br />
66 SWebBox-BEN111033 <strong>User</strong> <strong>Manual</strong>
<strong>SMA</strong> <strong>Solar</strong> <strong>Technology</strong> <strong>AG</strong> Settings<br />
4. Enter a secure password in the "Installer password" field and confirm it in the second field (see<br />
section 10.5.1 "Strength of Passwords" (page 66)).<br />
Changing the "installer" user group password<br />
The "installer" user group password can only be changed within the "installer" user group.<br />
Information on password security<br />
While you enter your password, the user interface of the Sunny WebBox displays<br />
information on the security level of the password entered. The Sunny WebBox categorizes<br />
passwords as "very unsafe", "unsafe", "adequate", "safe" and "very safe". Only select<br />
passwords whose security quality level is at least "safe".<br />
5. Select [Save].<br />
☑ The new password will be active the next time you log into the Sunny WebBox.<br />
10.6 Setting Data Upload<br />
The upload frequency setting is used to define how frequently the Sunny WebBox connects to the<br />
Sunny Portal or the external FTP server each day. You can also define the time when the Sunny<br />
WebBox connects to the Sunny Portal or the external FTP server. All data upload settings are related<br />
to both data upload to the Sunny Portal as well as to data upload to an external FTP server.<br />
1. Select "WebBox > Settings > Data transmission" in the user interface.<br />
2. Select the upload frequency in the "Upload frequency per time window" field.<br />
Maximum number of upload attempts<br />
If the data transmission from the Sunny WebBox to the Sunny Portal or external FTP server<br />
fails, the Sunny WebBox will make further attempts to transmit the data. The "Maximum<br />
number of upload attempts per time window" value specifies the number of data<br />
transmission attempts the Sunny WebBox makes within the defined time window.<br />
3. Select the maximum number of upload attempts in each time window in the "Maximum number<br />
of upload attempts per time window" field.<br />
4. Select [Save].<br />
☑ The data upload is set.<br />
<strong>User</strong> <strong>Manual</strong> SWebBox-BEN111033 67
Settings <strong>SMA</strong> <strong>Solar</strong> <strong>Technology</strong> <strong>AG</strong><br />
10.7 Configuring the CSV Data Format<br />
1. Select "WebBox > Recording" on the user interface.<br />
2. In the "Format" field, select "CSV".<br />
3. Select [Configure].<br />
☑ The page for configuring the CSV data format opens.<br />
4. Select the desired format of the file name in the "Filename format" field.<br />
5. Make a selection in the "Create column headers" field.<br />
"yes" A header is added to the CSV file.<br />
"no" A header is not added to the CSV file.<br />
6. In the "End-of-line character" field, choose the control character that separates the individual<br />
lines of the CSV file.<br />
CSV data format for Excel import<br />
Microsoft Excel can automatically import CSV file data into tables if the separator and the<br />
number format are properly configured. If you want to import the CSV data into Microsoft<br />
Excel for evaluation, set the separator to "Comma" and "#.##" as the number format.<br />
7. In the "Separator character" field, select the separator that is used to separate the content in the<br />
CSV file.<br />
8. In the "Number format" field, select the desired number format.<br />
9. In the "Timestamp format" field, select the desired time format.<br />
10. Select [Save].<br />
☑ The CSV data format settings have been saved. Any changes you make will only apply to future<br />
files.<br />
68 SWebBox-BEN111033 <strong>User</strong> <strong>Manual</strong>
<strong>SMA</strong> <strong>Solar</strong> <strong>Technology</strong> <strong>AG</strong> Settings<br />
10.8 Retrieving or Requesting Data from the Device Memory<br />
Retrieving data from the device memory is only possible for <strong>SMA</strong> inverters of the<br />
type Sunny Backup.<br />
The Sunny WebBox (version 1.52 or higher) currently supports the retrieval of data from<br />
the device memory for <strong>SMA</strong> inverters of the type Sunny Backup.<br />
The Sunny WebBox allows you to retrieve data from the memory of devices that are supported and<br />
have been detected by the Sunny WebBox. This data can either be retrieved automatically or<br />
requested manually. The device memory contains both the error memory and the event memory of the<br />
connected devices. Data from the event memory can only be requested manually. Data from the error<br />
memory can either be requested manually or retrieved automatically by the Sunny WebBox. If you<br />
have enabled automatic retrieval of data from the error memory, the Sunny WebBox will monitor the<br />
error memory of the connected device and automatically request error data whenever changes are<br />
made.<br />
Regardless of which transmission method (automatic or manual) is being used, device memory data<br />
is organized chronologically in the event report of the Sunny WebBox. You can view the event report<br />
on the Sunny WebBox user interface (see section 8.4 "Displaying the Event Report" (page 49)).<br />
10.8.1 Activating/Deactivating Automatic Data Retrieval from<br />
Error Memory<br />
1. Select "WebBox > Recording > Device memory" in the user interface.<br />
2. To enable automatic retrieval of data from the error memory, select "yes" from the "Automatically<br />
retrieve data from error memory" field.<br />
or<br />
To disable this function, select "no" (default setting).<br />
3. Select [Save].<br />
☑ The error memory settings are now saved.<br />
10.8.2 <strong>Manual</strong>ly Requesting Data from the Error or Event Memory<br />
It is not possible to request data from the event memory and the error memory at the same<br />
time. Wait until the status of Sunny WebBox is "Idle" before requesting data from the device<br />
memory.<br />
1. Select "WebBox > Recording > Device memory" in the user interface.<br />
2. To begin manual retrieval of data from the error memory, select [request] from the "<strong>Manual</strong>ly<br />
requesting fault memory" field.<br />
3. To begin manual retrieval of data from the event memory, select [request] from the "<strong>Manual</strong>ly<br />
requesting event memory" field.<br />
☑ The Sunny WebBox is now configured to retrieve data from the selected device memory.<br />
<strong>User</strong> <strong>Manual</strong> SWebBox-BEN111033 69
Settings <strong>SMA</strong> <strong>Solar</strong> <strong>Technology</strong> <strong>AG</strong><br />
10.9 Notification in Case of Error<br />
10.9.1 Notes on Notification in Case of Error<br />
The Sunny WebBox can notify you by e-mail when an error event occurs. An Internet connection is<br />
required for this feature. If your Sunny WebBox comes with a GSM modem, you can also be notified<br />
via SMS. This allows you to react rapidly to failures in your PV plant and minimize downtime.<br />
. Sunny WebBox reports an error event after two intervals of data compression<br />
If you have activated the error alarms, the Sunny WebBox will send error events via e-mail<br />
and, if a GSM modem has been installed, via SMS. The Sunny WebBox reports error type<br />
events, which persist twice as long as the time set for forming averages for data<br />
compression (see section 9.6.1 "Setting Data Compression" (page 58)). For example, if<br />
you have set that the Sunny WebBox always forms averages after 15 minutes, Sunny<br />
WebBox reports error type events which persist for more than 30 minutes. The Sunny<br />
WebBox does not send warning and disturbance type events per e-mail or SMS.<br />
Additional costs for notification in case of error<br />
Depending the selected communication type, additional costs may be incurred to you for<br />
notification in case of error. Ask your service provider about possible additional costs.<br />
Warning or fault event reports from the Sunny Portal<br />
You can configure the Sunny Portal to send you reports on warning or fault events via<br />
e-mail. The e-mails can be forwarded to a cell phone via an e-mail to SMS message service<br />
provider. Sunny WebBox settings regarding enabled notification in the event of errors do<br />
not affect the event reports you can configure in Sunny Portal.<br />
Displaying Error, Warning and Disturbance Type Events via the user interface<br />
The Sunny WebBox enters error, warning and disturbance type events in the event report,<br />
and displays them via the user interface (see section 8.4 "Displaying the Event Report"<br />
(page 49)).<br />
70 SWebBox-BEN111033 <strong>User</strong> <strong>Manual</strong>
<strong>SMA</strong> <strong>Solar</strong> <strong>Technology</strong> <strong>AG</strong> Settings<br />
10.9.2 Enabling/Disabling Notification in Case of Error<br />
1. Integrate the Sunny WebBox in your network (see section 27) or configure the GSM modem<br />
(see section 29).<br />
2. Select "WebBox > Settings > Data transmission" in the user interface.<br />
3. Make a selection in the "Notification active" field.<br />
"yes" Notification is active. Adjust further settings.<br />
"no" Notification is not active. Select [Save].<br />
4. Make a selection in the "Multiple Notices" field.<br />
"yes" The Sunny WebBox will send you an SMS when an error event occurs. If the<br />
error persists after 24 hours and after 48 hours, Sunny WebBox will notify<br />
you in each case.<br />
"no" The Sunny WebBox will notify you once an error event occurs.<br />
5. Make a selection in the "send error as e-mail message" field:<br />
"yes" The Sunny WebBox informs you via email when an error type event occurs.<br />
The input field for the e-mail address appears. Continue with step 6.<br />
"no" Notification by e-mail is deactivated. Continue with step 8.<br />
6. Enter your e-mail address. If the Sunny WebBox is to send notification to multiple e-mail<br />
addresses, enter the e-mail addresses with commas as separators.<br />
7. Click [test].<br />
☑ The Sunny WebBox sends a test e-mail to the telephone number entered. If the test e-mail<br />
was not sent, check your e-mail inbox spam folder, your local network settings (see page<br />
27), or the settings and signal strength of the GSM modem (see page 29).<br />
8. If a GSM modem is installed on the Sunny WebBox, make a selection in the "Send error as SMS<br />
message" field.<br />
"yes" The Sunny WebBox informs you via SMS when an error type event occurs.<br />
The input field for the call number will appear. Continue with step 9.<br />
"no" Notification via <strong>SMA</strong> is deactivated. Continue with step 10.<br />
9. If a GSM modem is installed on your Sunny WebBox, enter the telephone number for SMS<br />
message notification and select [test].<br />
☑ The Sunny WebBox sends a test e-mail to the telephone number entered.<br />
10. Select [Save].<br />
☑ Notification in case of error is activated.<br />
<strong>User</strong> <strong>Manual</strong> SWebBox-BEN111033 71
Service Functions <strong>SMA</strong> <strong>Solar</strong> <strong>Technology</strong> <strong>AG</strong><br />
11 Service Functions<br />
11.1 Information on Firmware Updates<br />
You have the option of updating the Sunny WebBox firmware. The firmware can be updated with or<br />
without access to Sunny Portal. When the Sunny WebBox firmware is updated, all the settings and<br />
data will be saved.<br />
You can update the Sunny WebBox firmware in the following ways:<br />
• Firmware update via Sunny Portal<br />
• Firmware update via SD card<br />
The user interface is temporarily unavailable.<br />
During the update, the Sunny WebBox restarts and you cannot access the Sunny WebBox<br />
for a brief period.<br />
Do not disconnect the Sunny WebBox from the power supply during the update<br />
process.<br />
11.2 Firmware Update via Sunny Portal<br />
If the Sunny WebBox has portal access, you can choose to have the firmware updated automatically<br />
or manually. The Sunny WebBox checks whether a new firmware version is available every time data<br />
is transmitted to Sunny Portal. If a new firmware update is available, the Sunny WebBox will<br />
download and install the firmware update between 12:00 a.m. and 4:00 a.m. Automatic firmware<br />
update is activated on delivery.<br />
Automatic firmware update when using the Power Reducer Box<br />
With firmware version 1.52 or higher, you can also enable automatic firmware updates if<br />
you are using the Sunny WebBox with the Power Reducer Box.<br />
11.2.1 Enabling Automatic Firmware Update (recommended)<br />
1. Select "WebBox > Settings > Data transmission" in the user interface.<br />
☑The "Data transmission" page opens.<br />
2. Make a selection in the "Automatic firmware updates" field:<br />
"yes" Automatic firmware update is activated.<br />
"no" Automatic firmware update is deactivated.<br />
3. Select [Save].<br />
☑ Automatic firmware update is activated or deactivated depending on the setting.<br />
72 SWebBox-BEN111033 <strong>User</strong> <strong>Manual</strong>
<strong>SMA</strong> <strong>Solar</strong> <strong>Technology</strong> <strong>AG</strong> Service Functions<br />
11.2.2 <strong>Manual</strong>ly Updating the Firmware<br />
1. Select "WebBox > Info" on the user interface.<br />
☑The "System information" page opens. If a new firmware version is available, the new version<br />
is displayed.<br />
2. If a new version is available, select [Refresh].<br />
☑ The Sunny WebBox downloads and installs the new firmware.<br />
11.3 Firmware Update via SD Card<br />
Formatting the SD card.<br />
Only use SD cards which have been formatted with the FAT32 file system. The Sunny<br />
WebBox converts the SD card's file system to TFAT in order to increase data security. If you<br />
wish to clear the SD card, you must format the SD card on a computer with the FAT32 file<br />
system.<br />
Disabling write protection on the SD card.<br />
Write protection on the SD card must be disabled during the update process.<br />
1. Select the required update file in the downloads area of www.<strong>SMA</strong>.de/en and download it to<br />
your computer.<br />
2. Connect the SD card to the computer and create a folder called "Update" on the SD card.<br />
3. Copy the downloaded update file to the "Update" folder created on the SD card and then<br />
remove the SD card from the computer.<br />
Saving only 1 update file in the "Update" folder.<br />
The "Update" folder may only contain 1 update file. If there is more than 1 update file in<br />
the "Update" folder, the firmware will not be updated.<br />
4. Insert the SD card into the Sunny WebBox SD card slot.<br />
☑ The update starts automatically. The Sunny WebBox is again available via the user interface<br />
after a successful update procedure.<br />
5. Check whether the Sunny WebBox is available via the user interface.<br />
6. If the Sunny WebBox can be accessed via the user interface, you can remove the SD card.<br />
If the Sunny WebBox cannot be accessed via the user interface, do not remove the SD card.<br />
☑ The firmware is now updated.<br />
<strong>User</strong> <strong>Manual</strong> SWebBox-BEN111033 73
Service Functions <strong>SMA</strong> <strong>Solar</strong> <strong>Technology</strong> <strong>AG</strong><br />
11.4 Stopping the Sunny WebBox<br />
You can stop the Sunny WebBox in one of the following ways:<br />
• Stopping the Sunny WebBox via the user interface<br />
• Stopping the Sunny WebBox by removing the plug-in power supply from the socket<br />
Stopping the Sunny WebBox via the <strong>User</strong> Interface<br />
1. Log into the Sunny WebBox as an installer.<br />
2. Select "WebBox > Info" on the user interface.<br />
3. Select [Stop System].<br />
☑ A window containing a security question opens.<br />
4. Click [Confirm].<br />
☑ The Sunny WebBox quits all programs and switches off the Web server.<br />
5. If the "POWER" LED is green and all other LEDs are red, disconnect the plug-in power supply<br />
from the power outlet.<br />
☑ The Sunny WebBox has been stopped.<br />
Stopping the Sunny WebBox by removing the plug-in power supply from the<br />
socket<br />
Loss of data when disconnecting the Sunny WebBox from the power supply<br />
Do not remove the Sunny WebBox plug-in power supply from the socket when the<br />
"MEMORY" LED light is flashing orange.<br />
1. Remove the plug-in power supply from the socket.<br />
☑ The Sunny WebBox has been stopped.<br />
74 SWebBox-BEN111033 <strong>User</strong> <strong>Manual</strong>
<strong>SMA</strong> <strong>Solar</strong> <strong>Technology</strong> <strong>AG</strong> Service Functions<br />
11.5 Resetting the Sunny WebBox<br />
During resetting, specific Sunny WebBox settings are returned to the factory setting. If you only wish<br />
to restart the Sunny WebBox without resetting the settings, see section 11.4 "Stopping the Sunny<br />
WebBox" (page 74).<br />
Data backup<br />
Before you reset the Sunny WebBox, take note when necessary of all settings such as<br />
network or portal settings. In addition secure the PV plant data in order to avoid data<br />
losses.<br />
You can reset the Sunny WebBox in different ways and to various degrees:<br />
• Resetting the Sunny WebBox via the user interface<br />
• Reset the Sunny WebBox via the Reset button<br />
Via user interface Via reset button<br />
All settings will be reset. The Sunny WebBox is The following settings will be reset:<br />
now reset to the delivery status.<br />
•<br />
or<br />
Passwords<br />
•<br />
or<br />
Network settings<br />
• All settings The Sunny WebBox is now reset<br />
to the delivery status.<br />
After resetting, adjust the plant ID for Sunny Portal<br />
If you reset the Sunny WebBox settings, the Sunny WebBox will delete all login settings for<br />
Sunny Portal. If you start the Sunny WebBox without making further settings, the Sunny<br />
WebBox creates a new plant with a new plant identifier in Sunny Portal.<br />
If the Sunny WebBox is to send the data to the existing plant in Sunny Portal, take the<br />
following steps after the reset:<br />
• Assign the plant identifier of the old system to the replacement device (see section<br />
9.2.3 "Adjusting the Plant ID for Sunny Portal" (page 52)).<br />
• In the replacement device, enter the e-mail address of a user with administrator<br />
authorizations for the system in Sunny Portal.<br />
<strong>User</strong> <strong>Manual</strong> SWebBox-BEN111033 75
Service Functions <strong>SMA</strong> <strong>Solar</strong> <strong>Technology</strong> <strong>AG</strong><br />
Resetting the Sunny WebBox via the <strong>User</strong> Interface<br />
1. Log into the Sunny WebBox as an installer.<br />
2. Select "WebBox > Info" on the user interface.<br />
3. Select "Factory settings".<br />
☑ A window containing a security question opens.<br />
4. Click [Confirm].<br />
☑ The Sunny WebBox is now reset to its factory settings and switches off the Web server.<br />
5. If the "POWER" LED is green and all other LEDs are red, disconnect the plug-in power supply<br />
from the power outlet.<br />
6. Wait 15 seconds.<br />
7. Reconnect the plug-in power supply to the power outlet.<br />
☑ The Sunny WebBox will now start with the factory settings.<br />
Resetting the Sunny WebBox via the Reset Button<br />
Beginning with Sunny WebBox version E1, the hole for the Reset button is found on the rear panel of<br />
the Sunny WebBox under the upper left foot.<br />
Only press the reset button when the Sunny WebBox is switched on.<br />
1. If the Sunny WebBox is mounted on a top-hat rail, remove it from the top-hat rail.<br />
If the Sunny WebBox is mounted directly to a wall, push the Sunny WebBox upwards slightly<br />
and remove the Sunny WebBox from the top hat rail.<br />
Resetting specific Sunny WebBox settings.<br />
Depending on how long you press the Reset button, the Sunny WebBox performs the<br />
actions listed in the following table.<br />
Time Action<br />
1 − 5 seconds Resetting the passwords to the factory setting. All other settings<br />
(event memory, network settings, modem settings, and portal<br />
settings) will remain intact.<br />
5 − 15 seconds Resetting the network settings to the factory setting. All other<br />
settings (event memory, modem settings, portal settings and<br />
passwords) will remain intact.<br />
15 − 30 seconds Resets all settings (event memory, network settings, modem<br />
settings, Sunny Portal settings and passwords) of the Sunny<br />
WebBox to the default values. The Sunny WebBox deletes the<br />
plant data and plant settings completely.<br />
76 SWebBox-BEN111033 <strong>User</strong> <strong>Manual</strong>
<strong>SMA</strong> <strong>Solar</strong> <strong>Technology</strong> <strong>AG</strong> Service Functions<br />
2. Insert a pointed object (such as a paper clip) into<br />
the hole and press the reset button.<br />
☑ The Sunny WebBox is now reset.<br />
11.6 Deleting Device Descriptions<br />
1. Log into the Sunny WebBox as an installer.<br />
2. Select "WebBox > Info" on the user interface.<br />
3. Select [Delete device descriptions].<br />
☑ The unit descriptions of all devices will be erased. When the Sunny WebBox is restarted, all unit<br />
descriptions will be detected again automatically.<br />
<strong>User</strong> <strong>Manual</strong> SWebBox-BEN111033 77
Maintenance and Care <strong>SMA</strong> <strong>Solar</strong> <strong>Technology</strong> <strong>AG</strong><br />
12 Maintenance and Care<br />
12.1 Maintenance<br />
Conduct regular visual inspections of the Sunny WebBox to check for external damage or dirt.<br />
12.2 Care<br />
NOTICE!<br />
Damage or destruction of the Sunny WebBox due to ingress of liquids. The<br />
Sunny WebBox is not waterproof.<br />
• Protect the Sunny WebBox from wet conditions.<br />
• To clean the Sunny Beam, only use a lightly dampened cloth to prevent the<br />
penetration of moisture. If there is a considerable amount of dirt, you can also use a<br />
mild, non-abrasive, non-corrosive cleaning agent.<br />
78 SWebBox-BEN111033 <strong>User</strong> <strong>Manual</strong>
<strong>SMA</strong> <strong>Solar</strong> <strong>Technology</strong> <strong>AG</strong> Decommissioning<br />
13 Decommissioning<br />
13.1 Disassembling the Sunny WebBox<br />
DANGER!<br />
Risk of lethal electric shock when opening the inverter.<br />
• All work on the inverter may only be carried out by an electrically skilled person.<br />
• Disconnect the inverter on the AC and DC sides as described in the inverter manual.<br />
1. Stop the Sunny WebBox as described in section 11.4 "Stopping the Sunny WebBox"<br />
(page 74).<br />
2. If an SD card is in the SD card slot of the Sunny WebBox, remove it.<br />
3. Disconnect the DC plug connector of the plug-in power supply from the Sunny WebBox.<br />
4. If the Sunny WebBox is connected to the telephone network via a modem connection,<br />
disconnect the telephone cable from the Sunny WebBox.<br />
5. If the Sunny WebBox is connected directly to a computer or a local network via the Ethernet<br />
connection, disconnect the Ethernet cable from the Sunny WebBox.<br />
6. Remove the RS485 plug from the Sunny WebBox.<br />
7. If the Sunny WebBox is mounted on a top-hat rail, push the enclosure of the device slightly<br />
upwards and remove the Sunny WebBox from the rail.<br />
8. If the Sunny WebBox is mounted directly to a wall, push the Sunny WebBox slightly upwards<br />
and remove it from the wall.<br />
☑ The Sunny WebBox has been dismounted.<br />
13.2 Packaging the Sunny WebBox<br />
When returning the device to us, use packaging that adequately protects the device from damage<br />
during transport (use the original packing if possible).<br />
13.3 Disposing of the Sunny WebBox<br />
Dispose of the Sunny WebBox at the end of its service life in accordance with the disposal regulations<br />
for electronic waste which apply at the installation site at that time. Alternatively, send it back to <strong>SMA</strong><br />
with shipping paid by sender, and labeled "ZUR ENTSORGUNG" ("FOR DISPOSAL").<br />
<strong>User</strong> <strong>Manual</strong> SWebBox-BEN111033 79
Troubleshooting <strong>SMA</strong> <strong>Solar</strong> <strong>Technology</strong> <strong>AG</strong><br />
14 Troubleshooting<br />
Problem Cause Rectification<br />
The Sunny WebBox is<br />
not available via the<br />
user interface.<br />
Sunny WebBox is<br />
unable connect via DSL<br />
router.<br />
The network connection of the<br />
Sunny WebBox has been<br />
interrupted.<br />
The network settings of the<br />
computer do not match the<br />
network settings of the Sunny<br />
WebBox.<br />
The DSL routers of some<br />
manufacturers can become<br />
disconnected when the DSL<br />
router switches to energy saving<br />
mode.<br />
Make sure the Sunny WebBox is<br />
connected to the network. Check the<br />
network cable and all the connections of<br />
the Sunny WebBox and the computer.<br />
Determine the network settings of the<br />
Sunny WebBox (see section<br />
15.2 "Determining the Network Settings<br />
of the Sunny WebBox" (page 85)).<br />
Configure your computer based on the<br />
Sunny WebBox network settings (see<br />
section 15.2 "Determining the Network<br />
Settings of the Sunny WebBox"<br />
(page 85)).<br />
Check the settings of your router.<br />
Check your Web browser settings. If<br />
necessary, set an exception for a proxy<br />
server.<br />
Reset the network settings of the Sunny<br />
WebBox via the Reset button (see<br />
section "Resetting the Sunny WebBox<br />
via the Reset Button" (page 76)). Press<br />
and hold the reset button for 5 − 15<br />
seconds. Set your computer to the Sunny<br />
WebBox default settings as described in<br />
section 6.4.2 "Windows 7, Windows<br />
Vista" (page 22).<br />
Disable the energy saving mode of the<br />
DSL router.<br />
Use the "LAN 1" port of the DSL router<br />
since the energy saving mode for this<br />
port is usually disabled by default.<br />
80 SWebBox-BEN111033 <strong>User</strong> <strong>Manual</strong>
<strong>SMA</strong> <strong>Solar</strong> <strong>Technology</strong> <strong>AG</strong> Troubleshooting<br />
Problem Cause Rectification<br />
Sunny WebBox is<br />
unable to connect via<br />
the GSM modem.<br />
Sunny WebBox restarts<br />
repeatedly.<br />
The GSM modem settings are<br />
not correct.<br />
The SIM card is not enabled for<br />
operation.<br />
The GSM modem signal<br />
strength is not sufficient.<br />
There is more than one update<br />
file in the "Update" folder on the<br />
SD card.<br />
Check the GSM modem settings (see<br />
section 10.4.1 "Testing the Connection"<br />
(page 65)). Perform a connection test<br />
(see section 10.4.1 "Testing the<br />
Connection" (page 65)). Correct the<br />
settings if necessary.<br />
Check whether the SIM card is enabled<br />
for operation. If necessary, have the card<br />
enabled for operation.<br />
Test the GSM modem signal strength<br />
(see section 10.4.2 "Testing the Signal<br />
Strength of the GSM Modem"<br />
(page 65)). If sufficient reception is not<br />
possible in the building, use the optimal<br />
GSM antenna extension set for outside<br />
installation (see section 16 "Accessories"<br />
(page 95)).<br />
Remove the SD card from the SD card<br />
slot of the Sunny WebBox. Make sure<br />
there is only one update file in the<br />
"Update" folder on the SD card. Once<br />
the startup process of the Sunny<br />
WebBox is complete, restart the<br />
firmware update (see section<br />
11.3 "Firmware Update via SD Card"<br />
(page 73)).<br />
<strong>User</strong> <strong>Manual</strong> SWebBox-BEN111033 81
Troubleshooting <strong>SMA</strong> <strong>Solar</strong> <strong>Technology</strong> <strong>AG</strong><br />
Problem Cause Rectification<br />
Sunny WebBox unable<br />
to detect devices<br />
connected to the<br />
RS485 bus.<br />
The Sunny WebBox will<br />
not transmit data to<br />
Sunny Portal.<br />
The data upload to<br />
Sunny Portal via the<br />
analog or GSM modem<br />
fails repeatedly.<br />
The data transmission protocol<br />
and the baud rate are not<br />
configured properly.<br />
Data transmission is<br />
deactivated.<br />
Incorrect Internet Service<br />
Provider data.<br />
Make sure the data transmission<br />
protocol and the baud rate for the<br />
connected devices are configured<br />
properly (see section 10.2.1 "Setting<br />
<strong>SMA</strong>-COM" (page 61)).<br />
Check the cabling of the devices on the<br />
RS485 communication bus. Refer to the<br />
RS485 cabling diagram for information<br />
on how the cables should be connected<br />
to the RS485 communication bus.<br />
Make sure the RS485 cable is properly<br />
connected to the Sunny WebBox. Check<br />
all connections (see section<br />
6.8.2 "Connecting the Sunny WebBox<br />
to the RS485 Communication Bus"<br />
(page 37)).<br />
Check the termination and signal biasing<br />
of the RS485 communication bus (see<br />
section 6.8.2 "Connecting the Sunny<br />
WebBox to the RS485 Communication<br />
Bus" (page 37)).<br />
Configure data transmission to the Sunny<br />
Portal (see section 9.2.1 "Registering<br />
Sunny WebBox in the Sunny Portal"<br />
(page 51)).<br />
Check the specified plant name and email<br />
address. You may need to register<br />
an account on the Sunny Portal again.<br />
Contact the <strong>SMA</strong> Serviceline.<br />
Check the entered data of your Internet<br />
Service Provider.<br />
82 SWebBox-BEN111033 <strong>User</strong> <strong>Manual</strong>
<strong>SMA</strong> <strong>Solar</strong> <strong>Technology</strong> <strong>AG</strong> Troubleshooting<br />
Problem Cause Rectification<br />
Sunny WebBox does<br />
not transmit data via FTP<br />
push. The "NETCOM"<br />
LED glows red.<br />
After an FTP download,<br />
the Internet Explorer<br />
shows old Sunny<br />
WebBox data.<br />
The Sunny WebBox<br />
daily reports and<br />
monthly reports are<br />
incomplete.<br />
The events in the event<br />
report do not appear in<br />
the usual positions<br />
under "time".<br />
The FTP push function is<br />
deactivated.<br />
You are not connected to the<br />
Internet.<br />
The Sunny WebBox FTP push<br />
function is not set correctly.<br />
Given the way Microsoft<br />
Internet Explorer handles cache,<br />
the Sunny WebBox may load<br />
outdated data.<br />
Sunny WebBox Communication<br />
via the GSM modem is not<br />
sufficiently stable. The Sunny<br />
WebBox is not transmitting the<br />
complete daily reports and<br />
monthly reports.<br />
The Sunny WebBox attempts the<br />
next upload before the current<br />
data transmission is finished. The<br />
data transmission starts over<br />
again.<br />
The time settings of the Sunny<br />
WebBox and the connected<br />
device do not match.<br />
Activate the FTP push function of the<br />
Sunny WebBox (see section 9.4 "FTP<br />
Push Function" (page 55)).<br />
Reestablish Internet access. If necessary,<br />
contact your Internet Service Provider.<br />
Check that the server address, the user<br />
name and the password are set correctly<br />
in the FTP push settings (see section<br />
9.4 "FTP Push Function" (page 55)).<br />
Check whether the user has write<br />
authorizations to the server's upload<br />
directory (see section 9.4 "FTP Push<br />
Function" (page 55)).<br />
Check whether the server port is set to the<br />
correct value (see section 9.4 "FTP Push<br />
Function" (page 55)).<br />
Test the Sunny WebBox FTP push<br />
function (see section 9.4 "FTP Push<br />
Function" (page 55)).<br />
Use an FTP client such as FileZilla to load<br />
data from the internal FTP server of the<br />
Sunny WebBox.<br />
Choose a better mounting location for<br />
the GSM antenna (see section<br />
6.7.4 "Determining the Mounting /<br />
Installation Location for the GSM<br />
Version" (page 33)).<br />
If sufficient reception is not possible in the<br />
building, use the optimal GSM antenna<br />
extension set for outside installation (see<br />
section 16 "Accessories" (page 95)).<br />
Reduce the maximum number of upload<br />
attempts in a time window (see section<br />
10.6 "Setting Data Upload" (page 67)).<br />
Synchronize the time settings of the<br />
Sunny WebBox and the connected<br />
device (see respective manuals).<br />
<strong>User</strong> <strong>Manual</strong> SWebBox-BEN111033 83
Troubleshooting <strong>SMA</strong> <strong>Solar</strong> <strong>Technology</strong> <strong>AG</strong><br />
Problem Cause Rectification<br />
none<br />
Events in the event<br />
report do not appear in<br />
the language you<br />
selected.<br />
After a Sunny WebBox<br />
is replaced, Sunny<br />
Portal contains two<br />
plants with the same<br />
name.<br />
Sunny WebBox unable<br />
to detect an inserted SD<br />
card.<br />
The "<strong>SMA</strong>COM" LED<br />
glows red.<br />
The "SYSTEM" LED<br />
glows red.<br />
The text messages for events in<br />
the connected device are not in<br />
the language you selected.<br />
A Sunny WebBox that is<br />
supplied as a replacement<br />
device logs into Sunny Portal<br />
with a new plant identifier.<br />
Sunny Portal creates a new plant<br />
for this plant ID, even if you gave<br />
the plant the same name.<br />
External storage is disabled in<br />
the Sunny WebBox settings.<br />
The SD card is not formatted<br />
with the FAT32 file system.<br />
The Sunny WebBox does not<br />
support SD cards with storage<br />
capacities of over 2 GB or<br />
SDHC cards.<br />
The SD card is not compatible<br />
with the Sunny WebBox.<br />
More than one master is<br />
connected on the RS485<br />
communication bus. On a<br />
communication bus, a master<br />
can access the shared<br />
communication bus at any time.<br />
It does not have to take other<br />
devices into consideration. If<br />
more than one master is<br />
connected to the communication<br />
bus, the devices will block each<br />
other.<br />
The operating system of the<br />
Sunny WebBox is damaged.<br />
Assign the plant identifier of the old<br />
system to the replacement device (see<br />
section 9.2.3 "Adjusting the Plant ID for<br />
Sunny Portal" (page 52)).<br />
In the replacement device, enter the email<br />
address of a user who has Sunny<br />
Portal administrator rights to the plant.<br />
In Sunny Portal, delete the new plant the<br />
replacement device created.<br />
Enable external storage in the Sunny<br />
WebBox settings (see section<br />
9.6 "Storing Recorded Data on an SD<br />
Card" (page 57)).<br />
Format the SD card with the FAT32 file<br />
system.<br />
Use SD cards with less than 2 GB of<br />
storage capacity.<br />
Use one of the SD cards supplied by<br />
<strong>SMA</strong>. Compatibility with all SD cards<br />
available on the market cannot be<br />
guaranteed.<br />
Make sure that no more than one master<br />
is connected to the RS485<br />
communication bus. <strong>SMA</strong> devices which<br />
can be connected to a communication<br />
bus as a master include the Sunny<br />
WebBox and Sunny Boy Control.<br />
Contact the <strong>SMA</strong> Serviceline.<br />
84 SWebBox-BEN111033 <strong>User</strong> <strong>Manual</strong>
<strong>SMA</strong> <strong>Solar</strong> <strong>Technology</strong> <strong>AG</strong> Appendix<br />
15 Appendix<br />
15.1 Allocating an IP Address in a Local Network<br />
You select a static IP address (Internet Protocol). Use the address range which is available to your<br />
router. In most cases the address range of the router lies between 192.168.0.1. and<br />
192.168.255.254. If necessary refer to the manual of your router.<br />
Please note during the allocation of the IP address that the first three address parts of the IP address<br />
must be identical for all participants of the same network. You may not allocate the same IP address<br />
twice.<br />
Example:<br />
Router: 192.168.0.1<br />
Computer 1 192.168.0.2<br />
Computer 2 192.168.0.3<br />
Sunny WebBox 192.168.0.168<br />
15.2 Determining the Network Settings of the Sunny WebBox<br />
With the following steps you can determine the current network settings of the Sunny WebBox. You<br />
can then configure your computer to allow you to access the Sunny WebBox again (see section<br />
10.3 "Ethernet Network" (page 62)).<br />
1. If necessary, remove the write protection of the SD card.<br />
2. Insert the SD card into the SD card slot of the Sunny WebBox (see section 9.6 "Storing<br />
Recorded Data on an SD Card" (page 57)).<br />
☑"MEMORY" LED flashes orange. The Sunny WebBox saves data to a specific directory<br />
folder on the SD card The name of the data file is "WebBox_[SerialNumber]", whereby<br />
[SerialNumber] designates the serial number of the respective Sunny WebBox.<br />
3. Wait until the "MEMORY" LED glows green.<br />
4. Remove the SD card from the SD card slot of the Sunny WebBox.<br />
5. Connect the SD card to a computer.<br />
6. Open the directory on the SD card ("WebBox_SerialNumber").<br />
This directory contains a file named "config.xml".<br />
7. Open the "config.xml" with a text editor or Internet Explorer.<br />
☑ Open the configuration file of the Sunny WebBox. See the configuration file for the required<br />
information (see section 15.3 "Structure of the Config.xml File" (page 86)).<br />
<strong>User</strong> <strong>Manual</strong> SWebBox-BEN111033 85
Appendix <strong>SMA</strong> <strong>Solar</strong> <strong>Technology</strong> <strong>AG</strong><br />
15.3 Structure of the Config.xml File<br />
<br />
<br />
<br />
<br />
<br />
<br />
<br />
<br />
<br />
<br />
<br />
<br />
<br />
<br />
<br />
<br />
(...)<br />
<br />
<br />
Setting Meaning<br />
Version Sunny WebBox firmware version<br />
Plant ID Plant ID for Sunny Portal<br />
<strong>User</strong> ID <strong>User</strong> ID for Sunny Portal<br />
DHCP Displays "true" when DHCP use is enabled and "false" when DHCP use is<br />
disabled.<br />
IP address The IP address of the Sunny WebBox as configured by the user or obtained<br />
from the DHCP server.<br />
SubNetMask The subnet mask of the Sunny WebBox as configured by the user or obtained<br />
from the DHCP server.<br />
Gateway The gateway address of the Sunny WebBox as configured by the user or<br />
obtained from the DHCP server.<br />
DNS server The DNS server address of the Sunny WebBox as configured by the user or<br />
obtained from the DHCP server.<br />
86 SWebBox-BEN111033 <strong>User</strong> <strong>Manual</strong>
<strong>SMA</strong> <strong>Solar</strong> <strong>Technology</strong> <strong>AG</strong> Appendix<br />
15.4 Structure of the Info.xml File<br />
<br />
<br />
150002132<br />
00-40-AD-1E-08-54<br />
2009-07-21T15:43:20<br />
1.50<br />
1.26<br />
<br />
Description of the XML tags<br />
Setting Meaning<br />
Serial number Sunny WebBox serial number.<br />
MacAddress Hardware address of the Sunny WebBox.<br />
Created Time of the FTP push connection test<br />
Version The current firmware version of the Sunny WebBox<br />
OSVersion Version of the Sunny WebBox operating system<br />
<strong>User</strong> <strong>Manual</strong> SWebBox-BEN111033 87
Appendix <strong>SMA</strong> <strong>Solar</strong> <strong>Technology</strong> <strong>AG</strong><br />
15.5 Structure of an XML Data File<br />
<br />
<br />
<br />
2010-02-10T01:37:04<br />
de<br />
<br />
<br />
WR38-006:2000333615:Ipv<br />
10.360<br />
20.225<br />
10.360<br />
20.225<br />
14.425071<br />
14<br />
900<br />
2010-06-23T16:30:38<br />
<br />
(...)<br />
<br />
<br />
Description of the XML tags<br />
Setting Meaning<br />
Info Information<br />
Created Date of generation<br />
Culture Language<br />
MeanPublic Data of the mean values<br />
Key Name of the element made up of device name, serial number of the device and<br />
the channel. Individual values are separated by a colon. Example:<br />
WR38-006:2000333615:Ipv<br />
First The first value prior to the query<br />
Load The last value of the query<br />
Min Smallest value of the measurement interval<br />
Max Largest value of the measurement interval<br />
Mean Average value of the measurement interval<br />
88 SWebBox-BEN111033 <strong>User</strong> <strong>Manual</strong>
<strong>SMA</strong> <strong>Solar</strong> <strong>Technology</strong> <strong>AG</strong> Appendix<br />
Base Number of measured values in the interval<br />
Period Length of the measurement interval in seconds<br />
TimeStamp Time stamp, at which the average was calculated<br />
15.6 Sunny WebBox with GSM Modem<br />
15.6.1 Notes on GSM Card Contract<br />
In contrast to land line telephones, cell phone network providers distinguish between voice and data<br />
services. For example, cell phone network providers provide different telephone numbers for voice<br />
and data for GSM devices.<br />
If both outgoing and incoming data connections are necessary, a GSM device will need its own data<br />
number for CSD data services. The Sunny WebBox does not support other data services. A standard<br />
SIM card with additional data connectivity has two telephone numbers (multi-numbering). You can<br />
apply for additional data connectivity with your service provider when obtaining a contract. Outgoing<br />
data connections from the Sunny WebBox (access to an Internet service provider) are possible<br />
without an additional data number.<br />
15.6.2 Selecting the GSM Tariff<br />
Select a GSM tariff based on the data volume of the connected devices. Refer to the following table<br />
to find out about the inverter’s expected monthly data volume.<br />
Selecting the right GSM tariff<br />
The specified data volumes only serve a rough guide. They are based on the number of<br />
connected devices and their settings. Contact <strong>SMA</strong> if you have any questions about which<br />
tariff to choose.<br />
GPRS data transmission<br />
The Sunny WebBox's GSM modem supports GPRS data transmission.<br />
Sunny WebBox with...<br />
...up to 5 devices ...up to 30 devices ...up to 50 devices<br />
ca. 30 MB per month* ca. 300 MB per month* ca. 400 MB per month*<br />
*These values represent estimated data volume. No responsibility is taken for the correctness of this information.<br />
<strong>User</strong> <strong>Manual</strong> SWebBox-BEN111033 89
Appendix <strong>SMA</strong> <strong>Solar</strong> <strong>Technology</strong> <strong>AG</strong><br />
15.6.3 GSM Card Contracts in Germany<br />
ISP telephone<br />
number<br />
T-D1<br />
Cell phone network provider*<br />
Vodafone e-plus<br />
*99***1# *99***1# *99***1#<br />
ISP user name t-d1 d2 e-plus<br />
ISP password sma sma gprs<br />
GMS SIM PIN Based on the documentation you received.<br />
GPRS APN internet.t-d1.de web.vodafone.de internet.eplus.de<br />
No responsibility is taken for the correctness of this information. Subject to errors and changes. The above information only applies<br />
to Germany. (Status as of: 2010-07-01)<br />
15.6.4 Retrofitting the SIM Card<br />
This section describes how to retrofit an SIM card. You only need to retrofit a SIM card if you ordered<br />
the following Sunny WebBox:<br />
<strong>SUNNY</strong><strong>WEBBOX</strong>-x5xx (integrated GSM modem without an integrated SIM card).<br />
NOTICE!<br />
Electrostatic discharges (ESD) may damage or destroy the Sunny WebBox.<br />
• Installation work on the Sunny WebBox may only be performed by qualified<br />
personnel.<br />
• Avoid coming into contact with components' connections and plug contacts.<br />
• Ground yourself before working on the device.<br />
1. Using a Phillips screwdriver, unscrew the 4 screws<br />
at the rear and store them in a safe place.<br />
2. Turn the Sunny WebBox so that the lid faces<br />
upwards.<br />
3. Remove the lid of the Sunny WebBox and store it in<br />
a safe place.<br />
90 SWebBox-BEN111033 <strong>User</strong> <strong>Manual</strong>
<strong>SMA</strong> <strong>Solar</strong> <strong>Technology</strong> <strong>AG</strong> Appendix<br />
4. Insert the SIM card into the Sunny WebBox.<br />
5. Position the lid of the Sunny WebBox on the<br />
enclosure and screw it into place.<br />
☑ The SIM card is retrofitted.<br />
15.6.5 Replacing the SIM card<br />
This section describes how to replace a SIM card if you want to install the SIM card of your new cell<br />
phone network provider.<br />
NOTICE!<br />
Electrostatic discharges (ESD) may damage or destroy the Sunny WebBox.<br />
• Installation work on the Sunny WebBox may only be performed by qualified<br />
personnel.<br />
• Avoid coming into contact with components' connections and plug contacts.<br />
• Ground yourself before working on the device.<br />
1. Using a Phillips screwdriver, unscrew the 4 screws<br />
at the rear and store them in a safe place.<br />
2. Turn the Sunny WebBox so that the lid faces upwards.<br />
3. Remove the lid of the Sunny WebBox and store it in a safe place.<br />
<strong>User</strong> <strong>Manual</strong> SWebBox-BEN111033 91
Appendix <strong>SMA</strong> <strong>Solar</strong> <strong>Technology</strong> <strong>AG</strong><br />
4. Remove the old SD card from the Sunny WebBox.<br />
5. Insert new SIM card in the Sunny WebBox.<br />
6. Position the lid of the Sunny WebBox on the<br />
enclosure and screw it into place.<br />
☑ The SIM card is replaced.<br />
92 SWebBox-BEN111033 <strong>User</strong> <strong>Manual</strong>
<strong>SMA</strong> <strong>Solar</strong> <strong>Technology</strong> <strong>AG</strong> Appendix<br />
15.6.6 Accessing Sunny WebBox via Integrated Analog Modem<br />
This section describes how to access your Sunny WebBox from any computer with a modem via the<br />
integrated modem.<br />
The computer must be equipped with an analog modem or an ISDN modem with CAPI driver.<br />
IP addresses assigned to Sunny WebBox and modem<br />
The Sunny WebBox is assigned the IP address 192.168.0.168 in your network. The<br />
modem on the receiver is assigned the IP address 192.168.0.169 in your network. These<br />
IP addresses may not be assigned to other devices in your computer's network.<br />
1. Install and connect the computer modem to the telephone network as described in the modem's<br />
user manual.<br />
2. Start Internet Explorer on the computer.<br />
3. In Internet Explorer, select "Tools > Internet Options".<br />
☑The "Internet Options" window opens.<br />
4. Select the "Connections" tab.<br />
5. Select [LAN Settings].<br />
6. If there is no checkmark in the "Use a proxy server for your LAN" box, continue to section<br />
"Configure dial-up connection".<br />
7. If there is a checkmark in the "Use a proxy server for LAN" box, click "Advanced...".<br />
8. Add "192.168.*" at the end of the entry in the "Do not use proxy server for addresses beginning<br />
with" field. Use semicolons to separate multiple entries.<br />
9. Select [OK] in the "Proxy Settings" window.<br />
10. Select [OK] in the "Local Area Network (LAN) Settings" window.<br />
11. Select [OK] in the "Internet Options" window.<br />
☑ Internet Explorer is now configured.<br />
<strong>User</strong> <strong>Manual</strong> SWebBox-BEN111033 93
Appendix <strong>SMA</strong> <strong>Solar</strong> <strong>Technology</strong> <strong>AG</strong><br />
Establishing a Dial-Up Connection Using Windows XP as an Example<br />
1. In Windows, go to "Start > Settings > Network Connections" and then select "New Connection"<br />
from the File menu.<br />
☑The "New Connection Wizard" window opens.<br />
2. Select [Next].<br />
☑ A window for selecting the network connection type opens.<br />
3. Select "Connect to the Internet" and click [Next].<br />
4. Select "Set up my connection manually" and click [Next].<br />
☑ A window for selecting the Internet connection opens.<br />
5. Select "Connect using a dial-up modem" and click [Next]. Make the same selection when<br />
connecting via ISDN.<br />
☑ A window for entering the connection name opens.<br />
6. Enter a connection name and click [Next].<br />
☑The "Phone number to dial" window opens.<br />
7. Enter the number of your Sunny WebBox and select [Next].<br />
Enter 0 before the telephone number if your computer is connected to a telephone system which<br />
requires you to first press 0 before connecting to outside lines.<br />
☑The "Connection Availability" window opens.<br />
8. Select the access rights for the connection.<br />
If you are not certain, select "All users".<br />
9. Select [Next].<br />
☑The "Internet Account Information" window opens.<br />
10. Enter "<strong>User</strong> name" (either "<strong>User</strong>" or "Installer").<br />
The user group selection does not affect the access rights to the Sunny WebBox.<br />
11. Enter the password.<br />
12. Select [Next].<br />
☑ A summary of the selections you made appears.<br />
13. Select "Finish".<br />
☑ The dial-up connection set up has been completed. The computer establishes a connection.<br />
94 SWebBox-BEN111033 <strong>User</strong> <strong>Manual</strong>
<strong>SMA</strong> <strong>Solar</strong> <strong>Technology</strong> <strong>AG</strong> Accessories<br />
16 Accessories<br />
16.1 Outdoor GSM Antenna<br />
The outdoor GSM antenna allows you to connect the Sunny WebBox to the GSM network. The<br />
prefabricated cable length is 10 m.<br />
Order number: SWB-OUTANGSM 100<br />
16.2 SD Cards<br />
As an alternative to the internal ring buffer, you can also store data from the Sunny WebBox on an<br />
SD card.<br />
Order number for SD card with 1 GB of memory: SD-Card 1 GB<br />
Order number for SD card with 2 GB of memory: SD-Card 2 GB<br />
16.3 RS485 Communication Cable<br />
With the RS485 communication cable, you can connect the Sunny WebBox to the RS485<br />
communication bus.<br />
Order number for <strong>SMA</strong> communication cable (outdoor): COMCAB-OUTxxxx *<br />
Order number for <strong>SMA</strong> communication cable (indoor): COMCAB-INxxxx **<br />
* *available in the following lengths xxx = 100 m / 200 m / 500 m / 1 000 m<br />
** *available in the following lengths xxx = 100 m / 200 m / 500 m / 1 000 m<br />
<strong>User</strong> <strong>Manual</strong> SWebBox-BEN111033 95
Technical Data <strong>SMA</strong> <strong>Solar</strong> <strong>Technology</strong> <strong>AG</strong><br />
17 Technical Data<br />
17.1 Sunny WebBox<br />
Mechanical Data<br />
Width x height x depth 255 mm x 130 mm x 57 mm<br />
Weight 750 g<br />
Power Supply<br />
Typical power consumption 4 W<br />
Maximum power consumption 10 W<br />
Environmental Conditions<br />
Ambient temperature –20 °C ... +65 °C<br />
Relative air humidity 5 % … 95 %, non-condensing<br />
Degree of protection *<br />
IP20<br />
Mounting location Indoors<br />
*<br />
Communication<br />
Other<br />
Degree of protection according to DIN 60529<br />
Inverters other than Sunny Central RS485, maximum 50 inverters<br />
Sunny Central RS485, 10/100 Mbit Ethernet,<br />
maximum 50 inverters<br />
Computer 10/100 Mbit Ethernet<br />
Modem *<br />
Analog, GSM<br />
RS485 communication range 1 200 m<br />
Ethernet communication range 100 m<br />
*<br />
optional<br />
Languages for the software user interface German, English, French, Italian, Spanish, Greek,<br />
Korean, Portuguese, Czech, Dutch<br />
Internal ring buffer 8 MB<br />
Additional memory via SD memory cards *<br />
128 MB / 512 MB / 1 GB / 2 GB<br />
* optional<br />
96 SWebBox-BEN111033 <strong>User</strong> <strong>Manual</strong>
<strong>SMA</strong> <strong>Solar</strong> <strong>Technology</strong> <strong>AG</strong> Technical Data<br />
17.2 Plug-in Power Supply (CINCON, TRG30R 120)<br />
Mechanical Data<br />
Width x height x depth 107.8 mm x 57.5 mm x 33.5 mm<br />
Weight 300 g<br />
Power Supply<br />
Voltage 100 V − 240 V AC, 50 / 60 Hz<br />
Nominal current 0.8 A<br />
<strong>User</strong> <strong>Manual</strong> SWebBox-BEN111033 97
Contact <strong>SMA</strong> <strong>Solar</strong> <strong>Technology</strong> <strong>AG</strong><br />
18 Contact<br />
If you have technical problems concerning our products, contact the <strong>SMA</strong> Serviceline. We need the<br />
following information in order to provide you with the necessary assistance:<br />
• Operating system of your computer<br />
• Sunny WebBox software version<br />
• Serial number and hardware version of your Sunny WebBox.<br />
• Type of communication interface between Sunny WebBox and the inverters<br />
• Type and serial numbers of the inverters connected to the plant.<br />
• If you need to send in the Sunny WebBox, be sure to remove the SD card from the SD card slot<br />
of the Sunny WebBox.<br />
<strong>SMA</strong> <strong>Solar</strong> <strong>Technology</strong> <strong>AG</strong><br />
Sonnenallee 1<br />
34266 Niestetal, Germany<br />
www.<strong>SMA</strong>.de<br />
<strong>SMA</strong> Serviceline<br />
Inverters: +49 561 9522 1499<br />
Communication: +49 561 9522 2499<br />
Fax: +49 561 9522 4699<br />
E-Mail: Serviceline@<strong>SMA</strong>.de<br />
98 SWebBox-BEN111033 <strong>User</strong> <strong>Manual</strong>
<strong>SMA</strong> <strong>Solar</strong> <strong>Technology</strong> <strong>AG</strong> Legal Restrictions<br />
The information contained in this document is the property of <strong>SMA</strong> <strong>Solar</strong> <strong>Technology</strong> <strong>AG</strong>. Publishing its content, either partially or<br />
in full, requires the written permission of <strong>SMA</strong> <strong>Solar</strong> <strong>Technology</strong> <strong>AG</strong>. Any internal company copying of the document for the<br />
purposes of evaluating the product or its correct implementation is allowed and does not require permission.<br />
Exclusion of liability<br />
The general terms and conditions of delivery of <strong>SMA</strong> <strong>Solar</strong> <strong>Technology</strong> <strong>AG</strong> shall apply.<br />
The content of these documents is continually checked and amended, where necessary. However, discrepancies cannot be<br />
excluded. No guarantee is made for the completeness of these documents. The latest version is available online at www.<strong>SMA</strong>.de<br />
or from the usual sales channels.<br />
Guarantee or liability claims for damages of any kind are excluded if they are caused by one or more of the following:<br />
• Damages during transportation<br />
• Improper or inappropriate use of the product<br />
• Operating the product in an unintended environment<br />
• Operating the product whilst ignoring relevant, statutory safety regulations in the deployment location<br />
• Ignoring safety warnings and instructions contained in all documents relevant to the product<br />
• Operating the product under incorrect safety or protection conditions<br />
• Altering the product or supplied software without authority<br />
• The product malfunctions due to operating attached or neighboring devices beyond statutory limit values<br />
• In case of unforeseen calamity or force majeure<br />
The use of supplied software produced by <strong>SMA</strong> <strong>Solar</strong> <strong>Technology</strong> <strong>AG</strong> is subject to the following conditions:<br />
• <strong>SMA</strong> <strong>Solar</strong> <strong>Technology</strong> <strong>AG</strong> rejects any liability for direct or indirect damages arising from the use of software developed by<br />
<strong>SMA</strong> <strong>Solar</strong> <strong>Technology</strong> <strong>AG</strong>. This also applies to the provision or non-provision of support activities.<br />
• Supplied software not developed by <strong>SMA</strong> <strong>Solar</strong> <strong>Technology</strong> <strong>AG</strong> is subject to the respective licensing and liability agreements<br />
of the manufacturer.<br />
<strong>SMA</strong> Factory Warranty<br />
The current guarantee conditions come enclosed with your device. These are also available online at www.<strong>SMA</strong>.de and can be<br />
downloaded or are available on paper from the usual sales channels if required.<br />
Trademarks<br />
All trademarks are recognized even if these are not marked separately. Missing designations do not mean that a product or brand<br />
is not a registered trademark.<br />
The Bluetooth ® word mark and logos are registered trademarks owned by Bluetooth SIG, Inc. and any use of such marks by <strong>SMA</strong><br />
<strong>Solar</strong> <strong>Technology</strong> <strong>AG</strong> is under license.<br />
<strong>SMA</strong> <strong>Solar</strong> <strong>Technology</strong> <strong>AG</strong><br />
Sonnenallee 1<br />
34266 Niestetal<br />
Germany<br />
Tel. +49 561 9522-0<br />
Fax +49 561 9522-100<br />
www.<strong>SMA</strong>.de<br />
E-Mail: info@<strong>SMA</strong>.de<br />
© 2004 to 2011 <strong>SMA</strong> <strong>Solar</strong> <strong>Technology</strong> <strong>AG</strong>. All rights reserved<br />
<strong>User</strong> <strong>Manual</strong> SWebBox-BEN111033 99
��������������������<br />
�����������������<br />
�����������������������<br />
����������<br />
����������������<br />
�������������������<br />
�����������������������������������<br />
������������������������<br />
����������������<br />
�������������������<br />
��������������������������������<br />
�����������������<br />
�������������������������<br />
�����������������<br />
�����������������<br />
������������������<br />
�������������<br />
������������������<br />
����������������������������������<br />
�������������������<br />
�����������������<br />
������������������<br />
������������������������������<br />
�����������������