(RK II oder RK III) Owner's Manual for Foil R20 ... - Bartels GmbH
(RK II oder RK III) Owner's Manual for Foil R20 ... - Bartels GmbH
(RK II oder RK III) Owner's Manual for Foil R20 ... - Bartels GmbH

Erfolgreiche ePaper selbst erstellen
Machen Sie aus Ihren PDF Publikationen ein blätterbares Flipbook mit unserer einzigartigen Google optimierten e-Paper Software.
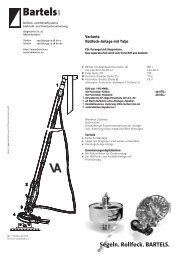
<strong>Bartels</strong><br />
<strong>GmbH</strong><br />
Headsail Furling and Reefing Systems<br />
Stainless Steel and Wire Processing<br />
Bergheimer Str. 26<br />
88677 MA<strong>RK</strong>DORF / GERMANY<br />
Tel +49 (0)7544 – 958600<br />
Fax +49 (0)7544 – 9586060<br />
http://www.bartels.eu<br />
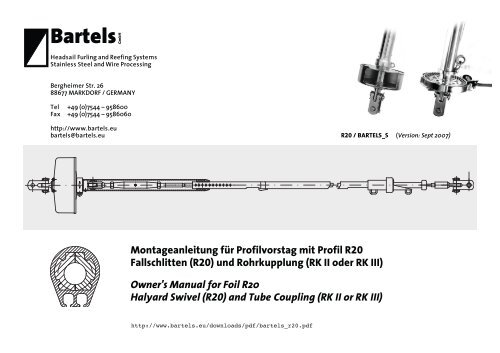
bartels@bartels.eu <strong>R20</strong> / BARTELS_S (Version: Sept 2007)<br />
Montageanleitung für Profilvorstag mit Profil <strong>R20</strong><br />
Fallschlitten (<strong>R20</strong>) und Rohrkupplung (<strong>RK</strong> <strong>II</strong> <strong>oder</strong> <strong>RK</strong> <strong>II</strong>I)<br />
<strong>Owner's</strong> <strong>Manual</strong> <strong>for</strong> <strong>Foil</strong> <strong>R20</strong><br />
Halyard Swivel (<strong>R20</strong>) and Tube Coupling (<strong>RK</strong> <strong>II</strong> or <strong>RK</strong> <strong>II</strong>I)<br />
http://www.bartels.eu/downloads/pdf/bartels_r20.pdf
Bitte beachten Sie<br />
Wir passen unsere Teile ständig dem <strong>for</strong>tschreitenden<br />
technischen Stand an, aus diesem Grund müssen wir uns<br />
Änderungen in Form und Technik vorbehalten. Aus allen<br />
Angaben, Abbildungen und Beschreibungen in diesen<br />
Montageanleitungen können keine Ansprüche abgeleitet<br />
werden.<br />
!<br />
Unfallgefahr!<br />
Unsachgemäße bauliche Veränderungen am Schiff<br />
können zu Schäden <strong>oder</strong> gar zum Verlust der Seetüchtigkeit<br />
führen.<br />
Falls Sie nicht über die notwendigen Werkzeuge und<br />
Einrichtungen <strong>oder</strong> genügend Sachwissen verfügen,<br />
lassen Sie Ein- <strong>oder</strong> Umbauten an Ihrem Schiff nur<br />
von uns <strong>oder</strong> in einer Fachwerkstatt vornehmen.<br />
Montagehinweis<br />
Zwischen Stag und Fall einen Winkel von ca. 10°<br />
einhalten, sonst kann sich das Fall um das Stag<br />
wickeln und die Rollreffanlage blockieren.<br />
Abhilfemaßnahmen: (ggf. Klassenvorschriften<br />
beachten)<br />
• Bockrolle am Mast montieren<br />
• Fallaustritt tiefer setzen (Rollenkasten ca. 200 mm<br />
unterhalb des Stages)<br />
• Alternativ kann das Fall ca. 0,5 m oberhalb des<br />
Stages aus dem Mast austreten (bei 7/8 Takelung).<br />
Please note<br />
We always adapt our parts to the newest technical standards.<br />
There<strong>for</strong>e we are <strong>for</strong>ced to reserve all rights regarding<br />
changes in shape and technique. The features of the<br />
indications, illustrations and descriptions in these mounting<br />
instructions are not be regarded as a binding agreement.<br />
Thus any legal claims or rights in this respect are<br />
excluded.<br />
!<br />
Risk of accident!<br />
Improper structural alterations on the boat can lead to<br />
damages or even to the loss of seaworthyness.<br />
In case you don’t have the suitable tools and equipment<br />
or sufficient specific technical knowledge,<br />
please charge us or another special workshop with<br />
per<strong>for</strong>ming the assembly or alterations on your boat.<br />
Mounting advice<br />
Between stay and halyard an angle of about 10° has<br />
to be observed, otherwise the halyard can twist itself<br />
around the stay and jam the reefing gear.<br />
Corrective measures: (Take note of the class<br />
regulations)<br />
• Mount halyard lead block on mast<br />
• Set halyard outlet lower (sheave box circa 200 mm<br />
under the stay)<br />
• Alternatively the halyard can lead out of the mast<br />
circa 0,5 m over the stay (with 7/8 rigging).
Vor der Montage:<br />
Profilgröße, Vorstagstärke und unteren Anschluß prüfen<br />
Der untere Anschluss des Vorstages muss so weit zerlegbar<br />
sein, daß die Profilstücke darüber montiert <strong>oder</strong> im Falle einer<br />
Beschädigung auch einzeln ausgetauscht werden können.<br />
Bei Profil <strong>R20</strong> mit Innendurchmesser 20mm empfehlen wir<br />
wegen der besseren Montierbarkeit bei Walzterminalen bis<br />
Draht 8 mm / UNF 5/8 (Ø=15,6mm ) <strong>oder</strong> max. Walzterminal<br />
UNF 3/4 (Ø=19mm) mit Draht 10mm zu verwenden.<br />
Eine evtl. vorhandene Verdickung über 19mm hinaus im<br />
Bereich einer gepressten Schlüsselfläche muß abgeschliffen<br />
werden.<br />
Bau<strong>for</strong>men und Rod-Anschlüsse siehe Seite 3.<br />
1. Altes Vorstag abmontieren und messen<br />
!<br />
Unfallgefahr!<br />
Vor dem Lösen des Vorstags am stehenden Mast den Mast gegen<br />
Kippen sichern. Dazu zwei Fallen am Pütting des Vorstages mit einem<br />
ausreichend dimensionierten Schraubschäkel befestigen und<br />
durchsetzen.<br />
Die Einstellung des Vorstagspanners vor dem Lösen kennzeichnen.<br />
Unfallgefahr!<br />
! !<br />
Soll das Vorstag vom stehenden Mast abmontiert werden unbedingt<br />
die hierzu er<strong>for</strong>derlichen Sicherheitsmaßnahmen vornehmen, z. B<br />
unter Mithilfe einer 2. Person und unter sachgerechter Verwendung<br />
eines Bootsmannstuhles.<br />
Demontage nicht bei Seegang, Regen <strong>oder</strong> starkem Wind vornehmen.<br />
Stag auslegen, den Vorstagspanner in die zuvor markierte Einstellung<br />
bringen und das Vorstagmaß (VS), gemäß Abbildung Seite 2, genau<br />
messen.<br />
- 1 -<br />
Be<strong>for</strong>e mounting:<br />
Check foil size, dia. of headstay and lower<br />
connection<br />
The lower connection of the <strong>for</strong>estay has to be designed<br />
to be taken apart in a manner that the foil sections can<br />
be mounted and damaged foil sections can be changed<br />
later on.<br />
For foil <strong>R20</strong> with inner dia. 20mm, we recommend <strong>for</strong><br />
easy mounting swaged terminals <strong>for</strong> wire up to 8mm /<br />
UNF 5/8 (Ø=15,6mm) or max. UNF 3/4 (Ø=19mm)<br />
thread <strong>for</strong> wire 10mm.<br />
If the terminal exceeds dia. 3/4 in a local flat zone <strong>for</strong> a<br />
<strong>for</strong>k wrench please grind this dia. to 3/4.<br />
1. Dismount and measure the <strong>for</strong>mer Headstay<br />
!<br />
Risk of accident!<br />
Be<strong>for</strong>e you release the headstay on the standing mast, the mast must<br />
be secured against tilting. For that purpose fix two halyards with a<br />
sufficiently dimensioned screw pin shackle at the chaine plate and<br />
strain them.<br />
Mark the adjusting position of the headstay turnbuckle be<strong>for</strong>e releasing it.<br />
Risk of accident!<br />
If you want to dismount the headstay from the standing mast it is<br />
absolutely necessary to notice the respective precautions – e. g.<br />
dismount only with the assistance of a second person and with<br />
appropiate use of a boatswain´s chair.<br />
Do not dismount the headstay in motion of sea, rain or strong wind.<br />
Lay out the headstay, adjust the headstay turnbuckle in the be<strong>for</strong>e marked<br />
position and measure the total length (VS) of the headstay – accurately<br />
according to the illustration on page 2.
- 2 -
oberer Fockroller-Anschluß<br />
top of jib furler<br />
BARTELS_S auf Deck above Deck<br />
ohne Wantenspanner<br />
without rigging screw<br />
RH RH LH<br />
ohne Wantenspanner<br />
without rigging screw<br />
mit Wantenspanner<br />
with rigging screw<br />
D-S Decksdurchführung deck passage<br />
RH<br />
oberer Anschluß Decksdurchführung<br />
top of deck passage<br />
RH<br />
mit Wantenspanner<br />
with rigging screw<br />
LH<br />
- 3 -<br />
RH<br />
RH<br />
Vorstag unten <strong>for</strong>estay lower end<br />
Gewindeterminal<br />
swage stud terminal<br />
RH für Profil <strong>R20</strong> Innen-Ø=20mm<br />
nach Aufwalzen des Terminals max. Ø= 3/4“ (19mm)<br />
<strong>for</strong> foil <strong>R20</strong> inner Ø=20mm<br />
max. dia. Ø=3/4“ (19mm) after swaging<br />
Schraubterminal mit Gewinde<br />
swageless stud terminal<br />
Hülse sleeve<br />
Standardgewinde Standard thread UNF 5/8 (Ø=15,6mm) UNF 3/4 (Ø=19mm)<br />
Draht wire 1x19 8mm, 10 mm 10mm, 12mm *<br />
Dy<strong>for</strong>m 8mm 10mm<br />
Rod –17 (=8,4mm) –22 (=9,5mm)<br />
Rod-Anschluß<br />
rod fitting<br />
RH<br />
erst nach den Profilstücken montieren<br />
has to be mounted after the foil sections<br />
5/8 Socket max. Ø=18mm –17<br />
3/4 Socket max. Ø=19,5mm –22<br />
RH<br />
* mit Schraubterminal mit Gewinde<br />
* with swageless stud terminal<br />
RH = Rechtsgewinde right hand thread<br />
LH = Linksgewinde left hand thread
Teilebenennung des Profilvorstages mit Profil <strong>R20</strong><br />
1 Rohrkupplung<br />
2 Schrauben für Längeneinstellung<br />
3 Profileinsatz<br />
4 Einführung<br />
5 Einführungsprofilstück R 20 (2,5m)<br />
6 Profilstücke R 20 (3m)<br />
7 Fallschlitten <strong>R20</strong><br />
8 Wantenspanner<br />
9 Gewindeterminal <strong>oder</strong> Rod-Anschluß<br />
10 Abstandhalter (Kunstoffrohr, von einem 1,5m Stück abschneiden)<br />
11 Buchse<br />
12 Reststück von Abstandhalter (10)<br />
13 Verbinder (2-tlg., auch für nachträgliche Montage)<br />
14 Verbinderplatte (2x pro Verbinder)<br />
15 Verbinderschrauben (4x pro Verbinder, Innensechskantschraube M4 x 5<br />
selbstsichernd)<br />
16 Kunstoffrohr (hält die Buchsen auf Abstand)<br />
17 Vorstag<br />
18 Endkappe ( 2-tlg.) muß mit zwei Schrauben gesichert werden)<br />
19 Vorstagsanschluß<br />
Parts <strong>for</strong> headstay with foil <strong>R20</strong><br />
1 tube coupling<br />
2 screws <strong>for</strong> length adjustment<br />
3 foil insert<br />
4 feeder<br />
5 feeder foil <strong>R20</strong> (2,5m)<br />
6 foil <strong>R20</strong> (3m)<br />
7 halyard swivel <strong>R20</strong><br />
8 rigging screw<br />
9 thread terminal or rod connection<br />
10 spacer (cut from one of the 1,5m plastic tubes)<br />
11 bushing (inner dia. standard 9mm)<br />
12 remaining piece from plastic tube (10)<br />
13 connector (split in two pieces, can be mounted later)<br />
14 connector plate (2 pieces per connector)<br />
15 Connector screws (4 pieces per connector, socket head screw M4 x 5<br />
selflocking)<br />
16 plastic tube 1,5m (used as spacer between bushings)<br />
17 headstay<br />
18 top cap (split in two pieces, has to be secured by two screws)<br />
19 top connection of headstay<br />
- 4 -<br />
- Montagehinweise auf gegenüberliegender Seite (5) <strong>for</strong> use with opposite page (5) -
- Teilebenennung auf gegenüberliegender Seite (4) <strong>for</strong> use with opposite page (4) -<br />
2. Vorstag (17) und oberstes Profilstück kürzen<br />
Probemontage gemäß oben gezeigter Abbildung durchführen. Vorstag und oberstes<br />
Profilteil so kürzen, daß das Vorstagsmaß VS erreicht wird.<br />
3. Vorstag bestücken, Terminal walzen <strong>oder</strong> Rod stauchen<br />
Wichtig: Vor dem Walzen/Stauchen müssen unbedingt alle Teile in korrekter Reihenfolge<br />
und Anzahl auf das Vorstag geschoben werden, welche sich nach dem Walzen nicht mehr<br />
aufschieben lassen<br />
Da unbekannt ist, ob das alte Vorstag weiterverwendet <strong>oder</strong> ein neues beschafft, die<br />
Arbeiten in einer Werkstatt <strong>oder</strong> vor Ort ausgeführt werden und dabei einer der<br />
bestehenden Anschlüsse weiterverwendet wird, übernimmt die BARTELS <strong>GmbH</strong> keine<br />
Haftung für eine korrekte sinngemäße Abwandlung der Vorgehensweise. In dieser<br />
Anleitung wird eine Reihenfolge beschrieben, bei welcher zuerst das untere Terminal<br />
gewalzt wird, dann das Vorstag mit den Innenteilen des Profils bestückt und dann das<br />
obere Terminal gewalzt wird.<br />
3a<br />
von einem Kunstoffrohr den Abstandshalter (10) so abschneiden, daß sich die ersten zwei<br />
Buchsen (11) etwa 10cm im <strong>R20</strong> Einführungsprofilstück (5) 2,5m lang befinden (an den<br />
beiden Profilenden befinden sich wegen der höheren Belastung je 2 Buchsen, in der Mitte<br />
ca. alle 1,5m eine Buchse).<br />
Die Verwendung eines Wantenspanners ( 8) ist nicht zwingend er<strong>for</strong>derlich, aber oft<br />
späterer hilfreich, da meistens noch Maßabweichung auszugleichen sind.<br />
3b<br />
das Reststück aus Schritt 3a und eine weitere Buchse (11) aufschieben<br />
3c<br />
bei der weiteren Montage folgen pro 3m Profilstück: ein Verbinder (13), eine Buchse (11),<br />
ein Kunstoffrohr (14) 1,5m lang und eine Buchse (11).<br />
Der Verbinder <strong>R20</strong> (13) ist zweiteilig und kann auch nach dem Terminalwalzen/Rod<br />
stauchen noch montiert werden.<br />
3d<br />
Innenteile beim letzten Profilstück: da das letzte Profilstück gekürzt wurde, hängt es von der<br />
verbleibenden Länge ab, wieviele der Innenteile gemäß Zeichnung überhaupt montiert<br />
werden können. Kunstoffrohr(e) so kürzen, daß die zwei letzten Buchsen ca. 3cm unterhalb<br />
der Endkappe zu liegen kommen.<br />
- 5 -<br />
2.Shortening of the headstay and the topmost foil<br />
Assemble parts as shown above. Shorten topmost foil and headstay (17) to get the total<br />
length VS of the headstay.<br />
3. Fitting the headstay, swaging the terminal or cold heading<br />
Important: all parts which will not pass the terminal or cold heading, have to be mounted<br />
be<strong>for</strong>e in correct order and amount.<br />
(As it is unknown, if the headstay will be brought to/from a workshop or the assembly will be<br />
done close to the ship, or if the old headstay will be altered and use one of the existing<br />
connections will be made, you will be responsible <strong>for</strong> correct alterations. BARTELS <strong>GmbH</strong><br />
can in such case not be hold liable in any way. Here we describe the order with lower<br />
terminal swaged first, upper end of headstay open to fit the inner parts of the foil be<strong>for</strong>e<br />
swaging the upper terminal)<br />
3a<br />
cut a spacer from one of the plastic tubes to hold the first two bushings (11) approx. 0,1m<br />
inside the beginning profile part (5) (put at both ends of the foil 2 bushings, because of<br />
higher strain, in the middle put one about each 1,5m).<br />
A rigging screw ( 8) is not obligatory, but very useful as mostly measurement deviations<br />
have to be corrected later on.<br />
3b<br />
fit the remaining plastic tube from step 3a and another bushing (11)<br />
3c<br />
<strong>for</strong> the next foil sections (section length=3m) you will need: one connector (13), one bushing<br />
(11), one plastic tube(14) 1,5m long, and another bushing (11) approx. in the middle of the<br />
foil.<br />
The connector R 20 is split into two pieces and can be mounted later<br />
3d<br />
inner parts <strong>for</strong> the last foil: different arrangement<br />
As the last foil has been cut, it depends on the remaining length to fit all or only some parts<br />
as shown above - cut the plastic tube(s) that the last two bushings are 1 inch below the top<br />
cap.
Rohrkupplung (1) und Profileinsatz (3) Verbinder (13) Endkappe (18)<br />
tube coupling (1) and foil insert (3) connector (13) top cap (18)<br />
- 6 -<br />
- Montagehinweise auf gegenüberliegender Seite (7) <strong>for</strong> use with opposite page (7) -
4. Profilmontage<br />
Diese Anleitung beschreibt die Reihenfolge über den unteren Vorstags-Anschluß, welcher<br />
zerlegt 19mm Durchmesser nicht überschreiten darf.<br />
Eine Profil-Montage über den oberen Anschluß (Vorstagsdraht offen, nicht gewalzt), ist<br />
ebenfalls möglich, nur muß dann entweder die zweite Walzung/Rod Stauchen vor Ort<br />
durchgeführt werden <strong>oder</strong> das ganze Vorstag transportiert werden.<br />
a) Das oberste Profilstück (ohne Vorstag im Inneren) 15mm vom Ende gegenüber<br />
den beiden Nuten mit 7,5mm bohren.<br />
b) oberstes Profilstück über das mit Buchsen (11) und Kunstoffrohren (10), (12)<br />
bestückte Vorstag in die Endposition schieben und die Endkappe (18)<br />
verschrauben. Auch bei allen weiteren Profilen (6) darauf achten, daß keine später<br />
benötigte Buchsen (11) in einem Profil vergessen werden, dies kann z.B. durch<br />
provisorisches Sichern mit Klebeband verhindert werden.<br />
c) Verbinderplatten (14) lagerichtig in die Aussparung des Verbinders (13 )einsetzen,<br />
in das Profil einführen und mit den Schrauben (15) befestigen. Sollten Schrauben<br />
(15) mit der selbstsichernden Kunstoffbeschichtung verloren gegangen sein, bitte<br />
Ersatzschrauben nur mit Sicherungsmittel ( zB. Loctite) einsetzen. Schrauben,<br />
welche sich später lockern und vorstehen, behindern den Fallschlitten!<br />
d) weitere Profilstücke (6) einschließlich des Einführungsprofilstücks (5) aufschieben<br />
und die Verbinder (13 ) wie unter c) beschrieben montieren.<br />
e) Fallschlitten (7) lagerichtig aufschieben<br />
f) Rohrkupplung (1) aufschieben<br />
- Erläuterung auf gegenüberliegender Seite (6) <strong>for</strong> use with opposite page (6) -<br />
g) Vorstagsanschluß (9) unten komplett montieren und sichern. Bei sehr langem<br />
Wantenspanner und einem Rod-Anschluß empfehlen wir, zunächst die Einführung<br />
(4) noch nicht zu montieren, dadurch kann die Rohrkupplung (1) weiter auf das<br />
Einführungsprofilstück (5) geschoben und dort mit Klebeband/Kabelbinder<br />
vorläufig gesichert werden.<br />
h) Bei Transport und Montage darauf achten, daß das komplette Vorstag nicht<br />
abgeknickt wird.<br />
- 7 -<br />
4. Mounting of foils<br />
This instruction describes the mounting of foils in the order passing the lower headstay<br />
connection. The dia. of parts which will remain connected to the wire/rod must not exceed<br />
3/4 (=19mm).<br />
In general, it is possible to mount the foils passing the upper connection whithout the upper<br />
swaging or cold heading, but then this process has to be done locally on board or you have<br />
to transport the whole headstay.<br />
a) drill one hole Ø=7,5mm approx. 15mm from the end of topmost foil (opposite the<br />
two grooves).<br />
b) pass topmost foil over the <strong>for</strong>estay equipped with bushings (11) and plastic tubes<br />
(10) and (12) to final position and mount top cap (18). When mounting further foils<br />
(6), do not <strong>for</strong>get bushings (11), which will be needed later on in the foils, secure<br />
them e.g. with tape.<br />
c) <strong>for</strong> mounting the connectors (13), put the connector plates (14) in correct position<br />
in the grooves of the connectors (13), slide it into the foil and fix it with the screws<br />
(15). Missing selflocking screws can be replaced by other ones, but use securing<br />
agent (e.g. Loctite), otherwise screws which will protude over the foil will stop the<br />
halyard swivel!<br />
d) fill up the headstay with foils (6), including the feeder foil part (5) and mount the<br />
connectors (13) as described in c).<br />
e) fit the halsyard swivel in correct orientation.<br />
f) mount the tube coupling (1).<br />
g) mount lower headstay connection (9), secure it (split pin or counter nut of<br />
turnbuckle). If the turnbuckle is very long or there is in addition a rod connection,<br />
we recommend to mount the feeder (4 ) later, thus the tube coupling (1) can be<br />
moved higher onto the feeder foil (5) and be secured there by tape or cable strap.<br />
h) during transport and mounting to the mast please take care that the foil will not be<br />
bended too much by sagging.
5. Vorstagmaß (VS) einstellen<br />
Durch Verstellen des Wantenspanners kann die Gesamtlänge VS<br />
eingestellt werden. Falls er<strong>for</strong>derlich, kann die Profillänge ebenfalls<br />
verändert werden.<br />
Bevor die Rohrkupplung mit dem Fockroller verbunden wird<br />
nochmals alle Sicherungselemente der Vorstagsverbindung (Splinte,<br />
Kontermuttern, Gewindestifte ) überprüfen .<br />
Segel-Einführung montieren<br />
mount the feeder<br />
- 8 -<br />
5. Adjusting the total length of headstay (VS)<br />
The total length VS can be adjusted with the rigging screw. If<br />
necessary, the total foil length may be adjusted, too.<br />
Check all securing elements ( eg. split pins, counter nuts, worm<br />
screws ) of <strong>for</strong>estay connection be<strong>for</strong>e mounting the tube coupling.<br />
! Unfallgefahr!<br />
! Risk of accident!<br />
Wird die Vor- <strong>oder</strong> die Feineinstellung des Vorstages am steh- In case the preliminary or the fine adjustment of the headstay is<br />
enden Mast durchgeführt, den Mast gegen Kippen sichern. carried out on the standing mast, the mast must be secured<br />
Dazu zwei Fallen am Pütting des Vorstages mit einem ausreich- against tilting. For that purpose fix two halyards with a<br />
end dimensionierten Schraubschäkel befestigen und durch- sufficiently dimensioned screw pin shackle at the chaine plate<br />
setzen.<br />
and strain them.<br />
Bei der Montage des Vorstages an den Mast darauf achten, daß While mounting the headstay on the mast take care that<br />
• das Vorstag nicht abknickt,<br />
• it does not yield to buckling,<br />
• alle Bolzen des Vorstages mit Splinten richtig gesichert sind • all bolts of the headstay are correctly secured with splints<br />
und<br />
and<br />
• das Terminal korrekt in den Mast eingehängt ist.<br />
• the terminal is correctly inserted on the mast.
Pflege<br />
Die Anlage ist im Segelbetrieb vielen äußeren Einflüssen ausgesetzt.<br />
Dazu gehören Seewasser, Witterungsbedingungen und Industrienähe.<br />
Diese Umstände er<strong>for</strong>dern eine regelmäßige Pflege der<br />
Anlage. Wir empfehlen, die Teile der Anlage die mit Salzwasser in<br />
Berührung kommen nach dem Segeln mit Süßwasser zu reinigen.<br />
Bei Verschmutzung Bootsshampoo <strong>oder</strong> Neutralseife verwenden.<br />
Umwelthinweis<br />
Bei der Reinigung darauf achten, daß keine Reinigungsmittel in die<br />
Gewässer gelangen.<br />
Wartung<br />
Die Teile sind wartungsfrei.<br />
Wichtig!<br />
Da die Sicherheit des gesamten Riggs von der Festigkeit aller<br />
Einzelteile abhängt sind alle Teile der Rollfock- <strong>oder</strong> der Rollreffanlage<br />
regelmäßig auf Risse und Verschleiß zu prüfen.<br />
Prüfen Sie auch die Terminalverankerungen am Mast und das<br />
Pütting an <strong>oder</strong> unter Deck.<br />
Die Splinte, Bolzen, Schrauben und Muttern auf korrekten Sitz<br />
und Abscherung regelmäßig kontrollieren.<br />
Das Vorstag auf Beschädigung und Korrosion regelmäßig<br />
kontrollieren.<br />
Beschädigte Teile so<strong>for</strong>t, unter Einhaltung der Sicherheitsmaßnahmen<br />
austauschen <strong>oder</strong> austauschen lassen.<br />
Care<br />
The gear is while in operation exposed to many external factors.<br />
Among these are seawater, atmospheric conditions and proximity<br />
to industry. This demands regular care of the gear. We recommend<br />
to clean those parts of the gear that come into contact with salt<br />
water with fresh water. In case of dirt or stains use boatshampoo or<br />
neutral soap.<br />
Environmental Hint<br />
When cleaning take care that the waters do not get contaminated.<br />
Maintenance<br />
The parts are free of maintenance.<br />
Important!<br />
As the safety of the complete rig depends on the solidity of all<br />
the separate parts all parts of the headsail furling and reefing<br />
gear must be checked <strong>for</strong> possible clefts and wear regulary.<br />
Examine also the terminal anchorage on the mast and the<br />
chaine plate above or below deck.<br />
Keep regular checks on the location and possible sheering off<br />
of splints.<br />
Keep regular checks on possible damage or corrosion of the<br />
headstay.<br />
Defect parts must be exchanged immediately. Observe the<br />
safety measures when exchanging parts.
Notizen • Notes<br />
Sailing. Furling. BARTELS.<br />
http://www.bartels.eu<br />
bartels@bartels.eu