VM 22 K - Hartig + Helling GmbH & Co. KG
VM 22 K - Hartig + Helling GmbH & Co. KG
VM 22 K - Hartig + Helling GmbH & Co. KG

Erfolgreiche ePaper selbst erstellen
Machen Sie aus Ihren PDF Publikationen ein blätterbares Flipbook mit unserer einzigartigen Google optimierten e-Paper Software.
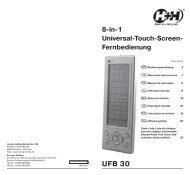
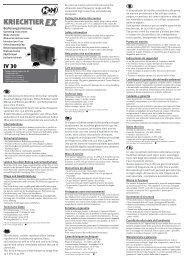
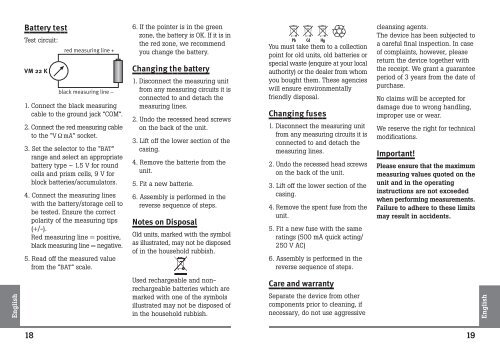
Battery test<br />
Test circuit:<br />
<strong>VM</strong> <strong>22</strong> K<br />
red measuring line +<br />
black measuring line –<br />
1. <strong>Co</strong>nnect the black measuring<br />
cable to the ground jack “COM”.<br />
2. <strong>Co</strong>nnect the red measuring cable<br />
to the “V Ω mA” socket.<br />
3. Set the selector to the “BAT”<br />
range and select an appropriate<br />
battery type – 1.5 V for round<br />
cells and prism cells, 9 V for<br />
block batteries/accumulators.<br />
4. <strong>Co</strong>nnect the measuring lines<br />
with the battery/storage cell to<br />
be tested. Ensure the correct<br />
polarity of the measuring tips<br />
(+/-).<br />
Red measuring line = positive,<br />
black measuring line = negative.<br />
5. Read off the measured value<br />
from the “BAT” scale.<br />
6. If the pointer is in the green<br />
zone, the battery is OK. If it is in<br />
the red zone, we recommend<br />
you change the battery.<br />
Changing the battery<br />
1. Disconnect the measuring unit<br />
from any measuring circuits it is<br />
connected to and detach the<br />
measuring lines.<br />
2. Undo the recessed head screws<br />
on the back of the unit.<br />
3. Lift off the lower section of the<br />
casing.<br />
4. Remove the batterie from the<br />
unit.<br />
5. Fit a new batterie.<br />
6. Assembly is performed in the<br />
reverse sequence of steps.<br />
Notes on Disposal<br />
Old units, marked with the symbol<br />
as illustrated, may not be disposed<br />
of in the household rubbish.<br />
You must take them to a collection<br />
point for old units, old batteries or<br />
special waste (enquire at your local<br />
authority) or the dealer from whom<br />
you bought them. These agencies<br />
will ensure environmentally<br />
friendly disposal.<br />
Changing fuses<br />
1. Disconnect the measuring unit<br />
from any measuring circuits it is<br />
connected to and detach the<br />
measuring lines.<br />
2. Undo the recessed head screws<br />
on the back of the unit.<br />
3. Lift off the lower section of the<br />
casing.<br />
4. Remove the spent fuse from the<br />
unit.<br />
5. Fit a new fuse with the same<br />
ratings (500 mA quick acting/<br />
250 V AC)<br />
6. Assembly is performed in the<br />
reverse sequence of steps.<br />
cleansing agents.<br />
The device has been subjected to<br />
a careful final inspection. In case<br />
of complaints, however, please<br />
return the device together with<br />
the receipt. We grant a guarantee<br />
period of 3 years from the date of<br />
purchase.<br />
No claims will be accepted for<br />
damage due to wrong handling,<br />
improper use or wear.<br />
We reserve the right for technical<br />
modifications.<br />
Important!<br />
Please ensure that the maximum<br />
measuring values quoted on the<br />
unit and in the operating<br />
instructions are not exceeded<br />
when performing measurements.<br />
Failure to adhere to these limits<br />
may result in accidents.<br />
Used rechargeable and nonrechargeable<br />
batteries which are<br />
marked with one of the symbols<br />
illustrated may not be disposed of<br />
in the household rubbish.<br />
Care and warranty<br />
Separate the device from other<br />
components prior to cleaning, if<br />
necessary, do not use aggressive<br />
18<br />
19