Installation Guide - LANCOM Systems
Installation Guide - LANCOM Systems
Installation Guide - LANCOM Systems

Sie wollen auch ein ePaper? Erhöhen Sie die Reichweite Ihrer Titel.
YUMPU macht aus Druck-PDFs automatisch weboptimierte ePaper, die Google liebt.
<strong>Installation</strong> <strong>Guide</strong> <strong>LANCOM</strong> GS-2326/GS-2326P/GS-2352<br />
Chapter 4: <strong>Installation</strong><br />
4.3 Package content and accessories<br />
Before beginning with the installation, please check that nothing is missing<br />
from your package. Along with the <strong>LANCOM</strong> Switch the box should contain<br />
the following accessories:<br />
<br />
<br />
<br />
<br />
Power cord<br />
19’’ adapter (2 pieces) and mounting materials<br />
<strong>LANCOM</strong> CD<br />
Printed documentation<br />
Should anything be missing, please take up immediate contact to your dealer<br />
or to the address on the delivery note supplied with your device.<br />
Ensure that you have all additional accessories at hand which might be<br />
required during installation.<br />
EN<br />
4.4 Mounting and connecting up the <strong>LANCOM</strong> switch<br />
Installing the <strong>LANCOM</strong> switch involves the following steps:<br />
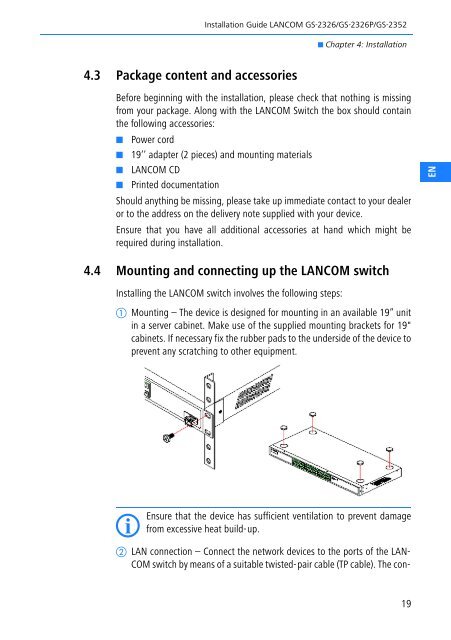
Mounting – The device is designed for mounting in an available 19” unit<br />
in a server cabinet. Make use of the supplied mounting brackets for 19"<br />
cabinets. If necessary fix the rubber pads to the underside of the device to<br />
prevent any scratching to other equipment.<br />
I<br />
Ensure<br />
that the device has sufficient ventilation to prevent damage<br />
from excessive heat build-up.<br />
LAN connection – Connect the network devices to the ports of the LAN-<br />
COM switch by means of a suitable twisted-pair cable (TP cable). The con-<br />
19