

Download ... - Horizon Hobby
Download ... - Horizon Hobby
Download ... - Horizon Hobby

Sie wollen auch ein ePaper? Erhöhen Sie die Reichweite Ihrer Titel.
YUMPU macht aus Druck-PDFs automatisch weboptimierte ePaper, die Google liebt.
11-10 Telemetry<br />
Please refer to wing-type model programming for<br />
instructions.<br />
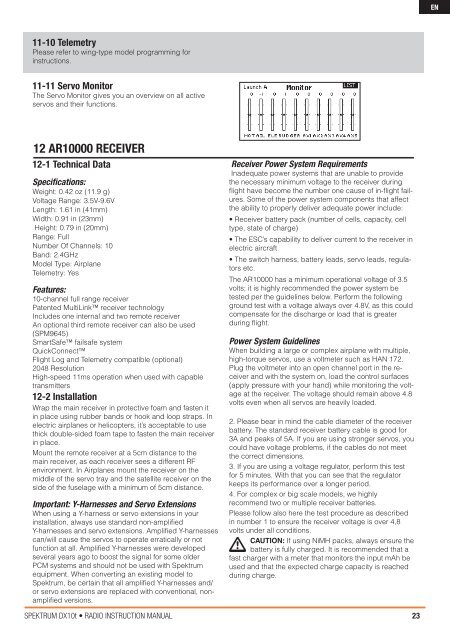
11-11 Servo Monitor<br />
The Servo Monitor gives you an overview on all active<br />
servos and their functions.<br />
12 AR10000 RECEIVER<br />
12-1 Technical Data<br />
Specifications:<br />
Weight: 0.42 oz (11.9 g)<br />
Voltage Range: 3.5V-9.6V<br />
Length: 1.61 in (41mm)<br />
Width: 0.91 in (23mm)<br />
Height: 0.79 in (20mm)<br />
Range: Full<br />
Number Of Channels: 10<br />
Band: 2.4GHz<br />
Model Type: Airplane<br />
Telemetry: Yes<br />
Features:<br />
10-channel full range receiver<br />
Patented MultiLink receiver technology<br />
Includes one internal and two remote receiver<br />
An optional third remote receiver can also be used<br />
(SPM9645)<br />
SmartSafe failsafe system<br />
QuickConnect<br />
Flight Log and Telemetry compatible (optional)<br />
2048 Resolution<br />
High-speed 11ms operation when used with capable<br />
transmitters<br />
12-2 Installation<br />
Wrap the main receiver in protective foam and fasten it<br />
in place using rubber bands or hook and loop straps. In<br />
electric airplanes or helicopters, it’s acceptable to use<br />
thick double-sided foam tape to fasten the main receiver<br />
in place.<br />
Mount the remote receiver at a 5cm distance to the<br />
main receiver, as each receiver sees a different RF<br />
environment. In Airplanes mount the receiver on the<br />
middle of the servo tray and the satellite receiver on the<br />
side of the fuselage with a minimum of 5cm distance.<br />
Important: Y-Harnesses and Servo Extensions<br />
When using a Y-harness or servo extensions in your<br />
installation, always use standard non-amplified<br />
Y-harnesses and servo extensions. Amplified Y-harnesses<br />
can/will cause the servos to operate erratically or not<br />
function at all. Amplified Y-harnesses were developed<br />
several years ago to boost the signal for some older<br />
PCM systems and should not be used with Spektrum<br />
equipment. When converting an existing model to<br />
Spektrum, be certain that all amplified Y-harnesses and/<br />
or servo extensions are replaced with conventional, nonamplified<br />
versions.<br />
SPEKTRUM DX10t • RADIO INSTRUCTION MANUAL<br />
Receiver Power System Requirements<br />
Inadequate power systems that are unable to provide<br />
the necessary minimum voltage to the receiver during<br />
flight have become the number one cause of in-flight failures.<br />
Some of the power system components that affect<br />
the ability to properly deliver adequate power include:<br />
• Receiver battery pack (number of cells, capacity, cell<br />
type, state of charge)<br />
• The ESC’s capability to deliver current to the receiver in<br />
electric aircraft<br />
• The switch harness, battery leads, servo leads, regulators<br />
etc.<br />
The AR10000 has a minimum operational voltage of 3.5<br />
volts; it is highly recommended the power system be<br />
tested per the guidelines below. Perform the following<br />
ground test with a voltage always over 4.8V, as this could<br />
compensate for the discharge or load that is greater<br />
during flight.<br />
Power System Guidelines<br />
When building a large or complex airplane with multiple,<br />
high-torque servos, use a voltmeter such as HAN 172.<br />
Plug the voltmeter into an open channel port in the receiver<br />
and with the system on, load the control surfaces<br />
(apply pressure with your hand) while monitoring the voltage<br />
at the receiver. The voltage should remain above 4.8<br />
volts even when all servos are heavily loaded.<br />
2. Please bear in mind the cable diameter of the receiver<br />
battery. The standard receiver battery cable is good for<br />
3A and peaks of 5A. If you are using stronger servos, you<br />
could have voltage problems, if the cables do not meet<br />
the correct dimensions.<br />
3. If you are using a voltage regulator, perform this test<br />
for 5 minutes. With that you can see that the regulator<br />
keeps its performance over a longer period.<br />
4. For complex or big scale models, we highly<br />
recommend two or multiple receiver batteries.<br />
Please follow also here the test procedure as described<br />
in number 1 to ensure the receiver voltage is over 4,8<br />
volts under all conditions.<br />
CAUTION: If using NiMH packs, always ensure the<br />
battery is fully charged. It is recommended that a<br />
fast charger with a meter that monitors the input mAh be<br />
used and that the expected charge capacity is reached<br />
during charge.<br />
23<br />
EN