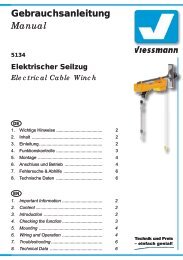
Viessmann Anleitung 5132 - Wasserkran - Reynaulds
Viessmann Anleitung 5132 - Wasserkran - Reynaulds
Viessmann Anleitung 5132 - Wasserkran - Reynaulds
- Keine Tags gefunden...

Sie wollen auch ein ePaper? Erhöhen Sie die Reichweite Ihrer Titel.
YUMPU macht aus Druck-PDFs automatisch weboptimierte ePaper, die Google liebt.
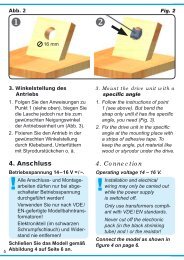
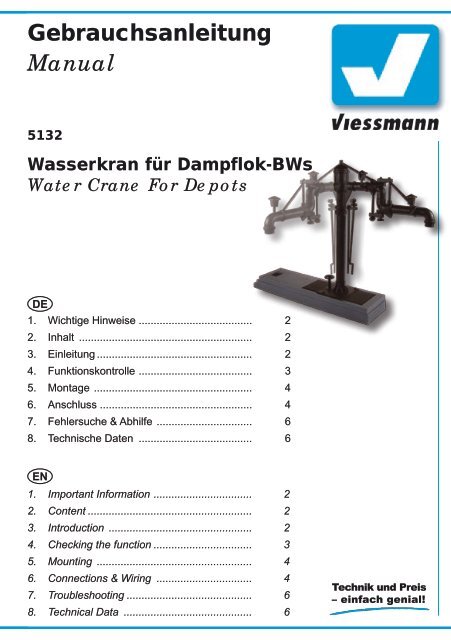
Der <strong>Wasserkran</strong> ist elementarer Bestandteil jedesDampflok-Betriebswerks und war häufig auch anLokeinsatzstellen zu finden. Er dient dazu, denWasservorrat von Dampflokomotiven aufzufüllen.Der <strong>Wasserkran</strong> steht neben dem Gleis undwird zum Betanken einer Lok über das Gleis geschwenkt.Dazu fährt die Lok zunächst bis zurTankposition auf dem Gleis (abhängig davon, wobei der jeweiligen Baureihe der Einfüllstutzen zufinden ist). Anschließend wird der Kran herübergeschwenktund dann heißt es „Wasser marsch!“.Wenn der Tank gefüllt ist, wird das Wasser abgestelltund der Kran wieder in seine Parkpositiongeschwenkt. Jetzt darf die Lok, mit frischem Wasserversorgt, weiterfahren.Mit dem <strong>Viessmann</strong> <strong>Wasserkran</strong> können Sie diesenVorgang nun auch im Modell nachbilden undso richtig Betrieb machen.4. FunktionskontrolleNehmen Sie den <strong>Wasserkran</strong> vorsichtig aus derVerpackung. Führen Sie vor der Montage eineFunktionskontrolle durch.► Schließen Sie dazu den <strong>Wasserkran</strong> gemäßAbbildung 4 an das Schaltmodul an.► Verbinden Sie den Stromanschluss (beschriftetmit „16 V=/~“) des Schaltmoduls mit einem geeignetenModellbahntransformator (z. B. <strong>Viessmann</strong>5200 oder 5201)► Verbinden Sie abwechselnd jeweils das brauneKabel des Trafos zusätzlich mit den beiden mitPfeilen markierten Eingängen des Schaltmoduls.Schließen Sie niemals beide Eingängegleichzeitig an den Trafo an. Das kann zurZerstörung des <strong>Wasserkran</strong>s führen.Der <strong>Wasserkran</strong> schwenkt um 90° und stoppt inseiner Endlage, sobald der jeweilige Eingang kurzmit dem Trafo verbunden wird.The water crane is a typical part of every depot forsteam engines. It is needed to fill up the locomotionswith water.The water crane stands beside the track. To tankup a loco, the crane is slewed over the track, afterthe loco drove to the tank position (the exactposition of the loco depends on the position ofthe neck). When the tank is full, the crane will beslewed back to the neutral position and the loco isallowed to travel on.The <strong>Viessmann</strong> water crane allows to demonstratethis very realistic on the model railroad too.4. Checking the functionRemove the water crane from the box carefully.Check all functions prior to installation.Connect the water crane to the switching moduleas shown in figure 4.Connect the power input of the switching module(labeled with “16 V=/~”) to a 16 V transformer formodel railways (e. g. <strong>Viessmann</strong> 5200 or 5201).Then alternately make contact between the brownoutput of the transformer and the control inputs ofthe switching module (labeled with arrows).Never connect the both inputs at the sametime to the transformer. This may destroy thewater crane.When you connect the inputs with the transformer,the water crane rotates 90° and stops in the respectiveend position.Abb. 1Fig. 1Abb. 2Fig. 290°12 mm3
5. Montage1. Bohren Sie an der Montagestelle ein Loch miteinem Durchmesser von 12 mm (Abb. 1).2. Führen Sie die Anschlusskabel von oben durchdas Montageloch und stecken Sie dann den<strong>Wasserkran</strong> mit dem Antrieb voran hinein.3. Befestigen Sie den <strong>Wasserkran</strong> mit dem beiliegendenBefestigungsring. Führen Sie dazu alleKabel des Signals durch den Ring. Die Federndes Rings müssen in Richtung des <strong>Wasserkran</strong>szeigen (Abb. 2).Halten Sie den <strong>Wasserkran</strong> am Sockel fest.Schieben Sie den Ring über den Antrieb unddrücken Sie ihn gegen die Modellbahnplatte.Drehen Sie den Ring um 90° um ihn zu arretieren4. Schrauben Sie das Schaltmodul nahe beim Antriebunterflur an einen geeigneten Träger (z. B.Anlagengrundplatte oder Spanten). Die Kabeldes <strong>Wasserkran</strong>s müssen ohne mechanischeSpannung bis zum Schaltmodul reichen.6. AnschlussAlle Anschluss- und Montagearbeiten dürfennur bei abgeschalteter Betriebsspannungdurchgeführt werden!Verwenden Sie nur nach VDE /EN-gefertigteModellbahntransformatoren!Sichern Sie die Stromquellen unbedingt soab, dass es bei einem Kurzschluss nichtzum Kabelbrand kommen kann.Die Betriebsspannung beträgt 16 V = / ~.Schließen Sie den <strong>Wasserkran</strong> und das Schaltmodulgemäß den Abbildungen 4 oder 5 an. Zur Bedeutungder Kabelfarben siehe Abbildung 3.Abb. 35. Mounting► Check that the water crane works properly asper the instructions above before you start installingit on the layout.► Drill a hole of 12 mm diameter at the mountingplace (Fig. 1).► Insert the connection wires into the hole first.Then put the water crane with the drive firstinto the hole.► Attach the signal to the baseboard with theenclosed ring. Put the ring over the cablesand the drive unit of the signal (Fig. 2).Turn the ring 90° to arret it.► Fix the switching module with screws near tothe drive unit of the water crane on a suitablesupport (e. g. the ground plate of your modelrailway).The cable of the drive unit have to reach theswitching module.6. Connections & WiringThe operation voltage is 16 V AC or DC.Installation and electrical wiring may onlybe carried out while the power supply isswitched off.Only use transfor mers compliant withVDE / EN standards.The power sources must be protected toprevent the risk of burning wires.Now make the electrical connection as per figure4 or 5. For the meaning of the cable coloursrefer to figure 3 (see below).Fig. 3gelbyellowbraunbrownschwarzblackblaubluerotredMotordriveMotordriveMassegroundEndlagenkontaktend position contactEndlagenkontaktend position contact4
Gleichstrombetrieb: Schließen Sie das gelbeKabel an den Minuspol des Trafos an.Analoge AnsteuerungAbbildung 4 zeigt, wie Sie den <strong>Wasserkran</strong> mitHilfe des <strong>Viessmann</strong> Tastenstellpultes 5547 anschließenkönnen. Schalter, Taster und Relais andererHersteller können Sie natürlich auch nutzen.Digitale AnsteuerungDer <strong>Viessmann</strong>-<strong>Wasserkran</strong> kann auch von einemDigitalsystem angesteuert werden (Abb. 5). BeimAnschluss z. B. an den <strong>Viessmann</strong>-Schaltdecoder5209 (Mot. und DCC) müssen Sie darauf ach-Direct current: Connect the yellow cable to thenegative pole of the transfomer.Analogue WiringThe conventional wiring is shown in figure 4. Itshows how you can connect the water crane to apush-button panel (e. g. 5547).Digital ControlThe <strong>Viessmann</strong> water crane can also be operatedwith a digital system. Refer to figure 5 (see below)for the correct wiring.Abb. 5Fig. 516 V=/~- +ge bnviessmannSchaltmodulMbl rt sw bn geblau bluerot redschwarz blackbraun browngelb yellow<strong>5132</strong>rotredbraunbrownDigital(Mot. / DCC)Abb. 4Fig. 4gelbyellowbl rt sw bn geviessmannSchaltmodul16 V=/~- +ge bnMrot redgrün greenJ K rt 1 gnrt 2 gn– + – +Adresse<strong>Viessmann</strong>DCC-Schaltdecoder 5209+ – + –gn 4 rt gn 3 rt16 V ~ / =braunbrownz. B. 5209e. g. 5209<strong>5132</strong>bl rt sw bn geviessmannSchaltmodul16 V=/~- +ge bnMgrün greenrot redUniversal Tasten - Stellpultgelbyellow16 V ~ / =braunbrown<strong>Viessmann</strong>z. B. 55475547e. g. 55475
ten, dass neben dem roten und grünen Kabel zurSignalsteuerung auch das braune Kabel für dieStromversorgung angeschlossen ist. Zum digitalenSchalten des <strong>Wasserkran</strong>s wird eine Ausgangsgruppeeines Schaltdecoders benötigt.Der Schaltdecoder 5209 (4-fach) ist kompatibelzum Märklin-Motorola und Märklin-Systems-Formatsowie zum NMRA-DCC-Format. Damit lässter sich mit den meisten am Markt vorhandenenDigitalzentralen wie z. B. <strong>Viessmann</strong> Commander,Digital plus (Lenz), Arnold Digital, Roco Digital,Fleischmann Twin Center, Digitrax, Uhlenbrock Intellibox,Tillig Digital, Märklin CS2 usw. steuern.7. Fehlersuche & AbhilfeJedes <strong>Viessmann</strong>-Produkt wird unter hohen Qualitätsstandardsgefertigt und vor seiner Auslieferunggeprüft. Sollte es dennoch zu einer Störung kommen,können Sie anhand der folgenden Punkteeine erste Überprüfung vornehmen. Testen Sie jedochzuvor die Stromzuführungen.1. Der <strong>Wasserkran</strong> schwenkt über die Ruhestellunghinaus oder erreicht diese nichtganz:<strong>Wasserkran</strong> in Ruhestellung stellen und Kranvorsichtig von Hand in richtige Position bringen.Der Kran lässt sich auf seiner Drehachse verstellen.Sollte das Produkt beschädigt sein, geben Sie esin der zugehörigen Verpackung zu Ihrem Fachhändleroder senden Sie es direkt an den<strong>Viessmann</strong>-Service (Adresse siehe unten).8. Technische DatenBetriebsspannung 16 Volt =/~Stromaufnahmeca. 100 mAUmgebungstemperatur (Betrieb) 0 - + 60 °CZulässige relative Luftfeuchtigkeit max. 85 %Höhe des <strong>Wasserkran</strong>sca. 73 mmLänge des Antriebszylinders ca. 42 mmSimply connect the wires to a digital switching decoder(e.g. <strong>Viessmann</strong> 5209 for Mot. and DCC).Remind, that all three cables (brown, red, green)are connected to the digital switching decoder.The digital switching decoder 5209 (4 outputs)is compatible to the Märklin-Motorola and theNMRA-DCC system. Therefore it is compatiblewith the following digital command stations: <strong>Viessmann</strong>Commander, Digital plus (Lenz), ArnoldDigital, Roco Digital, Fleischmann Twin Center,Digitrax, Uhlenbrock Intellibox, Tillig Digital, MärklinCS2 etc.7. TroubleshootingEvery <strong>Viessmann</strong>-product is manufactured underhigh quality standards and is tested before delivery.If there is a fault nevertheless, you can do afirst check. At first check the power supply.1. The water crane slews out of the neutral position:Set the water crane to the neutral position andadjust the arm of the crane to the correct positionvery careful! The water crane can be shiftedon its axle.If the product is damaged, send it in the originalpackage directly for repair to your local dealer orto the <strong>Viessmann</strong> company (see below for address).8. Technical DataOperating voltage:16 V AC / DCCurrent consumptionapprox. 100 mAAmbient temperature in use 0 - +60 °CComparative humidity allowed max. 85 %Height of water craneapprox. 73 mmLength of drive unitapprox. 42 mmDieses Produkt ist kein Spielzeug. Nicht geeignet fürKinder unter 14 Jahren! <strong>Anleitung</strong> aufbewahren!This product is not a toy. Not suitable for childrenunder 14 years! Keep these instructions!Ce produit n’est pas un jouet. Ne convient pas auxenfants de moins de 14 ans ! Conservez ce moded’emploi !Dit produkt is geen speelgoed. Niet geschikt voor kinderenonder 14 jaar! Gebruiksaanwijzing bewaren!Questo prodotto non è un giocattolo. Non adatto abambini al di sotto dei 14 anni! Conservare instruzioniper l’uso!Esto no es un juguete. No recomendado para menoresde 14 años! Conserva las instrucciones de servicio!Modellspielwaren GmbH9/2009 KoStand 01Sach-Nr. 92884Made in Europe6