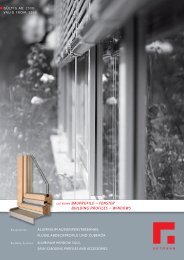
gutmann bauprofile - fenster und türen building profiles ... - COM-MET
gutmann bauprofile - fenster und türen building profiles ... - COM-MET
gutmann bauprofile - fenster und türen building profiles ... - COM-MET

Erfolgreiche ePaper selbst erstellen
Machen Sie aus Ihren PDF Publikationen ein blätterbares Flipbook mit unserer einzigartigen Google optimierten e-Paper Software.
Technische Hinweise<br />
Technical guidelines<br />
Regenschutzschienen <strong>und</strong> Endkappen<br />
Weather bars and end covers<br />
General Guidelines<br />
For many years now, Gutmann weather bars and precisely fitting end covers<br />
have been a guarantee for reliable, constructive wood protection and safe<br />
water drainage.<br />
Processing Guidelines<br />
The dimensions indicated in the illustrations must be met, especially in the<br />
clamping and sealing range of the wood cross section. The dimensions apply<br />
to completely assembled sashes and finished surfaces.<br />
In composite and stop bars, wood rebate, end cover, and weather bar must<br />
be one level.<br />
Screw-in weather bars may only be fastened with stainless-steel screws. We<br />
recommend using screw-in thresholds for burglar-resistant windows. A list of<br />
appropriate weather bars may be fo<strong>und</strong> in agreement certificates from fitting<br />
manufacturers, such as Siegenia-Aubi. Once installed, a gap of 1 mm<br />
must be created in the wood sash (see detail).<br />
Processing Guidelines "Cutting"<br />
The <strong>profiles</strong> must be cut with hard-metal saw blades using a tightener.<br />
The dimensions are indicated in the illustrations on page 10.<br />
The saw cut must not sever the drip cap punches when dividing up the<br />
<strong>profiles</strong>.<br />
Processing Guidelines "Sealing"<br />
Sprayable sealant must be used to seal the connections of the end cover<br />
with bar, wood, and breast of the wood frame.<br />
Standard End Covers<br />
The joint of the weather bar to the end cover must be sealed with silicone<br />
before clipping on the end cover.<br />
Before installing the weather bar, the corner of the window frame is jointed<br />
according to the instructions from detail B, the weather bars including end<br />
covers are installed, and excess sealant is removed.<br />
Sprayable End Covers<br />
Sealant is applied through spraying channels after the weather bar and end<br />
covers have been installed.<br />
Depending on the type of end cover, sealant is applied either through holes<br />
punched with a metal cartridge tip or through pre-existing openings.<br />
Enough sealant must be sprayed in to begin overflowing at the contact<br />
points.<br />
You may find further information about sealing end covers on page 10.<br />
Installing Weather Bars with Spring Strut<br />
A installation block must be used when installing weather bars with spring<br />
struts so that damage to the weather bar and the plastic bridges in thermally<br />
broken weather bars may be avoided and so that the weather bars may be<br />
positioned correctly.<br />
Sealing with weather bar<br />
and end cover in accordance<br />
with DIN 68121<br />
Installation block<br />
Example<br />
Detail B<br />
Sealing with wood frame in<br />
accordance with DIN 68121<br />
9