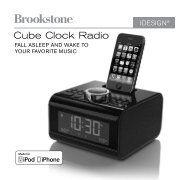
VerSatIle StereO fOr SMall SPaceS - Brookstone
VerSatIle StereO fOr SMall SPaceS - Brookstone
VerSatIle StereO fOr SMall SPaceS - Brookstone
You also want an ePaper? Increase the reach of your titles
YUMPU automatically turns print PDFs into web optimized ePapers that Google loves.
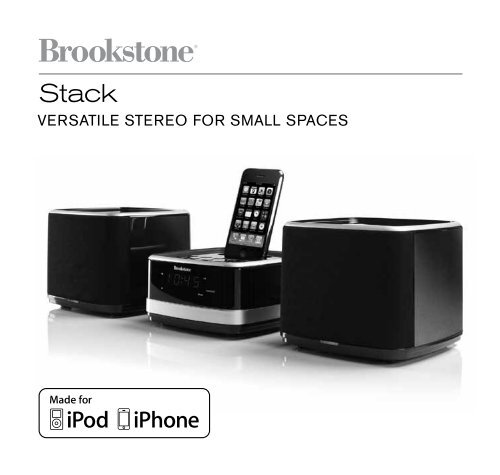
Stack<br />
<strong>VerSatIle</strong> <strong>StereO</strong> <strong>fOr</strong> <strong>SMall</strong> <strong>SPaceS</strong>
1<br />
Table of conTenTs<br />
Warnings and Cautions . . . . . . . . . . . . . . . . . . . . . . . . . . . . . . . . . . . . . . . . . . . . . . . . . . . . 2<br />
Location of Parts and Controls . . . . . . . . . . . . . . . . . . . . . . . . . . . . . . . . . . . . . . . . . . . . . 7<br />
Operation . . . . . . . . . . . . . . . . . . . . . . . . . . . . . . . . . . . . . . . . . . . . . . . . . . . . . . . . . . . . . . . . 11<br />
Compatibility . . . . . . . . . . . . . . . . . . . . . . . . . . . . . . . . . . . . . . . . . . . . . . . . . . . . . . . . . . . . .12<br />
Troubleshooting . . . . . . . . . . . . . . . . . . . . . . . . . . . . . . . . . . . . . . . . . . . . . . . . . . . . . . . . . .25<br />
Specifications . . . . . . . . . . . . . . . . . . . . . . . . . . . . . . . . . . . . . . . . . . . . . . . . . . . . . . . . . . . 28<br />
Warranty . . . . . . . . . . . . . . . . . . . . . . . . . . . . . . . . . . . . . . . . . . . . . . . . . . . . . . . . . . . . . . . . .29
Warning<br />
To reduce the risk of fire or electric shock, do not expose this unit to rain or moisture .<br />
CAUTION—TO REDUCE THE RISK OF ELECTRIC SHOCK, DO NOT REMOVE<br />
COVER (OR baCK) . NO USER-SERVICEabLE PaRTS INSIDE . REFER TO<br />
QUaLIFIED SERVICE PERSONNEL .<br />
The lightning flash with arrow-head symbol within an equilateral triangle<br />
is intended to alert the user to the presence of uninsulated “dangerous<br />
voltage” within the unit’s enclosure that may be of sufficient magnitude<br />
to constitute a risk of electric shock .<br />
The exclamation point within an equilateral triangle is intended to alert<br />
the user to the presence of important operating and maintenance<br />
(servicing) instructions in the literature accompanying the unit .<br />
2
3<br />
iMPorTanT safeTY insTrUcTions<br />
all of the safety and operating instructions should be read, adhered to and followed<br />
before the unit is operated .<br />
1 . Read these instructions .<br />
2 . Keep these instructions .<br />
3 . Heed all warnings .<br />
4 . Follow all instructions .<br />
5 . Do not use this apparatus near water .<br />
6 . Clean only with a dry cloth .<br />
7 . Do not block any ventilation openings . Install in accordance with the<br />
manufacturer’s instructions .<br />
8 . Do not install near any heat sources such as radiators, heat registers, stoves,<br />
or other apparatus (including amplifiers) that produce heat .<br />
9 . Do not defeat the safety purpose of the polarized or grounding-type plug .<br />
a polarized plug has two blades with one wider than the other . a groundingtype<br />
plug has two blades and a third grounding prong . The wide blade or the<br />
third prong is provided for your safety . If the provided plug does not fit into<br />
your outlet, consult an electrician for replacement of the obsolete outlet .<br />
10 . Protect the power cord from being walked on or pinched, particularly at plugs,<br />
convenience receptacles, and the point where they exit from the apparatus .<br />
11 . Only use attachments/accessories specified by the manufacturer .<br />
12 . Use only with a cart, stand, tripod, bracket or table specified by the<br />
manufacturer, or sold with the apparatus . When a cart is used, use caution<br />
when moving the cart/apparatus combination to avoid injury from tip-over .
Portable cart Warning<br />
13 . Unplug this apparatus during lightning storms or when unused for long<br />
periods of time .<br />
14 . Refer all servicing to qualified service personnel . Servicing is required when the<br />
apparatus has been damaged in any way, such as power-supply cord or plug is<br />
damaged, liquid has been spilled or objects have fallen into the apparatus, the<br />
apparatus has been exposed to rain or moisture, does not operate normally,<br />
or has been dropped .<br />
Note:<br />
1 . Important safety instructions shall be provided with each appliance . These safety<br />
instructions may be in the form of a separate booklet, separate sheet or part<br />
of the instruction manual .<br />
2 . If being included in the instruction manual, the safety instructions shall be<br />
located before any operating instructions .<br />
3 . These instructions shall be entitled “IMPORTaNT SaFETY INSTRUCTIONS .”<br />
4 . The safety instructions shall include, as applicable to the particular apparatus,<br />
the information and warnings listed before . The wording is capable of being<br />
supplemented, although not replaced, by drawings or cartoons .<br />
5 . The symbol shall be shown adjacent to the text of Important Safety Instructions .<br />
4
5<br />
caUTion<br />
• The apparatus should not be exposed to dripping or splashing, and no objects<br />
filled with liquids, such as vases, should be placed on the apparatus .<br />
• The main plug is used to disconnect the device if you do not want the unit<br />
to remain readily operable . In order to disconnect the apparatus from the<br />
main plug, it should be pulled from the outlet completely .<br />
• battery should not be exposed to excessive heat such as sunshine, fire or the like .<br />
Warning<br />
1 . Keep away from children . This is not a toy .<br />
2 . Use this unit only for its intended use as described in this manual .<br />
3 . Unplug this unit during lightning storms or when unused for long<br />
periods of time .<br />
4 . Never drop or insert an object into any opening .<br />
5 . Protect the power cord from being walked on or pinched, particularly at plug<br />
outlets, convenience receptacles and the point where it exits the unit .<br />
baTTerY PrecaUTions<br />
• Dispose of old batteries properly . Do not dispose of old batteries in a fire .<br />
• Do not leave batteries where a child or pet could play with or<br />
swallow them . If a battery is swallowed, contact a physician immediately .<br />
• The battery may explode if mistreated . Do not attempt to recharge<br />
or disassemble .<br />
• Use only fresh batteries of the required size and type . Do not mix old<br />
and new batteries, different types of batteries, or rechargeable batteries<br />
of different capacities .
fcc inforMaTon<br />
This equipment has been tested and found to comply with the limits for a Class b<br />
Digital Device, pursuant to Part 15 of the FCC Rules . These limits are designed to<br />
provide reasonable protection against harmful interference in a residential installation .<br />
This equipment generates, uses, and can radiate radio frequency energy and, if not<br />
installed and used in accordance with the instructions, may cause harmful interference<br />
to radio communications . However, there is no guarantee that interference will not<br />
occur in a particular installation .<br />
If this equipment does cause harmful interference to radio or television reception,<br />
which can be determined by turning the equipment off and on, the user is encouraged<br />
to try to correct the interference by one or more of the following measures:<br />
• Reorient or relocate the receiving antenna .<br />
• Increase the distance between the equipment and receiver .<br />
• Connect the equipment to an outlet on a circuit different from that<br />
to which the receiver is connected .<br />
• Consult the dealer or an experienced radio/TV technician for help .<br />
This equipment complies with Part 15 of the FCC Rules . Operation is subject<br />
to the following two conditions:<br />
1 . This equipment may not cause harmful interference .<br />
2 . This equipment must accept any interference received, including interference<br />
that may cause undesired operation .<br />
Modifications not authorized by the manufacturer may void the user’s authority<br />
to operate this device .<br />
6
7<br />
locaTion of ParTs and conTrols (TOP)<br />
1 . iPhone ® /iPod ® Device<br />
Docking Station<br />
2 . iPhone/iPod Device<br />
Docking Connector<br />
3 . iPod/iPhone Device<br />
Play/Pause button<br />
4 . alarm button<br />
5 . Preset button<br />
6 . Standby/Function button<br />
7 . Time & alarm Hour/Radio<br />
Frequency/back & Forward<br />
Track Search buttons<br />
8 . Volume and Time/alarm<br />
Minute +/- buttons<br />
9 . Snooze/Dimmer button<br />
10 . Mode/MEM button<br />
3<br />
4<br />
5<br />
6<br />
2<br />
7 8<br />
1<br />
10<br />
9
locaTion of ParTs and conTrols (SPEaKER & FRONT)<br />
1 . LED Display<br />
2 . aM/PM Indicator<br />
3 . alarm aL Indicator<br />
4 . FM Radio Mode LED Indicator<br />
5 . aUX Mode/alarm buzzer<br />
LED Indicator<br />
6 . iPod/iPhone Device Mode<br />
LED Indicator<br />
9<br />
8<br />
Speaker (1 of 2)<br />
7 . FM Radio Frequency MHz<br />
LED Indicator<br />
8 . Speaker Front<br />
9 . Speaker LED<br />
10 . Remote Control<br />
Infrared Sensor area<br />
3<br />
2 1 4<br />
10 7<br />
5<br />
6<br />
8
9<br />
locaTion of ParTs and conTrols (baCK)<br />
1 . Left/Right Speaker Sockets<br />
2 . Speaker Socket Cover Screw<br />
3 . Reset button<br />
4 . aUX-In Jack<br />
5 . back-Up battery Compartment<br />
1 2 3 4 5<br />
6 . RCa Video Jack<br />
7 . DC-In Jack<br />
8 . FM antenna Wire<br />
6<br />
8<br />
7
locaTion of ParTs and conTrols (REMOTE)<br />
1 . Infrared Transmitter<br />
2 . STaNDbY/ON button<br />
3 . FUNC button<br />
4 . MODE button<br />
5 . VOL +/- buttons<br />
6 . MUTE button<br />
7 . aLaRM ON/OFF button<br />
8 . SLEEP button<br />
9 . EQ button<br />
10 . DbbS button<br />
11 . MEM button<br />
12 . PLaY/PaUSE button<br />
13 . CH +/- buttons<br />
14 . TUN +/FF and TUN -/FR buttons<br />
15 . SNOOZE/DIM button<br />
16 . battery Compartment<br />
8<br />
9<br />
10<br />
11<br />
12<br />
13<br />
14<br />
15<br />
1<br />
16<br />
2<br />
3<br />
4<br />
5<br />
6<br />
7<br />
10
11<br />
oPeraTion<br />
reMOte Battery INStallatION<br />
1 . For first use, remove the insulating pull-tab inside the baTTERY<br />
COMPaRTMENT to engage the battery contacts of the included<br />
CR2032 button cell battery .<br />
2 . To replace a spent battery in the remote, slide out the baTTERY<br />
COMPaRTMENT TRaY located on the back of the remote control .<br />
3 . Insert 1 new CR2032 battery according to the polarity indicator<br />
on the TRaY .<br />
4 . Replace the baTTERY COMPaRTMENT TRaY .<br />
MaIN uNIt Back-uP Battery INStallatION<br />
1 . Open the baTTERY COMPaRTMENT LID on the back of the main unit .<br />
2 . Insert 2 aaa batteries (not included) according to the polarity indicators<br />
inside the compartment .<br />
3 . Close the baTTERY COMPaRTMENT LID securely .<br />
cONNectINg tHe MaIN uNIt tO POWer<br />
1 . Insert the adapter’s DC output plug into the DC IN jack on the back of the unit .<br />
2 . Plug the adapter into an electrical outlet .<br />
DOckINg yOur iPod/iPhone DeVIce<br />
1 . Use the dock insert that came with the device you are using with Stack<br />
or choose the one which fits your device from the selection included with<br />
the Stack (see next page) .
iPod nano 4G<br />
iPod nano 5G<br />
iPod classic 160Gb<br />
cOMPatIBle iPod/iPhone MODelS<br />
iPod touch (2nd generation)<br />
iPod touch (1st generation)<br />
iPod classic<br />
iPod nano (5th generation)<br />
iPod touch 2<br />
iPhone 3G/3GS<br />
iPod nano (4th generation)<br />
iPhone 3GS<br />
iPhone 3G<br />
iPhone<br />
2 . Insert the 30-PIN CONNECTOR on the MaIN UNIT into your iPod/iPhone<br />
device, making sure the device is seated securely .<br />
3 . Your iPod/iPhone device will begin to charge, or, if Stack is powered on,<br />
your device will begin to play .<br />
Note: If the dock is not used for a period of time, use the dock cover (not shown) .<br />
Using The reMoTe<br />
1 . Use the remote to operate Stack from a distance .<br />
2 . Make sure there isn’t anything blocking the path of the infrared remote transmitter .<br />
3 . The infrared transmitter on the remote will operate best within 15 feet .<br />
12
13<br />
radio oPeraTion<br />
fM aNteNNa<br />
Fully extend the FM antenna wire for the best FM radio reception .<br />
raDIO tuNINg<br />
1 . Press the button on the Stack or the button on the remote to<br />
turn on Stack .<br />
2 . Press the on the Stack or the fUnc button on the remote to select<br />
the FM radio receiving mode . The FM LED indicator will illuminate .<br />
3 . To manually tune to a desired station, repeatedly press the / buttons<br />
on the Stack or the TUn +/TUn - buttons on the remote .<br />
4 . To automatically search for stations with strong signals, press and hold the<br />
/ or the TUn +/TUn - buttons until the frequency digits on the display<br />
begin to scan, then release the button . The tuner will stop on the first strong<br />
signal it finds .<br />
Note: Manually tune to select weaker stations that might be skipped during<br />
automatic tuning. If the automatic tuning does not stop on the exact frequency<br />
of the station; for example, it stops on 100.9 MHz instead of 100.8 MHz, use the<br />
manual tuning method to “fine-tune” to the exact frequency of the desired station.<br />
raDIO PreSet StatIONS<br />
Stack allows you to store up to 20 FM stations .
MaNual PreSet StatIONS<br />
1 . With Stack powered on, press the button on the Stack or the button on the<br />
remote to select FM radio receiving mode . The FM LED indicator will illuminate .<br />
2 . Tune to the radio station you want to store in memory by repeatedly pressing the<br />
/ buttons on the Stack or the TUn +/TUn - buttons on the remote .<br />
3 . Press the button on the Stack or the MeM button on the remote .<br />
a preset station number (1, 2, 3, etc .) will appear and blink on the display .<br />
4 . To scroll through the preset station numbers, repeatedly press the /<br />
buttons or the TUn +/TUn - buttons .<br />
5 . To confirm the desired preset number for the current radio station,<br />
press the button on the Stack or the MeM button on the remote .<br />
6 . Repeat steps 3 to 6 to store additional stations .<br />
Note: you can overwrite a preset station by selecting and storing the new<br />
frequency in its place.<br />
autO-PreSet StatIONS<br />
1 . In radio mode, press and hold the button on the Stack or the MeM button<br />
on the remote until the frequency digits on the display begin to scan, then<br />
release the button .<br />
2 . The unit will capture strong radio station frequencies and save them<br />
in sequential order for all 20 presets .<br />
14
15<br />
recallINg PreSet StatIONS<br />
1 . With Stack powered on, press the button on the Stack or the button<br />
on the remote to select FM radio receiving mode . The FM LED indicator light<br />
will illuminate .<br />
2 . Press the button on Stack or the ch +/ch - buttons on the remote<br />
and a channel number will display .<br />
3 . Press the / buttons on Stack or the ch +/ch - buttons on the<br />
remote to scroll through and select the desired preset station number .<br />
iPod deVice oPeraTion<br />
PlayBack iPhone/iPod DeVIce MuSIc<br />
1 . Use the adapter included with your iPod player and insert it into the docking area .<br />
Note: Be careful when connecting the iPhone/iPod device to the dock to<br />
avoid damaging the 30-pin connector or the iPhone/iPod device.<br />
2 . With Stack powered on, press the button on the Stack to select iPhone/iPod<br />
mode . The iPhone device LED indicator light will illuminate .<br />
3 . The iPhone/iPod device will start playing automatically—and start charging immediately .<br />
4 . Press the button to pause or resume iPhone/iPod playback .<br />
5 . adjust the sound level by pressing the +/- buttons on Stack or the Vol +/Vol-<br />
buttons on the remote .<br />
Note: the volume level cannot be adjusted using the volume control on your<br />
iPhone/iPod device while it is docked on the Stack.<br />
iPhone/iPod DeVIce PlayBack cONtrOl<br />
1 . Press the button to pause or resume the iPhone/iPod playback .
2 . Press the or buttons on Stack or the TUn +/TUn - buttons<br />
on the remote to skip to the next or previous song .<br />
3 . Press and hold the or buttons or the TUn +/TUn - buttons for<br />
fast-forwarding or fast-rewinding during playback .<br />
VIDeO Out frOM tHe iPhone/iPod DeVIce<br />
You can connect this unit to a television or other video display that has<br />
a composite video input .<br />
1 . Securely dock your iPhone/iPod device .<br />
2 . Connect one end of a RCa cable (not included) to the rear RCa Video Jack on Stack .<br />
3 . Connect the other end of the RCa cable to VIDEO-IN of the television<br />
or video display on which you wish to watch the video and turn the unit on .<br />
4 . Press the button on the Stack or the button on the remote to turn<br />
on Stack .<br />
5 . Press the button on the Stack again to select iPhone/iPod mode .<br />
6 . Select a movie from your iPhone/iPod device menu .<br />
iPod Player Notes:<br />
• In the main menu, choose video, then select video setting.<br />
• Make sure the tV Out section is set to “ON.”<br />
• Switch back to the movie library and play the movie of your choice.<br />
Note: Video automatically defaults when using iPhone or iPod touch® device.<br />
16
17<br />
reMOVINg tHe iPod/iPhone DeVIce frOM tHe DOck<br />
To remove the iPhone/iPod device from the unit, press the button on the Stack<br />
or the button on the remote for three seconds to power off the Stack and then<br />
gently remove your device from the docking connector by pulling it straight up off the<br />
30-PIN CONNECTOR .<br />
Important: If the docking port will not be used for an extended period of time,<br />
cover it with the Dock cover adapter included in this package.<br />
aUXiliarY inPUT<br />
This unit provides an auxiliary audio signal input for connecting external audio devices .<br />
1 . Connect an audio cable (not included) with 3 .5mm stereo plug to the aUX-In<br />
Jack located at the back of the unit .<br />
2 . Connect the other end of the cable to a Line-Out Jack or Headphone Jack<br />
of your external audio device .<br />
3 . Turn on the external audio device .<br />
4 . Press the button on the Stack or the button on the remote to turn on Stack .<br />
5 . To select auxiliary audio input, press the button on the Stack again or<br />
the fUnc button on the remote until the aUX LED indicator illuminates .<br />
6 . The volume level can now be controlled through the main unit .<br />
Operate all other functions on the auxiliary device as usual .<br />
Note: If you’re connected the line Out Jack of your exteral device,<br />
you only need to adjust the volume control of this unit. If you’re connected<br />
to the Headphone Jack of your external device, then you may need to adjust<br />
both the volume control of your external device and the volume control of<br />
this unit to find the most desirable volume setting.
7 . Press the button on the Stack or the button on the remote for three<br />
seconds to power off the Stack when you finish listening . Don't forget that<br />
you need to manually power off your external device as well .<br />
PreseT eQ seTTings<br />
The unit provides 5 preset EQ settings for your selection in either radio,<br />
aUX or iPhone/iPod mode .<br />
1 . Press the EQ button on the remote to display the current EQ setting .<br />
2 . Each press of the EQ button will scroll through the EQ selections (see below) .<br />
DISPlay SyMBOl key<br />
E : 0 NORMaL<br />
E : 1 JaZZ<br />
E : 2 CLaSSIC<br />
E : 3 ROCK<br />
E : 4 POP<br />
3 . The preset EQ symbol will display for a few seconds after selection .<br />
BaSS BOOSt fuNctION<br />
1 . Select the bass boost effect by pressing the dbbs button on the remote .<br />
2 . Each press of the dbbs button will toggle the bass boost between ON and OFF .<br />
18
19<br />
3 . Stop on your choice and the ON or OFF indicator will display for a few seconds .<br />
Set lOuDNeSS ON/Off<br />
1 . When Stack is OFF, press the button on Stack or the Mode button<br />
on the remote until the LED digits blink .<br />
2 . Press the or Mode buttons two more times .<br />
3 . Press the +/- buttons on the Stack or the Vol +/Vol - buttons on the<br />
remote to select loudness On/Off .<br />
4 . Stack will take a few seconds to save your choice and exit the setting mode .<br />
seTTing The fUncTions<br />
Important: Stack must be Off to set the following functions.<br />
Set 12/24 HOurS DISPlay <strong>fOr</strong>Mat<br />
1 . Press the M.M or Mode button to enter the 12/24 hours display format<br />
setting mode .<br />
2 . Press the +/- buttons on the Stack or the Vol +/Vol- on the remote<br />
to select 12 hours or 24 hours display format .<br />
3 . To set, simply leave your choice on the display .<br />
Set tHe clOck<br />
1 . Press the or Mode button twice to enter the clock setting mode .<br />
2 . Press the or buttons on the Stack or the TUn +/TUn - buttons<br />
on the remote to scroll through and set the hour .<br />
3 . Press the +/- buttons on the Stack or the Vol +/Vol- on the remote<br />
to scroll through and set the minute .
Note: Press and hold any of the buttons mentioned in steps 2 and 3 above<br />
to scroll through the numbers forward or backward quickly.<br />
4 . Stop on your choice and the time set will be saved and displayed<br />
in a few seconds .<br />
exItINg tIMe SettINg MODe<br />
Simply wait for few seconds and the settings will be saved and you will<br />
automatically exit the setting mode .<br />
Set tHe alarM tIMe<br />
2 . Press and hold the button on Stack or the alarM on/off button<br />
on the remote until the aL LED indicator and alarm digits blink .<br />
3 . Press the / on the Stack or the TUn +/TUn — buttons on the<br />
remote to scroll through and set the alarm hour .<br />
4 . Press the +/- buttons on Stack or the Vol +/Vol — on the remote<br />
to scroll through and set the alarm minute .<br />
Note: Press and hold any of the buttons mentioned in steps 2 and 3 above<br />
to scroll through the numbers forward or backward quickly.<br />
Select tHe alarM SOuND<br />
The unit incorporates the alarm function with sounds to wake you that include<br />
a beep, FM Radio or music from your iPhone/iPod device .<br />
1 . Immediately after setting the alarm time, press the button on Stack or the<br />
alarM on/off button again and both aL LED indicator and alarm source<br />
LED indicator blink .<br />
20
21<br />
2 . Press the +/- buttons on Stack or the Vol +/Vol — on the remote to select<br />
alarm source buzzer, FM radio or iPhone/iPod .<br />
• To select wake to FM radio, the FM radio LED indicator will illuminate .<br />
• To select wake to iPhone/iPod device, the iPhone LED indicator<br />
will illuminate .<br />
• To select wake to buzzer, the bUZZ LED indicator will illuminate .<br />
3 . Stop on your choice and the alarm time you set will be saved and the current<br />
time will display .<br />
eNaBle DaIly alarM<br />
1 . Press the button on Stack or the alarM on/off button on the remote<br />
to toggle between alarm on and off . When turning the alarm on, the actual<br />
alarm time set will display for a few seconds .<br />
2 . For the alarm to be activated, the aL LED indicator must appear on<br />
the display .<br />
Note: When “Wake to radio” is selected, make sure the radio station<br />
to which you want to wake is tuned in.<br />
Wake tO Buzzer<br />
1 . When the alarm time is reached, the aL LED indicator blinks and the buzzer<br />
alarm will sound for one minute .<br />
2 . after one minute, Stack goes into auto-snooze mode for nine minutes if no<br />
button has been pressed .<br />
3 . You may manually activate the snooze function after the alarm sounds by
pressing the button on Stack or the snooZe/diM button on the remote .<br />
The buzzer stops for nine minutes and then sounds again .<br />
4 . The snooze operation (including both auto-snooze and manual snooze)<br />
will repeat five times within 60 minutes from the set alarm time .<br />
5 . To cancel the snooze time before it expires, press the button on Stack .<br />
6 . To stop the alarm immediately after the buzzer sounds, press the button on<br />
Stack or the alarM on/off button . It will then reset itself for the following day .<br />
Wake tO raDIO Or iPhone/iPod DeVIce<br />
When the alarm time is reached, the selected alarm source Radio or iPhone/iPod<br />
will automatically turn on . It starts softly and gradually becomes louder . During this<br />
time, the aL LED indicator blinks .<br />
1 . When the alarm time is reached, the aL LED indicator blinks and the alarm<br />
will sound for 60 minutes .<br />
2 . after 60 minutes, Stack will automatically reset for the following day .<br />
3 . You may manually activate the snooze function after the alarm sounds<br />
by pressing the button on Stack or the snooZe/diM button on<br />
the remote . The alarm stops for nine minutes and then sounds again .<br />
4 . The snooze operation will repeat five times within 60 minutes from the set<br />
alarm time .<br />
5 . To cancel the snooze time before it expires, press the button on Stack .<br />
6 . To stop the alarm immediately after the buzzer sounds, press the button on<br />
Stack or the alarM on/off button . It will then reset itself for the following day .<br />
Note: If “Wake to iPhone/iPod” is selected, but your iPhone/iPod device has not<br />
22
23<br />
been docked, the alarm source will default to the alarm Buzzer automatically.<br />
sleeP TiMer<br />
This feature allows you to fall asleep listening to the FM radio or your iPhone/iPod<br />
device music for up to 90 minutes .<br />
The unit shuts off automatically when the time selected expires .<br />
tO Set tHe SleeP tIMer<br />
1 . With Stack powered on, tune to a desired radio station in radio mode or have<br />
your iPhone/iPod device docked and Stack in iPhone/iPod mode .<br />
2 . Press the sleeP button on the remote control repeatedly to select the<br />
sleep timer (00, 15, 30, 45, 60 or 90 minutes) . The LED display shows<br />
the sleep time; e .g ., “SL 15” if 15 minutes is selected . Stack plays for<br />
the selected length of time, then automatically turns off .<br />
Note: If you changed your mind and don’t want to listen to audio while<br />
falling asleep, just select the “00” and the sleep timer setting will cancel.<br />
3 . You may also turn Stack off before the sleep timer counts down to zero .<br />
Note: If you are falling asleep to music from an external device connected<br />
to the aux input, the sleep timer will shut off the power to this system<br />
but it will not turn off the external device’s power.<br />
reseTTing The UniT<br />
If the unit experiences a power surge during a power outage, you may need
to reset Stack .<br />
• Unplug and then reconnect the aC power plug into the wall outlet .<br />
• Use a straightened paper clip, toothpick or similar objects to press the<br />
reseT button located at the rear of the main unit .<br />
When you press the reseT button, it clears the system’s memory to rectify<br />
the issue, and all of your previous settings will be erased .<br />
caUTion<br />
DO NOt uSe a SHarP, POINteD OBJect, SucH aS a PIN Or NeeDle,<br />
tO PreSS tHe reSet ButtON. It May DaMage tHe reSet SWItcH<br />
INSIDe tHe uNIt.<br />
24
25<br />
TroUbleshooTing<br />
ISSue SOlutION<br />
Sound is not clear<br />
or there is no sound .<br />
Check the cable or iPod/iPhone<br />
device connection .<br />
No power to Stack . Check the power adapter and cable .<br />
Sound is too faint/<br />
too much distortion .<br />
Unit does not respond<br />
to the remote control .<br />
Docked iPod player will not play<br />
movies/videos on its screen<br />
while attached to Stack .<br />
Press the volume button to adjust sound level .<br />
adjust the volume of connected music device .<br />
Move the remote control closer to Stack .<br />
There may be an obstruction between<br />
the remote and Stack . Move the remote<br />
to a more direct line to Stack .<br />
The remote’s batteries are low .<br />
Replace the remote’s batteries .<br />
Movies/videos can only be viewed using a<br />
TV when the iPod player is attached to Stack .
TroUbleshooTing (CONTINUED)<br />
ISSue SOlutION<br />
There is a “This accessory is<br />
not made to work with iPhone”<br />
warning on the iPhone device<br />
when docked in Stack .<br />
Cannot access<br />
“Camera Videos”<br />
on 5th gen iPod nano ®<br />
using the Stack .<br />
Stack needs a few seconds to authenticate<br />
the iPhone device . Try removing and<br />
re-docking the device if the warning does<br />
not disappear after a few seconds .<br />
In order to view camera videos on a<br />
5th gen iPod nano on your TV using Stack,<br />
your camera videos must be manually<br />
moved to Movies:<br />
1 . Connect your iPod nano to your computer .<br />
2 . access the DCIM folder on your iPod nano .<br />
3 . Locate your camera videos .<br />
4 . Import your camera videos to iTunes ®<br />
and sync your iPod nano .<br />
5 . Refer to pages 17-18 to play your<br />
videos on your TV using the speaker .<br />
26
27<br />
TroUbleshooTing (CONTINUED)<br />
ISSue SOlutION<br />
Movie is not displaying on TV .<br />
Confirm video cable is connected<br />
to the correct jacks on the speaker .<br />
Confirm correct Video Out cable type<br />
is selected under “iPod Settings .”<br />
Confirm correct TV signal type is selected<br />
under “iPod Settings .”<br />
If the movie was started before the video<br />
cable type was selected in “iPod Settings,”<br />
the movie may need to be restarted .
sPecificaTions<br />
Power adapter . . . . . . . . . . . . . . . . . . . . . . . . . . . . . . . . Input aC 100V-240V~50/60Hz<br />
Output DC 8V/2500ma<br />
Power Supply for the Unit . . . . . . . . . . . . . . . . . . . . DC 8V/2500ma<br />
battery backup for Clock/Memory . . . . . . . . . . . . DC 3V-2 x aaa (UM-4)<br />
Type battery (not included)<br />
Radio Frequency Range . . . . . . . . . . . . . . . . . . . . . . FM 87 .5~108 MHz ,<br />
0 .1MHz tuning step<br />
iPod/iPhone not included . iPod, iPod touch, iPod nano, iPhone and iTunes are trademarks<br />
of apple Inc ., registered in the U .S . and other countries . “Made for iPod” and “Made for iPhone”<br />
mean that an electronic accessory has been designed to connect specifically to iPod or iPhone,<br />
respectively, and has been certified by the developer to meet apple performance standards .<br />
apple is not responsible for the operation of this device or its compliance with safety and<br />
regulatory standards . Please note that the use of this accessory with iPod or iPhone may<br />
affect wireless performance .<br />
28
29<br />
one (1) Year liMiTed WarranTY<br />
brookstone ® warrants this product against defects in materials and/or workmanship<br />
under normal use for a period of ONE (1) YEaR from the date of purchase by the<br />
original purchaser (“Warranty Period”) . If a defect arises and a valid claim is received<br />
within the Warranty Period, at its option, brookstone will either 1) repair the defect<br />
at no charge, using new or refurbished replacement parts, or 2) replace the product<br />
with a new product that is at least functionally equivalent to the original product, or<br />
3) provide a store credit in the amount of the purchase price of the original product .<br />
a replacement product or part, including a user-installable part installed in accordance<br />
with instructions provided by brookstone, assumes the remaining warranty of the<br />
original product . When a product or part is exchanged, any replacement item becomes<br />
your property and the replaced item becomes brookstone’s property . When a store<br />
credit is given, the original product must be returned to brookstone and becomes<br />
brookstone’s property .<br />
Obtaining Service: To obtain warranty service, call brookstone Limited Warranty Service at<br />
1-800-292-9819 . Please be prepared to describe the product that needs service and<br />
the nature of the problem . a purchase receipt is required . all repairs and replacements<br />
must be authorized in advance . Service options, parts availability and response times<br />
will vary . You are responsible for delivery and the cost of delivery of the product or any<br />
parts to the authorized service center for replacement, per our instructions .<br />
limits and exclusions: Coverage under this Limited Warranty is limited to the United<br />
States of america, including the District of Columbia and the U .S . Territories of<br />
Guam, Puerto Rico, and the U .S . Virgin Islands . This Limited Warranty applies only<br />
to products manufactured for brookstone that can be identified by the “brookstone”<br />
trademark, trade name, or logo affixed to them or their packaging . The Limited<br />
Warranty does not apply to any non-brookstone products . Manufacturers or<br />
suppliers other than brookstone may provide their own warranties to the purchaser,
ut brookstone, in so far as permitted by law, provides these products “as is .”<br />
This warranty does not apply to: a) damage caused by failure to follow instructions<br />
relating to product’s use or the installation of components; b) damage caused by<br />
accident, abuse, misuse, fire, floods, earthquake or other external causes; c) damage<br />
caused by service performed by anyone who is not a representative of brookstone;<br />
d) accessories used in conjunction with a covered product; e) a product or part<br />
that has been modified to alter functionality or capability; f) items intended to be<br />
periodically replaced by the purchaser during the normal life of the product including,<br />
without limitation, batteries or light bulbs; g) any product sold “as is” including, without<br />
limitation, floor demonstration models and refurbished items; or h) a product that is<br />
used commercially or for a commercial purpose .<br />
BrOOkStONe SHall NOt Be lIaBle <strong>fOr</strong> INcIDeNtal Or cONSeQueNtIal<br />
DaMageS reSultINg frOM tHe uSe Of tHIS PrODuct, Or arISINg<br />
Out Of aNy BreacH Of tHIS WarraNty. tO tHe exteNt PerMItteD By<br />
aPPlIcaBle laW, BrOOkStONe DISclaIMS aNy aND all StatutOry Or<br />
IMPlIeD WarraNtIeS, INcluDINg, WItHOut lIMItatION, WarraNtIeS<br />
Of MercHaNtaBIlIty, fItNeSS <strong>fOr</strong> a PartIcular PurPOSe aND<br />
WarraNtIeS agaINSt HIDDeN Or lateNt DefectS. If BrOOkStONe<br />
caNNOt laWfully DISclaIM StatutOry Or IMPlIeD WarraNtIeS, tHeN<br />
tO tHe exteNt PerMItteD By laW, all SucH WarraNtIeS SHall Be<br />
lIMIteD IN DuratION tO tHe DuratION Of tHIS exPreSS WarraNty.<br />
Some states disallow the exclusion or limitation of incidental or consequential<br />
damages or how long an implied warranty lasts, so the above exclusions or limitations<br />
may not apply to you . This warranty gives you specific legal rights and you may also<br />
have other rights, which vary from state to state .<br />
30
Merrimack, New Hampshire USA 03054 • 800-846-3000 • www.<strong>Brookstone</strong>.com<br />
649210


