Wireless Outdoor Speaker with Auto-Tuning - Brookstone
Wireless Outdoor Speaker with Auto-Tuning - Brookstone
Wireless Outdoor Speaker with Auto-Tuning - Brookstone

Create successful ePaper yourself
Turn your PDF publications into a flip-book with our unique Google optimized e-Paper software.
497362_INS_<strong>Outdoor</strong>Wless Spkrs 6/9/05 11:00 AM Page 1<br />
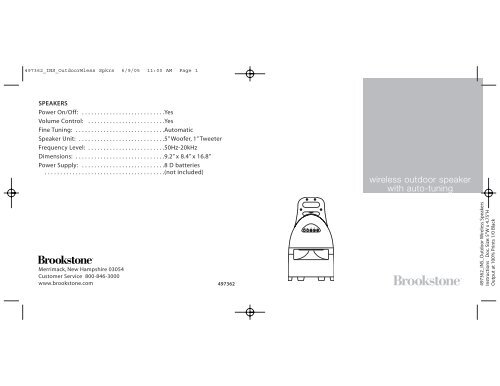
SPEAKERS<br />
Power On/Off: . . . . . . . . . . . . . . . . . . . . . . . . . . .Yes<br />
Volume Control: . . . . . . . . . . . . . . . . . . . . . . . . .Yes<br />
Fine <strong>Tuning</strong>: . . . . . . . . . . . . . . . . . . . . . . . . . . . . .<strong>Auto</strong>matic<br />
<strong>Speaker</strong> Unit: . . . . . . . . . . . . . . . . . . . . . . . . . . . .5” Woofer, 1” Tweeter<br />
Frequency Level: . . . . . . . . . . . . . . . . . . . . . . . . .50Hz-20kHz<br />
Dimensions: . . . . . . . . . . . . . . . . . . . . . . . . . . . . .9.2” x 8.4” x 16.8”<br />
Power Supply: . . . . . . . . . . . . . . . . . . . . . . . . . . .8 D batteries<br />
. . . . . . . . . . . . . . . . . . . . . . . . . . . . . . . . . . . . . . .(not included)<br />
Merrimack, New Hampshire 03054<br />
Customer Service 800-846-3000<br />
www.brookstone.com 497362<br />
— +<br />
wireless outdoor speaker<br />
<strong>with</strong> auto-tuning<br />
497362_INS_<strong>Outdoor</strong> <strong>Wireless</strong> <strong>Speaker</strong>s<br />
Instructions Doc. Size: 5"W x 4.75"H<br />
Output at 100% Prints 1/0 Black
497362_INS_<strong>Outdoor</strong>Wless Spkrs 6/9/05 11:00 AM Page 3<br />
2<br />
— +<br />
Using the <strong>Speaker</strong> Lights<br />
Use the speaker lights for additional ambience at night.<br />
Press LIGHTS once to turn the lights on and again to turn the<br />
lights off.<br />
CARE AND MAINTENANCE<br />
Cleaning the <strong>Speaker</strong> and Transmitter<br />
Wipe <strong>with</strong> a damp cloth. Do not use abrasive chemicals.<br />
SPECIFICATIONS<br />
TRANSMITTER<br />
Range: . . . . . . . . . . . . . . . . . . . . . . . . . . . . . . . . . .150 feet<br />
Fine <strong>Tuning</strong>: . . . . . . . . . . . . . . . . . . . . . . . . . . . . .<strong>Auto</strong>matic<br />
Number of Channels: . . . . . . . . . . . . . . . . . . . . .3<br />
Dimensions: . . . . . . . . . . . . . . . . . . . . . . . . . . . . .1.6” x 5.48” x 4.84”<br />
Power Supply: . . . . . . . . . . . . . . . . . . . . . . . . . . .AC/DC Adapters<br />
. . . . . . . . . . . . . . . . . . . . . . . . . . . . . . . . . . . . . . . . .(included)<br />
11<br />
497362_INS_<strong>Outdoor</strong> <strong>Wireless</strong> <strong>Speaker</strong>s<br />
Instructions Doc. Size: 5"W x 4.75"H<br />
Output at 100% Prints 1/0 Black
497362_INS_<strong>Outdoor</strong>Wless Spkrs 6/9/05 11:00 AM Page 5<br />
10<br />
Using the <strong>Speaker</strong>s<br />
1. If you are not using battery power, insert one end of the SPEAKER<br />
POWER ADAPTER into DC 9V on the speaker, and the other end into an<br />
electrical outlet.<br />
2. Turn on the power to your audio source.<br />
Note: If the transmitter is connected to your audio source’s variablelevel<br />
output jacks, you may adjust the volume on your audio source. If<br />
the transmitter is connected to your audio source’s fixed-level output<br />
jacks, no volume adjustment is needed.<br />
3. Slide OFF, CH1, CH2, CH3 on the transmitter to channel 1, 2 or 3. The<br />
TRANSMITTER POWER INDICATOR illuminates.<br />
4. Press POWER on the speaker and the SPEAKER POWER<br />
INDICATOR illuminates.<br />
5. Turn CH1, CH2, CH3 on the speaker to the same channel selected on<br />
the transmitter.<br />
6. Press VOLUME + or - to adjust the speaker volume to your desired<br />
listening level and BASS to turn on the bass. The BASS<br />
INDICATOR illuminates.<br />
Note:<br />
• If signal interference occurs, adjust the channel on both the speaker<br />
and the transmitter.<br />
• When not in use, press on the speaker to turn the power off and<br />
remove the batteries to prevent leakage in the compartment. Slide<br />
CHANNEL 1, 2, 3 on the transmitter to the OFF position.<br />
WIRELESS OUTDOOR SPEAKER<br />
WITH AUTO-TUNING<br />
<strong>Brookstone</strong> makes life better.<br />
Our <strong>Wireless</strong> <strong>Outdoor</strong> <strong>Speaker</strong> <strong>with</strong> <strong>Auto</strong>-<strong>Tuning</strong> lets you enjoy rich<br />
stereo sound indoors or out. With three separate channels, the<br />
speaker avoids interference when used near cordless phones,<br />
headsets or other devices. And <strong>with</strong> a 150-foot broadcast range,<br />
you’re able to listen to your music clearly—through walls, floors,<br />
and ceilings.<br />
The <strong>Wireless</strong> <strong>Outdoor</strong> <strong>Speaker</strong> <strong>with</strong> <strong>Auto</strong>-<strong>Tuning</strong> has been thoroughly<br />
tested to be certain it meets our own exacting quality control<br />
standards. Please take a few moments to review the following<br />
important information before using this product.<br />
Enjoy the freedom of wireless sound!<br />
3<br />
497362_INS_<strong>Outdoor</strong> <strong>Wireless</strong> <strong>Speaker</strong>s<br />
Instructions Doc. Size: 5"W x 4.75"H<br />
Output at 100% Prints 1/0 Black
497362_INS_<strong>Outdoor</strong>Wless Spkrs 6/9/05 11:00 AM Page 7<br />
4<br />
BATTERY PRECAUTIONS<br />
• Dispose of old batteries properly. Do not dispose of old batteries<br />
in a fire.<br />
• Do not leave batteries where a child or pet could play <strong>with</strong> or<br />
swallow them. If batteries are swallowed, contact a<br />
physician immediately.<br />
• Batteries may explode if mistreated. Do not attempt to recharge or<br />
disassemble batteries.<br />
WARNING<br />
1. Do not try to disassemble the speaker.<br />
2. Do not place speaker near heat sources such as radiators<br />
and heating vents.<br />
3. Do not store speaker in extreme temperatures.<br />
4. Turn the transmitter and speaker power off when not in use.<br />
Headphone Jack<br />
1. Insert one end of the TRANSMITTER POWER ADAPTER into DC 9V on<br />
the transmitter and the other end into an electrical outlet.<br />
2. Insert one end of the DUAL RCA CABLE into the appropriately colored<br />
R/L LINE IN jacks on the transmitter and the other end into the<br />
appropriately colored ends of the Y ADAPTER 3.5MM CABLE.<br />
3. Insert the 1/8” single end of the Y ADAPTER 3.5MM CABLE into your<br />
audio source’s headphone jack.<br />
Note: If your audio source requires a 1/4” headphone plug, you will need a<br />
1/4” adapter (not included).<br />
SPEAKER OPERATION<br />
Installing the <strong>Speaker</strong> Batteries<br />
You may insert batteries into the speaker as backup or if you prefer<br />
not to use the SPEAKER POWER ADAPTER.<br />
1. Turn the SCREWS located on the bottom of the speaker<br />
counterclockwise and remove the BATTERY COMPARTMENT COVER.<br />
2. Insert eight D batteries (not included) according to polarity<br />
indicators inside the compartment.<br />
3. Replace the BATTERY COMPARTMENT COVER and tighten<br />
the SCREWS.<br />
9<br />
497362_INS_<strong>Outdoor</strong> <strong>Wireless</strong> <strong>Speaker</strong>s<br />
Instructions Doc. Size: 5"W x 4.75"H<br />
Output at 100% Prints 1/0 Black
497362_INS_<strong>Outdoor</strong>Wless Spkrs 6/9/05 11:00 AM Page 9<br />
8<br />
TRANSMITTER OPERATION<br />
Connecting the Transmitter<br />
The transmitter may be connected two ways depending on your<br />
audio source. If your audio source has left and right RCA output jacks,<br />
you will only use the DUAL RCA CABLE. If your audio source does not<br />
have left and right RCA output jacks, but rather a stereo headphone<br />
jack, you will use both the Y ADAPTER 3.5MM CABLE and the DUAL<br />
RCA CABLE.<br />
Left and Right RCA Output Jacks<br />
1. Insert one end of the TRANSMITTER POWER ADAPTER into DC 9V on<br />
the transmitter, and the other end into an electrical outlet.<br />
2. Insert one end of the DUAL RCA CABLE into the appropriately colored<br />
R/L LINE IN jacks on the transmitter, and the other end into your audio<br />
source’s left and right audio output jacks.<br />
Note:<br />
• If there are no fixed-level audio outputs on your audio source,<br />
connect the DUAL RCA CABLE to variable-level (HI-FI) audio<br />
outputs or refer to Headphone Jack for Y ADAPTER 3.5MM CABLE<br />
connection instructions.<br />
• Do not connect the DUAL RCA CABLE to speaker terminals on your TV<br />
or audio source. This may damage the transmitter, your TV or<br />
audio source.<br />
FCC INFORMATION<br />
This equipment has been tested and found to comply <strong>with</strong> the limits<br />
for a class B digital Device, pursuant to part 15 of the FCC Rules. These<br />
limits are designed to provide reasonable protection against harmful<br />
interference in a residential installation. This equipment generates,<br />
uses, and can radiate radio frequency energy and, if not installed and<br />
used in accordance <strong>with</strong> the instructions, may cause harmful<br />
interference to radio communications. However, there is no guarantee<br />
that interference will not occur in a particular installation.<br />
If this equipment does cause harmful interference to radio or<br />
television reception, which can be determined by turning the<br />
equipment off and on, the user is encouraged to try to correct the<br />
interference by one or more of the following measures:<br />
• Reorient or relocate the receiving antenna.<br />
• Increase the distance between the equipment and receiver.<br />
• Connect the equipment to an outlet on a circuit different from<br />
which the receiver is connected.<br />
• Consult the dealer or an experienced radio/TV technician for help.<br />
This equipment complies <strong>with</strong> part 15 of the FCC Rules. Operation is<br />
subject to the following two conditions:<br />
1. This equipment may not cause harmful interference.<br />
2. This equipment must accept any interference received, including<br />
interference that may cause undesired operation.<br />
5<br />
497362_INS_<strong>Outdoor</strong> <strong>Wireless</strong> <strong>Speaker</strong>s<br />
Instructions Doc. Size: 5"W x 4.75"H<br />
Output at 100% Prints 1/0 Black
497362_INS_<strong>Outdoor</strong>Wless Spkrs 6/9/05 11:00 AM Page 11<br />
6<br />
LOCATION OF CONTROLS AND INDICATORS<br />
TRANSMITTER<br />
1. TRANSMITTER POWER INDICATOR<br />
2. OFF, CH1, CH2, CH3<br />
3. DC 9V<br />
4. R/L LINE IN<br />
SPEAKER<br />
1<br />
5. VOLUME ,<br />
6. POWER<br />
7. SPEAKER POWER INDICATOR<br />
8. BASS<br />
9. BASS INDICATOR<br />
10. LIGHTS<br />
11. CH1, CH2, CH3<br />
12. SCREWS<br />
13. BATTERY COMPARTMENT COVER<br />
14. DC 9V<br />
14<br />
5<br />
12<br />
6<br />
7<br />
11<br />
4<br />
2<br />
8<br />
9<br />
10<br />
3<br />
13<br />
POWER ADAPTERS/CABLES<br />
15. TRANSMITTER POWER ADAPTER<br />
16. SPEAKER POWER ADAPTER<br />
17. DUAL RCA CABLE<br />
18. Y ADAPTER 3.5MM CABLE<br />
15 16 17 18<br />
7<br />
497362_INS_<strong>Outdoor</strong> <strong>Wireless</strong> <strong>Speaker</strong>s<br />
Instructions Doc. Size: 5"W x 4.75"H<br />
Output at 100% Prints 1/0 Black