Contour 200i Air Owner's Manual (English) - Brookstone
Contour 200i Air Owner's Manual (English) - Brookstone
Contour 200i Air Owner's Manual (English) - Brookstone

Create successful ePaper yourself
Turn your PDF publications into a flip-book with our unique Google optimized e-Paper software.
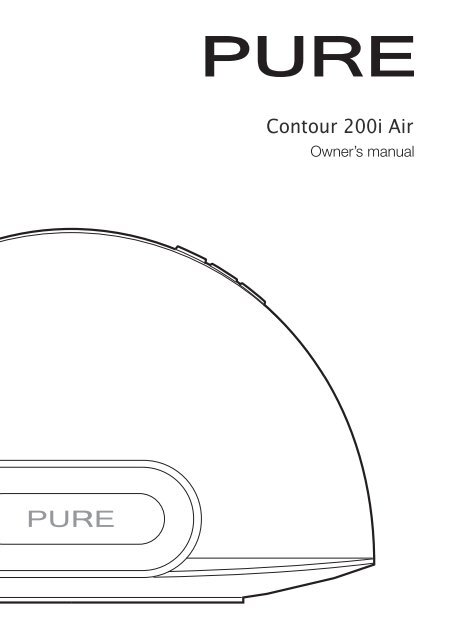
Owner’s manual
Safety instructions<br />
1. Read these instructions – All the safety and operating instructions should<br />
be read before this product is operated.<br />
2. Keep these instructions – The safety and operating instructions should be<br />
retained for future reference.<br />
3. Heed all warnings – All warnings on the appliance and in the operating<br />
instructions should be adhered to.<br />
4. Follow all instructions – All operating and use instructions should be<br />
followed.<br />
5. Do not use this apparatus near water – The appliance should not be<br />
used near water or moisture – for example, in a wet basement or near a<br />
swimming pool.<br />
6. Clean only with dry cloth.<br />
7. Do not block any ventilation openings. Install in accordance with the<br />
manufacturer’s instructions.<br />
8. Do not install near any heat sources such as radiators, heat registers,<br />
stoves, or other apparatus (including amplifiers) that produce heat.<br />
9. Do not defeat the safety purpose of the polarized or grounding plug. A<br />
polarized plug has two blades with one wider than the other. A grounding<br />
plug has two blades and a third grounding prong. The wide blade or the<br />
third prong is provided for your safety. If the provided plug does not fit into<br />
your outlet, consult an electrician for replacement of the obsolete outlet.<br />
10. Only use attachments/accessories specified by the manufacturer.<br />
11. Unplug the apparatus during lightning storms or when unused for long<br />
periods of time.<br />
12. Refer all servicing to qualified personnel. Servicing is required when the<br />
apparatus has been damaged in any way,such as power supply cord<br />
or plug is damaged, liquid has been spilled or objects have fallen into<br />
the apparatus has been exposed to rain or moisture, does not operate<br />
normally, or has been dropped.<br />
13. Do not install this equipment in a confined or building-in space such<br />
as a book case or similar unit. The ventilation should not be impeded<br />
by covering the ventilation openings with items such as newspaper,<br />
tablecloths, curtains etc.<br />
14. WARNING: To reduce the risk of fire or electric shock, do not expose this<br />
apparatus to rain or moisture. The apparatus shall not be exposed to<br />
dripping or splashing and that objects filled with liquids, such as vases,<br />
shall not be placed on apparatus.<br />
15. The mains plug and appliance coupler are used as disconnect device, the<br />
disconnect device shall remain readily operable<br />
16. WARNING: The remote batteries shall not be exposed to excessive heat<br />
such as sunshine, fire or the like.<br />
17. This equipment is a Class II or double insulated electrical<br />
appliance. It has been designed in such a way that it does not<br />
require a safety connection to electrical earth.<br />
18. Separation distance of at least 20cm must be maintained between the<br />
antenna of the product and all persons.<br />
19. The socket-outlet shall be installed near the equipment and shall be<br />
easily accessible.<br />
FCC NOTICE TO A USER IN THE UNITED STATES<br />
This equipment has been tested and found to comply with the limits for a Class<br />
B digital device, pursuant to Part 15 of the FCC Rules. These limits are designed<br />
to provide reasonable protection against harmful interference in a residential<br />
installation. This equipment generates, uses, and can radiate radio frequency<br />
energy and, if not installed and used in accordance with the instructions, may<br />
cause harmful interference to radio communications. However, there is no<br />
guarantee that interference will not occur in a particular installation. If this<br />
equipment does cause harmful interference to radio or television reception, which<br />
can be determined by turning the equipment off and on, the user is encouraged<br />
to try to correct the interference by one or more of the following measures:<br />
• Reorient or relocate the receiving antenna.<br />
• Increase the separation between the equipment and receiver.<br />
• Connect the equipment into an outlet on a circuit different from that to<br />
which the receiver is connected.<br />
• Consult the dealer or an experienced radio/TV technician for help.<br />
Warning! Any modification or changes to this device, unless explicitly<br />
approved by PURE, will invalidate the authorisation of the device.<br />
Operation of an unauthorized device is prohibited under Section 302 of<br />
the Communications Act of 1934, as amended, and Subpart 1 of Part 2 of<br />
Chapter 47 of the Code of Federal Regulations.<br />
This device complies with part 15 of the FCC rules. Operation is subject to the<br />
following two conditions: (1) This device may not cause harmful interference,<br />
and (2) this device must accept any interference received, including<br />
interference that may cause undesired operation.<br />
This Class B digital apparatus complies with Canadian ICES-003.<br />
Copyright<br />
Copyright 2011 by Imagination Technologies Limited. All rights reserved. No part<br />
of this publication may be copied or distributed, transmitted, transcribed, stored<br />
in a retrieval system, or translated into any human or computer language, in any<br />
form or by any means, electronic, mechanical, magnetic, manual or otherwise, or<br />
disclosed to third parties without the express written permission of Imagination<br />
Technologies Limited.<br />
Trademarks<br />
<strong>Contour</strong> <strong>200i</strong> <strong>Air</strong>, PURE, the PURE logo, Imagination Technologies, and the<br />
Imagination Technologies logo are trademarks or registered trademarks of<br />
Imagination Technologies Limited. iPad, iPod , iPod touch, iPhone, iTunes and<br />
<strong>Air</strong>Play are trademarks of Apple Inc., registered in the U.S. and other countries.<br />
“Made for iPod”, “Made for iPhone”, and “Made for iPad” mean that an electronic<br />
accessory has been designed to connect specifically to iPod, iPad or iPhone,<br />
respectively, and has been certified by the developer to meet Apple performance<br />
standards. Apple is not responsible for the operation of this device or its compliance<br />
with safety and regulatory standards. Please note that the use of this accessory<br />
with iPod, iPad or iPhone may affect wireless performance. All other product<br />
names are trademarks of their respective companies. Version 1 January 2012.<br />
Warranty information<br />
Imagination Technologies Ltd. warrants to the end user that this product will<br />
be free from defects in materials and workmanship in the course of normal<br />
use for a period of two years from the date of purchase. This guarantee covers<br />
breakdowns due to manufacturing or design faults; it does not apply in cases<br />
such as accidental damage, however caused, wear and tear, negligence,<br />
adjustment, modification or repair not authorised by us. Please visit www.<br />
pure.com/register to register your product with us. Should you have a problem<br />
with your unit please contact your supplier or contact PURE Support at the<br />
address shown on the rear of this manual. If you need to return your product<br />
please use the original packaging and include all parts and accessories. We<br />
reserve the right to refuse incomplete or badly packaged returns.<br />
Disclaimer<br />
Imagination Technologies Limited makes no representation or warranties with<br />
respect to the content of this document and specifically disclaims any implied<br />
warranties of merchantability or fitness for any particular purpose. Further,<br />
Imagination Technologies Limited reserves the right to revise this publication<br />
and to make changes in it from time to time without obligation of Imagination<br />
Technologies Limited to notify any person or organization of such revisions<br />
or changes.
Contents<br />
Getting started ............................................................................ 4<br />
Introduction ....................................................................................................................4<br />
Remote control ...............................................................................................................4<br />
Controls and connectors .................................................................................................5<br />
Front panel Status LED ...................................................................................................6<br />
Switching between Sleep, Standby and On......................................................................6<br />
Network setup.................................................................................................................6<br />
Preparing <strong>Contour</strong> to use <strong>Air</strong>Play with Wi-Fi ................................... 7<br />
Preparing <strong>Contour</strong> to use <strong>Air</strong>Play with an Ethernet cable ............... 10<br />
Using <strong>Air</strong>Play to play audio ......................................................... 11<br />
Introduction ................................................................................................................. 11<br />
Playing audio from iTunes............................................................................................. 11<br />
Allowing commands to be sent back to iTunes from <strong>Contour</strong> ........................................ 11<br />
Streaming audio to multiple rooms .............................................................................. 11<br />
Playing audio from an iPod touch, iPhone or iPad ......................................................... 12<br />
Listening to a docked iPod/iPhone/iPad ..................................... 13<br />
Compatibility ............................................................................................................... 13<br />
Docking your device ..................................................................................................... 13<br />
Selecting the dock ....................................................................................................... 13<br />
Controlling your device ................................................................................................. 13<br />
Using the auxiliary input ............................................................. 14<br />
Connecting an auxiliary device ..................................................................................... 14<br />
Selecting the auxiliary input ......................................................................................... 14<br />
Using the digital output .............................................................. 14<br />
Using an external digital output device ......................................................................... 14<br />
Connecting an external digital output device ................................................................ 14<br />
Using <strong>Contour</strong> Setup Manager ..................................................... 15<br />
Upgrading software manually ...................................................... 20<br />
<strong>Manual</strong> software updates ............................................................................................. 20<br />
Help .......................................................................................... 24<br />
Specifications ............................................................................ 25<br />
Pure Warranty Statement for Australia ......................................... 26<br />
3
4<br />
Getting started<br />
Introduction<br />
<strong>Contour</strong> <strong>200i</strong> <strong>Air</strong> can be used in a number of different ways:<br />
• As an <strong>Air</strong>Play device for playing audio from iTunes on your computer or an iPod touch, iPhone<br />
or iPad with <strong>Air</strong>Play — via your wireless network. See “Network setup” on page 6.<br />
• As a docking station for an iPod, iPhone or iPad. See page 13.<br />
• As a speaker for an audio device connected via the Aux In connector. See page 14.<br />
Note: <strong>Contour</strong> <strong>200i</strong> <strong>Air</strong> will be referred to as <strong>Contour</strong> throughout the rest of this user guide.<br />
Remote control<br />
Pull the plastic tab from the remote<br />
control battery compartment and<br />
remove the protective film from remote<br />
buttons.<br />
Standby<br />
Press to switch between Sleep, Standby and On.<br />
See page 6.<br />
Source Press to switch between <strong>Air</strong>Play, Dock and Auxiliary<br />
input sources.<br />
Shuffle the track playback order (when <strong>Air</strong>Play/<br />
Dock is the input source).<br />
Toggle to repeat current track , repeat all or no<br />
repeat (when <strong>Air</strong>Play/Dock is the input source).<br />
+<br />
Vol Volume up/Volume down<br />
-<br />
Menu Press to access the menu on a docked iPod or<br />
iPhone. Also steps back through menus.<br />
< Select > Select tracks and menu options on your iPod/<br />
iPhone (only when Dock is the input source).<br />
and Skip to beginning of current track or go to previous<br />
or next track. Hold to fast rewind or fast forward.*<br />
Play/pause current track<br />
*The remote control cannot be used to scan within a track when <strong>Air</strong>Play is the input source
Controls and connectors<br />
Standby<br />
Press to switch between<br />
Sleep, Standby and On.<br />
See page 6.<br />
Status<br />
LED<br />
See<br />
page<br />
6.<br />
Software<br />
Upgrade<br />
Status<br />
LED<br />
DC In<br />
Connector for<br />
supplied mains<br />
power adapter.<br />
Digital Coaxial<br />
Connector for<br />
output of digital<br />
audio signal.<br />
See page 14.<br />
Wi-Fi Setup<br />
Button used when<br />
setting up a wireless<br />
network. See page 7.<br />
Aux In<br />
Connector for<br />
analogue stereo<br />
input for MP3<br />
player or similar.<br />
See page 14.<br />
Mute<br />
Volume down<br />
Volume up<br />
Ethernet<br />
Connector for<br />
network cable. Use<br />
as an alternative to<br />
Wi-Fi for setup. See<br />
page 10.<br />
5
6<br />
Front panel Status LED<br />
When <strong>Contour</strong> is powered, the Status LED is visible through the front speaker mesh. The Status<br />
LED is also used to indicate the various states of <strong>Contour</strong>, by colour.<br />
Red Standby (bright) / Starting up (bright flashing) / Sleep (dimmed)<br />
Blue iPod/iPhone/iPad dock is active (flashing indicates that the connection to<br />
the docked product is preparing and also indicates remote activity)<br />
White <strong>Air</strong>Play is active (fast flashing indicates remote activity) (slow flashing<br />
indicates network connectivity problems)<br />
Pink Aux In is active (fast flashing indicates remote activity)<br />
Blue/Green (Alternate flashing) Temporary wireless network setup<br />
Cyan Flashing indicates a software error<br />
Amber Updating software<br />
Note: For quick reference, there is a sticker on the base of <strong>Contour</strong> which indicates the most<br />
common Status LED states.<br />
Switching between Sleep, Standby and On<br />
<strong>Contour</strong> has three power modes, Standby, Sleep and On. In Standby, <strong>Contour</strong> uses minimal power<br />
(Status LED is bright red). In Sleep mode, <strong>Contour</strong> remains connected to the wireless network<br />
(once attached) and is waiting for a source to be selected (the Status LED is dimmed red).<br />
To enter Sleep mode, press Standby. <strong>Contour</strong> will automatically enter Sleep mode if it does not<br />
receive any audio from <strong>Air</strong>Play or an iPod/iPhone/iPad.<br />
Once in Sleep mode, press Standby to switch to On.<br />
To enter Standby, press and hold Standby for four seconds on <strong>Contour</strong>, or the remote until the<br />
Status LED is bright red. Press Standby to switch straight to On. <strong>Contour</strong> will flash red for around<br />
30 seconds, pause, and then return to the state that <strong>Contour</strong> was in before Standby.<br />
Network setup<br />
<strong>Contour</strong> can be connected to your network using a wireless or wired connection.<br />
We recommend using the wireless connection method, which allows you to position your <strong>Contour</strong><br />
anywhere within range of your wireless connection. See page 7 for more information.<br />
To use the wired connection method, connect an Ethernet cable between the Ethernet port on the<br />
back of <strong>Contour</strong> and one of the available Ethernet ports on your router. You might want to use this<br />
method if you experience sound quality problems or if your <strong>Contour</strong> is located near your router.<br />
See page 10 for more information.
Preparing <strong>Contour</strong> to use<br />
<strong>Air</strong>Play with Wi-Fi<br />
Introduction<br />
There are five stages in preparing <strong>Contour</strong> to use <strong>Air</strong>Play if you are connecting <strong>Contour</strong> to your<br />
network with a wireless connection. Skip this section if you are using the wired connection<br />
method (see page 10).<br />
1. Prepare <strong>Contour</strong> for wireless setup.<br />
2. Create a connection between <strong>Contour</strong> and your setup device (any device with Wi-Fi and a<br />
browser, such as an iPhone or laptop), by using a temporary wireless network.<br />
3. Access <strong>Contour</strong> Setup Manager.<br />
4. Assign <strong>Contour</strong> a unique name.<br />
5. Add <strong>Contour</strong> to your wireless network.<br />
Stage 1: Prepare <strong>Contour</strong> for wireless setup<br />
1. Position <strong>Contour</strong> in range of your<br />
wireless network.<br />
2. Insert the connector of the mains<br />
power adapter into the socket on<br />
the rear of <strong>Contour</strong>.<br />
3. Plug in to the mains supply.<br />
4. When the red Status LED on the front has stopped flashing, <strong>Contour</strong> is in Sleep mode.<br />
18V DC<br />
Typical wireless setup<br />
7
8<br />
Stage 2: Connecting your setup device to <strong>Contour</strong><br />
In the next setup stage you need to establish a temporary connection between your setup device<br />
and <strong>Contour</strong>. In order to achieve this, you need to create a wireless network to connect <strong>Contour</strong> to<br />
an iPod Touch, iPhone, iPad or laptop.<br />
Connecting using a temporary wireless network<br />
1. Ensure that <strong>Contour</strong> is in Sleep mode or switched On.<br />
2. Press the Wi-Fi Setup button on the back of the <strong>Contour</strong> for five seconds. This will turn on<br />
<strong>Contour</strong>’s temporary wireless network. The Status LED will flash red while the temporary<br />
wireless network starts up.<br />
20 secs<br />
After around twenty seconds, the Status LED will then flash green and blue.<br />
3. On your setup device (iPhone, laptop etc), the <strong>Contour</strong> <strong>200i</strong> <strong>Air</strong> ****** wireless network<br />
should now be visible. Select this network. No password is required.<br />
4. Once you have connected to the <strong>Contour</strong> <strong>200i</strong> <strong>Air</strong> ****** wireless network, you can access<br />
the <strong>Contour</strong> Setup Manager on your setup device’s web browser. Use <strong>Contour</strong> Setup Manager<br />
to add <strong>Contour</strong> to your own wireless network. See Stage 3.<br />
Note: ****** represents a six digit code that will be unique to each <strong>Contour</strong>.<br />
Stage 3: Accessing <strong>Contour</strong> Setup Manager<br />
Once you have established the temporary connection between your setup device and <strong>Contour</strong>,<br />
you can assign a unique name to <strong>Contour</strong> and add it to your wireless network as follows:<br />
1. On your setup device, start your web browser (e.g. Safari, Google Chrome, Microsoft Internet<br />
Explorer, Mozilla Firefox).<br />
2. Enter the following address:<br />
http://192.168.1.12<br />
3. The <strong>Contour</strong> Setup Manager will be displayed:<br />
4. Click the Connection tab. The Connection tab is divided into two distinct areas <strong>Contour</strong><br />
Name Assignment and Wireless Network Settings. See Stage 4 for the next steps.
Stage 4: Assigning <strong>Contour</strong> a unique name<br />
If you prefer, you can change the name that your network, iTunes and Apple device sees the<br />
<strong>Contour</strong> as. Carry out the following in the <strong>Contour</strong> Name Assignment area below to change<br />
<strong>Contour</strong>’s name:<br />
1. Type the name (e.g. ‘Living Room’) that you want to assign <strong>Contour</strong> in the Product Name box.<br />
2. Click Update.<br />
3. Wait for the confirmation page to be displayed to confirm that the new Product Name has been<br />
applied to <strong>Contour</strong>.<br />
<strong>Contour</strong> Name<br />
Assignment<br />
Wireless Network<br />
Settings<br />
Stage 5: Adding <strong>Contour</strong> to your wireless network<br />
<strong>Contour</strong> will automatically scan for available networks. If the automatic option does not work, see<br />
“<strong>Manual</strong> wireless setup” on page 16 to manually add <strong>Contour</strong> to your wireless network:<br />
1. Select the name of your own wireless network from the Network drop-down list. The<br />
encryption method will automatically be detected by <strong>Contour</strong>.<br />
2. If required, enter the security key used by your network in the box below.<br />
3. Click Connect. The Status LED will then flash red to indicate that <strong>Contour</strong> is resetting. When<br />
<strong>Contour</strong> has reset it will enter Sleep mode and the Status LED will be dim red.<br />
4. Press Standby on <strong>Contour</strong> or the remote control so that <strong>Air</strong>Play is selected as the input<br />
source. If the Status LED is steady white <strong>Air</strong>Play has been setup successfully. If the Status<br />
LED is flashing white there is a problem with <strong>Contour</strong>’s network connection. See “Hints and<br />
tips” on page 24 for more information.<br />
5. <strong>Contour</strong> is now setup to use <strong>Air</strong>Play with a wireless connection. See page 11.<br />
Note: We recommend that you contact your IT department before attempting to connect <strong>Contour</strong><br />
to a corporate wireless network.<br />
9
10<br />
Preparing <strong>Contour</strong> to use<br />
<strong>Air</strong>Play with an Ethernet cable<br />
1. Connect an Ethernet cable from<br />
the Ethernet port on the back of<br />
<strong>Contour</strong> to your router.<br />
2. Insert the connector of the mains<br />
power adapter into the DC In<br />
socket on the rear of <strong>Contour</strong>.<br />
3. Plug in to the mains supply.<br />
4. A network connection between your router and <strong>Contour</strong> will then be established automatically.<br />
When the red Status LED on the front has stopped flashing, <strong>Contour</strong> is in Standby.<br />
5. Press Standby on <strong>Contour</strong> or the remote control until <strong>Contour</strong> has <strong>Air</strong>Play selected as its<br />
input source. If the Status LED is steady white then <strong>Air</strong>Play has been setup successfully. If the<br />
Status LED is flashing white, there is a problem with <strong>Contour</strong>’s network connection.<br />
Note: See “Help” on page 24 for help with troubleshooting <strong>Contour</strong> network connectivity<br />
issues.<br />
6. <strong>Contour</strong> is now set up to use <strong>Air</strong>Play with a wired connection. No further configuration is<br />
required. See page 11.<br />
18V DC<br />
Typical Ethernet setup
Using <strong>Air</strong>Play to play audio<br />
Introduction<br />
<strong>Air</strong>Play allows you to stream audio from an iPod touch, iPhone or iPad to a single <strong>Contour</strong>. <strong>Air</strong>Play<br />
also allows you to stream audio from iTunes to one or more <strong>Contour</strong> devices.<br />
Playing audio from iTunes<br />
Once you have successfully added <strong>Contour</strong> to the same network as your iTunes computer, iPod<br />
touch, iPhone or iPad, it should be automatically detected. (See page 6 for information on<br />
how to connect <strong>Contour</strong> to your network). Carry out the following to select <strong>Contour</strong> as an <strong>Air</strong>Play<br />
device in iTunes.<br />
1. Open iTunes.<br />
2. If <strong>Contour</strong> has been successfully<br />
added to the same network as your<br />
iTunes computer, iPod touch, iPhone<br />
or iPad, the <strong>Air</strong>Play symbol will<br />
appear on the bottom status bar of<br />
the iTunes window.<br />
3. Click the <strong>Air</strong>Play symbol and<br />
select your <strong>Contour</strong> from the <strong>Air</strong>Play<br />
list at the bottom of the screen.<br />
4. Select the track you wish to play. If <strong>Contour</strong> is in Sleep mode, it will wake up and switch the<br />
source to <strong>Air</strong>play. The <strong>Air</strong>Play symbol will turn blue when iTunes is using <strong>Contour</strong> as a speaker<br />
accessory.<br />
5. The Status LED on <strong>Contour</strong> will change to white to indicate that <strong>Air</strong>Play is active.<br />
Allowing commands to be sent back to iTunes from <strong>Contour</strong><br />
If you want to send commands back to iTunes from <strong>Contour</strong> (such as play/pause) you need to<br />
enable this option in iTunes. To enable this function, carry out the following:<br />
1. Click Edit.<br />
2. Click Preferences.<br />
3. Tick Allow iTunes audio control from remote speakers.<br />
Streaming audio to multiple rooms<br />
If you have more than one <strong>Contour</strong>, you can use <strong>Air</strong>Play to simultaneously stream audio to each<br />
<strong>Contour</strong>. You can set this up by using iTunes on your computer or by using the Apple Remote app.<br />
11
12<br />
Playing audio from an iPod touch, iPhone or iPad<br />
On your iPod touch, iPhone or iPad, ensure you are connected<br />
to the same wireless network as the <strong>Contour</strong>. You should then<br />
be able to select your <strong>Contour</strong> from the list of <strong>Air</strong>Play devices.<br />
On your iPod touch, iPhone or iPad, the <strong>Air</strong>Play symbol will be<br />
white when any <strong>Air</strong>Play device is available on the network. The<br />
<strong>Air</strong>Play symbol will turn blue when the iPod touch or iPhone<br />
is using <strong>Contour</strong> as a speaker accessory.<br />
Select the track you wish to play. If <strong>Contour</strong> is in Sleep mode,<br />
it will wake up and switch the source to <strong>Air</strong>Play. The Status<br />
LED will change to white when <strong>Air</strong>Play is active.
Listening to a docked iPod/<br />
iPhone/iPad<br />
Compatibility<br />
The dock on <strong>Contour</strong> is compatible with most iPod, iPhone and iPad models. For the latest<br />
information, check the compatibility table on our website: www.pure.com/products/ipodcompatibility.<br />
Docking your device<br />
Dock your device onto the connector.<br />
Your device will start charging as soon as it is docked and will continue charging whether <strong>Contour</strong><br />
is playing, in Standby or in Sleep mode.<br />
Selecting the dock<br />
Press Source until the Status LED is blue. <strong>Contour</strong> also automatically switches to this input<br />
source when you dock an iPod that is playing.<br />
Controlling your device<br />
When the iPod source is selected, your device will start playing the last track you were listening to.<br />
Use the remote, or the controls on your device, to navigate menus and control playback.<br />
13
14<br />
Using the auxiliary input<br />
Connecting an auxiliary device<br />
Connect the line out or headphone socket of your auxiliary device to the Aux In socket on your<br />
<strong>Contour</strong> using a suitable cable.<br />
Selecting the auxiliary input<br />
Press Source until the Status LED is pink.<br />
Using the digital output<br />
Using an external digital output device<br />
You can connect <strong>Contour</strong> to a digital output device, such as compatible hi-fi system. Any audio<br />
playing through <strong>Contour</strong> will also be sent to the attached device.<br />
Note: The volume controls on <strong>Contour</strong> will not change the volume on the digital device.<br />
Connecting an external digital output device<br />
Connect <strong>Contour</strong> to your digital output device using a suitable coaxial cable to connect to the<br />
Digital Coaxial connector.
Using <strong>Contour</strong> Setup Manager<br />
Introduction<br />
<strong>Contour</strong> features a Setup Manager. The Setup Manager allows you to change various <strong>Contour</strong><br />
settings and view <strong>Contour</strong>’s status. You can also use Setup Manager to carry out a software<br />
upgrade if a previous upgrade failed and you do not have access to the internet. You can access<br />
<strong>Contour</strong> Setup Manager after you have established a connection between your computer and<br />
<strong>Contour</strong>. Most people will only need to use <strong>Contour</strong> Setup Manager when they are initially setting<br />
up <strong>Contour</strong> using the temporary wireless connection (see “Stage 3: Accessing <strong>Contour</strong> Setup<br />
Manager” on page 8 for information on how to access <strong>Contour</strong> Setup Manager using a<br />
temporary wireless connection).<br />
Note: If you are connected to <strong>Contour</strong> with a router, you will need to find out what IP address has<br />
been allocated to <strong>Contour</strong> by your router and enter this into the address field of your web browser.<br />
Consult your router documentation for more information on how to find out the IP address that<br />
has been allocated to <strong>Contour</strong> by your router.<br />
Menu structure<br />
The <strong>Contour</strong> Setup Manager menus are accessed by clicking tabs at the top of the window. The<br />
number of tabs available in <strong>Contour</strong> Setup Manager varies depending on whether <strong>Contour</strong> is<br />
being accessed using a wireless or wired connection. If accessing <strong>Contour</strong> Setup Manager using<br />
a wireless connection, three tabs are visible. If accessing <strong>Contour</strong> Setup Manager with a wired<br />
connection, four tabs are visible.<br />
The available tabs are:<br />
Connection The Connection tab is used to configure <strong>Contour</strong>’s wireless settings.<br />
Advanced The Advanced tab opens the <strong>Manual</strong> Network Setup page.<br />
Status The Status tab opens the Status Information page. This page displays<br />
information about the software and the wireless connection status.<br />
Upgrade The Upgrade tab opens the Software Upgrade page. This page allows you to<br />
upgrade the software manually (only visible during wired setup).<br />
15
16<br />
Connection<br />
The Connection tab is divided into two main sections, <strong>Contour</strong> Name Assignment and Wireless<br />
Setup.<br />
<strong>Contour</strong> name assignment<br />
See page 9 for more information on how to assign a unique name for <strong>Contour</strong>.<br />
Automatic wireless setup<br />
See page 9 for information on automatic wireless setup.<br />
<strong>Manual</strong> wireless setup<br />
<strong>Contour</strong> Name<br />
Assignment<br />
Wireless Setup<br />
If your wireless network is not broadcasting an SSID, you will need to configure your wireless<br />
settings manually.<br />
1. Select ‘Configure <strong>Manual</strong>ly’ from the Network drop-down list and select the encryption<br />
type of your wireless network from the drop-down list below. <strong>Contour</strong> supports the following<br />
encryption types:<br />
• No Encryption Select this option if your wireless network is unsecured.<br />
• WEP Select this option if your wireless network is being secured using the<br />
Wired Equivalent Privacy (WEP) method.<br />
• WPA Select this option if your wireless network is being secured using the<br />
Wi-Fi Protected Access (WPA) method.<br />
• WPA2 Select this option if your wireless network is being secured using the<br />
Wi-Fi Protected Access II (WPA2) method.<br />
Note: Please check your wireless router configuration to find out the type of encryption that<br />
is being used on your wireless network.<br />
2. Enter the passphrase/key needed to connect to your network in the box below, if one is<br />
required.<br />
3. Click Connect. The Status LED will then flash red to indicate that <strong>Contour</strong> is resetting. When<br />
<strong>Contour</strong> has started up it will enter Sleep mode.
Advanced<br />
The Advanced tab is divided into two main sections, Proxy Server settings and IP address settings.<br />
Proxy Server<br />
Settings<br />
IP Address<br />
Settings<br />
Configuring Proxy Server settings<br />
If your network uses a proxy server to connect to the internet:<br />
1. Tick the Use Proxy Server checkbox.<br />
2. Enter the IP address of your Proxy Server into the Proxy Server box.<br />
3. Enter the port number being used by your Proxy Server into the Proxy Server Port box.<br />
4. Click Connect at the bottom of the window to save any changes made.<br />
Configuring IP Address settings<br />
<strong>Contour</strong> supports both DHCP and static IP address configuration. To use DHCP, tick the DHCP<br />
checkbox and click Connect. To use a static IP address:<br />
1. Enter the IP address that you want to assign to the <strong>Contour</strong> into the IP Address box.<br />
2. Enter the subnet mask that you want to assign to the <strong>Contour</strong> into the Netmask box.<br />
3. Enter the IP address of your network’s default gateway into the Gateway box.<br />
4. Enter the IP address of the Primary DNS server being used on your network.<br />
5. Enter the IP address of the Secondary DNS server being used on your network.<br />
6. Click Connect to save any changes made.<br />
17
18<br />
Status<br />
The Status tab displays a summary of <strong>Contour</strong>’s software/hardware information and also displays<br />
information about the state of the wireless connection.<br />
Connection<br />
Status<br />
Signal<br />
Strength<br />
Wireless<br />
Channel<br />
Product<br />
Software<br />
Version<br />
Indicates if <strong>Contour</strong> is connected to a wireless network or not. Also indicates<br />
the wireless LAN type, i.e. Basic Service Set, Extended Service Set.<br />
Displays the strength of the wireless connection between <strong>Contour</strong> and the<br />
peer network device, e.g., router.<br />
Displays the channel being used by the wireless connection.<br />
Displays the software version.
Upgrade<br />
The Upgrade tab is only visible when you connect to <strong>Contour</strong> with an Ethernet cable. We<br />
recommend using automatic software updates for your <strong>Contour</strong>, which are delivered via the Wi-Fi<br />
connection when <strong>Contour</strong> is in Standby or Sleep mode. If the Status LED on <strong>Contour</strong> is static<br />
amber, a new version of software is being installed. A software update takes between six to eight<br />
minutes.<br />
Note: Do not power off <strong>Contour</strong> while a software update is taking place.<br />
Note: The controls on <strong>Contour</strong> and the remote control will not function during an automatic<br />
software upgrade.<br />
Note: If you experience any problems with automatic software updates, see the following page for<br />
information on how to update the software manually. If you need to carry out a manual software<br />
upgrade, we recommend that you carry out the upgrade by using a directly connected PC. (See<br />
page 21 for more information).<br />
Software<br />
Date<br />
Software<br />
Version<br />
Displays the date that the currently loaded software was created on.<br />
Displays the version of software that is currently loaded on <strong>Contour</strong>.<br />
Upgrade Click Upgrade to start the manual software upgrade. Refer to the next page<br />
for more detailed information.<br />
19
20<br />
Upgrading software manually<br />
<strong>Manual</strong> software updates<br />
We recommend that you use automatic upgrades to obtain the latest software updates (see<br />
above). However, there may be occasions where automatic software updates are not possible<br />
due to internet connection problems or if an automatic software upgrade failed for any reason,<br />
e.g., if there was a power cut during an automatic software upgrade. The latest software updates<br />
can be downloaded from the Pure support website and can be uploaded on to <strong>Contour</strong> either<br />
by using a directly connected PC (see page 21) or by using your router network connection.<br />
If you are using your router network connection to upgrade <strong>Contour</strong> software, access <strong>Contour</strong><br />
Setup Manager by entering the IP address that was allocated to <strong>Contour</strong> by your router and refer<br />
to the steps outlined on page 22. If you do not know how to find the IP address that has been<br />
assigned to <strong>Contour</strong> from your router please use the peer to peer connection method detailed on<br />
the next page.<br />
Note: Consult your router documentation for more information on how to find out the IP address<br />
that has been allocated by your router.
Software upgrade using a directly connected PC<br />
If an automatic or manual software upgrade failed and you have lost network connectivity, you<br />
can upload the latest version of software to <strong>Contour</strong> by making a direct connection between your<br />
PC and the Ethernet port on <strong>Contour</strong>.<br />
Note: Ensure that any wireless connections on your PC are disabled before carrying out the<br />
following steps.<br />
1. Download the latest version of software for <strong>Contour</strong> from the Pure support site.<br />
2. Disconnect the mains power adapter from the socket on the back of <strong>Contour</strong>.<br />
3. Connect <strong>Contour</strong> to your computer using an Ethernet cable to the port on the back of <strong>Contour</strong><br />
as shown below.<br />
4. Ensure that the <strong>Contour</strong> has no devices in the dock and insert the connector of the mains<br />
power adapter into the socket on the rear of <strong>Contour</strong>.<br />
5. Plug in to the mains supply.<br />
6. Wait for the bright red LED to stop flashing.<br />
7. Press the Standby key.<br />
8. Wait for the white LED to stop flashing. This may take up to two minutes.<br />
9. On your setup device, start your web browser (e.g. Safari, Google Chrome, Microsoft Internet<br />
Explorer, Mozilla Firefox).<br />
10. Enter the following address: http://169.254.112.202<br />
11. The <strong>Contour</strong> Setup Manager will display.<br />
12. Carry out the Updating software using <strong>Contour</strong> Setup Manager procedure outlined on the<br />
following page to complete the software installation.<br />
21
22<br />
Updating software using <strong>Contour</strong> Setup Manager<br />
1. Click the Upgrade tab and then<br />
click the Upgrade button.<br />
2. The following dialogue box will appear,<br />
asking if you want to update <strong>Contour</strong><br />
software via the Ethernet. Click OK to<br />
confirm.<br />
3. Wait for the LED to change from<br />
white red slow flash to white<br />
blue slow flash (this can take<br />
up to 6 minutes) and move to<br />
step 4.<br />
4. The following window will<br />
appear. Click Browse and<br />
navigate to the location on your<br />
computer that you downloaded<br />
the software to.<br />
5. Click Upload.
6. The following window will appear,<br />
summarising the software update<br />
task. Click Upgrade to begin the<br />
software update.<br />
7. The following window will appear<br />
to indicate the software upgrade<br />
progress.<br />
Note: The software upgrade consists<br />
of two stages. Each stage needs<br />
to be completed from 1 to 100%.<br />
Do not pull the power and wait for<br />
both stages to be completed.<br />
8. The following window will appear to<br />
indicate that the software upgrade<br />
has completed. Remove the Ethernet<br />
cable and press the Power button to<br />
boot <strong>Contour</strong> up with the new version<br />
of software.<br />
Note: If you carried out the software upgrade using the directly connected PC method, disconnect<br />
your computer’s Ethernet cable from the port on the back of <strong>Contour</strong> and reconnect<br />
<strong>Contour</strong> to your network using either the wired or wireless connection method after the<br />
software upgrade has completed.<br />
23
24<br />
Help<br />
Hints and tips<br />
I cannot connect to my wireless network<br />
Ensure that your <strong>Contour</strong> is within range of your wireless router and that you are not located in a<br />
dead spot.<br />
I cannot connect to <strong>Contour</strong> Setup Manager after establishing a temporary<br />
wireless network connection<br />
<strong>Contour</strong> Setup Manager requires your setup device (computer, iPod, iPhone or iPad) to have<br />
DHCP (dynamic IP address) enabled on initial wireless setup.<br />
The Status LED is flashing white<br />
Your <strong>Contour</strong> has <strong>Air</strong>Play selected as the source but does not currently have a connection to a<br />
wireless network. Follow the instructions on page 6.<br />
The Status LED is flashing cyan<br />
If the Status LED is flashing Cyan, <strong>Contour</strong> has a firmware error. Disconnect the power for thirty<br />
seconds and then reconnect the power to try again. <strong>Contour</strong> should automatically recover by<br />
downloading the software again from the Pure Lounge. If this does not work, try the manual<br />
upgrade method. In order to force the unit into a manual upgrade from a firmware error, press<br />
and hold the Wi-Fi setup key on the back of the unit for five seconds, which will allow you to enter<br />
the <strong>Manual</strong> Software Update process. See “<strong>Manual</strong> software updates” on page 20 for more<br />
information.<br />
The audio and network connection keeps dropping when using a wireless<br />
connection<br />
Try changing the Wi-Fi channel on your router. Please check your router user guide for instructions<br />
on how to carry this out.<br />
I have more than one <strong>Contour</strong> on my network<br />
If you have more than one <strong>Contour</strong> on your network, it would be useful to assign each <strong>Contour</strong><br />
a name that made it easy to identify, e.g. Living Room or Bedroom (see page 16 for more<br />
information). The names that you assign each <strong>Contour</strong> will appear in the list of available <strong>Air</strong>Play<br />
devices in iTunes and on your iPod touch, iPhone or iPad.
Specifications<br />
Dock compatibility Supports most iPod, iPhone and iPad models. For the latest information,<br />
check the compatibility table on our website: www.pure.com/products/ipodcompatibility.<br />
Speakers 2 full-range 3.5” drive units with twin downward firing bass ports.<br />
Audio output 2 x 18W RMS.<br />
Input connectors 18V DC, 3.61A power adapter socket. iPod/iPhone/iPad connector. 3.5mm<br />
Aux-in for auxiliary devices. Ethernet socket.<br />
Output connectors Digital coaxial socket for digital audio.<br />
Remote control Infrared remote control. CR2025 button cell battery included.<br />
Mains power supply 100-240V, 50/60Hz 18V DC, 3.61A external power adapter.<br />
Dimensions 308mm wide x 174mm high x 145mm deep.<br />
Approvals CE marked. Compliant with the EMC and Low Voltage Directives (2004/108/<br />
EC and 2006/95/EC). ETSI EN 300 401 compliant.<br />
Australian C-Tick N1600 and Electrical Safety.<br />
Hereby, Pure Digital declares that this Band II LPD device is in compliance<br />
with the essential requirements and other provisions of the Directive<br />
1999/5/EC.<br />
Please go to www.pure.com for the full Declaration of Conformity<br />
Suitable for use in the following markets:- A, B, BG, CY, CZ, DK, EE, FIN, F, D,<br />
EL, HU, IRL, I, LV, LT, L, MT, NL, PL, P, RO, SK, SL, E, S, GB, ISL, LIE, NOR, CHE<br />
Disposal of Waste Electrical & Electronic Equipment<br />
This symbol on the product or on its packaging indicates that this product should not be treated<br />
as household waste. Instead it should be handed over to a suitable collection point for the<br />
recycling of electrical and electronic equipment. By ensuring this product is disposed of correctly,<br />
you will help prevent potential negative consequences for the environment and human health,<br />
which could otherwise be caused by inappropriate waste handling of this product. The recycling<br />
of materials will help to conserve natural resources. For more detailed information about<br />
recycling of this product, please contact your local council office, your household waste disposal<br />
service or the shop where you purchased the product.<br />
25
26<br />
Pure Warranty Statement for Australia<br />
This statement replaces any reference to warranty which may be contained elsewhere within this manual<br />
What do you need to do now?<br />
Option 1: You can register your purchase on-line at https://www.pure.com/au/register/register.asp<br />
Option 2: Or you can do nothing other than keep your proof of purchase as evidence of your purchase date.<br />
This proof of purchase would need to be presented if warranty service was ever required.<br />
If you have any questions about your warranty you can call us toll free .... 1800 988 268<br />
What’s covered by this warranty?<br />
• Pure agrees to refund, repair or replace, at your election, without charge to you, any part found to be<br />
defective during the warranty period.<br />
• If equipment has been used according to its accompanying instruction manual and is used in a domestic<br />
situation, a two year warranty period applies.<br />
How do you make your claim?<br />
Call 1800 988 268 for instructions on how to return your Pure product for warranty service or go to<br />
http://support.pure.com/au/ and complete the contact us form.<br />
What’s NOT covered by this warranty?<br />
Under this express warranty Pure will not be liable for loss or damage of any kind whatsoever, whether direct,<br />
indirect, incidental, consequential or otherwise.<br />
• Replacement of parts due to normal wear and tear<br />
• Products with serial number defacement, modification or removal<br />
• Water damage or corrosion caused by dampness<br />
• Any damage or deterioration due to shipment<br />
• Any product which has been subjected to misuse, abuse or accident<br />
Australian consumers — The benefits to the consumer given by this express warranty are in addition<br />
to other rights and remedies of the consumer under a law in relation to the goods or services to which this<br />
warranty relates. Our goods come with guarantees that cannot be excluded under the Australian Consumer Law,<br />
You are entitled to a replacement or refund for a major failure and for compensation for any other reasonably<br />
foreseeable loss or damage. You are also entitled to have the goods repaired or replaced if the goods fail to be<br />
of acceptable quality and the failure does not amount to a major failure.<br />
Pure is proudly distributed and supported in Australia by PIONEER ELECTRONICS AUSTRALIA PTY LTD, 5 ARCO<br />
LANE, HEATHERTON, VICTORIA, 3202
100%<br />
www.pure.com<br />
Pure<br />
Imagination Technologies Ltd.<br />
Home Park Estate<br />
Kings Langley<br />
Herts, WD4 8LZ<br />
United Kingdom<br />
www.pure.com<br />
http://support.pure.com<br />
Pure<br />
Karl-Marx Strasse 6<br />
64589 Stockstadt/Rhein<br />
Alemania<br />
sales_gmbh@pure.com<br />
http://support.pure.com/de<br />
Pure North America<br />
2269 Chestnut Street, Suite 455<br />
San Francisco CA 94123-2600<br />
USA<br />
www.pure.com/us<br />
http://support.pure.com/us<br />
EcoPlus<br />
100%<br />
Printed on 100% recycled paper<br />
Pure - Vertrieb über:<br />
Telanor AG<br />
Unterhaltungselektronik<br />
Bachstrasse 42<br />
4654 Lostorf<br />
Suiza<br />
info@telanor.ch<br />
www.telanor.ch<br />
Pure Australasia Pty Ltd<br />
PO Box 5049<br />
Wonga Park<br />
Victoria 3115<br />
Australia<br />
sales.au@pure.com<br />
http://support.pure.com/au<br />
<strong>Contour</strong> <strong>200i</strong> <strong>Air</strong> is a member of the Pure EcoPlus product<br />
family. All EcoPlus products are designed and manufactured<br />
to minimise their environmental impact.<br />
Documentation is printed on 100% recycled paper using<br />
soya-based ink.<br />
The retail carton protecting your product is printed on at<br />
least 70% recycled card finished using a water-based<br />
varnish and sized for maximum transport efficiency.<br />
For more information please visit www.pure.com/ecoplus<br />
102YL