ATTIX 751-01/-11 - Nilfisk-ALTO
ATTIX 751-01/-11 - Nilfisk-ALTO
ATTIX 751-01/-11 - Nilfisk-ALTO

You also want an ePaper? Increase the reach of your titles
YUMPU automatically turns print PDFs into web optimized ePapers that Google loves.
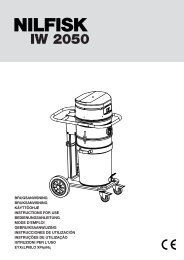
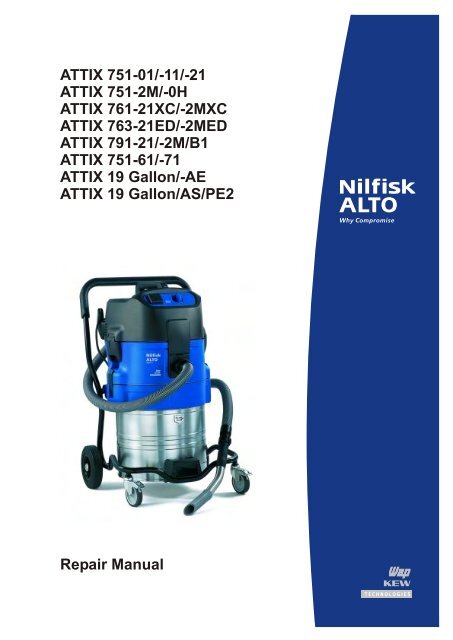
<strong>ATTIX</strong> <strong>751</strong>-<strong>01</strong>/-<strong>11</strong>/-21<br />
<strong>ATTIX</strong> <strong>751</strong>-2M/-0H<br />
<strong>ATTIX</strong> 761-21XC/-2MXC<br />
<strong>ATTIX</strong> 763-21ED/-2MED<br />
<strong>ATTIX</strong> 791-21/-2M/B1<br />
<strong>ATTIX</strong> <strong>751</strong>-61/-71<br />
<strong>ATTIX</strong> 19 Gallon/-AE<br />
<strong>ATTIX</strong> 19 Gallon/AS/PE2<br />
Repair Manual
A. Safety instructions<br />
B. Technical data<br />
C. Components<br />
D. Operation<br />
E. Troubleshooting<br />
F. Spare parts<br />
G. Tools<br />
H. Wiring
<strong>Nilfisk</strong><br />
<strong>ALTO</strong><br />
Preface .....................................................................7<br />
Symbols used to .....................................................................7<br />
mark instructions<br />
A Safety instructions .....................................................................8<br />
B Technical data .....................................................................9<br />
C Components 1 Trolley with container and adapter ring....... 12<br />
2 Cleaner heads............................................. 12<br />
3 Filter cleaning.............................................. 13<br />
4 Suction turbines.......................................... 14<br />
5 Electrical components................................. 15<br />
D Operation 1 Automatic filter cleaning<br />
(Attix 761/-21XC/-2M / 763-21ED/-2MED<br />
19 Gallon/AS/P2)......................................... 17<br />
2 EC drive (Attix 791-21/-2M/B1)....................17<br />
3 EC-3 electronics (Attix 791-21/-2M/B1)........17<br />
4 Electronic starter,<br />
EC-3 electronics (Attix 791-21)....................17<br />
5 Electronic flow sensor (Attix 791-2M/B1).....17<br />
6 Layout of electronic flow sensor EC<br />
(Attix 791-2M/B1).........................................18<br />
7 Electronic soft start<br />
(Attix <strong>751</strong>-<strong>01</strong>/-<strong>11</strong>, Attix 19 Gallon)................ 18<br />
8 Electronic starter with speed control<br />
(Attix <strong>751</strong>-21)............................................... 18<br />
9 Electronic flow metering (Attix <strong>751</strong>-0H)....... 18<br />
10 Electronic flow metering (Attix <strong>751</strong>-2M)...... 18<br />
<strong>11</strong> Electronic magnet control (Attix 761-21XC,<br />
763-21ED, 9 Gallon/AS/PE2)...................... 18<br />
12 Electronic flow sensor XC (Attix 761-2MXC,<br />
763-2MED).................................................. 18<br />
13 Turbine/temperature monitoring<br />
(Attix <strong>751</strong>-61/-71, 19 Gallon AE).................. 19<br />
14 Electronic level control<br />
(Attix <strong>751</strong>-61/-71, 19 Gallon AE).................. 19<br />
15 Layout of electronic level control<br />
(Attix <strong>751</strong>-61/-71, 19 Gallon AE). 21<br />
E Troubleshooting 1 ESD (electrostatic discharge)..................... 22<br />
Attix7_ver.1.0_14<strong>01</strong>05<br />
Contents<br />
2 Troubleshooting on unit............................... 22<br />
2.1 Unit will not work (all units with<br />
brush motor). ............................................ 22<br />
3/59
<strong>Nilfisk</strong><br />
<strong>ALTO</strong><br />
Attix7_ver.1.0_14<strong>01</strong>05<br />
Contents<br />
2.2 Unit will not work (all units with<br />
EC drive)......................................................23<br />
2.3 Warning sound! (all cleaners)...................... 24<br />
3 Trolley/container...........................................25<br />
3.1 Removing/fitting castors (all models except<br />
Attix <strong>751</strong>-71)................................................ 25<br />
3.2 Removing/fitting wheels (all models except<br />
Attix <strong>751</strong>-71)................................................ 25<br />
3.3 Removing/fitting feet (Attix <strong>751</strong>-71)............. 25<br />
3.4 Removing/fitting wheels (Attix <strong>751</strong>-71)........ 26<br />
3.5 Removing/fitting grips (all models except<br />
Attix <strong>751</strong>-71)................................................ 26<br />
3.6 Removing/fitting lock (all models)................ 26<br />
3.7 Removing/fitting grip with tensioning band<br />
(all models).................................................. 27<br />
3.8 Removing/fitting belt (all models)................ 28<br />
3.9 Removing/fitting pump (Attix <strong>751</strong>-61/-71,<br />
19 Gallon AE).............................................. 29<br />
3.10 Removing/fitting non-return pipe<br />
(Attix <strong>751</strong>-61/-71, 19 Gallon AE).................. 29<br />
4 Cleaner head............................................... 30<br />
4.1 Removing/fitting grip (Attix <strong>751</strong>-61/-71,<br />
19 Gallon AE).............................................. 30<br />
4.2 Removing/fitting grip (Attix <strong>751</strong>-<strong>01</strong>/-<strong>11</strong>/-21,<br />
<strong>751</strong>-2M/-0H, 791-21/-2M/B1, 19 Gallon)..... 30<br />
4.3 Removing/fitting grip (Attix 761-21XC/-2M<br />
XC, 763-21ED/-2MED, 19 Gallon./AS/PE2).30<br />
4.4 Removing/fitting hood (Attix <strong>751</strong>-<strong>01</strong>/-<strong>11</strong>/-21/<br />
-2M/-0H, 791-21, <strong>751</strong>-61/-71, 19 Gallon AE)30<br />
4.5 Removing/fitting hood (Attix 761-21XC/-2MXC,<br />
763-21ED/-2MED, 19 Gallon/AS/PE2)........ 30<br />
4.6 Removing/fitting cooling air filter<br />
(Attix 791-2M/B1).........................................31<br />
4.7 Removing/fitting hood (Attix 791-2M/B1)..... 31<br />
4.8 Removing/fitting locking clamps (Attix<br />
<strong>751</strong>-<strong>01</strong>/-<strong>11</strong>/-21/-2M/-0H, 761-21XC/-2MXC,<br />
763-21ED/-2MED, <strong>751</strong>-61/-71,<br />
19 Gallon AE, 19 Gallon/AS/PE) .................32<br />
4.9 Removing/fitting locking clamps<br />
(Attix 791-21)............................................... 32<br />
4.10 Removing/fitting locking clamps<br />
(Attix 791-2M/B1).........................................32<br />
5 Suction turbine.............................................33<br />
5.1 Removing/fitting clamping plate<br />
(Attix <strong>751</strong>-<strong>01</strong>/-<strong>11</strong>/-21/-2M/-0H/-61/-71,<br />
19 Gallon AE)............................................... 33<br />
5.2 Removing/fitting clamping plate (Attix<br />
761-21XC/-2MXC, 763-21ED/-2MED,<br />
19 Gallon/-AE)............................................. 33<br />
5.3 Removing/fitting clamping plate<br />
(Attix-791-21)............................................... 33<br />
5.4 Removing/fitting clamping plate<br />
(Attix 791-2M/B1).........................................33<br />
4/59
<strong>Nilfisk</strong><br />
<strong>ALTO</strong><br />
Attix7_ver.1.0_14<strong>01</strong>05<br />
Contents<br />
5.5 Removing/fitting bracket for filter tightener<br />
(Attix 761-21XC/-2MXC,<br />
763-21ED/-2MED, 19 Gallon/AS/PE2)........ 33<br />
5.6 Removing/fitting hose for level monitoring<br />
(Attix 761-21XC/-2MXC,<br />
763-21ED7-2MED, 19 Gallon/AS/PE,<br />
<strong>751</strong>-61/-71, 19 Gallon AE)........................... 33<br />
5.7 Removing/fitting motor carbon brushes<br />
(all models except with EC drive)................ 34<br />
5.8 Removing/fitting motor (all models except<br />
with EC drive).............................................. 34<br />
5.9 Checking motor, removing/fitting motor<br />
(Attix 791-21/-2M/B1)...................................34<br />
6 Automatic filter cleaning<br />
(Attix 761-21XC/-2MXC, 763-21ED/-2MED,<br />
19 Gallon/AS/PE2).......................................34<br />
7 Electrical...................................................... 35<br />
7.1 Removing/fitting electrical components....... 35<br />
7.2 Removing/fitting power cord (Attix <strong>751</strong>-<strong>01</strong>/-<strong>11</strong><br />
-21/-0H/-2M/-61/-71, 791-21, 19 Gallon AE)35<br />
7.3 Removing/fitting power cord (Attix 761-21XC/<br />
-2MXC, 763-21ED/-2MED, 19 Gal/AS/PE2).35<br />
7.4 Removing/fitting socket (Attix 791-2M/B1)...35<br />
7.5 Removing/fitting power cord<br />
(Attix 791-2M/B1).........................................36<br />
7.6 Checking electronic flow metering EC in<br />
manual mode (Attix 791-2M/B1).................. 37<br />
7.7 Checking electronic flow metering EC in<br />
automatic mode (Attix 791-2M/B1).............. 38<br />
7.8 Checking flow sensor detection (performance)<br />
of electronic flow metering<br />
(Attix <strong>751</strong>-2M/-0H, 761-2MXC, 763-2MED,<br />
791-2M/B1).................................................. 39<br />
7.9 Checking and calibration (adjustment)<br />
of flow sensor (Attix <strong>751</strong>-2M/-0H, 761-<br />
2MXC, 763-2MED, 791-2M/B1)...................39<br />
7.10 Removing/fitting electronic flow metering EC<br />
(Attix 791-2M/B1).........................................39<br />
7.<strong>11</strong> Checking electronic level control in manual<br />
mode (Attix <strong>751</strong>-61/-71,19 Gallon AE)......... 40<br />
7.12 Checking electronic level control in<br />
automatic mode (Attix <strong>751</strong>-61/-71,<br />
19 Gallon AE)...............................................41<br />
7.13 Calibrating electronic level control<br />
(Attix <strong>751</strong>-61/-71, 19 Gallon AE).................. 43<br />
7.14 Removing/fitting electronic level control<br />
(Attix <strong>751</strong>-61/-71, 19 Gallon AE).................. 43<br />
7.15 Checking temperature sensor<br />
(Attix <strong>751</strong>-61/-71, 19 Gallon AE).................. 44<br />
7.16 Removing/fitting temperature sensor/<br />
flow sensor (Attix <strong>751</strong>-61/-71/-2M/-0H,<br />
19 Gallon AE, 763-2MED, 791-2M/B1).........44<br />
5/59
<strong>Nilfisk</strong><br />
<strong>ALTO</strong><br />
Attix7_ver.1.0_14<strong>01</strong>05<br />
Contents<br />
7.17 Checking, removing/fitting electronic soft<br />
start (Attix <strong>751</strong>-<strong>01</strong>/-<strong>11</strong>, 19 Gallon)................ 44<br />
7.18 Checking, removing/fitting electronic EA<br />
with speed control (Attix <strong>751</strong>-21)................. 44<br />
7.19 Checking, removing/fitting electronic flow<br />
metering (Attix.<strong>751</strong>-2M/-0H)........................ 44<br />
7.20 Checking, removing/fitting electronic magnet<br />
control (Attix 761-21XC, 763-21ED,<br />
19 Gallon/AS/PE2).......................................44<br />
7.21 Checking level monitoring<br />
(Attix 761-21XC/-2MXC, 763-21ED/-2MED,<br />
19 Gallon/AS/PE2)......................................44<br />
7.22 Checking, removing/fitting electronic flow<br />
sensor XC (Attix 761-2MXC, 763-2MED).... 45<br />
7.23 Potentiometer (hose diameter)<br />
(Attix <strong>751</strong>-2M, 761-2MXC, 263-2MED,<br />
791-2M/B1).................................................. 45<br />
7.24 Checking piezo buzzer (Attix <strong>751</strong>-2M/-0H,<br />
761-2MXC, 763-2MED, 791-2M/B1)............45<br />
7.25 Checking, removing/fitting electronic EA.<br />
with speed control EC-3 (Attix 791-21)........ 45<br />
7.26 Checking, removing/fitting electronic EC-3<br />
(Attix 791-21/-2M/B1)...................................45<br />
7.27 Checking, removing/fitting RFI filter/<br />
varistor (Attix 791-21/-2M/B1)......................45<br />
F Spare parts ............................................................................. 46<br />
G Tools 1 Special-purpose tools.................................. 47<br />
H Wiring 1 Wiring diagram (Attix <strong>751</strong>-<strong>01</strong>)...................... 48<br />
2 Wiring diagram (Attix <strong>751</strong>-<strong>11</strong>, 19 Gallon).....49<br />
3 Wiring diagram (Attix <strong>751</strong>-21)...................... 50<br />
4 Wiring diagram (Attix <strong>751</strong>-2M)..................... 51<br />
5 Wiring diagram (Attix <strong>751</strong>-0H)..................... 52<br />
6 Wiring diagram (Attix 761-21XC,<br />
763-21ED)................................................... 53<br />
7 Wiring diagram (Attix 761-2MXC,<br />
763-2MXC).................................................. 54<br />
8 Wiring diagram (Attix 791-21)...................... 55<br />
9 Wiring diagram (Attix 791-2M/B1)................56<br />
10 Wiring diagram (Attix <strong>751</strong>-61,<br />
19 Gallon AE)...............................................57<br />
<strong>11</strong> Wiring diagram (Attix <strong>751</strong>-71)...................... 58<br />
12 Wiring diagram (Attix 19 Gallon AS/PE2).... 59<br />
6/59
<strong>Nilfisk</strong><br />
<strong>ALTO</strong><br />
In this manual you will find<br />
the essentials you need<br />
to know when repairing<br />
wet and dry cleaners of<br />
the Attix 7 and 19 Gallon<br />
series.<br />
When carrying out repairs,<br />
make sure you<br />
have a suitable workbench<br />
or the like with the<br />
necessary power supply<br />
available.<br />
If you determine an error<br />
in operation, be sure to<br />
refer the customer to the<br />
user manual.<br />
Symbols used to mark instructions<br />
Attix7_ver.1.0_14<strong>01</strong>05.<br />
Preface<br />
A fault in the equipment<br />
can have a number of causes.<br />
Chapter E Troubleshooting<br />
will help you<br />
here.<br />
Use the illustrated spare<br />
parts lists for your repairs.<br />
These show you the location<br />
of the individual parts<br />
and the sequence in which<br />
they are assembled.<br />
Read the technical information<br />
sheets. These will<br />
tell you about any technical<br />
modifications made<br />
after publication of this<br />
repair manual.<br />
☞<br />
Technical information<br />
sheets are a supplement<br />
to the spare parts list until<br />
a follow-on publication.<br />
Repair manuals and technical<br />
information sheets<br />
should be available at the<br />
site where repairs are carried<br />
out. Further repair<br />
manuals of the Attix series<br />
may be necessary for<br />
repairs to the equipment.<br />
It is not permitted to give<br />
them to third parties.<br />
Use original <strong>Nilfisk</strong><br />
<strong>ALTO</strong> spare parts only!<br />
Safety instructions marked<br />
with this symbol in<br />
this manual must be observed<br />
to prevent danger<br />
to persons.<br />
This symbol is used to<br />
mark safety instructions<br />
that must be observed to<br />
prevent damage to the<br />
equipment and degradation<br />
of performance.<br />
This symbol indicates tips<br />
and instructions to simplify<br />
work and to ensure safe<br />
operation.<br />
7/59
<strong>Nilfisk</strong><br />
<strong>ALTO</strong><br />
For your own safety<br />
ESD (electrostatic<br />
discharge)<br />
Attix7_ver.1.0_14<strong>01</strong>05<br />
Safety instructions<br />
Repairs should only be<br />
made by someone who<br />
has received proper<br />
instructions for the job<br />
or who is a qualified electrician.<br />
A<br />
Observe national safety<br />
directives and regulations<br />
for the electrical engineering<br />
trade, in particular:<br />
IEC 60335-2-69<br />
EN 60335-2-69<br />
DIN VDE 105 part 1:<br />
operation of electrical<br />
power installations<br />
DIN VDE 07<strong>01</strong>/0702:<br />
repair, modification and<br />
testing of electrical installations<br />
Before starting the equipment,<br />
be sure to read the<br />
accompanying service<br />
manual, and keep it close<br />
as ready reference.<br />
The equipment should<br />
only be used by persons<br />
who have been instructed<br />
in its use and are authorized<br />
to do so.<br />
Observe the following ESD precautions before any<br />
repair of or near electronic parts:<br />
• Touch the protective conductor to discharge your own<br />
body.<br />
• Possibly wear an anti-static wrist strap.<br />
• Use a conducting floor or tabletop.<br />
• Never touch a circuit board or electronic components,<br />
always hold them by the plastic or insulation.<br />
• Transport electronic parts in conductive packaging<br />
(e.g. special ESD packages).<br />
8/59<br />
Safety Instructions
Attix7_ver.1.0_14<strong>01</strong>05<br />
Version /<br />
Type<br />
Attix<br />
<strong>751</strong>-<strong>01</strong> <strong>751</strong>-21 <strong>751</strong>-2M<br />
National<br />
Variants<br />
ZA EU DK CH GB <strong>11</strong>0V GB<br />
<strong>751</strong>-<strong>11</strong> <strong>751</strong>-0H 761-21 XC<br />
230V<br />
EU EU EU DK EU DK<br />
GB<br />
<strong>11</strong>0V<br />
GB<br />
230V<br />
Voltage V 230 <strong>11</strong>0 230<br />
<strong>11</strong>0 230<br />
Frequency Hz<br />
50/60<br />
Fusing A 16 10 25 13 16<br />
10 16 10 25 13<br />
Power consumption PIEC W<br />
1200<br />
1000<br />
1200<br />
Connected load for<br />
appliance socket<br />
W - 2400 <strong>11</strong>00 1550 1800 2400<br />
- 2400 <strong>11</strong>00 1550 1800<br />
Total connected load W - 3600 2300 2750 3000 3600<br />
- 3600 2300 2750 3000<br />
Power cord lenght m 7,5<br />
10 7,5<br />
10<br />
Electrical data<br />
Protection<br />
Dimensions<br />
and wight<br />
Unit-specific<br />
data<br />
Power cord type<br />
H05RR-<br />
F3G0,75<br />
Protection class II<br />
Protection category<br />
RFI suppression<br />
Width mm<br />
Depth mm<br />
Hight mm<br />
Weight kg<br />
Tank volume l<br />
Air volume flow (max) l/min<br />
Static wate lift (max) Pa<br />
Sound pressure level at<br />
1m, EN 60704-1<br />
dB(A)<br />
Operating noise dB(A)<br />
H05RR-<br />
F3G1,5<br />
H05RR-<br />
F3G1,0<br />
H07BQ-F<br />
3G2,5<br />
H05RR-<br />
F3G1,5<br />
H07RN-<br />
F3G1,5<br />
I II<br />
IPX4<br />
EN 55<strong>01</strong>4-1<br />
580<br />
605<br />
970<br />
H05RR-<br />
F3G1,0<br />
H05RR-<br />
F3G1,5<br />
H05RR-<br />
F3G1,0<br />
25 27<br />
70<br />
3600 3100<br />
23000 20000<br />
64 60<br />
57<br />
Technical data<br />
H07BQ-F<br />
3G2,5<br />
I<br />
3600<br />
23000<br />
64<br />
H05RR-<br />
F3G1,5<br />
9/59<br />
<strong>Nilfisk</strong><br />
<strong>ALTO</strong><br />
Technical Data<br />
B
Attix7_ver.1.0_14<strong>01</strong>05<br />
Version /<br />
Type<br />
National<br />
Variants<br />
Electrical data<br />
Protection<br />
Dimensions<br />
and wight<br />
Unit-specific<br />
data<br />
Protection class<br />
Protection category<br />
RFI suppression<br />
Attix 763-21 ED 761-2M XC 763-2M ED 791-21 791-2M/B1 <strong>751</strong>-61 <strong>751</strong>-71<br />
EU EU EU EU EU<br />
GB<br />
<strong>11</strong>0V<br />
GB<br />
EU DK CH<br />
230V<br />
EU<br />
Voltage V 230 230 230 230 230 <strong>11</strong>0 230 230 230<br />
Frequency Hz<br />
50/60<br />
Fusing A 16<br />
25 13 16 10 16<br />
Power consumption PIEC W<br />
1200<br />
Connected load for<br />
appliance socket<br />
W 2400 1550 1800 650<br />
Total connected load W 3600<br />
2750 3000 1850<br />
Power cord lenght m 7,5<br />
10 7,5 10(FI)<br />
Power cord type<br />
H05RR-<br />
F3G1,5<br />
H07RN-<br />
H07BQ-F 3G2,5<br />
F3G1,5<br />
H05RR-<br />
F3G1,5<br />
H05RR-<br />
F3G1,0<br />
H07RN-<br />
F3G1,5<br />
Width mm 580<br />
480<br />
Depth mm 605<br />
510<br />
Hight mm 1284 970 1280 970<br />
875<br />
Weight kg 17 27 17 25<br />
33 31<br />
Tank volume l 30 70 30<br />
70<br />
Air volume flow (max) l/min<br />
Static wate lift (max) Pa<br />
Sound pressure level at<br />
1m, EN 60704-1<br />
dB(A)<br />
Operating noise dB(A)<br />
I<br />
IPX4<br />
EN 55<strong>01</strong>4-1<br />
3600<br />
23000<br />
64<br />
57<br />
Technical data<br />
10/59<br />
<strong>Nilfisk</strong><br />
<strong>ALTO</strong><br />
Technical Data<br />
B
Attix7_ver.1.0_14<strong>01</strong>05<br />
Protection Electrical Data<br />
Version /<br />
Type Attix<br />
19 Gallon 19 Gallon-AE<br />
19 Gallon-AS/PE2<br />
Voltage V<br />
120<br />
Frequency Hz<br />
60<br />
Fusing A<br />
15<br />
Power consumption HP 1,4 1,1<br />
1,4<br />
Connected load for<br />
appliance socket<br />
HP 0,5 0,8<br />
0,5<br />
Total connected load HP<br />
1,9<br />
Power cord lengt ft 25 35<br />
25<br />
Dimensions<br />
and weight<br />
Unit-specific<br />
data<br />
Power cord type<br />
Protection class<br />
Protection category<br />
RFI suppression<br />
SJTW-A<br />
AWG14/3<br />
SJTW-A<br />
AWG14/3<br />
Width in<br />
23<br />
Depth in<br />
24<br />
Height in<br />
38<br />
Weight ib 55 73<br />
60<br />
Tank volume gal<br />
19<br />
Volume flow (air) cfm<br />
Static water lift in<br />
Sound pressure level at<br />
1m EN 60704-1<br />
dB(A)<br />
Operating noise dB(A)<br />
SJTW-A AWG14/3<br />
I<br />
IPX4<br />
EN 55<strong>01</strong>4-1<br />
127<br />
93<br />
64<br />
57<br />
Technical data<br />
<strong>11</strong>/59<br />
<strong>Nilfisk</strong><br />
<strong>ALTO</strong><br />
Technical Data<br />
B
<strong>Nilfisk</strong><br />
<strong>ALTO</strong><br />
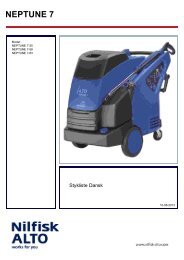
1 Trolley with container and adapter ring<br />
1) Base frame<br />
2) Adapter ring<br />
3) Container<br />
4) Belt<br />
2 Cleaner heads<br />
Attix7_ver.1.0_14<strong>01</strong>05<br />
Components<br />
1<br />
Attix <strong>751</strong>-<strong>01</strong>,-0H Attix <strong>751</strong>-<strong>11</strong>/-21, Attix 19 Gallon<br />
Attix 761-21XC<br />
Attix 791-21<br />
4<br />
3<br />
2<br />
C<br />
Attix7 3516<br />
Attix5 0602 Attix5 06<strong>01</strong><br />
12/59<br />
Components
<strong>Nilfisk</strong><br />
<strong>ALTO</strong><br />
Attix <strong>751</strong>-2M<br />
Attix 761-2MXC<br />
Attix 763-2MED<br />
Attix7_ver.1.0_14<strong>01</strong>05<br />
Components<br />
Attix7 3517<br />
Attix 19 Gallon/AS/PE2XC<br />
Attix 791-2M/B1 Attix <strong>751</strong>-61/-71<br />
Attix 19 Gallon AE<br />
3 Filter cleaning All units with automatic filter cleaning.<br />
C<br />
Attix5 2903 Attix7 3508<br />
Attix7 3608<br />
Filter cleaning with the Attix 7 is the same as for the<br />
Attix 560-XC (see repair manual Attix 550/560, section<br />
“Components” page 13).<br />
13/59<br />
Components
<strong>Nilfisk</strong><br />
<strong>ALTO</strong><br />
4 Suction turbines<br />
Attix7_ver.1.0_14<strong>01</strong>05<br />
Components<br />
Attix <strong>751</strong>-<strong>01</strong>/-<strong>11</strong>/-21/-2M/-0H/-61/-71<br />
Attix 19 Gallon/-AE<br />
Attix 761-21XC/-2MXC<br />
Attix 763-2M ED<br />
Attix 19 Gallon/AS/PE2XC<br />
Attix 791-21<br />
Attix 791-2M/B1<br />
C<br />
Attix5-0445<br />
Attix5-2913<br />
Attix EC-2809<br />
14/59<br />
Components
<strong>Nilfisk</strong><br />
<strong>ALTO</strong><br />
5 Electrical components<br />
Electronic level control<br />
Attix <strong>751</strong>-61/71<br />
Attix7_ver.1.0_14<strong>01</strong>05<br />
Components<br />
Attix7 3634<br />
Electronic flow metering EC<br />
Attix 791-2M/B1<br />
The following Attix 7 models are fitted with the same electronic circuitry used in<br />
other units:<br />
C<br />
Attix7 3631<br />
Electronic Electronic<br />
See section<br />
Electronic Electronic flow magnet Electronically "Components" in<br />
Attix soft start EA metering contol identical to Attix repair manual<br />
<strong>751</strong>-<strong>01</strong>/-<strong>11</strong><br />
550-<strong>01</strong>, Attix 550/560<br />
19 Gallon X<br />
12 Gallon page 14<br />
<strong>751</strong>-21<br />
550-21, Attix 550/560<br />
X<br />
12 Gallon RDF page 14<br />
<strong>751</strong>-2M<br />
Attix 550/560<br />
X 550-2M/-2H page 14<br />
<strong>751</strong>-0H<br />
Attix 550/560<br />
X 550-0H page 14<br />
761-21XC,<br />
763-21ED,<br />
560-21XC, Attix 550/560<br />
19Gallon/AS/<br />
X 12 Gallon RDFD page 14<br />
761-2M/XC,<br />
PE<br />
Attix 550/560<br />
763-2M/ED X 560-2MXC/-2HXC page 14<br />
791-21<br />
590-21, Attix 590-21<br />
X<br />
12 Gallon EC page 8<br />
15/59<br />
Components
<strong>Nilfisk</strong><br />
<strong>ALTO</strong><br />
GFCI circuit-breaker<br />
Attix 19 Gallon-AE<br />
Submersible pump<br />
Attix <strong>751</strong>-61/-71<br />
Attix 19 Gallon AE<br />
Attix7_ver.1.0_14<strong>01</strong>05<br />
Components<br />
Attix7-2360<br />
PRCD circuit-breaker<br />
Attix <strong>751</strong>-71<br />
C<br />
Attix7-3640<br />
Attix7-3638<br />
16/59<br />
Components
<strong>Nilfisk</strong><br />
<strong>ALTO</strong><br />
The following Attix 7 functions are identical to other models:<br />
1<br />
2<br />
Attix<br />
Function of automatic<br />
filter cleaning system<br />
Function of EC.drive<br />
5 Electronic flow sensor EC (Attix 791-2M/B1)<br />
Alto no.: 3020<strong>01</strong>710<br />
(200–230 Vac/50–60 Hz)<br />
Alto no.: 3020<strong>01</strong>709<br />
(100–120 Vac/50–60 Hz)<br />
Attix7_ver.1.0_14<strong>01</strong>05<br />
761-21XC/-2MXC<br />
763-21ED/-2MED 19 791-21 /-<br />
Gallon AS/PE2 2M/B1<br />
X<br />
Operation<br />
Several functions are<br />
integrated on this circuit<br />
board:<br />
- M a i n s w i t c h<br />
Man - 0 - Auto ‘<br />
- Speed control<br />
- Remote control of EC<br />
drive<br />
- Soft start<br />
- Automatic starter for<br />
electrical tools<br />
- Flow detection by flow-<br />
sensor<br />
- Setting of different hose<br />
diameters<br />
LED functions:<br />
Green LED flashes:<br />
unit on standby<br />
Green LED on:<br />
flow > 22 m/s<br />
791-21 /-<br />
2M/B1 791-21<br />
3<br />
Technical description<br />
of electronic EC-3 X<br />
4<br />
Technical description<br />
of electronic EA. EC-3 X<br />
X<br />
Yellow LED on:<br />
flow > 20 m/s and < 22<br />
m/s<br />
Red LED on:<br />
flow < 20 m/s plus buzzer<br />
sounds<br />
Function<br />
identical to Attix<br />
D<br />
see section<br />
"Operation" in<br />
repair manual<br />
560-21/-2M/-2H,<br />
12 Gallon RDFD Attix 550/560<br />
590-21,<br />
12 Gallon EC Attix 590-21<br />
590-21,<br />
12 Gallon EC Attix 590-21<br />
590-21,<br />
12 Gallon EC Attix 590-21<br />
Main switch, speed control,<br />
automatic starter:<br />
as described in Attix<br />
550/560 repair manual<br />
section D.<br />
Soft start:<br />
the motor always makes a<br />
soft start.<br />
Operating data:<br />
saved operating data can<br />
be read out on the Alto terminal<br />
(no. 3<strong>01</strong> 000 383 for<br />
operating data retrieval).<br />
Flow sensor:<br />
as described in Attix<br />
550/560 repair manual,<br />
section D.<br />
17/59<br />
n<br />
Operatio
<strong>Nilfisk</strong><br />
<strong>ALTO</strong><br />
6 Layout of electronic flow sensor EC (Attix 791-2M/B1)<br />
L1<br />
Powe r line<br />
N<br />
eSped<br />
potentiometer Mai n switch Attix7_ver.1.0_14<strong>01</strong>05<br />
Solderi ng<br />
jumper JS1<br />
Motor<br />
terminal Terminal flow sensor<br />
302000428 Terminal<br />
compressed air<br />
flow monitor Termin al<br />
piezo<br />
buzzer The following Attix 7 functions are identical to other models:<br />
Attix<br />
7 Technical<br />
description of<br />
electronic<br />
softstart X<br />
8 Technical<br />
description of<br />
electronic<br />
automatic starter.<br />
<strong>751</strong>-<strong>01</strong>/-<strong>11</strong><br />
19 Gallon <strong>751</strong>-21 <strong>751</strong>-0H <strong>751</strong>-2M<br />
X<br />
Operation<br />
761-21XC<br />
763-21ED<br />
19 Gal./AS/PE2<br />
761-2MXC<br />
763-2MED<br />
Plug-in jumper<br />
self-calibration 1 6<br />
Connector for<br />
re mote control of EC drive<br />
Function<br />
identical to<br />
Attix<br />
LE D red<br />
LED yellow<br />
LED green<br />
Hose<br />
diameter potentiometer Operating<br />
data<br />
readout Calibration button<br />
D<br />
L1<br />
Socket<br />
outlet litz wire<br />
N<br />
See section<br />
"Operation" in<br />
repair manual<br />
550-<strong>01</strong><br />
12 Gallon Attix 550/560<br />
550-21<br />
12 Gal.RDF Attix 550/560<br />
9 Technical<br />
description of<br />
electronic flow<br />
measurment<br />
10<br />
X 550-0H Attix 550/560<br />
Technical<br />
description of<br />
electronic flow<br />
measurment X 550-2M/-2H Attix 550/560<br />
<strong>11</strong> Technical<br />
description of<br />
electronic magnet<br />
control X<br />
12 Technical<br />
description of<br />
electronic flow<br />
measurement XC X<br />
550-21<br />
12 Gal.RDFD Attix 550/560<br />
560-2MXC/-<br />
2HXC Attix 550/560<br />
18/59<br />
n<br />
Operatio
<strong>Nilfisk</strong><br />
<strong>ALTO</strong><br />
13 Turbine / temperature monitoring (Attix <strong>751</strong>-61/-71,19 Gallon AE)<br />
14 Electronic level control<br />
(Attix <strong>751</strong>-61/-71, 19 Gallon AE)<br />
Alto no.: 3020<strong>01</strong>712<br />
(200–230 Vac/50–60 Hz)<br />
Alto no.: 3020<strong>01</strong>7<strong>11</strong><br />
(100–120 Vac/50–60 Hz)<br />
Several functions are integrated<br />
on this circuit<br />
board:<br />
- Main switch Pump -<br />
Auto - 0 - Man<br />
- Speed control in manu<br />
al<br />
- Soft start<br />
- Level control<br />
- Turbine temperaturemonitoring<br />
Attix7_ver.1.0_14<strong>01</strong>05<br />
Operation<br />
D<br />
A sensor in the exhaust air duct (like flow sensor)<br />
measures the temperature of the air from the turbine.<br />
If the turbine reaches a temperature of more than<br />
85°C, motor speed is reduced.<br />
Main switch:<br />
this allows selection of<br />
three modes.<br />
Pump:<br />
momentary contact for<br />
emptying the container.<br />
One-time operation<br />
causes the pump to run for<br />
30 s.<br />
Man:<br />
the turbine immediately<br />
starts.<br />
Auto:<br />
the turbine and pump are<br />
controlled as a function of<br />
the level.<br />
Speed control:<br />
the integrated speed control<br />
only works in Man<br />
mode. The control range<br />
is 90° to 130°.<br />
Advantages:<br />
- Optimal matching of<br />
suction capacity to the<br />
application<br />
- Prolonged turbine service<br />
life<br />
- Reduced noise emission<br />
- Power savings<br />
LED functions:<br />
Green LED (D2) on:<br />
operating voltage applied<br />
Green LED (D6) on:<br />
pump on<br />
Green LED (D7) on:<br />
motor on<br />
Red LED (D3) flashes:<br />
microprocessor working<br />
Red LED (D5) on:<br />
level - turn off motor<br />
Yellow LED (D4) on:<br />
level - turn on pump<br />
Operating data:<br />
saved operating data can<br />
be read out on the Alto terminal<br />
(no. 3<strong>01</strong> 000 383 for<br />
operating data retrieval).<br />
Continued on page 20<br />
19/59<br />
n<br />
Operatio
<strong>Nilfisk</strong><br />
<strong>ALTO</strong><br />
Attix7_ver.1.0_14<strong>01</strong>05<br />
Operation<br />
D<br />
Level control:<br />
Level control by means of a pressure sensor is implemented<br />
to optimize working with the equipment. The level<br />
in the container is metered in a rubber baffle pipe.The<br />
pressure sensor measures the difference in pressure<br />
between the container and the baffle pipe. Rising<br />
water level increases the pressure in the pipe. The pressure<br />
in the baffle pipe increases linearly with water level.<br />
Man mode:<br />
The electronic circuitry cuts out the turbine upwards of<br />
a defined pressure (water level), and remains in this<br />
status until the cleaner is turned off and the container<br />
emptied. The pump cannot be started in manual<br />
mode. The power of the turbine can be altered by<br />
speed control.<br />
Auto mode:<br />
Only the suction turbine runs when there is no water in<br />
the container. When the container fills with water, the<br />
pump is turned on. If more water flows into the container<br />
than the pump can convey out of the container, the level<br />
continues to rise. To prevent overfilling, the suction turbine<br />
is cut out at maximum level. As soon as the water level<br />
is significantly reduced by the pump, the suction motor<br />
is cut in again. Upon total emptying of the container,<br />
the pump is cut out with a time delay.<br />
Pump mode:<br />
The Pump switch setting is a momentary contact (automatic<br />
reset). One-time actuation causes the pump to<br />
work for 30 s. This function can be used to completely<br />
empty the container. At the same time this is a safeguard<br />
against the pump running when it is dry.<br />
20/59<br />
n<br />
Operatio
<strong>Nilfisk</strong><br />
<strong>ALTO</strong><br />
15 Layout of electronic level control (Attix <strong>751</strong>-61/-71, Attix 19 Gallon AE)<br />
LED yellow Lev el pump<br />
on (D4)<br />
LED red<br />
Motor off<br />
(D5)<br />
Terminal 2<br />
Motor<br />
LE D green Pump on<br />
(D6)<br />
Calibration button<br />
B2<br />
Pressure sensor Attix7_ver.1.0_14<strong>01</strong>05<br />
eSped<br />
potentiometer Temperature<br />
sensor<br />
Operation<br />
L ED green Moto r on ( D 7)<br />
Read out<br />
operating<br />
data<br />
N<br />
Socket<br />
terminal<br />
Pump<br />
LE D green<br />
(D2)<br />
N<br />
Power line Reserve. LED<br />
L1<br />
L1<br />
LED re d(D 3)<br />
fIno<br />
Terminal 1<br />
Motor<br />
D<br />
21/59<br />
n<br />
Operatio
<strong>Nilfisk</strong><br />
<strong>ALTO</strong><br />
Attix7_ver.1.0_14<strong>01</strong>05<br />
E<br />
1 ESD (electrostatic discharge) - Touch the protective con<br />
ductor to discharge sta<br />
tic from your own body.<br />
- Possibly wear an antistatic<br />
wrist strap.<br />
- Use a conductive floortabletop.<br />
- Never touch a circuit<br />
board or electronic com<br />
ponents, always hold<br />
2 Troubleshooting on unit<br />
Observe the following<br />
ESD precautions before<br />
any repairs to electronic<br />
circuitry:<br />
2.1 Unit will not work<br />
(all units with brush motor) Start:<br />
line voltage must be present<br />
and plug must be plugged<br />
in.<br />
Voltage applied to<br />
switch?<br />
Yes<br />
Do electronics work?<br />
Yes<br />
Check plug and power<br />
cord, replace if<br />
necessary.<br />
Replace electronics.<br />
Does motor work? No Repair or replace motor.<br />
Yes<br />
Troubleshooting<br />
No<br />
No<br />
Does cleaner work?<br />
them by the plastic or in<br />
sulation.<br />
- Transport electronic<br />
parts in conductive pa<br />
ckaging (e.g. Special<br />
ESD packages).<br />
No<br />
Conduct safety chec k.<br />
22/59<br />
Yes<br />
Troubleshooting
<strong>Nilfisk</strong><br />
<strong>ALTO</strong><br />
2.2 Unit will not work (all units with EC drive)<br />
Voltage applied to<br />
switch?<br />
Yes<br />
Voltage applied to EC-<br />
3 electronics? (See<br />
check of EC-3<br />
electronics)<br />
Yes<br />
Do EC-3 electronics<br />
work? (See check of<br />
EC-3 electronics)<br />
Yes<br />
Does EC motor work?<br />
Yes<br />
Attix7_ver.1.0_14<strong>01</strong>05<br />
Troubleshooting<br />
No<br />
No<br />
No<br />
No<br />
Start:<br />
line voltage must be<br />
present and plug must be<br />
plugged in.<br />
Check plug and power<br />
cord, replace if<br />
necessary.<br />
Check electronics/<br />
board and RFI filter,<br />
replace if necessary .<br />
Replace EC-3<br />
electronics.<br />
Check EC motor,<br />
replace if necessary.<br />
Does cleaner work?<br />
No<br />
E<br />
Cond uct safety check.<br />
23/59<br />
Yes<br />
Troubleshooting
<strong>Nilfisk</strong><br />
<strong>ALTO</strong><br />
2.3 Warning sound!<br />
(all cleaners)<br />
Remove hose from container<br />
fitting.<br />
Warning still<br />
sounds.<br />
Remove filter bag from<br />
container.<br />
Warning still<br />
sounds.<br />
Check filter, replace if<br />
necessary.<br />
Warning still<br />
sounds.<br />
Check flow sensor, replace<br />
if necessary.<br />
Warning still<br />
sounds.<br />
Check flow sensor detection<br />
(function), i.e.<br />
electronic flow metering,<br />
replace electronics<br />
if necessary.<br />
Warning still<br />
sounds.<br />
Attix7_ver.1.0_14<strong>01</strong>05<br />
Troubleshooting<br />
Warning<br />
gone.<br />
Warning<br />
gone.<br />
Start:<br />
switch on “I” for full power, potentiometer<br />
set to correct hose diameter,<br />
unit in normal cleaning mode.<br />
Check adjustment of<br />
flow sensor, recalibrate<br />
if necessary.<br />
Check if hose or<br />
nozzle is<br />
clogged.<br />
Insert new filter<br />
bag.<br />
No<br />
E<br />
Conduct safety<br />
check.<br />
Performance check of<br />
flow sensor: OK?<br />
24/59<br />
Yes<br />
Troubleshooting
<strong>Nilfisk</strong><br />
<strong>ALTO</strong><br />
3 Trolley/container<br />
3.1 Removing/fitting castors (all models except Attix <strong>751</strong>-71)<br />
3.2 Removing/fitting wheels (all models except Attix <strong>751</strong>-71)<br />
3.3 Removing/fitting feet (Attix <strong>751</strong>-71)<br />
Attix7_ver.1.0_14<strong>01</strong>05<br />
Troubleshooting<br />
1<br />
1<br />
Attix7 3647<br />
Attix7 3648<br />
1<br />
Attix7 3649<br />
E<br />
1. Use an Allen key (5 mm)<br />
to undo the countersunk<br />
head screw (1), and remove<br />
the castor.<br />
2. Fit in the reverse order.<br />
1. Lever off the wheel cap<br />
(1) with a screwdriver, and<br />
remove the wheel.<br />
2. Fit in the reverse order.<br />
1. Take the container out<br />
of the base frame, and<br />
raise the frame by laying<br />
the handle on the floor.<br />
2. Unscrew the nut (1),<br />
and remove the foot with<br />
the screw.<br />
3. Fit in the reverse order.<br />
25/59<br />
Troubleshooting
<strong>Nilfisk</strong><br />
<strong>ALTO</strong><br />
3.4 Removing/fitting wheels (Attix <strong>751</strong>-71)<br />
3.5 Removing/fitting grips (all models except Attix <strong>751</strong>-71)<br />
3.6 Removing/fitting lock (all models)<br />
Attix7_ver.1.0_14<strong>01</strong>05<br />
Troubleshooting<br />
1<br />
Attix7 3650<br />
☞<br />
1<br />
1<br />
1<br />
2<br />
1<br />
1<br />
1<br />
1<br />
Attix7 3652<br />
Attix7 3655<br />
E<br />
1. Lever off the wheel cap<br />
(1) with a screwdriver.<br />
2. Lever the clamping ring<br />
(2) off the axle with a<br />
screwdriver, and remove<br />
the wheel.<br />
3. Fit in the reverse order.<br />
Do not push the clamping<br />
ring too far onto the axle<br />
otherwise the wheel will<br />
not turn freely.<br />
1. Undo the six screws (1)<br />
with a Phillips screwdriver,<br />
and remove the grips.<br />
2. Fit in the reverse order.<br />
1. Lever off the lock (1)<br />
with a screwdriver.<br />
2. Fit in the reverse order,<br />
pressing the lock (1) firmly<br />
over the latch so that you<br />
hear it snap into place.<br />
26/59<br />
Troubleshooting
<strong>Nilfisk</strong><br />
<strong>ALTO</strong><br />
Attix7_ver.1.0_14<strong>01</strong>05<br />
Troubleshooting<br />
3.7 Removing/fitting grip with tensioning band (all models)<br />
1<br />
7<br />
1<br />
7<br />
5<br />
4<br />
2 3<br />
6<br />
7<br />
1<br />
Attix7 3657<br />
1<br />
Attix7 3659<br />
7<br />
Attix7 3660<br />
Attix7 3661<br />
E<br />
1. Take the cleaner head<br />
with the adapter ring off<br />
the container, and lift the<br />
container out of the base<br />
frame.<br />
2. Mark (1) the position of<br />
the grip (4) and the facing<br />
stop (5) on the container.<br />
3. Undo the screw (2) on<br />
the tensioning band (3)<br />
with a screwdriver, and remove<br />
the grip (4) and tensioning<br />
band (3).<br />
4. Fit in the reverse order,<br />
placing the grip (4) and<br />
stop (5) between the markings<br />
and lightly tightening<br />
the screw (2) on the tensioning<br />
band (3).<br />
5. Set the container in the<br />
base frame, and lock it in<br />
place.<br />
6. Align the grip (4) and<br />
stop (5) on the container in<br />
the base frame (7), and<br />
firmly tighten the screw (2)<br />
on the tensioning band<br />
(3).<br />
☞ 27/59<br />
Note:<br />
The contact faces of the<br />
contact spring (6) must be<br />
clean and free of corrosion.<br />
Troubleshooting
<strong>Nilfisk</strong><br />
<strong>ALTO</strong><br />
3.8 Removing/fitting belt (all models)<br />
3<br />
6<br />
6<br />
7<br />
Attix7_ver.1.0_14<strong>01</strong>05<br />
4<br />
4<br />
Troubleshooting<br />
2<br />
1<br />
Attix7 3663<br />
Attix7 3662<br />
☞<br />
E<br />
1. Take the cleaner head<br />
with the adapter ring off<br />
the container, and lift the<br />
container out of the base<br />
frame.<br />
2. Mark the position of the<br />
belt on the container (1).<br />
3. Take out the C-coupling<br />
(2) with a long screwdriver<br />
(only cleaners used by fire<br />
brigades).<br />
4. Thread a normal length<br />
of cord (3) or the like (60-<br />
80 cm) through one of the<br />
loops (4) of the tensioning<br />
device, and pull the loop<br />
(4) back over the catch<br />
(6). Detach the second<br />
loop (4) in the same way,<br />
and take off the belt (7).<br />
5. Fit in the reverse order,<br />
making sure the belt (7) is<br />
correctly positioned.<br />
Note:<br />
On cleaners used by fire<br />
brigades, always fit the Ccoupling<br />
(2) first as a positioning<br />
aid.<br />
28/59<br />
Troubleshooting
<strong>Nilfisk</strong><br />
<strong>ALTO</strong><br />
Attix7_ver.1.0_14<strong>01</strong>05<br />
Troubleshooting<br />
3.9 Removing/fitting pump (Attix <strong>751</strong>-61/-71, Attix 19 Gallon AE)<br />
1. Take the cleaner head<br />
with the adapter ring off<br />
the container, and lift the<br />
container out of the base<br />
frame..<br />
2. Take out the C-coupling<br />
(see 3.8/3, page 27).<br />
E<br />
3. Disassemble the plug<br />
(1) of the pump (3), undo<br />
the cable fixture (4) on the<br />
container, pull the cable<br />
through, and take out the<br />
pump.<br />
Fit in the reverse order.<br />
3.10 Removing/fitting non-return pipe (Attix <strong>751</strong>-61/-71, Attix 19 Gallon AE)<br />
2<br />
3<br />
1<br />
Attix7 3668<br />
☞<br />
4<br />
1<br />
Attix7 3664<br />
1. Remove the pump (1)<br />
(see 3.9, page 28).<br />
2. Unscrew the non-return<br />
pipe (2) from the threaded<br />
fitting of the pump (1), and<br />
remove it.<br />
3. Fit in the reverse order.<br />
Note:<br />
The threaded fitting can<br />
be sealed with normal<br />
silicone.<br />
29/59<br />
Troubleshooting
<strong>Nilfisk</strong><br />
<strong>ALTO</strong><br />
4. Cleaner head<br />
4.1 Removing/fitting grip (Attix <strong>751</strong>-61/-71,19 Gallon AE)<br />
The following repairs are identical as with other models.<br />
Attix<br />
Attix7_ver.1.0_14<strong>01</strong>05<br />
<strong>751</strong>-<strong>01</strong>/-<strong>11</strong>/-21<br />
<strong>751</strong>-2M/-0H<br />
791-21/-2M/B1<br />
19 Gallon<br />
761-21XC<br />
761-2MXC<br />
763-21ED<br />
763-2MED<br />
19 Gal./AS/PE2<br />
4.2 Removing /<br />
fitting grip X<br />
4.3 Removing /<br />
fitting grip X<br />
<strong>751</strong>-<strong>01</strong>/-<strong>11</strong>/-21<br />
<strong>751</strong>-2M/-0H<br />
791-21/-2M/B1<br />
19 Gallon-AE<br />
Attix <strong>751</strong>-61/-71<br />
4.4 Removing /<br />
fitting hood X<br />
761-21XC<br />
761-2MXC<br />
763-21ED<br />
763-2MED<br />
19 Gal./AS/PE2<br />
4.5 Removing /<br />
fitting hood X<br />
Troubleshooting<br />
1 1<br />
Attix7 36<strong>11</strong><br />
Identical to<br />
Attix<br />
550-<strong>01</strong><br />
12 Gallon<br />
560-21<br />
12 Gal.RDFD<br />
Identical to<br />
Attix<br />
550-<strong>01</strong><br />
12 Gallon<br />
560-21<br />
12 Gal.RDFD<br />
E<br />
As explained in the Attix<br />
550/560 repair manual,<br />
section E, page 36. But<br />
first unscrew the clamping<br />
fixtures right and left (1).<br />
See section<br />
"Troubleshooting"<br />
in repair manual<br />
Attix 550/560<br />
page 36<br />
Attix 550/560<br />
page 37<br />
See section<br />
"Troubleshooting"<br />
in repair manual<br />
Attix 550/560<br />
page 36<br />
Attix 550/560<br />
page 37<br />
30/59<br />
Troubleshooting
<strong>Nilfisk</strong><br />
<strong>ALTO</strong><br />
Attix7_ver.1.0_14<strong>01</strong>05<br />
Troubleshooting<br />
4.6 Removing/fitting cooling air filter (Attix 791-2M/B1)<br />
4.7 Removing/fitting hood (Attix 791-2M/B1)<br />
2<br />
3<br />
4<br />
3<br />
3<br />
4<br />
4<br />
1<br />
4<br />
Attix7 3612<br />
3<br />
3<br />
Attix7 3616<br />
3<br />
Attix7 3625<br />
E<br />
1. Undo the screw (1) with<br />
an Allen key (5 mm), and<br />
take off the cover.<br />
2. Pull off the filter insert<br />
(2) forwards.<br />
3. Undo the four screws<br />
(3) with a Phillips<br />
screwdriver, and take off<br />
the filter case.<br />
4. Fit in the reverse order.<br />
1. Unscrew the cooling air<br />
filter (see 4.6).<br />
2. Unscrew the socket<br />
(see 7.4).<br />
3. Undo the two screws (3)<br />
with an Allen key (5 mm),<br />
and take off the grip.<br />
4. Undo the four screws<br />
(4) of the locking clamps<br />
with a Phillips screwdriver,<br />
and take off the hood.<br />
5. Fit in the reverse order.<br />
31/59<br />
Troubleshooting
<strong>Nilfisk</strong><br />
<strong>ALTO</strong><br />
The following repairs are identical as with other models.<br />
Attix<br />
4.8 Removing / fitting<br />
locking clamps<br />
4.10 Removing/fitting locking clamps (Attix 791-2M/B1)<br />
Attix7_ver.1.0_14<strong>01</strong>05<br />
Troubleshooting<br />
All models<br />
except<br />
791-21/-2M/B1 791-21<br />
Identical to<br />
Attix<br />
X<br />
550-<strong>01</strong><br />
560-21<br />
12 Gallon/-RDFD<br />
4.9 Removing / fitting<br />
locking clamps X 590-21<br />
1. Remove the hood (see<br />
4.7).<br />
2. Take off the clamping<br />
plate (see Attix 590-21EC<br />
repair manual, section E).<br />
E<br />
See section<br />
"Troubleshooting"<br />
in repair manual<br />
Attix 550/560<br />
page 45<br />
Attix 590-21<br />
page 18<br />
3. Pull the locking clamps<br />
upwards and off.<br />
4. Fit in the reverse order.<br />
32/59<br />
Troubleshooting
<strong>Nilfisk</strong><br />
<strong>ALTO</strong><br />
5. Suction turbine<br />
The following repairs are identical as with other models.<br />
Attix<br />
5.4 Removing / fitting clamping plate (Attix 791-2M/B1).<br />
Attix7_ver.1.0_14<strong>01</strong>05<br />
<strong>751</strong>-<strong>01</strong>/-<strong>11</strong>/-21<br />
<strong>751</strong>-2M/-0H<br />
19 Gallon-AE<br />
<strong>751</strong>-61/-71<br />
5.1 Removing /<br />
fitting clamping<br />
plate X<br />
5.2 Removing /<br />
fitting clamping<br />
plate X<br />
761-21XC<br />
761-2MXC<br />
763-21ED<br />
763-2MED<br />
Identical to<br />
19 Gal./AS/PE2 791-21 Attix<br />
5.3 Removing /<br />
fitting clamping<br />
plate X 590-21<br />
1. Remove the hood (see<br />
4.7).<br />
2. Remove the clamping<br />
plate (see Attix 590-21EC<br />
repair manual, section E).<br />
The following repairs are identical as with other models.<br />
761-21XC<br />
761-2MXC<br />
763-21ED<br />
763-2MED<br />
19<br />
Gal./AS/PE2<br />
<strong>751</strong>-61/-71<br />
19 Gallon AE<br />
761-21XC<br />
761-2MXC<br />
763-21ED<br />
763-2MED<br />
19<br />
Attix<br />
Gal./AS/PE2<br />
5.5 Removing / fitting<br />
bracket for filter<br />
tightener X<br />
5.6 Removing / fitting<br />
hose for level<br />
monotoring X<br />
Troubleshooting<br />
E<br />
See section<br />
"Troubleshooting"<br />
in repair manual<br />
550-<strong>01</strong> Attix 550/560<br />
12 Gal./-RDFD page 38<br />
560-21 Attix 550/560<br />
12 Gal./-RDFD page 39<br />
Identical to<br />
Attix<br />
560-21<br />
12 Gal./-RDFD<br />
560-21<br />
12 Gal./- RDFD<br />
Attix 590-21<br />
page 18<br />
3. Fit in the reverse order.<br />
See section<br />
"Troubleshooting"<br />
in repair manual<br />
Attix 550/560<br />
page 40<br />
Attix 550/560<br />
page 40<br />
33/59<br />
Troubleshooting
<strong>Nilfisk</strong><br />
<strong>ALTO</strong><br />
The following repairs are identical as with other models.<br />
Attix7_ver.1.0_14<strong>01</strong>05<br />
All models<br />
except<br />
those with<br />
EC-drive<br />
Troubleshooting<br />
791-21/-<br />
2M/B1<br />
761-21XC<br />
761-2MXC<br />
763-21ED<br />
763-2MED<br />
19 Gal./AS/PE2 Identical to Attix<br />
Attix<br />
5.7 Removing /<br />
fitting motor<br />
560-21<br />
carbon brushes X<br />
12 Gallon/- RDFD<br />
5.8 Removing /<br />
560-21<br />
fitting motor<br />
5.9 Checking motor,<br />
removing / fitting<br />
motor<br />
X<br />
12 Gallon/- RDFD<br />
X 590-21EC<br />
6 Automatic filter<br />
560-21<br />
cleaning X 12 Gallon/- RDFD<br />
E<br />
See section<br />
"Troubleshooting"<br />
in repair manual<br />
Attix 550/560<br />
page 41<br />
Attix 550/560<br />
page 41<br />
Attix 590-21<br />
page 19-20<br />
Attix 550/560<br />
page 42-44<br />
34/59<br />
Troubleshooting
<strong>Nilfisk</strong><br />
<strong>ALTO</strong><br />
Attix7_ver.1.0_14<strong>01</strong>05<br />
E<br />
7 Electrical Following repairs or servicing,<br />
perform a thorough<br />
electrical check.<br />
Caution!<br />
Make sure the power plug<br />
is pulled out while you are<br />
carrying out repairs.<br />
7.1 Removing / fitting<br />
electrical components<br />
The following repairs are identical as with other models.<br />
7.4 Removing/fitting<br />
socket<br />
Attix 791-2M/B1<br />
<strong>751</strong>-<strong>01</strong>/-<strong>11</strong>/-21<br />
<strong>751</strong>-2M/-0H<br />
19 Gallon/-AE<br />
<strong>751</strong>-61/-71<br />
791-21<br />
Attix<br />
7.2 Removing /<br />
fitting power<br />
cord<br />
X<br />
7.3 Removing /<br />
fitting power<br />
cord X<br />
Troubleshooting<br />
☞<br />
761-21XC<br />
761-2MXC<br />
763-21ED<br />
763-2MED<br />
19 Gal./AS/PE2 Identical to Attix<br />
2<br />
2<br />
1<br />
2<br />
2<br />
1. Use a screwdriver to<br />
take off the cover frame<br />
(1).<br />
550-<strong>01</strong><br />
12 Gallon/- RDF<br />
560-21<br />
12 Gallon/- RDFD<br />
Attix7 3623<br />
Caution!<br />
Work with the appropriate<br />
wiring diagram (see section<br />
H). It is helpful if you<br />
make a sketch to clearly<br />
show which cable (note<br />
the color) matches which<br />
terminal.<br />
2<br />
See section<br />
"Troubleshooting"<br />
in repair manual<br />
Attix 550/560<br />
page 45<br />
Attix 550/560<br />
page 45<br />
2<br />
Attix7 3624<br />
2. Undo the six screws (2)<br />
holding the cover with a<br />
Phillips screwdriver, and<br />
take off the cover.<br />
35/59<br />
Troubleshooting
<strong>Nilfisk</strong><br />
<strong>ALTO</strong><br />
Attix7_ver.1.0_14<strong>01</strong>05<br />
Troubleshooting<br />
7.5 Removing/fitting power cord (Attix 791-2M/B1)<br />
4<br />
3<br />
4<br />
Attix7 3620<br />
1. Remove the hood (see 4.7).<br />
E<br />
3. Disconnect the cable on<br />
the socket (3), undo the<br />
two screws (4) with a Phillips<br />
screwdriver, and take<br />
off the case.<br />
4. Fit in the reverse order.<br />
2. Remove the power cord (see Attix 590-21EC repair<br />
manual, section E, page 21).<br />
36/59<br />
Troubleshooting
<strong>Nilfisk</strong><br />
<strong>ALTO</strong><br />
7.6 Checking electronic flow metering EC in manual mode<br />
(Attix 791-2M/B1)<br />
L1<br />
Power line<br />
N<br />
Attix7_ver.1.0_14<strong>01</strong>05<br />
Troubleshooting<br />
Lamp<br />
EC electronics 30 3022 00 0000 764 764<br />
E<br />
LED red<br />
LED yellow LED green<br />
1. Make sure the unit is isolated from the power.<br />
2. Remove the hood (see 4.4).<br />
3. Set the cleaner head on a clean container<br />
(w/o a filter bag) and withdraw the hose from the<br />
container fitting.<br />
4. Apply line voltage and set the switch to “I”.<br />
Visual check:<br />
Green LED on = EC electronics driven, air flow OK.<br />
Yellow LED on = EC electronics driven, air flow<br />
reduced.<br />
Red LED on = EC electronics driven, air flow too low.<br />
5. Make sure the unit is isolated from the power.<br />
6. Withdraw the two cables for the EC electronics on<br />
the switch and connect the lamp 302000764.<br />
7. Apply line voltage and set the switch to “I”.<br />
Check:<br />
Lamp “EC electronics” illuminates immediately.<br />
Red LED illuminates and warning sounds.<br />
“MAN” OK?<br />
Ja - “MAN” mode OK.<br />
No -replace electronic and<br />
recalibrate<br />
37/59<br />
Troubleshooting
<strong>Nilfisk</strong><br />
<strong>ALTO</strong><br />
7.7 Checking electronic flow metering EC in automatic mode<br />
(Attix 791-2M/B1)<br />
L1<br />
Power line<br />
N<br />
Attix7_ver.1.0_14<strong>01</strong>05<br />
Troubleshooting<br />
Terminal EC electronics E<br />
1. Make sure the unit is isolated from the power.<br />
2. Remove the hood (see 4.4).<br />
3. Set the cleaner head on a clean container<br />
(w/o a filter bag) and withdraw the hose from the<br />
container fitting.<br />
4. Insert the “tool” lamp in the socket (302000765) and<br />
rotate the bulb one turn out of the receptacle.<br />
5. Apply line voltage and set the switch to “Auto”.<br />
6. Visual check:<br />
Green LED flashes (standby).<br />
7. Check:<br />
Turn the bulb properly into the receptacle. The “tool”<br />
lamp illuminates immediately, and the motor starts.<br />
The red, yellow and green LEDs illuminate.<br />
The red and yellow LEDs extinguish after 3-5 s.<br />
Rotate the bulb one turn out of the receptacle.<br />
The motor stops (runs on) after 3-5 s.<br />
“Auto” Mode OK?<br />
Lamp<br />
Tool<br />
302000765<br />
Yes - “Auto” Mode OK.<br />
No - Replace electronic<br />
and recalibrate<br />
LED red LED yellow<br />
LED green<br />
38/59<br />
Troubleshooting
<strong>Nilfisk</strong><br />
<strong>ALTO</strong><br />
The following repairs are identical as with other models.<br />
Attix<br />
7.8 Checking flow sensor<br />
detection (performance) of<br />
electronic flow metering<br />
7.10 Removing/fitting electronic flow metering EC (Attix 791-2M/B1)<br />
Attix7_ver.1.0_14<strong>01</strong>05<br />
Troubleshooting<br />
<strong>751</strong>-2M/-0H<br />
761-2MXC<br />
763-2MED1<br />
791-2M/B1 Identical to Attix<br />
X 550-2M/-0H<br />
7.9 Checking and calibration<br />
(adjustment) of flow<br />
sensor X 550-2M/-0H<br />
2<br />
2<br />
4<br />
3<br />
4<br />
2<br />
2<br />
Attix7 3633<br />
1. Remove the hood (see<br />
4.7).<br />
2. Disconnect the power<br />
cord, cables to EC electronics,<br />
flow sensor, buzzer,<br />
and potentiometer from<br />
the electronics. Disconnect<br />
L1 and N on the<br />
socket (2).<br />
2<br />
E<br />
See section<br />
"Troubleshooting"<br />
in repair manual<br />
Attix 550/560<br />
page 54<br />
Attix 550/560<br />
page 55-56<br />
2<br />
2<br />
Attix7 3630<br />
Withdraw the plug for the<br />
speed control from the EC<br />
electronics.<br />
3. Undo the retaining<br />
screw (3) on the rotary<br />
knob with a Phillips<br />
screwdriver, and remove<br />
the rotary knob.<br />
4. Undo the two retaining<br />
screws (4) behind the rotary<br />
knob with a Phillips<br />
screwdriver, and remove<br />
the electronics.<br />
5. Fit in the reverse order.<br />
39/59<br />
Troubleshooting
<strong>Nilfisk</strong><br />
<strong>ALTO</strong><br />
7.<strong>11</strong> Checking electronic level control in manual mode<br />
(Attix <strong>751</strong>-61/-71, 19 Gallon/AE)<br />
Attix7_ver.1.0_14<strong>01</strong>05<br />
7 cm<br />
1 1cm<br />
Attix7 3641<br />
Troubleshooting<br />
1H<br />
Lamp Motor 302000764 1L<br />
Power line<br />
N<br />
LE D green<br />
Motor on<br />
(D7)<br />
Speed potentiometer E<br />
1. Make sure the unit is isolated from the power supply.<br />
2. Remove the hood (see 4.4, page 31).<br />
3. Place the cleaner head on a table so that the hose<br />
hangs downwards.<br />
4. Remove the two motor cables from the board and<br />
the switch.<br />
5. Connect the test lamp 302000764.<br />
6. Apply line voltage and set the switch to “I”<br />
(Man) for full power.<br />
Visual check:<br />
Green LEDs (D2 and D7) illuminate.<br />
Red LED (D3) flashes (microprocessor working).<br />
Check soft start and speed control:<br />
The motor lamp slowly starts to illuminate (soft<br />
start).<br />
Set the switch to minimum speed.<br />
The brightness of the lamp reduces.<br />
Check level control:<br />
Mark the hose at <strong>11</strong> cm.<br />
Slowly immerse the hose in a container filled with<br />
water until the lamp extinguishes. This turn-off point<br />
should be at the marking <strong>11</strong> cm +1 cm (recalibrate<br />
the level control if necessary (see 7.) and repeat the<br />
procedure).<br />
Green LED (D2) illuminates, red LED (D3) flashes.<br />
Red LED (D5) illuminates.<br />
7. The system can be activated again after a reset.<br />
“Manual” OK?<br />
LED green<br />
Pump on<br />
(D6)<br />
Calibration<br />
button<br />
LED red<br />
(D3)<br />
Microprocessor<br />
working<br />
LE D yellow<br />
Level<br />
Pump on<br />
( D4)<br />
LED red<br />
Motor off<br />
(D5)<br />
B2<br />
Pressur e sensor Yes - “MAN” Mode OK.<br />
LE D green<br />
Operating voltage<br />
present<br />
(D2)<br />
No - Replace electronic and<br />
recalibrate level<br />
40/59<br />
Troubleshooting
<strong>Nilfisk</strong><br />
<strong>ALTO</strong><br />
7.12 Checking electronic level control in automatic mode<br />
(Attix <strong>751</strong>-61/-71, 19 Gallon/AE)<br />
Attix7_ver.1.0_14<strong>01</strong>05<br />
H1<br />
Lamp<br />
Motor<br />
302000764 L1<br />
Power line<br />
N<br />
LED green Moto r on<br />
( D7)<br />
Troubleshooting<br />
LED green<br />
Pump<br />
on<br />
(D6)<br />
E<br />
1. Make sure the unit is isolated from the power supply.<br />
2. Remove the hood (see 4.4, page 30).<br />
3. Place the cleaner head on a table so that the hose<br />
hangs downwards.<br />
4. Remove the two motor cables from the board and<br />
the switch.<br />
5. Connect the test lamp 302000764.<br />
6. Insert the test lamp 302000765 in the socket.<br />
7. Apply line voltage and set the switch to “Auto”.<br />
Visual check:<br />
Green LEDs (D2 and D7) illuminate.<br />
Red LED (D3) flashes.<br />
Check soft start:<br />
The motor lamp slowly starts to illuminate (soft<br />
start).<br />
Continued on page 42<br />
Calibration button<br />
Lamp H2<br />
Pump<br />
302000765<br />
LED yellow<br />
Level<br />
Pump on<br />
( D4)<br />
LED red<br />
Motor off<br />
(D5)<br />
LED<br />
red<br />
Microprocessor working (D3)<br />
LED green<br />
Operating voltage present<br />
(D2)<br />
B2<br />
Pressur e sensor 41/59<br />
Troubleshooting
<strong>Nilfisk</strong><br />
<strong>ALTO</strong><br />
Attix7_ver.1.0_14<strong>01</strong>05<br />
Troubleshooting<br />
E<br />
Check level control:<br />
Mark the hose at 7 and <strong>11</strong> cm (see 7.<strong>11</strong>, page 40).<br />
Slowly immerse the hose in a container filled with<br />
water until the lamp illuminates. This turn-on point<br />
should be at the marking 7 cm +1 cm (recalibrate<br />
the level control if necessary (see 7.13, page 40)<br />
and repeat the procedure).<br />
Green LEDs (D7, D2 and D6) illuminate.<br />
Red LED (D3) flashes (microprocessor working).<br />
Yellow LED (D4) illuminates (level - pump on).<br />
Continue to immerse the hose in water until the<br />
check lamp (motor) extinguishes. This turn-off point<br />
should be at the marking <strong>11</strong> cm +1 cm.<br />
Green LEDs (D2 and D6) illuminate.<br />
Red LED (D3) flashes.<br />
Yellow LED (D4) illuminates.<br />
Red LED (D5) illuminates.<br />
8. Take the hose out of the water.<br />
Visual check:<br />
The check lamp (motor) illuminates after about 6 s.<br />
Green LEDs (D2, D7 and D6) illuminate.<br />
Yellow LED (D4) illuminates.<br />
Red LED (D3) flashes.<br />
After another 20-25 s the check lamp (pump) and<br />
LEDs (D4 and D6) extinguish.<br />
9. Check pump mode:<br />
Set the switch to “Pump” and hold it there.<br />
The motor lamp extinguishes.<br />
The pump lamp illuminates.<br />
Green LEDs (D2 and D6) illuminate.<br />
Red LED (D3) flashes.<br />
Red LED (D5) illuminates.<br />
Yellow LED (D4) illuminates.<br />
After about 60 s the check lamp (pump) and LEDs<br />
(D6 and D3) extinguish.<br />
Briefly set the switch to “Pump” (it should automatically<br />
return to “Auto”).<br />
The motor lamp and pump lamp illuminate.<br />
Green LEDs (D2, D6 and D7) illuminate.<br />
Red LED (D3) flashes.<br />
Yellow LED (D4) illuminates.<br />
After about 30 s the lamp (pump) and LEDs (D4 and<br />
D6) extinguish.<br />
Yes - “Auto” Mode OK.<br />
“Automatic” OK?<br />
No - Replace electronic<br />
and recalibrate level<br />
42/59<br />
Troubleshooting
<strong>Nilfisk</strong><br />
<strong>ALTO</strong><br />
Attix7_ver.1.0_14<strong>01</strong>05<br />
Troubleshooting<br />
7.13 Calibrating electronic level control (Attix <strong>751</strong>-61/-71, 19 Gallon/AE)<br />
7.14 Removing/fitting electronic level control<br />
(Attix <strong>751</strong>-61/-71, 19 Gallon/AE)<br />
2<br />
D4<br />
5D<br />
D2<br />
E<br />
Attix7 3646<br />
1. Make sure the unit is isolated from the power<br />
supply.<br />
2. Remove the hood (see 4.4, page 30).<br />
3. Place the cleaner head on a table so that the hose<br />
hangs downwards.<br />
4. Mark the hose at 7 cm (see 7.<strong>11</strong>, page 40).<br />
5. Place the jumper (53840) on X5 (1).<br />
6. Apply line voltage and set the switch to “I”.<br />
Visual check:<br />
Green LED (D2) illuminates.<br />
Yellow LED (D4) and red LED (D5) flash.<br />
7. Immerse the hose up to the marking in water, and<br />
press the calibration button (2) with an insulated<br />
tip. During calibration the LEDs (D4 and D5) will<br />
illuminate (about 2-3 s). After calibration they<br />
extinguish.<br />
8. Remove the jumper from X5 (1), and check the level<br />
control after resetting with the switch.<br />
1. Remove the hood (see 4.4).<br />
2. Withdraw the connections of the power line, motor<br />
and temperature sensor from the electronics.<br />
Disconnect L1 and N on the socket. Take the two<br />
hoses off the pressure sensor.<br />
3. Undo the retaining screw on the rotary knob with a<br />
Phillips screwdriver, and remove the rotary knob<br />
(see 7.10).<br />
4. Undo the two retaining screws behind the rotary<br />
knob with a Phillips screwdriver, and remove the<br />
electronics (see 7.10).<br />
5. Fit in the reverse order.<br />
1<br />
43/59<br />
Troubleshooting
<strong>Nilfisk</strong><br />
<strong>ALTO</strong><br />
The following repairs are identical as with other models.<br />
Attix<br />
Attix7_ver.1.0_14<strong>01</strong>05<br />
<strong>751</strong>-61/-71,<br />
19 Gallon AE<br />
<strong>751</strong>-61/-71,<br />
19 Gallon AE,<br />
<strong>751</strong>-2M/-0H,<br />
763-2MED<br />
791-2M/B1<br />
Identical to<br />
Attix<br />
7.15 Checking<br />
temperature sensor X Centix<br />
7.16 Removing / fitting<br />
temperature sensor<br />
/ flow sensor X<br />
7.17<br />
7.18<br />
7.19<br />
550-2M/-0H<br />
Centix<br />
<strong>751</strong>-<strong>01</strong>/-<strong>11</strong><br />
Identical to<br />
Attix<br />
19 Gallon <strong>751</strong>-21 <strong>751</strong>-2M/-0H Attix<br />
Checking removing /<br />
fitting electronic soft<br />
550-<strong>01</strong><br />
start X<br />
12 Gallon<br />
Checking removing /<br />
fitting electronic EA.<br />
Checking removing /<br />
fitting electronic flow<br />
X 550-21<br />
metering X 550-0H/-2M<br />
761-21XC<br />
763-21ED<br />
19 Gal.<br />
Attix<br />
AS/PE2<br />
7.20 Checking removing /<br />
fitting electronic<br />
magnet control X<br />
7.21 Checking level<br />
monitoring<br />
Troubleshooting<br />
761-21XC/-2MXC<br />
763-21ED/-2MED<br />
19 Gal. AS/PE2<br />
X<br />
Identical to<br />
Attix<br />
560-21<br />
12 Gallon<br />
RDFD<br />
560-21<br />
12 Gallon<br />
RDFD<br />
E<br />
See section<br />
"Troubleshooting"<br />
in repair manual<br />
Attix 350/360/Centix<br />
page 48<br />
Attix 350/360/Centix<br />
page 48<br />
See section<br />
"Troubleshooting"<br />
in repair manual<br />
Attix 550/560<br />
page 47-48<br />
Attix 550/560<br />
page 49-51<br />
Attix 550/560<br />
page 52-57<br />
See section<br />
"Troubleshooting"<br />
in repair manual<br />
Attix 550/560<br />
/Seite 60-63<br />
Attix 550/560<br />
/Seite 63-64<br />
44/59<br />
Troubleshooting
<strong>Nilfisk</strong><br />
<strong>ALTO</strong><br />
The following repairs are identical as with other models.<br />
7.22<br />
Attix<br />
Attix7_ver.1.0_14<strong>01</strong>05<br />
761-2MXC<br />
763-2MED<br />
<strong>751</strong>-2M<br />
761-2MXC<br />
763-2MED<br />
791-2M/B1<br />
Checking /<br />
removing<br />
electronic flow<br />
sensor XC X 560-2MXC<br />
7.23 Electronic<br />
potentiometer<br />
(hose diameter) X<br />
E<br />
<strong>751</strong>-2M/-0H<br />
761-2MXC<br />
See section<br />
763-2MED<br />
"Troubleshooting"<br />
791-2M/B1 Identical to Attix in repair manual<br />
560-21<br />
12 Gallon RDFD<br />
7.24 Checking piezo<br />
buzzer X 560-2MXC<br />
Attix 791-21<br />
791-21<br />
791-2M/B1<br />
Identical to<br />
Attix<br />
7.25 Removing / fitting<br />
electronic EA. EC-3<br />
7.26 Checking removing /<br />
X 590-21<br />
7.27<br />
Troubleshooting<br />
fitting electronic EC-3 X 590-21<br />
Checking, removing /<br />
fitting RFI filter /<br />
varistor X 590-21<br />
Attix 550/560<br />
/Seite 66-68<br />
Attix 550/560<br />
/Seite 69-70<br />
Attix 550/560<br />
/Seite 71<br />
See section<br />
"Troubleshooting"<br />
in repair manual<br />
Attix 590-21<br />
/Seite 22-24<br />
Attix 590-21<br />
/Seite 25-26<br />
Attix 590-21<br />
/Seite 26-27<br />
45/59<br />
Troubleshooting
<strong>Nilfisk</strong><br />
<strong>ALTO</strong><br />
Attix7_ver.1.0_14<strong>01</strong>05<br />
Spare parts<br />
☞<br />
F<br />
Please use the current<br />
spare parts list.<br />
46/59<br />
Spare parts
<strong>Nilfisk</strong><br />
<strong>ALTO</strong><br />
1 Special-purpose<br />
tools<br />
Attix7_ver.1.0_14<strong>01</strong>05<br />
5<br />
Tools<br />
1<br />
1. Calibration sensor (Alto no. 302000766)<br />
2. Electronic device to check EC turbine<br />
(Alto no. 62859)<br />
3. Digital multimeter<br />
4. Lamp holder E-27/40 W (Alto no. 302000764)<br />
5. Lamp holder E-27/40 W (Alto no. 302000765)<br />
6. Test device (Alto no. 40434)<br />
7. Adjustment mask (Alto no. 62480)<br />
6<br />
4<br />
3<br />
2<br />
7<br />
G<br />
Attix7 3677<br />
Attix7 3678<br />
47/59<br />
Tools
<strong>Nilfisk</strong><br />
<strong>ALTO</strong><br />
1 Wiring diagram of Attix <strong>751</strong>-<strong>01</strong><br />
Attix7_ver.1.0_14<strong>01</strong>05<br />
X1<br />
M1<br />
Motor<br />
L1<br />
1a<br />
1<br />
+<br />
M<br />
1~<br />
~<br />
=<br />
N<br />
3 3a<br />
Wiring<br />
X2<br />
+<br />
Z1<br />
MC<br />
A1<br />
Motor<br />
H<br />
A1 Electroni c soft start<br />
M1 M otor turbine<br />
X1 Power line X2 Termina l strip 6-way Z1 Anti-static clip 48/59<br />
i g<br />
W rin
<strong>Nilfisk</strong><br />
<strong>ALTO</strong><br />
2 Wiring diagram of Attix <strong>751</strong>-<strong>11</strong>, Attix 19 Gallon<br />
Z1<br />
X3<br />
Attix7_ver.1.0_14<strong>01</strong>05<br />
W1<br />
W2<br />
X1<br />
M1<br />
Wiring<br />
Motor<br />
L1<br />
1a<br />
1<br />
+<br />
M<br />
1~<br />
~<br />
=<br />
N<br />
3 3a<br />
+<br />
MC<br />
A1<br />
Motor<br />
H<br />
A1 Electronic sof t start M1 Moto r turbine W1 Single-co re lead W2 Single-core lead<br />
X1 Po wer line X3 Stocket Z1 Anti-static clip<br />
49/59<br />
i g<br />
W rin
<strong>Nilfisk</strong><br />
<strong>ALTO</strong><br />
3 Wiring diagram of Attix <strong>751</strong>-21<br />
A1<br />
Motor<br />
MC<br />
Attix7_ver.1.0_14<strong>01</strong>05<br />
Air<br />
+<br />
X1<br />
+<br />
+<br />
3<br />
3a<br />
~<br />
N<br />
M1<br />
Wiring<br />
=<br />
1a 1<br />
L<br />
M<br />
1~<br />
Q1<br />
Z1<br />
X3<br />
H<br />
A1 Electronic sof t start<br />
M1 Moto r turbine X1 Powe r line<br />
X3 Socket Z1 Anti-static clip<br />
50/59<br />
i g<br />
W rin
<strong>Nilfisk</strong><br />
<strong>ALTO</strong><br />
4 Wiring diagram of Attix <strong>751</strong>-2M<br />
A2 Flow-<br />
Sensor<br />
A3<br />
Tube<br />
H1<br />
Attix7_ver.1.0_14<strong>01</strong>05<br />
A1<br />
Motor<br />
+<br />
+<br />
X6<br />
X5<br />
1<br />
2<br />
3<br />
X4<br />
1<br />
2<br />
3<br />
X2<br />
Air<br />
X3<br />
X8<br />
1<br />
2<br />
3<br />
X1<br />
1<br />
MC<br />
X1<br />
+<br />
+<br />
3<br />
3a<br />
~<br />
N<br />
M1<br />
=<br />
Wiring<br />
1a 1<br />
L<br />
M<br />
1~<br />
Q1<br />
Z1<br />
X3<br />
H<br />
A1 Electronic flow metering<br />
A2 Flo w sensor A3 Potentiometer H1 Buzzer M1 Moto r turbine<br />
X1 Power line X3 Socket Z1 Anti-static clip 51/59<br />
i g<br />
W rin
<strong>Nilfisk</strong><br />
<strong>ALTO</strong><br />
5 Wiring diagram of Attix <strong>751</strong>-0H<br />
A2 Flow-<br />
Sensor<br />
H1<br />
Attix7_ver.1.0_14<strong>01</strong>05<br />
A1<br />
Motor<br />
+<br />
X6<br />
X5<br />
1<br />
2<br />
3<br />
X4<br />
1<br />
2<br />
3<br />
X8<br />
1<br />
2<br />
3<br />
X1<br />
1<br />
MC<br />
X1<br />
M1<br />
+<br />
Wiring<br />
3<br />
3a<br />
~<br />
N<br />
=<br />
M<br />
1~<br />
1a 1<br />
L<br />
Q1<br />
X2 Z1<br />
H<br />
A1 Electronic flow metering<br />
A2 Flow sensor<br />
H1 Buzzer<br />
M1 Motor turbine<br />
X1 Power line<br />
X2 Terminal strip 6-way<br />
Z1 Anti-static clip<br />
52/59<br />
i g<br />
W rin
<strong>Nilfisk</strong><br />
<strong>ALTO</strong><br />
6 Wiring diagram of Attix 761-21XC, Attix 763-21ED<br />
A1<br />
Baffle pipe<br />
9mbar<br />
Motor<br />
P2<br />
X1<br />
Pressure<br />
Compensation<br />
Reservoir<br />
Attix7_ver.1.0_14<strong>01</strong>05<br />
ge<br />
X2<br />
rt<br />
+<br />
+<br />
+<br />
~<br />
1a 1<br />
MC =<br />
X3<br />
ge<br />
Magnet B<br />
X3<br />
Air<br />
Y2 Y1<br />
X1<br />
3a 3<br />
X7 X9<br />
F1<br />
Magnet A<br />
M1<br />
Wiring<br />
N<br />
AS<br />
L<br />
M<br />
1~<br />
X2<br />
W2<br />
W1<br />
Z1<br />
H<br />
A1 Ee l ctronc i magne t control M1 Moto r turbn i e<br />
W1 Sn i ge l -cor e lead W2 Snge i l -cor e lead X1 Powe r ln i e<br />
X2 Termina l stri p 6-way X3 Socket Y1/Y2 Solenoid Z1 Anti-static clip 53/59<br />
i g<br />
W rin
<strong>Nilfisk</strong><br />
<strong>ALTO</strong><br />
7 Wiring diagram of Attix 761-2MXC, Attix 763-2MED<br />
A2 Sensor<br />
Tube<br />
H1<br />
A3<br />
gn<br />
A1<br />
Attix7_ver.1.0_14<strong>01</strong>05<br />
rt<br />
X10<br />
X4<br />
X5<br />
X6<br />
X9<br />
+<br />
X3<br />
+<br />
X1<br />
1<br />
2<br />
3<br />
1<br />
2<br />
3<br />
Air<br />
1<br />
2<br />
3<br />
1<br />
2<br />
3<br />
Baffle pipe<br />
Motor<br />
ge<br />
9mbar<br />
P2<br />
rt<br />
MC<br />
Pressure<br />
Compensation<br />
Reservoir<br />
ge<br />
Y2<br />
+<br />
X1<br />
+<br />
X<strong>11</strong><br />
3a 3<br />
Y1<br />
X12<br />
1a 1<br />
Magnet B Magnet A<br />
M1<br />
~<br />
Wiring<br />
N AS<br />
=<br />
R32<br />
L<br />
M<br />
1~<br />
X2<br />
W2<br />
Z1<br />
W1<br />
X3<br />
H<br />
A1 Electronic flow metering<br />
A2 Flow sensor<br />
A3 Potentiometer<br />
H1 Buzzer<br />
M1 Motor turbine<br />
W1 Single-core lead<br />
W2 Single-core lead<br />
X1 Power line X2 Terminal strip<br />
X3 Socket<br />
Y1/Y2 Solenoid<br />
Z1 Anti-static clip<br />
54/59<br />
i g<br />
W rin
<strong>Nilfisk</strong><br />
<strong>ALTO</strong><br />
12 Wiring diagram of Attix 19 Gallon AS/PE 2<br />
Staurohr<br />
A1<br />
X1<br />
Motor<br />
Druckausgleich<br />
Behaelter<br />
9mbar<br />
P2<br />
Attix7_ver.1.0_14<strong>01</strong>05<br />
ge<br />
MC<br />
X2<br />
rt<br />
B1<br />
ge<br />
Magnet B<br />
Q<br />
X3<br />
+<br />
Air<br />
+<br />
Y2 Y1<br />
X1<br />
+<br />
~<br />
X7 X9<br />
Wiring<br />
3a 3<br />
N<br />
=<br />
F1<br />
Magnet A<br />
M1<br />
1a 1<br />
L<br />
M<br />
1~<br />
X2<br />
W2<br />
W1<br />
Z1<br />
X3<br />
H<br />
A1 Electroni c magnet control<br />
B1 Flow monitor M1 Motor turbine W1 Single-co re lead W2 Single-core lead<br />
X1 Power line<br />
X2 Termina l strip 6-way<br />
X3 Socket<br />
Y1/Y2 Solenoid Z1 Anti-s tatic clip 55/59<br />
i g<br />
W rin
<strong>Nilfisk</strong><br />
<strong>ALTO</strong><br />
8 Wiring diagram of Attix 791-21<br />
X5<br />
Attix7_ver.1.0_14<strong>01</strong>05<br />
1<br />
A1<br />
MC<br />
Air N<br />
L<br />
+<br />
+<br />
X1<br />
+<br />
Wiring<br />
3<br />
3a<br />
~<br />
=<br />
C1<br />
A2<br />
M1<br />
1<br />
1a 1<br />
6<br />
X2<br />
X72<br />
1<br />
Q1<br />
M<br />
1<br />
6<br />
X2<br />
PE<br />
Z1<br />
X3<br />
H<br />
A1 Electronic so ft start EC<br />
A2 Electronic EC<br />
C1 R FI suppression capacitor M1 Moto r turb ine EC<br />
X1 Power line<br />
X2 Terminal strip<br />
X3 Socket<br />
Z1 Anti-stati c clip<br />
56/59<br />
i g<br />
W rin
<strong>Nilfisk</strong><br />
<strong>ALTO</strong><br />
9 Wiring diagram of Attix 791-2M/B1<br />
A2 Flow<br />
Sensor<br />
A3<br />
Tube<br />
H1<br />
A1<br />
+<br />
+<br />
X5<br />
1<br />
2<br />
X4<br />
1<br />
2<br />
X8<br />
1<br />
Attix7_ver.1.0_14<strong>01</strong>05<br />
3<br />
3<br />
X2<br />
Air<br />
X3<br />
2<br />
3<br />
X7<br />
MC<br />
+<br />
X1<br />
X1<br />
+<br />
3<br />
3a<br />
~<br />
N<br />
=<br />
Operating data<br />
1<br />
Wiring<br />
1a 1<br />
C1<br />
A4<br />
M1<br />
L<br />
3<br />
2<br />
X7<br />
X8<br />
M<br />
1<br />
X2<br />
PE<br />
Z1<br />
X3<br />
H<br />
A1 Electronic flow metering A2 Flo w sensor A3 Potentiometer A42 Electronic EC<br />
C 1 RFI suppression capacitor H1 Buzzer<br />
M1 Motor turbi ne EC<br />
X1 Power line X2 Terminal strip X3 Socket<br />
Z1 Anti-static clip<br />
57/59<br />
i g<br />
W rin
<strong>Nilfisk</strong><br />
<strong>ALTO</strong><br />
10 Wiring diagram of Attix <strong>751</strong>-61, Attix 19 Gallon AE<br />
Baffle pipe<br />
A1<br />
X1<br />
Motor<br />
Pressure<br />
compensation<br />
Reservoir<br />
ge<br />
P2<br />
Pressure<br />
Sensor<br />
Attix7_ver.1.0_14<strong>01</strong>05<br />
rt<br />
MC<br />
+<br />
X1<br />
+<br />
3a 3<br />
~<br />
N<br />
Wiring<br />
=<br />
M1<br />
L<br />
M<br />
1~<br />
X2<br />
X3<br />
Z1<br />
M2<br />
Pumpe<br />
M<br />
H<br />
A1 Electroni c sof t start<br />
M1 Mot or turbine M2 Pump<br />
X1 Po wer line<br />
X2 Term inal strip 6-way X3 Socket Z1 Anti-static clip<br />
58/59<br />
i g<br />
W rin
<strong>Nilfisk</strong><br />
<strong>ALTO</strong><br />
<strong>11</strong> Wiring diagram of Attix <strong>751</strong>-71<br />
Baffle pipe<br />
A1<br />
X1<br />
Motor<br />
Pressure<br />
Compensation<br />
Reservoir<br />
ge<br />
P2<br />
Pressure<br />
Sensor<br />
Attix7_ver.1.0_14<strong>01</strong>05<br />
rt<br />
MC<br />
+<br />
X1<br />
S1<br />
+<br />
3a 3<br />
Wiring<br />
~<br />
N<br />
=<br />
M1<br />
L<br />
PRCD<br />
3-pole<br />
M<br />
1~<br />
X2<br />
X3<br />
Z1<br />
M2<br />
Pumpe<br />
H<br />
M<br />
A1 Ee l ctronc i sof t start M1 Moto r turbine<br />
M2 Pump<br />
S1 PRCD<br />
X1 Powe r line X2 Termina l stri p 6-way X3 Socket Z1 Anti-stati c cip l<br />
59/59<br />
i g<br />
W rin