COMAND - Mercedes Benz USA
COMAND - Mercedes Benz USA
COMAND - Mercedes Benz USA

Create successful ePaper yourself
Turn your PDF publications into a flip-book with our unique Google optimized e-Paper software.
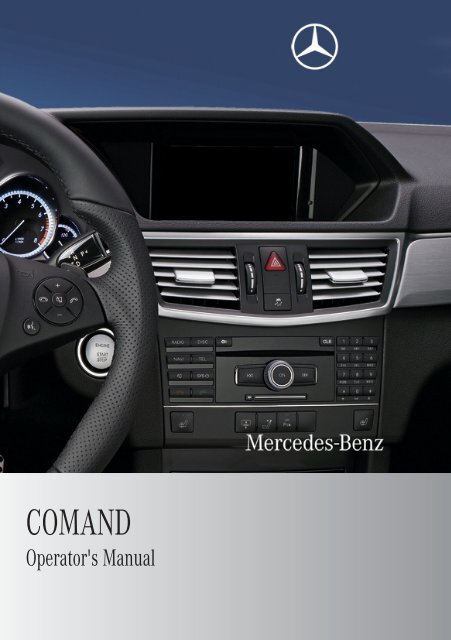
<strong>COMAND</strong><br />
Operator's Manual
Welcome to <strong>COMAND</strong>!<br />
Please make yourself familiar with your<br />
<strong>COMAND</strong> control unit and read the<br />
instructions in this manual before operating<br />
the <strong>COMAND</strong> system. This will help you derive<br />
a greater benefit from the system. Please also<br />
follow the instructions and warnings<br />
contained in this manual. Ignoring them could<br />
result in damage to the vehicle or personal<br />
injury to you or others.<br />
Depending on model, version and<br />
configuration, your <strong>COMAND</strong> system<br />
equipment may differ. Therefore, you may<br />
find explanations for optional equipment not<br />
installed in your vehicle. If you have any<br />
questions about the operation of any<br />
equipment, your authorized <strong>Mercedes</strong>-<strong>Benz</strong><br />
Center will be glad to demonstrate the proper<br />
procedures.<br />
We continuously strive to improve our<br />
product and ask for your understanding that<br />
we reserve the right to make changes in<br />
design and equipment. Therefore,<br />
information, illustrations and descriptions in<br />
this manual might differ from the equipment<br />
installed in your vehicle. As such, the<br />
information, illustrations and descriptions<br />
contained in this manual may not be<br />
reasonably relied upon in making any claims<br />
with respect to the actual performance of the<br />
product.<br />
These operating instructions form an integral<br />
part of the vehicle and should therefore<br />
always be kept inside the vehicle and passed<br />
on to the new owner if the vehicle is sold.<br />
We extend our best wishes for many miles of<br />
safe, pleasurable driving.<br />
<strong>Mercedes</strong>-<strong>Benz</strong> <strong>USA</strong>, LLC<br />
A Daimler Company
Index ....................................................... 4<br />
Introduction ......................................... 14<br />
Content 3<br />
At a Glance .......................................... 17<br />
System Settings .................................. 39<br />
Navigation ........................................... 47<br />
Telephone ............................................ 97<br />
Audio .................................................. 121<br />
Video .................................................. 155<br />
Rear Seat Entertainment .................. 165<br />
Voice Control ..................................... 185<br />
Tele Aid .............................................. 215
4 Index<br />
1, 2, 3 ...<br />
911 emergency call .......................... 102<br />
911 emergency call system ..... 102, 216<br />
A<br />
Accepting incoming calls ........... 29, 109<br />
Active partitions in USB devices ..... 152<br />
Address book<br />
adding destinations to ..................... 94<br />
creating new entries ...................... 112<br />
deleting entries from ............. 105, 114<br />
details ............................................ 115<br />
dialing numbers from ..................... 116<br />
downloading contents ................... 117<br />
editing entries ................................ 115<br />
Home address ................................. 91<br />
menu overview .............................. 112<br />
navigating to destinations in .......... 116<br />
opening .......................................... 112<br />
saving call list entries in ................ 107<br />
searching ....................................... 113<br />
selecting an entry .......................... 112<br />
voice control<br />
with ....................... 116, 197, 207, 211<br />
see My address (destination)<br />
Address of destination (See also<br />
Destinations)<br />
entering with voice commands ...... 192<br />
home address .................................. 71<br />
stopover destinations ...................... 73<br />
Alphabetical track selection ............ 152<br />
Alternative Route function ................. 86<br />
Announcement phase (driving<br />
maneuvers) .......................................... 81<br />
Announcements, navigation<br />
see Navigation announcements<br />
Announcements, traffic (real-time) ... 90<br />
Answering incoming calls .......... 29, 109<br />
Audio .......................................... 122, 174<br />
announcements ............................... 85<br />
CD, DVD, and MP3 ........................ 131<br />
loudness .......................................... 34<br />
phone volume ................................ 101<br />
read-out ........................................... 34<br />
rear seat entertainment system ..... 170<br />
sound settings ................................. 35<br />
steering wheel operation ................. 28<br />
surround sound ................................ 36<br />
turning off ........................................ 34<br />
voice control .................................. 186<br />
wireless headsets .......................... 168<br />
see Muting audio<br />
see Navigation announcements<br />
see Read-aloud announcements<br />
see Volume<br />
Audio Aux (auxiliary)<br />
main system .................................. 153<br />
switching to ................................... 153<br />
voice commands for ...................... 205<br />
Audio format<br />
audio playback ............................... 143<br />
DVD Video ..................................... 162<br />
rear seat entertainment system ..... 176<br />
Audio menu ........................................ 122<br />
Authorizing Bluetooth devices ........... 99<br />
Automatic (display)<br />
main display ..................................... 42<br />
rear seat entertainment system ..... 172<br />
Automatic picture switch-off ........... 156<br />
Auxiliary (Aux) operation<br />
main audio ..................................... 153<br />
main video ..................................... 163<br />
rear seat entertainment<br />
system ........................... 168, 170, 181<br />
voice commands for ...................... 205<br />
voice control with .......................... 211<br />
Avoid settings for route guidance ..... 55<br />
B<br />
Back button ......................................... 24<br />
Backward track skip ......................... 141<br />
Balance (sound), setting ..................... 35<br />
Bass setting<br />
main system .................................... 35<br />
rear seat entertainment system ..... 171<br />
Batteries for rear seat<br />
entertainment .................................... 169<br />
Bit rates for digital audio .................. 133<br />
Blocked areas for route guidance ...... 60<br />
Blocking routes ................................... 85<br />
Bluetooth ® ........................................... 44<br />
activating phone .............................. 99
downloading address book<br />
content .......................................... 117<br />
external authorization .................... 100<br />
making calls ..................................... 98<br />
switching on/off .............................. 45<br />
Brightness setting<br />
main function display ....................... 41<br />
main video ..................................... 160<br />
rear seat entertainment<br />
system ........................... 173, 179, 183<br />
Browsing lists<br />
see Predictive speller<br />
see Searching<br />
C<br />
Calculating routes<br />
see Route guidance<br />
Calling (See also Telephone)<br />
dialing with keypad ........................ 109<br />
emergency calls ..................... 102, 216<br />
history of calls ............................... 106<br />
redialing ................................... 30, 110<br />
using address book entries ............ 116<br />
using phone book<br />
entries ............................. 29, 103, 110<br />
voice control with .......................... 199<br />
see Call lists<br />
Call lists ............................................. 106<br />
calling number in ........................... 110<br />
deleting .......................................... 109<br />
displaying details ........................... 107<br />
saving entries in address<br />
book .............................................. 107<br />
selecting ........................................ 106<br />
Call waiting function ......................... 111<br />
Camera, rear view ............................... 44<br />
Camera angle, DVD video ................. 181<br />
Camera angle, DVD Video ................. 162<br />
Canceling entry into <strong>COMAND</strong> ........... 32<br />
Categories<br />
points of interest (POIs) ................... 76<br />
satellite radio ......................... 129, 201<br />
stopover destinations ...................... 73<br />
CD/DVD discs<br />
Loading .......................................... 134<br />
Index 5<br />
CD/DVD drive, rear seat<br />
entertainment .................................... 168<br />
multiuser operation ....................... 171<br />
CD Audio<br />
rear seat entertainment system ..... 171<br />
CD Audio, main vehicle ..................... 131<br />
ejecting discs ................................. 136<br />
fast forward and reverse ................ 142<br />
Gracenote ® Media Database ......... 143<br />
handling and care of discs ............. 134<br />
loading discs .................................. 134<br />
selecting a track ............................ 141<br />
starting playback ........................... 139<br />
stopping or pausing playback ........ 140<br />
voice control with .................. 203, 209<br />
Channel selection (satellite radio) ..... 28<br />
voice commands for ...................... 202<br />
Chapter selection (DVD)<br />
main video ..................................... 160<br />
rear seat entertainment system ..... 179<br />
Character entry ................................... 31<br />
City center, selecting as<br />
destination ................................... 67, 194<br />
City of destination, selecting ............. 64<br />
Clear button ......................................... 25<br />
Color video settings<br />
main video ..................................... 160<br />
rear seat entertainment<br />
system ................................... 179, 183<br />
<strong>COMAND</strong><br />
control unit ...................................... 20<br />
<strong>COMAND</strong>, about<br />
basic functions ................................ 34<br />
operation of ..................................... 30<br />
resetting to factory settings ............. 45<br />
switching on/off .............................. 34<br />
<strong>COMAND</strong> components ........................ 18<br />
<strong>COMAND</strong> controller ............................. 23<br />
<strong>COMAND</strong> Control System ................... 18<br />
Commands for voice control ............ 205<br />
for address book ................... 198, 207<br />
for CD, DVD, MP3 .................. 203, 209<br />
for navigation ........................ 192, 206<br />
for phone operation ....................... 206<br />
for radio and satellite radio .... 201, 208<br />
general commands ........................ 205<br />
Compass .............................................. 62
6 Index<br />
Contacts<br />
see Address book<br />
Contrast setting<br />
main video ..................................... 160<br />
rear seat entertainment<br />
system ................................... 179, 183<br />
Copyright, audio ................................ 133<br />
Crosshair position in map .................. 54<br />
saving in Last Destinations .............. 95<br />
Current location of vehicle<br />
see Vehicle location (current)<br />
Current street, displaying ................... 58<br />
Customer Assistance Center,<br />
calling ................................................. 217<br />
D<br />
Data for navigation<br />
see Updating map software<br />
Daylight Savings Time ........................ 41<br />
Day mode (display)<br />
main display ..................................... 42<br />
rear seat entertainment system ..... 172<br />
Deregistering Bluetooth devices ..... 101<br />
Destination input ................................. 62<br />
entering a city .................................. 64<br />
Entering a house number ................. 68<br />
from destination memory ................. 71<br />
from Last Destinations ..................... 72<br />
from map ......................................... 72<br />
Selecting a state/province .............. 63<br />
speed restriction on ................... 50, 72<br />
Stopover .......................................... 73<br />
via address ...................................... 63<br />
Destination memory (See also Last<br />
Destinations) ................................. 71, 91<br />
adding stopover destination ............ 73<br />
choosing destination from ............... 71<br />
home address in .............................. 91<br />
saving destinations to .............. 93, 196<br />
voice control for ............................ 196<br />
Destination reached message ............ 83<br />
Destinations<br />
adding to address book ................... 94<br />
displaying information about ........... 86<br />
distance to, displaying ..................... 58<br />
guidance to ...................................... 80<br />
moving map to ................................. 55<br />
saving to destination<br />
memory ................................... 93, 196<br />
Search & Send service ................... 217<br />
selecting point of interest ................ 74<br />
stopover destinations ...................... 73<br />
voice control with .......................... 192<br />
see Route guidance<br />
Detour function ................................... 85<br />
Dialed calls, list of ............................. 106<br />
Dialing telephone<br />
see Calling<br />
Dialog<br />
see Voice control<br />
Disc handling ....................... 48, 134, 156<br />
Disk drive, rear seat entertainment<br />
multiuser operation ....................... 171<br />
Disk drive for rear seat<br />
entertainment system ...................... 168<br />
Display, main ....................................... 18<br />
automatic DVD picture switch-off .. 156<br />
brightness setting ............................ 41<br />
menus ........................................ 25, 30<br />
rear view camera ............................. 44<br />
settings for ...................................... 41<br />
switching on/off .............................. 40<br />
with voice command ...................... 188<br />
Display, map<br />
see Map display<br />
Display screens, rear seat<br />
entertainment .................................... 167<br />
hiding or showing menus ............... 178<br />
multiuser operation ....................... 171<br />
selecting for headset ..................... 169<br />
selecting for remote ...................... 167<br />
Distance to destination, displaying ... 58<br />
District, selecting as destination ....... 67<br />
with voice commands .................... 194<br />
Downloading address book<br />
content ............................................... 117<br />
Driving maneuvers .............................. 81<br />
DRM (Digital Rights Management) ... 148<br />
DTMF tone transmission .................. 111<br />
DVD Audio, main vehicle .................. 131<br />
ejecting discs ................................. 136<br />
fast forward and reverse ................ 142<br />
handling and care of discs ....... 48, 134<br />
loading discs .................................. 134
Notes about ................................... 133<br />
pause function ............................... 140<br />
selecting a track ............................ 141<br />
setting audio format ...................... 143<br />
starting playback ........................... 139<br />
stopping or pausing playback ........ 140<br />
voice control with .................. 203, 210<br />
DVD Audio, rear seat<br />
entertainment .................................... 170<br />
DVD changer<br />
loading ............................................. 49<br />
DVD menu operation ................ 160, 180<br />
DVD playback conditions ................. 157<br />
DVD Video .......................................... 156<br />
automatic picture switch off .......... 156<br />
control menu, displaying/hiding .... 158<br />
DVD menu ..................................... 160<br />
fast forward/rewind ...................... 159<br />
functional restrictions .................... 157<br />
handling and care of discs ............. 156<br />
interactive content ........................ 162<br />
menu system ................................. 158<br />
notes on ........................................ 156<br />
operating DVD menu ............. 160, 180<br />
picture settings .............................. 160<br />
rear seat entertainment system ..... 177<br />
safety notes ................................... 156<br />
selecting film/track ....................... 160<br />
stop function ................................. 159<br />
submenu overview ......................... 157<br />
switching to ................................... 158<br />
voice control with .................. 204, 211<br />
Dynamic routing ............................ 55, 91<br />
E<br />
Ejecting discs, rear seat<br />
entertainment system ...................... 174<br />
Ejecting discs and memory cards<br />
main audio system ......................... 136<br />
Emergency phone calls ............ 102, 216<br />
Ending active phone calls ................. 111<br />
Ending calls .......................................... 29<br />
External audio or video devices<br />
main system .......................... 153, 163<br />
rear seat entertainment system ..... 181<br />
voice control with .......................... 205<br />
F<br />
Fader (sound), setting ......................... 35<br />
Fast forward<br />
audio playback ............................... 142<br />
rear seat entertainment<br />
system ................................... 175, 178<br />
video playback ............................... 159<br />
Film selection, DVD ................... 160, 179<br />
Folders<br />
MP3 mode, selecting ..................... 142<br />
rear seat MP3 operation ................ 175<br />
Formats, audio .................................. 132<br />
Forward track skip ............................ 141<br />
Full-screen map ................................... 54<br />
G<br />
Geo-coordinates, displaying ............... 58<br />
Global voice control commands ...... 187<br />
Google Maps ® .................................... 217<br />
GPS reception ...................................... 51<br />
displaying geo-coordinates .............. 58<br />
Gracenote ®<br />
Media database ............................. 143<br />
GSM network coverage ....................... 98<br />
H<br />
Index 7<br />
Hands-free microphone, switching<br />
on/off ................................................. 111<br />
Hanging up (phone calls) .................. 111<br />
Hard disk drive<br />
voice control with .................. 204, 210<br />
HD Radio ......................................... 123<br />
Headsets, rear seat<br />
entertainment ........................... 168, 170<br />
Help with voice control, general ...... 213<br />
Highway information, displaying ....... 59<br />
Highway junctions, selecting as<br />
destination ........................................... 69<br />
Home address in destination<br />
memory .......................................... 71, 91<br />
deleting ............................................ 94<br />
setting or changing .......................... 91<br />
House numbers, entering for<br />
destination ................................... 68, 195
8 Index<br />
I<br />
Incident (traffic notification) .............. 87<br />
Incoming calls<br />
answering ................................ 29, 109<br />
rejecting .................................. 29, 109<br />
Individualization of voice control ...... 42<br />
Information calls ............................... 217<br />
Initiating phone calls<br />
see Calling<br />
Input of navigation destination .......... 62<br />
speed restriction on ................... 50, 72<br />
Input speller<br />
settings for address book .............. 108<br />
Inserting disk, rear seat<br />
entertainment .................................... 173<br />
Installing map data ............................. 49<br />
Interactive content on DVDs .... 162, 181<br />
Interrupting audio playback ............. 140<br />
Interrupting video playback ............. 159<br />
Intersection (selecting) .................... 194<br />
iPod ® devices ..................................... 147<br />
connecting to ................................. 147<br />
playback options ............................ 152<br />
playlists and folders ....................... 150<br />
selecting tracks ............................. 150<br />
K<br />
Keypad, entering characters with ..... 32<br />
L<br />
Lane recommendations ...................... 83<br />
Language settings ............................... 44<br />
DVD Video ............................. 162, 181<br />
rear seat entertainment system ..... 172<br />
Last Destinations ............................... 95<br />
adding stopover destination ............ 73<br />
adding to memory ............................ 93<br />
choosing destination from ............... 72<br />
deleting destination from ................. 95<br />
saving current vehicle<br />
position ...................................... 54, 95<br />
voice control for ............................ 196<br />
Listing address book contents ........ 200<br />
Loading CDs and DVDs<br />
main system .................................. 134<br />
rear seat entertainment system ..... 173<br />
Local voice control commands ........ 187<br />
Location of vehicle, current<br />
see Vehicle location (current)<br />
LOGIC7 ® Surround Sound system ..... 36<br />
Loudness<br />
see Volume<br />
M<br />
Magazine compartments, DVD<br />
changer .............................................. 134<br />
Main function display<br />
see Display, main<br />
Main function menus<br />
list of ................................................ 19<br />
navigation mode, switching to ......... 53<br />
opening ............................................ 30<br />
Main menu, overview of ..................... 19<br />
Maneuver phase (driving<br />
maneuvers) .......................................... 82<br />
Map display (See also Navigation) ..... 56<br />
blocked area for route ..................... 60<br />
destination information .................... 86<br />
driving maneuver preparation .......... 81<br />
entering destination on .................... 72<br />
entering POI from ............................ 80<br />
general information, at bottom ........ 58<br />
hiding crosshairs .............................. 55<br />
setting scale .................................... 54<br />
topographic map .............................. 59<br />
traffic information ............................ 58<br />
traffic lane recommendations .......... 83<br />
traffic notifications in ....................... 87<br />
updating map software .................... 48<br />
Measurement units, navigation ......... 52<br />
Media interface ................................. 147<br />
data formats .................................. 148<br />
voice control with .................. 204, 211<br />
Media Interface<br />
connecting devices ........................ 148<br />
selecting category/playlist/folder . 150<br />
selecting files ................................. 150<br />
switching to ................................... 149<br />
Memory cards<br />
starting playback ........................... 139<br />
voice control with .................. 204, 210
Menus, <strong>COMAND</strong><br />
how to operate ................................ 31<br />
list of ................................................ 19<br />
Menus, steering wheel ........................ 25<br />
Messages<br />
during voice command .................. 188<br />
for driving maneuvers ...................... 81<br />
for traffic lane recommendations ..... 83<br />
real-time traffic reports .................... 90<br />
Missed calls, list of ........................... 106<br />
Missed navigation<br />
announcements, requesting .............. 85<br />
Mobile telephone<br />
see Telephone<br />
MP3 mode, main vehicle .................. 132<br />
fast forward and reverse ................ 142<br />
selecting a track ............................ 141<br />
selecting folders ............................ 142<br />
starting playback ........................... 139<br />
stopping or pausing playback ........ 140<br />
voice control with .................. 203, 210<br />
MP3 operation, rear seat<br />
entertainment .................................... 174<br />
MP3 players ....................................... 147<br />
playback options ............................ 152<br />
playlists and folders ....................... 150<br />
selecting active partition ............... 152<br />
selecting tracks ............................. 150<br />
MP3 storage medium ........................ 132<br />
Multifunction display .......................... 26<br />
Audio menu ..................................... 28<br />
Menus and submenus ...................... 26<br />
Multifunction steering wheel ............. 25<br />
voice control button ....................... 187<br />
Multisession CDs ............................... 132<br />
Music register ................................... 144<br />
Deleting ......................................... 146<br />
Folder functions ............................. 146<br />
Memory space info ........................ 146<br />
Playback options ........................... 147<br />
recording ....................................... 145<br />
switching on .................................. 144<br />
voice control with .................. 204, 210<br />
Muting audio<br />
main system .................................... 34<br />
navigation announcements ........ 34, 85<br />
rear seat entertainment system ..... 168<br />
My address (destination) .............. 71, 91<br />
deleting from destination memory ... 94<br />
setting or changing .......................... 91<br />
N<br />
Index 9<br />
Names<br />
for MP3 files and folders ................ 132<br />
for saved destinations ...................... 93<br />
searching for POIs by ....................... 75<br />
Navigation (See also Route<br />
guidance) ............................................. 48<br />
audio fadeout ...................... 35, 60, 85<br />
basic settings ................................... 55<br />
destination input .............................. 62<br />
destination memory ......................... 91<br />
displaying/hiding menu system ....... 54<br />
general information .......................... 51<br />
last destinations .............................. 95<br />
map display ..................................... 56<br />
menu overview ................................. 52<br />
operational readiness ...................... 51<br />
POI input .......................................... 74<br />
scrolling the map ............................. 54<br />
setting map scale ............................. 54<br />
steering wheel operation ................. 26<br />
switching to navigation mode .......... 53<br />
to address book destinations ........ 116<br />
traffic messages .............................. 87<br />
updating map software .................... 48<br />
voice control with .................. 191, 206<br />
Navigation<br />
announcements .................... 81, 85, 186<br />
during active phone calls ................. 85<br />
switching on/off ........................ 34, 85<br />
volume of ......................................... 35<br />
NAVI menu ..................................... 26, 52<br />
Near destination, entering POI .......... 74<br />
Network coverage for phone calls ..... 98<br />
Night mode (display)<br />
main display ..................................... 42<br />
Normal track sequence .................... 144<br />
rear seat entertainment system ..... 176<br />
Number keypad<br />
entering characters with .................. 32<br />
Numbers, entering with voice<br />
command ........................................... 188
10 Index<br />
O<br />
Off-map routes .................................... 83<br />
Off-road routes .................................... 83<br />
Operating example .............................. 33<br />
Orientation of map .............................. 56<br />
Outgoing calls<br />
see Calling<br />
P<br />
Partitions in USB devices ................. 152<br />
Passcodes for Bluetooth phones ..... 100<br />
Pausing playback<br />
main audio ..................................... 140<br />
main video ..................................... 160<br />
rear seat entertainment<br />
system ................................... 176, 178<br />
PCMCIA memory card<br />
ejecting .......................................... 137<br />
loading ........................................... 136<br />
Phone<br />
submenu ........................................ 102<br />
switching to phone mode .............. 102<br />
see Telephone<br />
Phone book ........................................ 103<br />
adding entries ................................ 104<br />
deleting from ................................. 105<br />
dialing from ..................... 29, 104, 110<br />
editing entries ................................ 105<br />
selecting entry ............................... 103<br />
voice control with .......................... 190<br />
Phone calls<br />
emergency ............................. 102, 216<br />
lists of ............................................ 106<br />
making ........................................... 109<br />
see Calling<br />
Phone menu ....................................... 102<br />
Phone number search for POIs .......... 75<br />
Picture format<br />
main video ..................................... 160<br />
rear seat entertainment<br />
system ................................... 179, 183<br />
Picture settings for video<br />
main system .................................. 160<br />
rear seat entertainment<br />
system ................................... 179, 183<br />
Playback options<br />
iPods, MP3 players, and USB<br />
devices .......................................... 152<br />
Music Register ............................... 147<br />
rear seat entertainment system ..... 176<br />
track sequence .............................. 144<br />
Playing audio<br />
fast forward and reverse ................ 142<br />
for rear seat entertainment ... 170, 173<br />
headsets ........................................ 168<br />
muting ............................................. 34<br />
options for playback ...................... 144<br />
selecting track ............................... 141<br />
see Muting audio<br />
see Selecting audio track<br />
POI input<br />
choosing a category ......................... 75<br />
local area of destination .................. 74<br />
vicinity of location ............................ 75<br />
vicinity of specific location ............... 75<br />
Points of interest (POIs)<br />
adding stopover destination ............ 73<br />
selecting as destination ................... 74<br />
stopover destinations ...................... 73<br />
voice control for ............................ 195<br />
ZAGAT ® Rating Service .................... 79<br />
Possible lane, defined ......................... 83<br />
Predictive speller ................................ 31<br />
destination memory list ................... 71<br />
for points of interest (POIs) ........ 76, 78<br />
house number list ............................ 68<br />
street junction list ............................ 69<br />
street list ......................................... 67<br />
zip code list ...................................... 66<br />
Preparation phase (driving<br />
maneuvers) .......................................... 81<br />
Province of destination,<br />
selecting ...................................... 63, 192<br />
R<br />
Radio<br />
HD Radio .................................... 123<br />
satellite radio ................................. 123<br />
selecting stations .......................... 202
switching to ................................... 123<br />
voice control with .................. 201, 209<br />
Random track playback .................... 144<br />
rear seat entertainment system ..... 176<br />
Read-aloud announcements ............... 87<br />
navigation ........................................ 85<br />
settings for ...................................... 42<br />
see Navigation announcements<br />
see Traffic messages<br />
Read CD Database function .............. 143<br />
Reading out address book ................ 200<br />
Real-time traffic notifications ............ 87<br />
Rear audio option .............................. 122<br />
Rear compartment socket ................ 169<br />
Rear seat entertainment<br />
active source from <strong>COMAND</strong> ......... 182<br />
Rear seat entertainment<br />
system ................................................ 166<br />
audio operation .............................. 173<br />
Aux operation ................................ 181<br />
basic functions .............................. 170<br />
system settings ............................. 172<br />
video operation .............................. 177<br />
Rear view camera, switching on/<br />
off ......................................................... 44<br />
Received calls, list of ........................ 106<br />
Receive volume (phone) ................... 101<br />
Recommended lane, defined .............. 83<br />
Redialing telephone ............................ 30<br />
voice control for ............................ 191<br />
Registering mobile phones ................. 99<br />
Rejecting incoming calls ............ 29, 109<br />
Remote control, rear seat<br />
entertainment .................................... 167<br />
batteries for ................................... 170<br />
Removing discs and memory<br />
cards ................................................... 136<br />
Rewind (reverse)<br />
main audio playback ...................... 142<br />
rear seat entertainment system ..... 175<br />
video playback ....................... 159, 178<br />
Roadside assistance ......................... 216<br />
Route calculation ................................ 70<br />
history of, saving .............................. 95<br />
points of interest (POIs) ............. 79, 80<br />
with home address .......................... 92<br />
see Last Destinations<br />
Route guidance .............................. 60, 80<br />
after vehicle transport ..................... 51<br />
blocked areas .................................. 60<br />
canceling or resuming ...................... 85<br />
detours and alternative routes ......... 85<br />
driving maneuvers ........................... 80<br />
lane recommendations .................... 83<br />
navigation<br />
announcements ........... 34, 81, 85, 186<br />
off-map routes ................................. 83<br />
off-road routes ................................. 83<br />
Route browser ................................. 86<br />
saving calculations for ..................... 95<br />
stopover destinations ...................... 73<br />
traffic lane recommendations .......... 83<br />
traffic messages .............................. 87<br />
voice control for ............................ 196<br />
with home address .......................... 92<br />
see Last Destinations<br />
Route mode .......................................... 55<br />
S<br />
Index 11<br />
Satellite radio .................................... 127<br />
category selection ................. 129, 202<br />
Displaying information ................... 131<br />
Memory functions .......................... 130<br />
Selecting a channel ....................... 129<br />
selecting channels ......................... 202<br />
Switching on .................................. 128<br />
Updating channels ......................... 131<br />
voice control with .................. 201, 209<br />
Saving route calculations<br />
see Last Destinations<br />
Scale of navigation map, setting ....... 54<br />
Scene selection<br />
main system .................................. 160<br />
rear seat entertainment system ..... 179<br />
Scrolling navigation map .................... 54<br />
Search & Send ................................... 217<br />
Search & Send service ...................... 217<br />
Searching (See also Predictive speller)<br />
address book ......................... 199, 200<br />
audio tracks ................................... 141<br />
for mobile phones ............................ 99<br />
phone book ...................................... 29<br />
points of interest (POIs) ................... 76<br />
see Track selection (audio)
12 Index<br />
Selecting audio track<br />
CD, DVD, or MP3 ........................... 141<br />
normal and random options ........... 144<br />
rear seat entertainment system ..... 175<br />
steering wheel operation ................. 28<br />
voice commands for ...................... 204<br />
Selecting from lists ............................. 33<br />
Settings for <strong>COMAND</strong> system ............ 40<br />
resetting to factory settings ............. 45<br />
Skipping to tracks<br />
see Track selection (audio)<br />
Sound<br />
see Audio<br />
Speed restriction on destination<br />
input ............................................... 50, 72<br />
Speed restriction on video display .. 156<br />
Speller .................................................. 31<br />
destination memory list ................... 71<br />
for points of interest (POIs) ........ 76, 78<br />
house number list ............................ 68<br />
street junction list ............................ 69<br />
street list ......................................... 67<br />
zip code list ...................................... 66<br />
Spelling with voice command .......... 188<br />
Standard Time ..................................... 41<br />
State of destination,<br />
selecting ...................................... 63, 192<br />
Station selection (radio)<br />
voice commands for ...................... 202<br />
Steering wheel ............................ 25, 187<br />
Stopover destinations ......................... 73<br />
deleting ............................................ 74<br />
Stopping playback<br />
main audio ..................................... 140<br />
main video ..................................... 159<br />
rear seat entertainment<br />
system ................................... 176, 178<br />
Storage media handling ..... 48, 134, 156<br />
Street junctions, selecting as<br />
destination ........................................... 69<br />
Street of destination,<br />
selecting ...................................... 67, 194<br />
Subtitles for DVD Video ............ 162, 181<br />
Surround sound ................................... 36<br />
Symbols in this book .......................... 14<br />
System language<br />
for input speller ............................. 108<br />
System Settings menu ........................ 40<br />
reset to factory settings ................... 45<br />
T<br />
Tele Aid ............................................... 216<br />
Telephone (See also Calling)<br />
activating ......................................... 99<br />
address book ................................. 111<br />
Bluetooth interface .......................... 99<br />
call lists ......................................... 106<br />
call waiting function ....................... 111<br />
functional restrictions ...................... 99<br />
general information .......................... 98<br />
incoming calls .......................... 29, 109<br />
loudness of calls .............................. 35<br />
making calls ................................... 109<br />
navigation announcements during<br />
calls ................................................. 85<br />
operating options ............................. 98<br />
phone book .................................... 103<br />
prerequisites .................................... 99<br />
setting transmit and receive<br />
volume ........................................... 101<br />
steering wheel operation ................. 29<br />
Tele Aid .......................................... 216<br />
voice control with .......................... 206<br />
Telephone book<br />
see Phone book<br />
Telephone calls<br />
emergency ............................. 102, 216<br />
lists of ............................................ 106<br />
making ........................................... 109<br />
see Calling<br />
Tel menu ............................................... 29<br />
Terminating phone calls ................... 111<br />
Time format ......................................... 41<br />
Time of arrival, displaying .................. 58<br />
Time settings ....................................... 41<br />
Time zone<br />
setting ............................................. 41<br />
Town, selecting as destination ........ 193<br />
Track information<br />
rear seat entertainment ................. 177<br />
Track names ...................................... 132<br />
Track selection (audio)<br />
CD, DVD, or MP3 ........................... 141<br />
iPods and MP3 players .................. 152
normal and random options ........... 144<br />
rear seat entertainment system ..... 175<br />
steering wheel operation ................. 28<br />
voice commands for ...................... 204<br />
Track selection (video) ..... 160, 161, 179<br />
voice commands for ...................... 204<br />
Traffic lane recommendations ........... 83<br />
Traffic messages ................................. 87<br />
Traffic symbol information ................. 90<br />
Training for voice control ................... 42<br />
Transmit volume (phone) ................. 101<br />
Treble setting<br />
main system .................................... 35<br />
rear seat entertainment system ..... 171<br />
Troubleshooting<br />
voice control .................................. 211<br />
U<br />
Units of measurement, navigation .... 52<br />
Updating Gracenote ® Media<br />
Database ............................................ 143<br />
Updating map software ...................... 48<br />
USB devices<br />
connecting to ................................. 147<br />
playback options ............................ 152<br />
playlists and folders ....................... 150<br />
selecting active partition ............... 152<br />
selecting tracks ..................... 150, 152<br />
V<br />
Vehicle location (current)<br />
displaying ......................................... 58<br />
GPS reception .................................. 51<br />
moving map to ................................. 55<br />
saving in Last Destinations ........ 54, 95<br />
Video .................................................. 156<br />
control menu, displaying/hiding .... 158<br />
handling and care of discs ............. 156<br />
interactive content ........................ 162<br />
operating DVD menu ............. 160, 180<br />
picture settings .............................. 160<br />
rear seat entertainment system ..... 177<br />
voice control with .......................... 211<br />
Video Aux (auxiliary)<br />
main system .................................. 163<br />
rear seat entertainment system ..... 168<br />
Voice control ..................................... 186<br />
canceling the dialog ....................... 188<br />
command list ................................. 205<br />
creating voice names ..................... 198<br />
general operation .......................... 186<br />
help function .................................. 213<br />
interrupting the dialog ................... 187<br />
operating safety ............................. 186<br />
settings ............................................ 42<br />
starting the dialog .......................... 187<br />
switching help screen on or off ........ 42<br />
training for voice recognition ........... 42<br />
troubleshooting ............................. 211<br />
with address book ......... 116, 197, 211<br />
with DVD changer .......................... 203<br />
with external equipment (Aux) ....... 205<br />
with navigation .............................. 191<br />
with phone ..................................... 188<br />
with radio and satellite radio ......... 201<br />
Voice mail, voice control for ............ 191<br />
Voice names, creating ...................... 198<br />
Volume (loudness)<br />
<strong>COMAND</strong> ......................................... 34<br />
external audio sources .......... 153, 163<br />
mobile phones ............................... 101<br />
muting <strong>COMAND</strong> ............................. 34<br />
navigation announcements ........ 35, 85<br />
phone calls ...................................... 35<br />
voice command ............................. 188<br />
wireless headsets .......................... 169<br />
W<br />
Wireless headsets, rear seat<br />
entertainment .................................... 168<br />
basic operation .............................. 171<br />
batteries for ................................... 170<br />
muting audio playback ................... 168<br />
Y<br />
Yahoo Local Maps ® ........................... 217<br />
Z<br />
Index 13<br />
ZAGAT ® Rating Service ....................... 79<br />
Zip code of destination, selecting ...... 65
14 Introduction<br />
Where to find it<br />
This operator's manual has been designed to<br />
help you use your <strong>COMAND</strong> control unit in all<br />
situations. Since not all models have the<br />
same standard equipment, your <strong>COMAND</strong><br />
system equipment may deviate from some<br />
descriptions and illustrations.<br />
Indexes<br />
Content and keyword indexes are intended to<br />
help you find information quickly.<br />
At a Glance<br />
Here you will find an overview of the<br />
components of <strong>COMAND</strong>. Then you will find<br />
examples illustrating how to operate<br />
<strong>COMAND</strong> and information on the basic<br />
functions. If you are operating a <strong>COMAND</strong> for<br />
the first time or have rented the vehicle, you<br />
should first read this chapter.<br />
System Settings<br />
Here you will find all the important<br />
information regarding the system settings of<br />
the <strong>COMAND</strong>.<br />
Navigation<br />
Here you will find detailed information<br />
regarding the following topics:<br />
RSetting options for the map display and the<br />
route calculation<br />
RDestination input<br />
RPOI input<br />
RRoute guidance<br />
RTraffic information<br />
RDestination memory<br />
Telephone<br />
The telephone functions are described here.<br />
You will also find information on the address<br />
book.<br />
Audio<br />
Here you will find all information regarding<br />
the audio function and its Radio, SatRadio,<br />
CD-audio/DVD audio/MP3, Music Register,<br />
Media Interface and Audio Aux modes.<br />
Video<br />
Here you will find all information regarding<br />
the video system.<br />
Rear Seat Entertainment (RSE)<br />
In this chapter the Rear Seat Entertainment<br />
is explained.<br />
Voice Control<br />
Here you will find information about operating<br />
several <strong>COMAND</strong> functions via Voice Control.<br />
Tele Aid<br />
Here you will find information on how to use<br />
Tele Aid and the Search & Send function.<br />
Symbols<br />
Trademarks ® :<br />
RBluetooth ® is a registered trademark of<br />
Bluetooth SIG Inc.<br />
RLogic 7 ® is a registered trademark of<br />
Harman International Industries,<br />
Incorporated
RMicrosoft ® is a registered trademark of<br />
Microsoft Corporation in the United States<br />
and other countries<br />
RSIRIUS and related marks are trademarks<br />
of SIRIUS Satellite Radio Inc.<br />
RWindows media ® is a registered trademark<br />
of Microsoft Corporation in the United<br />
States and other countries<br />
You will find the following symbols in these<br />
operating instructions:<br />
G Warning!<br />
Warning notices draw your attention to<br />
hazards that may endanger your health or life,<br />
or the health or life of others.<br />
! Highlights hazards that may result in<br />
damage to your <strong>COMAND</strong>.<br />
i Helpful hints or further information you<br />
may find useful.<br />
X This symbol points to<br />
instructions for you to follow. A<br />
number of these symbols<br />
appearing in succession<br />
indicates a multiple-step<br />
procedure.<br />
O The continuation symbol marks<br />
an interrupted procedure which<br />
will be continued on the next<br />
page.<br />
(Y page 11) This symbol tells you where to<br />
look for further information on<br />
this subject.<br />
Display Messages, menu items or soft<br />
key names appearing in the<br />
<strong>COMAND</strong> color display are<br />
printed in the style shown here.<br />
Operating Safety<br />
Introduction 15<br />
G Warning<br />
Any alterations of electronic components or<br />
software can cause malfunctions.<br />
Radio, satellite radio, amplifier, DVD changer,<br />
navigation module, telephone and Voice<br />
Control systems are interconnected.<br />
Therefore, if one of the components is not<br />
operational, or has not been removed/<br />
replaced properly, the function of other<br />
components could be impaired.<br />
Such conditions might seriously impair the<br />
operating safety of your vehicle.<br />
We recommend to have any service work on<br />
electronic components carried out by an<br />
authorized <strong>Mercedes</strong>-<strong>Benz</strong> Center.<br />
G Warning<br />
In order to avoid distraction which could lead<br />
to an accident, the driver should enter system<br />
settings while the vehicle is at a standstill, and<br />
operate the system only when permitted by<br />
road, weather and traffic conditions.<br />
Bear in mind that at a speed of just 30 mph<br />
(approximately 50 km/h), your car covers a<br />
distance of 44 feet (approximately 14 m) every<br />
second.<br />
<strong>COMAND</strong> supplies you with information to<br />
help you select your route more easily and<br />
guide you conveniently and safely to your<br />
destination. For safety reasons, we<br />
encourage the driver to stop the vehicle in a<br />
safe place before answering or placing a call,<br />
or consulting the <strong>COMAND</strong> screen to read<br />
navigational maps, instructions, or<br />
downloaded information.<br />
G Warning<br />
While the navigation system provides<br />
directional assistance, the driver must remain<br />
focused on safe driving behavior, especially<br />
attention to traffic and street signs, and<br />
should utilize the system’s audio cues while<br />
driving.<br />
Z
16 Introduction<br />
The navigation system does not supply any<br />
information on stop signs, yield signs, traffic<br />
regulations or traffic safety rules. Their<br />
observance always remains in the driver’s<br />
personal responsibility. DVD maps do not<br />
cover all areas nor all routes within an area.<br />
This device complies with Part 15 of the<br />
FCC Rules. Operation is subject to the<br />
following two conditions:<br />
1. This device may not cause harmful<br />
interference, and<br />
2. This device must accept any interference<br />
received, including interference that may<br />
cause undesired operation.<br />
G Warning<br />
Change or modification not expressly<br />
approved by the party responsible for<br />
compliance could void the user's authority to<br />
operate this equipment.<br />
! Note: This equipment has been tested<br />
and found to comply with the limits for a<br />
Class A digital device, pursuant to Part 15<br />
of the FCC Rules. These limits are designed<br />
to provide reasonable protection against<br />
harmful interference when the equipment<br />
is operated in a commercial environment.<br />
This equipment generates, uses and can<br />
radiate radio frequency energy and, if not<br />
installed and used in accordance with the<br />
instruction manual, may cause harmful<br />
interference to radio communications.<br />
G Warning<br />
This equipment complies with FCC radiation<br />
exposure limits set forth for uncontrolled<br />
equipment and meets the FCC radio<br />
frequency (RF) Exposure Guidelines in<br />
Supplement C to OET65.<br />
This equipment has very low levels of RF<br />
energy that is deemed to comply without<br />
maximum permissive exposure evaluation<br />
(MPE). But it is desirable that it should be<br />
installed and operated with at least 8 inches<br />
(20 cm) and more between the radiator and a<br />
person's body (excluding extremities: hands,<br />
wrists, feet and legs.)
<strong>COMAND</strong> Control System ................... 18<br />
Multifunction Steering Wheel ............ 25<br />
Operating <strong>COMAND</strong> ............................ 30<br />
Basic Functions of <strong>COMAND</strong> .............. 34<br />
17<br />
At a Glance
18 <strong>COMAND</strong> Control System<br />
At a Glance<br />
<strong>COMAND</strong> Control System<br />
E-Class illustrated<br />
Function Page<br />
1 <strong>COMAND</strong> display 18<br />
2 <strong>COMAND</strong> control unit with<br />
DVD changer 20<br />
3 <strong>COMAND</strong> controller 23<br />
Vehicle Equipment<br />
i This Operator’s Manual describes all<br />
features, standard or optional, potentially<br />
available for your vehicle at the time of<br />
purchase. Please be aware that your<br />
vehicle might not be equipped with all<br />
features described in this manual.<br />
Components of <strong>COMAND</strong><br />
<strong>COMAND</strong> comprises:<br />
Rthe <strong>COMAND</strong> display<br />
Rthe <strong>COMAND</strong> control unit with DVD<br />
changer<br />
Rthe <strong>COMAND</strong> controller with the Back and<br />
Clear button<br />
You can use <strong>COMAND</strong> to operate the<br />
following main functions:<br />
Rthe navigation system<br />
Rthe audio function with the radio, SatRadio,<br />
disc (CD audio, DVD audio or MP3 mode),<br />
PCMCIA memory card (MP3 mode), Music<br />
Register and Audio Aux modes<br />
Rthe telephone and the address book<br />
function<br />
RDVD Video<br />
Rsystems settings<br />
You can call up the main functions:<br />
Rusing the corresponding function buttons<br />
Rusing the main function line in the<br />
<strong>COMAND</strong> display<br />
<strong>COMAND</strong> Display<br />
i Do not touch the <strong>COMAND</strong> display. The<br />
display has a very sensitive high-gloss<br />
surface; there is a risk of scratching. Should<br />
the display need cleaning, use a mild<br />
cleaning agent and a soft, antistatic, lintfree<br />
cloth. Commercially available alcohol<br />
and ammonia-free TFT or LCD cleaners are<br />
recommended.<br />
The <strong>COMAND</strong> display shows the function<br />
currently selected and its associated menus.<br />
The <strong>COMAND</strong> display is divided into several<br />
areas.<br />
The radio display is shown in the example.
Example: Audio main function display<br />
1 Status line<br />
2 Main function line<br />
3 Main area<br />
4 Submenu line<br />
Status line 1 displays the time and the<br />
current telephone status.<br />
With the main function line 2 you can select<br />
the main function.<br />
Select the function with the <strong>COMAND</strong><br />
controller (Y page 23).<br />
In the example, the audio main function is set<br />
to radio mode and the main area 3 is active.<br />
i The arrangement of the menus can vary,<br />
depending on the equipment. Normally, the<br />
menus for the full equipment version are<br />
shown in this manual.<br />
Menu Overview<br />
Having selected a main function, you will find<br />
the submenu line at the bottom edge of the<br />
<strong>COMAND</strong> display.<br />
If one of the main functions such as<br />
Navigation, Audio, Video or Phone is currently<br />
selected, additional menus are available from<br />
the main function line (Y page 19).<br />
This is indicated by a small triangle behind the<br />
main function label.<br />
1 Triangle indicating an additional menu<br />
Navi Audio Phone Video<br />
Mode FM/AM Radio Phone DVD Video<br />
Map Orientation SatRadio Address book Video Aux<br />
POI Symbols On<br />
Map<br />
Traffic Information<br />
On Map<br />
Text Information<br />
On Map<br />
Ç Topographic<br />
Map<br />
Disc (CD audio,<br />
DVD audio, MP3<br />
mode)<br />
Memory card (MP3<br />
mode)<br />
Music Register<br />
Media Interface<br />
<strong>COMAND</strong> Control System 19<br />
Z<br />
At a Glance
20 <strong>COMAND</strong> Control System<br />
At a Glance<br />
Navi Audio Phone Video<br />
Ç Highway<br />
information<br />
Ç Read Traffic<br />
Messages<br />
Automatically<br />
Ç Audio Fadeout<br />
Block Area<br />
SIRIUS Service<br />
Rear<br />
AUX<br />
You can determine basic settings for the map<br />
display, route calculation and route guidance<br />
functions in Navigation.<br />
i You can call up functions such as<br />
destination entry and the destination<br />
memory at the bottom of the <strong>COMAND</strong><br />
display in the Navigation Submenu line.<br />
In the Audio main function, you can switch<br />
modes in the audio menu.<br />
In the Phone main function, you can choose<br />
between the telephone mode and the address<br />
book.<br />
In the Video main function, you can choose<br />
between the DVD mode and the Video Aux<br />
mode.<br />
<strong>COMAND</strong> Control Unit<br />
The <strong>COMAND</strong> control unit allows you to:<br />
Rswitch <strong>COMAND</strong> on/off<br />
Radjust the volume<br />
Rselect the main function/mode directly<br />
Renter telephone numbers and accept,<br />
reject, initiate and end calls<br />
Rload and eject CDs/DVDs or a PCMCIA<br />
memory card
Function Page<br />
1 $<br />
Switch to radio mode 123<br />
Switch wavebands<br />
2 h<br />
Switch to<br />
Last selected medium in<br />
DVD changer<br />
139,<br />
158<br />
Memory Card 139<br />
Music Register 144<br />
Media Interface 147<br />
3 V<br />
Load/eject button 134,<br />
136<br />
4 Disc slot<br />
CD/DVD loading 134<br />
CD/DVD ejection 136<br />
Update the map software 48<br />
5 E<br />
Select stations using the<br />
station search function 125<br />
Fast reverse 142<br />
Select the previous track 141<br />
<strong>COMAND</strong> Control System 21<br />
Function Page<br />
6 q<br />
Switch <strong>COMAND</strong> on/off 34<br />
Adjust the volume 34<br />
7 F<br />
Select stations using the<br />
station search function 125<br />
Fast forward 142<br />
Select the next track 141<br />
8 2<br />
Clear button for functions<br />
Telephone number entry 109<br />
Delete a digit or entire entry<br />
9 Number keypad<br />
Select stations via station<br />
presets 125<br />
Store stations manually 125<br />
Telephone number entry 109<br />
DTMF tone transmission 111<br />
a PCMCIA memory card slot 136<br />
b Eject button for the<br />
PCMCIA memory card 137<br />
Z<br />
At a Glance
22 <strong>COMAND</strong> Control System<br />
At a Glance<br />
Function Page<br />
c 6<br />
Accept a call 109<br />
Dial a call 109<br />
Redial 110<br />
d ~<br />
Reject a call 109<br />
End an active call 111<br />
Reject a waiting call 111<br />
e W<br />
Open the system menu 40<br />
Function Page<br />
f 8<br />
Switch the sound on/off 34<br />
Mute navigation<br />
announcements 34<br />
g %<br />
Switch to telephone mode 102<br />
h Ø<br />
Switch to navigation mode 53
<strong>COMAND</strong> Controller<br />
1 <strong>COMAND</strong> controller<br />
You can use the <strong>COMAND</strong> controller to select<br />
the menu items in the <strong>COMAND</strong> display.<br />
Move a selection bar to do so.<br />
You can call up menus and lists in this way,<br />
move within menus or lists and exit menus<br />
and lists in this way.<br />
<strong>COMAND</strong> controller operation<br />
You can operate the <strong>COMAND</strong> controller in<br />
the following ways:<br />
Rpress briefly or press and hold n<br />
Rrotate clockwise or counter-clockwise<br />
ymz<br />
Rslide to the left or right omp<br />
or<br />
Rslide up or down qmr<br />
or<br />
Rslide diagonally wmx<br />
In the instructions, operating directions are<br />
described as follows:<br />
<strong>COMAND</strong> Control System 23<br />
X Select Station list.<br />
which is a short form for<br />
X Turn ymz or slide qmr the <strong>COMAND</strong><br />
controller.<br />
This moves the selection bar to the<br />
Station list menu item.<br />
X Press the n <strong>COMAND</strong> controller.<br />
This confirms your selection. The station<br />
list appears.<br />
Z<br />
At a Glance
24 <strong>COMAND</strong> Control System<br />
At a Glance<br />
Symb<br />
ol<br />
<strong>COMAND</strong> controller operation Function (example)<br />
n Press briefly RSelect menu item or list entry<br />
Press and hold until the selected<br />
action has been carried out<br />
RShow/hide the menu system (e.g. when<br />
using navigation or video functions)<br />
RAccept destination for navigation<br />
ymz Rotate RMove through vertical or horizontal menus<br />
or lists<br />
RMove through text<br />
RProgram settings<br />
qmr Slide RMove through vertical menus<br />
Slide and hold<br />
RExit horizontal menus<br />
RMove through a navigation map<br />
omp Slide RMove through horizontal menus<br />
Slide and hold<br />
RExit vertical menus<br />
RSwitch to the next/previous track<br />
RFast-forward or reverse for CD Audio or<br />
DVD Audio playback<br />
RMove through a navigation map<br />
wmx Slide and hold RMove through a navigation map<br />
Back Button<br />
1 Back button k<br />
X To exit the menu: Briefly press the k<br />
button 1.<br />
<strong>COMAND</strong> changes to the next higher menu<br />
level in the current operating mode.<br />
i You can also exit a menu by sliding the<br />
<strong>COMAND</strong> controller omp or qmr<br />
(Y page 30).<br />
X To switch to the main display from<br />
submenu displays: Press and hold the<br />
k button 1.<br />
<strong>COMAND</strong> changes to the main display of<br />
the current operating mode.
Clear Button<br />
1 Clear button 2<br />
X To delete an individual character: Briefly<br />
press the 2 button 1.<br />
X To delete an entire entry: Press and hold<br />
the 2 button 1.<br />
Multifunction Steering Wheel<br />
E-Class illustrated<br />
Multifunction Steering Wheel 25<br />
Function<br />
1 Multifunction display<br />
2 W Volume up<br />
X Volume down<br />
8 Mute<br />
~ End and reject calls<br />
6 Accept and iniate calls<br />
3 ? Activate Voice Control<br />
4 % Press briefly:<br />
Navigate one level up in the<br />
menu structure of the<br />
multifunction display<br />
cancel Voice Control<br />
confirm messages<br />
Press and hold:<br />
Multifunction display changes<br />
to the standard display (trip<br />
odometer and odometer)<br />
<strong>COMAND</strong> changes to the main<br />
display of the current operating<br />
mode<br />
5 Select submenu or scroll through lists<br />
9 Upwards<br />
: Downwards<br />
Selecting a menu<br />
; Right<br />
= Left<br />
a Confirm selection<br />
Operating the Multifunction Display<br />
G Warning!<br />
A driver’s attention to the road and traffic<br />
conditions must always be his/her primary<br />
focus when driving.<br />
For your safety and the safety of others,<br />
selecting features through the multifunction<br />
steering wheel should only be done by the<br />
Z<br />
At a Glance
26 Multifunction Steering Wheel<br />
At a Glance<br />
driver when traffic and road conditions permit<br />
it to be done safely.<br />
Bear in mind that at a speed of just 30 mph<br />
(approximately 50 km/h), your vehicle is<br />
covering a distance of 44 feet (approximately<br />
14 m) every second.<br />
X To select a menu: Press the =<br />
or ; button.<br />
X To select a submenu or scroll in a list:<br />
Press the 9 or : button.<br />
X To select the next menu level up: Press<br />
the % button.<br />
X To select the standard display: Press the<br />
% button repeatedly until the standard<br />
display with the odometer and trip<br />
odometer appears again in the display.<br />
or<br />
X Press and hold the % button until the<br />
standard display with the odometer and trip<br />
odometer appears.<br />
X To confirm the selection: Press the<br />
a button.<br />
X To confirm a display message: Press the<br />
a or % button.<br />
Multifunction Display<br />
The description field on the multifunction<br />
display shows you values and settings as well<br />
as any display messages that may have been<br />
generated.<br />
1 Description field<br />
2 Line for menus<br />
Text field 1 shows settings, functions,<br />
submenus and any malfunctions that occur.<br />
X To show the line for menus 2: Press the<br />
= or ; button.<br />
Menus and Submenus<br />
The number of menus shown depends on the<br />
optional equipment in the vehicle.<br />
Multifunction Display Menus<br />
i The following table only lists the functions<br />
and submenus that are needed in<br />
connection with <strong>COMAND</strong>. For information<br />
on the vehicle-related submenus please<br />
refer to the vehicle operator's manual.<br />
Menus Functions and Submenus<br />
Navi Navigation messages<br />
Audio Selecting radio stations<br />
Operating the DVD changer/<br />
Music register/Memory card<br />
Tel Accepting a call<br />
Initiating a call<br />
Rejecting a call<br />
Ending a call<br />
Selecting a phone book entry<br />
Calls dialed<br />
Navi Menu<br />
The multifunction display shows navigation<br />
instructions in the Navi menu.<br />
Route Guidance Inactive<br />
1 Direction of travel<br />
2 Current road
The road you are currently driving on only<br />
appears if it is in the map software.<br />
Route Guidance Active<br />
No Maneuver Announced<br />
1 Distance to destination<br />
2 Distance to next maneuver<br />
3 Current road<br />
4 Symbol for “follow the road's course”<br />
Maneuver Announced Without Change of<br />
Lane<br />
1 Road into which the maneuver leads<br />
2 Distance to maneuver and graphic<br />
distance display<br />
3 Symbol for maneuver<br />
When a maneuver is announced, you will see<br />
the symbol for the maneuver and beside it a<br />
graphic distance display 2. This decreases<br />
as you approach the announced maneuver.<br />
Maneuver Announced With Change of<br />
Lane<br />
Lane recommendations are only displayed if<br />
the relevant data is available on the digital<br />
map.<br />
Multifunction Steering Wheel 27<br />
1 Road into which the maneuver leads<br />
2 Distance to maneuver and graphic<br />
distance display<br />
3 Lane recommendation<br />
4 Symbol for maneuver<br />
On multiple-lane roads, a lane<br />
recommendation 3 may be shown for the<br />
next maneuver. There may be additional lanes<br />
during a maneuver.<br />
Lane<br />
Recommendation<br />
Display<br />
Lane without lower<br />
limit<br />
Meaning<br />
Uninterrupted lane<br />
Lane with lower limit New lane during a<br />
maneuver<br />
Lane with arrow Lane recommended<br />
for the maneuver<br />
Navigation Status Indicators in the<br />
Multifunction Display<br />
When route guidance is activated, the<br />
following messages may appear:<br />
R
28 Multifunction Steering Wheel<br />
At a Glance<br />
ROff Map: the vehicle is outside the range<br />
of the digital map. The vehicle is in an offmap<br />
position.<br />
ROff Mapped Road: the vehicle is on a road<br />
which is not in the digital map, or is away<br />
from the road, for example in a car park.<br />
RNo Route: no route to the selected<br />
destination could be calculated.<br />
Audio Menu<br />
Use the functions in the Audio menu to<br />
operate the audio equipment. If no audio<br />
equipment is switched on, the multifunction<br />
display shows the message Audio Off.<br />
X To adjust the volume: Press the W or<br />
X button.<br />
Selecting a Radio Station/Channel<br />
X Switch on <strong>COMAND</strong> and select FM/ AM<br />
Radio (Y page 123) or SatRadio<br />
(Y page 127).<br />
X Select the Audio menu.<br />
1 Wave band<br />
2 Preset number with channel number,<br />
channel name or frequency<br />
X To select the next or previous preset<br />
channel: Briefly press 9 or :.<br />
or<br />
X To select the next or previous channel:<br />
Press and hold 9 or :.<br />
i You can only change the wave band and<br />
save new stations/channels using<br />
<strong>COMAND</strong>.<br />
Operating the DVD Changer/Music<br />
Register/ Memory Card/Media<br />
Interface<br />
X Switch on <strong>COMAND</strong> and select Disc,<br />
Memory Card (Y page 139), Music<br />
Register (Y page 144) or Media Interface<br />
(Y page 149).<br />
X Select the Audio menu.<br />
Example: View of the CD player<br />
1 Current disc<br />
2 Current track<br />
X To select the next or previous track:<br />
Briefly press 9 or :.<br />
or<br />
X To scroll through the track list in<br />
upward or downward direction: Press<br />
and hold 9 or :.<br />
i If you are playing a CD or DVD with track<br />
information, the multifunction display<br />
shows the name and number of the track.<br />
The track is displayed on MP3s.<br />
Operating the DVD Video<br />
X Switch on <strong>COMAND</strong> and select DVD Video<br />
(Y page 158).<br />
X Select the Audio menu.<br />
1 Current scene
X To select the next or previous scene:<br />
Briefly press 9 or :.<br />
X To search for the next or previous<br />
scene: Press and hold 9 or :.<br />
Tel Menu<br />
G Warning<br />
Some jurisdictions prohibit the driver from<br />
using a cellular telephone while driving.<br />
Whether or not prohibited by law, for safety<br />
reasons, the driver should not use the cellular<br />
telephone while the vehicle is in motion. Stop<br />
the vehicle in a safe location before placing or<br />
answering a call.<br />
If you nonetheless choose to use the mobile<br />
phone while driving, please use the handsfree<br />
feature and be sure to pay attention to the<br />
traffic situation at all times. Use the mobile<br />
phone only when road, weather and traffic<br />
conditions permit. Otherwise, you may not be<br />
able to observe traffic conditions and could<br />
endanger yourself and others.<br />
Bear in mind that at a speed of just 30 mph<br />
(approximately 50 km/h), your vehicle is<br />
covering a distance of 44 feet (approximately<br />
14 m) every second.<br />
You can use the functions in the Tel menu to<br />
operate your mobile phone.<br />
X Switch on <strong>COMAND</strong> (Y page 34).<br />
X Select the Tel menu (Y page 102).<br />
Mobile Phone Status<br />
RIf the mobile phone has not yet been<br />
authorized, the message in the<br />
multifunction display is:<br />
Ready for Bluetooth Telephony...<br />
(Y page 99).<br />
RIf the mobile phone is switched on and<br />
authorized, the message Phone READY<br />
appears in the multifunction display.<br />
Multifunction Steering Wheel 29<br />
Accepting a Call<br />
If someone calls you while you are in the<br />
Tel menu, the following message appears in<br />
the multifunction display:<br />
X Press 6 to answer a call.<br />
You can also take a call if you have not<br />
selected the Tel menu.<br />
i The name of the caller only appears if it is<br />
included in the phone book.<br />
Rejecting or Ending a Call<br />
X Press ~.<br />
You can also reject or end a call if you have<br />
not selected the Tel menu.<br />
Dialing a Number from the Phone Book<br />
If your mobile phone is able to receive calls,<br />
you can search for and dial a number from the<br />
phone book in <strong>COMAND</strong> at any time.<br />
i You can enter new numbers in the phone<br />
book using <strong>COMAND</strong> .<br />
X Select the Tel menu.<br />
The multifunction display shows<br />
Phone READY.<br />
X Press :, 9 or a to call up the<br />
phone book.<br />
X Press : or 9 to select the name you<br />
are searching for.<br />
The stored names are displayed in<br />
alphabetical order.<br />
X If only one telephone number is stored<br />
for a name: Press 6 or a to start<br />
dialing.<br />
The message Connecting Call... and<br />
the selected number appear in the<br />
Z<br />
At a Glance
30 Operating <strong>COMAND</strong><br />
At a Glance<br />
multifunction display. The name also<br />
appears, provided it is stored in the phone<br />
book. The selected number is stored in the<br />
CALLS DIALED list in <strong>COMAND</strong><br />
(Y page 106).<br />
If a call is connected, the phone book entry<br />
appears in the multifunction display.<br />
or<br />
X If there is more than one number for a<br />
particular name: Press 6 or a to<br />
display the numbers.<br />
X Press : or 9 to select the number<br />
you want to dial.<br />
X Press 6 or a to start dialing.<br />
The message Connecting Call... and<br />
the selected number appear in the<br />
multifunction display. The name also<br />
appears, provided it is stored in the phone<br />
book. The selected number is stored in the<br />
CALLS DIALED list in <strong>COMAND</strong>.<br />
If a call is connected, the phone book entry<br />
appears in the multifunction display.<br />
i To exit the phone book without making a<br />
call, press the ~ button. Phone READY<br />
appears in the multifunction display.<br />
i If you press and hold the : or 9<br />
button for more than one second, a rapid<br />
scroll begins. After four seconds, the rapid<br />
scroll speeds up. The rapid scroll stops<br />
when you release the button or reach the<br />
end of the list.<br />
Redialing<br />
<strong>COMAND</strong> saves the most recently dialed<br />
names and numbers from the mobile phone.<br />
This means that you do not have to search<br />
through the entire phone book.<br />
X Select the Tel menu.<br />
The multifunction display shows<br />
Phone READY.<br />
X Press 6 to go to the most recently<br />
dialed number or name in the<br />
CALLS DIALED menu.<br />
X Press : or 9 to select the number<br />
or name you are looking for.<br />
X Press 6 or a to start dialing.<br />
Operating <strong>COMAND</strong><br />
Opening Menu of a Main Function<br />
Example: Audio Menu<br />
Within the Audio Function<br />
1 Main function line<br />
2 Audio menu<br />
3 The symbol R indicates current<br />
operating mode.<br />
X To switch to main function line 1:<br />
Slide qm.<br />
X To select audio main function:<br />
Rotate ymz or slide omp.<br />
X To confirm selection: Press n<br />
You will see the main display for the<br />
selected audio mode.<br />
X To switch back to the main function<br />
line 1:<br />
Slide qm and press n.<br />
The Audio menu appears.
Selecting Menu Item<br />
Example 1: Radio, Station Memory<br />
1 Selection bar<br />
Selecting Menu Item<br />
X Rotate ymz or slide qmr.<br />
The selection bar moves up and down<br />
within the list.<br />
Confirming Menu Item<br />
X Press n.<br />
Exiting the Menu Without Selecting<br />
X Slide omp in the opposite direction to the<br />
direction of the list.<br />
Example 2: Navigation, Enter<br />
Destination Menu<br />
Enter Destination menu<br />
1 Menu with upper and lower menu bar<br />
2 Selector bar<br />
Selecting Menu Item<br />
X Rotate ymz or slide qmr.<br />
The selector bar moves horizontally.<br />
Switching Menu Bar<br />
X Slide qmr.<br />
Confirming Menu Item<br />
X Press n.<br />
Character Entry<br />
Operating <strong>COMAND</strong> 31<br />
The example shows a list of cities during<br />
destination entry in the navigation.<br />
1 Predictive speller with number and<br />
character line<br />
i In the predictive speller 1 you can only<br />
select the characters that are currently<br />
available. The set of characters that is<br />
available depends on those already entered<br />
and the data for the digital map.<br />
When entering characters, the list entry at the<br />
top always displays the entry that best<br />
matches the characters already entered.<br />
<strong>COMAND</strong> automatically adds matching<br />
letters to those already entered by the user.<br />
Z<br />
At a Glance
32 Operating <strong>COMAND</strong><br />
At a Glance<br />
Entering Characters<br />
Using the Speller<br />
X To select characters: Rotate ymz or<br />
slide omp.<br />
X Slide qmr to switch between the lines in<br />
the speller.<br />
X To confirm character selection: Press<br />
n.<br />
A possible option:<br />
X To switch predictive speller language<br />
(character set): Select !.<br />
With Number Keypad<br />
Alternatively, you can enter characters using<br />
the number keypad (direct input).<br />
Example:<br />
X Press one of the number keys, e.g. 2, once<br />
or repeatedly in succession.<br />
After you have pressed it the first time, the<br />
character display appears at the lower<br />
edge of the display. The first available letter<br />
is highlighted.<br />
You see which characters you can enter with<br />
that key. Each time you press the key, the<br />
next character is highlighted.<br />
For example, key 2:<br />
RPress once = A<br />
RPress twice = B<br />
RPress three times = C<br />
Wait until the character display disappears.<br />
Deleting an Entry<br />
X To delete individual characters: Select<br />
õ at the bottom right of the speller and<br />
press n.<br />
or<br />
X Press the 2 button next to the<br />
<strong>COMAND</strong> controller.<br />
X To delete an entire entry: Select õ<br />
and press and hold n until the entire entry<br />
is deleted.<br />
or<br />
X Hold the 2 button down until the entire<br />
entry is deleted.<br />
Canceling an Entry<br />
X Select á at the bottom left in the speller<br />
and press n.<br />
or<br />
X Press the k button.<br />
The address input menu appears.<br />
Accepting the First List Entry<br />
X Press and hold n until the Enter<br />
Destination menu appears.<br />
Here you will find the accepted list entry.<br />
or<br />
If <strong>COMAND</strong> can match the characters<br />
entered definitively to one town, the Enter<br />
Destination menu appears automatically<br />
with the selected list entry.<br />
Switching to the List Without Predictive<br />
Speller<br />
If other entries for a town exist, or the name<br />
exists more than once in the system, then<br />
d is highlighted in the speller.<br />
X Press n.<br />
It is also possible to change to the list at any<br />
time during character input.
X Slide qm repeatedly until the list appears<br />
without the speller.<br />
i Without the speller entering characters<br />
using the number keypad is not possible.<br />
X To re-open the speller: Press the k<br />
button.<br />
or<br />
X Select d and press n.<br />
<strong>COMAND</strong> will complete your entry if the<br />
name is unambiguous. In this case, it is not<br />
necessary to switch to the list. The Enter<br />
Destination menu will appear<br />
automatically.<br />
Selecting a list entry<br />
Town list in navigation mode<br />
: G symbol for additional options<br />
X To select a town: Rotate ymz or slide<br />
qmr.<br />
X To confirm selection: Press n.<br />
A town with the G symbol exists more<br />
than once in the selected state/province<br />
or it has subentries. Confirming this type of<br />
town will result in a further selection. The<br />
G symbol then switches to I.<br />
Operating Example<br />
Switching to Radio Mode and Calling up<br />
the Station List<br />
Initial situation: You would like to switch, for<br />
example, from the phone function to radio<br />
mode and request the Presets list from<br />
there.<br />
i In this guide, the path to a menu item is<br />
shown as an action in a special typeface.<br />
Audio£Audio£FM/AM Radio<br />
£Radio£Presets.<br />
i Depending on the initial situation, this<br />
sequence of actions may be shorter.<br />
If radio mode was active last, it is sufficient<br />
to select Audio£Radio£Presets.<br />
The individual steps for the above example<br />
are described below.<br />
Switching to the Current Audio Mode<br />
i You can also call up the current audio<br />
mode using the buttons $ or h.<br />
X To move to the main function line:<br />
Slide qm.<br />
X To select the audio main function:<br />
Rotate ymz or slide omp.<br />
X To confirm your selection: Press n.<br />
The main display of the previous audio<br />
operating mode, e.g. CD audio, appears.<br />
The selection bar is in the display/selection<br />
window.<br />
1 Selection bar<br />
Switching to Radio Mode<br />
Operating <strong>COMAND</strong> 33<br />
X To select Audio again: Slide qm.<br />
X To confirm selection: Press n.<br />
The Audio menu appears.<br />
Z<br />
At a Glance
34 Basic Functions of <strong>COMAND</strong><br />
At a Glance<br />
X To select FM/AM Radio: Rotate ymz or<br />
slide qm.<br />
X To confirm selection: Press n.<br />
The radio main display appears.<br />
Tuning to a Station Manually<br />
X Slide mr to highlight the lower menu bar.<br />
X Rotate ymz or slide omp to select FM, AM<br />
or WB.<br />
X Tune to a station by rotating ymz or sliding<br />
omp.<br />
The red line (tuning indicator) moves right<br />
or left and stops when a receivable station<br />
is found.<br />
Basic Functions of <strong>COMAND</strong><br />
i The <strong>COMAND</strong> components can be found<br />
on (Y page 18). Operating examples can be<br />
found on (Y page 30).<br />
Switching <strong>COMAND</strong> On/Off<br />
X Press the q button.<br />
A warning message is displayed. <strong>COMAND</strong><br />
calls up the previously selected menu.<br />
i If you switch off <strong>COMAND</strong>, playback of<br />
the current audio or video source will also<br />
be switched off.<br />
Sound<br />
X To switch on/off: Press the 8 button.<br />
The sound from the active audio or video<br />
source is switched on or muted.<br />
i When the sound is muted, you will see the<br />
X icon in the status bar.<br />
If you change the audio or video source or<br />
change the volume, the sound is<br />
automatically switched on again.<br />
i Announcements from the navigation<br />
system can still be heard with the sound<br />
switched off.<br />
Switching Navigation Announcements<br />
On/Off<br />
X Press 8 during the announcement.<br />
i The navigation announcements are<br />
switched on again if you start a new route<br />
guidance or if <strong>COMAND</strong> is switched off and<br />
on with the q button.<br />
Setting the Volume<br />
X To set: Turn the q rotary/push button.<br />
or<br />
X Press the W or X button on the multifunction<br />
steering wheel.<br />
The volume of the selected audio or video<br />
source changes.
Volume of Navigation Announcements<br />
You can set the volume for navigation<br />
announcements independently of the volume<br />
for the active audio or video source.<br />
During a navigation announcement:<br />
X Turn the q rotary/push button.<br />
or<br />
X Press the W or X button on the multifunction<br />
steering wheel.<br />
Audio Fadeout<br />
The Audio Fadeout function, if activated,<br />
lowers the volume of the current audio source<br />
when a navigation announcement is issued.<br />
As soon as the navigation announcement has<br />
ended, the audio source will be played at the<br />
previous volume (Y page 60).<br />
Setting Volume for Phone Calls<br />
You can adjust the volume for hands-free<br />
mode during a telephone call.<br />
During a telephone call:<br />
X Turn the q rotary/push button.<br />
or<br />
X Press the W or X button on the multifunction<br />
steering wheel.<br />
Sound Settings<br />
You can select different sound settings for<br />
each audio and video source. The sound<br />
menu can be opened from the submenu of the<br />
desired operating mode.<br />
Examples:<br />
RAudio £FM/AM Radio£Sound<br />
RAudio£Disc£Sound<br />
Setting Bass and Treble<br />
X Select Sound£Treble or Bass.<br />
The previously selected setting is indicated<br />
by an empty bar.<br />
Basic Functions of <strong>COMAND</strong> 35<br />
Setting treble and bass<br />
1 Last selected setting<br />
2 Current setting<br />
X To change the setting: Rotate ymz or<br />
slide qmr until the desired treble and bass<br />
levels are set.<br />
X To save setting: Press n.<br />
The setting is stored and the menu is<br />
exited.<br />
X To exit the menu without changes: Press<br />
the k button or slide omp.<br />
Setting Balance and Fader<br />
The balance determines whether the sound<br />
intensity is higher on the driver’s side or on<br />
the front passenger’s side.<br />
The fader determines whether the sound<br />
intensity is higher in the front or in the rear of<br />
the vehicle.<br />
X Select Sound £ Bal/Fad (balance/<br />
fader).<br />
Z<br />
At a Glance
36 Basic Functions of <strong>COMAND</strong><br />
At a Glance<br />
Setting Balance and Fader (display image may<br />
differ depending on model)<br />
1 Current setting<br />
X To change the setting: Slide qmr or<br />
omp until the balance and fader are set as<br />
desired.<br />
X To store a setting: Press the n button.<br />
The setting is stored and the menu is<br />
exited.<br />
X To exit the menu without changes: Press<br />
the k button.<br />
Surround Sound<br />
Your vehicle is equipped with the harman/<br />
kardon LOGIC7 ® Surround Sound system.<br />
You can select between LOGIC7 ® off and<br />
LOGIC7 ® on.<br />
harman/kardon LOGIC7 ® Surround Sound is<br />
available for the following operating modes:<br />
RRadio (FM only)<br />
RSatRadio<br />
RCD Audio<br />
RDVD Audio (MLP, DTS, PCM and Dolby<br />
Digital audio formats)<br />
RMP3 (including PCMCIA memory card)<br />
RAUX<br />
RVideo DVD (PCM, DTS and Dolby Digital<br />
audio formats)<br />
i As some DVDs contain both stereo and<br />
multi-channel audio formats, it may be<br />
necessary to set the audio format.<br />
i The LOGIC7 ® on function of the harman/<br />
kardon LOGIC7 ® Surround Sound system<br />
allows playback of discrete 5.1 and stereo<br />
recordings with an optimum surround<br />
sound experience for each passenger. It<br />
enables optimum playback of music and<br />
films on CD or audio and video DVDs with<br />
high-resolution surround formats, such as<br />
MLP, DTS or Dolby Digital. For ideal sound<br />
perception from all seats, LOGIC7 ®<br />
distributes the 5.1 surround information<br />
over the 12-channel architecture. This<br />
results in sound characteristics like those<br />
intended by the sound engineer when the<br />
original was recorded.<br />
harman/kardon LOGIC7 ® converts each<br />
two-channel stereo sound source into<br />
multi-channel surround sound. LOGIC7 ®<br />
reads the surround information stored<br />
during the original recording and<br />
distributes it over the 12 channels. No<br />
effects are created during the process,<br />
anything that was always on the recording<br />
is just made audible again. In addition,<br />
harman/kardon LOGIC7 ® moves the<br />
perceived sound source away from the<br />
loudspeakers and thereby generates a<br />
natural 360° sound experience for every<br />
passenger.<br />
i If you select LOGIC7 ® off, playback of all<br />
recognized formats is as it is on the<br />
medium. Due to the design of the<br />
passenger compartment, an optimum<br />
audio experience cannot be guaranteed for<br />
all passengers.<br />
i Discs which support the audio formats<br />
mentioned have the following logos:
Dolby Digital<br />
DTS<br />
MLP<br />
Setting Surround Sound<br />
You can select LOGIC7 ® on or LOGIC7 ® off<br />
in surround sound mode.<br />
X Select Sound£Surround.<br />
Surround sound setting (display image may differ<br />
depending on model)<br />
Basic Functions of <strong>COMAND</strong> 37<br />
X To select the setting: Rotate ymz or slide<br />
qmr.<br />
X To save the setting: Press n.<br />
The setting is stored and you exit the menu.<br />
X To exit the menu without changes: Press<br />
the k button or slide omp.<br />
i Please note the following:<br />
RFor the optimum audio experience for all<br />
passengers when LOGIC7 ® is switched<br />
on, the balance and fade should be set to<br />
the center of the passenger<br />
compartment.<br />
RYou will achieve the best sound results<br />
by playing high-quality audio and DVD<br />
Video.<br />
RMP3 tracks should have a bit rate of at<br />
least 128 kbit/s.<br />
RSurround-sound playback does not work<br />
for mono signal sources, such as the AM<br />
waveband in radio mode.<br />
RIf the radio reception is poor, e.g. in a<br />
tunnel, you should switch off LOGIC7 ®<br />
because it may otherwise switch<br />
automatically between stereo and mono<br />
and therefore distort the sound<br />
temporarily.<br />
ROn some stereo recordings, the sound<br />
characteristics may differ from<br />
conventional stereo playback.<br />
Z<br />
At a Glance
System Menu Overview ...................... 40<br />
Switching the Display On/Off ............ 40<br />
Time ...................................................... 41<br />
Display Settings .................................. 41<br />
Read-Out .............................................. 42<br />
Voice Control ....................................... 42<br />
Language Setting ................................ 44<br />
Rear View Camera ............................... 44<br />
Bluetooth ............................................. 44<br />
Reset .................................................... 45<br />
39<br />
System Settings
40 Switching the Display On/Off<br />
System Settings<br />
System Menu Overview<br />
Vehicle Equipment<br />
i This Operator’s Manual describes all<br />
features, standard or optional, potentially<br />
available for your vehicle at the time of<br />
purchase. Please be aware that your<br />
vehicle might not be equipped with all<br />
features described in this manual.<br />
Opening System Menu<br />
X Press the W function button.<br />
or<br />
X Select System in the main function line.<br />
The system menu appears.<br />
1 Settings menu<br />
2 Time<br />
= Display Off<br />
Settings Time Display<br />
Off<br />
Display<br />
(Y page 41)<br />
Text reader speed<br />
(Y page 42)<br />
Voice Control<br />
(Y page 42)<br />
Language<br />
(Y page 44)<br />
Rear View<br />
Camera<br />
(Y page 44)<br />
O Activate<br />
Bluetooth ®<br />
(Y page 44)<br />
Reset<br />
(Y page 45)<br />
i Use this<br />
function to<br />
delete your<br />
personal data,<br />
e.g. before<br />
selling your<br />
vehicle.<br />
Set Time<br />
(Y page<br />
41)<br />
Format<br />
(Y page<br />
41)<br />
Time Zone<br />
(Y page<br />
41)<br />
Switching the Display On/Off<br />
(Y page<br />
40)<br />
X To switch the display off:<br />
Select System£Display Off.<br />
The display is switched off.<br />
X To switch on the display: Press the 9<br />
button, the k button or one of the<br />
=, ;, : or 9 buttons.<br />
or<br />
X Press the q button.<br />
The system menu appears.<br />
i You can also press one of the function<br />
buttons, e.g. the h button. This turns on<br />
the display and switches to the<br />
corresponding function.
Time<br />
Setting the Time<br />
i The correct time must be set for the<br />
following functions to operate correctly:<br />
RCalculation of expected time of arrival<br />
RTime stamps for calls received and calls<br />
dialed<br />
X Press the W function button or select<br />
System.<br />
X Select Time £Set Time.<br />
1 Sets the time<br />
2 Current date<br />
X To set value: Rotate ymz or slide qmr.<br />
X To save setting: Press n.<br />
i If you adjust the time in 30-minute<br />
increments, the previously selected time<br />
zone and automatic time-zone switching<br />
between daylight saving time and standard<br />
time settings are lost (Y page 41).<br />
i The increment for setting the minutes is<br />
30 minutes due to GPS reception.<br />
Setting the Time Format<br />
X Select System£Time£Format.<br />
The format list appears. The R dots show<br />
the current settings.<br />
i The abbreviations mean:<br />
Time format: HH - Hour, MM - Minute for<br />
either 24-hour clock or AM/PM format<br />
X To change the format: Rotate ymz or<br />
slide qmr.<br />
X To confirm the change: Press n.<br />
X To store the setting and exit the menu:<br />
Slide omp.<br />
Setting the Time Zone and Switching<br />
Between Daylight Saving Time and<br />
Standard Time<br />
i The correct time zone and daylight<br />
saving/standard time must be set for the<br />
following navigation system functions to<br />
operate correctly:<br />
RCalculation of expected time of arrival<br />
RTime stamps for calls received and calls<br />
dialed<br />
X To set the time zone: Select System<br />
£Time£Time Zone.<br />
A time zone list appears. The R dot<br />
indicates the current setting.<br />
X Select the appropriate time zone.<br />
X To switch between Daylight Saving and<br />
standard time: Select Daylight Saving<br />
Time (Summer) or Standard Time<br />
(Winter).<br />
The R dot indicates the current setting.<br />
X To store setting and exit menu:<br />
Slide omp.<br />
Display Settings<br />
Setting the Brightness<br />
Display Settings 41<br />
i The brightness detected by the <strong>COMAND</strong><br />
light sensor affects the setting options for<br />
this function.<br />
X Select System£Settings£Display<br />
£Brightness.<br />
Z<br />
System Settings
42 Voice Control<br />
System Settings<br />
1 Brightness bar<br />
X To set the brightness: Rotate ymz or<br />
slide qmr.<br />
The brightness bar moves up or down.<br />
X To confirm selection: Press n or slide<br />
om.<br />
or<br />
X Press the k button.<br />
Setting the Display Design<br />
X Select System£Settings£Display.<br />
X Select Day mode, Night mode or<br />
Automatic.<br />
The R dot indicates the current setting.<br />
i In the Automatic setting, <strong>COMAND</strong><br />
evaluates the readings from the automatic<br />
vehicle light sensor and switches between<br />
the display designs automatically.<br />
Read-Out<br />
Setting Reading Speed<br />
X Select System£Settings£Text<br />
Reader Speed.<br />
The list of possible settings appears. The<br />
R dot indicates the current setting.<br />
X To select the setting: Rotate ymz or slide<br />
qmr.<br />
X To confirm your selection: Press n.<br />
Voice Control<br />
Switching the Help Screen On or Off<br />
X Select System£Settings£Voice<br />
Control.<br />
X Select Help Window.<br />
You have switched the help window on<br />
Ç or off c.<br />
i In addition to the audible instructions, the<br />
help screen displays other information<br />
during the individualization process and the<br />
later voice control mode.<br />
Individualization<br />
You can use the individualization function<br />
option to adapt the Voice control system to<br />
your own voice and therefore improve voice<br />
recognition. This will affect the ability of the<br />
system to recognize the voices of other users,<br />
and for this reason it can be switched off<br />
(Y page 43).<br />
The individualization function comprises two<br />
parts and lasts around five minutes. During<br />
the process you will practice a few number<br />
sequences and voice commands.<br />
Starting New Individualization<br />
i It is only possible to start individualization<br />
when the vehicle is stationary. Before<br />
starting, switch off all devices or functions<br />
which could interfere, such as the radio or<br />
the navigation system. After starting the
session, the system guides you through the<br />
training with spoken instructions.<br />
X Select System£Settings£Voice<br />
Control£Start New<br />
Individualization.<br />
You see and hear a prompt asking whether<br />
you would like further information.<br />
X Select Yes or No.<br />
If you select No, the first part of<br />
individualization begins. You hear a prompt<br />
asking whether you would like to train the<br />
system in numbers or in voice commands.<br />
After selecting Yes, you see an information<br />
display and hear information regarding the<br />
individualization process. The first part of<br />
individualization then begins automatically.<br />
or<br />
X To close the display: Press n.<br />
You hear a prompt asking whether you<br />
would like to train the system in numbers<br />
or in voice commands.<br />
At the end of the first part, you will see a<br />
prompt asking whether you wish to begin the<br />
second part.<br />
X Select Yes or No.<br />
If you select No, individualization will be<br />
canceled. The data from the first part is<br />
stored automatically.<br />
If you select Yes, the second part will begin.<br />
Individualization is completed at the end of<br />
the second part. You will see a corresponding<br />
message. The data from the second part is<br />
stored automatically.<br />
Voice Control 43<br />
Canceling the First or Second Part of<br />
Individualization<br />
X Select Cancel.<br />
A prompt appears asking whether you<br />
really do wish to cancel.<br />
X Select Yes or No.<br />
If you select Yes, individualization will be<br />
canceled. The data from the current part is<br />
not stored.<br />
If you select No, the current part begins<br />
again.<br />
Deleting Existing Individualization Data<br />
X Select System£Settings£Voice<br />
Control£Delete<br />
Individualization.<br />
A prompt appears asking whether you<br />
really wish to delete.<br />
X Select Yes or No.<br />
The individualization data will either be<br />
deleted or not, depending on your<br />
selection. You will see a corresponding<br />
message.<br />
Switching Individualization On and Off<br />
X Select System£Settings£Voice<br />
Control £ Individualization On.<br />
You have switched individualization on Ç<br />
or off c.<br />
Z<br />
System Settings
44 Bluetooth<br />
System Settings<br />
Language Setting<br />
This function allows you to determine the<br />
language for the menu displays and the<br />
navigation messages. The language selection<br />
affects the input options in the editing and<br />
smart speller.<br />
X Select System£Setting£Language.<br />
The list of languages appears. The R dot<br />
indicates the current setting.<br />
X To select a language: Rotate ymz or slide<br />
qmr.<br />
The selection moves up and down.<br />
X To confirm the language selection:<br />
Press n.<br />
<strong>COMAND</strong> loads the selected language and<br />
sets it.<br />
Rear View Camera<br />
<strong>COMAND</strong> shows the camera picture on the<br />
display when<br />
Rthe function is switched on in the System<br />
Settings menu and<br />
Rthe vehicle is shifted into reverse gear<br />
As soon as you shift out of reverse gear, the<br />
previous display is shown.<br />
i In vehicles equipped with a rear view<br />
camera, the Video Aux connection cannot<br />
be used for external video sources.<br />
Switching On/Off the Display of the<br />
Rear View Camera<br />
X Switch to System Menu<br />
System settings menu with Rear View Camera<br />
option<br />
X Select Settings£Rear View Camera.<br />
X Select Activation by R gear.<br />
Depending on the previous state the<br />
function is switched on Ç or offc.<br />
Bluetooth<br />
General Information About<br />
Bluetooth ®<br />
i Bluetooth-capable devices must<br />
correspond to a particular profile to be<br />
connected to <strong>COMAND</strong>. Every Bluetooth<br />
device has a Bluetooth-specific name.<br />
Bluetooth ® technology is the standard for<br />
short-range wireless data transmission of up<br />
to approximately 30 feet. Bluetooth ® can be<br />
used to exchange vCards, for example.<br />
Bluetooth ® is a registered trademark of the<br />
Bluetooth Special Interest Group (SIG) Inc.
Switching Bluetooth On or Off<br />
X Select System£Settings£Activate<br />
Bluetooth.<br />
Bluetooth is switched on Ç or offc.<br />
Reset<br />
i You can fully reset <strong>COMAND</strong> to the<br />
factory settings. This process deletes all<br />
personal data, among other things, (e.g.<br />
station memory, address book entries,<br />
entries in the destination memory and in<br />
the last destinations of the navigation<br />
system). It is recommended that you<br />
perform a reset before the vehicle is<br />
handed over or sold, for example.<br />
X Select System£Settings£Reset.<br />
A prompt appears asking whether you wish<br />
to reset.<br />
X Select Yes or No.<br />
If you select Yes, a prompt will appear again<br />
asking whether you really wish to reset.<br />
X Select Yes or No.<br />
If you select Yes, a message will be shown.<br />
<strong>COMAND</strong> is reset and restarted.<br />
Reset 45<br />
Z<br />
System Settings
Introduction ......................................... 48<br />
Destination Input ................................ 62<br />
POI Input .............................................. 74<br />
Route Guidance ................................... 80<br />
Traffic Messages ................................. 87<br />
Destination Memory ........................... 91<br />
Last Destinations ................................ 95<br />
47<br />
Navigation
48 Introduction<br />
Navigation<br />
Introduction<br />
Vehicle Equipment<br />
i This Operator’s Manual describes all<br />
features, standard or optional, potentially<br />
available for your vehicle at the time of<br />
purchase. Please be aware that your<br />
vehicle might not be equipped with all<br />
features described in this manual.<br />
Safety Instructions<br />
G Warning<br />
For safety reasons, only enter a destination<br />
when the vehicle is stationary. When the<br />
vehicle is in motion, a passenger should enter<br />
the destination. Study manual and select<br />
route before driving.<br />
Bear in mind that at a speed of just 30 mph<br />
(approximately 50 km/h), your vehicle is<br />
covering a distance of 44 feet (approximately<br />
14 m) every second.<br />
<strong>COMAND</strong> calculates the route to the<br />
destination without taking account of the<br />
following:<br />
RTraffic lights<br />
RStop and right-of-way-signs<br />
RLane merging<br />
RParking or stopping prohibited areas<br />
ROther road and traffic rules and regulations<br />
RNarrow bridges<br />
G Warning<br />
<strong>COMAND</strong> may give incorrect navigation<br />
commands if the data in the digital map does<br />
not correspond with the actual road/traffic<br />
situation. Digital maps do not cover all areas<br />
nor all routes within an area. For example, if<br />
the traffic routing has been changed or the<br />
direction of a one-way road has been<br />
reversed.<br />
For this reason, you must always observe<br />
applicable road and traffic rules and<br />
regulations during your journey. Road and<br />
traffic rules and regulations always have<br />
priority over the navigation commands<br />
generated by the system.<br />
G Warning<br />
Navigation announcements are intended to<br />
direct you while driving without diverting your<br />
attention from the road and driving.<br />
Please always use this feature instead of<br />
consulting the map display for directions.<br />
Consulting the symbols or map display for<br />
directions may cause you to divert your<br />
attention from driving and increase your risk<br />
of an accident.<br />
Updating the Map Software<br />
The digital data for the map software will<br />
become obsolete, just like conventional road<br />
maps. Optimum route guidance by the<br />
navigation system is only achieved with upto-date<br />
map software. Information on new<br />
map software versions is available from an<br />
authorized <strong>Mercedes</strong>-<strong>Benz</strong> Center.<br />
You can have the map software updated there<br />
by means of a DVD or perform the update<br />
process yourself.<br />
Notes on DVD Discs<br />
ROnly touch the discs at the edges.<br />
RHandle the discs with care in order to<br />
prevent reading errors.<br />
RAvoid scratching, leaving fingerprints and<br />
dust on the discs.<br />
RUse a commercially available cleaning cloth<br />
to clean discs. Always wipe in a straight line<br />
from the inside outwards, never in a circular<br />
motion.<br />
RAfter use, put the discs back into the box.<br />
RProtect the discs from heat and direct<br />
sunlight.
Update Sequence<br />
The sequence includes the following stages:<br />
RLoading DVD into the DVD changer<br />
RUpdate process<br />
i The update process may take between 60<br />
and 150 minutes, depending on the size of<br />
the map software.<br />
If possible, perform the update when the<br />
vehicle is stationary. The DVD read speed<br />
is faster when the vehicle is stationary than<br />
when the vehicle is moving and the update<br />
therefore takes less time. If you perform<br />
the update with the engine off and the<br />
vehicle battery is no longer powerful<br />
enough, <strong>COMAND</strong> may shut off<br />
automatically during the process to protect<br />
the battery. In this case, restart the update<br />
with the engine running.<br />
You can interrupt the update process and<br />
continue it at later time. If you cancel the<br />
update process, the navigation system is<br />
not ready for operation.<br />
G Warning<br />
Never leave the engine running in an enclosed<br />
space. The exhaust gases contain carbon<br />
monoxide. Inhaling exhaust gases constitutes<br />
a health hazard and could lead to loss of<br />
consciousness or even death.<br />
Loading DVDs into DVD Changer<br />
The DVD changer is a magazine with six builtin<br />
compartments.<br />
1 Load button<br />
2 Disc slot<br />
X Press the Load button 1.<br />
A menu indicates which magazine<br />
compartments are currently loaded.<br />
X To select an empty magazine<br />
compartment: Rotate ymz or slide omp.<br />
X To start loading: Press n.<br />
The message Please Insert Disc <br />
will be displayed.<br />
X Insert the DVD into the slot 2 with the<br />
printed side upwards.<br />
The DVD changer pulls in the DVD. The<br />
message Loading Disc ... will be<br />
displayed.<br />
i If the magazine is full, you will first need<br />
to eject a disc.<br />
Update Process<br />
Introduction 49<br />
The update process starts once the DVD has<br />
been loaded.<br />
<strong>COMAND</strong> checks whether the map software<br />
on the DVD matches the vehicle's navigation<br />
system and system software.<br />
Map Software is not suitable for the<br />
Navigation System or the System<br />
Software<br />
A message is displayed stating that the<br />
navigation update DVD with the new map<br />
data is not suitable for the system or the<br />
system software.<br />
<strong>COMAND</strong> ejects the DVD.<br />
Z<br />
Navigation
50 Introduction<br />
Navigation<br />
X Remove the DVD from the slot.<br />
X Have the system software updated by an<br />
authorized <strong>Mercedes</strong>-<strong>Benz</strong> Center.<br />
i It will only be possible to update the map<br />
software once the system software has<br />
been updated.<br />
Map Software matches the Navigation<br />
System and the current System Software<br />
<strong>COMAND</strong> checks whether the DVD's map<br />
data has already been installed.<br />
Map Data Is already installed<br />
The version release and a corresponding<br />
message will be given on the display.<br />
X To confirm message: Press n.<br />
<strong>COMAND</strong> ejects the DVD.<br />
Map Data is not yet installed<br />
The version release and a query as to whether<br />
the update should be carried out will be given<br />
on the display.<br />
X Select Yes or No.<br />
If No is selected, <strong>COMAND</strong> ejects the DVD<br />
automatically and the map data is not<br />
updated.<br />
X Remove the DVD from the slot.<br />
If Yes is selected, the map data is updated.<br />
Updating the Map Data<br />
While the update is in progress, a<br />
corresponding message and a progress bar<br />
are displayed. The progress bar fills from left<br />
to right over the course of the update. The<br />
navigation system is not functional until the<br />
update is complete.<br />
You cannot eject the DVD during the update.<br />
If you switch <strong>COMAND</strong> off during the update,<br />
this will interrupt the update and the update<br />
will resume at the point of interruption when<br />
the system is restarted.<br />
While updating, <strong>COMAND</strong> may prompt you to<br />
change the DVD. A corresponding message<br />
is then displayed.<br />
X Press the Load button V.<br />
The magazine menu appears. The magazine<br />
compartment containing the current disc is<br />
highlighted.<br />
X Press 9.<br />
<strong>COMAND</strong> ejects the DVD.<br />
X Remove the DVD from the slot.<br />
X Insert the DVD requested by <strong>COMAND</strong>.<br />
If the update has been completed<br />
successfully, a corresponding message is<br />
displayed.<br />
X To confirm message: Press n.<br />
<strong>COMAND</strong> ejects the DVD.<br />
X Remove the DVD from the slot.<br />
The update is complete.<br />
If the update has not been completed<br />
successfully, a message is displayed<br />
indicating that the map update is not<br />
possible.<br />
X To confirm message: Press n.<br />
<strong>COMAND</strong> ejects the DVD.<br />
X Remove the DVD from the slot.<br />
An unsucessful update may be caused by one<br />
of the following:<br />
RDVD dirty or scratched.<br />
X Clean the DVD.<br />
Please refer to the “Notes on DVD<br />
discs” section (Y page 48).<br />
X Restart the update.<br />
ROverheating as a result of excessively high<br />
temperatures in the passenger<br />
compartment.<br />
X Wait until the passenger compartment<br />
has cooled down.<br />
X Restart the update.<br />
Input Restriction<br />
There is an input restriction for vehicles in<br />
certain countries.<br />
The restriction is active for vehicle speeds<br />
above approx. 3 mph. The restriction is
deactivated as soon as the speed falls below<br />
approx. 2 mph.<br />
Certain entries cannot be made when the<br />
restriction is active, e.g. a city or road entry.<br />
This is indicated by the fact that certain menu<br />
items cannot be selected.<br />
General Information<br />
Operational Readiness of the<br />
Navigation System after the System<br />
Software Update<br />
Sometimes the installed map software is no<br />
longer compatible following a system<br />
software update by an authorized <strong>Mercedes</strong>-<br />
<strong>Benz</strong> Center. In this case, the navigation<br />
system is not operational.<br />
X To update map software: Proceed as<br />
described in the “Update Process” section<br />
(Y page 49). Use map software compatible<br />
with the system software.<br />
i Please note that in this case the update<br />
must run through right to the end. If you<br />
cancel beforehand, the navigation system<br />
will still not be ready for operation.<br />
After start-up or initial start-up, the navigation<br />
system must perform a position finding<br />
operation. As a result, you may have to drive<br />
for some time until precise route guidance<br />
takes place.<br />
GPS Reception<br />
The correct functioning of the navigation<br />
system is also dependent on the GPS<br />
reception. In certain situations, the GPS<br />
reception may be impaired, distorted or even<br />
impossible, e.g. in tunnels, multi-storey car<br />
parks or due to snow on the GPS antenna. If<br />
there is snow on the GPS antenna, you should<br />
remove it. The GPS antenna is at the rear on<br />
the vehicle's roof.<br />
Introduction 51<br />
Route Guidance after Vehicle Transport<br />
After vehicle transport (e.g. by ferry, car train<br />
or by towing) <strong>COMAND</strong> must determine the<br />
vehicle location again.<br />
Position finding takes place automatically<br />
when the vehicle is driven off again, even if<br />
<strong>COMAND</strong> is switched off. The actual length of<br />
time may vary from case to case.<br />
While the vehicle is determining its position,<br />
route guidance is subject to the following<br />
restrictions:<br />
RNavigation announcements, route<br />
guidance displays and displayed street<br />
names do not match the actual location.<br />
R<strong>COMAND</strong> does not issue any navigation<br />
announcements.<br />
RThe message Off Mapped Road and a<br />
direction arrow are displayed instead of the<br />
route guidance displays. The arrow<br />
indicates the direction of the destination.<br />
i Direction arrow accuracy is also<br />
dependent on correct vehicle position<br />
and/or direction.<br />
Once the position finding operation has been<br />
completed, route guidance takes place again<br />
via navigation announcements and route<br />
guidance displays.<br />
Interrupting Journey during Route<br />
Guidance<br />
i An interruption in the journey means<br />
parking the vehicle and switching off the<br />
vehicle.<br />
The continuation of the journey means<br />
switching the vehicle on again and<br />
continuing to drive.<br />
Z<br />
Navigation
52 Introduction<br />
Navigation<br />
If you interrupt the journey during route<br />
guidance and continue it later, the following<br />
applies:<br />
RIf you continue the journey within 2 hours,<br />
<strong>COMAND</strong> automatically continues route<br />
guidance.<br />
RIf you continue the journey after 2 hours,<br />
route guidance is canceled. You will have<br />
Menu Overview<br />
Navi<br />
Setting route calculation mode<br />
Selecting map orientation<br />
Selecting POI symbols on map<br />
Selecting traffic information on map<br />
Selecting text information on map<br />
Switching topographic map display on/off<br />
Switching highway information on/off<br />
Switching the automatic reading of traffic<br />
messages on/off<br />
Switching Audio Fadeout on/off<br />
Setting Block Area<br />
SIRIUS Service<br />
to continue the canceled route guidance<br />
again manually (Y page 85).<br />
Measurement Units<br />
The measurement units displayed in<br />
navigation mode are identical to those set in<br />
the instrument cluster.
Submenu Overview<br />
Guide Traffic Route (with<br />
active route<br />
guidance)<br />
Selecting<br />
POI in<br />
depicted<br />
map<br />
segment, if<br />
available<br />
Displaying<br />
traffic<br />
messages<br />
Reading<br />
aloud traffic<br />
messages<br />
Switching to Navigation Mode<br />
X Press the function button Ø.<br />
or<br />
Opening<br />
detour<br />
function<br />
Having<br />
alternative<br />
route<br />
calculated<br />
Opening<br />
destination<br />
information<br />
Opening route<br />
browser<br />
X Select Navi in the main function menu.<br />
This displays the map with the menu<br />
system either displayed or hidden.<br />
Pos. (with<br />
active route<br />
guidance)<br />
Position<br />
Save Vehicle<br />
Position or<br />
crosshairs<br />
position<br />
i The<br />
crosshairs<br />
position can<br />
be saved<br />
when the<br />
crosshairs<br />
are<br />
displayed<br />
on the map.<br />
Vehicle<br />
Position Map<br />
Destination<br />
Position Map<br />
Center Map on<br />
Stopover<br />
Display<br />
compass<br />
screen<br />
RPT. (with<br />
active<br />
route<br />
guidance)<br />
Repeating<br />
current<br />
navigation<br />
announcem.<br />
Introduction 53<br />
Dest. (with<br />
active route<br />
guidance)<br />
Destination<br />
Cancel route<br />
guidance<br />
Entering<br />
destination<br />
Rusing<br />
address<br />
Rfrom<br />
memory<br />
Rfrom Last<br />
destination<br />
memory<br />
Rfrom POIs<br />
Rusing map<br />
Ras<br />
stopover<br />
destination<br />
Save<br />
destination<br />
i If the message Please insert the<br />
map DVD to activate Navigation.<br />
appears instead of the map display, see<br />
(Y page 48). Map without activated route guidance and with<br />
menu system displayed<br />
1 Status line<br />
2 Main function line<br />
Z<br />
Navigation
54 Introduction<br />
Navigation<br />
3 Current vehicle location<br />
4 Navigation submenu<br />
Map without activated route guidance and with<br />
menu system hidden<br />
1 Current vehicle location<br />
2 Set map orientation<br />
3 Set map scale<br />
Displaying/Hiding Menu System<br />
X To hide: Slide qm and when the menu item<br />
Full screen is displayed press n.<br />
or<br />
X Press the function button Ø.<br />
The menu system is hidden. This displays<br />
the map in full screen mode.<br />
X To display: In full screen map mode press<br />
n.<br />
Setting Map Scale<br />
i You can only set the map scale when the<br />
menu system is hidden (map in full-screen<br />
mode).<br />
X Rotate ymz until the required map scale is<br />
set.<br />
The map scale 3 is displayed as soon as<br />
you start rotating ymz. Rotating clockwise<br />
makes the map smaller, rotating<br />
anticlockwise enlarges it.<br />
1 Currently set map scale as number<br />
2 Pointer indicating the currently selected<br />
map scale<br />
3 Scale<br />
Saving Current Vehicle Location as<br />
Destination in the Last Destinations<br />
X To display menu system if applicable:<br />
Press n.<br />
X To save: Select Position£Save<br />
Vehicle Position.<br />
<strong>COMAND</strong> saves the current vehicle<br />
location as destination in the last<br />
destinations memory. A window appears<br />
containing a corresponding message.<br />
X To exit menu: Slide omp or press the<br />
k button.<br />
Scrolling the Map<br />
i You can only scroll the map when the<br />
menu system is hidden (map in full-screen<br />
mode).<br />
X Hide menu system if applicable<br />
(Y page 54).<br />
X Slide qmr, omp or wmx.<br />
Crosshairs will appear on the map.
1 Current vehicle location<br />
2 Crosshairs<br />
3 Information on crosshairs position<br />
4 Set map scale<br />
i The display item 3 may for example be<br />
a road if corresponding data is available in<br />
the digital map and Current Street is<br />
activated. Or it displays the geo-coordinate<br />
position of the crosshairs if Geocoordinates<br />
display is activated.<br />
Saving crosshairs position as destination<br />
in the Last Destinations memory<br />
X To display menu system if applicable:<br />
Press n.<br />
X To save: Select Position£Save<br />
Crosshair Position.<br />
<strong>COMAND</strong> saves the crosshairs position as<br />
a destination in the last destinations<br />
memory. A window appears containing a<br />
corresponding message.<br />
Hiding crosshairs<br />
X Press the k button.<br />
The crosshairs disappear and the map is<br />
set to the vehicle location.<br />
or<br />
X Set the map to the vehicle location, see<br />
description below.<br />
Setting Map to Vehicle, Destination or<br />
Stopover Location<br />
i If you have moved the map, you can<br />
quickly move the map to the vehicle,<br />
destination or stopover location using this<br />
function. It is only possible to set it to the<br />
destination location when route guidance<br />
is active.<br />
X To display menu system if applicable:<br />
Press n.<br />
X To set map to vehicle location: Select<br />
Position£Vehicle Position Map.<br />
This hides the crosshairs.<br />
or<br />
X Press the k button if the crosshairs are<br />
displayed.<br />
This hides the crosshairs.<br />
X To set the destination location: Select<br />
Position£Destination Position<br />
Map.<br />
The crosshairs position is then set to the<br />
destination.<br />
X To set the stopover location: Select<br />
Position£Stopover Position Map.<br />
The crosshairs position is then set to the<br />
stopover.<br />
Basic Settings<br />
You can perform the settings listed below<br />
with route guidance inactive or active.<br />
Route Mode<br />
Introduction 55<br />
This function allows you to set the following<br />
route calculation modes and options for route<br />
guidance:<br />
RShort Route<br />
<strong>COMAND</strong> calculates a route by minimizing<br />
the driving distance without taking into<br />
acount traffic messages.<br />
RDynamic Route<br />
Z<br />
Navigation
56 Introduction<br />
Navigation<br />
<strong>COMAND</strong> calculates a route by minimizing<br />
the driving time and takes into account<br />
traffic messages received along the route.<br />
The navigation system thus can avoid<br />
traffic jams by recalculating the route<br />
dynamically.<br />
RDynamic Route Only After Request<br />
Same as Dynamic Route with the<br />
exception that a message appears asking<br />
you whether you want to allow the<br />
rerouting or not.<br />
RFast Route<br />
<strong>COMAND</strong> calculates a route by minimizing<br />
the driving time without taking into acount<br />
traffic messages.<br />
RAvoid Highways<br />
RAvoid Toll Roads<br />
RAvoid Tunnels<br />
RAvoid Ferries<br />
RAvoid AutoTrains<br />
1 Route calculation mode<br />
; Route options<br />
Setting Route Calculation Mode<br />
X Display menu system if applicable<br />
(Y page 54).<br />
X Select Navi £Mode.<br />
X Select Short Route, Dynamic Route,<br />
Dynamic Route Only After Request or<br />
Fast Route.<br />
X To exit menu: Slide omp.<br />
Setting Route Options<br />
X Display menu system if applicable<br />
(Y page 54).<br />
X Select Navi £Mode.<br />
X To switch route option on/off: Select<br />
required option.<br />
Depending on the previous status, the<br />
option will be switched on Ç or offc.<br />
You may activate several options.<br />
i The calculated route may include ferry<br />
connections, for example, even if the<br />
operation Avoid Ferries has been<br />
activated.<br />
i If you change the route mode setting<br />
when route guidance is active, <strong>COMAND</strong><br />
calculates a new route.<br />
Map Display<br />
Map Orientation<br />
1 Currently set map orientation<br />
The following displays are possible:<br />
R9= orientation to north (the map display<br />
is oriented to the north, north is always at<br />
the top)<br />
R8= Driving direction (the map display is<br />
oriented in the direction of travel, the<br />
direction of travel is always at the top, the<br />
orange tip of the symbol points<br />
northwards)<br />
R8= Bird's-eye view<br />
(the map display is oriented in the direction<br />
of travel, the map projection reproduces<br />
the curvature of the earth's surface, the<br />
orange tip of the symbol points<br />
northwards)
Example of map from bird's-eye view<br />
1 Current crosshairs location<br />
2 Currently set map orientation<br />
X To set map orientation: Display menu<br />
system if applicable (Y page 56).<br />
X Select Navi£Map Display.<br />
A dotR indicates the current setting.<br />
1 Options for map orientation<br />
X Select North Up or Heading Up or<br />
Bird's-eye View.<br />
X To exit menu: Slide omp.<br />
X Hide menu systems if applicable<br />
(Y page 54).<br />
The map orientation changes accordingly.<br />
Setting POI Symbols<br />
You can select which POIs are to be displayed<br />
as symbols on the map. Points of interests<br />
include, for example, gas station, hotels,<br />
cinemas and restaurants.<br />
1 Options for POI symbols (Y page 57).<br />
X To set: Display menu system if applicable<br />
(Y page 54).<br />
X Select Navi£POI Symbols On Map.<br />
X Select Standard Symbols or Personal<br />
Symbols or No Symbols.<br />
The settings have the following effect:<br />
RStandard Symbols<br />
Displays the factory-set symbols<br />
RPersonal Symbols<br />
The list of POIs is displayed<br />
X To switch symbol display on/off:<br />
Select the corresponding POI.<br />
Depending on the previous status, the<br />
corresponding symbol displays will be<br />
switched on Ç or offc. You may<br />
also activate the symbol displays for<br />
several POIs.<br />
RNo Symbols<br />
No POI symbols are shown on the map.<br />
i The list indicates all symbols for all<br />
countries that are contained in the digital<br />
map. However, not all POIs are availbale in<br />
all countries. As a result, certain POI<br />
symbols may not be shown on the map<br />
even though the symbol display is switched<br />
on.<br />
X To exit menu: Slide omp.<br />
X Hide menu system if applicable<br />
(Y page 54).<br />
Introduction 57<br />
Z<br />
Navigation
58 Introduction<br />
Navigation<br />
Traffic Information on Map<br />
Provided you have a subscription to SIRIUS<br />
XM Satellite Radio Traffic Message Service,<br />
you can have the traffic information displayed<br />
on the map. There are three different<br />
categories of information you can select.<br />
RIncidents<br />
Road sections marked by a yellow line =<br />
with arrows: traffic slowdown possible due<br />
to incidents (e.g. road work)<br />
RSpeed and Flow<br />
Road sections marked by yellow or red<br />
cars :.<br />
Yellow cars: Traffic congestion, average<br />
speed 25 – 45 mph.<br />
Red cars: Traffic congestion, average<br />
speed 5 – 20 mph.<br />
RFree Flow<br />
Road sections marked by a green line with<br />
arrows ;: free flow of traffic.<br />
1 Speed and Flow<br />
2 Free Flow<br />
3 Incidents<br />
Text Information on Map<br />
You can have map information displayed at<br />
the bottom edge of the screen. By default the<br />
map information is set to Arrival Time/<br />
Distance.<br />
X To set: Display menu system if applicable<br />
(Y page 54).<br />
X Select Navi£Text Information On<br />
Map.<br />
A dot R indicates the current setting.<br />
X Select Arrival Time/Distance or<br />
Current Street or Geo-coordinates or<br />
None.<br />
X To exit menu: Slide omp.<br />
X Hide menu system if applicable<br />
(Y page 54).
Time of Arrival/Distance to Destination<br />
Map with display activated for time of arrival/<br />
distance<br />
1 Symbol for destination<br />
2 Distance to the destination<br />
3 Symbol for estimated time of arrival<br />
4 Estimated time of arrival<br />
i This display can only be seen during route<br />
guidance. In the Scroll Map function you<br />
will see other data depending on the<br />
crosshairs position, for example a street<br />
name if the digital map supports this data.<br />
Current Street<br />
Map with road display activated<br />
1 Road name or road number, e.g. for<br />
highways<br />
Geo-Coordinates Display<br />
Map with geo-coordinates display activated<br />
1 Current, rounded height above sea level<br />
2 Coordinates display of the current vehicle<br />
location (latitude)<br />
3 Coordinates display of the current vehicle<br />
location (longitude)<br />
4 Number of visible GPS satellites.<br />
i Adequate GPS reception must be<br />
available for all displays. The altitude<br />
display 1 may differ from actual altitude<br />
because the navigation system calculates<br />
it using the GPS signals.<br />
i In the Scroll Map function the display<br />
1 and 4 are not displayed.<br />
“None” Menu Option<br />
Map with display switched off<br />
1 Currently set map orientation<br />
i In the Scroll Map function you will see<br />
other data depending on crosshairs<br />
position, for example a road name if the<br />
digital map supports this data.<br />
Topographic Map<br />
You can have the map display enhanced with<br />
topographic features (e.g. mountain ranges,<br />
coloration based on relief information).<br />
X To set: Display menu system if applicable<br />
(Y page 54).<br />
X Select Navi£Topographic Map.<br />
Depending on the previous status, the<br />
function will be switched offcor on Ç.<br />
Highway Information<br />
Introduction 59<br />
When driving on highways, you can have the<br />
next gas stations, service areas, etc. as well<br />
as the distance to them displayed in the righthand<br />
half of the screen.<br />
Z<br />
Navigation
60 Introduction<br />
Navigation<br />
X To set: Display menu system if applicable<br />
(Y page 54).<br />
X Select Navi£Highway Information.<br />
Depending on the previous status, the<br />
function will be switched offcor on Ç.<br />
Example display: Function on<br />
1 Available points of interest<br />
2 Name of rest area or exit number<br />
3 Distance from the current vehicle location<br />
Read Traffic Messages Automatically<br />
You can choose whether the traffic messages<br />
relevant for the route are read automatically<br />
or whether you have to start the reading<br />
manually using the Traffic submenu.<br />
X To set: Display menu system if applicable<br />
(Y page 54).<br />
X Select Navi£Read Traffic Messages<br />
Automatically.<br />
Depending on the previous status, the<br />
function will be switched offcor on Ç.<br />
Audio Fadeout<br />
The Audio Fadeout function, if activated,<br />
lowers the volume of the current audio source<br />
when a navigation announcement is issued.<br />
As soon as the navigation announcement has<br />
ended, the audio source will be played with<br />
the previous volume.<br />
X To activate: Display menu system if<br />
applicable (Y page 54).<br />
X Select Navi£Audio Fadeout.<br />
Depending on the previous status, the<br />
function will be switched offcor on Ç.<br />
Block Area<br />
You can define an area within the map display<br />
that is not to be used by the system in<br />
calculating a route, if possible.<br />
i The calculated route may include a<br />
blocked area if the destination is within a<br />
blocked area or if the destination can only<br />
be reached using roads that lead through a<br />
blocked area. Highways cannot be blocked.<br />
X To set, change or delete: Display menu<br />
system if applicable (Y page 54).<br />
X Select Navi £Block Area.<br />
If no areas were previously set, the map<br />
display appears ready to select an area. If<br />
areas were previously set, the blocked area<br />
list appears.<br />
X To set the map scale: Rotate ymz.<br />
X To scroll the map: Slide qmr, omp or<br />
wmx.<br />
X To define the center of the block area:<br />
Press n.<br />
The blocked area appears in red.
X To change the size of the block area:<br />
Rotate ymz.<br />
X To confirm the area and exit map<br />
display: Press n.<br />
The area is added to the block area list.<br />
A checked entry indicates an active block<br />
area.<br />
i You can block several areas for the route<br />
calculation and activate or de-activate<br />
them by setting or removing the check<br />
mark.<br />
Displaying and Changing an Existing<br />
Block Area<br />
X To select the area you want to display<br />
or change: Slide qmr.<br />
X Select Options£Display/Change.<br />
The map display appears with the block<br />
area marked red.<br />
X To set the map scale: Rotate ymz.<br />
X To scroll the map: Slide qmr, omp or<br />
wmx.<br />
X To define the center of the block area:<br />
Press n.<br />
X To set the desired size of the block area:<br />
Rotate ymz.<br />
X To confirm the area and exit map<br />
display: Press n.<br />
X Hide menu system if applicable<br />
(Y page 54).<br />
Defining a New Block Area<br />
X Select Options£Avoid New Area<br />
The map is displayed.<br />
X To set the map scale: Rotate ymz.<br />
X Rotate ymz until the desired size of the<br />
new block area is set.<br />
X Slide qmr, omp or wmx to shift the new<br />
block area to the desired region.<br />
X To confirm the area and exit map<br />
display: Press n.<br />
X Hide menu system if applicable<br />
(Y page 54).<br />
Deleting a Block Area<br />
X To select the area you want to delete:<br />
Slide qmr.<br />
X Select Options£Delete.<br />
You will be prompted to confirm that you<br />
wish to delete the block area.<br />
X Select Yes or No.<br />
If you select Yes <strong>COMAND</strong> deletes the<br />
entry.<br />
SIRIUS XM Traffic Service<br />
Introduction 61<br />
You can display the SIRIUS XM Service<br />
information.<br />
X To display the SIRIUS XM service<br />
information: Select Navi£SIRIUS<br />
Service<br />
Z<br />
Navigation
62 Destination Input<br />
Navigation<br />
: SIRIUS XM traffic information service<br />
phone number<br />
; Serial number of your traffic information<br />
service module<br />
Subscribing to SIRIUS XM Traffic<br />
Information Service<br />
X Contact Traffic Information service<br />
provider at the telephone number<br />
displayed in the screen.<br />
i It is also possible to activate the satellite<br />
service online. To do so please visit SIRIUS<br />
XM Satellite Radio’s website at<br />
www.sirius.com (<strong>USA</strong>).<br />
After the connection is made:<br />
X Follow the instructions given by the<br />
operator.<br />
The activation process may take up to 10<br />
minutes.<br />
i If a subscription is not included with<br />
system purchase, credit card information is<br />
required to activate your account.<br />
Compass Function<br />
You can display a compass representation of<br />
the current vehicle position and direction.<br />
X Select Position£Compass<br />
: Current vehicle direction<br />
; Current, rounded height above sea level<br />
= Current vehicle position: longitude<br />
? Number of visible GPS satellites<br />
A Current vehicle position: latitude<br />
B Steering angle<br />
i In order to display the height ; the<br />
reception of at least four GPS satellites is<br />
necessary.<br />
X To exit the menu: Select Back.<br />
or<br />
X Press the % button.<br />
Destination Input<br />
Introduction to Destination Input<br />
G Warning!<br />
For safety reasons, only enter a new<br />
destination when the vehicle is stationary.<br />
i It is possible to enter a destination<br />
regardless of whether route guidance is<br />
active or inactive.<br />
The following destination entry options are<br />
available:<br />
REntering a destination via the address<br />
(Y page 63)<br />
REntering a destination from the destination<br />
memory (Y page 71)<br />
REntering a destination from the last<br />
destinations (Y page 72)
REntering a POI (Y page 74)<br />
REntering a destination via the map<br />
(Y page 72)<br />
REntering a stopover destination<br />
(Y page 73)<br />
REntering a destination via “Search & Send”<br />
(Y page 217)<br />
Entering a Destination via the<br />
Address<br />
i In some countries it is not possible to<br />
enter addresses at vehicle speeds above<br />
approx. 3 mph. The function becomes<br />
available again as soon as the speed falls<br />
below approx. 2 mph.<br />
The following options are available for<br />
entering a destination via an address:<br />
REntering state/province, city/zip code and<br />
street<br />
REntering state/province, city and city<br />
center<br />
REntering state/province, city/zip code and<br />
street and house number<br />
REntering state/province, city/zip code and<br />
street and junction<br />
REntering street, state/province, city/zip<br />
code and house number<br />
Route calculation can then be started<br />
(Y page 70).<br />
Opening Enter Destination Menu<br />
X If necessary switch to navigation mode and<br />
display menu system (Y page 54).<br />
X Select Destination£Address Entry.<br />
The Enter Destination menu appears.<br />
Enter Destination menu<br />
Menu Items in Enter Destination Menu<br />
Some menu items are not available or not yet<br />
available, depending on the address items<br />
entered for the address or the data for the<br />
digital map.<br />
Example:<br />
After the state/province has been selected<br />
the menu items No., Center,<br />
Intersection, Save and Start are not<br />
available. Or the ZIP menu item is not<br />
available if the digital map does not contain<br />
any zip codes.<br />
Selecting a State/Province<br />
i You can only select those states/<br />
provinces that are stored in the digital map.<br />
X Select State/Prov in the Enter<br />
Destination menu.<br />
A menu appears where you can choose one<br />
of the following lists:<br />
RLast States/Provinces<br />
RStates (U.S.A.) or<br />
RProvinces (Canada).<br />
Destination Input 63<br />
X To select a list: Rotate ymz or slide<br />
qmr.<br />
X Press n.<br />
The selected state/province list appears.<br />
Z<br />
Navigation
64 Destination Input<br />
Navigation<br />
X To selected a state/province: Rotate<br />
ymz or slide qmr.<br />
X Press n.<br />
The Enter Destination menu appears again.<br />
The selected state/province has been<br />
entered automatically.<br />
Entering a City<br />
i You can only enter those cities that are<br />
stored in the digital map. Any zip code that<br />
has already been entered is deleted when<br />
a city is entered.<br />
X In the Enter Destination menu, select<br />
City.<br />
The city list is displayed with or without<br />
predictive speller. The display of the<br />
predictive speller depends on how many<br />
cities are available for the selected state/<br />
province.<br />
City List with Predictive Speller<br />
If this list is given in the display, the predictive<br />
speller 8 is activated automatically.<br />
1 Characters entered by the user<br />
2 Characters automatically added by the<br />
system<br />
3 List entry that best matches the<br />
characters already entered<br />
4 Switches to the list without speller<br />
5 Press and hold deletes complete entry,<br />
press briefly deletes last character<br />
6 Currently unavailable characters<br />
7 Currently available characters<br />
8 Predictive Speller<br />
9 Currently selected character<br />
a Cancels an entry<br />
b List<br />
i In the predictive speller 8 you can only<br />
select characters 7 that are currently<br />
available. The availability of the characters<br />
depends on the characters already entered<br />
and the data included in the digital map.<br />
When entering characters, the list entry 3<br />
always displays the city that best matches the<br />
characters already entered.<br />
<strong>COMAND</strong> automatically adds matching<br />
letters 2 to those characters 1 already<br />
entered by the user.<br />
Entering Characters<br />
X To select characters: Rotate ymz or slide<br />
omp.<br />
X Slide qmr to switch between the lines in<br />
the speller.<br />
X To confirm character selection:<br />
Press n.<br />
Alternatively, you can enter characters using<br />
the number keypad (direct input).<br />
Example:<br />
X Press one of the number keys, e.g. 2, once<br />
or repeatedly in succession.<br />
After you have pressed it the first time, the<br />
character display appears at the lower<br />
edge of the display. The first letter available<br />
is highlighted.
You see which characters you can enter with<br />
that key. Each time you press the key, the<br />
next character is highlighted.<br />
For example, key 2:<br />
RPress once = A<br />
RPress twice = B<br />
RPress three times = C<br />
Wait until the character display disappears.<br />
Deleting an Entry<br />
X To delete individual characters: Select<br />
õ at the bottom right of the speller and<br />
press n.<br />
or<br />
X Press the 2 button next to the<br />
<strong>COMAND</strong> controller.<br />
X To delete an entire entry: Select õ<br />
and press and hold n until the entire entry<br />
has been deleted.<br />
or<br />
X Press and hold 2 until the entire entry<br />
has been deleted.<br />
Canceling an Entry<br />
X Select á at the bottom left of the speller<br />
and press n.<br />
or<br />
X Press the k button.<br />
The Enter Destination menu appears.<br />
Accepting First List Entry<br />
X Press and hold n until the Enter<br />
Destination menu appears.<br />
Here you will find the accepted list entry.<br />
or<br />
X If <strong>COMAND</strong> can match the characters<br />
entered definitively to one city. The Enter<br />
Destination menu appears automatically<br />
with the selected list entry.<br />
Switching to the City List without<br />
Predictive Speller<br />
You can switch to the list at any point while<br />
entering characters.<br />
X Slide qm repeatedly until the list appears<br />
without the speller.<br />
or<br />
X Select d and press n.<br />
City List without Predictive Speller<br />
: G symbol for additional options<br />
X To select a city: Rotate ymz or slide<br />
qmr.<br />
X To cancel selection: Select Back and<br />
press n.<br />
or<br />
X Press the k button.<br />
X To confirm selection: Press n.<br />
A town with the G symbol exists more<br />
than once in the selected state/province.<br />
Confirming this type of town will result in a<br />
display of further information (state/<br />
province/region) on the towns. The G<br />
symbol then switches to I.<br />
If no other options exist, the Enter Destination<br />
menu appears again in the display.<br />
<strong>COMAND</strong> has accepted the selected city and<br />
entered it automatically in the Enter<br />
Destination menu.<br />
Entering a Zip Code<br />
Destination Input 65<br />
i You can only enter those zip codes that<br />
are stored in the digital map. For some<br />
countries it is not possible to enter any zip<br />
code.<br />
Z<br />
Navigation
66 Destination Input<br />
Navigation<br />
X In the Enter Destination menu select ZIP.<br />
The zip code list is displayed with or without<br />
predictive speller (Y page 64). The display<br />
of the predictive speller depends on how<br />
many zip codes are available for the<br />
selected state/province.<br />
Zip Code List with Predictive Speller<br />
If this list is given in the display, the predictive<br />
speller 9 is activated automatically.<br />
1 Numbers entered by the user<br />
2 Numbers automatically added by the<br />
system<br />
3 List entry that best matches the<br />
characters already entered<br />
4 Switches to list without speller<br />
5 Press and hold deletes complete entry,<br />
press briefly deletes last character<br />
6 Currently available digits<br />
7 Currently selected digit<br />
8 Currently unavailable characters<br />
9 Predictive Speller<br />
a Cancels entry<br />
b List<br />
i In the predictive speller 9 you can only<br />
select digits that are currently available.<br />
The availability of the characters depends<br />
on the characters already entered and the<br />
data included in the digital map.<br />
When entering a digit, the list entry 3 always<br />
displays the zip code that best matches the<br />
characters already entered. <strong>COMAND</strong><br />
automatically adds digits 2 to those digits<br />
1 already entered by the user.<br />
For the steps of<br />
REntering characters<br />
RDeleting an entry<br />
RCanceling an entry<br />
RSwitching to the list without predictive<br />
speller<br />
proceed as described under “City List with<br />
Predictive Speller” (Y page 64).<br />
If <strong>COMAND</strong> can match the characters<br />
entered definitively to one city, the list<br />
without predictive speller appears with the<br />
best match highlighted.<br />
Switching to the Zip Code List without<br />
Predictive Speller<br />
You can switch to the the list at any point<br />
while entering characters.<br />
X Slide qm repeatedly until the list appears<br />
without the speller.<br />
or<br />
X Select d and press n.<br />
ZIP Code List without Predictive Speller<br />
X To select a zip code: Rotate ymz or slide<br />
qmr.<br />
X To cancel selection: Select Back and<br />
press n.<br />
or<br />
X Press the k button.<br />
X To confirm selection: Press n.
If <strong>COMAND</strong> can assign the zip code to a<br />
unique address, the Enter Destination menu<br />
is displayed again. The address data has been<br />
entered automatically. Now you can start the<br />
route calculation (Y page 70).<br />
If <strong>COMAND</strong> is unable to assign the zip to a<br />
unique address, the Enter Destination menu<br />
is also displayed again. The zip code has been<br />
entered automatically. To further limit the<br />
choice, you can now enter the street. When<br />
entering the street, only those streets within<br />
the area of the entered zip code are available.<br />
Entering a Street<br />
i Any city center that has already been<br />
entered is deleted when a street is entered.<br />
You can only enter those streets that are<br />
stored in the digital map.<br />
X In the Enter Destination menu select<br />
Street.<br />
The street list is displayed with or without<br />
predictive speller. The display of the<br />
predictive speller depends on how many<br />
streets are available for the selected city,<br />
state or province.<br />
Street List with Predictive Speller<br />
If this list is given in the display, the predictive<br />
speller 2 is activated automatically.<br />
1 List entry that best matches the<br />
characters already entered<br />
2 Predictive speller<br />
i In the predictive speller 2 you can only<br />
select characters that are currently<br />
available. The set of characters that is<br />
available depends on the characters<br />
already entered and the data included in<br />
the digital map.<br />
For the steps of<br />
REntering characters<br />
RDeleting an entry<br />
RAccepting first list entry<br />
RCanceling an entry<br />
RSwitching to the list without predictive<br />
speller<br />
proceed as described under “City list with<br />
predictive speller” (Y page 64).<br />
Street List Without Predictive Speller<br />
X To select a street: Rotate ymz or slide<br />
qmr.<br />
X To cancel selection: Select Back and<br />
press n.<br />
or<br />
X Press the k button.<br />
X To confirm selection: Press n.<br />
The Enter Destination menu appears again.<br />
<strong>COMAND</strong> has accepted the selected street<br />
and entered it automatically in the Enter<br />
Destination menu.<br />
Now you can start the route calculation<br />
(Y page 70).<br />
Entering a City Center<br />
Destination Input 67<br />
i You can only enter those city centers that<br />
are stored in the digital map.<br />
Z<br />
Navigation
68 Destination Input<br />
Navigation<br />
X In the Enter Destination menu select<br />
Center.<br />
The city center list is displayed.<br />
X To select a city center: Rotate ymz or<br />
slide qmr.<br />
X To cancel selection: Select Back and<br />
press n.<br />
or<br />
X Press the k button.<br />
X To confirm selection: Press n.<br />
After the confirmation, the Enter<br />
Destination menu appears again. <strong>COMAND</strong><br />
has accepted the selected city center and<br />
entered it automatically in the Enter<br />
Destination menu.<br />
Now you can start the route calculation<br />
(Y page 70).<br />
Entering a House Number<br />
i It is not possible to enter house numbers<br />
until a street has been entered. You can<br />
only enter house numbers that are stored<br />
in the digital map. The digital map does not<br />
contain all house numbers for all streets.<br />
X In the Enter Destination menu select No..<br />
The house number list is displayed with or<br />
without predictive speller. The display of<br />
the predictive speller depends on how<br />
many house numbers are available for the<br />
selected street.<br />
House Number List with Predictive<br />
Speller<br />
If this list is displayed, the predictive speller<br />
3 is activated automatically.<br />
1 Here the list entry will appear that best<br />
matches the characters being entered<br />
2 List<br />
3 Predictive speller<br />
i In the predictive speller 3 you can only<br />
select digits that are currently available.<br />
The set of characters that is available<br />
depends on those already entered and the<br />
data for the digital map.<br />
For the steps of<br />
REntering digits<br />
RDeleting an entry<br />
RAccepting first list entry<br />
RCanceling an entry<br />
RSwitching to the list without predictive<br />
speller<br />
proceed as described under “City list with<br />
predictive speller” (Y page 64).
House Number List Without Predictive<br />
Speller<br />
X To select a house number: Rotate ymz<br />
or slide qmr.<br />
X To cancel selection: Select Back and<br />
press n.<br />
or<br />
X Press the k button.<br />
X To confirm selection: Press n.<br />
After the confirmation, the Enter<br />
Destination menu appears again. <strong>COMAND</strong><br />
has accepted the selected house number<br />
and entered it automatically in the Enter<br />
Destination menu.<br />
Now you can start the route calculation<br />
(Y page 70).<br />
Entering a Junction<br />
i A junction can be entered once you have<br />
entered a street (Y page 67). You can only<br />
enter those juntions that are stored in the<br />
digital map.<br />
X In the Enter Destination menu select<br />
Intersection.<br />
The junction list is displayed with or without<br />
predictive speller. The display of the<br />
predictive speller depends on how many<br />
junctions are available for the selected<br />
street.<br />
Junction List with Predictive Speller<br />
If this list is displayed, the predictive speller<br />
3 is activated automatically.<br />
1 Here the list entry will appear that best<br />
matches the characters being entered<br />
2 List<br />
3 Predictive speller<br />
i In the predictive speller 3 you can only<br />
select characters that are currently<br />
available. The set of characters that is<br />
available depends on those already entered<br />
and the data for the digital map.<br />
For the steps of<br />
REntering characters<br />
RDeleting an entry<br />
RAccepting first list entry<br />
RCanceling an entry<br />
Destination Input 69<br />
RSwitching to the list without predictive<br />
speller<br />
proceed as described under “City list with<br />
predictive speller” (Y page 64).<br />
Z<br />
Navigation
70 Destination Input<br />
Navigation<br />
Junction List Without Predictive Speller<br />
: G symbol for additional options<br />
X To select a junction: Rotate ymz or slide<br />
qmr.<br />
X To cancel selection: Select Back and<br />
press n.<br />
or<br />
X Press the k button.<br />
X To confirm selection: Press n.<br />
After the confirmation, the Enter<br />
Destination menu appears again. <strong>COMAND</strong><br />
has accepted the selected junction and<br />
entered it automatically in the Enter<br />
Destination menu.<br />
Now you can start the route calculation<br />
(Y page 70).<br />
Starting Route Calculation<br />
i Route calculation can only be started<br />
once all the necessary address data has<br />
been entered.<br />
X In the Enter Destination menu select<br />
Start.<br />
1 Destination<br />
2 Starts route calculation and then starts<br />
route guidance<br />
If route guidance is not active yet, the route<br />
calculation is started.<br />
If route guidance is already active, you will be<br />
prompted to confirm that route guidance<br />
should be ended.<br />
X Select Yes or No.<br />
If you select Yes <strong>COMAND</strong> cancels route<br />
guidance and starts the route calculation to<br />
the newly entered destination.<br />
If you select No <strong>COMAND</strong> resumes the<br />
active route guidance.<br />
During the route calculation, an arrow<br />
points towards the destination, and<br />
underneath the message Calculating<br />
Route..., for example, is displayed.<br />
Route guidance begins after the route has<br />
been calculated (Y page 80).<br />
i Route calculation takes some time. The<br />
length of time depends on, e.g. distance to<br />
the destination. <strong>COMAND</strong> calculates the<br />
route using the digital map data. The<br />
calculated route may deviate from the<br />
actual road situation, e.g. as a result of road<br />
works or incomplete map data. Please refer<br />
to the information on the digital map<br />
(Y page 58).
Entering a Destination from the<br />
Destination Memory<br />
X If necessary switch to navigation mode and<br />
display menu system (Y page 54).<br />
X Select Destination£From Memory.<br />
The destination memory list with or without<br />
predictive speller is displayed. The display<br />
of the predictive speller depends on how<br />
many entries exist in the destination<br />
memory.(Y page 72).<br />
i There is always an entry in the destination<br />
memory with the name My Address. You<br />
can assign your home address, for<br />
example, to this entry and select it for route<br />
guidance (Y page 91). This entry is at the<br />
top of the list in the destination memory.<br />
Destination Memory List with<br />
Predictive Speller<br />
If this list is given in the display, the predictive<br />
speller 8 is activated automatically.<br />
1 Character entered by the user<br />
2 Characters added by the system<br />
3 List entry that best matches the<br />
characters already entered<br />
4 Switches to list without speller<br />
5 Press and hold deletes complete entry,<br />
press briefly deletes last character<br />
6 Currently unavailable characters<br />
7 Currently available characters<br />
8 Predictive speller<br />
9 Currently selected character<br />
a Cancels an entry<br />
b Destination memory list<br />
i In the predictive speller 8 you can only<br />
select characters that are currently<br />
available. The set of characters that is<br />
available depends on those already entered<br />
and the content of the destination memory.<br />
When entering characters, the list entry 3<br />
always displays the destination memory entry<br />
that best matches the characters already<br />
entered. <strong>COMAND</strong> automatically adds<br />
matching letters 2 to those characters 1<br />
already entered by the user.<br />
For the steps of<br />
REntering characters<br />
RDeleting an entry<br />
RAccepting first list entry<br />
RCanceling an entry<br />
Destination Input 71<br />
RSwitching to the list without predictive<br />
speller<br />
proceed as described under “City list with<br />
predictive speller” (Y page 64).<br />
Switching to the Destination Memory List<br />
Without Predictive Speller<br />
You can switch to the list at any point while<br />
entering characters.<br />
X Slide qm repeatedly until the list appears<br />
without the speller.<br />
or<br />
X Select d and press n.<br />
If <strong>COMAND</strong> can match the characters<br />
entered definitively to one entry, the list<br />
appears automatically without the predictive<br />
speller.<br />
Z<br />
Navigation
72 Destination Input<br />
Navigation<br />
Destination Memory List without<br />
Predictive Speller<br />
X To select a destination: Rotate ymz or<br />
slide qmr.<br />
X To cancel selection: Select Back and<br />
press n.<br />
or<br />
X Press the k button.<br />
X To confirm selection: Press n.<br />
X To start route calculation: Select Start.<br />
Entering Destination from the Last<br />
Destinations<br />
X If necessary switch to navigation mode and<br />
display menu system (Y page 54).<br />
X Select Destination£From Last<br />
Destinations.<br />
Last destinations list<br />
X To select a destination: Rotate ymz or<br />
slide qmr.<br />
X To confirm selection: Press n.<br />
X To start route calculation: Select Start.<br />
i For more information on the “Last<br />
Destinations” memory go to (Y page 95).<br />
Entering Destination via the Map<br />
i In some countries, entering destinations<br />
via the map is not possible at vehicle<br />
speeds above approx. 3 mph. The function<br />
becomes available again as soon as the<br />
speed falls below approx. 2 mph.<br />
Using the destination entry via the map,<br />
you can also enter a destination that lies<br />
within the digital map but whose address<br />
data is not included in the digital map.<br />
Opening the Map<br />
X If at least a city has been entered, select<br />
Map in the Enter Destination menu<br />
(Y page 63).<br />
or<br />
X If necessary, display the menu system in<br />
the map display (Y page 54).<br />
X Select Destination£Using Map.<br />
In both cases, the map together with the<br />
crosshairs appears.<br />
1 Current vehicle location<br />
2 Crosshairs
3 Information on crosshairs position<br />
4 Set map scale<br />
i The display 3 depends on the settings<br />
selected in “Text information On Map”<br />
(Y page 58). It may display the current road<br />
if corresponding data is available in the<br />
digital map. Or it displays the geocoordinates<br />
position of the crosshairs if<br />
Geo-coordinates display is activated.<br />
Moving the Map and Selecting a<br />
Destination<br />
X To move the map: Slide qmr, omp or<br />
wmx.<br />
X To set the map scale: Rotate ymz.<br />
Rotating clockwise makes the map smaller,<br />
rotating counterclockwise enlarges it.<br />
X To select a destination: Press n once or<br />
repeatedly until the Enter Destination<br />
menu is displayed or, if <strong>COMAND</strong> cannot<br />
define a destination unambiguously, a list<br />
of possible destinations.<br />
X To select a destination: Rotate ymz or<br />
slide qmr.<br />
X Press n.<br />
If the destination is within the digital map,<br />
<strong>COMAND</strong> tries to find the destination on<br />
the map.<br />
If the destination can be found, the Enter<br />
Destination menu is displayed with the<br />
address of the destination. Otherwise you<br />
will see the entry Destination From<br />
Map.<br />
X To start route calculation: Select Start.<br />
Entering Stopover Destination<br />
i When route guidance is activate, you can<br />
enter a stopover destination. Stopover<br />
destinations may be predefined<br />
destinations in the following categories<br />
suggested by <strong>COMAND</strong> for you to select:<br />
RATM/Cash Machine<br />
RHospital<br />
RGas Station<br />
RParking Lot<br />
RRestaurant<br />
However, you can also enter destinations<br />
other than those that have been<br />
predefined. Select the menu item Other for<br />
this purpose.<br />
You can influence the route guidance to the<br />
main destination in a specific way using the<br />
stopover function. Once the stopover<br />
destination has been reached, <strong>COMAND</strong><br />
automatically continues the route guidance<br />
to the main destination.<br />
Entering Predefined Destinations<br />
X If necessary switch to navigation mode and<br />
display menu system (Y page 54).<br />
X Select Destination£Stopover.<br />
No Stopover Destination available yet<br />
X Select a category.<br />
A Stopover Destination exists<br />
X To change: Select Change Stopover.<br />
X Select a category.<br />
Destination Input 73<br />
X Select another stopover destination.<br />
Z<br />
Navigation
74 POI Input<br />
Navigation<br />
Selecting a Predefined Category<br />
<strong>COMAND</strong> first searches for destinations<br />
along the route within the selected category.<br />
<strong>COMAND</strong> then searches for destinations in<br />
the vicinity of the vehicle's location.<br />
If <strong>COMAND</strong> is unable to find any destination,<br />
a message to that effect will be displayed.<br />
X Select OK.<br />
X If necessary, select another category.<br />
If <strong>COMAND</strong> finds destinations, a list is<br />
displayed in the right-hand part of the<br />
screen. Here you will find the stopover<br />
destinations in the selected category.<br />
The list shows<br />
RName<br />
RInformation on the location of the stopover<br />
destination in relation to the direction of<br />
travel and the<br />
RCurrent distance to the stopover<br />
destination.<br />
X To choose a destination: Rotate ymz or<br />
slide qmr.<br />
X To select a destination: Press n.<br />
The Enter Destination menu appears and<br />
displays the address of the destination.<br />
X To cancel a selection: Select Back.<br />
X To start route calculation: Select Start.<br />
Entering Another Destination as<br />
Stopover Destination<br />
X If necessary, switch to navigation mode<br />
and display menu system (Y page 54).<br />
X Select Destination£Stopover.<br />
X To enter: Select OTHER.<br />
Choose from:<br />
RAddress Entry<br />
RFrom Memory<br />
RFrom Last Destination<br />
RFrom POIs<br />
X Select a menu item.<br />
The rest of the destination entry will vary<br />
depending on the selection made:<br />
For the Address Entry option see:<br />
Entering a destination via address<br />
(Y page 63).<br />
For the From Memory option see:<br />
Entering a destination from the destination<br />
memory (Y page 71).<br />
For the From Last Destination option see:<br />
Entering a destination from the last<br />
destinations (Y page 72).<br />
For the From POIs option see:<br />
Entering a POI (Y page 74).<br />
X To start route calculation: Select Start.<br />
Deleting Stopover Destination<br />
An existing stopover destination can be<br />
deleted.<br />
X Switch to navigation mode if necessary.<br />
X Select Destination£Stopover<br />
£Delete Stopover.<br />
<strong>COMAND</strong> deletes the stopover destination<br />
and recalculates the route to the main<br />
destination.<br />
POI Input<br />
Entering a POI in Local Area of<br />
Destination<br />
i It is only possible to enter a POI in the<br />
local area of the destination when route<br />
guidance is active.<br />
X In the map display with the menu system<br />
displayed, select Destination£ From<br />
POIs£Near Destination.<br />
X Continue by selecting the POI category<br />
(Y page 75).
Entering a POI in the Vicinity of the<br />
Location<br />
X In the map display with the menu system<br />
displayed, select Destination£From<br />
POIs£Current Position.<br />
X Continue by selecting the POI category<br />
(Y page 75).<br />
Entering a POI in the Vicinity of a<br />
Specific Location<br />
i Using this option you will get a list of<br />
alphabetically sorted POIs that belong to<br />
the city entered.<br />
Option 1<br />
X In the map display with the menu system<br />
displayed, select Destination£From<br />
POIs£Other City.<br />
X If necessary proceed as described under<br />
“Selecting a State/Province” (Y page 63).<br />
X To enter a city: Select City.<br />
The city input menu appears.<br />
X Proceed as described in the “Entering a<br />
City” section (Y page 64)<br />
X After entering the city, continue by<br />
selecting the POI category (Y page 75).<br />
Option 2<br />
X Enter an address in the Enter Destination<br />
menu (Y page 63).<br />
X Select POI.<br />
X Continue by selecting the POI category<br />
(Y page 75).<br />
Entering POIs via Name Search<br />
i This function gives you access to all POIs<br />
that are available in the digital map.<br />
X In the map display with the menu system<br />
displayed (Y page 54), select Destination<br />
£From POIs£Search By Name.<br />
This displays a list of all POIs in the digital<br />
map and the predictive speller.<br />
X Continue as described in the “POI List with<br />
Predictive Speller” section (Y page 78).<br />
Entering a POI via Phone Number<br />
Search<br />
i This function gives you access to all POIs<br />
in the digital map stored with a phone<br />
number.<br />
X In the map display with the menu system<br />
displayed (Y page 54), select Destination<br />
£From POIs £Search By Phone<br />
Number.<br />
This displays a list of all POIs in the digital<br />
map sorted by phone number and the<br />
predictive speller.<br />
X Continue as described in the “POI List with<br />
Predictive Speller” section (Y page 78).<br />
Choosing a POI Category<br />
POI Input 75<br />
The categories and POIs available depend on<br />
the area for which you wish to enter the POI.<br />
RPOI in local area of destination:<br />
Alphabetically sorted categories and POIs<br />
sorted by distance in the vicinity of the<br />
destination location are available.<br />
RPOI in the vicinity of the location:<br />
Alphabetically sorted categories and POIs<br />
sorted by distance in the vicinity of the<br />
vehicle location are available.<br />
RPOI in a particular city:<br />
If you have only entered the country and the<br />
city, alphabetically sorted categories and<br />
alphabetically sorted POIs within the city<br />
limits are available.<br />
Z<br />
Navigation
76 POI Input<br />
Navigation<br />
If you have entered more than the country<br />
and the city, alphabetically sorted<br />
categories and POIs sorted by distance in<br />
the vicinity of the address entered are<br />
available.<br />
RPOI via name search:<br />
An alphabetically sorted list of all POIs is<br />
available.<br />
RPOIs via phone number:<br />
A numerically sorted list is available.<br />
Selecting a Category<br />
Depending on the number of available<br />
categories, the main category list is displayed<br />
either with or without predictive speller<br />
(Y page 77).<br />
Main Category List with Predictive Speller<br />
If this list is given in the display, the predictive<br />
speller 7 is activated automatically.<br />
1 Symbol for main category<br />
2 Characters entered by the user<br />
3 Characters automatically added by the<br />
system<br />
4 List entry that best matches the<br />
characters already entered<br />
5 Main category list<br />
6 Currently unavailable characters<br />
7 Predictive speller<br />
8 Currently selected character<br />
9 Currently available characters<br />
i In the predictive speller 7, you can only<br />
select characters that are currently<br />
available. The set of characters that is<br />
available depends on those already entered<br />
and the data included in the digital map.<br />
When entering characters, the list entry 4<br />
always displays the category that best<br />
matches the characters already entered.<br />
<strong>COMAND</strong> automatically adds matching<br />
letters 3 to those characters 2 already<br />
entered by the user.<br />
Entering characters<br />
X To select characters: Rotate ymz or slide<br />
omp.<br />
X Slide qmr to switch between the lines.<br />
X To confirm character selection:<br />
Press n.<br />
Deleting an Entry<br />
X To delete individual characters: Select<br />
õ in the bottom line and press n.<br />
or<br />
X Press the 2 button next to the<br />
<strong>COMAND</strong> controller.<br />
X To delete an entire entry: Select õ in<br />
the bottom line and press n until the entire<br />
entry is deleted.<br />
or<br />
X Press and hold the 2 button until the<br />
entire entry has been deleted.<br />
Canceling an Entry<br />
X Select Back in the bottom line and press<br />
n.<br />
or<br />
X Press the k button.<br />
The previous menu appears.<br />
Accepting First List Entry<br />
X Press and hold n until the list appears<br />
without speller.<br />
or<br />
if <strong>COMAND</strong> can match the characters<br />
entered to one entry, the list appears<br />
automatically without the speller.
Switching to the Main Category List<br />
Without Predictive Speller<br />
You can switch to the list at any point while<br />
entering characters.<br />
X Slide qm repeatedly until the list appears<br />
without the speller.<br />
or<br />
X Select d and press n.<br />
Main Category List Without Predictive<br />
Speller<br />
Example: Main category list for POIs<br />
1 Selected main category<br />
X To select a main category: Slide qmr or<br />
rotate ymz.<br />
X To cancel selection: Press the k<br />
button.<br />
X To confirm selection: Press n.<br />
1 Calls up all entries in the RESTAURANT<br />
main category<br />
2 Calls up all entries in the BREWPUB<br />
subcategory<br />
3 Predictive speller<br />
i In the predictive speller 3 you can only<br />
select characters that are currently<br />
available. The availability of the characters<br />
depends on the characters already entered<br />
and the data included in the digital map.<br />
For the steps of<br />
REntering characters<br />
RDeleting an entry<br />
RAccepting first list entry<br />
RCanceling an entry<br />
RSwitching to the list without predictive<br />
speller<br />
proceed as described under “Main category<br />
list with predictive speller” (Y page 76).<br />
With the POI category list displayed:<br />
POI Input 77<br />
X To select a subcategory: Slide qmr or<br />
rotate ymz.<br />
X To cancel selection: Press the k<br />
button.<br />
X To confirm selection: Press n.<br />
After selecting a subcategory you will see<br />
the list of POIs. This contains the available<br />
POIs for the subcategory that are located<br />
in the search area.<br />
i If ALL is selected in the list, the POI list<br />
contains all the POIs in all subcategories of<br />
the RESTAURANT main category that are<br />
located in the search area. The list item<br />
OTHER at the end of the list contains all the<br />
POIs not assigned to any subcategory in the<br />
RESTAURANT main category that are<br />
located in the search area.<br />
The selected main category contains no<br />
subcategories:<br />
Selecting it immediately opens the POI list.<br />
The POI list then contains the available POIs<br />
for the main category that are located in the<br />
search area.<br />
Z<br />
Navigation
78 POI Input<br />
Navigation<br />
POI list<br />
As an example, the illustration below shows<br />
the POI list for the main category of<br />
RESTAURANT, subcategory BREWPUB, in the<br />
vicinity of the location.<br />
1 Direction of destination<br />
2 Air-line distance to the destination<br />
3 Point of interest<br />
4 Selected category or subcategory<br />
i Depending on the POI category selected,<br />
<strong>COMAND</strong> uses different reference points<br />
when determining the distance to the<br />
destination:<br />
RIn the vicinity of the location:<br />
The distance to the POI from the current<br />
vehicle location.<br />
RLocal area of destination:<br />
The distance to the POI from the<br />
destination entered.<br />
Selecting a POI<br />
X Select the desired POI.<br />
The full address of the selected POI is<br />
displayed.<br />
i If the selected POI has a telephone<br />
number entry, you can make a call to the<br />
POI if a mobile phone is connected to<br />
<strong>COMAND</strong>.<br />
1 POI with address<br />
2 Starts route calculation<br />
3 Saves POI as destination<br />
4 Shows details of the address<br />
5 Initiates a call, if available<br />
6 Cancels selection<br />
7 Displays the map<br />
X To cancel selection: Press the k<br />
button.<br />
or<br />
X Select Back<br />
The POI list appears.<br />
X To start route calculation: Select Start.<br />
POI list with predictive speller<br />
If you have selected Entering a POI via<br />
Name Search (Y page 75), the list of all<br />
available POIs in the digital map is displayed.<br />
1 First list entry after opening the list<br />
2 POI list<br />
3 Predictive speller<br />
4 Category symbols
i In the predictive speller 3 you can only<br />
select characters that are currently<br />
available. The set of characters that is<br />
available depends on those already entered<br />
and the data included in the digital map.<br />
For the steps of<br />
REntering characters<br />
RDeleting an entry<br />
RAccepting first list entry<br />
RCanceling an entry<br />
proceed as described under “Main category<br />
list with predictive speller” (Y page 76).<br />
Selecting a POI<br />
To accept first list entry:<br />
X Press and hold n until the list appears<br />
without speller.<br />
or<br />
If <strong>COMAND</strong> can match the characters<br />
entered definitively to one entry, the list is<br />
displayed without predictive speller with the<br />
matching entry highlighted.(Y page 78).<br />
You can switch to the list at any point while<br />
entering characters.<br />
X Slide qm repeatedly until the list appears<br />
without the speller.<br />
or<br />
X Select d and press n.<br />
X To display the full address of the POI:<br />
Select ? and press n.<br />
X To cancel selection: Press the k<br />
button.<br />
or<br />
X Select Back.<br />
The POI list appears.<br />
X To start route calculation: Select Start.<br />
ZAGAT ® Rating Service<br />
Entries with the Z symbol contain additional<br />
ZAGAT information. ZAGAT is a service that<br />
evaluates restaurants, for example, in<br />
different categories like food, decor, service<br />
etc., supplies the average price level (cost)<br />
and a general description.<br />
After you have selected the entry with the Z<br />
symbol the next display includes the Zagat<br />
ratings.<br />
1 ZAGAT Ratings<br />
2 Display details<br />
The following symbols may appear:<br />
RMoon: serves after 11pm<br />
RCrossed out S: closed on Sundays<br />
RCrossed out credit card: does not accept<br />
credit cards<br />
X To see description: Select Details.<br />
POI Input 79<br />
Z<br />
Navigation
80 Route Guidance<br />
Navigation<br />
ZAGAT example description<br />
Entering a POI via the Map<br />
i If the crosshairs are visible on the map,<br />
you can enter POIs in the vicinity of the<br />
crosshairs. If the crosshairs are not visible,<br />
you can enter POIs in the vicinity of the<br />
current vehicle location.<br />
X In the map display with the menu system<br />
displayed (Y page 54) select Guide.<br />
POIs are available:<br />
Depending on the map scale selected, POI<br />
symbols are displayed on the map. The<br />
scale starting at which symbols are<br />
displayed on the map varies from symbol<br />
to symbol.<br />
You can select which symbols <strong>COMAND</strong><br />
should display (Y page 57). The POI nearest<br />
to the center of the screen is selected<br />
automatically.<br />
No POIs available:<br />
A corresponding message is displayed.<br />
i This message is also displayed if the menu<br />
item No Symbols under Map Display has<br />
been selected (Y page 57).<br />
X To confirm message: Press n.<br />
1 Information about the highlighted POI<br />
2 Highlighted POI<br />
X To select a POI: Select Next or<br />
Previous.<br />
X To start route calculation: Select Start,<br />
see also (Y page 70).<br />
You will be asked whether the POI should<br />
be adopted as the destination.<br />
X Select Yes or No.<br />
Route calculation starts if Yes is selected;<br />
a new POI can be chosen if No is selected.<br />
Route Guidance<br />
General Notes<br />
G Warning<br />
<strong>COMAND</strong> calculates the route to the<br />
destination without taking account of the<br />
following, for example:<br />
RTraffic lights<br />
RStop and right-of-way signs<br />
RLane merging<br />
RParking or stopping prohibited areas<br />
ROther road and traffic rules and regulations<br />
RNarrow bridges<br />
<strong>COMAND</strong> may give incorrect navigation<br />
commands if the data in the digital map does<br />
not correspond with the actual road/ traffic<br />
situation. For example, if the traffic routing<br />
has been changed or the direction of a oneway<br />
road has been reversed.
For this reason, you must always observe<br />
applicable road and traffic rules and<br />
regulations during your journey. Road and<br />
traffic rules and regulations always have<br />
priority over the navigation commands<br />
generated by the system.<br />
<strong>COMAND</strong> guides you to the destination by<br />
means of driving recommendations in the<br />
form of navigation announcements or route<br />
guidance displays.<br />
i The route guidance displays only appear<br />
if the display has been switched to<br />
navigation mode.<br />
If, for some reason, you do not follow the<br />
navigation announcements or if you leave the<br />
calculated route, <strong>COMAND</strong> automatically<br />
calculates a new route to the destination.<br />
If the map data contains corresponding<br />
information during route guidance, <strong>COMAND</strong><br />
tries to avoid roads with limited passability,<br />
e.g. roads that are blocked for through-traffic<br />
and are for residents only.<br />
Driving Maneuver<br />
Driving maneuvers are given in three phases:<br />
RPreparation phase<br />
RAnnouncement phase<br />
RManeuver phase<br />
Preparation Phase<br />
<strong>COMAND</strong> prepares you for the next driving<br />
maneuver. Based on the example display<br />
shown below, the announcement is made<br />
using Prepare to turn right. The display<br />
is not split and displays the map over the<br />
entire width.<br />
1 Next road to be taken<br />
2 Point at which the driving maneuver takes<br />
place (dot)<br />
3 Current vehicle location, the tip of the<br />
triangle points in the vehicle’s direction of<br />
travel<br />
4 Road currently being driven down<br />
i Depending on the basic setting selection<br />
in “Information on map” you will see in 4<br />
RInformation on “Arrival time/distance”<br />
RRoad currently being driven down<br />
RGeo-coordinate display.<br />
If you have selected the None menu item,<br />
the display is hidden.<br />
Announcement Phase<br />
Route Guidance 81<br />
<strong>COMAND</strong> announces the imminent driving<br />
maneuver. Based on the example display<br />
shown below, the announcement is made<br />
400 ft. ahead of the driving maneuver using<br />
Please turn left in 400 ft. and<br />
follow the ’road name’.<br />
i The announced distance to the maneuver<br />
depends on the class of road and its speed<br />
limit category.<br />
The display is now split into two sectors. In<br />
the left half, you see the normal map view.<br />
The right side shows an enlarged section of<br />
the area around the junction (Crossing Zoom)<br />
or a 3D image of the road's course with the<br />
route indicating the next maneuver.<br />
Z<br />
Navigation
82 Route Guidance<br />
Navigation<br />
The example illustrated below shows the<br />
junction zoom in the right-hand half.<br />
1 Next road to be taken or sign post<br />
information<br />
2 Visual distance indicator to the driving<br />
maneuver<br />
3 Distance information to the driving<br />
maneuver<br />
4 Driving maneuver (exit to the left)<br />
i The solid part of the visual distance<br />
indicator 2 reduces from bottom to top as<br />
the announced driving maneuver gets<br />
closer.<br />
Maneuver Phase<br />
<strong>COMAND</strong> announces the imminent change of<br />
driving maneuver. The distance to the driving<br />
maneuver is constantly updated. In the<br />
example display below, an announcement is<br />
made 90 ft. ahead of the driving maneuver<br />
using Now turn right. The display is split<br />
into two halves, as in the announcement<br />
phase.<br />
1 Current vehicle location, tip of the triangle<br />
points in the vehicle’s direction of travel<br />
2 Visual distance indicator to the next<br />
driving maneuver<br />
3 Distance information to the driving<br />
maneuver<br />
Once the driving maneuver is complete,<br />
<strong>COMAND</strong> will automatically switch back to<br />
full-screen display.<br />
Example Display without Driving<br />
Maneuver<br />
1 Route<br />
2 Current vehicle location<br />
3 Road currently being driven down<br />
4 Set map orientation, for explanation and<br />
setting see (Y page 56)<br />
5 Set map scale, for explanation and setting<br />
see (Y page 54)
Traffic Lane Recommendations<br />
On multi-lane roads, <strong>COMAND</strong> may display<br />
traffic lane recommendations. For this there<br />
must be corresponding data available on the<br />
digital map.<br />
With respect to the next two driving<br />
maneuvers, <strong>COMAND</strong> displays the traffic lane<br />
recommendations 6, 7 and 8.<br />
1 Point of the next driving maneuver<br />
2 Point of the second driving maneuver.<br />
3 Next driving maneuver, exit on right here<br />
4 Visual distance indicator to the next<br />
driving maneuver<br />
5 Distance information to the next driving<br />
maneuver<br />
6 Recommended lane<br />
7 Possible lane<br />
8 Lane not recommended<br />
9 Current vehicle location, tip of the triangle<br />
points in the vehicle’s direction of travel<br />
Explanation of the Traffic Lane<br />
Recommendations<br />
RRecommended lane 6:<br />
From this lane it is possible to carry out the<br />
next two driving maneuvers without<br />
changing lanes.<br />
RPossible lane 7:<br />
From this lane it is only possible to carry<br />
out the next driving maneuver without<br />
changing lanes.<br />
RLane not recommended 8:<br />
From this lane it is not possible to carry out<br />
the next driving maneuver without<br />
changing lanes.<br />
Depiction of the Traffic Lane<br />
Recommendations<br />
The color depiction of the traffic lane<br />
recommendations differs depending on<br />
whether the display is set to day or night<br />
design.<br />
Lane Day<br />
design<br />
Recommended lane<br />
6<br />
Possible lane<br />
7<br />
Lane not<br />
recommended<br />
8<br />
Dark<br />
blue<br />
Light<br />
blue<br />
Night<br />
design<br />
Light<br />
blue<br />
Dark<br />
blue<br />
Grey Grey<br />
Destination or Destination Region<br />
Reached<br />
Once you have reached your destination, a<br />
checkered flag is displayed and route<br />
guidance is ended automatically.<br />
Off-road and Off-map<br />
Route Guidance 83<br />
G Warning<br />
The <strong>COMAND</strong> navigation system may direct<br />
you to off-road routes that your vehicle may<br />
not be capable of traversing through without<br />
damaging your tires, wheels or vehicle. It is<br />
the driver’s sole responsibility to determine<br />
the suitability of the route. Off-road routes<br />
may be of varying conditions and their<br />
appropriateness for use may be affected by<br />
various factors such as time of day, time of<br />
year and immediate weather conditions that<br />
cannot be judged or taken into consideration<br />
by the <strong>COMAND</strong> system.<br />
Z<br />
Navigation
84 Route Guidance<br />
Navigation<br />
Route Guidance to an Off-road<br />
Destination<br />
<strong>COMAND</strong> can also guide you to destinations<br />
that are within the area covered by the digital<br />
map, but are not themselves included on the<br />
map. Such destinations are off-road<br />
destinations, which you can enter, for<br />
example, by entering the destination via the<br />
map.<br />
In this case, <strong>COMAND</strong> guides you on roads<br />
known to the system for as long as possible<br />
using navigation announcements and route<br />
guidance displays.<br />
1 Off-road destination<br />
2 Off-road route segment (dashed line)<br />
3 Current vehicle location, tip of the triangle<br />
points in the vehicle’s direction of travel<br />
4 Road name, if available<br />
When the vehicle is entering the area that is<br />
not covered by the digital map, the screen is<br />
split. On the right half of the screen an arrow<br />
appears that points to the off-road<br />
destination 1 and the system announces:<br />
You have reached your destination<br />
area. Please follow the arrow on the<br />
display. When the vehicle comes close to<br />
the destination the message You have<br />
reached your destination is given.<br />
Route Guidance from an Off-road<br />
Location to a Destination<br />
If the vehicle location is within the area<br />
covered by the digital map, but the map itself<br />
does not contain any information on the<br />
location, the vehicle is in an off-road position.<br />
<strong>COMAND</strong> can guide you from such a position<br />
to a destination.<br />
At the start of route guidance you will see the<br />
message Off Mapped Road, an arrow and<br />
the distance to the destination. The arrow<br />
indicates the direction of the actual<br />
destination.<br />
The blue marking for the route on the map<br />
starts from the nearest road known to the<br />
system.<br />
As soon as the vehicle is travelling again on a<br />
road known to the system, route guidance<br />
continues in the usual manner.<br />
Route Guidance from an Off-map<br />
Location to a Destination<br />
If the vehicle location is outside the area<br />
covered by the digital map, then the vehicle<br />
is in an off-map position. <strong>COMAND</strong> can guide<br />
you from such a position to a destination.<br />
At the start of route guidance you will see the<br />
message Off Map, an arrow and the distance<br />
to the destination. The arrow indicates the<br />
direction of the actual destination.<br />
The blue marking for the route on the map<br />
starts from the nearest road known to the<br />
system.<br />
As soon as the vehicle is travelling again on a<br />
road known to the system, route guidance<br />
continues in the usual manner.<br />
Off-road During Route Guidance<br />
The actual path of the road may deviate from<br />
the data in the digital map due to road work.<br />
In cases like this, the system is temporarily<br />
not able to locate the vehicle location on the<br />
digital map; the vehicle is thus in an off-road<br />
position.<br />
The display then shows the message Off<br />
Mapped Road, an arrow and the distance to<br />
the destination. The arrow indicates the<br />
direction of the actual destination.
As soon as the vehicle location is found again,<br />
route guidance continues in the usual<br />
manner.<br />
Navigation Announcements<br />
G Warning<br />
Navigation announcements are intended to<br />
direct you while driving without diverting your<br />
attention from the road and driving.<br />
Please always use this feature instead of<br />
consulting the map display for directions.<br />
Consulting the symbols or map display for<br />
directions may cause you to divert your<br />
attention from driving and increase your risk<br />
of an accident.<br />
i During an active telephone call, the<br />
navigation announcements are<br />
suppressed.<br />
If you have missed an announcement, you can<br />
call up the current announcement at any<br />
time.<br />
X To request current announcement: In<br />
map view with the menu system<br />
(Y page 54) displayed, selectRPT.<br />
X To switch off navigation<br />
announcements: During the<br />
announcement, press the B button.<br />
You will briefly see the message: The<br />
driving instructions have been<br />
muted.<br />
X To switch navigation announcements<br />
back on manually: In map view with the<br />
menu system (Y page 54) displayed, select<br />
RPT.<br />
or<br />
X Start a new route calculation (Y page 70).<br />
or<br />
X If <strong>COMAND</strong> is switched on again or the<br />
engine is restarted.<br />
X To set the volume of the<br />
announcements: Set the volume during<br />
the automatic announcement (Y page 35).<br />
or<br />
X Call up an announcement manually by<br />
selecting RPT in map view with the menu<br />
system displayed.<br />
X Adjust the volume.<br />
Audio Fadeout<br />
The Audio Fadeout function, if activated,<br />
lowers the volume of the current audio source<br />
when a navigation announcement is issued.<br />
As soon as the navigation announcement has<br />
ended, the audio source will be played with<br />
the previous volume (Y page 60).<br />
Canceling Route Guidance<br />
X In the map display with the menu system<br />
displayed (Y page 54) select Destination<br />
£Cancel Route Guidance.<br />
Resuming Route Guidance<br />
X Select Destination£Continue Route<br />
Guidance in map view with the menu<br />
system displayed.<br />
<strong>COMAND</strong> calculates the route.<br />
Detour Function<br />
Route Guidance 85<br />
i The Detour function blocks a route<br />
segment ahead. You can set the length of<br />
the block. <strong>COMAND</strong> calculates a detour<br />
route if possible.<br />
X Select Route£Detour in map view with<br />
the menu system displayed.<br />
X To set the length of block: Select<br />
Longer or Shorter repeatedly until the<br />
required length is set.<br />
The blocked segment is highlighted in red/<br />
white on the map. Shown at the top of the<br />
display is the length of the blocked<br />
Z<br />
Navigation
86 Route Guidance<br />
Navigation<br />
segment and the route segment to which<br />
the block goes.<br />
X To cancel the function: Select Back.<br />
X To start route calculation: Select Start,<br />
see also (Y page 70).<br />
X To delete block: In map view with the<br />
menu system displayed, select Route<br />
£Detour£Delete.<br />
Alternative Route<br />
i You can have other routes calculated for<br />
the original route guidance using the<br />
Alternative Route function.<br />
X In the map display with the menu system<br />
displayed (Y page 54) select Route<br />
£Alternative Route.<br />
The display is split into two halves. On the<br />
left is the map, which displays one or more<br />
alternative routes between the start and<br />
the destination. The current route is<br />
highlighted in dark blue, other alternative<br />
routes are light blue (day mode). If the<br />
display is in night mode, the representation<br />
is inverse.<br />
The right side of the display shows<br />
information on the active alternative route,<br />
e.g. length of the segment and the<br />
estimated time of arrival.<br />
X To select next or previous alternative<br />
route: Select Next or Previous.<br />
The selected route is now highlighted in<br />
dark blue.<br />
X To return to the original route guidance:<br />
Select Back.<br />
X To start route guidance with the<br />
selected alternative route guidance:<br />
Select Start.<br />
Route Browser<br />
i The route browser provides an overview<br />
of the route. You can move along the route<br />
segment by segment using the route<br />
browser and view information and details<br />
about the route segments.<br />
X In the map display with the menu system<br />
displayed, select Route£Route<br />
Browser.<br />
The route browser is in the display.<br />
The top of the display shows information on<br />
the highlighted route segment, e.g. the<br />
road name or number and the segment<br />
length of the road to be driven.<br />
The highlighted route segment is identified<br />
on the map by its white color and red edge.<br />
X To display next or previous route<br />
segment: Select Next or Previous.<br />
X To enlarge or reduce the map display:<br />
Select ; or :.<br />
X To close route browser: Select Back.<br />
Displaying Destination Information<br />
X In the map display with the menu system<br />
(Y page 54) shown, select Route<br />
£Destination Information.<br />
The destination information is given in the<br />
display.<br />
Example display with main destination and<br />
stopover destination<br />
1 Distance/estimated time of arrival/<br />
estimated journey time to the stopover<br />
destination<br />
2 Stopover destination =
3 Main destination<br />
4 Distance/estimated time of arrival/<br />
estimated journey time to the main<br />
destination <<br />
i When calculating the estimated time of<br />
arrival, <strong>COMAND</strong> uses the time set on the<br />
<strong>COMAND</strong> as its basis. For this reason, the<br />
time on <strong>COMAND</strong> must be set correctly<br />
(Y page 41). The calculation of the<br />
estimated time of arrival does not<br />
specifically take into consideration<br />
whether it is summer time or standard time<br />
at the destination. It is not taken into<br />
consideration whether or not the<br />
destination is in a different time zone. The<br />
distance to the destination, the estimated<br />
time of arrival and the estimated remaining<br />
journey time 1, 4 are not displayed until<br />
the route calculation is complete.<br />
X To close the destination information:<br />
Slide omp.<br />
or<br />
X Press the k button.<br />
Traffic Messages<br />
i Optional satellite radio equipment and a<br />
subscription to SIRIUS XM Satellite Radio<br />
service provider are required for the<br />
satellite radio reception referred to here.<br />
You can find more information on SatRadio<br />
in chapter “Satellite Radio” (Y page 127).<br />
Traffic Messages 87<br />
<strong>COMAND</strong> can receive and incorporate traffic<br />
messages via satellite radio into the<br />
navigation system. Traffic report messages<br />
and map symbols can then be viewed in the<br />
<strong>COMAND</strong> display.<br />
Real-Time Traffic Notifications in the<br />
Map<br />
<strong>COMAND</strong> can display certain traffic events in<br />
the map. The notifications are shown in the<br />
map scale range from 0.05 mi to 20 mi.<br />
X Rotate ymz until the required map scale is<br />
set when the menu system is hidden (map<br />
in full-screen mode) (Y page 54).<br />
1 Marker symbols for the extension of the<br />
affected route section<br />
2 Symbol for event on the route (speed and<br />
flow)<br />
3 Destination<br />
4 Map scale<br />
Z<br />
Navigation
88 Traffic Messages<br />
Navigation<br />
Real-Time Traffic Notification Symbols<br />
Symbol Description Traffic Notifications in Map Display Traffic<br />
Report<br />
Lists<br />
Yellow<br />
line with<br />
arrows<br />
Green<br />
line with<br />
arrows<br />
Red line<br />
with<br />
arrows<br />
Warning<br />
(red)<br />
Incident<br />
(yellow)<br />
Traffic jam<br />
on route<br />
(Speed and<br />
flow)<br />
Traffic jam<br />
on route<br />
(Speed and<br />
flow)<br />
Blocked<br />
section on<br />
route<br />
Appears at the beginning of the<br />
affected road section if route guidance<br />
is active and route goes through the<br />
event area.<br />
Appears at the beginning of the<br />
affected road section if route guidance<br />
is active and route goes through the<br />
incident area.<br />
Appears at the beginning of traffic<br />
congestion (average speed<br />
25 – 45 mph) if route guidance is active<br />
and route goes through congested<br />
area.<br />
Yellow car symbols could appear in<br />
combination with this symbol.<br />
Appears at the beginning of traffic<br />
congestion (average speed 5 – 20 mph)<br />
if route guidance is active and route<br />
goes through congested area.<br />
Red car symbols could appear in<br />
combination with this symbol.<br />
Appears at the beginning of a blocked<br />
area if route guidance is active and<br />
route goes through blocked area.<br />
XX XX symbols could appear in<br />
combination with this symbol.<br />
Incidents Possible obstacles for traffic flow (e.g.<br />
road work)<br />
Appears on the affected side<br />
(direction) of the road<br />
Free flow No obstacles for traffic flow<br />
Appears only on the free-flow side<br />
(direction) of the road<br />
Warning<br />
message<br />
Event on the road<br />
Appears on the affected side<br />
(direction) of the road<br />
Appears<br />
with<br />
warning<br />
entry type<br />
Appears<br />
with<br />
incident<br />
entry type<br />
Appears<br />
with traffic<br />
jam on<br />
route (stop<br />
and go)<br />
entry type<br />
Appears<br />
with Traffic<br />
jam on<br />
route entry<br />
type<br />
Appears<br />
with<br />
Blocked<br />
section<br />
entry type<br />
(Not<br />
possible)<br />
(Not<br />
possible)<br />
(Not<br />
possible)<br />
Traffic<br />
Report<br />
Message<br />
Appears<br />
with<br />
warning<br />
entry type<br />
Appears<br />
with<br />
incident<br />
entry type<br />
Appears<br />
with<br />
traffic jam<br />
on route<br />
(stop and<br />
go) entry<br />
type<br />
Appears<br />
with<br />
Traffic<br />
jam on<br />
route<br />
entry type<br />
Appears<br />
with<br />
Blocked<br />
section<br />
entry type<br />
(Not<br />
possible)<br />
(Not<br />
possible)<br />
(Not<br />
possible)
Displaying Real-Time Traffic Reports<br />
X If necessary, switch to navigation mode<br />
and show the menu system (Y page 54).<br />
X Select Traffic.<br />
If you see a dialogue box displaying the<br />
message No Traffic Messages,<br />
this either means:<br />
RMessages were not yet received<br />
Rthere are no messages available<br />
X To cancel the search: Select Cancel.<br />
X To close the message: Select OK<br />
If there are traffic reports, you will see a list.<br />
The content of the list varies depending on<br />
whether route guidance is active or not.<br />
List When Route Guidance is not Active<br />
The list shows all the roads, areas or regions<br />
for which messages are available.<br />
i A traffic message may also concern an<br />
area or region rather than a road, e.g.<br />
impaired visibility due to fog.<br />
X To read a traffic report: Select a road, an<br />
area or region.<br />
List When Route Guidance is Active<br />
The list first shows roads, areas or regions on<br />
the route for which there are traffic reports.<br />
Traffic Messages 89<br />
X To display all messages: Select Display<br />
All Messages.<br />
You will see a list of all roads, areas or<br />
regions for which reports are available,<br />
including those that do not affect the route.<br />
X To display a traffic message: Select a<br />
road, area or region from the list.<br />
X To close the list: Slide omp once or<br />
repeatedly.<br />
Z<br />
Navigation
90 Traffic Messages<br />
Navigation<br />
Example of a Traffic Message<br />
1 Depending on your selection: Messages<br />
on the Route or All Messages<br />
2 Message 8 of 16 for the road affected<br />
3 Text of message<br />
4 Road, area or region for which there is a<br />
message<br />
5 State/province designation<br />
6 Icon for message type, e.g. speed and<br />
flow message<br />
X To scroll within the message or to the<br />
next message: Slide qmr.<br />
X To return to the message list: Slide omp<br />
Traffic Symbol Information<br />
X To display traffic symbol information:<br />
Select Traffic Symbol Information.<br />
Example display<br />
1 Road concerned<br />
2 Icon for message type, e.g. Speed and<br />
flow message<br />
X To display next or previous symbol<br />
information: Select Next or Previous.<br />
The symbol is highlighted.<br />
X To change the map display: Select Map.<br />
You can zoom and pan the map display and<br />
select other traffic messages.<br />
X To select the symbol: Press n.<br />
X To display details: Select Details.<br />
Details of a traffic symbol information<br />
X To leave the details display: Slide omp.<br />
X To leave the symbol information<br />
display: Select Back.<br />
Read-aloud Function<br />
The read-aloud function is only available<br />
when route guidance is active. It can read out<br />
traffic reports on the route. You can set the<br />
language (Y page 44) and the read-aloud<br />
speed (Y page 42).<br />
If the automatic reading function of traffic<br />
messages is activated, incoming traffic<br />
messages are read aloud automatically<br />
(Y page 60).<br />
X If necessary, switch to navigation mode<br />
and show the menu system (Y page 54).<br />
X Select Traffic£Read out all<br />
messages on route.<br />
<strong>COMAND</strong> reads out the messages in<br />
sequence.
i The Messages on the Route menu item<br />
has no function if there are no messages<br />
relating to the route.<br />
X To cancel read-out of current message:<br />
Select Cancel Read-aloud Function.<br />
or<br />
X Press the F button.<br />
<strong>COMAND</strong> reads the current message aloud<br />
and then ends the read-aloud function.<br />
Dynamic Rerouting<br />
<strong>COMAND</strong> can recalculate the route by taking<br />
into account traffic messages received along<br />
the route.<br />
You can set the options for dynamic rerouting<br />
in the NAVI menu (Y page 55).<br />
If you have set the option to Dynamic Route<br />
Only After Request and <strong>COMAND</strong><br />
recalculates a route, a message appears<br />
asking you whether you want to allow the<br />
rerouting or not.<br />
X To accept the rerouting: Select Accept.<br />
X To continue on the original route: Select<br />
Reject.<br />
Destination Memory<br />
Home Address<br />
i The destination memory always contains<br />
an entry named My address which is at the<br />
Destination Memory 91<br />
top of the list. You may wish to assign your<br />
home address to this entry, for example. If<br />
the My address (¤ icon) entry already<br />
contains data that can be used for<br />
navigation, you can select it for route<br />
guidance.<br />
Assigning Home Address for First Time<br />
or Changing Home Address<br />
X If necessary, switch to navigation mode<br />
and display the menu system (Y page 54).<br />
X Select Destination£From Memory.<br />
If there are more than 8 entries in the<br />
destination memory, the destination<br />
memory list with predictive speller is<br />
displayed, otherwise the destination<br />
memory list is displayed without predictive<br />
speller (Y page 71).<br />
If the list appears without the input<br />
characters, the entry My address is<br />
highlighted automatically.<br />
Switching to the Destination Memory List<br />
Without Predictive Speller<br />
X Slide qm repeatedly until the predictive<br />
speller disappears.<br />
The entry My Address is highlighted<br />
automatically unless you have entered a<br />
character using the predictive speller.<br />
Z<br />
Navigation
92 Destination Memory<br />
Navigation<br />
If characters have been entered using the<br />
predictive speller:<br />
X Rotate ymz or qm slide in the list until the<br />
My Address entry is highlighted.<br />
or<br />
X To assign an address for the first time:<br />
Press and hold n until the speller<br />
disappears.<br />
The entry My Address is highlighted<br />
automatically in the list.<br />
X To exit the menu: Select Back.<br />
Subsequent operation depends on whether<br />
you enter the address or wish to use an<br />
address book entry that can be used for<br />
navigation as My address.<br />
Entering or Changing Your Address<br />
X If necessary, change to the destination list<br />
without speller.<br />
X To enter the address for the first time:<br />
Press n and select New Entry.<br />
X To change the existing address: Select<br />
Options £ New Entry.<br />
In both cases, the address input menu<br />
appears.<br />
X Enter the address. Proceed in the same way<br />
as you would enter a destination as<br />
described in the “Entering a destination by<br />
address” section (Y page 63).<br />
X Select Save after you have entered the<br />
address.<br />
<strong>COMAND</strong> then stores the entry. You will<br />
see a message and then the address menu<br />
with the selected address. Start is<br />
highlighted automatically.<br />
Using an Address Book Entry as Home<br />
Address<br />
X If necessary, change to the destination list<br />
without speller (Y page 91).<br />
X To assign an address for the first time:<br />
Press n and select Assign to Address<br />
Book Entry.<br />
X Select Home or Work if applicable.<br />
X To change home address: Select<br />
Options£ Assign to Address Book<br />
Entry.<br />
X Select Home or Work if applicable.<br />
X In both cases you will see a list with or<br />
without predictive speller depending on the<br />
number of address book entries.<br />
X Select the desired address book entry.<br />
Proceed as described in the “Searching for<br />
an address book entry” section<br />
(Y page 113).<br />
i Information on how to link address book<br />
entries with navigation data can be found<br />
in “Assigning a destination to an address<br />
book entry” (Y page 94).<br />
X To confirm your selection: Press n.<br />
An address is assigned for the first time:<br />
<strong>COMAND</strong> then stores the entry. You will<br />
see a message and then the address menu<br />
with the selected address. Start is<br />
highlighted automatically.<br />
The address is changed:<br />
A prompt appears, asking if you really wish<br />
to overwrite My Address.<br />
X Select Yes or No.<br />
If you select Yes, <strong>COMAND</strong> overwrites the<br />
destination. You will see a message and<br />
then the address menu with the selected<br />
address. Start is highlighted<br />
automatically.<br />
If you select No, the list will reappear.<br />
Selecting Home Address for Route<br />
Guidance<br />
i If the My Address (¤ icon) entry already<br />
contains data that can be used for<br />
navigation, you can select it for route
guidance. If not, then first assign a<br />
destination to this entry (Y page 91).<br />
X If necessary, switch to navigation mode<br />
and display the menu system (Y page 54).<br />
X Select Destination£From Memory.<br />
You will see a list with or without predictive<br />
speller depending on how many entries<br />
exist in the address book.<br />
X Destination memory with predictive<br />
speller: Slide qm repeatedly until the list<br />
appears without the predictive speller.<br />
or<br />
X Select d at the bottom right in the<br />
predictive speller.<br />
X Destination memory list without input<br />
characters: Press n<br />
1 Start route calculation to your address<br />
You will see the address entry menu with the<br />
address data for your own address. Start is<br />
highlighted automatically.<br />
Starting Route Calculation<br />
X Press n.<br />
Once the route has been calculated, route<br />
guidance begins (Y page 70).<br />
Storing a Destination in the<br />
Destination Memory<br />
i This function also stores the destination<br />
in the address book. <strong>COMAND</strong> creates an<br />
address book entry that contains the<br />
complete, navigable address data. You can<br />
then select this entry in the address book<br />
and start route guidance to the address<br />
from there.<br />
After the Address Has Been Entered<br />
X Select Save after you have entered the<br />
address in the address input menu.<br />
You can now select storage options.<br />
During Route Guidance<br />
X If necessary, show the menu system<br />
(Y page 54).<br />
X Select Destination£Save<br />
Destination.<br />
You can now select storage options.<br />
Accepting from the Last Destinations<br />
X Show the menu system, if necessary.<br />
X Select Destination£From Last<br />
Destinations.<br />
The list of previous destinations appears.<br />
X To select a destination: Rotate ymz or<br />
slide qmr.<br />
X To confirm the destination: Press n.<br />
The address of the destination is displayed.<br />
X Select Save.<br />
You can now select memory options.<br />
Selecting Memory Options<br />
Destination Memory 93<br />
Saving Destination Without Name<br />
X Select Save Without Name.<br />
<strong>COMAND</strong> stores the destination in the<br />
destination memory and uses the address<br />
as the destination name.<br />
or<br />
X Select Save as My Address.<br />
<strong>COMAND</strong> stores the destination in the<br />
destination memory as My Address.<br />
Z<br />
Navigation
94 Destination Memory<br />
Navigation<br />
If the selected address book entry already<br />
contains address data that can be used for<br />
navigation (¤ icon), a prompt will appear<br />
asking whether you wish to overwrite the<br />
existing data.<br />
X Select Yes or No.<br />
After selecting Yes, the Saving<br />
Procedure Successful message<br />
appears; selecting No cancels the<br />
procedure.<br />
Saving Destination With Name<br />
X Select Save With Name.<br />
X Select the category desired, e.g. Home.<br />
The input menu containing data fields and<br />
input characters appears.<br />
1 Selected data field with cursor<br />
2 Predictive speller<br />
X To enter data: Continue with the step<br />
“Changing Data Field” in the “Creating a<br />
New Address Book Entry” section<br />
(Y page 112).<br />
<strong>COMAND</strong> stores the destination under the<br />
name entered.<br />
Assigning Destination to an Address Book<br />
Entry<br />
i This function assigns the complete,<br />
navigable address data to an existing<br />
address book entry. You can then select<br />
this entry in the address book and start<br />
route guidance to the address from there.<br />
X Select Assign to Address Book Entry.<br />
X Select the desired category, e.g. Home.<br />
You will see a list with or without predictive<br />
speller depending on how many entries<br />
exist in the address book.<br />
X Select the desired address book entry.<br />
Proceed as described in the “Searching for<br />
an Address Book Entry” section<br />
(Y page 113).<br />
<strong>COMAND</strong> stores the data if the address<br />
book entry selected does not yet contain<br />
navigable address data.<br />
If the selected address book entry already<br />
contains address data that support<br />
navigation, you will be prompted to confirm<br />
that you wish to overwrite the existing data.<br />
X Select Yes or No.<br />
If you select Yes, <strong>COMAND</strong> saves the data.<br />
Deleting Destination Home Address<br />
Entry from the Destination Memory<br />
X If necessary, switch to navigation mode<br />
and display the menu system (Y page 54).<br />
X Select Destination£From Memory.<br />
You will see a list with or without predictive<br />
speller depending on how many entries<br />
exist in the address book.<br />
X Select the destination you are looking for.<br />
Proceed as described in the “Entering a<br />
Destination from the Destination Memory”<br />
section (Y page 71).<br />
X Select Options£Delete.<br />
A prompt appears asking whether you wish<br />
to delete the destination.<br />
X Select Yes or No.<br />
If you select Yes, <strong>COMAND</strong> deletes the<br />
destination. You see a corresponding<br />
message.<br />
i If the address data, which supports<br />
navigation, for the destination to be deleted<br />
has also been assigned to an address book<br />
entry, <strong>COMAND</strong> deletes this data there,<br />
too. If the corresponding address book
entry does not contain any other data, e.g.<br />
phone numbers, <strong>COMAND</strong> deletes the<br />
entire address book entry.<br />
Last Destinations<br />
i <strong>COMAND</strong> automatically saves the last<br />
destinations used for the last route<br />
calculation. If the memory is full, <strong>COMAND</strong><br />
deletes the oldest destination. You can also<br />
save a destination from the last<br />
destinations to the destination memory.<br />
Here it is saved permanently.<br />
Saving a Destination Permanently in<br />
the Destination Memory<br />
X Proceed as described in the “Accepting<br />
from the Last Destinations” section<br />
(Y page 72).<br />
Saving the Vehicle Position in the List<br />
of Last Destinations<br />
X If necessary, switch to navigation mode<br />
and display the menu system (Y page 54).<br />
X Select Position£Save Vehicle<br />
Position.<br />
<strong>COMAND</strong> saves the current vehicle<br />
position as a destination in the list of last<br />
destinations.<br />
Saving the Crosshair Position in the<br />
List of Last Destinations<br />
i A crosshair appears on the map if you<br />
have moved the map manually. You can<br />
store the crosshair position as a<br />
destination in the list of last destinations.<br />
X If necessary, display the menu system:<br />
Press n.<br />
X Select Position£Save Crosshair<br />
Position.<br />
<strong>COMAND</strong> saves the crosshair position as a<br />
destination in the list of last destinations.<br />
Deleting One of the Last Destinations<br />
X If necessary, switch to navigation mode<br />
and display the menu system (Y page 54).<br />
X Select Destination£From Last<br />
Destinations.<br />
The list of last destinations appears.<br />
X Select the desired destination.<br />
X Select Options£Delete.<br />
A query appears.<br />
Last Destinations 95<br />
X Select Yes or No.<br />
If you select Yes, <strong>COMAND</strong> deletes the<br />
destination. You see a corresponding<br />
message.<br />
Z<br />
Navigation
Safety Precautions .............................. 98<br />
General Information ............................ 98<br />
Activating the Mobile Phone .............. 99<br />
Submenu Overview .......................... 102<br />
<strong>COMAND</strong> Phone Book ....................... 103<br />
Call Lists ............................................ 106<br />
Making Calls ...................................... 109<br />
Address Book .................................... 111<br />
97<br />
Telephone
98 General Information<br />
Telephone<br />
Safety Precautions<br />
G Warning<br />
Some jurisdictions prohibit the driver from<br />
using a cellular telephone while driving.<br />
Whether or not prohibited by law, for safety<br />
reasons, the driver should not use the cellular<br />
telephone while the vehicle is in motion. Stop<br />
the vehicle in a safe location before placing or<br />
answering a call.<br />
If you nonetheless choose to use the mobile<br />
phone while driving, please use the handsfree<br />
feature and be sure to pay attention to the<br />
traffic situation at all times. Use the mobile<br />
phone only when road, weather and traffic<br />
conditions permit. Otherwise, you may not be<br />
able to observe traffic conditions and could<br />
endanger yourself and others.<br />
Bear in mind that at a speed of just 30 mph<br />
(approximately 50 km/h), your vehicle is<br />
covering a distance of 44 feet (approximately<br />
14 m) every second.<br />
G Warning<br />
You and others may damage your health due<br />
to excessive electromagnetic radiation. By<br />
using an external antenna, the possible health<br />
risks of electromagnetic fields, which are<br />
under discussion among the scientific<br />
community, should be largely prevented.<br />
General Information<br />
Vehicle Equipment<br />
i This Operator’s Manual describes all<br />
features, standard or optional, potentially<br />
available for your vehicle at the time of<br />
purchase. Please be aware that your<br />
vehicle might not be equipped with all<br />
features described in this manual.<br />
Making Calls via Bluetooth ® Interface<br />
The telephone function via the Bluetooth ®<br />
interface is available in conjunction with a<br />
Bluetooth-enabled mobile phone.<br />
With a suitable mobile phone, you can use<br />
<strong>COMAND</strong>’s hands-free feature to download<br />
contacts from your mobile phone (Phone<br />
Book Access profile) and electronic business<br />
cards (vCards) via the Bluetooth ® interface.<br />
Suitable Mobile Phones<br />
Further information on suitable mobile<br />
phones and connecting Bluetooth-enabled<br />
mobile phones to <strong>COMAND</strong> is available via<br />
the Internet at www.mbusa-mobile.com. Or<br />
call the <strong>Mercedes</strong>-<strong>Benz</strong> Customer Assistance<br />
Center at 1-800-FOR-MERCedes<br />
(1-800-367-6372) (US), or Customer<br />
Relations at 1-800-387-0100 (Canada).<br />
Interruptions to the Connection<br />
While Driving<br />
Interruptions to the connection may occur if<br />
Rthere is inadequate network coverage in<br />
certain regions<br />
Ryou are switching from one transmitting/<br />
receiving station (cell) to another and there<br />
is no voice channel available in this cell<br />
Ryou are using a SIM card that is not<br />
compatible with the available network<br />
Rwhen using a mobile phone with<br />
“Twincard”, the mobile phone is<br />
simultaneously logged into the network<br />
with the second SIM card.<br />
Operating Options<br />
If the mobile phone is connected with<br />
<strong>COMAND</strong> via the Bluetooth ® interface, you<br />
can operate the phone using the following<br />
devices:
RKeypad on the <strong>COMAND</strong> control unit<br />
RMultifunction steering wheel<br />
RVoice Control<br />
The explanations in this section assume that<br />
the mobile phone is connected to <strong>COMAND</strong><br />
via the Bluetooth ® interface. Exceptions are<br />
explicitly described.<br />
Functional Restrictions<br />
Under the following circumstances, the<br />
phone may not yet be useable:<br />
RIf it is not yet logged into a network. The<br />
phone will try independently to log into a<br />
network. If no network is available, you will<br />
not be able to make “911” emergency calls.<br />
If you try to make an outgoing call, the<br />
message No Service appears briefly.<br />
Activating the Mobile Phone<br />
Mobile Phone With Bluetooth ®<br />
Interface<br />
Prerequisites for the Mobile Phone<br />
For making calls using <strong>COMAND</strong> via the<br />
Bluetooth ® interface, you will need a<br />
Bluetooth-enabled mobile phone.<br />
i Not all mobile phones available on the<br />
market are comparably suitable. Further<br />
information on suitable mobile phones and<br />
connecting Bluetooth-enabled mobile<br />
phones to <strong>COMAND</strong> is available via the<br />
Internet at www.mbusa-mobile.com. Or<br />
call the <strong>Mercedes</strong>-<strong>Benz</strong> Customer<br />
Assistance Center at 1-800-FOR-<br />
MERCedes (1-800-367-6372) (US), or<br />
Customer Relations at 1-800-387-0100<br />
(Canada).<br />
Activating Bluetooth ®<br />
Before you begin activation of your mobile<br />
phone connection via the Bluetooth ®<br />
Activating the Mobile Phone 99<br />
interface please ensure it is compatible with<br />
Bluetooth ® handsfree profile 1.0 or higher<br />
(Y mobile phone operating guide):<br />
X Switch on the mobile phone and enter the<br />
PIN, if applicable (Y mobile phone<br />
operating guide).<br />
X Activate Bluetooth ® connection on the<br />
mobile phone (Y mobile phone operating<br />
guide).<br />
i On certain mobile phones, not only do you<br />
have to activate the Bluetooth ® function<br />
but the device must also be made “visible”<br />
for other devices.<br />
Each Bluetooth ® device has a Bluetooth ®<br />
device name. It is recommended to give the<br />
device a personal name, by which you can<br />
clearly recognize your mobile phone.<br />
i If the Bluetooth ® function on the<br />
<strong>COMAND</strong> is switched off, the message<br />
Bluetooth not activated in system<br />
settings. appears.<br />
X Activate Bluetooth ® connection on<br />
<strong>COMAND</strong> (Y page 45).<br />
Registering a Mobile Phone<br />
(Authorizing)<br />
When you use your mobile phone in<br />
conjunction with <strong>COMAND</strong> for the first time,<br />
you must register (authorize) it.<br />
It is possible to register several mobile<br />
phones. The connection is always established<br />
to the mobile phone that was activated last.<br />
When you authorize a new mobile phone, it is<br />
activated automatically. You can switch<br />
between the authorized mobile phones<br />
(Y page 101).<br />
Searching for a Mobile Phone<br />
X In the phone submenu select Phone<br />
£Bluetooth Phones£Update.<br />
<strong>COMAND</strong> searches for suitable<br />
Bluetooth ® phones within range and enters<br />
them in the phone list.<br />
Z<br />
Telephone
100 Activating the Mobile Phone<br />
Telephone<br />
i The duration of the search procedure<br />
depends on the number and type of<br />
Bluetooth ® phones. The search may take a<br />
few minutes.<br />
When first entering the device list and before<br />
running an update, the black dot R indicates<br />
the active phone (found and authorized).<br />
After running an update:<br />
1 The check marks Ò indicate if a phone<br />
has been authorized (black) or not (grey)<br />
2 Device not within range but previously<br />
authorized (¿ appears in grey)<br />
3 Device within range but not yet authorized<br />
Phone icons indicate if a phone is found<br />
(black) or not (grey).<br />
i If the new device you are looking for will<br />
not appear in the list and the device list<br />
already contains 15 devices, <strong>COMAND</strong> will<br />
ask you to de-authorize (Y page 101) one<br />
or more authorized devices. You will then<br />
have to start the search again.<br />
X To start search again: Select Update<br />
Entering Passcode<br />
X Select the as yet unauthorized device (no<br />
check mark yet) from the list.<br />
X Select Options£Authorize<br />
or<br />
X Press n.<br />
X The input menu for the passcode appears.<br />
i The passcode is any number chosen by<br />
you between one and sixteen digits in<br />
length. We recommend to use at least four<br />
digits because this improves the quality of<br />
the encryption during connection. The<br />
passcode can differ during each<br />
authorization for each device. You must<br />
enter the same number on <strong>COMAND</strong> and<br />
on the device to be authorized. Please also<br />
refer to the instructions in the mobile<br />
phone operating guide.<br />
X To enter from <strong>COMAND</strong>: Select the digits<br />
in the menu bar one after the other.<br />
X To correct entry: Select õ.<br />
X To cancel entry: Select Back.<br />
X To confirm entry: Select ¬.<br />
If a Bluetooth ® connection is established<br />
successfully, you will be prompted to enter a<br />
code on the mobile phone (Y mobile phone<br />
operating guide).<br />
X Enter the same passcode on the mobile<br />
phone as you did on <strong>COMAND</strong>.<br />
The device is authorized. You can now<br />
make calls via <strong>COMAND</strong>’s hands-free<br />
device using the authorized mobile phone.<br />
External Authorization<br />
If <strong>COMAND</strong> cannot find your mobile phone,<br />
this may be due to special security settings<br />
on your mobile phone. In this case, you can<br />
check whether, conversely, your mobile<br />
phone can find <strong>COMAND</strong>.
<strong>COMAND</strong>’s Bluetooth ® device name is “MB<br />
Bluetooth”.<br />
X In the phone submenu select Phone<br />
£Bluetooth Phones£Update<br />
£Options£External<br />
Authorization.<br />
X Start the Bluetooth ® search on the mobile<br />
phone (Y mobile phone operator's guide).<br />
X Select <strong>COMAND</strong> (“MB Bluetooth”) on the<br />
mobile phone.<br />
X When prompted to do so, enter the<br />
passcode on the mobile phone and on<br />
<strong>COMAND</strong>.<br />
i After you have entered the passkey on<br />
<strong>COMAND</strong> and on the mobile phone, you<br />
have to trigger a connection to <strong>COMAND</strong><br />
manually on some mobile phones.<br />
Displaying Details on a Mobile Phone<br />
X In the phone submenu select Phone<br />
£Bluetooth Phones.<br />
X Select the mobile phone from the list.<br />
X Select Options£Details.<br />
The details screen for the device is<br />
displayed.<br />
X To close the details screen: Rotate<br />
ymz or slide omp.<br />
or<br />
X Press the n or the k button.<br />
Deregistering (De-Authorizing) a<br />
Mobile Phone<br />
X In the phone submenu select Phone<br />
£Bluetooth Phones.<br />
X Select the authorized mobile phone.<br />
X Select Options£De-Authorize.<br />
You will be asked whether the device<br />
should really be de-authorized.<br />
X Select Yes or No.<br />
If you select Yes, the authorization of the<br />
device is withdrawn.<br />
Activating the Mobile Phone 101<br />
i If the authorization of a device which had<br />
been authorized in the past has been<br />
withdrawn, the device list no longer<br />
includes this device.<br />
i If you de-authorize the mobile phone on<br />
<strong>COMAND</strong>, you should also de-authorize<br />
“MB Bluetooth” on the mobile phone.<br />
Otherwise a future authorization may fail.<br />
Activating Another Mobile Phone<br />
If you have authorized several mobile phones,<br />
you can switch between the individual mobile<br />
phones.<br />
When you authorize a new mobile phone, it is<br />
activated automatically. Only one mobile<br />
phone is active at a time.<br />
X Select Phone£Bluetooth Phones.<br />
X Select the mobile phone from the list.<br />
X Press n.<br />
The selected mobile phone is activated if<br />
the selected mobile is within reception<br />
range and its Bluetooth ® function is<br />
switched on. Any previously activated<br />
phone is deactivated.<br />
Setting Transmit and Receive Volume<br />
i These settings should normally not be<br />
changed as the factory settings are<br />
matched to most mobile phones.<br />
i Changes may result in significant<br />
impairments to the transmission quality.<br />
These settings may not be changed during<br />
an active phone call.<br />
X In the phone submenu select Phone<br />
£Bluetooth Phones.<br />
X Select the authorized mobile phone.<br />
X Select Options£Reception Volume or<br />
Transmission Volume.<br />
i Reception and Transmission volume only<br />
appear for authorized devices.<br />
Z<br />
Telephone
102 Submenu Overview<br />
Telephone<br />
X To set the volume: Slide qmr.<br />
The red bar moves up or down.<br />
X To confirm selection: Press n.<br />
“911” Emergency Call<br />
G Warning<br />
The 911 emergency call system is a public<br />
service. Using it without due cause is a<br />
criminal offense.<br />
Submenu Overview<br />
The following conditions must be met for a<br />
“911” emergency call:<br />
RPhone switched on<br />
RMobile phone network available<br />
RValid SIM card in the phone (not required<br />
on all mobile phone networks)<br />
RMobile phone connected with <strong>COMAND</strong> via<br />
Bluetooth ®<br />
If you are unable to make an emergency call,<br />
you will have to initiate rescue measures<br />
yourself.<br />
The “911” emergency number is a public<br />
service. Any abuse is punishable by law.<br />
X Enter the digits on the <strong>COMAND</strong> control<br />
unit (Y page 109).<br />
X Press the 6 button.<br />
The phone establishes the connection.<br />
X Wait until the emergency call center<br />
answers, then describe the emergency.<br />
Phone Call lists or Mic On/Off<br />
Bluetooth Phones Displays or deletes call lists<br />
Download Contacts Switches hands-free microphone on/off<br />
(during a call)<br />
Delete Contacts<br />
Phone Main Menu<br />
Switching to Phone Mode<br />
X Press the function button % on the<br />
<strong>COMAND</strong> control unit.<br />
i If you press the 6 button with the<br />
phone main menu already open, the call list<br />
“Calls Dialed” appears (Y page 106).<br />
or<br />
From another Main Function<br />
X Select Phone£Phone£Phone.<br />
i If phone mode was active last, you only<br />
need to select “Phone”.<br />
Within the Phone Function<br />
X Select Phone£Phone.<br />
or<br />
X In the phone mode press the k button<br />
repeatedly until the phone main menu<br />
appears.
Phone Menu<br />
1 Phone service status<br />
2 Signal strength (if provided by phone)<br />
3 Call status<br />
4 Displays <strong>COMAND</strong> phone book<br />
5 Displays call list selection<br />
6 Input speller with characters for entering<br />
phone numbers<br />
7 Device name of the connected mobile<br />
phone<br />
<strong>COMAND</strong> Phone Book<br />
The <strong>COMAND</strong> phone book is an extract of<br />
entries from the address book. All the<br />
<strong>COMAND</strong> address book entries having at<br />
least one phone number can be found in the<br />
<strong>COMAND</strong> phone book.<br />
i For many operating functions you can<br />
also use the buttons on the multifunction<br />
steering wheel, e.g. the =, ;,<br />
9, :, a, 6 or ~ buttons,<br />
for selecting a menu, scrolling through lists<br />
or initiating or ending a call (Y page 25).<br />
Opening <strong>COMAND</strong> Phone Book<br />
X Open the phone main menu (Y page 102).<br />
X Select Name.<br />
The <strong>COMAND</strong> phone book is displayed.<br />
1 Address book entry<br />
2 Calls up options<br />
3 Predictive speller<br />
4 Closes phone book<br />
5 ¦ symbol for voice name<br />
Address book entries may have the symbol<br />
5. An additional voice name is saved with<br />
these entries.<br />
If an address book entry has the symbol +<br />
then this has more than one phone number.<br />
You can select these subentries<br />
(Y page 103).<br />
X To close phone book: In the predictive<br />
speller select the symbol á.<br />
or<br />
X Press k.<br />
Selecting an Entry<br />
Selecting via List<br />
X Rotate ymz or slide qmr until the desired<br />
entry is highlighted.<br />
X To confirm selection: Press n.<br />
Selecting Subentries<br />
<strong>COMAND</strong> Phone Book 103<br />
X Select a phone book entry with the + icon<br />
and press n.<br />
The subentries appear. The + icon<br />
changes to /.<br />
Z<br />
Telephone
104 <strong>COMAND</strong> Phone Book<br />
Telephone<br />
1 Expanded phone book entry<br />
2 Phone book entry with subentries<br />
X Rotate ymz or slide qmr and select the<br />
desired sub-entry.<br />
Displaying Details on an Entry<br />
<strong>COMAND</strong> can also fully display an<br />
abbreviated entry.<br />
X Select entry.<br />
X Select Options£Details.<br />
The details screen appears.<br />
X To close details screen: Slide omp<br />
repeatedly until the entry is highlighted<br />
again.<br />
or<br />
X Press the k button.<br />
Initiating Call to an Entry<br />
X Select entry (Y page 103).<br />
X Press n<br />
or<br />
X Press the 6 button on the <strong>COMAND</strong><br />
control unit.<br />
Creating a New Entry<br />
i When a new entry is added through the<br />
<strong>COMAND</strong> phone book, it is saved to the<br />
address book.<br />
X Select Options£New Entry in the<br />
<strong>COMAND</strong> phone book.<br />
X Select a number category, e.g. Home.<br />
X Select a telephone category, e.g. Mobile<br />
Phone.<br />
X Select Save.<br />
The input menu with data fields appears.<br />
1 Cursor<br />
2 Data field<br />
3 Input speller<br />
4 Selected phone category<br />
Switching Data Field<br />
X Slide qm repeatedly until the input speller<br />
disappears.<br />
X Then slide qmr and press n.<br />
or<br />
X Select [ or ] in the input speller.<br />
The input menu displays the data field<br />
selected.<br />
Entering Data into a Field<br />
X Select all the characters one after the other<br />
in the input speller 3.<br />
i The input speller provides the characters<br />
corresponding to the selected data field.
X To switch input speller to upper or<br />
lower case characters: Select & or<br />
(.<br />
X To switch input speller character set:<br />
Select k.<br />
Every time this is selected it switches the<br />
character set.<br />
X To change the input speller language:<br />
Select !.<br />
X Rotate ymz or slide qmr until the desired<br />
language is highlighted and then press n.<br />
X To move the cursor in the data field:<br />
Select Y or Z.<br />
Deleting an Entry<br />
X To delete individual characters: Select<br />
õ and briefly press n.<br />
or<br />
X Press the 2 button next to the<br />
<strong>COMAND</strong> controller.<br />
The character to the left of the cursor is<br />
deleted.<br />
X To delete an entire entry: Select õ<br />
and press n until the entire entry has been<br />
deleted.<br />
or<br />
X Press the 2 button next to the<br />
<strong>COMAND</strong> controller and hold it until the<br />
entire entry is deleted.<br />
Cancelling an Entry<br />
X Select á.<br />
If one of the data fields contains data, a<br />
prompt will appear asking whether you wish<br />
to store the entry.<br />
X Select Yes or No.<br />
The entry will either be stored or not,<br />
depending on your selection.<br />
Saving an Entry<br />
X Select d.<br />
A corresponding message is displayed.<br />
Deleting an Entry<br />
<strong>COMAND</strong> Phone Book 105<br />
The deletion rules vary according to the entry<br />
selected:<br />
RPhone book entry selected:<br />
The entry is deleted in the <strong>COMAND</strong> phone<br />
book and the address book if the address<br />
book entry only contains phone numbers.<br />
REntire address book entry selected:<br />
The entry is deleted in the <strong>COMAND</strong> phone<br />
book and additionally also in the address<br />
book if the address book entry only<br />
contains phone numbers.<br />
RSubentry of an address book entry<br />
selected:<br />
The subentry is deleted in the <strong>COMAND</strong><br />
phone book and in the address book.<br />
X To delete: Select entry (Y page 103).<br />
X Select Options£Delete.<br />
You will be prompted to confirm that you<br />
really want to delete the entry.<br />
X Select Yes or No.<br />
Yes option: The entry is deleted according<br />
to the above rules.<br />
Adding a Phone Number to a Phone<br />
Book Entry<br />
X Select the address book entry.<br />
X Select Options£Add Phone No..<br />
X Select a number category, e.g. Home.<br />
X Select a phone category, e.g. Mobile<br />
Phone.<br />
X Select Save.<br />
If five numbers are saved for the entry in the<br />
selected number category, a prompt will<br />
appear asking whether you wish to overwrite<br />
one of the existing numbers.<br />
Z<br />
Telephone
106 Call Lists<br />
Telephone<br />
X Select Yes or No.<br />
If you select Yes, a selection list will appear<br />
containing the five existing numbers.<br />
X Select the number to be overwritten.<br />
The input menu with the data field for<br />
entering the new telephone number<br />
appears.<br />
X To enter digits: Select the required digits<br />
in sequence from the input speller or use<br />
the number keypad.<br />
X To move the cursor in the data field:<br />
Select Y or Z.<br />
X To delete individual digits: Select õ<br />
and briefly press the n button.<br />
or<br />
X Press the 2 button next to the<br />
<strong>COMAND</strong> controller.<br />
The digit to the left of the cursor is deleted.<br />
X To delete an entire entry: Select õ<br />
and press n until the entire entry has been<br />
deleted.<br />
or<br />
X Press and hold down the 2 button next<br />
to the <strong>COMAND</strong> controller until the entire<br />
entry is deleted.<br />
X To save entry: Select d.<br />
Call Lists<br />
i <strong>COMAND</strong> supports Bluetooth ® PBAP<br />
(Phone Book Access Profile).<br />
How <strong>COMAND</strong> handles call lists depends<br />
on the type of mobile phone connected:<br />
RBluetooth ® phone with PBAP support:<br />
<strong>COMAND</strong> downloads the call lists from<br />
the mobile phone when the phone is<br />
connected to <strong>COMAND</strong><br />
RBluetooth ® phone without PBAP support:<br />
<strong>COMAND</strong> creates the call lists from calls<br />
received (including missed calls) and<br />
made during phone mode when a mobile<br />
phone is connected to <strong>COMAND</strong>.<br />
The particular menu item can only be<br />
selected if calls have already been received<br />
or made from <strong>COMAND</strong>.<br />
The display of missed calls in the <strong>COMAND</strong><br />
display is not possible with all mobile<br />
phones.<br />
i The menu item Call lists is not active<br />
if no mobile phone is connected to<br />
<strong>COMAND</strong>.<br />
i If the mobile phone does not support<br />
PBAP, <strong>COMAND</strong> automatically deletes the<br />
call lists if a mobile phone other than the<br />
last used is connected.<br />
i The instrument cluster control system<br />
displays a list of the last dialed calls.<br />
i For many operating functions you can<br />
also use the buttons on the multifunction<br />
steering wheel, e.g. the =, ;,<br />
9, :, a, 6 or ~ buttons,<br />
for selecting a menu, scrolling through lists<br />
or initiating or ending a call (Y page 25).<br />
Calling up the List<br />
X In the phone main menu select Call<br />
Lists.<br />
A menu appears.<br />
X Select Calls Received or Calls<br />
Dialed.<br />
The appropriate list appears.<br />
or<br />
X When the basic telephone menu is<br />
displayed, press the 6 button on<br />
<strong>COMAND</strong>.<br />
A list of the last dialed calls appears.
List of incoming calls<br />
1 List of calls received<br />
2 Date/time of the highlighted entry<br />
3 List entry options menu<br />
X To select a list entry: Rotate ymz or slide<br />
qmr.<br />
X To close list: Select Back.<br />
or<br />
X Press the k button next to the<br />
<strong>COMAND</strong> controller.<br />
Displaying Details on a List Entry<br />
<strong>COMAND</strong> can also fully display an<br />
abbreviated list entry.<br />
X Select the list entry.<br />
X Select Options£Details.<br />
The details screen appears.<br />
X Back to the list: Slide omp until the list is<br />
highlighted.<br />
or<br />
X Press the k button next to the<br />
<strong>COMAND</strong> controller.<br />
Saving Unsaved List Entry<br />
Unsaved list entries are displayed with the<br />
phone number.<br />
Saved list entries are displayed with the<br />
name. They are saved in the <strong>COMAND</strong> phone<br />
book.<br />
Saving in the Address Book as a New<br />
Entry<br />
X Select the list entry.<br />
X Select Options£Save£New Entry.<br />
i Save has no function if the selected list<br />
entry is already stored in the address book.<br />
X Select a number category, e.g. Home.<br />
X Select a telephone category, e.g. Mobile<br />
Phone.<br />
Number category Display (phone<br />
and address book)<br />
Not classified °<br />
Home @<br />
Work \<br />
Phone category Display (phone<br />
and address book)<br />
Not classified °<br />
Mobile ¢<br />
Car ^<br />
Pager ï<br />
X Select Save.<br />
An input menu with data fields will appear.<br />
The data field for the phone number is<br />
completed automatically.<br />
1 Cursor<br />
2 Data field<br />
Call Lists 107<br />
Z<br />
Telephone
108 Call Lists<br />
Telephone<br />
3 Input speller<br />
4 Data field for phone number is completed<br />
automatically<br />
5 Phone category<br />
6 Number category<br />
X To switch data fields: Slide qm until the<br />
input speller disappears.<br />
X Then slide qmr and press n.<br />
or<br />
X Select [ or ] and press n.<br />
The selected data field is highlighted.<br />
X To enter data into a field: Select all the<br />
characters one after the other in the input<br />
speller 3.<br />
i The input speller offers the characters<br />
that correspond to the selected data field.<br />
X To switch input speller to upper or<br />
lower case characters: Select ( or<br />
&.<br />
X To switch input speller character set:<br />
Select k.<br />
Every time this is selected it switches the<br />
character set (digits, lower case letters).<br />
X To change the input speller language:<br />
Select !.<br />
X Rotate ymz or slide qmr until the desired<br />
language is highlighted and then press n.<br />
X To move the cursor in the data field:<br />
Select Y or Z.<br />
X To delete individual characters: Select<br />
õ and briefly press n.<br />
or<br />
X Press the 2 button next to the<br />
<strong>COMAND</strong> controller.<br />
The character to the left of the cursor is<br />
deleted.<br />
X To delete an entire entry: Select õ<br />
and press n until the entire entry has been<br />
deleted.<br />
or<br />
X Press the 2 button next to the<br />
<strong>COMAND</strong> controller and hold it until the<br />
entry is deleted.<br />
X To save entry: Select d.<br />
A corresponding message is displayed.<br />
X To cancel entry: Select Back.<br />
If one of the data fields contains data, a<br />
prompt will appear asking whether you wish<br />
to save the entry.<br />
X Select Yes or No.<br />
The entry will either be stored or not,<br />
depending on your selection.<br />
Adding a Phone Number from the Call<br />
List to an Existing Address Book Entry<br />
X Select the list entry.<br />
X Select Options£Save£Add Phone<br />
No.<br />
i Save has no function if the selected list<br />
entry is already stored.<br />
X Select a number category, e.g. Home.<br />
X Select a phone category, e.g. Mobile<br />
Phone.<br />
X Select Save.<br />
The search menu for address book entries<br />
appears.<br />
X Search for the desired entry.<br />
i Please see the “Searching for an Address<br />
Book Entry” section (Y page 113) for a<br />
detailed description on searching for an<br />
address book entry.<br />
X Press n after completing the search.<br />
If there are fewer than five numbers saved<br />
for the required entry in the selected<br />
number category, <strong>COMAND</strong> saves the<br />
data.<br />
If five numbers are saved for the entry you<br />
are searching for, a prompt will appear
asking whether you wish to overwrite one<br />
of the existing numbers.<br />
X Select Yes or No.<br />
If you select Yes, a selection list with the<br />
five existing numbers is displayed.<br />
X Select the number to be overwritten.<br />
<strong>COMAND</strong> overwrites the selected number<br />
with the new data.<br />
Deleting Call Lists<br />
This function is only available if you use a<br />
Bluetooth ® phone without PBAB support, that<br />
is, if the call lists have been created by<br />
<strong>COMAND</strong>.<br />
X Select Call Lists£Delete Call<br />
Lists from the basic telephone menu.<br />
A query appears asking if all call lists are to<br />
be deleted.<br />
X Select Yes or No.<br />
The call lists will either be deleted or not,<br />
depending on your selection.<br />
i If you use a mobile phone with PBAP<br />
support, you have to delete the call lists on<br />
the mobile phone. Next time you reconnect<br />
the mobile phone, <strong>COMAND</strong> downloads the<br />
empty call lists.<br />
Making Calls<br />
Incoming Call<br />
Rejecting or Accepting Calls<br />
Incoming calls are indicated by a dialogue<br />
window.<br />
X To reject: Select Reject.<br />
or<br />
X Press the ~ button on the <strong>COMAND</strong><br />
control panel or the ~ button on the<br />
multifunction steering wheel.<br />
X To accept: Select Accept.<br />
or<br />
X Press the 6 button on the <strong>COMAND</strong><br />
control panel or the 6 button on the<br />
multifunction steering wheel.<br />
After accepting the call, you will conduct the<br />
conversation over the hands-free system. The<br />
call volume can be adjusted (Y page 35).<br />
Please see the “Functions during a Single<br />
Call” section for other functions<br />
(Y page 110).<br />
i You can also accept a call as described<br />
above when <strong>COMAND</strong> is showing a display<br />
of a different main application. The display<br />
switches to the telephone display after you<br />
accept the call. After the call is finished,<br />
you see the display of the previous main<br />
application again.<br />
Initiating an Outgoing Call<br />
Making Calls 109<br />
Entering a Phone Number via the<br />
<strong>COMAND</strong> Control Unit<br />
X Open the phone main menu (Y page 102).<br />
X Enter all the digits on the numeric keypad<br />
one after the other.<br />
Z<br />
Telephone
110 Making Calls<br />
Telephone<br />
X To delete individual digits: Press briefly<br />
the CLR button on the <strong>COMAND</strong> control<br />
unit.<br />
X To delete an entire phone number: Press<br />
and hold the CLR button until the number<br />
is deleted.<br />
X To place a call: Press the 6 button on<br />
the <strong>COMAND</strong> control panel or press the<br />
6 button on the multifunction steering<br />
wheel.<br />
Entering a Phone Number from the<br />
<strong>COMAND</strong> Controller<br />
X Open the phone main menu (Y page 102).<br />
X To enter digits: Select the required digits<br />
in sequence.<br />
X To delete individual digits: Select õ<br />
and briefly press the n button.<br />
or<br />
X Press the 2 button next to the<br />
<strong>COMAND</strong> controller.<br />
X To delete an entire phone number:<br />
Select õ and press n until the phone<br />
number has been deleted.<br />
or<br />
X Press and hold down the 2 button next<br />
to the <strong>COMAND</strong> controller until the entire<br />
entry is deleted.<br />
X To connect a call: Select ° at the bottom<br />
right-hand side of the input speller.<br />
or<br />
X Press the 6 button on the <strong>COMAND</strong><br />
control panel or the 6 button on the<br />
multifunction steering wheel.<br />
Redialing<br />
X Open the phone main menu (Y page 102).<br />
X Select ° at the bottom right-hand side of<br />
the input speller.<br />
or<br />
X Press the 6 button on the <strong>COMAND</strong><br />
control unit when the phone main menu is<br />
displayed.<br />
The dialed calls list appears. The call dialed<br />
last will be at the top of the list.<br />
X To select a call: Rotate ymz or slide qmr<br />
X To initiate call: Press n.<br />
Initiating a Call to a Call List Entry or<br />
<strong>COMAND</strong> Phone Book Entry<br />
X Call up a call list and select an entry<br />
(Y page 106).<br />
or<br />
X Open the <strong>COMAND</strong> phone book and select<br />
an entry (Y page 103).<br />
X To initiate call: Press n.<br />
Functions During a Single Call<br />
Phone mode with a single call<br />
1 Other party<br />
2 Symbol for active phone connection<br />
3 Switches the hands-free microphone off<br />
or on<br />
4 Sends DTMF tones (not possible with all<br />
mobile phones)
5 Device name of the connected mobile<br />
phone<br />
6 Terminates call<br />
Switching Hands-Free Microphone On<br />
or Off<br />
X Open the phone main menu (Y page 102).<br />
X To switch off: Select Mic Off.<br />
If the microphone is switched off, the ><br />
icon appears in the main area.<br />
X To switch on: Select Mic On.<br />
The > symbol disappears.<br />
DTMF Tone Transmission<br />
i This function is not possible with all<br />
mobile phones.<br />
Answering machines or other devices can be<br />
controlled by DTMF tones, e.g. for remote<br />
query functions.<br />
X To send individual characters: During a<br />
call select the required characters using<br />
the <strong>COMAND</strong> controller.<br />
or<br />
X Press the corresponding button on the<br />
<strong>COMAND</strong> control unit keypad.<br />
Every character selected will be<br />
transmitted immediately.<br />
X Transmitting phone book entry as a<br />
sequence of characters: Select Name.<br />
X Select the desired phone book entry.<br />
The entry is transmitted immediately as a<br />
sequence of characters.<br />
X To switch back to the call display: Select<br />
Back.<br />
Ending an Active Call<br />
X If necessary, open the phone main menu<br />
(Y page 102).<br />
X To terminate call: Select 4.<br />
or<br />
X Press the ~ button on the <strong>COMAND</strong><br />
control panel or the ~ button on the<br />
multifunction steering wheel.<br />
Call Waiting<br />
i The call waiting function must be<br />
supported and activated by the phone<br />
provider.<br />
If you are conducting a single call and you<br />
receive another, the second call number is<br />
entered into the received calls list and a signal<br />
tone will sound.<br />
Address Book<br />
G Warning!<br />
Please devote your attention first and<br />
foremost to the traffic situation you are in.<br />
Before your journey, please familiarize<br />
yourself with the address book functions.<br />
Only use the <strong>COMAND</strong> when road and traffic<br />
conditions permit you to do so. Otherwise you<br />
could be involved in an accident in which you<br />
or others could be injured.<br />
General Information<br />
Address Book 111<br />
The entries of the address book can be used<br />
for making phone calls and for setting<br />
navigation destinations.<br />
i You should delete your personal data<br />
before selling your vehicle, using the Reset<br />
function (Y page 45).<br />
Z<br />
Telephone
112 Address Book<br />
Telephone<br />
Opening the Address Book<br />
From Another Main Function<br />
X Select Phone£Phone£Address Book.<br />
i If the address book was last open in the<br />
telephone function, you only need to select<br />
Phone.<br />
Within the Phone Function<br />
X Select Phone£Address Book.<br />
The address book main display appears.<br />
Address book with address book entry ¥ and<br />
navigable data ¤<br />
i An address book entry may contain up to<br />
five phone numbers and both a private and<br />
business address.<br />
Submenu Overview for Address Book<br />
Address Book Search<br />
Downloading<br />
contacts (from<br />
mobile phone, from<br />
memory card or<br />
business cards)<br />
Deleting contacts<br />
New Delete<br />
Creating a new<br />
address book entry<br />
Searching for an<br />
address book entry<br />
Deleting an address<br />
book entry<br />
Selecting Entry in the Address Book<br />
X Rotate ymz or slide omp when the<br />
display/selection window is active.<br />
Creating a New Address Book Entry<br />
i You can create address data directly in<br />
the address book. If you save phone<br />
numbers in the <strong>COMAND</strong> phone book,<br />
these are saved in the address book. When<br />
you save a navigation destination,<br />
<strong>COMAND</strong> creates an address book entry<br />
containing the complete address data that<br />
support navigation.<br />
X Open the address book (Y page 112) and<br />
select New.<br />
The input menu containing data fields and<br />
the input speller appears.<br />
Input menu with data fields<br />
1 Selected data field with cursor<br />
2 Input speller<br />
Switching Data Field<br />
X Slide qm repeatedly until the input speller<br />
is hidden.<br />
X Then slide qmr and press n.<br />
or<br />
X Select [ or ] in the input speller.<br />
The input menu indicates the selected data<br />
field.
Entering Data into a Field<br />
X Select all the characters one after the other<br />
in the input speller 2.<br />
i The input speller provides the characters<br />
corresponding to the selected data field.<br />
X To switch input speller to upper or<br />
lower case characters: Select ( or<br />
&.<br />
X To switch input speller character set:<br />
Select k.<br />
Every time this is selected it switches the<br />
character set.<br />
X To change the input speller language:<br />
Select !.<br />
X Rotate ymz or slide qmr until the desired<br />
language is highlighted and then press n.<br />
X To move the cursor in the data field:<br />
Select Y or Z.<br />
Deleting<br />
X To delete an individual character: Select<br />
õ and briefly press n.<br />
or<br />
X Press the 2 button next to the<br />
<strong>COMAND</strong> controller.<br />
The character to the left of the cursor is<br />
deleted.<br />
X To delete an entire entry: Select õ<br />
and press n until the entire entry has been<br />
deleted.<br />
or<br />
X Press the 2 button next to the<br />
<strong>COMAND</strong> controller and hold it until the<br />
entire entry is deleted.<br />
Canceling an Entry<br />
X Select á.<br />
If one of the data fields contains new data,<br />
a prompt will appear asking whether you<br />
wish to store the entry.<br />
X Select Yes or No.<br />
The entry will either be stored or not,<br />
depending on your selection.<br />
Saving an Entry<br />
Address Book 113<br />
X Select d.<br />
The address book displays the entry.<br />
Searching for an Address Book Entry<br />
X Open the address book (Y page 112) and<br />
select Search.<br />
If there are more than eight entries, the<br />
search menu with the predictive speller<br />
appears.<br />
Search menu with predictive speller<br />
1 ¥ Symbol for address book entry<br />
2 ¤ Symbol for complete address data<br />
from the navigation<br />
3 ¦ Symbol for voice name<br />
4 å Symbol for phone book entry from the<br />
mobile phone<br />
5 Predictive speller<br />
Entries without symbols or with the symbols<br />
1 and 3 are just address book entries. A<br />
voice name has additionally been saved for<br />
entries with the symbol 3. Entries with the<br />
Z<br />
Telephone
114 Address Book<br />
Telephone<br />
symbol 2 contain complete address data<br />
from the navigation system, which support<br />
navigation and are covered by the digital map<br />
data. You can quickly start route guidance to<br />
this kind of entry (Y page 116).<br />
Switching from the Predictive Speller<br />
to the List<br />
X Slide mq or press n and hold it until the<br />
predictive speller is hidden.<br />
or<br />
X Select d.<br />
Switching from the List to the<br />
Predictive Speller<br />
X Select Back from the list.<br />
or<br />
X Press the k button next to the<br />
<strong>COMAND</strong> controller.<br />
Searching<br />
Searching via Predictive Speller<br />
X Switch from the list to the predictive speller<br />
if necessary.<br />
X To change the language of the<br />
predictive speller: Select !.<br />
X To switch the character set of the<br />
predictive speller : Select k.<br />
Depending on the previous setting, you will<br />
change to letters with special characters or<br />
to numbers with special characters.<br />
X To enter characters: Select the<br />
characters for the required entry one after<br />
another.<br />
X To delete individual characters: Select<br />
õ and briefly press n.<br />
or<br />
X Press the 2 button next to the<br />
<strong>COMAND</strong> controller.<br />
Each time you enter or delete a character,<br />
the closest match will be displayed at the<br />
top of the list.<br />
X To delete an entire entry: Select õ<br />
and press n until the entire entry has been<br />
deleted.<br />
or<br />
X Press the 2 button next to the<br />
<strong>COMAND</strong> controller and hold it until the<br />
entire entry is deleted.<br />
X To end search: Switch from the predictive<br />
speller to the list.<br />
The top list entry is highlighted<br />
automatically.<br />
X Back to the address book: If necessary,<br />
switch from the list to the predictive speller<br />
and select á in the predictive speller.<br />
or<br />
X Press the k button next to the<br />
<strong>COMAND</strong> controller.<br />
Searching via the List<br />
X If necessary, switch from the predictive<br />
speller to the list (Y page 113).<br />
X Turn ymz or slide qmr until the desired<br />
entry is highlighted in the list.<br />
Deleting Entry<br />
X Search for the required entry<br />
(Y page 113).<br />
X Select Options£Delete.<br />
or<br />
X Select Delete from the address book<br />
(Y page 112).<br />
A deletion prompt appears.<br />
X Select Yes or No.<br />
The entry will be deleted or retained on the<br />
basis of the selection.<br />
i Deleting an entry in the phone book on<br />
the mobile phone does not delete the entry<br />
in the address book.
Displaying Details About an Address<br />
Book Entry<br />
X Switch from the predictive speller to the list<br />
(Y page 113).<br />
or<br />
X Select an address book entry from the<br />
address book (Y page 112).<br />
X Press n.<br />
The detailed display appears.<br />
Details screen for private data<br />
1 Back to the previous menu<br />
2 Selected data field<br />
3 @ symbol for private data<br />
4 Calls up options<br />
5 \ symbol for business data<br />
Selecting Another Data Field<br />
X Rotate ymz or slide qmr.<br />
Displaying Abbreviated Content in Full<br />
X Select Options£Details.<br />
The complete display appears.<br />
X To close complete display: Slide omp or<br />
press n.<br />
or<br />
X Press the k button next to the<br />
<strong>COMAND</strong> controller.<br />
Closing Details Screen<br />
X Select Back.<br />
or<br />
X Press the k button next to the<br />
<strong>COMAND</strong> controller.<br />
Changing Entry<br />
Changing an Address Book Entry<br />
X Search for the address book entry<br />
(Y page 113).<br />
X Select Options£Change Entry.<br />
or<br />
Address Book 115<br />
X Display details about an address book<br />
entry.<br />
X Select Options£Change Entry.<br />
The input menu with data fields appears.<br />
X Continue from the step "Switching Data<br />
Field" in the "Creating a New Address Book<br />
Entry" section (Y page 112).<br />
Changing Category of a Phone Number<br />
Data Field<br />
X Display the details for an entry and<br />
highlight the phone number data field<br />
(Y page 115).<br />
X Select Options£Change Category.<br />
X Select a number category, e.g. Home.<br />
X Select a telephone category, e.g. Mobile<br />
Phone.<br />
Z<br />
Telephone
116 Address Book<br />
Telephone<br />
X Select Preferred, where applicable.<br />
Depending on the previous state, switch<br />
the option on Ç or off c. The phone<br />
number is displayed as the first number in<br />
the phone book and can be dialed<br />
immediately.<br />
X Select Save.<br />
The new category is saved.<br />
Initiating a Phone Call to an Entry<br />
i The mobile phone must be connected via<br />
the Bluetooth ® interface.<br />
X Display the details for an entry and<br />
highlight the phone number data field<br />
(Y page 115).<br />
X Press n.<br />
The phone initiates the call. The display<br />
switches to the phone mode display.<br />
or<br />
X Select Options£Call.<br />
The phone initiates the call.<br />
Starting Navigation to an Entry<br />
i You can use this function as soon as you<br />
have saved a destination in the destination<br />
memory (Y page 91). <strong>COMAND</strong> then also<br />
saves the destination in the address book<br />
with the complete address data that<br />
supports navigation.<br />
X Search for an address book entry with the<br />
¤ symbol (Y page 113).<br />
X Display the details about an entry and<br />
highlight the address data field<br />
(Y page 115).<br />
X Press n.<br />
i Pressing n only works if the address data<br />
field contains complete navigable data.<br />
This is indicated by the ¤ symbol.<br />
or<br />
X Select Options£Navigate.<br />
i Navigate can only be selected when the<br />
address data field contains complete<br />
navigable data. This is indicated by the ¤<br />
symbol.<br />
1 Address that supports navigation<br />
2 Opens Enter Destination menu<br />
The Enter Destination menu appears, the<br />
selector bar is located at the menu item<br />
Start (Y page 70).<br />
Voice Names<br />
i Voice names can be entered via Voice<br />
Control System.<br />
Adding Voice Name<br />
i You can add one voice name per address<br />
book entry.<br />
X Search for an address book entry without<br />
or with a voice name (¦ icon)<br />
(Y page 113).<br />
X Select Options£Voice Name£Add.<br />
The process continues by voice<br />
commands. The Voice Control System<br />
guides you through the dialogs<br />
(Y page 197).
Deleting Voice Name<br />
X Search for the address book entry with a<br />
voice entry (Y page 113).<br />
X Select Options£Voice Name<br />
£Delete.<br />
A deletion prompt appears.<br />
X Select Yes or No.<br />
<strong>COMAND</strong> deletes the voice entry<br />
depending on your selection.<br />
Listening to Voice Name<br />
X Search for the address book entry with a<br />
voice entry (Y page 113).<br />
X Select Options£Voice Name<br />
£Listen.<br />
You will hear the voice name.<br />
Downloading Contacts<br />
You can download contacts from the mobile<br />
phone or from the memory card into the<br />
address book or receive vCards from an<br />
external Bluetooth ® device.<br />
The à icon in the address book indicates<br />
phone book entries which have been<br />
downloaded from the mobile phone.<br />
i Depending on the mobile phone used, this<br />
function imports only the phone book<br />
entries in the mobile phone or the phone<br />
book entries in the SIM card.<br />
Entries imported from the PCMCIA memory<br />
card have the ÆÂ icons. Received<br />
vCards are identified by the Æ icon and<br />
BT.<br />
Depending on the source of the contact data,<br />
different requirements apply:<br />
Mobile phone with Bluetooth ® profile PBAP<br />
RBluetooth ® must be activated in <strong>COMAND</strong><br />
and on the mobile phone (see the mobile<br />
phone operating instructions).<br />
RThe mobile phone is connected to<br />
<strong>COMAND</strong> (Y page 99).<br />
Address Book 117<br />
PCMCIA memory card<br />
RThe PCMCIA memory card is inserted<br />
(Y page 136) and contains importable<br />
contact data.<br />
External Bluetooth ® device<br />
RBluetooth ® is activated in <strong>COMAND</strong> and on<br />
the Bluetooth ® device (N operating<br />
instructions of the device).<br />
RThe Bluetooth ® device can send vCards via<br />
Bluetooth ® (N operating instructions of the<br />
device).<br />
RThe Bluetooth ® device in the vehicle is<br />
switched on.<br />
It is not necessary to authorize the device in<br />
<strong>COMAND</strong> to receive vCards.<br />
Downloading from a Mobile Phone with<br />
PBAP Support<br />
X Select Address Book or, if the phone main<br />
menu is displayed, Phone on <strong>COMAND</strong>.<br />
X Select Download Contacts<br />
A selection menu appears.<br />
X Select From Mobile Phone.<br />
X Select Add or Overwrite.<br />
Selecting Add imports the phone book<br />
entries from the mobile phone into the<br />
address book.<br />
Selecting Overwrite downloads the<br />
telephone entries from the mobile phone<br />
and overwrites all phone book entries in the<br />
address book with the d icon. The<br />
Z<br />
Telephone
118 Address Book<br />
Telephone<br />
previous phone book entries are then no<br />
longer available.<br />
After successfully downloading the contact<br />
data you see a corresponding message.<br />
The address book or the phone main menu<br />
is displayed.<br />
i You can select the Overwrite menu item<br />
if the address book already contains such<br />
entries. If the address book is full, you see<br />
a corresponding message.<br />
Downloading from the Memory Card<br />
X Select Address Book or, if the phone main<br />
menu is displayed, Phone.<br />
X Select Download Contacts.<br />
A selection menu appears.<br />
X Select From Memory Card.<br />
X Select Add or Overwrite.<br />
Selecting Add imports the entries from the<br />
PCMCIA memory card into the address<br />
book.<br />
Selecting Overwrite imports the entries<br />
from the PCMCIA memory card and<br />
overwrites all entries in the address book<br />
with the ¥Â icons. The previous entries<br />
are then no longer available.<br />
After successfully importing the contact<br />
data you see a corresponding message.<br />
The address book or the phone main menu<br />
is displayed.<br />
i You can select the Overwrite menu item<br />
if the address book already contains such<br />
entries. If the address book is full, you see<br />
a corresponding message.<br />
Downloading vCards via Bluetooth ®<br />
You can receive vCards from devices (such as<br />
a PC) which support the transmission of<br />
vCards via Bluetooth ® .<br />
It is not necessary to authorize the device in<br />
<strong>COMAND</strong> to do so.<br />
Received vCards are imported into the<br />
address book.<br />
i If you switch to another main function,<br />
e.g. navigation, while receiving vCards, the<br />
reception of vCards will be terminated.<br />
X Select Address Book or, if the phone main<br />
menu is displayed, Phone.<br />
X Select Download Contacts.<br />
A selection menu appears.<br />
X Select Receive Business Cards.<br />
This interrupts the Bluetooth connection<br />
between <strong>COMAND</strong> and your active mobile<br />
phone. <strong>COMAND</strong> is ready to receive vCards<br />
from another Bluetooth ® device.<br />
X Start data transfer on the external<br />
Bluetooth device (N operating instructions<br />
of the device).<br />
The data on the vCards is automatically<br />
transferred to the address book. The<br />
number of vCards received is displayed.<br />
X To cancel the transfer: Press W.<br />
or<br />
X Press the % button.<br />
Deleting Data<br />
X If the address book is displayed, select<br />
Address BookQDelete Contacts.<br />
or<br />
X If the phone main menu is displayed, select<br />
PhoneQDelete Contacts.<br />
A selection menu appears.
X Select Internal Contacts or From<br />
Mobile Phone or From Memory Card or<br />
Received Business Cards or Delete<br />
All.<br />
A prompt corresponding to your selection<br />
appears.<br />
X Select Yes or No.<br />
X Press the W button.<br />
If you confirm by selecting Yes, the<br />
contacts you have selected are deleted.<br />
Address Book 119<br />
Z<br />
Telephone
120
Audio Menu ....................................... 122<br />
Radio .................................................. 123<br />
Satellite Radio ................................... 127<br />
CD Audio/DVD Audio/MP3 .............. 131<br />
Music Register .................................. 144<br />
Media Interface ................................. 147<br />
Audio Aux .......................................... 153<br />
121<br />
Audio
122 Audio Menu<br />
Audio<br />
Audio Menu<br />
i Information on the <strong>COMAND</strong> control<br />
system and how to operate it can be found<br />
on (Y page 18).<br />
i For many operating functions you can<br />
also use the buttons on the multifunction<br />
steering wheel, e.g. the =, ;,<br />
9, : buttons, for selecting a channel<br />
or a menu or scrolling through lists<br />
(Y page 25).<br />
Vehicle Equipment<br />
i This Operator’s Manual describes all<br />
features, standard or optional, potentially<br />
available for your vehicle at the time of<br />
purchase. Please be aware that your<br />
vehicle might not be equipped with all<br />
features described in this manual.<br />
Calling up the Audio Menu<br />
X Select Audio<br />
The audio mode last active is switched on.<br />
or<br />
X Press the $ function button.<br />
Radio mode is switched on<br />
X Select Audio<br />
The audio menu appears.<br />
i If radio mode was active last, you only<br />
need to select Audio.<br />
Display with Audio menu<br />
1 Main function line<br />
2 Current audio mode<br />
3 Audio menu<br />
You can switch to the various audio modes in<br />
the audio menu:<br />
RFM / AM radio mode (Y page 123)<br />
RSatRadio mode (Y page 127)<br />
RCD-/DVD audio/MP3 mode (Y page 131)<br />
RMemory Card (Y page 139)<br />
RMusic Register (Y page 144)<br />
RRear (Y page 122)<br />
RAux mode (Y page 153)<br />
Rear Playback Mode<br />
Rear playback mode channels the audio<br />
source from the Rear Seat Entertainment<br />
System to <strong>COMAND</strong> for playback through the<br />
vehicle speakers.<br />
X Switching on Rear playback mode:<br />
Select Rear from the Audio menu
Radio<br />
Switching to the Radio<br />
From the <strong>COMAND</strong> Control Unit<br />
X Press the $ function button.<br />
or<br />
X Select Audio£Audio£FM/AM Radio in<br />
the display.<br />
i Press the button repeatedly to switch<br />
wavebands in the sequence FM, AM, WB<br />
and SatRadio mode. Pressing again will<br />
switch back to FM radio mode.<br />
Within the Audio Function<br />
X Select Audio£FM/AM Radio.<br />
The radio display appears. The last selected<br />
station in the last selected waveband is<br />
heard.<br />
1 Main area with tuning dial<br />
2 Memory preset number<br />
3 Name of selected station (HD Radio<br />
symbol und subprogram number for HD<br />
Radio stations only)<br />
4 Station frequency<br />
5 Sound settings<br />
6 FM, AM or WB radio<br />
7 Program info<br />
8 Stored station list<br />
9 Radio functions<br />
Notes on HD Radio<br />
i HD Radio features include<br />
Radio 123<br />
Rdigital broadcasts in the same waveband<br />
as analog AM/FM; the analog AM/FM<br />
stations remain at their current place on<br />
the dial<br />
Rthe ability to broadcast multiple program<br />
streams over a single FM frequency (e.g.<br />
HD1, HD2, etc.)<br />
Rstatic-free, clear reception<br />
RFM stations offer CD quality sound, AM<br />
stations sound like analog FM stations<br />
Ra variety of data services, including textbased<br />
information – artist name, song<br />
title, etc. – shown on the display.<br />
More information on HD Radio you will find<br />
at http://www.hdradio.com.<br />
You can de-activate HD Radio for the selected<br />
frequency in the radio submenu.<br />
X Select Radio£HD Radio in the radio<br />
display.<br />
If the checkbox c is unchecked, HD<br />
Radio is de-activated.<br />
Now you hear the analog program of this<br />
frequency.<br />
As soon as you change to another HD Radio<br />
frequency, HD Radio will be re-activated.<br />
Z<br />
Audio
124 Radio<br />
Audio<br />
Submenu Overview<br />
Radio (FM<br />
and AM<br />
only)<br />
Enter<br />
Frequency<br />
Ç Show<br />
Station<br />
Information<br />
ÇHD<br />
Radio<br />
Ç Active<br />
aud./vid.<br />
source for<br />
the rear<br />
Ç Rear<br />
audio/<br />
video off<br />
Presets<br />
(FM and<br />
AM only)<br />
Channel<br />
(WB only)<br />
Autostore List of<br />
receivable<br />
channels<br />
List of<br />
stored<br />
stations<br />
Switching Wavebands<br />
You can switch the radio between the FM,<br />
AM, and WB wavebands.<br />
X Press the $ function button on the<br />
control unit repeatedly until the desired<br />
band is selected.<br />
i Press the button $ repeatedly to<br />
switch waveband in the sequence of FM,<br />
AM, WB and SatRadio mode. Pressing again<br />
will switch back to FM radio mode.<br />
or<br />
X Press : to highlight the submenu.<br />
X To select a waveband: Rotate ymz or<br />
slide omp until the currently set waveband<br />
is highlighted (FM, AM or WB).<br />
X Press 9.<br />
Waveband submeu is opened.<br />
Info FM Sound<br />
Program<br />
Information<br />
FM Treble<br />
AM Bass<br />
WB Balance/<br />
Fader<br />
Surround<br />
sound<br />
1 Waveband submenu<br />
The currently set waveband is indicated<br />
by a dot #.<br />
X Select the desired waveband (FM, AM or<br />
WB).
Tuning to a Station<br />
You can tune to a station via station search,<br />
by manual frequency input or via the station<br />
memory.<br />
Tuning to a Station via Station Search<br />
X Rotate ymz or slide omp when the main<br />
area is highlighted.<br />
or<br />
X Press E or F on the <strong>COMAND</strong><br />
control unit.<br />
The search proceeds upwards or<br />
downwards and stops at the next<br />
receivable station.<br />
Tuning to a Station via Manual<br />
Frequency Input<br />
X Select Radio£Enter Frequency in the<br />
radio display.<br />
An input menu appears.<br />
or<br />
X Press õ on the control unit.<br />
X To enter a frequency: Press number<br />
buttons on the control unit.<br />
i You can only select numbers that are<br />
currently permissible.<br />
<strong>COMAND</strong> will tune to the frequency entered.<br />
i If in the FM or AM wavebands you enter a<br />
frequency outside the frequency subrange,<br />
<strong>COMAND</strong> will select the next<br />
frequency down.<br />
Tuning to a Station via the Station<br />
Memory<br />
X Select Presets in the radio display.<br />
or<br />
X Press n when the main area is highlighted.<br />
The station memory appears. The dot R in<br />
front of a preset indicates that the currently<br />
tuned station is stored there.<br />
X To select a station: Rotate ymz or slide<br />
qmr.<br />
X To tune to a station: Press n.<br />
or<br />
X Press a number key, e.g. 4, on the control<br />
unit.<br />
Wavebands Frequency<br />
AM (MF) 530 - 1700 kHz<br />
FM (VHF) 87.7 - 107.9 MHz<br />
WB (Weather Band) Weather channels<br />
Storing Stations<br />
There are 10 presets available for FM, AM and<br />
SatRadio wavebands.<br />
Storing Stations Manually<br />
X Press n when the main area is highlighted.<br />
or<br />
X Select Presets in the radio display.<br />
In both cases, the station memory will<br />
appear. The dot R in front of a preset<br />
station indicates the station the radio is<br />
currently tuned to.<br />
Station memory<br />
Radio 125<br />
Z<br />
Audio
126 Radio<br />
Audio<br />
X To store a station to a selected preset:<br />
Press and hold n until a signal tone<br />
sounds.<br />
or<br />
X Press and hold a number key, e.g. 4, until<br />
a signal tone sounds.<br />
The station is stored.<br />
Storing via Autostore<br />
i The function automatically assigns<br />
receivable stations to the presets, sorted<br />
according to reception quality. The stations<br />
which were stored in the station memory<br />
manually are overwritten.<br />
X Press n when the main area is active.<br />
X Select Autostore.<br />
or<br />
X Select Presets£Autostore in the radio<br />
display.<br />
<strong>COMAND</strong> searches for receivable stations.<br />
A corresponding message is displayed. The<br />
available stations are automatically stored<br />
under the presets.<br />
Canceling Autostore Procedure<br />
X Select Cancel.<br />
Switching to Weather Band<br />
X Press the $ function button on the<br />
control unit repeatedly until the weather<br />
band is selected.<br />
or<br />
X Slide mr to highlight the submenu.<br />
X To select the weather band: Rotate<br />
ymz or slide o until the currently set<br />
waveband is highlighted (FM or AM).<br />
X Press 9.<br />
Waveband submeu is opened.<br />
X Select WB.<br />
Searching a Channel<br />
X Rotate ymz or slide omp when the main<br />
area is highlighted.<br />
or<br />
X Press E or F on the control unit.<br />
The search proceeds upwards or<br />
downwards and stops at the next<br />
receivable channel.<br />
Selecting a Channel from Channel list<br />
X Slide mr to highlight the submenu.<br />
X To call up the channel list: Rotate ymz<br />
or slide omp until Channel is highlighted.<br />
X Press n.<br />
The channel list appears.<br />
X To select a channel: Rotate ymz or slide<br />
qmr.<br />
X To tune to the selected channel:<br />
Press n.<br />
or<br />
X Press a number key, e.g. 4, on the control<br />
unit at any time.<br />
Station Information<br />
i This feature is only available for analog<br />
FM and digital AM/FM (HD Radio)<br />
programs.<br />
Information on the current station is<br />
displayed beneath the main function line.
X To activate/deactivate the station<br />
information display: Select Radio<br />
£Show Station Information from the<br />
radio submenu.<br />
If the checkbox O is checked, station<br />
information is displayed.<br />
Program Information<br />
i This feature is only available for analog<br />
FM and digital AM/FM (HD Radio)<br />
programs.<br />
Information on the current program is<br />
normally displayed above the submenu line.<br />
X To display the program information in<br />
the main area: Select Info in the radio<br />
display submenu.<br />
Information on the program currently tuned<br />
to is now displayed in the main area. The<br />
content and scope of the information<br />
depends on the radio station.<br />
Satellite Radio<br />
Important Notes<br />
In this chapter, you will find detailed<br />
information regarding<br />
Rselecting a channel and a program category<br />
Rmemory functions<br />
Rsound adjustments<br />
Satellite Radio 127<br />
If you have not done so already, please<br />
familiarize yourself with these functions by<br />
reading chapter “At a glance”.<br />
i Optional satellite radio equipment and a<br />
subscription to satellite radio service<br />
provider are required for the satellite radio<br />
operation described here.<br />
i Note that categories and channels shown<br />
in illustrations are dependent on<br />
programming content delivered by the<br />
service provider. Programming content is<br />
subject to change. Therefore, channel and<br />
categories shown in illustrations and<br />
descriptions contained in this manual may<br />
differ from the channels and categories<br />
delivered by the service provider.<br />
Satellite radio service may be unavailable<br />
or interrupted from time to time for a<br />
variety of reasons, such as environmental<br />
or topographic conditions and other things<br />
we cannot control. Service might also not<br />
be available in certain places (e.g., in<br />
tunnels, parking garages, or within or next<br />
to buildings) or near other technologies.<br />
i SIRIUS XM Satellite Radio provides over<br />
130 channels of digital-quality radio,<br />
including 100% commercial-free music,<br />
sports, news and entertainment.<br />
SIRIUS XM Satellite Radio uses a fleet of<br />
high-power satellites to broadcast 24 hours<br />
per day, coast-to-coast, in the contiguous<br />
U.S and Canada.<br />
This diverse, satellite-delivered<br />
programming is available for a monthly<br />
subscription fee. For more information, call<br />
the SIRIUS XM Service Center<br />
Z<br />
Audio
128 Satellite Radio<br />
Audio<br />
(Y page 131) or contact www.sirius.com<br />
(<strong>USA</strong>) or www.siriuscanada.com (Canada).<br />
Subscribing<br />
Subscribing to Satellite Radio<br />
To switch to satellite radio operation:<br />
X From another main function: Select<br />
Audio£Audio£SatRadio.<br />
i If radio mode was active last, you only<br />
need to select Audio.<br />
X Within the audio function: Select Audio<br />
£SatRadio.<br />
If the satellite radio service is not activated,<br />
the Satellite radio main menu appears and<br />
displays the Weather channel. You cannot<br />
select any other station.<br />
X Select SatRadio (from the submenu)<br />
£Service.<br />
The Service information display will appear.<br />
Service information display<br />
1 Phone number of the provider,<br />
(SIRIUS XM Radio)<br />
2 SIRIUS XM ID of your satellite receiver<br />
X Contact satellite radio service provider at<br />
the telephone number displayed in the<br />
screen.<br />
i It is also possible to activate the satellite<br />
service online. To do so please visit<br />
SIRIUS XM Satellite Radio’s website at<br />
www.sirius.com (<strong>USA</strong>) or<br />
www.siriuscanada.com (Canada).<br />
After the connection is made:<br />
X Follow the instructions given by the<br />
operator.<br />
The activation process may take up to 10<br />
minutes. If it is successful, you will see the<br />
display with the message No Service<br />
followed by the Satellite radio main menu.<br />
i If a subscription is not included with<br />
system purchase, credit card information is<br />
required to activate your account.<br />
If a satellite receiver is not installed or not<br />
properly installed, the message Device<br />
Unavailable will appear.<br />
Satellite Radio Operation<br />
i For many operating functions you can<br />
also use the buttons on the multifunction<br />
steering wheel, e.g. the =, ;, 9<br />
buttons, for selecting a channel or a menu<br />
or scrolling through lists (Y page 25).<br />
Switching on<br />
See “Subscribing to Satellite Radio” for<br />
important subscription information<br />
(Y page 128).<br />
To switch to satellite radio operation:<br />
X From another main function: Select<br />
Audio£Audio£SatRadio.<br />
i If radio mode was active last, you only<br />
need to select Audio.<br />
X Within the audio function: Select Audio<br />
£SatRadio.<br />
i Satellite receiver not functional:<br />
The message Device Unavailable will<br />
appear in a window.
The message No Service will appear at start<br />
up or when the signal is not available.<br />
After the <strong>COMAND</strong> acquires the signal, the<br />
Satellite radio display will appear. The station<br />
last tuned to will begin to play.<br />
Satellite radio main menu<br />
1 SatRadio main display<br />
2 Channel name<br />
3 Memory preset number<br />
4 Selected category/channel number<br />
5 Track info (short)<br />
6 Sound settings<br />
7 Category list<br />
8 Channel info (detailed)<br />
9 Preset channel list<br />
a SatRadio menu<br />
i You can display 5 in full:<br />
RChannel information (Y page 131)<br />
Changing the Category<br />
Satellite radio stations are split up into<br />
categories. You can select between various<br />
categories such as News/Talk, Sports and<br />
Country, if available. The category list is<br />
sorted alphabetically.<br />
Selecting a Category<br />
X To call up the category list: Rotate ymz<br />
or slide omp until Category is highlighted<br />
in the submenu.<br />
X Press n.<br />
The category list appears.<br />
X To select a category: Rotate ymz or slide<br />
omp.<br />
X To set the selected category: Press n.<br />
The selected category will appear in the<br />
display. The channel last tuned to in the<br />
new category will begin to play.<br />
At the beginning of the category list the<br />
category All Channels will appear. This<br />
category is sorted numerically (by channel<br />
numbers) and allows you to scroll through<br />
all available channels.<br />
Selecting a Channel<br />
You can use the following functions:<br />
RChannel search<br />
RChannel selection via direct entry<br />
RSelecting a channel from the SatRadio<br />
channel list<br />
RSelection from the preset menu<br />
Channel Search<br />
Satellite Radio 129<br />
X Rotate ymz or slide omp if the SatRadio<br />
main display is highlighted.<br />
or<br />
X Press E or F on the control unit.<br />
The search proceeds upwards or<br />
downwards and stops at the next channel<br />
in the selected category.<br />
Z<br />
Audio
130 Satellite Radio<br />
Audio<br />
SatRadio Menu<br />
X On the submenu bar rotate ymz or slide<br />
omp until SatRadio is highlighted.<br />
X Press n.<br />
The SatRadio menu appears.<br />
Entering a Channel Number Directly<br />
X Select SatRadio£Enter Channel in the<br />
SatRadio menu.<br />
An input dialog appears.<br />
or<br />
X Press l on the control unit.<br />
X To enter a channel: Press corresponding<br />
number buttons on the control unit.<br />
<strong>COMAND</strong> will tune to the channel entered.<br />
i You can only select numbers that are<br />
currently permissible.<br />
Selecting a Channel from the SatRadio<br />
Channel List<br />
X Select SatRadio£Channel List in the<br />
SatRadio menu.<br />
The channel list appears.<br />
X To select a channel: Rotate ymz or slide<br />
qmr<br />
X To tune to the selected channel:<br />
Press n.<br />
Memory Functions<br />
i There are 10 presets available.<br />
You can use the following functions:<br />
RStoring channels<br />
RSelecting a channel from the Satellite<br />
preset memory<br />
Storing Channels<br />
X Press n if the main area is highlighted.<br />
or<br />
X Select Presets on the SatRadio submenu<br />
bar.<br />
In both cases, the channel memory will<br />
appear. The dot R in front of a preset<br />
indicates that the currently tuned channel<br />
is stored there.<br />
Channel Memory<br />
X To select a preset: Rotate ymz or slide<br />
qmr.<br />
X To store a channel to a selected preset:<br />
Press and hold n until a signal tone<br />
sounds.<br />
or<br />
X Press and hold a number key, e.g. 4, until<br />
a signal tone sounds.<br />
The channel is stored.<br />
Selecting a Channel from the Memory List<br />
X To call up the channel list: In the<br />
submenu rotate ymz or slide omp until<br />
Presets is highlighted.<br />
The presets list appears.<br />
X To select a channel: Rotate ymz or slide<br />
qmr.<br />
X To tune to the selected channel:
Press n.<br />
or<br />
X Press a number key, e. g. 4 on the control<br />
unit.<br />
Displaying Information<br />
X In the submenu rotate ymz or slide omp<br />
until Info is highlighted.<br />
X Press n.<br />
Information about the current program<br />
appears.<br />
1 Category<br />
2 Channel<br />
3 Artist<br />
4 Song title<br />
You will see (if available)<br />
Rthe full name<br />
Radditional information<br />
X To switch back to the SatRadio main<br />
display: Slide omp.<br />
Displaying Service Information<br />
You can call the provider service center for<br />
questions or releases whenever you need.<br />
X Select SatRadio£Service in the<br />
SatRadio submenu.<br />
The service information appears.<br />
CD Audio/DVD Audio/MP3 131<br />
1 Phone number of the provider, (SIRIUS<br />
XM) or Call Service Provider<br />
2 SIRIUS XM ID of your satellite receiver<br />
X To switch back to the SatRadio main<br />
display: Slide omp.<br />
Channel List Updates<br />
While receiving a new channel list the<br />
message Updating Channels will appear.<br />
The channel last tuned to will be muted until<br />
the update is completed. You cannot operate<br />
the satellite radio.<br />
After completion of the update, the Satellite<br />
radio main menu will appear. The channel last<br />
tuned to will begin to play if available in the<br />
new channel list.<br />
Sound Settings<br />
Refer to chapter “At a glance” on how to<br />
adjust sound settings.<br />
RVolume (Y page 35)<br />
RBalance and fader control (Y page 35)<br />
RBass and treble control (Y page 35)<br />
RSurround sound (Y page 36)<br />
CD Audio/DVD Audio/MP3<br />
Safety Instructions<br />
G Warning<br />
<strong>COMAND</strong> is classified as a Class 1 laser<br />
product. You must not open the casing. There<br />
Z<br />
Audio
132 CD Audio/DVD Audio/MP3<br />
Audio<br />
is a risk of exposure to invisible laser radiation<br />
if you open the casing, or if the casing is faulty<br />
or damaged.<br />
<strong>COMAND</strong> does not contain any parts that you<br />
are able to maintain yourself. For safety<br />
reasons, all maintenance work must be<br />
exclusively carried out by qualified<br />
technicians.<br />
G Warning<br />
Only carry out the following when the vehicle<br />
is stationary:<br />
RInserting a disc<br />
REjecting a disc<br />
There is a risk of accident by being distracted<br />
from road and traffic conditions if you load a<br />
CD/DVD while the vehicle is in motion.<br />
Notes on MP3 Mode<br />
Permissible Storage Media<br />
RCD-R and CD-RW<br />
RDVD+R and DVD+RW<br />
RDVD-R and DVD-RW<br />
RPCMCIA memory card<br />
Permissible File Systems<br />
RISO9660/Joliet for CD storage media<br />
RUDF for DVDs<br />
RFAT16 or FAT32 for PCMCIA memory card<br />
with storage medium<br />
Multisession CDs<br />
On multisession CDs, the content of the first<br />
session determines how <strong>COMAND</strong> handles<br />
the CD.<br />
If the first session, for example, contains data<br />
in CD Audio format and the second session<br />
contains MP3 tracks, <strong>COMAND</strong> handles the<br />
CD as a conventional Audio CD. This means<br />
that the MP3 tracks cannot be accessed.<br />
Similarly, if the first session contains MP3<br />
tracks and the second session contains data<br />
in CD Audio format, <strong>COMAND</strong> handles the CD<br />
as an MP3 CD. Only the MP3 tracks can be<br />
accessed.<br />
File Structure of Storage Medium<br />
When creating an MP3 storage medium, you<br />
can organize MP3 tracks into folders. A folder<br />
can also contain additional folders. A storage<br />
medium may have a maximum of 255 folders<br />
in total. A maximum of 255 tracks and 255<br />
folders are permissible per folder. A<br />
maximum of 4000 tracks in total are<br />
permissible per storage medium.<br />
Track Names and Folder Names<br />
When creating an MP3 storage medium, you<br />
can assign names to the MP3 tracks and to<br />
the folders.<br />
<strong>COMAND</strong> uses these names in MP3 mode for<br />
the corresponding display. Empty folders or<br />
folders containing data other than MP3 tracks<br />
will not be displayed by <strong>COMAND</strong>.<br />
If MP3 files are stored in the root directory<br />
itself, the root directory also counts as a<br />
folder. <strong>COMAND</strong> will then display the root<br />
directory name as a folder name.<br />
Please note the following when assigning<br />
track names:<br />
RTrack names must contain at least one<br />
character.<br />
RTrack names must have the extension<br />
“mp3”.<br />
RA period must appear between the track<br />
name and the extension.<br />
i <strong>COMAND</strong> does not support ID3 tags.<br />
Permissible Formats<br />
<strong>COMAND</strong> supports the following formats:<br />
RMPEG1 audio layer 3 format
i In everyday speech, this format<br />
designation has been replaced by the<br />
designation “MP3”.<br />
RMicrosoft Windows ® Media Audio V2, V7,<br />
V8 und V9 (WMA).<br />
Notes on Copyright<br />
The music tracks that you can create for<br />
playback in MP3 mode are generally<br />
copyright-protected under applicable<br />
international and national laws.<br />
In many countries, the reproduction of<br />
copyrighted material is not permitted even if<br />
only for personal use without the express<br />
prior consent of the copyright holder.<br />
Please check the current copyright laws for<br />
your country and comply with them.<br />
These restrictions do not apply, for example,<br />
to your own compositions and recordings or<br />
for recordings for which authorization has<br />
been obtained from the copyright holder.<br />
Notes about DVD Audio Discs<br />
<strong>COMAND</strong> can playback commercially<br />
available, prerecorded Audio DVDs that bear<br />
the following label. You will usually find the<br />
label on the DVD booklet, the inlay or the DVD<br />
itself.<br />
i Audio DVDs differ from recordable DVD-R<br />
and DVD-RW discs.<br />
Data on Audio DVDs are stored either in<br />
uncompressed format or in lossless<br />
compressed format. The sound quality on<br />
Audio DVDs is therefore better than on<br />
recordable DVDs that contain MP3 data<br />
because the MP3 format uses a lossy type of<br />
compression. You cannot delete data from or<br />
CD Audio/DVD Audio/MP3 133<br />
record additional data to commercially<br />
available, prerecorded Audio DVDs. Please<br />
note the following information about CDs/<br />
DVDs and pay special attention to the notes<br />
on copied and/or self-written CDs/DVDs.<br />
Permissible Bit and Sampling Rates<br />
RFixed and variable bit rates from 32 kbps to<br />
320 kbps<br />
RSampling rates from 8 kHz to 48 kHz<br />
i Only use MP3 tracks with a bit rate of<br />
128 kbps or higher and with a sampling rate<br />
of 44.1 kHz or higher. Lower rates may<br />
result in impaired sound quality. This is<br />
particularly true if the surround sound<br />
function has been activated.<br />
WMA (Windows ® Media Audio) format of the<br />
following type:<br />
Rfixed bit rates from 5 kBit/s up to<br />
384 kBit/s<br />
Rsampling rates from 8 kHz to 48 kHz.<br />
<strong>COMAND</strong> does not support WMA files of the<br />
following type:<br />
RDRM (Digital Rights Management)<br />
encrypted files<br />
i If other music files are stored in these<br />
audio formats on a storage medium, in<br />
addition to MP3 files, the loading process<br />
may take longer before the first track is<br />
played.<br />
Notes about CD/DVD Discs<br />
i Discs with copy protection do not comply<br />
with the CD Audio standard and in some<br />
cases cannot be played by <strong>COMAND</strong>. When<br />
playing copied discs, problems may occur<br />
with the playback.<br />
A wide variety of discs, disc writing software<br />
and writers are available. Due to this variety<br />
we cannot guarantee that the system will be<br />
able to play discs that you have written/<br />
copied yourself.<br />
Z<br />
Audio
134 CD Audio/DVD Audio/MP3<br />
Audio<br />
There may be playback problems with<br />
userburned CDs with a storage capacity of<br />
more than 700 MB. These CDs do not meet<br />
current valid standards.<br />
i When playing a DVD Audio, it may be the<br />
case with numerous albums that the last<br />
track does not contain any music and<br />
<strong>COMAND</strong> switches to the next track. This<br />
is due to the production method and does<br />
not imply a fault with the unit.<br />
! Do not attach stickers or labels of any<br />
kind to discs. They may come loose and<br />
damage <strong>COMAND</strong>.<br />
<strong>COMAND</strong> has been designed for discs<br />
meeting the requirements of standard<br />
EN 60908. Therefore, only discs with a<br />
maximum thickness of 1.3 mm can be<br />
used.<br />
If a thicker disc is inserted, e.g. one which<br />
stores data on both sides, (DVD on one<br />
side, audio data on the other side), this<br />
cannot be ejected and <strong>COMAND</strong> will be<br />
damaged.<br />
Do not use 8 cm diameter discs, not even<br />
with an adapter. Only use round discs with<br />
a diameter of 12 cm.<br />
i <strong>COMAND</strong> can play CD Audio with the high<br />
resolution surround format.<br />
Notes on the Care of CD/DVD Discs<br />
ROnly touch the discs at the edges.<br />
RHandle discs with care in order to prevent<br />
malfunctions during playback.<br />
RAvoid scratching, leaving fingerprints and<br />
dust on the discs.<br />
RClean the discs occasionally with a<br />
commercially available cleaning cloth.<br />
Always wipe in a straight line from the<br />
inside outwards, never in a circular motion.<br />
RThe discs must only be labelled using pens<br />
specially designed for this purpose.<br />
RAfter use, put the discs back into the box.<br />
RProtect the discs from heat and direct<br />
sunlight.<br />
Loading CDs and DVDs<br />
G Warning<br />
Only load a CD or DVD when the vehicle is<br />
stationary. There is a risk of accident by being<br />
distracted from road and traffic conditions if<br />
you load a CD/DVD while the vehicle is in<br />
motion.<br />
Bear in mind that at a speed of just 30 mph<br />
(appr. 50 km/h), your vehicle is covering a<br />
distance of 44 feet (appr. 14 m) every second.<br />
i If the CD/DVD is printed on one side, this<br />
side must face upwards when loaded. If<br />
neither side is printed, the side to be played<br />
must face downwards.<br />
The system may not be able to play copyprotected<br />
CDs/DVDs.<br />
Loading the DVD Changer<br />
The DVD changer is a magazine with six builtin<br />
compartments.<br />
1 Load/Eject button (all magazine<br />
compartments)<br />
2 Disc slot
Loading an Individual Magazine<br />
Compartment<br />
X Press the Load V button.<br />
A menu indicates which magazine<br />
compartments are currently loaded. The<br />
highlighted or currently playing<br />
compartment is indicated by a red number.<br />
Magazine Menu<br />
X To select magazine compartment:<br />
Rotate ymz<br />
or slide omp.<br />
X To start loading: Press n.<br />
The DVD changer will switch to the selected<br />
magazine compartment. The message<br />
Please Wait... will be displayed.<br />
Then message Please Insert Disc<br />
will be displayed.<br />
i Only insert a CD after <strong>COMAND</strong> has<br />
prompted you to do so with this message.<br />
Only insert one CD per magazine<br />
compartment.<br />
X Insert a disc into the slot with the printed<br />
side upwards.<br />
The DVD changer pulls in the disc and<br />
places it in the selected magazine<br />
compartment. The message Loading<br />
Disc will be displayed.<br />
i The loading process may take a while,<br />
depending on the type of disc. If you do not<br />
insert a disc, the display will switch back to<br />
the magazine menu after approximately<br />
20 seconds.<br />
The DVD changer plays the disc if<br />
Rit has been inserted correctly<br />
Rit is a permissible disc<br />
Magazine menu, one disc loaded<br />
1 Magazine compartment occupied,<br />
ejecting possible<br />
2 Empty magazine compartment<br />
X To exit menu: Press the Load V button<br />
again.<br />
or<br />
X Select Back<br />
or<br />
CD Audio/DVD Audio/MP3 135<br />
X Press the k button<br />
Filling Empty Magazine Compartments<br />
X Press the Load V button.<br />
The magazine menu appears. The currently<br />
playing compartment is indicated by a red<br />
Z<br />
Audio
136 CD Audio/DVD Audio/MP3<br />
Audio<br />
number or, if the magazine is empty,<br />
compartment 1 is marked.<br />
X Select Fill Empty Slots.<br />
The message Please insert disc <br />
will be displayed.<br />
i Only insert a CD after <strong>COMAND</strong> has<br />
prompted you to do so with this message.<br />
Only insert one CD per magazine<br />
compartment.<br />
X Insert a disc into the slot with the printed<br />
side facing upwards.<br />
You see the Please wait... message.<br />
Once the disc is loaded, the DVD changer<br />
switches to the next empty compartment.<br />
You see these messages: Please wait<br />
and then Please insert disc .<br />
X Repeat the step until all compartments are<br />
loaded.<br />
The DVD changer plays the last disc you<br />
loaded if it has been inserted correctly and<br />
if it is a permissible type.<br />
If loading is not completed, <strong>COMAND</strong> plays<br />
the first disc inserted.<br />
X To end loading procedure: Press the Load<br />
V button again.<br />
or<br />
X Select Back.<br />
or<br />
X Press the k button next to the<br />
<strong>COMAND</strong> controller.<br />
Loading PCMCIA Memory Card<br />
G Warning<br />
Only load a memory card when the vehicle is<br />
stationary. There is a risk of accident by being<br />
distracted from road and traffic conditions if<br />
you load a memory card while the vehicle is<br />
in motion.<br />
Bear in mind that at a speed of just 30 mph<br />
(appr. 50 km/h), your vehicle is covering a<br />
distance of 44 feet (appr. 14 m) every second.<br />
<strong>COMAND</strong> supports 16-bit full-size type I and II<br />
PCMCIA memory cards.<br />
i <strong>COMAND</strong> supports commercially<br />
available PCMCIA cards or PCMCIA card<br />
adapters with storage media that may not<br />
be designed for the temperatures which<br />
occur in the vehicle. You should therefore<br />
remove the PCMCIA card from the vehicle<br />
when not in use since extreme<br />
temperatures could damage these devices.<br />
1 PCMCIA memory card slot<br />
X Push the PCMCIA memory card into the<br />
slot.<br />
The end with the contact must point<br />
towards the slot.<br />
<strong>COMAND</strong> loads the memory card and<br />
displays the message Reading Memory<br />
Card. If no MP3 tracks can be found, a<br />
message will be displayed.<br />
Ejecting CDs and DVDs<br />
G Warning<br />
Only load a CD or DVD when the vehicle is<br />
stationary. There is a risk of accident by being<br />
distracted from road and traffic conditions if<br />
you load a CD/DVD while the vehicle is in<br />
motion.<br />
Bear in mind that at a speed of just 30 mph<br />
(appr. 50 km/h), your vehicle is covering a<br />
distance of 44 feet (appr. 14 m) every second.
i If you eject a disc while another is being<br />
played, the DVD changer interrupts<br />
playback. Playback will continue once the<br />
disc has been ejected completely.<br />
Ejecting One Disc<br />
X Press Eject V button.<br />
The magazine menu appears. The magazine<br />
compartment containing the current disc is<br />
highlighted.<br />
1 Magazine compartment occupied,<br />
ejecting possible<br />
2 Disc type<br />
3 Disc name (only if stored on disc)<br />
4 Current disc<br />
X To select occupied magazine<br />
compartment: Rotate ymz or slide omp.<br />
X Press n.<br />
The Ejecting disc ... message<br />
appears. Then you see the following<br />
message:<br />
CD Audio/DVD Audio/MP3 137<br />
X Remove the disc from the slot.<br />
If you do not remove the disc from the slot,<br />
the DVD changer will automatically pull it<br />
back in after a short while and resume<br />
playback.<br />
Ejecting All Discs<br />
X Press the Eject V button.<br />
The magazine menu appears.<br />
X Select Eject All.<br />
The DVD changer ejects the first disc<br />
found. The message Ejecting disc<br />
... is displayed.<br />
X Remove the disc from the slot when you<br />
see the message prompting you to do this.<br />
The DVD changer switches to the next<br />
occupied magazine compartment and<br />
ejects the disc.<br />
X Repeat the last step until the magazine is<br />
empty.<br />
Ejecting a PCMCIA Memory Card<br />
G Warning<br />
Only load a memory card when the vehicle is<br />
stationary. There is a risk of accident by being<br />
distracted from road and traffic conditions if<br />
you load a memory card while the vehicle is<br />
in motion.<br />
Bear in mind that at a speed of just 30 mph<br />
(appr. 50 km/h), your vehicle is covering a<br />
distance of 44 feet (appr. 14 m) every second.<br />
Z<br />
Audio
138 CD Audio/DVD Audio/MP3<br />
Audio<br />
1 Eject button<br />
2 PCMCIA memory card slot<br />
Menu Overview<br />
CD or DVD-A or<br />
MP3<br />
Normal track<br />
sequence<br />
Only with DVD-<br />
A:<br />
«/±/X<br />
« Pause<br />
playback<br />
Random tracks ± Stop<br />
playback<br />
Random folder<br />
(MP3 mode<br />
only)<br />
Switches the CD<br />
database<br />
reading function<br />
on/off (CD<br />
mode only)<br />
X Restart or<br />
continue<br />
playback<br />
Track list or<br />
Folder<br />
Display track list<br />
(CD Audio/<br />
DVD Audio<br />
mode only)<br />
Folder list (MP3<br />
mode only)<br />
X Press Eject button 1 twice.<br />
The PCMCIA memory card is ejected.<br />
X Take the PCMCIA memory card out of<br />
slot 2.<br />
Media Sound<br />
Media selection<br />
via media list<br />
RCD/DVD<br />
Changer<br />
RMemory Card<br />
RMusic<br />
Register<br />
RMedia<br />
Interface<br />
RAux<br />
Treble<br />
Bass<br />
Balance/Fader<br />
Surround sound
Switching to CD Audio, DVD Audio or<br />
MP3 Mode<br />
From the Control Panel<br />
X Insert a CD/DVD (Y page 134) or a PCMCIA<br />
memory card (Y page 136).<br />
<strong>COMAND</strong> loads the medium inserted and<br />
begins playback.<br />
or<br />
X Press the h function button.<br />
i Pressing the function button switches<br />
directly to the disc mode selected last<br />
(CD Audio, DVD Audio, MP3-CD or DVD<br />
Video). <strong>COMAND</strong> then accesses all discs in<br />
the DVD changer, the memory card or the<br />
Music Register.<br />
X If necessary, select CD/DVD Audio/ MP3<br />
media (Y page 141).<br />
or<br />
X When playing a video DVD: Open the<br />
media list as described in "Selecting DVD<br />
media" (Y page 141).<br />
X Select an audio storage medium.<br />
This switches to the required disc mode.<br />
Via the <strong>COMAND</strong> Controller<br />
From Another Main Function<br />
X Select Audio£Audio£Disc or<br />
Memory Card or Music Register in the<br />
audio menu display.<br />
i If the desired mode is also the last active<br />
mode, you only need to select Audio.<br />
Within the Audio Function<br />
X Select Audio£Disc or Memory card in<br />
the audio menu display.<br />
i Disc accesses audio discs in the DVD<br />
changer. Memory Card selects the slot for<br />
the PCMCIA memory card.<br />
CD Audio/DVD Audio/MP3 139<br />
X Select CD/DVD Audio/MP3 as required<br />
(Y page 141).<br />
The desired disc mode is activated.<br />
Example of CD Audio Mode Display<br />
1 Disc type _<br />
2 Track number<br />
3 Track name (only if stored on the disc as<br />
CD text or available from Gracenote ® )<br />
4 Elapsed track time<br />
5 Visual track and time display<br />
6 Current playback option<br />
7 Sound settings<br />
8 Media selection<br />
9 Disc name (only if stored on the disc as<br />
CD text or available from Gracenote ® )<br />
a Display track list<br />
b Disc position in the media list<br />
c Disc or track recording<br />
d Playback options<br />
Z<br />
Audio
140 CD Audio/DVD Audio/MP3<br />
Audio<br />
Example of DVD Audio Display<br />
1 Disc type ü<br />
2 Track number<br />
3 Track name (if available)<br />
4 Elapsed track time<br />
5 Visual time and track display<br />
6 Current playback option<br />
7 Sound settings<br />
8 Media selection<br />
9 Disc name (if available)<br />
a Display track list<br />
b Stop function<br />
c Pause function<br />
d Disc position in the media list<br />
e Playback options<br />
Example display in MP3 mode<br />
1 Disc type þ or º (memory card)<br />
2 Track number<br />
3 Track or file name<br />
4 Elapsed track time<br />
5 Visual time and track display<br />
6 Current playback option<br />
7 Sound settings<br />
8 Media selection<br />
9 Current folder<br />
a Display folder list<br />
b Disc position in the media list<br />
c Playback options<br />
i An example of a media list display can be<br />
found on (Y page 141).<br />
Stop Function<br />
i This function is only available in DVD<br />
Audio mode.<br />
X Switch to DVD Audio mode.<br />
X To interrupt playback: Select ±.<br />
The display « changes to X.<br />
X To resume playback: Select X.<br />
Playback continues from the point where it<br />
was interrupted.<br />
X To stop playback: Select ± again when<br />
playback is interrupted.<br />
or<br />
X Select ± twice during playback.<br />
Option selector remains at X.<br />
X To restart playback: Select X.<br />
Playback starts from the beginning of the<br />
DVD.<br />
Pause Function<br />
In CD Audio, DVD Audio and MP3 Mode<br />
X To pause playback: Briefly press 8.<br />
X appears at the top left of the status bar.<br />
X To continue playback: Briefly press<br />
8 again.<br />
Playback continues from the point where it<br />
was paused. X disappears.
Only in DVD Audio mode<br />
X To pause playback: Switch to DVD Audio<br />
mode.<br />
X Select «.<br />
The display « changes to X.<br />
X To resume playback: Switch to DVD<br />
Audio mode.<br />
Playback continues from the point where it<br />
was paused.<br />
X Select X.<br />
The display X changes to «.<br />
Selecting CD/DVD Audio/MP3 Media<br />
X In CD Audio, DVD Audio and MP3<br />
mode: Select Media.<br />
or<br />
X In CD Audio and DVD Audio mode only:<br />
Press n when the main area is highlighted.<br />
The media list appears. The dot R<br />
indicates the medium currently playing.<br />
Media List<br />
The media list shows the discs currently<br />
available:<br />
RIn the DVD changer (magazine<br />
compartments 1 to 6)<br />
The following storage media can be read:<br />
_ CD Audio, þ MP3-CD or MP3-DVD,<br />
ü DVD Audio and ý DVD Video<br />
i If a storage medium is not readable, an<br />
entry appears next to the magazine<br />
CD Audio/DVD Audio/MP3 141<br />
compartment or a message is displayed<br />
when the memory card is selected.<br />
RPCMCIA memory card º at position 7<br />
RMusic Register Ñ at position 8<br />
X To select a disc: Rotate ymz or slide<br />
qmr.<br />
X Press n.<br />
i If you select a DVD Video ý, <strong>COMAND</strong><br />
switches to video mode (Y page 158).<br />
Selecting a Track<br />
i For many operating functions you can<br />
also use the buttons on the multifunction<br />
steering wheel, e.g. the 9, :<br />
buttons, for selecting a track, a menu or<br />
scrolling through lists (Y page 25).<br />
Selection via Track Skip<br />
X To skip forwards or backwards to a<br />
track: Rotate ymz when the main area is<br />
highlighted.<br />
or<br />
X Press the E or F button.<br />
i “Forward track skip” skips to the next<br />
track. “Backward track skip” skips to the<br />
beginning of the current track, if the track<br />
has been playing for more than 8 seconds.<br />
If the track has been playing for less than<br />
8 seconds, it will skip to the beginning of<br />
the previous track. If the playback option<br />
Random Tracks is switched on, the track<br />
sequence is random.<br />
Z<br />
Audio
142 CD Audio/DVD Audio/MP3<br />
Audio<br />
Selecting via Track List<br />
X In CD Audio and DVD Audio mode: Select<br />
Track List.<br />
or<br />
X In MP3 mode: Press n when the main<br />
area window is highlighted.<br />
The track list appears. The R dot indicates<br />
the current track.<br />
X To select a track: Rotate ymz or slide<br />
qmr.<br />
X Press n.<br />
i In MP3 mode, the list shows all the tracks<br />
in alphabetical order.<br />
Fast Forward/Reverse<br />
X When the main area is highlighted: Slide<br />
and hold omp until the desired position is<br />
reached.<br />
or<br />
X Press and hold the E or F button<br />
until the desired position has been<br />
reached.<br />
Selecting Folders<br />
i This function is only available in MP3<br />
mode.<br />
X Switch to MP3 mode (Y page 139).<br />
X Select Folder.<br />
or<br />
X Press n when the main area is highlighted.<br />
The folder list appears.<br />
1 Current folder name<br />
2 Track symbol<br />
3 Current track<br />
4 Back folder symbol<br />
X To switch to the next folder up: Select<br />
the Q symbol.<br />
The display changes to the next folder up<br />
(back folder).<br />
1 Disc name (if stored on disc)<br />
2 Current folder<br />
3 Folder symbol<br />
X To select a folder: Rotate ymz or slide<br />
qmr.<br />
X Press n.<br />
The tracks of the folder appear.<br />
X To select a track: Rotate ymz or slide<br />
qmr.<br />
X Press n.<br />
The track is played and the corresponding<br />
folder is now the active folder.
Gracenote ® Media Database<br />
i This function is only available in CD Audio<br />
mode.<br />
CD information including album title, artist<br />
name and track name is obtained from the<br />
Gracenote ® Media Database. A version of the<br />
Gracenote ® Media Database is stored on the<br />
<strong>COMAND</strong>’s hard drive. Access to this<br />
database is indicated by the Gracenote logo<br />
being displayed in the lower right of some<br />
audio displays.<br />
Many audio CDs contain CD text. <strong>COMAND</strong><br />
uses the information contained in this text for<br />
displaying the name of the artist, album and<br />
track.<br />
If the audio CD does not contain any CD text,<br />
<strong>COMAND</strong> can recognize unknown audio<br />
tracks in CD Audio mode with the aid of the<br />
Gracenote Media Database. For this to<br />
happen, the corresponding information must<br />
be stored in the Gracenote Media Database<br />
and the “Read CD Database” function must<br />
be switched on.<br />
If this is the case, <strong>COMAND</strong> provides the<br />
corresponding data, such as name of artist,<br />
album and track, in the corresponding<br />
displays and lists.<br />
If <strong>COMAND</strong> accesses the Gracenote Media<br />
Database while reading an audio CD, the<br />
following information is displayed:<br />
CD Audio/DVD Audio/MP3 143<br />
Switching "Read CD Database"<br />
Function On and Off<br />
X Switch to CD Audio mode (Y page 139).<br />
X Select CD£Read CD Database.<br />
A list opens from which you can select the<br />
desired data. Select None if you do not want<br />
to display any of the data.<br />
Updating the Gracenote ® Media<br />
Database<br />
As new music CD releases occur it is<br />
necessary to update the Gracenote Media<br />
Database. Optimum Gracenote ® music<br />
recognition function is only achieved when<br />
the most up-to-date database is available in<br />
your vehicle.<br />
You can have the music recognition software<br />
updated at an Authorized <strong>Mercedes</strong>-<strong>Benz</strong><br />
center by means of a DVD or perform the<br />
update process yourself.<br />
i The Gracenote ® Media Database is<br />
updated at the same time as the map<br />
software (Y page 48).<br />
Setting Audio Format<br />
It is only possible to set the audio format in<br />
DVD Audio mode. The number of available<br />
audio formats depends on the DVD. The<br />
content of a DVD Audio is called the “album”,<br />
which can be divided into a maximum of nine<br />
groups. A group may contain, for example,<br />
music of different sound qualities (stereo and<br />
Z<br />
Audio
144 Music Register<br />
Audio<br />
multi-channel formats) or bonus tracks. Each<br />
group can include up to 99 tracks. If a DVD<br />
Audio only comprises one audio format, the<br />
“Group” menu item(s) cannot be selected.<br />
X Switch to DVD Audio mode (Y page 139).<br />
X Select DVD-A£Group.<br />
The list of available audio formats appears.<br />
The dot R indicates the format currently<br />
selected.<br />
X To change setting: Rotate ymz or slide<br />
qmr.<br />
X Press n.<br />
Playback Options<br />
The following options are available:<br />
RNormal Track Sequence<br />
You will hear the tracks in the normal order<br />
(e.g. track 1, 2, 3, etc.).<br />
RRandom Tracks<br />
You will hear the tracks in random order<br />
(e.g. track 3, 8, 5, etc.).<br />
RRandom Folder (MP3 mode only)<br />
You hear the tracks in the currently active<br />
folder and any subfolders in random order.<br />
X To select an option: Switch to CD Audio,<br />
DVD Audio or MP3 mode (Y page 139).<br />
X Select CD or DVD-A or MP3.<br />
The option list appears. A dot R indicates<br />
the option selected.<br />
X Select an option.<br />
The option is activated. For all options<br />
except Normal Track Sequence, you will<br />
see a corresponding display in the main<br />
area.<br />
i The Normal Track Sequence option is<br />
automatically selected when you change<br />
the medium you are currently listening to<br />
or when you select a different medium. If<br />
an option is selected, it remains selected<br />
after <strong>COMAND</strong> is switched on or off.<br />
Music Register<br />
You can record tracks from Audio CDs and<br />
store them in the Music Register. The<br />
memory capacity is 6 GB.<br />
! Keep your original music files in a safe<br />
place. A fault with the <strong>COMAND</strong> may cause<br />
the music files stored in the Music Register<br />
to be lost. <strong>Mercedes</strong>-<strong>Benz</strong> <strong>USA</strong>, LLC is not<br />
liable for any loss of data.<br />
Switching to the Music Register<br />
From Another Main Function<br />
X Select Audio£Audio£Music<br />
Register in the Audio menu display.<br />
i If Music Register was the last mode,<br />
you only need to select Audio.<br />
Within the Audio Function<br />
X Select Audio£Music Register.<br />
Music Register is loaded. The Music<br />
Register display appears.<br />
No music files available:<br />
A message will be displayed.<br />
X First record music files from an Audio CD<br />
(Y page 145).<br />
Music files available:<br />
You will hear the first track of the first folder<br />
found or playback will start from the point<br />
listened to last.
1 Storage media type — Music Register Ñ<br />
2 Track number<br />
3 Track name<br />
4 Elapsed track time<br />
5 Visual time and track display<br />
6 Current playback option<br />
7 Sound settings<br />
8 Media selection<br />
9 Current folder<br />
a Folder functions<br />
b Storage medium position in the media list<br />
c Calls up Music Register menu<br />
Recording Music Files<br />
i CD information, including album title,<br />
artist name and track name is obtained<br />
from the Gracenote ® Media Database<br />
(Y page 143).<br />
X In the Disc submenu with Audio CD<br />
inserted, select REC. The Record submenu<br />
appears.<br />
Selecting Tracks to Be Recorded<br />
X Rotate ymz or slide omp until Tracks is<br />
highlighted.<br />
X Press n.<br />
X Select tracks to be recorded by switching<br />
the check mark next to each track entry on<br />
or off.<br />
1 Record all tracks (default)<br />
; Option for selecting individual tracks<br />
= Confirm selection<br />
i If you do not select individual tracks<br />
before recording, all tracks on the CD will<br />
be recorded.<br />
Selecting a Destination Folder<br />
X Rotate ymz or slide omp until<br />
Destination Folder is highlighted.<br />
X Press n.<br />
Selection list<br />
1 Create new folder (default)<br />
2 Existing folders<br />
3 Currently active folder<br />
Music Register 145<br />
X To select folder: Rotate ymz or slide<br />
qmr.<br />
X Press n.<br />
i If you do not select a destination folder<br />
before recording, a new folder will be<br />
created.<br />
Z<br />
Audio
146 Music Register<br />
Audio<br />
Start the Recording<br />
X Rotate ymz or slide omp until Start is<br />
highlighted.<br />
X Press n.<br />
In the display information about source,<br />
destination and progress of the recording<br />
is shown.<br />
i The Disc menu re-appears automatically<br />
after a successful recording.<br />
X To stop the recording: Rotate ymz or<br />
slide omp until Cancel is highlighted..<br />
X Press n.<br />
The Disc menu re-appears.<br />
Deleting all Music Files<br />
This function deletes all music files from<br />
Music Register.<br />
X Select Music Register£Delete All<br />
Music Files.<br />
A prompt appears. No is highlighted.<br />
X Do not delete: Press the n button.<br />
The Music Register display appears.<br />
X To delete: Select Yes.<br />
A corresponding message appears.<br />
Calling up Memory Space Info<br />
X Select Music Register£Memory Info.<br />
A window appears containing information on:<br />
RMemory capacity<br />
RAvailable memory<br />
ROccupied memory<br />
RContent (folders, tracks)<br />
Folder Functions<br />
You can view the content of Music Register,<br />
change folder or track names and delete<br />
individual folders or tracks.<br />
X Select Folder in the submenu.<br />
or<br />
X Press n when the main area is highlighted.<br />
1 Back folder symbol<br />
2 Current folder<br />
3 Music file symbol<br />
X To switch to the next folder up: Select<br />
the Q symbol.<br />
The display changes to the next folder up.<br />
Changing Folder/Track Name<br />
X Select Folder.<br />
X To select a folder/track: Rotate ymz or<br />
slide qmr.<br />
X Select Options£Change.<br />
X Enter a name for the folder/track in the<br />
input line.<br />
X To save changes: Select d.
Deleting Folders/Track<br />
X Select Folder.<br />
X To select a folder/track: Rotate ymz or<br />
slide qmr.<br />
X Select Options£Delete.<br />
A query appears. No is highlighted.<br />
X Do not delete: Press the n button.<br />
X To delete: Select Yes and press n.<br />
A message appears.<br />
Playback Options<br />
The following options are available:<br />
RNormal Track Sequence<br />
You will hear the tracks in the normal<br />
sequence (e.g. track 1, 2, 3 etc.).<br />
RRandom Tracks:<br />
You hear the tracks in random order.<br />
RRandom Folder<br />
The tracks of the currently active folder and<br />
any subfolders are heard in random order.<br />
X To select an option: Switch to Music<br />
Register (Y page 144).<br />
X Select Music Register in the submenu.<br />
The option list appears. A R dot indicates<br />
the activated option.<br />
X Select an option.<br />
The option is activated. A corresponding<br />
display will appear in the main area for all<br />
options except Normal Track Sequence.<br />
i The option Normal Track Sequence is<br />
automatically activated if you change the<br />
medium which is currently being played or<br />
if you select another medium. An activated<br />
option remains active after <strong>COMAND</strong> is<br />
switched on or off.<br />
Media Interface<br />
Important Notes<br />
Connection Options<br />
Via the UCI connection (Universal Consumer<br />
Interface) you can connect the following<br />
media to <strong>COMAND</strong>:<br />
RiPods<br />
RMP3 player<br />
RUSB devices<br />
Supported iPod ® Versions<br />
The following iPod ® versions are fully<br />
supported:<br />
RiPod ® mini<br />
RiPod ® nano<br />
RiPod ® classic<br />
RiPod ® touch<br />
Media Interface 147<br />
Supported USB Devices<br />
The following USB devices are supported:<br />
RUSB sticks (flash memory)<br />
RUSB hard drives (1-inch, 1.8-inch and<br />
2.5-inch drives) with a starting/continuous<br />
current rating of maximum 800 mA<br />
(otherwise a separate power supply will be<br />
necessary)<br />
i The Media Interface supports USB<br />
storage media of "USB Device Subclass 6".<br />
You can obtain information about the "USB<br />
Device Subclass 6" from the manufacturer.<br />
Further Information on Supported<br />
Devices<br />
Further information on compatible<br />
multimedia devices is available via the<br />
Internet at www.mbusa-mobile.com. Or call<br />
the <strong>Mercedes</strong>-<strong>Benz</strong> Customer Assistance<br />
Center at 1-800-FOR-MERCedes<br />
(1-800-367-6372) (US), or Customer<br />
Relations at 1-800-387-0100 (Canada).<br />
Z<br />
Audio
148 Media Interface<br />
Audio<br />
Supported Data Formats (USB devices)<br />
The following data types are supported:<br />
RMP3: CBR, VBR (up to 320 kbit/s)<br />
RWMA: CBR, VBR (up to 320 kbit/s)<br />
In order to display the metadata during<br />
playback, ID3 tags (version 1.x, 2.3, 2.4) and<br />
WMA tags in ASCII and UTF16 coding are<br />
supported.<br />
Notes on USB Devices<br />
RIn order to keep the initialisation time short,<br />
do not store data other than music files on<br />
the USB device.<br />
RUp to eight directory levels with up to 1,000<br />
tracks are supported.<br />
RDo not use a USB extension cable or<br />
adapter. These may impair functionality.<br />
RPlaylists are searched for in the<br />
background on the USB device and, if<br />
available, are offered beside folders in a<br />
separate category.<br />
RYou can only use USB devices formatted<br />
with the file system format FAT (File<br />
Allocation Table).<br />
i Files protected with DRM (Digital Rights<br />
Management) are not supported by the<br />
Media Interface.<br />
Connecting External Devices<br />
You will find the connection sockets in the<br />
glove compartment.<br />
Never connect more than one device at a<br />
time. Please consult a <strong>Mercedes</strong>-<strong>Benz</strong><br />
Service Center for further information.<br />
i Do not leave external devices in the<br />
vehicle, as functionality cannot be<br />
guaranteed above certain temperatures<br />
(such as inside a vehicle in direct sunlight).<br />
<strong>Mercedes</strong>-<strong>Benz</strong> does not take<br />
responsibility for any damage to external<br />
devices.<br />
1 Connection socket for 1/8 inch jack plug,<br />
for MP3 players, for example.<br />
2 iPod ® plug for connecting an iPod ®<br />
3 USB socket for connecting a USB device<br />
4 Example device: iPod ®<br />
X Connect the external device using<br />
appropriate connection 1, 2 or 3.<br />
Never connect more than one device at a<br />
time. You will otherwise not be able to play<br />
back from the external device.<br />
<strong>COMAND</strong> activates the device.<br />
If you remove a device, the No Device<br />
Connected message appears.<br />
i The connected iPod ® or USB device<br />
should not be operated with a remote<br />
control (such as a Bluetooth remote<br />
control) while it is being operated with<br />
Media Interface, as this could cause<br />
unforeseen technical difficulties.<br />
i The initialisation period may be extended<br />
if you connect an iPod ® or USB device<br />
which has a fully discharged battery.<br />
i Error messages appear while the device<br />
is being activated if:<br />
Ryou have connected two devices at the<br />
same time<br />
R<strong>COMAND</strong> does not support the device<br />
connected<br />
Rthe device connected consumes too<br />
much power<br />
Rthe Media Interface connection is<br />
defective
If necessary, consult a <strong>Mercedes</strong>-<strong>Benz</strong><br />
Service Center.<br />
Switching to Media Interface<br />
From Another Main Function<br />
X Select Audio£Audio£Media<br />
Interface in the audio menu display.<br />
i If you previously selected operation with<br />
Media Interface, you need only select<br />
Audio.<br />
or<br />
X Press the h function button.<br />
Switch on the previous disc operating<br />
mode.<br />
i If you previously selected operation with<br />
Media Interface, it will now be switched on.<br />
X Select Media.<br />
The media list appears. The R dot<br />
indicates the current medium being played.<br />
X Rotate ymz or slide qmr until the position<br />
of Media Interface is highlighted in the<br />
media list.<br />
i If no device is connected, you will see the<br />
entry Media Interface instead of a<br />
device name.<br />
X Press n.<br />
<strong>COMAND</strong> activates the connected device<br />
(only for iPods and USB devices). You will<br />
see a corresponding message. The basic<br />
display then appears.<br />
Example display: iPod ® operation<br />
1 Device type<br />
2 Track number<br />
3 Track name<br />
4 Visual elapsed track time<br />
5 Numeric elapsed track time (also in<br />
format 00:00:00 for audiobooks)<br />
6 Visual track display<br />
7 Current playback option<br />
8 Sound settings<br />
9 Media list<br />
a Album name, if available<br />
b Categories, playlists and/or folders<br />
c Artist, if available<br />
d Playback options<br />
i If the device connected does not contain<br />
any playable tracks, a corresponding<br />
message appears.<br />
Within the Audio Function<br />
Media Interface 149<br />
X Connect an external device (Y page 148).<br />
<strong>COMAND</strong> activates the device. The basic<br />
display appears.<br />
or<br />
X Select Audio£Media Interface.<br />
i The type of device 1 that has been<br />
connected is indicated by the<br />
corresponding icons for iPod ® , MP3 player<br />
or USB mass storage device.<br />
Z<br />
Audio
150 Media Interface<br />
Audio<br />
Selecting Music Files<br />
i <strong>COMAND</strong> displays the data stored on the<br />
iPod ® , MP3 player or USB mass storage<br />
device in the storage structure used in the<br />
medium in question.<br />
Selecting by Skipping to a Track<br />
X To skip forwards or backwards to a<br />
track: Slide omp.<br />
or<br />
X Press the F or E button.<br />
i Skipping forwards skips to the next track.<br />
Skipping backwards skips to the beginning<br />
of the current track if the track has been<br />
playing for more than 8 seconds. If the<br />
track has been playing for less than 8<br />
seconds, it skips to the start of the previous<br />
track. If you have selected a playback<br />
option other than Normal Track<br />
Sequence, the track sequence is random.<br />
Selecting by Manual Track Number<br />
Entry<br />
X To make an entry: Press the l button.<br />
An input menu appears. The number of<br />
possible input places depends on the<br />
number of tracks stored.<br />
X To enter a track number: Press a number<br />
key, such as s.<br />
The number is entered in the first position<br />
in the input line.<br />
i If an invalid number is entered, <strong>COMAND</strong><br />
will ignore it and it will not be displayed.<br />
X Enter more numbers if desired.<br />
X To confirm your entry: Press the n<br />
button.<br />
The selected track is played.<br />
Fast forward/rewind<br />
X When the main area is highlighted, slide<br />
and hold omp until the desired position has<br />
been reached.<br />
or<br />
X Press and hold the F or E button<br />
until the desired position has been<br />
reached.<br />
Selecting a Category/Playlist/Folder<br />
iPods and MP3 Players<br />
You can select tracks by category for iPods<br />
and by folder for MP3 players.<br />
Depending on the connected device, the<br />
categories may include:<br />
RCurrent track list<br />
RPlaylists (e.g. All, My top 25 or Music<br />
videos)<br />
RArtists<br />
RAlbums<br />
RPodcasts<br />
RAudiobooks<br />
RGenres<br />
RComposers<br />
i Some playback categories contain the<br />
All entry. Further entries of this type can<br />
follow depending on the hierarchy level.<br />
After selecting a title at the track level, the<br />
entire content of the category selected will<br />
be played.<br />
USB Devices<br />
For USB mass storage devices, you can select<br />
folders and also playlists (if available).<br />
<strong>COMAND</strong> can also display the album name<br />
and artist (“metadata”) during playback, if<br />
this information has previously been entered.<br />
Playlists are shown in the display with a<br />
particular icon. When you open the playlist,
the selected tracks are opened and playback<br />
begins.<br />
For USB mass storage devices, you can<br />
determine whether metadata from the tags in<br />
the coded music data should be displayed or<br />
whether the file name and directory should be<br />
displayed during playback.<br />
X Select Media Interface £Display<br />
Metadata.<br />
Selecting a Category and Opening a<br />
Folder<br />
X To open a category list/folder: Press n<br />
when the main area is highlighted.<br />
or<br />
X Select Music.<br />
You will see the available categories or the<br />
folder content (e.g. other folders).<br />
i The Music menu item is not available until<br />
the device has been activated.<br />
1 Device name and device icon<br />
2 Selectable categories<br />
X To select a category/folder: Slide qmr<br />
and confirm with n.<br />
You will see the content of the selected<br />
category or selected folder.<br />
i You may see the Please wait...<br />
message beforehand.<br />
X If necessary, repeat this operating step<br />
until the tracks in the desired folder appear.<br />
1 Symbol for back folder<br />
2 Current category<br />
3 Track icon<br />
4 Current track<br />
Media Interface 151<br />
X To select a track: Slide qmr and confirm<br />
with n.<br />
The track is played.<br />
or<br />
X Select an album or folder and confirm with<br />
n.<br />
X To select a track: Slide qmr and confirm<br />
with n.<br />
After that, the first track of the album/<br />
folder is played.<br />
X To switch to the next folder up: Select<br />
the Q icon.<br />
i The Q icon is always listed right at the<br />
top of the folder in question.<br />
Playing the Content of a Category or<br />
Folder<br />
X Select a category or folder.<br />
X Press n for longer than two seconds.<br />
The content of the category or folder<br />
selected is played in accordance with the<br />
playback option (Y page 152) selected.<br />
Z<br />
Audio
152 Media Interface<br />
Audio<br />
Alphabetical Track Selection<br />
iPods and MP3 Players<br />
i This function is available for categories<br />
which are arranged in alphabetical order.<br />
This function is not available within<br />
playlists, for example.<br />
X Select a category, e.g. artists.<br />
The available artists appear.<br />
X Press the corresponding number key once<br />
or repeatedly to select the initial letter of<br />
the desired artist. For example, to select an<br />
artist whose name begins with C, press the<br />
number key "2" three times.<br />
You see the available letters at the bottom<br />
edge of the display.<br />
After a message, the first entry in the list<br />
which matches the letter entered is<br />
highlighted.<br />
i If there is no entry which matches the<br />
letter which has been entered, the last<br />
entry in the list which matches a previous<br />
letter is highlighted.<br />
USB Devices<br />
i This function is available for directories<br />
which are arranged in alphabetical order.<br />
This function is not available within<br />
playlists.<br />
X Press the number key in question once or<br />
repeatedly in a directory to select the initial<br />
letter of the desired artist.<br />
For example, to select an artist whose<br />
name begins with C, press the number key<br />
“2” three times.<br />
You see the available letters at the bottom<br />
edge of the display.<br />
If the directory only contains folders,<br />
<strong>COMAND</strong> searches for folders. The first<br />
entry in the list that matches the letter is<br />
highlighted.<br />
If this does not happen, <strong>COMAND</strong> searches<br />
for tracks. After a message, the first entry<br />
in the list which matches the letter entered<br />
is highlighted.<br />
i If there is no entry which matches the<br />
letter which has been entered, the last<br />
entry in the list which matches a previous<br />
letter is highlighted.<br />
Selecting the Active Partition (USB<br />
Devices Only)<br />
You can select this function for USB devices<br />
when the storage device is partitioned. Up to<br />
four partitions (primary or logical and FATformatted)<br />
are supported.<br />
i The Windows formatting program<br />
supports FAT partitions with either FAT16<br />
or FAT32.<br />
X Select Media Interface£Select<br />
Active partition.<br />
Playback Options<br />
The following options are available to you:<br />
RNormal Track Sequence:<br />
You hear the tracks in their normal order<br />
(numerical or alphabetical).<br />
RRandom Tracks:<br />
You hear all tracks in random order.<br />
RRandom Categories or Random Folder<br />
(in the case of USB devices when Folder<br />
has been selected):<br />
You hear the tracks in the current active<br />
category or folder and any subfolders in<br />
random order.<br />
X To select an option: Select Media<br />
Interface in the basic display.<br />
The option list appears. A R dot indicates<br />
the option selected.<br />
X Select an option.
Audio Aux<br />
An external audio source (Aux) can be<br />
connected to <strong>COMAND</strong> via the 1/8 inch jack<br />
1 located inside the glovebox.<br />
Switching to Audio Aux Mode<br />
From Another Main Function<br />
X Select Audio£Audio£Aux in the audio<br />
menu display.<br />
i If the last mode was audio Aux mode, you<br />
only need to select Audio.<br />
Within the Audio Function<br />
X Select Audio£Aux.<br />
The Audio Aux menu appears. The medium<br />
in the external audio source is heard,<br />
provided it is connected and switched to<br />
playback.<br />
i Please see the corresponding operating<br />
instructions for how to operate the external<br />
audio source.<br />
You can set the following in audio Aux mode:<br />
RVolume (Y page 35)<br />
RBalance and fader (Y page 35)<br />
RTreble and bass (Y page 35)<br />
RSurround sound (Y page 36)<br />
Audio Aux 153<br />
G Warning<br />
Due to the different volumes of the external<br />
audio sources, system messages (e.g.<br />
navigation announcements) may be much<br />
louder. You may need to disable these system<br />
messages or adjust the volume of these<br />
messages manually.<br />
i The volume of external audio sources is<br />
extremely variable. It is possible that a<br />
device connected as an external audio<br />
source will sound quieter or louder in the<br />
vehicle or that the usual maximum volume<br />
cannot be achieved. On certain devices the<br />
volume can be set separately. In this case,<br />
start at a moderate volume and increase it<br />
slowly. In this way, you can determine<br />
whether the system is capable of playback<br />
without distortion, even at high volume.<br />
Z<br />
Audio
154
General Information ......................... 156<br />
Submenu Overview .......................... 157<br />
DVD Video .......................................... 158<br />
Video Aux .......................................... 163<br />
155<br />
Video
156 General Information<br />
Video<br />
General Information<br />
Safety Notes<br />
G Warning<br />
<strong>COMAND</strong> is classified as a Class 1 laser<br />
product. You must not open the casing. There<br />
is a risk of exposure to invisible laser radiation<br />
if you open the casing, or if the casing is faulty<br />
or damaged.<br />
<strong>COMAND</strong> does not contain any parts that you<br />
are able to maintain yourself. For safety<br />
reasons, all maintenance work must be<br />
exclusively carried out by qualified<br />
technicians.<br />
G Warning<br />
Only carry out the following when the vehicle<br />
is stationary:<br />
RInserting a disc<br />
REjecting a disc<br />
There is a risk of accident by being distracted<br />
from road and traffic conditions if you load a<br />
CD/DVD while the vehicle is in motion.<br />
Vehicle Equipment<br />
i This Operator’s Manual describes all<br />
features, standard or optional, potentially<br />
available for your vehicle at the time of<br />
purchase. Please be aware that your<br />
vehicle might not be equipped with all<br />
features described in this manual.<br />
Automatic Picture Switch-off<br />
The video picture is only displayed if the<br />
gearshift lever is in “P” position.<br />
When the gearshift lever is moved out of the<br />
“P” position, the following message is<br />
displayed: In order not to distract<br />
you from the traffic situation, the<br />
picture is faded out while the<br />
vehicle is in motion.<br />
When the gearshift lever is moved back into<br />
the “P” position, the picture switches back<br />
on.<br />
Notes on Storage Media<br />
i When playing copied discs, problems may<br />
occur with the playback. A wide variety of<br />
disc-writing software and writers are<br />
available. Due to this variety we cannot<br />
guarantee that the system will be able to<br />
play discs that you have written/copied<br />
yourself.<br />
! Do not affix stickers or labels to the discs,<br />
as they could peel off and damage<br />
<strong>COMAND</strong>. Stickers can cause the disc to<br />
bend, which can result in read errors and<br />
disc recognition problems.<br />
! <strong>COMAND</strong> is designed to hold discs which<br />
comply with the EN 60908 standard. You<br />
can therefore only use discs with a<br />
maximum thickness of 1.3 mm.<br />
If you insert thicker discs, e.g. those that<br />
contain data on both sides (DVD on one<br />
side and audio data on the other), they<br />
cannot be ejected and can damage<br />
<strong>COMAND</strong>.<br />
Do not use discs with a diameter of 8 cm,<br />
even with an adapter. Only use round discs<br />
with a diameter of 12 cm.<br />
Notes on the Care of Discs<br />
ROnly hold discs by the edge.<br />
RHandle discs with care in order to prevent<br />
malfunctions during playback.<br />
RAvoid scratching, leaving fingerprints and<br />
dust on the discs.<br />
RClean the discs occasionally with a<br />
commercially available cleaning cloth.<br />
Always wipe in a straight line from the<br />
inside outwards, never in a circular motion.
RThe discs must only be labelled using pens<br />
specially designed for this purpose.<br />
RAfter use, replace the discs into the sleeve.<br />
RProtect the discs from heat and direct<br />
sunlight.<br />
DVD Playback Conditions<br />
Some DVDs may not comply with the NTSC<br />
or PAL TV playback standards. Sound, picture<br />
and other playback problems may occur<br />
when you play such DVDs.<br />
As standard, <strong>COMAND</strong> can play video DVDs<br />
which meet the following criteria:<br />
RRegion code 1 or region code 0 (all regions)<br />
i With a video DVD having another region<br />
code, a corresponding message will be<br />
displayed.<br />
RPAL or NTSC TV standard<br />
Information on this can usually be found<br />
either on the DVD itself or on the DVD sleeve.<br />
i The factory setting for <strong>COMAND</strong> is region<br />
code 1. An authorized <strong>Mercedes</strong>-<strong>Benz</strong><br />
Submenu Overview<br />
Center can change this setting up to five<br />
times. This will enable you to play video<br />
DVDs with other region codes, provided<br />
that they have been made to the PAL or<br />
NTSC TV standard.<br />
Functional Restrictions<br />
It may be the case that some functions or<br />
actions may not be possible at certain times,<br />
or may not be possible in general, depending<br />
on the DVD.<br />
When you activate such functions or actions,<br />
this is indicated by the 7 in the display.<br />
Loading a DVD<br />
X Proceed as described in the “Loading CDs<br />
and DVDs” section (Y page 134).<br />
Ejecting a DVD<br />
X Proceed as described in the “Ejecting CDs<br />
and DVDs” section (Y page 136).<br />
DVD-Video «/X ± Media Sound<br />
DVD functions « Pauses<br />
playback<br />
Brightness X Resumes<br />
playback<br />
Contrast X Restarts<br />
playback<br />
± Stops<br />
playback<br />
Medium<br />
selection<br />
Treble<br />
Bass<br />
Balance/Fader<br />
Color Surround sound<br />
16:9 Optimized<br />
4:3<br />
Widescreen<br />
Submenu Overview 157<br />
Z<br />
Video
158 DVD Video<br />
Video<br />
DVD-Video «/X ± Media Sound<br />
Active Aud./Vid.<br />
Source for the Rear<br />
Rear Audio/Video<br />
Off<br />
DVD Video<br />
Switching to DVD Video<br />
From the Control Panel<br />
X Insert a DVD Video (Y page 134).<br />
<strong>COMAND</strong> loads the medium inserted and<br />
starts playing it.<br />
or<br />
X From another main function: Press the<br />
h function button.<br />
The function button takes you directly to<br />
the last active disc mode (CD Audio , DVD<br />
Audio , MP3 CD, Media Interface or DVD<br />
Video). <strong>COMAND</strong> accesses all discs in the<br />
DVD changer.<br />
If you previously selected DVD Video mode,<br />
it will now be switched on.<br />
If you have another disc mode activated:<br />
X Select Media.<br />
The media list appears.<br />
X Select a DVD Video (Y page 159).<br />
Via <strong>COMAND</strong> Controller<br />
X Select Video from the main function line.<br />
Displaying/Hiding Control Menu<br />
X To show:Slide qmr.<br />
X To hide: Slide qmr.<br />
or<br />
X Wait approximately eight seconds.<br />
Control menu displayed<br />
1 Disc type<br />
2 Current title<br />
3 Current scene<br />
4 Elapsed title time<br />
5 Display menu system<br />
Displaying/Hiding Menu System<br />
X To show: Press n.<br />
or<br />
X When the control menu is shown, select<br />
Menu.<br />
X To hide: Slide qm and select Full<br />
screen.
Menu system displayed<br />
1 DVD Video menu<br />
2 Pause function<br />
3 Stop function<br />
4 Media selection<br />
5 Sound settings<br />
Fast Forward or Rewind<br />
X Slide and hold omp in Full Screen mode<br />
until the desired position is reached.<br />
or<br />
X Press and hold E or F in the control<br />
panel until the desired position has been<br />
reached.<br />
You see the control menu.<br />
Selecting DVD Media<br />
X In DVD video mode, if necessary display the<br />
menu system (Y page 158).<br />
X Select Media.<br />
The media list appears. The R dot<br />
indicates the current medium being played.<br />
Media list<br />
1 Symbol for DVD Video<br />
2 DVD Video currently playing<br />
X To select video ý: Rotate ymz or slide<br />
qmr.<br />
X To confirm your selection: Press n.<br />
<strong>COMAND</strong> changes the medium.<br />
i If you select a CD, an DVD Audio or an<br />
MP3 medium, you switch to the audio mode<br />
in question. You can find further<br />
information about the media list on<br />
(Y page 141).<br />
Stop Function<br />
DVD Video 159<br />
X In DVD Video mode, display the menu<br />
system if necessary (Y page 158).<br />
X To interrupt playback: Select ±.<br />
The display « changes to X.<br />
X To resume playback: Select X.<br />
Playback continues from the point where it<br />
was interrupted. The menu system is<br />
hidden.<br />
X To stop playback: Select ± again while<br />
playback is interrupted.<br />
or<br />
X Select ± twice during playback.<br />
Selection is at X.<br />
X To restart playback: Select X.<br />
Playback restarts from the beginning. The<br />
menu system is hidden.<br />
Z<br />
Video
160 DVD Video<br />
Video<br />
Pause Function<br />
X In DVD Video mode, display the menu<br />
system if necessary (Y page 158).<br />
X To pause playback: Select «.<br />
The display « changes to X.<br />
X To resume playback: Select X.<br />
Playback continues from the point where it<br />
was paused. The menu system is hidden.<br />
Selecting a Scene/Chapter<br />
X To skip forwards or backwards: Rotate<br />
ymz or slide omp in Full Screen mode.<br />
or<br />
X Press the E or F button on the<br />
control panel.<br />
The control menu (Y page 158) appears for<br />
approximately 8 seconds.<br />
Selecting a Film/Track<br />
i This function is only available if the DVD<br />
is divided into several films/tracks.<br />
X Display the menu system if necessary<br />
(Y page 158).<br />
X Select DVD-Video£DVD Functions.<br />
A menu appears.<br />
DVD function menu<br />
X Turn ymz or slide qmr until Title<br />
Selection is selected.<br />
X To call up the selection list: Press n.<br />
X Select a film/track.<br />
Picture Settings<br />
Adjusting the Brightness, Contrast or<br />
Color<br />
X Display the menu system if necessary<br />
(Y page 158).<br />
X Select DVD-Video £ Brightness,<br />
Contrast or Color.<br />
X To change the setting: Rotate ymz or<br />
slide qmr until the desired setting is<br />
reached.<br />
X To save the setting: Press n.<br />
Changing the Picture Format<br />
X Display the menu system if necessary<br />
(Y page 158).<br />
X Select DVD-Video.<br />
The DVD-Video menu appears. The filled-in<br />
option button in front of one of these menu<br />
items: 16:9 Optimized, 4:3 or<br />
Widescreen indicates the format currently<br />
selected.<br />
X To change the format: Rotate ymz or<br />
slide qmr until the desired format is<br />
selected.<br />
X To save the setting: Press n.<br />
DVD Menu<br />
i The DVD menu is the menu stored on the<br />
DVD itself. It is structured in various ways<br />
according to the individual DVD and<br />
permits certain actions and settings.
Opening the DVD Menu<br />
X In DVD Video mode, if necessary, display<br />
the menu system (Y page 158).<br />
X Select DVD-Video£DVD Functions<br />
£Menu.<br />
The DVD menu appears.<br />
Selecting Menu Items in the DVD Menu<br />
X Slide qmr or omp.<br />
X To confirm your selection: Press n.<br />
The selection menu appears.<br />
i Menu items which cannot be selected are<br />
greyed out.<br />
X To confirm selection: Select Select.<br />
<strong>COMAND</strong> will perform the action or<br />
displays a submenu represented by the<br />
menu item selected in the DVD menu. If<br />
necessary select from further options in the<br />
same way.<br />
<strong>COMAND</strong> then switches back to the DVD<br />
menu.<br />
i Depending on the DVD, it is possible the<br />
menu item Play either has no function or<br />
no function in certain parts of the DVD<br />
menu. This is indicated by the 7 symbol<br />
on the display.<br />
or<br />
X In DVD Video mode, if necessary, display<br />
the control menu (Y page 158).<br />
X Select Menu£DVD Video£DVD<br />
Functions<br />
DVD menu<br />
Stopping Film or Skipping to the<br />
Beginning or End of a Scene<br />
X Select any menu item from the DVD menu.<br />
The selection menu appears.<br />
X To stop a film: Select Stop from the menu.<br />
X To skip to the end of a scene: Select<br />
Ô from the menu.<br />
X To skip to the beginning of a scene:<br />
Select Ó from the menu.<br />
i Depending on the DVD, the Ó and<br />
Ô menu items may not function at all or<br />
may not function at certain points in the<br />
DVD menu. You will see the 7 symbol in<br />
the display as an indicator.<br />
Moving up one Level in the DVD Menu<br />
X Press the k button.<br />
or<br />
DVD Video 161<br />
X Select the corresponding menu item in the<br />
DVD menu.<br />
or<br />
X Select any menu item from the DVD menu.<br />
X Select Go Up from the selection menu.<br />
i Depending on the DVD, the Play menu<br />
item may not function at all or may not<br />
function at certain points in the DVD menu.<br />
You will see the 7 symbol in the display<br />
as an indicator.<br />
Z<br />
Video
162 DVD Video<br />
Video<br />
Back to the Movie<br />
X Press the k button repeatedly until you<br />
see the film.<br />
or<br />
X Select the corresponding menu item in the<br />
DVD menu.<br />
X Select the Back (to movie) menu item<br />
from the selection menu.<br />
i Depending on the DVD, the Back (to<br />
movie) menu item may not function in<br />
general or may not function at certain<br />
points in the DVD menu.<br />
Setting the Language and Audio<br />
Format<br />
i This function is not available on all DVDs.<br />
Where available, you can set the DVD menu<br />
language and the audio language or audio<br />
format. The number of possible settings is<br />
dependent on the DVD content. It is<br />
possible that the settings may also be<br />
accessed in the DVD menu (Y page 160).<br />
X Display the menu system if necessary<br />
(Y page 158).<br />
X Select DVD-Video£DVD Functions.<br />
X Select Menu Language or Audio<br />
Language.<br />
Both of these will bring up a selection menu<br />
after a few seconds. The R dot in front of<br />
an entry indicates the currently selected<br />
language.<br />
X To change the setting: Rotate ymz or<br />
slide qmr until the desired setting is<br />
reached.<br />
X To save the setting: Press n.<br />
Subtitles and Camera Angle<br />
i These functions are not available on all<br />
DVDs. The number of subtitle languages<br />
and camera angles available depends on<br />
the content of the DVD. The settings may<br />
also be accessed in the DVD menu<br />
(Y page 160).<br />
X Display the menu system if necessary<br />
(Y page 158).<br />
X Select DVD-Video £ DVD Functions.<br />
X Select Subtitles or Camera Angle.<br />
Both of these will bring up a selection<br />
menu. The R dot in front of an entry<br />
indicates the current setting.<br />
X To change the setting: Rotate ymz or<br />
slide qmr until the desired setting is<br />
reached.<br />
X To save the setting: Press n.<br />
Interactive Content<br />
DVDs may have interactive content (e.g. a<br />
video game).<br />
In a video game, for example, you can control<br />
the play by selecting or triggering actions. The<br />
type and number of actions is dependent on<br />
the DVD.<br />
X To select an action: Slide qmr or omp.<br />
X To trigger an action: Press n.<br />
A menu appears and the first entry,<br />
Select, is highlighted.<br />
X Press n.<br />
or<br />
X In DVD Video mode, if necessary display<br />
the control menu (Y page 158).<br />
X Select Menu£DVD-Video£DVD<br />
Functions.<br />
X Select a directional arrow to select or<br />
trigger an action.
The way you can control the actions depends<br />
on the DVD.<br />
Video Aux<br />
Aux Connectors<br />
An external video source (Video Aux) can be<br />
connected to <strong>COMAND</strong> via Media Interface<br />
(Y page 147)1/8 inch audio/video jack<br />
located inside the glovebox.<br />
i In vehicles equipped with a rear view<br />
camera, the Video Aux connection cannot<br />
be used for external video sources.<br />
Switching to Video Aux<br />
From Another Main Function<br />
X Select Video£Video£Video Aux<br />
i If Video Aux mode was active last, you<br />
only need to select Video.<br />
Within the Video Function<br />
X Select Video£Video Aux<br />
The Video Aux menu appears. The medium<br />
in the external video source is played,<br />
provided it is connected and switched to<br />
playback.<br />
i Please refer to the relevant operating<br />
guide for operation of the external video<br />
source.<br />
Video Aux Settings<br />
The following settings can be made in Video<br />
Aux mode:<br />
RVolume (Y page 35)<br />
RBalance and fader (Y page 35)<br />
RTreble and bass (Y page 35)<br />
RSurround sound (Y page 36)<br />
RPicture (Y page 160)<br />
Video Aux 163<br />
G Warning<br />
Due to the different volumes of the external<br />
audio sources, system messages (e.g.<br />
navigation announcements) may be much<br />
louder. You may need to disable these system<br />
messages or adjust the volume of these<br />
messages manually.<br />
i The volume of external audio sources is<br />
extremely variable. It is possible that a<br />
device connected as an external audio<br />
source will sound quieter or louder in the<br />
vehicle or that the usual maximum volume<br />
cannot be achieved. On certain devices the<br />
volume can be set separately. In this case,<br />
start at a moderate volume and increase it<br />
slowly. In this way, you can determine<br />
whether the system is capable of playback<br />
without distortion, even at a high volume.<br />
Z<br />
Video
164
General Information ......................... 166<br />
Basic Functions ................................. 170<br />
System Settings ................................ 172<br />
CD/DVD Audio and MP3 Operation . 173<br />
DVD Video Operation ........................ 177<br />
Aux Operation ................................... 181<br />
165<br />
Rear Seat Entertainment
166 General Information<br />
Rear Seat Entertainment<br />
General Information<br />
Vehicle Equipment<br />
i This Operator’s Manual describes all<br />
features, standard or optional, potentially<br />
available for your vehicle at the time of<br />
purchase. Please be aware that your<br />
vehicle might not be equipped with all<br />
features described in this manual.<br />
Overview<br />
This chapter describes the RSE (Rear Seat<br />
Entertainment) system:<br />
RBasic functions (Y page 170)<br />
RSystem settings (Y page 172)<br />
RCD/DVD audio and MP3 operation<br />
(Y page 173)<br />
RDVD Video operation (Y page 177)<br />
RAux operation (Y page 181)<br />
Safety Instructions<br />
G Warning<br />
The RSE CD/DVD player is a Class 1 laser<br />
product. There is a danger of invisible laser<br />
radiation when you open or damage the cover.<br />
Do not remove the cover. The RSE CD/DVD<br />
player does not contain any parts which can<br />
be serviced by the user. For safety reasons,<br />
have any necessary service work performed<br />
by qualified personnel.<br />
G Warning<br />
The driver should not wear a Rear Seat<br />
Entertainment headset while operating the<br />
vehicle under any circumstances. The use of<br />
a headset while driving the vehicle could<br />
drastically impair the ability to react to audible<br />
traffic conditions (e.g. emergency sirens from<br />
police/fire/ambulance, another car’s horn,<br />
etc.).<br />
G Warning<br />
When not in use, headsets or external video<br />
sources should be stored in a safe location<br />
(e.g. one of the vehicle’s storage<br />
compartments) so that they are not loose<br />
within the passenger compartment during<br />
braking, vehicle maneuvers or a traffic<br />
accident. Objects moving within the<br />
passenger compartment could cause serious<br />
personal injury to vehicle occupants.<br />
G Warning<br />
Due to a potential choking hazard, wired<br />
headset usage by children should only occur<br />
with adult supervision.<br />
Rear Seat Entertainment<br />
Components<br />
The rear-seat entertainment system consists<br />
of:<br />
Rtwo display screens behind the head rests<br />
of front-seats<br />
Rremote control(s)<br />
Ra CD/DVD drive<br />
RAux connectors on the drive and display<br />
screens for connecting external devices<br />
Rtwo headsets (wireless headsets only<br />
available in the US)
Display Screens<br />
: Connector for wired headset<br />
; Aux connectors<br />
Remote Control<br />
: Switching the display screen on or off<br />
; Switching on/off the key illumination<br />
= Selecting the display screen (left/right)<br />
= Display<br />
? Infra-red sensors<br />
General Information 167<br />
? Selecting menu item or menu (arrows)<br />
A Confirming selection (OK)<br />
B Muting the playback<br />
C Setting the Volume (wired headset)<br />
D Skipping tracks forward/backward<br />
E Selecting a title directly<br />
F Leaving a menu<br />
Selecting the Active Display Screen for<br />
the Remote Control<br />
With the remote control you can select which<br />
of the two display screens is responsive to the<br />
remote control.<br />
X Selecting the left/right display screen:<br />
Rotate the wheel = until L or R appears in<br />
the small window.<br />
Switching On/Off the Display Screen<br />
i If the ignition key is in position 0 or 1 (Y<br />
vehicle operating guide) or the key is not<br />
inserted, the display screens are switched<br />
off automatically after 30 minutes. Before<br />
switching off a corresponding message<br />
appears.<br />
You can switch on the screen(s) again but<br />
be aware it will continue to discharge the<br />
vehicle battery.<br />
Z<br />
Rear Seat Entertainment
168 General Information<br />
Rear Seat Entertainment<br />
X Point the remote control to the active<br />
screen and press the On/Off : button on<br />
the remote control.<br />
The display screen is switched on or off.<br />
i Switching on with the remote control is<br />
only possible if the ignition is on.<br />
Muting the Audio Playback (Only Wired<br />
Headset)<br />
X Press the button B on the remote control.<br />
Depending on the previous state the sound<br />
is switched on or off.<br />
Selecting a Menu Item and Confirming the<br />
Selection<br />
X Selecting the menu item: Press the arrow<br />
buttons ? on the remote control.<br />
X Confirming the selection: Press the OK<br />
button A.<br />
CD/DVD Drive and Aux Connectors<br />
The CD/DVD drive is located in<br />
Rcentral position underneath the rear seats<br />
in vehicles with folding rear seat<br />
Rin the arm rest between the rear seats in<br />
vehicles without folding rear seat<br />
: Setting the volume<br />
; Selecting the display screen<br />
= Battery compartment<br />
? Switching headset on/off<br />
A State Indicator LED<br />
: CD/DVD slot<br />
; Aux, right (R) connector for audio signal<br />
= Aux, left (L) connector for audio signal<br />
? Aux, connector for video signal (V)<br />
A CD/DVD eject button<br />
The Aux connectors shown here represent<br />
the source Disk Drive Aux. The same<br />
connectors are available at the display<br />
screens. These represent the Aux source<br />
Display Aux .<br />
Wireless Headsets<br />
i Vehicles sold in the US are equipped with<br />
wireless headsets. Vehicles sold in Canada<br />
and elsewhere are equipped with wired<br />
headsets.<br />
X Adapt the fit of the headset by pulling the<br />
headset clamp as indicated by the arrows<br />
in the figure above.
Switching ON/Off the Wireless headset<br />
X Press button ?.<br />
Depending on the previous state the<br />
headset is switched on or off. In order to<br />
preserve battery charge, the headset is<br />
switched off if there is no IR signal<br />
reception for appr. 3 minutes.<br />
Setting the Wireless Headset Volume<br />
X Turn the Thumb wheel : to set the desired<br />
volume.<br />
i If you have connected a wired headset to<br />
a display screen, you can set the volume<br />
with the Volume +/- button C of the<br />
remote control (Y page 167).<br />
Selecting the Display Screen for the<br />
Headset<br />
X Select the display screen with the<br />
switch ;.<br />
The selected screen L or R is indicated.<br />
State Indicator LED<br />
The color of the LED indicates:<br />
Rif the headset is switched on or off<br />
Rthe battery condition<br />
Color State<br />
Green Headset is switched on and<br />
the batteries are full.<br />
Dark Headset is switched off or<br />
the batteries are empty or<br />
not inserted.<br />
Red Headset is switched on and<br />
the batteries are almost<br />
empty.<br />
Connecting Additional Headsets<br />
You can connect wired headsets to both of<br />
the display screens. The socket is suitable for<br />
headsets with 1/8“ stereo jacks and 32 Ohm<br />
impedance (Y page 167).<br />
Rear Compartment Socket<br />
In vehicles with the rear-seat entertainment<br />
system, there is a 12 V socket in the rear<br />
compartment. Please refer to the vehicle<br />
Operator's Manual for the exact location of<br />
the socket.<br />
The socket can be used for accessories with<br />
a maximum power consumption of 180 W.<br />
Replacing the Batteries<br />
General Information 169<br />
You need batteries for the remote control and<br />
the wireless headset.<br />
G Warning<br />
Keep batteries out of the reach of children.<br />
Immediately seek medical help if a child<br />
swallows a battery. Batteries are not to be<br />
short-circuited, dismantled or thrown into<br />
fire.<br />
H Environmental Note<br />
Batteries contain materials that can harm the<br />
environment if disposed of improperly.<br />
Recycling of batteries is the preferred method<br />
of disposal. Many states require sellers of<br />
batteries to accept old batteries for recycling.<br />
Z<br />
Rear Seat Entertainment
170 Basic Functions<br />
Rear Seat Entertainment<br />
Remote Control Batteries<br />
The remote control contains two batteries of<br />
size AAA, 1.5 V.<br />
X Remove the cover of the battery<br />
compartment 3 on the back of the remote<br />
control by pressing down the clip :.<br />
X Take out the empty batteries 5.<br />
X Insert the new batteries. Mind the polarity<br />
marks on the batteries.<br />
Battery on the left:<br />
The plus terminal (+) must face upwards.<br />
Battery on the right:<br />
The plus terminal (+) must face downwards.<br />
X Put the cover with the engagement<br />
hooks ? first onto the battery<br />
compartment and let the snap-fit hook 2<br />
snap in.<br />
Wireless Headset Batteries<br />
The battery compartment cover is located on<br />
the left headphone.<br />
1 Battery compartment cover<br />
The wireless headset contains two batteries<br />
of size AAA, 1.5 V.<br />
X Open battery compartment cover : by<br />
folding it up. When doing so, hold the left<br />
headphone as shown in the illustration to<br />
prevent the inserted batteries from falling<br />
out.<br />
X Take out the empty batteries.<br />
X Insert the new batteries. Mind the polarity<br />
marks on the batteries.<br />
Battery on the left:<br />
The plus terminal (+) must face upwards.<br />
Battery on the right:<br />
The plus terminal (+) must face downwards.<br />
X Close the battery compartment.<br />
The state indicator LED lights green when<br />
you switch on the headset and the batteries<br />
were inserted correctly.<br />
Basic Functions<br />
The following operating modes are available<br />
for the rear-seat entertainment system:<br />
RCD/DVD Audio and MP3 mode CD/DVD<br />
Audio and MP3 operation (Y page 173)<br />
RDVD Video operation (Y page 177)<br />
RAUX mode
In Aux mode you can play external video<br />
sources that are connected either to the<br />
display screens or to the CD/DVD drive. In<br />
addition you can play the active audio or<br />
video source of <strong>COMAND</strong> (Y page 181).<br />
With the system settings menu you can set<br />
display design and language for each screen<br />
separately (Y page 172).<br />
Wireless Headset Operation<br />
i Vehicles sold in the US are equipped with<br />
wireless headsets. Vehicles sold in Canada<br />
and elsewhere are equipped with wired<br />
headsets.<br />
You can use the wireless headset and/or two<br />
wired headsets connected to the display<br />
screens (Y page 168).<br />
X Switch on the wireless headset<br />
(Y page 169).<br />
X Set the volume of the headset<br />
(Y page 169).<br />
X Select the display screen for the headset<br />
(Y page 169).<br />
Main Loudspeaker Operation<br />
i This function is available in connection<br />
with <strong>COMAND</strong>.<br />
The sound of a medium which is played in the<br />
RSE disc drive can also be heard over the<br />
vehicle loudspeakers. For this, at least on one<br />
of the display screens the operating mode<br />
Disc has to be active.<br />
X Switching to Audio menu: Select Audio<br />
£ Audio in <strong>COMAND</strong>.<br />
X Select Rear.<br />
The volume control of the headsets has no<br />
impact on the volume of the loudspeakers.<br />
Setting Treble and Bass<br />
X Switch to the menu of the respective<br />
operating mode<br />
RCD Audio (Y page 174)<br />
RDVD Audio (Y page 174)<br />
RMP3 (Y page 174)<br />
RDVD Video (Y page 177)<br />
RAux (Y page 182)<br />
X Select Treble or Bass.<br />
A setting scale appears.<br />
X To change the value: Press the n or<br />
ý button on the remote control.<br />
X To confirm the setting: Press the 9<br />
button on the remote control.<br />
Multiuser Operation<br />
The two display screens can be operated<br />
almost entirely independent from each other.<br />
For some menus, however, there can arise<br />
conflicts if the two display screens are used<br />
simultaneously.<br />
Simultaneous Use of the Rear-<br />
Compartment Disc Drive<br />
Basic Functions 171<br />
If on both display screens the disc drive is<br />
used, the selection of certain settings on one<br />
screen will have an impact on the other<br />
screen as well.<br />
The following functions affect both screens:<br />
RChanging the playback options<br />
RSelecting a track (from track list or folder)<br />
RUsing the Play, Stop or Pause function.<br />
RUsing the fast forward/rewind function<br />
RSwitching to DVD menu and and navigating<br />
through it<br />
RSetting language, subtitle and camera<br />
angle<br />
RCalling up interactive DVD content<br />
Z<br />
Rear Seat Entertainment
172 System Settings<br />
Rear Seat Entertainment<br />
The following functions affect only one<br />
screen:<br />
RChanging Audio, Video or screen settings<br />
RSwitching between full screen and menu<br />
system.<br />
Switching Operating Modes<br />
When you leave an operation mode, e.g. CD<br />
Audio, its current settings are stored. If you<br />
call up this operation mode later, there are<br />
two possibilities:<br />
RThe operation mode settings have been<br />
changed on the other display screen.<br />
RThe operation mode settings have not been<br />
changed.<br />
In the first case the operation mode settings<br />
will be as they are on the other display screen.<br />
In the second case the settings remain as<br />
they were before you left the operation mode.<br />
Functional Restrictions in DVD Video<br />
Mode<br />
Some functions may temporarily or<br />
permanently not be available. If you use such<br />
functions, you will see the symbol 7.<br />
System Settings<br />
All system settings can be set for each display<br />
screen independently.<br />
Calling up the System Menu<br />
X Select System in the main function line.<br />
The system menu appears on the selected<br />
display screen.<br />
Selecting the Display Language<br />
X Select System Settings £ Language.<br />
The list of languages appears. A R dot<br />
indicates the current setting.<br />
X To change the setting: Select another<br />
language with the button n or ý on<br />
the remote control.<br />
X Press the 9 button.<br />
The rear-seat entertainment system<br />
activates the selected language.<br />
Switching the Display Design<br />
X Select System settings.<br />
X Select Day Mode, Night Mode or<br />
Automatic.<br />
The ä icon indicates the current setting.<br />
X Use the n or ý button to select a<br />
setting.<br />
RDay Mode<br />
The display remains set to day design.<br />
RNight Mode<br />
The display remains set to night design.<br />
RAutomatic<br />
The display automatically switches<br />
depending on the instrument cluster<br />
lighting.<br />
X Press the 9 button on the remote control.
Adjusting the Brightness<br />
X Select System settings £<br />
Brightness.<br />
A scale appears.<br />
X To set the brightness: Press the n or<br />
ý button.<br />
The brightness bar moves up or down. The<br />
image dims or brightens according to the<br />
bar position on the scale.<br />
X To confirm the setting: Press the 9<br />
button on the remote control.<br />
Switching the Display Screen On/ Off<br />
Switching Off the Display<br />
X Select Display off from the system<br />
menu.<br />
Switching On the Display<br />
X Press the 9 button on the remote control.<br />
CD/DVD Audio and MP3 Operation<br />
Safety Instructions<br />
G Warning<br />
The RSE CD/DVD player is a Class 1 laser<br />
product. There is a danger of invisible laser<br />
radiation when you open or damage the cover.<br />
Do not remove the cover. The RSE CD/DVD<br />
player does not contain any parts which can<br />
be serviced by the user. For safety reasons,<br />
have any necessary service work performed<br />
by qualified personnel.<br />
Notes on CDs/DVDs<br />
Please refer to the chapter ”Audio” for<br />
general information about CD/DVD discs and<br />
on the MP3 format (Y page 133) and<br />
(Y page 132).<br />
CD/DVD Audio and MP3 Operation 173<br />
Inserting a Disc<br />
The CD/DVD drive is located in<br />
Rcentral position underneath the rear seats<br />
in vehicles with folding rear seat<br />
Rin the arm rest between the rear seats in<br />
vehicles without folding rear seat<br />
1 CD/DVD slot<br />
2 Eject button<br />
The drive takes one medium at a time. If there<br />
is already a medium loaded, you must first<br />
eject it.<br />
X Insert a disc into the slot with the printed<br />
side upwards.<br />
If the medium has no printed side, the side<br />
you want to play has to face downwards.<br />
The drive pulls the disc in.<br />
The CD/DVD drive plays the disc<br />
Rif it has been inserted properly and<br />
Rafter you have switched to disc operation<br />
(Y page 174).<br />
The data of a MP3 disc must be first loaded<br />
from the drive. This takes some time<br />
depending on the number of folders and files.<br />
Z<br />
Rear Seat Entertainment
174 CD/DVD Audio and MP3 Operation<br />
Rear Seat Entertainment<br />
Ejecting a Disc<br />
X Press Eject button 8.<br />
The drive ejects the disc.<br />
X Take the disc out of the slot.<br />
If you do not take the disc out of the slot,<br />
the drive will pull it in again automatically<br />
after a short while.<br />
Switching to CD Audio, DVD Audio or<br />
MP3 Operation<br />
X Insert a disc (Y page 173).<br />
X Select Disc in the main function line using<br />
the remote control.<br />
The corresponding mode is activated. The<br />
rear-seat entertainment system plays the<br />
disc.<br />
Example Display of CD Audio Operation<br />
1 Disc type _<br />
2 Track number<br />
3 Track name (only if stored on the disc as<br />
CD text)<br />
4 Elapsed track time<br />
5 Visual time and track display<br />
6 Current playback settings (no icon for<br />
“Normal track sequence”)<br />
7 Bass setting<br />
8 Treble setting<br />
9 Disc name (only if stored on the disc as<br />
CD text)<br />
a Track list<br />
b Playback options<br />
Example Display of DVD Audio<br />
Operation<br />
1 Disc type ü<br />
2 Track number<br />
3 Track name<br />
4 Elapsed track time<br />
5 Visual time and track display<br />
6 Current playback option (no icon for<br />
“Normal track sequence”)<br />
7 Bass setting<br />
8 Treble setting<br />
9 Disc name (if available)<br />
a Track list<br />
b Stop function<br />
H Pause function<br />
I Playback options<br />
Example Display of MP3 Operation<br />
1 Disc type þ<br />
2 Track number<br />
3 Track name<br />
4 Elapsed track time
5 Visual time and track display<br />
6 Current playback option (no icon for<br />
"Normal track sequence")<br />
7 Bass setting<br />
8 Treble setting<br />
9 Current folder or medium name<br />
a Folder list<br />
b Playback options<br />
i For MP3 titles with variable bitrate the<br />
display of the elapsed track time may not<br />
be correct.<br />
Selecting a Track<br />
Selecting by Skipping to a Track<br />
X To skip forwards or back to a track:<br />
Press . or , on the remote control.<br />
or<br />
X Press E or F button on the remote<br />
control.<br />
‘Forward track skip’ skips to the next track.<br />
‘Backward track skip’ skips to the<br />
beginning of the current track, if the track<br />
has been playing for more than 8 seconds.<br />
If the track has been playing for less than<br />
8 seconds, it will skip to the beginning of<br />
the previous track.<br />
Selecting via Track List<br />
X In CD Audio/DVD Audio mode: Select<br />
Track list.<br />
or<br />
X In MP3 mode: Press the 9 button when<br />
the main area is highlighted.<br />
The track list appears. The R dot indicates<br />
the current track.<br />
X To select a track: Press n or ý on<br />
the remote control.<br />
X Press 9 on the remote control.<br />
CD/DVD Audio and MP3 Operation 175<br />
Selecting a Track by Directly Entering<br />
its Number<br />
X Press button h.<br />
The track entry display appears.<br />
Example: track 2<br />
X Press the number button 2.<br />
Example: track 12<br />
X Press the corresponding number keys in<br />
rapid succession.<br />
i It is not possible to enter numbers that<br />
exceed the number of tracks on the CD or<br />
in the currently active folder.<br />
X Wait for approximately 3 seconds after<br />
making an entry.<br />
You will hear the entered track. The<br />
corresponding basic menu then reappears.<br />
Fast Forward/Rewind<br />
X Main area is active: Press and hold<br />
the . or , button on the remote<br />
control until you have reached the desired<br />
position.<br />
or<br />
X Press and hold the E or F on the<br />
remote control until you have reached the<br />
desired position.<br />
Selecting a Folder<br />
i This function is only available in MP3<br />
mode.<br />
X Select Folder in MP3 mode.<br />
or<br />
X Press the 9 button when the main area is<br />
highlighted.<br />
The content of the folder is displayed.<br />
Z<br />
Rear Seat Entertainment
176 CD/DVD Audio and MP3 Operation<br />
Rear Seat Entertainment<br />
1 Back folder symbol<br />
2 Current folder name<br />
3 Track icon<br />
X To switch to the next folder up: Select<br />
icon U.<br />
The display shows the next folder up.<br />
1 Back folder symbol<br />
2 Folder symbol<br />
X To select a folder: Select the desired<br />
folder.<br />
You will see the tracks in the folder.<br />
X To select a track: Press n or ý on<br />
the remote control.<br />
X Press 9 on the remote control.<br />
The track is played and the corresponding<br />
folder is now the active folder.<br />
Pause function<br />
i This function is only available in DVD<br />
Audio mode.<br />
X To pause playback: Select «.<br />
The display « changes to X.<br />
X To resume playback: Select X.<br />
The display X changes to «.<br />
Stop function<br />
i This function is only available in DVD<br />
Audio mode.<br />
X To interrupt playback: Select ±.<br />
The playback stops and jumps to the<br />
beginning of the DVD.<br />
X To resume playback: Select X.<br />
The playback continues from the position<br />
where it was stopped.<br />
Setting the Audio Format<br />
It is only possible to set the audio format in<br />
DVD Audio mode. The number of available<br />
audio formats is dependent on the DVD. The<br />
content of an Audio DVD is called the ‘album’,<br />
which can be divided into a maximum of nine<br />
groups. A group may contain, for example,<br />
music of different sound qualities (stereo and<br />
multi-channel formats) or bonus tracks. Each<br />
group can include up to 99 tracks. If an Audio<br />
DVD only comprises one audio format, the<br />
“Group” menu item(s) cannot be selected.<br />
X Select DVD-A £Group.<br />
The list of available audio formats appears.<br />
The R dot indicates the format currently<br />
selected.<br />
X To change a setting: Press n or ý<br />
on the remote control.<br />
X Press 9 on the remote control.<br />
X To exit the menu: Press . or , on<br />
the remote control.<br />
Playback options<br />
The following options are available:
RNormal Track Sequence<br />
You will hear the tracks in the normal<br />
sequence (e.g. track 1, 2, 3, etc.).<br />
RRandom Tracks:<br />
You will hear the tracks in random order<br />
(e.g. track 3, 8, 5, etc.).<br />
RRandom Folder (MP3 mode only)<br />
The tracks in the currently active folder and<br />
any subfolders are heard in random order.<br />
X To select an option: Switch to CD or DVD-<br />
A or MP3 mode (Y page 174).<br />
X Select CD or DVD-A or MP3.<br />
The option list appears. A R dot indicates<br />
the option currently selected.<br />
X Select an option.<br />
The option is switched on. All options<br />
except Normal Track Sequence will be<br />
indicated in the main area.<br />
i If you change the disc, the Normal<br />
Track Sequence option is activated<br />
automatically. If an option is selected, it<br />
remains selected after the rear-seat<br />
entertainment system is switched on or off.<br />
Switching Track Information On/Off<br />
(MP3 Mode Only)<br />
If this function is switched on, folder and track<br />
names are displayed.<br />
If this function is switched off, disc and file<br />
name are displayed.<br />
X Select Display Track Information.<br />
The function is switched on Ç or off<br />
c depending on the previous status.<br />
DVD Video Operation<br />
Please refer to the chapter “Audio” for<br />
general information about CD/DVD discs<br />
(Y page 133) and on the MP3 format<br />
(Y page 132).<br />
DVD Video Operation 177<br />
For Safety Instructions refer to section “CD/<br />
DVD Audio and MP3 Operation”<br />
(Y page 131).<br />
For special notes on DVDs and DVD playback<br />
conditions refer to chapter “Video”<br />
(Y page 158).<br />
Functional Restrictions<br />
Depending on the DVD, it is possible that<br />
certain functions or actions described in this<br />
section will be temporarily blocked or may not<br />
function at all. As soon as you try to activate<br />
these functions or actions, you will see icon<br />
7 in the display.<br />
Loading and Ejecting DVDs<br />
X Proceed as described in the "CD/DVD<br />
Audio and MP3 mode" section<br />
(Y page 173).<br />
Switching to DVD mode<br />
X Load a DVD Video disc.<br />
The rear-seat entertainment system loads<br />
the inserted disc.<br />
The DVD is played according to the<br />
playback options:<br />
Either the film is started automatically or<br />
the DVD menu appears that is stored on the<br />
disc. In the latter case you must start the<br />
film manually.<br />
X Select Disc using the remote control.<br />
DVD mode is activated.<br />
The Video DVD meets the playback<br />
criteria: Either the film is started<br />
automatically or the DVD menu appears<br />
that is stored on the disc. In the latter case<br />
you must start the film manually.<br />
X To do so, select the corresponding menu<br />
item in the DVD menu (Y page 180).<br />
i If Disc operation was selected last, the<br />
disc is played automatically after loading.<br />
Z<br />
Rear Seat Entertainment
178 DVD Video Operation<br />
Rear Seat Entertainment<br />
Hiding or Showing the Control Menu<br />
X To display: Press n or ý on the<br />
remote control.<br />
X To hide: Press n or ý on the remote<br />
control.<br />
or<br />
X Wait for approximately 8 seconds.<br />
Control menu<br />
1 Disc type<br />
2 Current track<br />
3 Current scene<br />
4 Elapsed track time<br />
5 Displays menu system<br />
Displaying/Hiding Menu System<br />
X To display: Press the 9 button.<br />
or<br />
X When the control menu is shown, select<br />
Menu.<br />
Menu system<br />
1 DVD-Video menu<br />
2 Pause function<br />
3 Stop function<br />
4 Treble setting<br />
5 Bass setting<br />
X To hide: Press n on the remote control<br />
and select Full Screen.<br />
Fast Forward/Rewind<br />
X Press and hold the E or F button<br />
until the desired position has been<br />
reached.<br />
You see the control menu.<br />
Stop Function<br />
X Display the menu system if necessary<br />
(Y page 178).<br />
X To interrupt playback: Select ±.<br />
The playback stops.<br />
X To resume playback: Select X.<br />
Pause Function<br />
X Display the menu system if necessary<br />
(Y page 178).<br />
X To pause playback: Select «.<br />
The display « changes to X.<br />
X To resume playback: Select X.<br />
The menu system is hidden.
Selecting a Scene/Chapter<br />
If the film is subdivided into scenes or<br />
chapters, you can select the scenes or<br />
chapters step by step while the film is<br />
running. Some DVDs do not allow this in<br />
certain sections (e.g. in the introduction).<br />
X To skip forwards or back: Press .<br />
or , on the remote control.<br />
or<br />
X Press the E or F button.<br />
The control menu (Y page 178) appears for<br />
approximately 8 seconds.<br />
Selecting a scene/chapter directly<br />
Example: scene/chapter 5<br />
X Press the h button while the movie is<br />
running.<br />
X Press number button 5.<br />
or<br />
X Display the menu system if necessary<br />
(Y page 178).<br />
X Select DVD-V £ DVD Functions.<br />
X Select Scene selection in the menu.<br />
X Use the . or , button to select<br />
number 5.<br />
In both cases playback will begin after a<br />
short while with scene/chapter 5.<br />
i Scene/chapter selection may also be<br />
possible from the DVD menu stored on the<br />
DVD itself.<br />
Selecting a Film/Track<br />
If the DVD contains several films, these can<br />
be selected directly. Film selection is possible<br />
both while the DVD is stopped and while it is<br />
playing.<br />
X Display the menu system if necessary<br />
(Y page 178).<br />
X Select DVD-V £ DVD Functions.<br />
X Select Title Selection in the menu.<br />
X To call up the selection list: Press the<br />
9 button.<br />
X Select a film/track.<br />
Selecting a Film/Track Directly<br />
Example: selecting film 2<br />
X Press number button 2.<br />
After a short while, film 2 begins.<br />
i Film selection may also be possible from<br />
the DVD menu on the DVD itself.<br />
Picture Settings<br />
DVD Video Operation 179<br />
Adjusting the Brightness, Contrast or<br />
Color<br />
X Display the menu system if necessary<br />
(Y page 178).<br />
X Select DVD-V £ Brightness or<br />
Contrast or Colour.<br />
X To change setting: Press n or ý<br />
until the desired setting has been attained.<br />
X To store a setting: Press the 9 button.<br />
Switching Picture Format<br />
X Display the menu system if necessary<br />
(Y page 178).<br />
X Select DVD-V.<br />
The DVD-V menu appears. The ä icon in<br />
front of one of these menu items: 16:9<br />
Z<br />
Rear Seat Entertainment
180 DVD Video Operation<br />
Rear Seat Entertainment<br />
optimized, 4:3 or Wide Screen indicates<br />
the currently selected format.<br />
X To switch formats: Press n or ý<br />
until the desired format is selected.<br />
X To save setting: Press 9.<br />
DVD Menu<br />
The DVD menu is the menu stored on the DVD<br />
itself. It is structured in various ways<br />
according to the individual DVD and permits<br />
certain actions and settings.<br />
i For multilingual DVDs, you can switch<br />
between languages in the DVD menu, for<br />
example.<br />
Opening the DVD Menu<br />
X Display the menu system if necessary<br />
(Y page 178).<br />
X Select DVD-V £ DVD Functions £<br />
Menu.<br />
The DVD menu appears.<br />
Selecting Menu Items from the DVD<br />
Menu<br />
X Press n, ý, . or , on the<br />
remote control.<br />
X To confirm your selection: Press 9.<br />
The selection menu appears.<br />
i Menu items which cannot be selected are<br />
grayed out.<br />
DVD menu<br />
X Confirm Select.<br />
<strong>COMAND</strong> will perform the action or<br />
displays a submenu represented by the<br />
menu item selected in the DVD menu. If<br />
necessary select from further options in the<br />
same way.<br />
X Make a selection from the further options,<br />
if necessary.<br />
The rear-seat entertainment system then<br />
switches back to the DVD menu.<br />
i Depending on the DVD, the Go up menu<br />
item may not function at all or may not<br />
function at certain points in the DVD menu.<br />
You will see the 7 icon in the display as<br />
an indicator.<br />
Stopping Film or Skipping to the<br />
Beginning/End of a Scene<br />
X Select any menu item from the DVD menu.<br />
The selection menu appears.<br />
X To stop a film: Select Stop from the menu.<br />
X To skip to the end of a scene: Select<br />
Ô from the menu.<br />
X To skip to the beginning of a scene:<br />
Select Ó from the menu.<br />
i Depending on the DVD, the Ó and<br />
Ô menu items may not function at all or<br />
may not function at certain points in the<br />
DVD menu. You will see the 7 icon in the<br />
display as an indicator.<br />
Switching to the next DVD Menu up<br />
X Press % on the remote control.<br />
or<br />
X Select the corresponding menu item in the<br />
DVD menu.<br />
or<br />
X Select any menu item from the DVD menu.<br />
X Select Go up from the menu.<br />
i Depending on the DVD, the Go up menu<br />
item may not function at all or may not<br />
function at certain points in the DVD menu.
You will see the 7 icon in the display as<br />
an indicator.<br />
Back to Movie<br />
X Press % on the remote control<br />
repeatedly until you see the film.<br />
or<br />
X Select the corresponding menu item in the<br />
DVD menu.<br />
or<br />
X Select any menu item from the DVD menu.<br />
X Select the Back (To the Movie) menu<br />
item from the selection menu.<br />
i Depending on the DVD, the Back (To<br />
the Movie) menu item may not function<br />
in general or may not function at certain<br />
points in the DVD menu. You will see the<br />
7 icon in the display as an indicator.<br />
Setting the Language<br />
i This function is not available on all DVDs.<br />
If it is available, you can set the audio<br />
language or the audio format. The number<br />
of settings is determined by the DVD<br />
content. The settings may also be<br />
accessible in the DVD menu (Y page 180).<br />
X Display the menu system if necessary<br />
(Y page 178).<br />
X Select DVD-V £ DVD Functions.<br />
X Select Audio Language.<br />
A selection menu appears after a short<br />
while. The R dot in front of an entry<br />
indicates the currently selected language.<br />
X To change a setting: Press n or ý<br />
until the desired setting has been reached.<br />
X To save setting: Press 9.<br />
X To exit the menu without changes:<br />
Press . or ,.<br />
Subtitles and Camera Angle<br />
i These functions are not available on all<br />
DVDs. The number of subtitle languages<br />
and camera angles available depends on<br />
the content of the DVD. The settings may<br />
also be accessible in the DVD menu.<br />
X Display the menu system if necessary<br />
(Y page 178).<br />
X Select DVD-V £ DVD functions.<br />
X Select Subtitles or Camera angle.<br />
Both of these will call up a selection menu<br />
after a few seconds. The R dot in front of<br />
an entry indicates the current setting.<br />
X To change a setting: Press n or ý<br />
until the desired setting has been attained.<br />
X To save setting: Press 9.<br />
X To exit the menu without changes:<br />
Press . or ,.<br />
Interactive content<br />
DVDs can also contain interactive content<br />
(e.g. a video game). In a video game, you may<br />
be able to influence events by selecting and<br />
triggering actions. The type and number of<br />
actions depend on the DVD.<br />
X To select an action: Press n,<br />
ý, . or , on the remote control.<br />
X To trigger an action: Press 9 on the<br />
remote control.<br />
A menu appears and the first entry,<br />
Select, is highlighted.<br />
X Press 9 on the remote control.<br />
Aux Operation<br />
Aux Operation 181<br />
i You can connect two external video<br />
sources to the display screens (Display<br />
Aux) and additionally one video source to<br />
the DVD drive (Drive Aux).<br />
Z<br />
Rear Seat Entertainment
182 Aux Operation<br />
Rear Seat Entertainment<br />
For further information on external video<br />
sources please refer to the operating guide<br />
of the device.<br />
Connecting an Aux Source<br />
Drive Aux<br />
The Aux connectors of the drive are beside<br />
the Eject button on the front panel of the DVD<br />
drive (Y page 168).<br />
Display Aux<br />
The display Aux jacks are located on the side<br />
of the screen (Y page 167).<br />
Connecting an Audio or Video Source<br />
X Insert the audio jacks for the left and the<br />
right signal into the respective connectors<br />
labeled L and R.<br />
X Insert the video jack (yellow) into the<br />
connector with the V label.<br />
Switching to AUX Mode<br />
Disc Drive Aux<br />
X Select Aux.<br />
The Aux menu appears.<br />
Aux menu<br />
X Select Source £ Drive Aux.<br />
The video source is played if it is connected<br />
to the drive and in playback mode. If there<br />
is no video picture available, an Audio menu<br />
appears.<br />
i For operating the external video source<br />
please refer to the operator’s guide of the<br />
device.<br />
Display Aux<br />
X Select the display screen to which the<br />
external source is connected.<br />
X Select Aux.<br />
X Select Source £ Display Aux.<br />
The video source is played if it is connected<br />
to the screen and in playback mode. If there<br />
is no video picture available, an Audio menu<br />
appears.<br />
Selecting an Active <strong>COMAND</strong> Source<br />
X Select Aux.<br />
X Select Source £ <strong>COMAND</strong>.<br />
The Audio or Video mode to which<br />
<strong>COMAND</strong> is set is played by the RSE<br />
system.<br />
Operation with Active Source from<br />
<strong>COMAND</strong><br />
Audio or Video that is active in <strong>COMAND</strong> can<br />
also be played back via the RSE system.<br />
X Switch to the desired Audio mode or<br />
display the menu system in Video mode on<br />
<strong>COMAND</strong>.<br />
X Select the menu item on the left below, e.g.<br />
CD if <strong>COMAND</strong> is in CD mode.<br />
X Select Active Aud./Vid. Source for<br />
the Rear.
In the status line you will see the headset<br />
symbol and the _ symbol indicating the<br />
active mode.<br />
If you change the mode in <strong>COMAND</strong>, the new<br />
mode is also played back via the RSE system.<br />
The display changes accordingly.<br />
X To switch off the function in <strong>COMAND</strong>:<br />
Switch to the desired audio mode in<br />
<strong>COMAND</strong> or call up the menu system when<br />
in video mode.<br />
X Select the menu item on the left below, e.g.<br />
CD if CD mode is selected.<br />
X Select Rear Audio/Video Off.<br />
Setting the Brightness/Contrast/<br />
Color<br />
X In the AUX menu, select Display Aux or<br />
Drive Aux.<br />
X Select Brightness, Contrast or Color.<br />
A setting scale appears.<br />
X To adjust setting: Press n or ý.<br />
X To confirm setting: Press 9.<br />
Changing the Picture Format<br />
Aux Operation 183<br />
X In the AUX menu, select Display Aux or<br />
Drive Aux.<br />
The ä icon in front of one of these menu<br />
items: 16:9 optimized, 4:3 or Wide<br />
Screen indicates the currently selected<br />
format.<br />
X To switch formats: Press n or ý<br />
until the desired format is selected.<br />
X To save setting: Press 9.<br />
Z<br />
Rear Seat Entertainment
184
Overview ............................................ 186<br />
Phone ................................................. 188<br />
Navigation ......................................... 191<br />
Address Book .................................... 197<br />
Radio and Satellite Radio ................. 201<br />
DVD Changer ..................................... 203<br />
External Equipment (Aux) ................ 205<br />
Command List ................................... 205<br />
Troubleshooting ................................ 211<br />
185<br />
Voice Control
186 Overview<br />
Voice Control<br />
Overview<br />
Operating Safety<br />
G Warning!<br />
Please devote your attention first and<br />
foremost to the traffic situation you are in.<br />
While the system permits hands-free phone<br />
operation, attention to traffic may be diverted<br />
not only by physical operation of a phone, but<br />
also by the distraction of a phone<br />
conversation while driving. As such, for safety<br />
reasons, we encourage the driver to stop the<br />
vehicle in a safe place before answering or<br />
placing a phone call.<br />
For safety reasons, you should only select a<br />
destination when the vehicle is stationary.<br />
While the navigation system provides<br />
directional assistance, the driver must remain<br />
focused on safe driving behavior, especially<br />
pay attention to traffic and street signs, and<br />
should utilize the system’s audio cues while<br />
driving.<br />
The navigation system does not supply any<br />
information on stop signs, yield signs, traffic<br />
regulations or traffic safety rules. Their<br />
observance always remains in the driver’s<br />
personal responsibility. DVD maps do not<br />
cover all areas nor all routes within an area.<br />
Traffic regulations always have priority over<br />
any route recommendations given.<br />
Bear in mind that at a speed of just 30 mph<br />
(approximately 50 km/h), your vehicle is<br />
covering a distance of 44 feet (approximately<br />
14 m) every second.<br />
G Warning<br />
Navigation announcements are intended to<br />
direct you while driving without diverting your<br />
attention from the road and driving.<br />
Please always use this feature instead of<br />
consulting the map display for directions.<br />
Consulting the symbols or map display for<br />
directions may cause you to divert your<br />
attention from driving and increase your risk<br />
of an accident.<br />
G Warning!<br />
Please do not use the Voice Control System<br />
in an emergency, as the tone of your voice<br />
may change in a stressful situation. This could<br />
cause a delay in completing your phone call<br />
in a timely manner. This could distract you in<br />
an emergency situation and cause you to be<br />
involved in an accident.<br />
Vehicle Equipment<br />
i This Operator’s Manual describes all<br />
features, standard or optional, potentially<br />
available for your vehicle at the time of<br />
purchase. Please be aware that your<br />
vehicle might not be equipped with all<br />
features described in this manual.<br />
Symbols Only Used in this Chapter<br />
The following symbols indicate:<br />
s that you have to say something<br />
t that there is a voice output from the<br />
voice control<br />
u that the system shows information on<br />
the display.<br />
Usage<br />
You can use the voice control system to<br />
operate the following systems depending on<br />
the equipment in your vehicle:<br />
RPhone<br />
RNavigation<br />
RAddress book<br />
RAudio (radio, satellite radio, DVD changer,<br />
memory card, music register, media<br />
interface)<br />
Say the commands without pausing between<br />
individual words. If you enter a command that<br />
does not exist or is incorrect, the voice<br />
control system asks you for a new command<br />
with Please repeat or Please repeat
your entry!. The voice control confirms<br />
important commands to you and gives you<br />
instructions in the event of incorrect entries.<br />
Command Types<br />
Voice control distinguishes between the<br />
following types of command:<br />
RGlobal commands:<br />
These are commands which can be called<br />
up at any time (e.g. help, navigation or<br />
phone commands).<br />
RLocal commands:<br />
These are commands which are only<br />
available for the active application (e.g.<br />
“Save”).<br />
Active Application<br />
The local commands refer to the application<br />
currently shown on the display and to the<br />
audio source you are currently listening to.<br />
For example, if you are listening to the radio<br />
while the navigation application is active on<br />
the display, you can operate both<br />
applications using voice control.<br />
Operating Voice Control<br />
1 Multifunction display<br />
2 x Mute, X decreases the volume,<br />
W increases the volume<br />
3 ? Activates voice control<br />
? % Cancels voice control<br />
Starting the Dialog<br />
X Switch on the ignition (see the vehicle<br />
Operator's Manual).<br />
i After the ignition has been switched on, it<br />
takes about 30 seconds for the voice<br />
control system to be ready for operation.<br />
During this period the message Loading<br />
Speech Data is displayed.<br />
X Press the ? button.<br />
An acoustic signal confirms that the dialog<br />
has been started.<br />
X Give a command.<br />
Interrupting the Dialog<br />
Overview 187<br />
If a list appears on the display, you can use<br />
the “Pause” command to interrupt the dialog.<br />
You can then select an entry using the<br />
<strong>COMAND</strong> controller.<br />
Z<br />
Voice Control
188 Phone<br />
Voice Control<br />
To resume the dialog with voice control, press<br />
the ? button on the multifunction steering<br />
wheel.<br />
Canceling the Dialog<br />
X Press the % button.<br />
or<br />
X Say the command Cancel (except when<br />
creating and storing voice tags, navigation<br />
entries or during individualization).<br />
or<br />
X Press any button on <strong>COMAND</strong>.<br />
Adjusting the Volume<br />
X Start the dialog.<br />
X Give a command, e.g. Help.<br />
X Press the W or X button.<br />
The volume increases or decreases during<br />
voice output.<br />
or<br />
X Set the volume for the voice output on the<br />
volume control for <strong>COMAND</strong>.<br />
Display Messages<br />
The audible help function can be<br />
supplemented by visual help on the display<br />
(Y page 42). If the help function is switched<br />
on, the most important commands that are<br />
currently possible appear in the display when<br />
you start the dialog.<br />
In the address book and navigation system, a<br />
selection list is shown in the display if voice<br />
control requires additional information from<br />
you.<br />
Entering Numbers<br />
RDigits from “zero” to “nine” are permitted.<br />
RSay the phone number in groups of three<br />
to five digits.<br />
Spell<br />
RThe letters of the alphabet and the numbers<br />
0 to 9 are permitted.<br />
RSay the letters in groups of five to seven<br />
letters.<br />
RSay each individual letter clearly.<br />
i Using individualization, you can fine-tune<br />
voice control to your own voice and thus<br />
improve voice recognition. The process of<br />
individualization is described in chapter<br />
“System Settings” (Y page 42).<br />
i If you use individualization, it may impair<br />
recognition of other users. Switch off<br />
individualization if it makes recognition of<br />
other users worse.<br />
Phone<br />
G Warning<br />
Some jurisdictions prohibit the driver from<br />
using a cellular telephone while driving.<br />
Whether or not prohibited by law, for safety<br />
reasons, the driver should not use the cellular<br />
telephone while the vehicle is in motion. Stop<br />
the vehicle in a safe location before placing or<br />
answering a call.<br />
If you nonetheless choose to use the mobile<br />
phone while driving, please use the handsfree<br />
feature and be sure to pay attention to the<br />
traffic situation at all times. Use the mobile<br />
phone only when road, weather and traffic<br />
conditions permit. Otherwise, you may not be<br />
able to observe traffic conditions and could<br />
endanger yourself and others.<br />
Bear in mind that at a speed of just 30 mph<br />
(approximately 50 km/h), your vehicle is<br />
covering a distance of 44 feet (approximately<br />
14 m) every second.
Operation<br />
You can use voice control to:<br />
Rplace a call by using your voice to input a<br />
phone number<br />
Rstore names and numbers in the address<br />
book<br />
Rdial a number from the address book<br />
Rdial a number from the received calls or<br />
latest calls list<br />
Rlisten to the phone book<br />
Rretrieve and manage your voice mail and<br />
recorded announcement services<br />
Rredial<br />
Voice control recognizes whether:<br />
Ryour phone is switched on<br />
Ryour phone is connected via Bluetooth ®<br />
Rthe car phone is registered with the<br />
relevant mobile phone network<br />
Rit is possible to dial<br />
If it is not possible to dial, voice control issues<br />
a message to this effect.<br />
i You can still operate your phone using the<br />
keypad.<br />
Commands<br />
“Phone”<br />
Use the “Phone” command to select the<br />
phone application. Use this command if you<br />
wish the digits entered to be shown on the<br />
display.<br />
“Help Phone”<br />
Voice control has an extensive help function.<br />
Using the “Help Phone” command, you can<br />
have all the essential commands for the<br />
phone read out (Y page 206).<br />
“Dial number”<br />
You can use the “Dial number” command to<br />
dial a phone number.<br />
The digits 0 to 9 and the word “Plus” are<br />
permitted.<br />
“Plus” replaces the international dialing code,<br />
e.g. “00”.<br />
Say the phone number in the form of a<br />
continuous string of digits or as blocks of<br />
digits, e.g. three to five digits.<br />
Voice control repeats the digits it recognizes<br />
after each block of digits (with a pause of<br />
about half a second between each block of<br />
digits) and waits for you to continue speaking.<br />
Example of dialog:<br />
s Dial number<br />
t Please say the number<br />
s Zero one three zero<br />
t Zero one three zero<br />
s Five zero zero five<br />
t Five zero zero five<br />
s Okay<br />
t Dialing number<br />
i You can also dial the specified number if<br />
you press the 6 button on the multifunction<br />
steering wheel instead of the<br />
concluding command “Okay”.<br />
“Confirm”<br />
Phone 189<br />
While you are entering a number, you can use<br />
the “Confirm” command to have all the<br />
spoken digits repeated by voice control.<br />
Voice control will then prompt you to<br />
continue with the entry.<br />
Example of dialog:<br />
s Dial number<br />
t Please say the number<br />
s Zero one three zero<br />
t Zero one three zero<br />
s Confirm<br />
t Zero one three zero. Please continue.<br />
Z<br />
Voice Control
190 Phone<br />
Voice Control<br />
s Five zero zero five<br />
t Five zero zero five<br />
s Okay<br />
t Dialing number<br />
i You can also dial the specified number if<br />
you press the 6 button on the multifunction<br />
steering wheel instead of the<br />
concluding command Okay.<br />
“Correction”<br />
While you are entering a number, you can use<br />
the “Correction” command to correct the<br />
block of digits last spoken. When you input<br />
this command, voice control deletes the last<br />
block of digits and repeats the digits input up<br />
to this point. Voice control will then prompt<br />
you to continue with the entry.<br />
Example of dialog:<br />
s Dial number<br />
t Please say the number<br />
s Zero one three zero<br />
t Zero one three zero<br />
s Five zero zero five<br />
t Five zero zero five<br />
s Correction<br />
t Zero one three zero. Please continue.<br />
s Five zero zero five<br />
t Five zero zero five<br />
s Okay<br />
t Dialing number<br />
“Delete”<br />
While you are entering a number, you can use<br />
the “Delete” command to delete all the digits<br />
which have been entered. After you have<br />
input this command, voice control prompts<br />
you to enter additional digits or commands.<br />
Example of dialog:<br />
s Dial number<br />
t Please say the number<br />
s Zero one three zero<br />
t Zero one three zero<br />
s Five zero zero five<br />
t Five zero zero five<br />
s Delete<br />
t Number deleted, please say the<br />
number again<br />
s Zero three seven three<br />
t Zero three seven three<br />
s Three nine one<br />
t Three nine one<br />
s Okay<br />
t Dialing number<br />
“Save Name” (Address Book)<br />
(Y page 198)<br />
“Dial Name” (Address Book)<br />
(Y page 199)<br />
“Delete Name” (Address Book)<br />
(Y page 199)<br />
“Read out Phone Book” and “Dialing a<br />
Phone Number”<br />
You can use the “Read out phone book”<br />
command to listen to all entries in the phone<br />
book in which a phone number is also stored<br />
and, if required, select an entry.<br />
Example of dialog:<br />
s Read out phone book<br />
The system reads out all the address<br />
book entries with phone numbers. If<br />
the list contains more than 30 entries,<br />
the system asks you to say the name<br />
from which the reading shall be<br />
started.<br />
u The system shows the list of phone<br />
book entries being read out.<br />
X To select an entry: Press the ? button<br />
immediately after the desired entry has<br />
been read out.
i If there is more than one phone number<br />
for an entry, voice control queries this.<br />
t Do you want to call Smith?<br />
s Home<br />
t Smith home. Dialing.<br />
X To cancel the dialog: Press the %<br />
button.<br />
The system confirms by responding<br />
“Cancel”.<br />
“Redial”<br />
You can use the “Redial” command to redial<br />
the number most recently called.<br />
Managing Announcement Services or<br />
Voice Mail<br />
You can also use voice control to manage<br />
your voice mail or recorded announcement<br />
services.<br />
X Press the ? button while a phone call is<br />
in progress.<br />
An acoustic signal confirms that the system<br />
is activated.<br />
X Say the required digits (“zero” to “nine”).<br />
or<br />
X Say the required words “Star” or “Hash”.<br />
X Say the concluding command “Okay”.<br />
The system dials the number entered.<br />
Navigation<br />
G Warning!<br />
For safety reasons, you should only select a<br />
destination when the vehicle is stationary.<br />
While the navigation system provides<br />
directional assistance, the driver must remain<br />
focused on safe driving behavior, especially<br />
pay attention to traffic and street signs, and<br />
should utilize the system’s audio cues while<br />
driving.<br />
The navigation system does not supply any<br />
information on stop signs, yield signs, traffic<br />
regulations or traffic safety rules. Their<br />
observance always remains in the driver’s<br />
personal responsibility. DVD maps do not<br />
cover all areas nor all routes within an area.<br />
Traffic regulations always have priority over<br />
any route recommendations given. Bear in<br />
mind that at a speed of just 30 mph<br />
(approximately 50 km/h), your vehicle is<br />
covering a distance of 44 feet (approximately<br />
14 m) every second.<br />
During route guidance, you will not receive<br />
information on:<br />
Rtraffic lights<br />
Rstop and yield signs<br />
Rparking or stopping zones<br />
Rone-way streets<br />
Rnarrow bridges<br />
Rother traffic regulation data<br />
You should therefore always strictly observe<br />
traffic regulations while driving. Drive<br />
carefully and always obey traffic laws and<br />
road signs, even if they contradict navigation<br />
system instructions.<br />
G Warning!<br />
Please do not use the Voice Control System<br />
in an emergency, as the tone of your voice<br />
may change in a stressful situation. This could<br />
cause a delay in completing your phone call<br />
in a timely manner. This could distract you in<br />
an emergency situation and cause you to be<br />
involved in an accident.<br />
Operation<br />
You can use voice control to:<br />
Renter a state<br />
Renter a province<br />
Renter a city<br />
Renter a district (center)<br />
Navigation 191<br />
Z<br />
Voice Control
192 Navigation<br />
Voice Control<br />
Renter a street<br />
Renter an intersection<br />
Renter a house number<br />
Renter an entire address<br />
Renter a zip code<br />
Rfind address<br />
Renter a point of interest<br />
Rselect one of your previous destinations<br />
Rcall up route information<br />
Rstore a destination<br />
Rdisplay the map<br />
Renlarge/reduce the size of the map<br />
Rlisten to the destination memory<br />
Rstart and stop route guidance<br />
Rswitch the guidance instructions on and off<br />
X To select the navigation application press<br />
the ? button on the multifunction<br />
steering wheel.<br />
X Give the “Navigation” command.<br />
X Press the ? button.<br />
X Give one of the navigation commands<br />
explained below.<br />
Commands<br />
You cannot start the route guidance until all<br />
the necessary address data has been<br />
entered.<br />
“Help Navigation”/“Help”<br />
Using the “Help navigation” command, you<br />
can have all the essential commands for the<br />
navigation system read out.<br />
Entering an Address<br />
i If voice control fails to recognize your<br />
entry, it is advisable to spell the name of<br />
the town and street. Spell names of towns<br />
and streets when abroad.<br />
The system guides you completely through<br />
the dialog to route guidance. As soon as a<br />
valid address is entered (at least the town),<br />
you can use the “Start route guidance”<br />
command to start the route guidance.<br />
“Enter state”/“Enter province”<br />
You can use the “Enter state”/“Enter<br />
province” command to change the state or<br />
province setting of the navigation system.<br />
Example of dialog:<br />
s Enter state<br />
t Please enter the name of the state<br />
u The system shows a numbered list of<br />
possible state names on the display. If<br />
there is only one entry on the list, voice<br />
control asks if it is correct.<br />
t Please select a line number<br />
s Line number 1<br />
t Line number 1 accepted<br />
“Enter Destination”<br />
You can use the “Enter destination”<br />
command to enter a complete address.<br />
The system guides you through the whole<br />
dialog. As soon as a valid address is entered<br />
(at least the town), you can use the “Start<br />
route guidance” command to start the route<br />
guidance.<br />
Example of dialog:<br />
s Enter destination<br />
t Do you want to enter street first or<br />
town first?<br />
s Town<br />
t Please say the name of the town<br />
s Albany<br />
t Loading list of towns<br />
u The system shows a numbered list of<br />
possible city names on the display. If
there is only one entry on the list, voice<br />
control asks if it is correct.<br />
t Please select a line number.<br />
s Line number 1<br />
t Line number 1 accepted<br />
t Would you like to enter a street?<br />
s Yes<br />
t Please say the name of the street<br />
s Park Avenue<br />
t Loading list of streets<br />
u The system shows a numbered list of<br />
possible street names on the display.<br />
If there is only one entry on the list,<br />
voice control asks if it is correct.<br />
t Please select a line number<br />
s Line number 1<br />
t Line number 1 accepted<br />
t Would you like to enter a house<br />
number?<br />
s No<br />
t Would you like to start route guidance?<br />
s Yes<br />
t Starting route guidance<br />
The system stores the selected destination<br />
and starts route guidance.<br />
If you give one of the following commands,<br />
the system guides you through the dialog to<br />
route guidance.<br />
“Enter Town”<br />
You can use the “Enter town” command to<br />
enter any town in the state or province that is<br />
currently selected.<br />
i If the city you require does not appear in<br />
the list or the system fails to recognize the<br />
name of the town, it can be entered by<br />
using the “Spell town” command.<br />
i You can use the “Next page” or “Previous<br />
page” commands to scroll through the list.<br />
You can use the “Correction” command to<br />
enter the name of the town again.<br />
Example of dialog:<br />
s Enter town<br />
t Please say the name of the town<br />
s Albany<br />
t Loading list of towns<br />
u The system shows a numbered list of<br />
possible town names on the display. If<br />
there is only one entry on the list, voice<br />
control asks if it is correct.<br />
t Please select a line number<br />
s Line number 1<br />
t Line number 1 accepted<br />
The town is stored for route guidance.<br />
“Spell town”<br />
Using the “Spell town” command, you can<br />
spell any town. This may be necessary if<br />
certain town or street names are not<br />
recognized.<br />
Say the letters in the form of a continuous<br />
string of letters. In the case of long names, it<br />
is not always necessary to spell the whole<br />
name. Usually only the first five to seven<br />
letters are required.<br />
A list of city names will appear in the display<br />
and you can choose the one you require.<br />
Say each individual letter clearly.<br />
It is not easy to avoid confusion of<br />
similarsounding letters (e.g. D and E).<br />
Example of dialog:<br />
s Spell town<br />
t Please spell the town<br />
s F-R-E-N-S<br />
t Loading list of towns<br />
u The system shows a numbered list of<br />
city names on the display<br />
t Please select a line number<br />
s Number three<br />
t Number three accepted<br />
The town is stored for route guidance.<br />
Navigation 193<br />
Z<br />
Voice Control
194 Navigation<br />
Voice Control<br />
i You can use the “Next page” or “Previous<br />
page” commands to scroll through the list.<br />
You can use the “Correction” command to<br />
spell the town again from the beginning.<br />
i Note that the list in the display is sorted<br />
according to the probability of voice<br />
recognition.<br />
“Enter District” (Center)<br />
You can use the “Enter district” command to<br />
enter an area in a city which you have<br />
selected previously.<br />
Example of dialog:<br />
s Enter district<br />
t Please say the name of the district<br />
s Manhattan<br />
u The system shows a numbered list of<br />
districts in the display if the selected<br />
city has more than one district<br />
t Please select a line number<br />
s Line number 1<br />
t Line number 1 accepted<br />
The district is stored for route guidance.<br />
“Enter Street”<br />
You can use the “Enter Street” command to<br />
enter the name of any street in the selected<br />
city.<br />
i If only a few streets are stored for a<br />
selected town, they will be displayed for<br />
selection immediately after you give the<br />
“Enter Street” command.<br />
Example of dialog:<br />
s Enter Street<br />
t Please say the name of the street<br />
s Mabel’s Street<br />
u The system shows a numbered list of<br />
street names on the display<br />
t Please select a line number<br />
s Number three<br />
t Number three accepted<br />
The street name is stored for route guidance.<br />
“Correction”<br />
If you have entered or spelled a city or street,<br />
you can use the “Correction” command to<br />
enter the city or street again or spell it from<br />
the beginning.<br />
“Enter Intersection”<br />
You can use the “Intersection” command to<br />
specify an intersection of two streets.<br />
No street has been entered yet<br />
Example of dialog:<br />
s Enter Intersection<br />
t Please say the name of the first street<br />
s Main street<br />
t Please select a line number or say<br />
continue<br />
s Number 1<br />
t Number 1 accepted<br />
t Please say the name of the<br />
intersecting street<br />
s Mable street<br />
t Please select a line number or say<br />
continue<br />
s Number 4<br />
t Number 4 accepted<br />
t Do you want to start route guidance?<br />
s Yes<br />
The route guidance to the specified<br />
intersection is started.<br />
A street has already been entered<br />
Example of dialog:<br />
s Enter Intersection<br />
t Please say the name of the<br />
intersecting street<br />
s Mable street<br />
t Please select a line number or say<br />
continue<br />
s Number 4
t Number 4 accepted<br />
t Do you want to start route guidance?<br />
s Yes<br />
The route guidance to the specified<br />
intersection is started.<br />
In connection with the "Enter<br />
Destination" dialog<br />
i You can enter an intersection instead of<br />
a house number in the “Enter Destination”<br />
dialog.<br />
Example of dialog (continues “Enter<br />
Destination” dialog):<br />
t Do want to enter a house number?<br />
s Enter Intersection<br />
t Please say the name of the<br />
intersecting street<br />
s Mable street<br />
t Please select a line number or say<br />
continue<br />
s Number 4<br />
t Number 4 accepted<br />
t Do you want to start route guidance?<br />
s Yes<br />
The route guidance to the specified<br />
intersection is started.<br />
“House Number”<br />
You can use the “House number” command<br />
to specify the house number for the selected<br />
street in individual digits.<br />
Example of dialog:<br />
s House number<br />
t Please say the house number in single<br />
digits<br />
s Three four<br />
t Three four<br />
s Okay<br />
The house number is stored for route<br />
guidance.<br />
“Points of interest” (POI)<br />
You can use the “Points of interest” command<br />
to select specific destinations (gas stations,<br />
airports, stations, etc.).<br />
Example of dialog:<br />
s Point of interest<br />
u The system shows the following list in<br />
the display:<br />
1. Current position<br />
2. Other City<br />
3. Other State<br />
4. Other Province<br />
t Please select a line number<br />
s Line number 1 ...<br />
t Line number 1 accepted<br />
u The system shows a numbered list of<br />
POI categories<br />
t Please select a line number or say the<br />
category name<br />
s Line number 5<br />
u The system shows a numbered list<br />
with destinations from the selected<br />
category<br />
t Please select a line number<br />
s Line number 1<br />
t Line number 1 accepted<br />
The specific destination which has the<br />
number one is stored for route guidance.<br />
i Depending on the selected area, other<br />
lists may be shown.<br />
You can only select points of interest in the<br />
state or province the navigation system is set<br />
for.<br />
Selecting next point of interest<br />
You can use the following commands to<br />
select nearby points of interest:<br />
R“Next gas station”<br />
R“Next car park”<br />
R“Next <strong>Mercedes</strong>-<strong>Benz</strong> Service”<br />
Navigation 195<br />
Z<br />
Voice Control
196 Navigation<br />
Voice Control<br />
R“Next restaurant”<br />
R“Next hospital”<br />
Example of dialog:<br />
s Next gas station<br />
u The system shows a numbered list of<br />
gas stations on the display<br />
t Please select a line number.<br />
s Line number 1<br />
u Line number one accepted. Would you<br />
like to start route guidance?<br />
s Yes<br />
The route guidance for this point of interest<br />
is started.<br />
or<br />
s No<br />
t Do you want to save the destination?<br />
s Yes<br />
The dialog continues as shown in the section<br />
“Save destination”.<br />
“Last Destinations”<br />
You can use the “Last destinations”<br />
command to reselect a destination from a list<br />
of the previously selected destinations.<br />
Example of dialog:<br />
s Last destinations<br />
u The system shows a numbered list of<br />
the previously selected destinations<br />
t Please select a line number<br />
s Line number 1<br />
u Line number one accepted. Would you<br />
like to start route guidance?<br />
s Yes<br />
The route guidance for this destination is<br />
started.<br />
“Save Destination”<br />
You can use the “Save destination” command<br />
to save the current destination in the address<br />
book by means of a voice name.<br />
i If the desired voice name already exists<br />
in the address book, the system asks if you<br />
want to add the address.<br />
Example of dialog:<br />
s Save destination<br />
t Please say the name<br />
s Smith<br />
t Please repeat the name<br />
s Smith<br />
t Where would you like to save: home or<br />
work?<br />
s Work<br />
t The destination has been saved.<br />
“Find Address”<br />
You can use the “Find address” command to<br />
select a previously saved address and start<br />
route guidance.<br />
Example of dialog:<br />
s Find address<br />
t Please say the name<br />
s Smith<br />
u The system shows a numbered list of<br />
saved addresses in the display<br />
t Please select a line number<br />
s Line number 1<br />
t Line number 1 accepted<br />
t Smith. Starting route guidance.<br />
“Start Route Guidance”<br />
When Route Guidance is inactive, you can use<br />
the “Start route guidance” command to start<br />
route guidance once a valid destination has<br />
been entered.<br />
s Start route guidance<br />
t Starting route guidance<br />
“Route Information”<br />
You can use the “Route information”<br />
command to have the following information<br />
on your currently planned route read out:
RDistance to destination<br />
RRemaining driving time<br />
RExpected arrival time<br />
“Guidance Instructions On”<br />
When you use the “Guidance instructions on”<br />
command, voice control repeats the last<br />
driving tip. If the driving tip output has been<br />
switched off up to this point, it is now<br />
switched on again.<br />
“Guidance Instructions Off”<br />
You can use this command to switch off the<br />
route guidance voice output.<br />
“Cancel Route Guidance”<br />
You can use this command to stop route<br />
guidance.<br />
Example of dialog:<br />
s Cancel route guidance<br />
t Are you sure you want to cancel route<br />
guidance?<br />
s Yes<br />
t Cancelling route guidance<br />
Voice control cancels route guidance.<br />
or<br />
s No<br />
t Continuing route guidance.<br />
The dialog with voice control is terminated.<br />
Route guidance remains activated.<br />
“Zoom In”/“Zoom Out”<br />
You can use these commands to zoom the<br />
map display one step in or out.<br />
“Zoom In Completely”/“Zoom Out<br />
Completely”<br />
You can use these commands to set the map<br />
display directly to the smallest or largest<br />
scale.<br />
“Read Out Destination Memory”<br />
You can use the “Read out destination<br />
memory” command to listen to the entries<br />
from the address book’s destination memory<br />
and, if required, navigate to one of them.<br />
Example of dialog:<br />
s Read out destination memory<br />
The system reads out all entries, from<br />
the address book destination memory.<br />
If the list contains more than 30<br />
entries, the system asks you to say the<br />
name from which the reading shall be<br />
started.<br />
i If you do not say a name, voice control<br />
reads out all destination entries.<br />
X To select an entry and set an address:<br />
Press the ? button at the selected<br />
entry.<br />
t If there is more than one address, the<br />
system asks “Navigate to: home or<br />
work?”<br />
s Home<br />
The system starts route guidance.<br />
X To cancel the dialog: Press the %<br />
button.<br />
You have canceled the dialog. The system<br />
confirms by responding “Cancel”.<br />
Address Book<br />
Address Book 197<br />
G Warning!<br />
Please devote your attention first and<br />
foremost to the traffic situation you are in.<br />
Before your journey, please familiarize<br />
yourself with the address book functions.<br />
Only use the Voice Control System when road<br />
and traffic conditions permit you to do so.<br />
Otherwise you could be involved in an<br />
accident in which you or others could be<br />
injured.<br />
Z<br />
Voice Control
198 Address Book<br />
Voice Control<br />
Overview<br />
The address book gives you the option of<br />
storing information about people in the form<br />
of entries.<br />
Using voice control, you can dial a phone<br />
number stored in the address book or start<br />
route guidance for a stored address.<br />
Apart from the speaker-dependent voice<br />
names stored in the address book, voice<br />
control can recognize all the entries in the<br />
name fields of the address book. Recognition<br />
of the entries in the address book depends on<br />
the text that was entered. To make a call you<br />
must say the text of the entry.<br />
Check the address book entries for the<br />
following:<br />
RThe name entries, e.g. last name and first<br />
name, are in the right fields.<br />
RDo not use abbreviations or acronyms.<br />
RAvoid unnecessary spaces in names.<br />
RDo not use special characters.<br />
You can improve voice recognition by saving<br />
a speaker-dependent voice name for address<br />
book entries.<br />
Use a speaker-dependent voice name:<br />
Rfor names which are difficult to pronounce<br />
Rto distinguish names which sound similar<br />
Rfor names which are not pronounced as<br />
they are written<br />
Voice control can store up to 50 of these<br />
address book entries by means of a speakerdependent<br />
voice name.<br />
Operation<br />
You can use voice control at any time to:<br />
Rsave a name<br />
Rselect a name<br />
Rdelete a name<br />
Rlist the address book<br />
Rdelete the address book<br />
Ropen the address book<br />
Ropen an entry from the address book<br />
Rlist the phone book<br />
Rlist the destination memory<br />
X To open the address book: Press<br />
the ? button on the multifunction<br />
steering wheel.<br />
X Give the “Address book” command.<br />
X Press the ? button.<br />
X Give one of the address book commands<br />
explained below.<br />
Commands<br />
“Address Book”<br />
X To open the address book: Say the<br />
command “Address book”.<br />
“Help Address Book”<br />
X Using the “Help address book” command,<br />
you can have all the essential commands<br />
for the address book read out.<br />
“Save Name”<br />
Use the “Save name” command to save a<br />
phone number with a voice name for a<br />
specific speaker. Use this command for a<br />
name which is complicated or which is<br />
pronounced differently as it is spelled, for<br />
example, because it is a foreign name. When<br />
you have given the command “Save Name”,<br />
voice control prompts you to enter a phone<br />
number.<br />
The digits 0 to 9 and the word “Plus” are<br />
permitted.<br />
“Plus” replaces the international dialing code,<br />
e.g. “00”.<br />
Say the phone number in the form of a<br />
continuous string of digits or as blocks of<br />
digits, e.g. three to five digits.<br />
Voice control repeats the digits it recognizes<br />
after each block of digits (with a pause of
about half a second between each block of<br />
digits) and waits for you to continue speaking.<br />
When you have given the command “Okay”,<br />
voice control prompts you two or three times<br />
to say the name. When repeating the name,<br />
make sure that you pronounce it in exactly<br />
the same way as you did the first time.<br />
Otherwise, the name cannot be saved and<br />
voice control aborts the saving procedure.<br />
Example of dialog:<br />
s Save name<br />
t Please say the number<br />
s Zero one three zero<br />
t Zero one three zero<br />
s Five zero zero five<br />
t Five zero zero five<br />
s Okay<br />
t Please say the name.<br />
s Smith<br />
t Please repeat the name.<br />
s Smith<br />
t Would you like to save the number in<br />
a category?<br />
s No<br />
t Name and number saved<br />
“Dial Name”<br />
You can use the “Dial name” command to<br />
place a call by selecting a name from your<br />
address book. You can choose either a voice<br />
name or say a name entry.<br />
Only say the surname if only the surname is<br />
entered in the address book.<br />
Say the surname first and then the first name<br />
if both are entered in the address book.<br />
Example of dialog:<br />
s Dial name<br />
t Please say the name<br />
s Smith<br />
If there is more than one phone<br />
number for an entry, voice control<br />
queries this:<br />
t Do you want to make a work call or a<br />
home call?<br />
or<br />
Please select a line number<br />
s Work<br />
t Smith work. Dialing number.<br />
“Find Name”<br />
Use the “Find name” command to search for<br />
a name in the address book. Voice control<br />
then asks what action you want it to perform:<br />
for example call the selected number, start<br />
route guidance to the saved address or open<br />
the entry.<br />
Example of dialog:<br />
s Find name<br />
t Please say the name<br />
s Smith<br />
u The system shows a numbered list in<br />
the display.<br />
t Please select a line number.<br />
s Line number 1 ...<br />
t Line number 1 accepted.<br />
The system opens the first entry on the<br />
list.<br />
If the selected entry contains at least<br />
one phone number or an address,<br />
voice control asks whether you want<br />
to dial the number or navigate to the<br />
stored address.<br />
“Find Address”<br />
(Y page 196)<br />
“Delete Name”<br />
Address Book 199<br />
Use the “Delete name” command to delete a<br />
voice name from your address book.<br />
Example of dialog:<br />
s Delete name<br />
t Please say the name<br />
s Smith<br />
t Do you want to delete Smith?<br />
Z<br />
Voice Control
200 Address Book<br />
Voice Control<br />
s Yes<br />
t The voice name has been deleted<br />
“Read Out Address Book”<br />
You can use the “Read out address book”<br />
command to listen to all names and voice<br />
names in the address book. You can select an<br />
entry during this.<br />
If no name is entered in the name field of the<br />
address book, the phone number or the<br />
address is read out. A name can be entered<br />
later in the name field.<br />
Example of dialog:<br />
s Read out address book<br />
The system reads out all address book<br />
entries. If there are more than 30 entries, the<br />
system asks from which entry it should start<br />
the reading.<br />
i If you do not say a name, voice control<br />
reads out all address book entries.<br />
X To select an address book entry:<br />
Press the ? button at the selected<br />
entry.<br />
The entry is selected and shown on the<br />
display. Voice control asks whether the<br />
selected entry should be called, navigated<br />
to or opened.<br />
X To cancel the dialog:<br />
Press the % button.<br />
You have cancelled the dialog. The system<br />
confirms by responding “Cancel”.<br />
“Delete Address Book”<br />
You can use the “Delete address book”<br />
command to delete individual voice names or<br />
all the voice names in the address book. The<br />
address data is not deleted.<br />
“Open Entry”<br />
You can use the “Open entry” command to<br />
open any address book entry.<br />
Example of dialog:<br />
s Open entry<br />
t Please say the name<br />
s Smith<br />
u The system shows a numbered list in<br />
the display.<br />
t Please select a line number.<br />
s Line number 1 ...<br />
t Line number 1 accepted.<br />
The system opens the first entry on the<br />
list.<br />
If the selected entry contains at least<br />
one phone number or an address,<br />
voice control asks whether you want<br />
to dial the number or navigate to the<br />
stored address.<br />
“Spell Entry”<br />
You can use the “Spell entry“ command to<br />
open any address book entry by spelling the<br />
name.<br />
Say the letters in the form of a continuous<br />
string of letters (five to seven letters).<br />
A list of possible entries will appear in the<br />
display and you can choose the one you<br />
require.<br />
Example of dialog:<br />
s Spell entry<br />
t Please spell the name.<br />
s S-M-I-T-H<br />
u The system shows a numbered list in<br />
the display.<br />
t Please select a line number.<br />
s Number four<br />
t Number four accepted<br />
The system opens the fourth entry on<br />
the list.<br />
If the selected entry contains at least<br />
one phone number or an address,<br />
voice control asks whether you want<br />
to dial the number or navigate to the<br />
stored address.<br />
i You can use the “Next page” or “Previous<br />
page” commands to scroll through the list.
You can use the “Correction” command to<br />
spell the name again.<br />
Radio and Satellite Radio<br />
G Warning!<br />
Please devote your attention first and<br />
foremost to the traffic situation you are in.<br />
Before your journey, please familiarize<br />
yourself with the radio functions.<br />
Only use the Voice Control System when road<br />
and traffic conditions permit you to do so.<br />
Otherwise you could be involved in an<br />
accident in which you or others could be<br />
injured.<br />
Operation<br />
You can use voice control to:<br />
Rselect the waveband<br />
Rfind a station<br />
Rselect a frequency (FM, AM)<br />
Rselect a category (Satellite radio)<br />
Rlisten to the station list<br />
Rsave a voice name for a station<br />
Rdelete a station list (voice names only)<br />
Rdelete a station (voice name only)<br />
Rselect a channel number (Satellite radio)<br />
The names of all received and stored stations<br />
are available for voice recognition. To<br />
improve voice recognition, you can store a<br />
voice name for a specific speaker.<br />
X To select the radio or satellite radio<br />
application: Press the ? button on the<br />
multifunction steering wheel.<br />
X Say the command Radio or Satellite<br />
Radio.<br />
X Press the ? button.<br />
X Say one of the radio or satellite radio<br />
commands explained below.<br />
Commands<br />
You can always give the commands for the<br />
radio when you are listening to the radio, even<br />
if a different application is shown on the<br />
display.<br />
“Help Radio”<br />
Using the “Help Radio” command, you can<br />
have all the commands for the radio read out.<br />
“Help Satellite Radio”<br />
Using the “Help Satellite Radio” command,<br />
you can have all the commands for the<br />
satellite radio read out.<br />
Selecting a Waveband<br />
You can set the waveband with the following<br />
commands:<br />
R“FM”<br />
R“AM”<br />
Radio and Satellite Radio 201<br />
“Next Station”/“Previous Station”<br />
You can start manual tuning and set the next<br />
station using the following commands:<br />
R“Next station”<br />
R“Previous station”<br />
“Next Category”/“Previous Category”<br />
You can use the following commands to<br />
change the category on satellite radio:<br />
R“Next category”<br />
R“Previous category”<br />
Selecting the Frequency (FM Range)<br />
You can select frequencies within the FM<br />
range (87.7 to 107.9 MHz) directly. Voice<br />
control also recognizes the words<br />
“frequency”, “point” and “megahertz”.<br />
Example of dialog:<br />
s Eighty seven point nine megahertz<br />
u Voice control sets the frequency.<br />
Z<br />
Voice Control
202 Radio and Satellite Radio<br />
Voice Control<br />
Selecting the Frequency (AM Range)<br />
You can select frequencies within the AM<br />
range (530 to 1710 kHz) directly. Voice<br />
control also recognizes the words<br />
“frequency” and “kilohertz”.<br />
Example of dialog:<br />
s Five hundred and thirty kilohertz<br />
u Voice control sets the frequency.<br />
“Save Station”<br />
Using the “Save station” command you can<br />
give a voice name to the station currently<br />
selected. You can also use this command to<br />
improve voice recognition for difficult names<br />
or if you want to use a name of your own. You<br />
could, for example, save a station with the<br />
name “Favorite station”.<br />
When you have given the command, voice<br />
control prompts up to three times to say the<br />
station name. When repeating the station<br />
name, make sure that you pronounce it in<br />
exactly the same way as you did the first time.<br />
Otherwise, the name cannot be saved and<br />
voice control aborts the saving procedure.<br />
Example of dialog:<br />
s Save station<br />
t Please say the station name<br />
s Favorite station<br />
t Please repeat the station name.<br />
s Favorite station<br />
t The station has been saved.<br />
“Select Station”<br />
Using the “Select station” command, you can<br />
select a station.<br />
Example of dialog:<br />
s Select station<br />
t Please say the station name<br />
s Favorite station<br />
u Voice control sets the station<br />
“Station 'Favorite Station'”<br />
Using this command, you can select a station.<br />
Example of dialog:<br />
s Station 'Favorite station'<br />
u Voice control sets the station 'Favorite<br />
station'<br />
“Select Category” (Satellite radio)<br />
Using the “Select category” command, you<br />
can select an available category.<br />
Example of dialog:<br />
s Select category<br />
t Please say the category name<br />
s News<br />
u Voice control sets the category<br />
“Category News” (Satellite Radio)<br />
Use this command to select a satellite radio<br />
category.<br />
Example of dialog:<br />
s Category news<br />
u Voice control sets the category<br />
“Enter Channel Number” (Satellite<br />
Radio)<br />
Use the command “Enter channel number” to<br />
select a satellite radio category.<br />
“Read Out Station List” and “Selecting<br />
a Station”<br />
Using the “Read out station list” command,<br />
you can hear a list of all receivable stations<br />
and choose one from your station list.<br />
i If voice control does not recognize the<br />
station name, have it read out the list of<br />
stations. This allows you to check whether<br />
you have saved the station you require in<br />
the station list.<br />
Example of dialog:<br />
s Read out station list<br />
The system reads out the station list.
If the station you require is read out:<br />
X Press the ? button.<br />
The system sets the corresponding<br />
frequency.<br />
X To cancel the dialog: Press the %<br />
button.<br />
You have cancelled the dialog. The system<br />
confirms by responding “Cancel”.<br />
“Delete Station”<br />
You can use the “Delete station” command to<br />
delete a voice name for a station from your<br />
station list.<br />
Example of dialog:<br />
s Delete station<br />
t Which station name do you want to<br />
delete?<br />
s Favorite station<br />
t Do you want to delete 'Favorite<br />
station'?<br />
s Yes<br />
t Station deleted.<br />
“Delete Station List”<br />
You can use the “Delete station list”<br />
command to delete all voice names or<br />
individual ones from your station list.<br />
Example of dialog:<br />
s Delete station list<br />
t Would you like to delete all voice<br />
names from the station list?<br />
s Yes<br />
t Are you sure?<br />
s Yes<br />
t All voice names have been deleted<br />
from the station list<br />
u The system permanently deletes all<br />
voice names in the station list.<br />
or<br />
s No<br />
The system reads out the list of stations.<br />
When the system reads out the stations to be<br />
deleted:<br />
X Press the ? button.<br />
The station to be deleted is selected. The<br />
system reads out the selected station<br />
again.<br />
t Do you want to delete 'Favorite<br />
station'?<br />
s Yes<br />
t Station deleted<br />
u The system deletes the station and<br />
reads out the remaining entries in the<br />
station list.<br />
or<br />
s No<br />
The system continues to read out the list of<br />
stations.<br />
DVD Changer<br />
G Warning<br />
Please devote your attention first and<br />
foremost to the traffic situation you are in.<br />
Before your journey, please familiarize<br />
yourself with the disc functions.<br />
Only use the Voice Control System when road<br />
and traffic conditions permit you to do so.<br />
Otherwise you could be involved in an<br />
accident in which you or others could be<br />
injured.<br />
Operation<br />
You can use voice control to:<br />
Rselect a CD/DVD<br />
Rselect a track<br />
Rselect a directory in MP3 operation<br />
DVD Changer 203<br />
Rselect a group in DVD Audio operation<br />
i On the command “Next/previous CD/<br />
DVD”, the DVD changer changes from one<br />
CD/ DVD to the next, skipping any empty<br />
compartments. If you select an empty<br />
Z<br />
Voice Control
204 DVD Changer<br />
Voice Control<br />
compartment with the “CD/DVD 1 to CD/<br />
DVD 6” command, the current<br />
compartment remains selected.<br />
X To select the CD application: Press<br />
the ? button.<br />
X Say one of the following commands:<br />
R“CD player/CD changer”<br />
R“DVD audio”<br />
R“DVD video”<br />
R“MP3”<br />
X Press the ? button.<br />
X Give one of the CD or DVD commands<br />
explained below.<br />
Commands<br />
“Help CD”/“Help DVD”/“Help MP3”<br />
With the commands:<br />
R“Help CD”<br />
R“Help DVD audio”<br />
R“Help DVD video”<br />
R“Help MP3”<br />
you can have all the commands for the CD,<br />
DVD or MP3 read out.<br />
“Next CD/DVD”<br />
With the “Next CD”/“Next DVD” commands,<br />
you can select the next Audio CD/ DVD from<br />
your DVD changer.<br />
“Track 1” to “Track 99”<br />
With the “Track 1” to “Track 99” commands,<br />
you can select a track number from the<br />
inserted CD/DVD.<br />
“Next Track”<br />
You can use the “Next track” command to<br />
select the next track.<br />
“Previous Track”<br />
With the “Previous track” or “Repeat track”<br />
commands, you can have the track just<br />
played repeated. If the command is spoken<br />
as the first few seconds of the track are<br />
played, the previous track is selected.<br />
“Group 1” to “Group 9”<br />
With the “Group 1” to “Group 9” commands,<br />
you can select a group on an inserted Audio<br />
DVD.<br />
“Next Group”/“Previous Group”<br />
With the “Next group”/“Previous group”<br />
commands, you can select the next or<br />
previous group on the inserted Audio DVD.<br />
“Next Folder”/“Previous Folder”<br />
With the “Next folder”/“Previous folder”<br />
commands, you can select a folder on the<br />
inserted CD/DVD in MP3 mode.<br />
“Memory Card”<br />
With the “Memory card” command, you can<br />
switch to the PCMCIA card on the <strong>COMAND</strong><br />
system.<br />
“DVD Video”<br />
With the “DVD video” command, you can start<br />
a Video DVD on the <strong>COMAND</strong> system.<br />
“Music Register”<br />
With the “Music register” command, you can<br />
change to the internal music register (hard<br />
disk) of <strong>COMAND</strong>.<br />
“Media Interface”<br />
With the “Media interface” command, you<br />
can change to the external device that is<br />
connected to the media interface of<br />
<strong>COMAND</strong>.
External Equipment (Aux)<br />
“Audio Aux”<br />
You can use the “Audio Aux” command to<br />
activate the Aux input.<br />
Command List<br />
In the Command list section, you will find all<br />
the main commands for operating voice<br />
control. The commands available to you<br />
depend on the vehicle’s equipment.<br />
i Some functions have several voice<br />
commands to facilitate operation. These<br />
are grouped together between the<br />
separator lines in the list and can be used<br />
interchangeably.<br />
General Commands<br />
RYes<br />
RCorrect<br />
ROkay<br />
RCancel<br />
RNo<br />
RPause<br />
RAddress book<br />
RMP3<br />
RCD changer<br />
RCD<br />
RNavigation<br />
RRoute guidance<br />
RNav<br />
RDVD video<br />
RDVD audio<br />
RRadio<br />
RSatellite radio / Sirius<br />
RPhone<br />
RMessages<br />
RVideo<br />
RCorrection<br />
RWrong<br />
RIncorrect<br />
RHelp<br />
RHelp functions<br />
RHelp devices<br />
RHelp voice control [system]<br />
RHelp voice control/voice control help<br />
RGeneral help<br />
R0 – 9 (Numbers)<br />
Ra – z (Letters of the alphabet)<br />
RContinue<br />
RGo forward<br />
RNext page<br />
RPrevious page<br />
RGo back<br />
RBack<br />
RHelp radio<br />
RHelp phone/help telephone<br />
RHelp address book<br />
RHelp CD changer<br />
RHelp DVD<br />
RHelp DVD changer<br />
Command List 205<br />
Z<br />
Voice Control
206 Command List<br />
Voice Control<br />
RHelp DVD audio<br />
RHelp DVD audio changer<br />
RHelp MP3<br />
RHelp MP3 changer<br />
RHelp navigation<br />
RHelp route guidance<br />
RHelp nav<br />
Phone Commands<br />
RPhone<br />
RTelephone on/phone on<br />
RSave<br />
RSave name<br />
RSave number<br />
RSave phone number<br />
RDial number<br />
RDial phone number<br />
RConfirm<br />
RConfirm number<br />
RConfirm phone number<br />
RList phone book<br />
RRead out phone book<br />
RRedial<br />
RRedial last number<br />
RRedial last phone number<br />
RCorrection<br />
RIncorrect<br />
RWrong number<br />
RWrong phone number<br />
RDelete<br />
RDelete name<br />
RDelete phone number<br />
Navigation Commands<br />
RNavigation<br />
RRoute guidance<br />
RNav<br />
RGuidance/ route guidance instructions<br />
on<br />
RSwitch guidance/ route guidance<br />
instructions on<br />
RListen to guidance/ route guidance<br />
instructions<br />
RGuidance/ route guidance instructions<br />
off<br />
RSwitch off guidance/ route guidance<br />
instructions<br />
RMute guidance/ route guidance<br />
instructions<br />
RHouse number<br />
REnter house number<br />
RMap<br />
RShow map<br />
RMap on/switch on map<br />
RZoom in<br />
RZoom in on map<br />
RZoom out<br />
RZoom out of map
RZoom out completely<br />
RZoom in completely<br />
REnter state<br />
RChange state<br />
REnter province<br />
RChange province<br />
REnter destination area<br />
RAnother state<br />
RLast destinations<br />
REnter town<br />
REnter name of town<br />
RSpell town<br />
RSpell name of town<br />
RDistrict<br />
REnter district<br />
RCenter<br />
REnter center<br />
RSpell district<br />
RSpell center<br />
REnter intersection<br />
RIntersection<br />
RPoint(s) of interest/POI(s)<br />
REnter point(s) of interest/POI(s)<br />
RStreet<br />
REnter street<br />
RName of street<br />
REnter name of street<br />
RSpell street<br />
RSpell name of street<br />
REnter destination<br />
RSave destination<br />
RSave address<br />
RStart route guidance/routing/<br />
destination guidance<br />
RBegin route guidance<br />
RBegin destination guidance<br />
RContinue route guidance/destination<br />
guidance<br />
RCancel route guidance/navigation/<br />
nav/destination guidance<br />
RExit route guidance/navigation/nav/<br />
destination guidance<br />
RStop route guidance/navigation/ nav/<br />
destination guidance<br />
RTerminate route guidance/navigation/<br />
nav/destination guidance<br />
RNext gas station<br />
RNext <strong>Mercedes</strong>-<strong>Benz</strong> Service<br />
RNext workshop<br />
RNext MB service<br />
RNext hospital<br />
RNext car park<br />
RNext restaurant<br />
Address Book Commands<br />
RAddress book<br />
RRead out/play address book<br />
RList address book<br />
RDelete address book<br />
RSpell entry<br />
RSpell name<br />
RFind entry<br />
Command List 207<br />
Z<br />
Voice Control
208 Command List<br />
Voice Control<br />
RDelete name<br />
RRead out/play destination memory<br />
RList destination memory<br />
R<br />
R car<br />
R car phone<br />
R landline<br />
R landline phone<br />
R mobile<br />
R mobile phone<br />
R phone<br />
R work<br />
R home<br />
RWork<br />
ROffice<br />
RCompany/business<br />
RCar<br />
RCar phone<br />
RLandline<br />
RLandline phone<br />
RMobile<br />
RMobile phone<br />
RWork car<br />
RWork car phone<br />
RCar phone work/office/business/<br />
company<br />
RWork/office/business/company/<br />
landline<br />
RWork/office/business/company/<br />
landline telephone/phone<br />
RLandline telephone/phone work/office/<br />
business/company<br />
RWork/office/business/company/<br />
mobile<br />
RWork/office/business/company/<br />
phone<br />
RMobile phone work/office/business/<br />
company<br />
RHome<br />
RHome car<br />
RHome car phone<br />
RCar phone home<br />
RHome landline<br />
RHome landline telephone/phone<br />
RLandline telephone/phone home<br />
RHome mobile<br />
RHome mobile phone<br />
RMobile phone home<br />
RDial name<br />
RSave name<br />
RSave number<br />
RSave telephone/phone number<br />
RAccept<br />
RAccept name<br />
RAccept phone number<br />
ROkay<br />
RFinished<br />
R – <br />
RSelect 1 – select 6<br />
RNumber 1 – number 6<br />
Audio and Video Commands<br />
RAudio
Radio<br />
RRadio on<br />
R87 7 megahertz - 107 9 megahertz<br />
R87 point 7 to 107 point 9<br />
R87 point 7 megahertz to 107 point 9<br />
megahertz<br />
RFrequency 87 7 to frequency 107 9<br />
RFrequency 87 point 7 to frequency 107<br />
point 9<br />
RFrequency 87 point 7 megahertz to<br />
frequency 107 point 9 megahertz<br />
RFM<br />
RAM<br />
RWeatherband<br />
RNext station<br />
ROther station<br />
RStation search<br />
RStation <br />
RDelete station<br />
RSave station<br />
RSelect station<br />
RList station list<br />
RRead out station list<br />
RDelete station list<br />
RPrevious station<br />
RLast station<br />
Satellite Radio (SIRIUS XM)<br />
RSatellite Radio on/SIRIUS on<br />
RNext station<br />
ROther channel<br />
RChannel <br />
RDelete channel<br />
RSave channel<br />
RSelect channel<br />
RList channel list<br />
RRead out channel list<br />
RDelete channel list<br />
RLast channel<br />
RPrevious station<br />
RNext category<br />
RPrevious category<br />
RCategory <br />
RSelect category<br />
RList category list<br />
RRead out category list<br />
RPrevious category<br />
RLast category<br />
CD Changer<br />
RCD changer<br />
RNext CD<br />
ROther CD<br />
RPrevious CD<br />
RLast CD<br />
Command List 209<br />
Z<br />
Voice Control
210 Command List<br />
Voice Control<br />
RNext track<br />
ROther track<br />
RPrevious track<br />
RLast track<br />
RRepeat/replay track<br />
RCD 1 to CD 6<br />
RCD number 1 to CD number 6<br />
RTrack 1 to Track 99<br />
RTrack number 1 to Track number 99<br />
MP3<br />
RMP3<br />
RMP3 changer (on)<br />
RNext MP3<br />
ROther MP3<br />
RPrevious MP3<br />
RLast MP3<br />
RRepeat/replay MP3<br />
RNext directory<br />
ROther directory<br />
RPrevious directory<br />
RLast directory<br />
RNext track<br />
ROther track<br />
RPrevious track<br />
RLast track<br />
RRepeat/replay track<br />
RTrack 1 to Track 99<br />
RTrack number 1 to Track number 99<br />
RMP3 1 to MP3 6<br />
RMP3 number 1 to MP3 number 99<br />
Music Register<br />
RMusic register<br />
RHard disk<br />
Memory Card<br />
RMemory card<br />
DVD Audio<br />
RDVD audio<br />
RDVD audio changer on<br />
RNext DVD audio<br />
ROther DVD audio<br />
RPrevious DVD audio<br />
RLast DVD audio<br />
RNext directory<br />
ROther directory<br />
RPrevious directory<br />
RLast directory<br />
RNext group<br />
ROther group<br />
RPrevious group<br />
RLast group<br />
RGroup 1 to 9<br />
RGroup number 1 to 9
RNext track<br />
ROther track<br />
RPrevious track<br />
RLast track<br />
RRepeat/replay track<br />
RTrack 1 to Track 99<br />
RTrack number 1 to Track number 99<br />
RDVD audio 1 to DVD audio 6<br />
RDVD audio number 1 to DVD audio<br />
number 6<br />
Troubleshooting<br />
Problem Possible Cause/<br />
Consequence<br />
Voice control does<br />
not understand<br />
you.<br />
You have not<br />
operated the<br />
system from the<br />
driver’s seat.<br />
You have spoken<br />
too exaggeratedly,<br />
too loudly or too<br />
quietly.<br />
Media interface<br />
RMedia interface<br />
Aux<br />
Audio aux<br />
Video<br />
RVideo<br />
RDVD video<br />
Suggested Solutions<br />
Troubleshooting 211<br />
X Only operate the system from the driver’s<br />
seat.<br />
X State the commands coherently and clearly<br />
without exaggerating.<br />
Z<br />
Voice Control
212 Troubleshooting<br />
Voice Control<br />
Problem Possible Cause/<br />
Consequence<br />
An address book<br />
entry without a<br />
speakerdependent<br />
voice<br />
name is not<br />
recognized.<br />
An address book<br />
entry without a<br />
speakerdependent<br />
voice<br />
name is not<br />
recognized.<br />
The fields in the<br />
address book entry<br />
for the last name<br />
and first name are<br />
both filled in, but<br />
you only said the<br />
first name or the<br />
last name.<br />
The names entered<br />
in the address<br />
book do not sound<br />
sufficiently<br />
different, or are not<br />
pronounced as<br />
they are written.<br />
The names entered<br />
in the address<br />
book do not sound<br />
sufficiently<br />
different, or are not<br />
pronounced as<br />
they are written.<br />
The sound of the<br />
voice names in the<br />
address book is not<br />
sufficiently<br />
different.<br />
Suggested Solutions<br />
X Say the last name and then the first name of<br />
the address book entry in full.<br />
X Make sure the address book entries are<br />
plausible.<br />
Check the address book entries for the<br />
following:<br />
RThe name entries, e.g. last name and first<br />
name, are in the right fields.<br />
RDo not use abbreviations or acronyms.<br />
RAvoid unnecessary spaces in names.<br />
RDo not use special characters.<br />
X Create a speaker-dependent voice name.<br />
or<br />
X Give the “Read out address book” command.<br />
The system reads out the address book.<br />
X Press the ? button when the name you<br />
want is read out.<br />
X The voice names entered in the address book<br />
must sound as different as possible, e.g. store<br />
the names White and Wright as “Mr White<br />
office” and “Mr Wright John”.<br />
or<br />
X Give the “Read out address book” command.<br />
The system reads out the address book.<br />
X Press the ? button when the name you<br />
want is read out.
Problem Possible Cause/<br />
Consequence<br />
A station list entry<br />
is not recognized.<br />
If you are making<br />
speakerdependent<br />
voice<br />
names, the system<br />
prompts you to<br />
enter them several<br />
times.<br />
Help Function<br />
The voice names<br />
for the stations in<br />
the address book<br />
do not sound<br />
sufficiently<br />
different.<br />
The two voice<br />
names differ from<br />
each other.<br />
Voice control has a comprehensive help<br />
function to assist the user.<br />
The voice control help function provides:<br />
Rgeneral information about how best to<br />
operate voice control<br />
Ra list of the possible commands<br />
“Help Voice Control”<br />
You can use the “Help Voice Control”<br />
command to obtain information about how<br />
best to operate voice control.<br />
“Help”<br />
If you press the ? button and say the<br />
command “Help”, you will receive help for the<br />
application currently selected.<br />
If you select the “Help” command during a<br />
voice dialog, for example after the “Dial<br />
number” command, you will receive help<br />
explaining how the dialog continues.<br />
Suggested Solutions<br />
Troubleshooting 213<br />
X Save a speaker-dependent voice name for the<br />
station (Y page 198)<br />
or<br />
X Give the “Read out station list” command.<br />
The system reads out the station list.<br />
X Press the ? button when the station you<br />
want is read out.<br />
The station is selected.<br />
X Say the voice name with the same intonation<br />
both times.<br />
You can also request the help function for a<br />
specific system, for example with the “Help<br />
phone” command.<br />
If you have activated the help window, you will<br />
see a selection of the possible commands on<br />
the display (Y page 42).<br />
Z<br />
Voice Control
214
Overview ............................................ 216<br />
Emergency Calls ............................... 216<br />
Roadside Assistance ........................ 216<br />
Information Calls .............................. 217<br />
Search & Send ................................... 217<br />
215<br />
Tele Aid
216 Roadside Assistance<br />
Tele Aid<br />
Overview<br />
Vehicle Equipment<br />
i This Operator’s Manual describes all<br />
features, standard or optional, potentially<br />
available for your vehicle at the time of<br />
purchase. Please be aware that your<br />
vehicle might not be equipped with all<br />
features described in this manual.<br />
The Tele Aid System<br />
(Tele Aid – Telematic Alarm Identification on<br />
Demand)<br />
The Tele Aid system offers a variety of<br />
services, e.g.:<br />
RAutomatic and manual emergency<br />
RRoadside Assistance<br />
RInformation<br />
RSearch & Send<br />
Emergency Calls<br />
Automatically<br />
An emergency call is initiated automatically<br />
following an accident in which the emergency<br />
tensioning devices (ETDs) or air bags deploy.<br />
Initiating an Emergency Call Manually<br />
X Briefly press SOS button cover to open.<br />
X Press SOS button (for longer than 2<br />
seconds).<br />
The indicator lamp in the SOS button will<br />
flash until the emergency call is concluded.<br />
X Wait for a voice connection to the<br />
Response Center.<br />
X Close cover after the emergency call is<br />
concluded.<br />
i During the emergency call message<br />
Emergency Call Connected is displayed,<br />
operation from <strong>COMAND</strong> is not possible.<br />
For a complete description and additional<br />
information on Emergency calls please refer<br />
to the vehicle Operator's Manual.<br />
Roadside Assistance<br />
The Roadside Assistance button F is<br />
located in the overhead control panel.<br />
X Press and hold Roadside Assistance Button<br />
F (for longer than 2 seconds).<br />
A call to a <strong>Mercedes</strong>-<strong>Benz</strong> Roadside<br />
Assistance dispatcher will be initiated. The<br />
button will flash while the call is in progress.<br />
X Describe the nature of the need for<br />
assistance.<br />
For a complete description and additional<br />
information on Roadside Assistance calls<br />
please refer to the vehicle Operator's Manual.
Information Calls<br />
The Information button ï is located in the<br />
overhead control panel.<br />
X Press and hold Information button ï<br />
(for longer than 2 seconds).<br />
A call to the Customer Assistance Center<br />
will be initiated. The button will flash while<br />
the call is in progress. The operator in the<br />
Customer Assistance Center can download<br />
a destination (e.g service center) to your<br />
<strong>COMAND</strong> system, which you can use for<br />
navigation as described in the section<br />
“Search & Send” (Y page 217).<br />
For a complete description and additional<br />
information on Information calls please refer<br />
to the vehicle Operator's Manual.<br />
Search & Send<br />
i In order to utilize Search & Send your<br />
vehicle must be equipped with Tele Aid,<br />
Navigation, and an active Tele Aid<br />
subscription.<br />
“Search & Send” is a navigation destination<br />
address entry service. A destination address<br />
located using Google Maps ® or Yahoo Local<br />
Maps ® websites can be delivered via Tele Aid<br />
directly to the Navigation system in your<br />
vehicle.<br />
Specify and Send a Destination<br />
Address<br />
i Please refer to any specific instructions<br />
provided by either website regarding<br />
entering or sending an address. Each<br />
website functions differently and is subject<br />
to change.<br />
X Go to maps.google.com or<br />
maps.yahoo.com and enter a destination<br />
address in the address entry field.<br />
X Depending on which website you are using,<br />
click on the appropriate button to send the<br />
destination address to your Tele Aid<br />
account email address.<br />
X Enter the email address you specified when<br />
you activated your Tele Aid account in the<br />
appropriate field when the “Send” dialog<br />
box appears.<br />
X Click “Send”.<br />
Retrieve Destination Address<br />
Search & Send 217<br />
X Press the Tele Aid Information button<br />
ï to begin the download of the<br />
destination address to your vehicle's<br />
navigation system.<br />
i If you have sent more than one<br />
destination address to your vehicle you<br />
must make one Information Call for each<br />
destination address download.<br />
X Select Yes when the message appears<br />
asking if you would like to start navigation.<br />
Z<br />
Tele Aid
218 Search & Send<br />
Tele Aid<br />
This will open the start navigation screen<br />
(Y page 70).<br />
X Select Start.<br />
or<br />
X Select No if you wish to save the<br />
downloaded destination address in the<br />
From Memory destination list for future<br />
use.<br />
i Destination addresses will download in<br />
the same order they were sent. If you have<br />
multiple <strong>Mercedes</strong>-<strong>Benz</strong> vehicles equipped<br />
with Tele Aid and active accounts, each<br />
destination address sent will be retrievable<br />
by all vehicles associated with the e-mail<br />
address you specified for your Tele Aid<br />
account.
219
220
We reserve the right to modify the technical<br />
details of the <strong>COMAND</strong> system as given in the<br />
data and illustrations of this Operator’s<br />
Manual.<br />
Press time: 05/10/2009<br />
Reprinting, translation and copying, even of<br />
excerpts, is not permitted without prior<br />
authorization in writing.
Order no. 6515 6833 13 Part no. 212 584 18 81 Edition A 2010