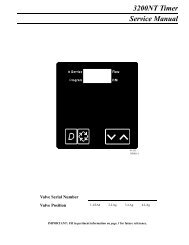
5600 Calendar Clock Valve - Hydrotech
5600 Calendar Clock Valve - Hydrotech
5600 Calendar Clock Valve - Hydrotech

You also want an ePaper? Increase the reach of your titles
YUMPU automatically turns print PDFs into web optimized ePapers that Google loves.
<strong>5600</strong><br />
<strong>Calendar</strong> <strong>Clock</strong> <strong>Valve</strong><br />
Combination Organic Color Removal & Softener<br />
Operation Manual<br />
Read all instructions carefully before operation.<br />
#51426 Rev. 12/08
Performance and Specifications<br />
Item Model Softening Color Removal Service Maximum Mineral Brine Resin Anion Resin Salt Shipping<br />
Number Number Capacity (kilograins) Capacity (ppm-gallons) Flow Rate (2) Flow to Drain Tank Size (3) Tank Size (3) VolumeVolumeCapacity Weight<br />
@10lb/cf (1) @10lb/cf (1) USGPM (LPM) USGPM (LPM) inches (mm) inches (mm) cu.ft. (litres) cu.ft. (litres) Lbs. (kg) Lbs. (kg)<br />
7377 WTCA45 12 2,000 8 (30.3) 2.4 (9.1) 10 x 54 (254 x 1372) 22 x 38 (559 x 965) 0.50 (14) 1.00 (28) 420 (191) 100 (45)<br />
Caution: These water conditioners are not intended to be used for treating water that is microbiologically unsafe or of unknown quality without adequate<br />
disinfection before or after the system.<br />
Notes:<br />
Operating Temperature Range: 110°F (43°C)<br />
Operating Pressure Range: 100 psig (689 kPa)<br />
Electrical: Standard 110V<br />
Pipe size: 3/4””<br />
1<br />
1. “*” designates that 10 lb/cf is the factory salt setting for all units.<br />
2. Capacities of softeners may deviate from the chart above depending on flow rates and raw water<br />
conditions.<br />
3. The manufacturer reserves the right to make product improvements which may deviate from the<br />
specifications and descriptions stated herein without obligation to change previously manufactured<br />
products or to note the change.<br />
4. 1 Kilograin is equal to 1000 grains.<br />
Application and Installations for the<br />
Combination OCR Removal & Softener Unit<br />
This Combination Softener has been designed to remove tannins and hardness from your water supply. Tannins can cause<br />
a yellow to brown colour in the water (i.e. organic colour) and also may impart taste and odour as well. Tannins are formed<br />
by the decomposition of vegetable matter. Hardness is responsible for the deposition of calcium carbonate scale in pipes<br />
and equipment.<br />
All tannins are not equal, the unit selected should have been with the assistance of an authorized representative or<br />
distributor. This is typically done based on a water analysis and column testing of the source water and/or with experience<br />
on other successful installations in the area on the same source water.<br />
Application Notes about Combination OCR Removal & Softener Unit:<br />
1. Although the Combination unit was selected using the source water, the selected Combination unit was the most<br />
suitable for this application, total removable of all colour contaminants may occasionally not be attained due to:<br />
a) Multiple types of tannins in the source water. Unit media may only be successful at removing some of these<br />
organics, but not all.<br />
b) Colour may be caused by contaminants other than organics.<br />
c) The remaining contaminants may require removal by other methods such as activated carbon, reverse<br />
osmosis, etc. Please consult your authorized representative or distributor for solutions.<br />
2. Metals in the water such as Iron and Manganese can also foul the Combination resin bed, reducing the ability to remove<br />
tannins and hardness. An iron filter or iron guard softener should be used to reduce the problem causing contaminants<br />
to an acceptable level.<br />
(Installation Tip: Ensure that the Combination unit is only allowed to regenerate after the regeneration of<br />
the filter unit, if one is present.)<br />
3. Turbidity caused by suspended solids and sediment can foul the Combination resin bed. Removal of the turbidity can<br />
be achieved through some type of mechanical filtration such as a multi-media filter and/or cartridge filters.<br />
4. Depending on the alkalinity of the source water being treated, the pH (alkalinity) of the water after the Combination unit<br />
will likely drop for part or all of the units service run after regeneration. This is caused by the Combination unit’s resin<br />
ability to also remove alkalinity in the water. Adjustment of the waters pH may be required once treated by the<br />
Combination unit.<br />
5. If “nitrates” are present in the source water, consult your authorized representative or distributor for additional solutions.<br />
(Caution: This unit has not been designed for nitrate removal and should be dealt with separately.)<br />
6. Occasionally, a fishy odour will occur if the source water is of a high pH, typically greater than 8.0. If this occurs, putting<br />
the unit through a couple regeneration cycles can sometimes reduce the odour. Chlorine in combination with a higher<br />
pH can also make the odour worse or more difficult to overcome as chlorine degrades the resin in the Combination unit.<br />
7. Depending on the alkalinity of the source water being treated, the chlorides in the treated water from the Combination<br />
unit will increase proportionally. This may result in a bitter salty taste which should be treated with a reverse osmosis<br />
drinking water system for household drinking and cooking water.
CAUTION:<br />
If the ground from the electrical panel or breaker box to the water<br />
meter or underground copper pipe is tied to the copper water lines<br />
and these lines are cut during installation of the Noryl bypass<br />
valve and/or poly pipe, an approved grounding strap must be<br />
used between the two lines that have been cut in order to maintain<br />
continuity. The length of the grounding strap will depend upon the<br />
number of units being installed and/or the amount of copper pipe<br />
being replaced with poly. See Figure 1.<br />
In all cases where metal pipe was originally used and is later<br />
interrupted by poly pipe or the Noryl bypass valve as in Figure 1<br />
or by physical separation as in Figure 2, to maintain proper<br />
metallic pipe bonding, an approved ground clamp c/w not less<br />
than #6 copper conductor must be used for continuity.<br />
Check your local electrical code for the correct clamp and cable<br />
size.<br />
Installation Instructions<br />
2<br />
Figure 1<br />
Ground<br />
From<br />
Panel<br />
Poly Pipe<br />
Figure 2<br />
Electrical Panel<br />
Ground Strap<br />
Poly Pipe<br />
Softener<br />
c/w Plastic Bypass<br />
Copper Pipe<br />
Water Meter<br />
Outside Water Line For Outside & 3rd Tap Comes From Meter<br />
Unfiltered Water Bypass<br />
Loop Cut & Capped<br />
Filtered Water Line in Home<br />
Ground Strap Required<br />
Because of Break in Continuity<br />
1. Determine the best location for your water softener, bearing in mind the location of your water supply lines, drain line<br />
and 110 volt AC electrical outlet. Subjecting the softener to freezing or temperatures above 110°F (43°C) will void the<br />
warranty.<br />
2. Water to supply outside faucets used to water lawns and gardens should not be softened. A new water line is often<br />
required to be connected to supply hard water to the inlet of the water softener and to the outside faucets. Cut the<br />
water line between where it enters the house; before any lines that branch off to feed the hot water heater or other<br />
fixtures in the house; and as near the desired location of the water softener as possible. Install a tee fitting on the feed<br />
end of the cut pipe and an elbow fitting on the other end. Install piping from the tee to the inlet of the water softener<br />
and from the elbow to the outlet to the softener. To server the water lines which branch off to feed outside faucets, cut<br />
the branch lines approximately two inches from the fitting on the main water line. Install an elbow on the end of the<br />
pipe nearest the outside faucet and a cap on the end connected to the existing water line. Install piping from the tee<br />
on the inlet to the water softener to the elbow on the pipe to the outside faucet. Following this procedure will result in<br />
all lines in the house, with the exception of the outside faucets but including the water heater and therefore the hot<br />
water lines, being supplied with soft water.<br />
3. Familiarize yourself with the location of the inlet, outlet and drain on the control valve. Be very careful not to get the<br />
controls wet.
4. Attach the bypass valve to the control valve. Connect the<br />
inlet and outlet of the water softener to the plumbing in<br />
the house. The control valve must not be subjected to<br />
temperatures above 71°C (160°F). To avoid damaging<br />
the control valve when sweat fittings are used, solder the<br />
threaded copper adapters to the copper pipe and then,<br />
using teflon tape, screw the assembly into the bypass<br />
valve.<br />
CAUTION - do not use pipe thread compound as it may<br />
attack the material in the valve body.<br />
5. Using teflon tape, screw the 1/2” hose barb into the drain<br />
port in the valve. Attach 1/2” drain hose to the hose barb<br />
and tighten securely with a hose clamp. Run the drain<br />
line to a floor drain or a laundry drain. Complete any<br />
necessary plumbing.<br />
6. On the twin tank units, pull the 3/8” brine line through the<br />
hole in the side of the brine tank. Connect the brine line<br />
to the fitting on the side of the valve using the nut and<br />
ferrule. Tighten snugly.<br />
7. Make sure the bypass valve is in the service position.<br />
8. Set the time of day and the program wheel according to the instructions on page 4.<br />
9. Remove back cover plate. Make sure that the salt dosage is set as recommended on page 5.<br />
NOTE: The various regeneration positions may be dialed manually by turning the large knob on the front of the control<br />
clockwise, until the indicator shows the desired position.<br />
10. Turn the large knob to the backwash position. Turn on the water supply to the valve and wait until water starts running<br />
at the drain. Allow the water to run at the drain for 2 to 3 minutes.<br />
11. Turn the knob advancing the valve to the brine and rinse position. Allow the water to run at the drain for a further 2 to<br />
3 minutes. Using the same procedure, turn the knob to rapid rinse position and allow to run for a few minutes.<br />
12. Plug the conditioner in. Manually turn the knob to the start of the brine refill position. The correct amount of water will<br />
be automatically metered through the air check tube in the brine well into the brine tank, and the control will<br />
automatically return to the service position. The service position is indicated by the word SERVICE on the front dial.<br />
13. Replace back cover on the control module.<br />
14. Put a minimum of 40 kg of crystal water softener salt in the brine tank. The unit will automatically fill to the correct level<br />
when it regenerates.<br />
Optional Sanitization Procedure: We recommend that all new water conditioners be disinfected as part of the startup.<br />
Sanitization is achieved by the application of chlorine in the regeneration cycle of the conditioner. A liquid solution of 5.25%<br />
sodium hypochlorite (commonly referred to as household bleach) is recommended as a suitable disinfectant. Use only<br />
unscented products. For every cubic foot of resin in the softener, pour approximately two (2) tablespoons of sodium<br />
hypochlorite into the brine well tube. The brine tank refill in Step 12 should add the correct amount of water to the brine<br />
tank. If not, the water can be added manually now. Press and hold the EXTRA CYCLE button to begin a manual<br />
regeneration. Press the EXTRA CYCLE button again to advance the valve to the Brine/Rinse position. Allow softener to<br />
complete the Brine/Rinse cycle, then let the manual regeneration continue until the brine tank is refilled again with the<br />
correct amount of water.<br />
ALL STATE AND LOCAL GOVERNMENT CODES GOVERNING INSTALLATION OF THESE DEVICES MUST BE OBSERVED.<br />
3<br />
BRINE<br />
LINE<br />
DRAIN<br />
LINE<br />
INLET<br />
Rear View - Plumbing Hook-Up<br />
OUTLET
Setting the Time of Day (Figure 3)<br />
Operating Instructions<br />
This is a 24-hour timer and must correspond with the correct time on your wrist watch<br />
to ensure proper cycling of your conditioner. Disengage the drive gear by pressing and<br />
holding in the RED BUTTON on the left side of the control. Now turn the large 24-hour<br />
gear until the actual time of day is at the time of day arrow at the bottom of the panel.<br />
Release the red button to re-engage the drive gear. The correct time of day on the 24hour<br />
clock has now been set.<br />
Time of Regeneration<br />
The time of regeneration is factory set at 2:00 a.m.<br />
Manual Regeneration Cycle (Figure 4)<br />
Should you run out of soft water due to inadequate frequency of regeneration or<br />
inadequate reserve capacity, power failure, lack of salt, or excessive usage because<br />
of unexpected company, you can initiate a manual regeneration simply by turning the<br />
manual regeneration knob on the front of the control to “REGEN” position. The<br />
conditioner will now automatically complete a regeneration cycle and return to service.<br />
Be sure there is adequate salt and salt brine in the brine tank for a satisfactory<br />
regeneration.<br />
Setting the Regeneration Frequency (Figure 5)<br />
The unit’s control features a skipper wheel with twelve numbered tabs and trip fingers. Each represents one day of a twelve day<br />
schedule. By adjusting the skipper wheel tabs the control can be programmed to regenerate every second, third, fourth, sixth or every<br />
twelfth day, according to your requirements.<br />
The control is shipped with all the skipper wheel tabs pushed outwards. You must push the tabs in toward the center of the wheel<br />
(retracting the trip fingers) for each day that regeneration is not required.<br />
Rotate the skipper wheel until number “1” is at the pointer, leave this tab out. Moving clockwise round the skipper wheel, push in tabs<br />
for those days regeneration is not required. The tabs left out trigger regeneration, these should be evenly spaced around the wheel.<br />
Figure 5<br />
Important Note - Due to the nature of the interaction between the colour producing organic molecules and the resin bed in your<br />
Combination unit, we recommend the unit be regenerated a minimum of every 3 days. This is to extend the life of the resin bed<br />
in your Combination unit.<br />
4<br />
Figure 3<br />
Figure 4
Salt Settings are factory set and should not need adjustment<br />
WTCA45...................................8 lbs<br />
Automatic Bypass<br />
The regeneration cycle lasts approximately 2-1/2 hours, after which soft water service will be restored. During regeneration, hard water<br />
is automatically bypassed for use in the household. Hot water should be used as little as possible during this time to prevent hard water<br />
from filling the water heater. This is why automatic regeneration is set for sometime during the night and manual regenerations should<br />
be performed when little or no water will be used in the household.<br />
Safety Float<br />
The brine tank is equipped with a safety float which prevents your brine tank from overfilling as a result of a malfunction such as a power<br />
failure.<br />
Water Pressure<br />
Your softener is designed to operate under normal water pressures from 20 psi (1.4 atm) to 120 psi (8.2 atm).<br />
New Sounds<br />
You may notice new sounds as your water softener operates. The regeneration cycle lasts approximately 2-1/2 hours. During this time,<br />
you may hear water running intermittently to the drain.<br />
Manual Bypass (Figure 6)<br />
In the case of emergency, such as an overflowing brine tank, you can isolate your<br />
water softener from the water supply using the bypass valve located at the back of the<br />
control.<br />
In normal operation the bypass is open with the on/off knobs in line with the inlet and<br />
outlet pipes. To isolate the softener, simply rotate the knobs clockwise (as indicated<br />
by the word BYPASS and arrow) until they lock.<br />
You can use your water related fixtures and appliances as the water supply is<br />
bypassing the softener. However, the water you use will be hard.<br />
To resume soft water service, open bypass valve by rotating the knobs counterclockwise.<br />
5<br />
Figure 6<br />
OUTLET<br />
INLET
Maintenance<br />
Checking the Salt Level<br />
Check the salt level monthly. Remove the lid from the cabinet or brine tank, make sure salt level is always above the<br />
brine level (you should not be able to see water).<br />
Adding Salt<br />
Use only clean salt labeled for water conditioner use, such as crystal, pellet, nugget, button or solar.<br />
The use of rock salt is discouraged because it contains insoluble silt and sand which build up in the brine tank and can<br />
cause problems with the system’s operation. Add the salt directly to the tank, filling no higher than the top of the brine<br />
well.<br />
Caution<br />
Liquid brine will irritate eyes, skin and open wounds - gently wash exposed area with fresh water. Keep children away<br />
from your water conditioner.<br />
Bridging (Figure 7)<br />
Humidity or wrong type of salt may create a cavity between the water and the salt. This<br />
action, known as “bridging”, prevents the brine solution from being made, leading to your<br />
water supply being hard.<br />
If you suspect salt bridging, carefully pound on the outside of the brine tank or pour some<br />
warm water over the salt to break up the bridge. This should always be followed up by<br />
allowing the unit to use up any remaining salt and then thoroughly cleaning out the brine<br />
tank.<br />
Allow four hours to produce a brine solution, then manually regenerate the softener.<br />
Care of Your Softener<br />
To retain the attractive appearance of your new water softener, clean occasionally with mild soap solution. Do not use<br />
abrasive cleaners, ammonia or solvents. Never subject your softener to freezing or to temperatures above 110°F (43°C).<br />
Cleaning the Injector Assembly (Figure 8)<br />
Sediment, salt and silt will restrict or clog the injector. A clean water<br />
supply and pure salt will prevent this from happening.<br />
The injector assembly is located on the right side of the control valve.<br />
This assembly is easy to clean.<br />
Shut off the water supply to your softener and reduce the pressure by<br />
opening a cold soft water faucet. Using a screwdriver, remove the two<br />
screws holding the injector cover to the control valve body. Carefully<br />
remove the assembly and disassemble as shown in Figure 8. The<br />
injector orifice is removed from the valve body by carefully turning it<br />
out with a large screwdriver. Remove the injector throat the same way.<br />
Carefully flush all parts including the screen. Use a mild acid such as<br />
vinegar or Pro-Rust Out to clean the small holes in the orifice and<br />
throat.<br />
Reassemble using the reverse procedure.<br />
Resin Cleaner<br />
An approved resin cleaner must be used on a regular basis if your water supply contains iron. The amount of resin cleaner<br />
and frequency of use is determined by the quantity of iron in your water (consult your local representative or follow the<br />
directions on the resin package).<br />
6<br />
Figure 8<br />
Figure 7<br />
INJECTOR BODY<br />
INJECTOR THROAT<br />
INJECTOR NOZZLE<br />
“O” RING<br />
INJECTOR COVER<br />
SCREW<br />
INJECTOR SCREEN
Trouble Shooting your Combination Softener Unit<br />
Problem: Fishy or unpleasant odour is apparent in the treated water that is not present in the untreated water.<br />
1. pH of the incoming water may be high. • This odour may be apparent on startup and will<br />
typically be reduced or eliminated after a couple<br />
service runs and regenerations cycles of the<br />
Combination Softener unit.<br />
2. pH of the incoming water maybe high in • The addition of chlorine along with high pH<br />
combination with chlorine present for typically increases the chances that an odour will<br />
disinfection. be present in the treated water With the presence<br />
of chlorine, it is unlikely odour will be eliminated.<br />
Chlorine can be removed through the use of an<br />
activated carbon filter, however it is highly<br />
recommended that additional disinfection methods<br />
be re-employed downstream of the Combination<br />
Softener unit with Ultraviolet Sterilizers or<br />
Chlorination Pumps.<br />
Problem: Combination Softener unit was removing colour from water, but then starts to show colour again<br />
until regeneration. Then colour is removed again.<br />
1. Capacity of Combination Softener unit is being over run • Decrease the gallons between service runs to a<br />
and resulting in tannins not being removed near the end point where no coloured water is appearing<br />
of service run. between one regeneration to the next.<br />
Problem: Combination Softener unit was removing colour from water, but then starts to show colour earlier<br />
and earlier into service run.<br />
OR<br />
Problem: Combination Softener unit was removing colour from water, but no longer seems to be effective.<br />
1. Regeneration is not being performed adequately. • Check to see if salt is in brine tank. If no salt is<br />
present, last regeneration(s) may have been done<br />
without salt brine. Add salt to brine tank and<br />
manually regenerate Combination Softener unit until<br />
after allowing brine to dilute in water for at least 4<br />
hours.<br />
• Check to see if brine tank is being refilled with<br />
water properly at the end of the regeneration<br />
cycle and/or if water is being drawn into the valve<br />
during the brine draw cycle. Injector & Screen or<br />
Brine <strong>Valve</strong> may be plugged and require cleaning.<br />
• Check to see that valve settings are correct.<br />
2. Regeneration is not being performed at all. • Check gallonage setting between regenerations.<br />
Capacity set may be too large.<br />
• Check to see that meter is turning and properly<br />
connected via the meter cable to the timer.<br />
• Check to ensure that Bypass <strong>Valve</strong> is not open<br />
and bypassing the Combination Softener unit with<br />
untreated water.<br />
3. Resin Media may be backwashing to drain. • Confirm backwash flow control is installed on drain<br />
line and check that backwash flow control has not<br />
been swapped for service line flow control.<br />
• Monitor drain line during regeneration cycle and<br />
check that no resin beads are exiting the<br />
Combination Softener unit.<br />
4. Combination Softener unit resin media may be fouled • Try manually regenerating Combination Softener<br />
with organics. Check resin visually to confirm. unit two or three times in a row. Allowing<br />
approximately four (4) hours between regenerations<br />
to allow salt brine to be saturated.<br />
7
4. Cont’d... • As a last resort, try adding approximately four (4)<br />
ounces of household bleach (5.25%) into the brine<br />
well. Begin a manual regeneration. Monitor the<br />
drain line for a strong chlorine odour which should<br />
occur in the brine draw cycle . When odour is<br />
present, halt regeneration by unplugging unit and<br />
shutting down water flow to the unit via the bypass<br />
valve. Shutdown the unit for approximately<br />
two (2) hours, then continue regeneration by<br />
plugging unit back in and replacing bypass valve to<br />
service position. Only try this step as a last resort<br />
as chlorine will degrade the resin bed. If<br />
unsuccessful, see next step.<br />
• Resin bed may have become permanently fouled<br />
due to infrequency of regenerations or nature of<br />
tannins causing colour in water. Replace resin<br />
media bed and check to see that regeneration<br />
frequency is adequate or consult your dealer.<br />
5. Combination Softener filter resin media may be fouled • Iron should typically be removed prior to the<br />
with Iron. Check visually to confirm. unit. Install an iron filter upstream of the unit.<br />
• Clean iron from resin media bed with a reducing<br />
agent such as sodium bisulfite or sodium<br />
hydrosulfite by adding it to the brine tank down the<br />
brine well and allowing time to mix. Manually<br />
regenerate softener.<br />
Recommended Product: PRO RUST OUT –<br />
see instructions on bottle on cleaning of water<br />
softeners.<br />
• If resin bed cannot be cleaned, it may be<br />
permanently fouled with iron. Replace resin media<br />
bed and install treatment upstream of unit to<br />
remove iron.<br />
6. Combination Softener filter resin media may be fouled • Calcium Carbonate fouling is the result of<br />
with Calcium Carbonate. hardness precipitating onto the resin media.<br />
• Clean calcium carbonate from resin media with a<br />
mild acid solution such as phosphoric acid. Do this<br />
by adding cleaning product to the brine tank via the<br />
brine well and then manually regenerate. Once<br />
complete, manually regenerate again with salt<br />
brine.<br />
Recommended Product: PRO Res-Care –<br />
see instructions on bottle on cleaning of water<br />
softeners.<br />
8
Problem: Combination Softener unit appear to be causing a high pressure drop in home water system.<br />
1. Pressure drop may be due other factors. • Confirm pressure loss is due to the unit, and<br />
not the result of distribution or well pump problem.<br />
• Confirm pressure loss is due to unit by<br />
checking flow while in BYPASS mode.<br />
• Check that flow demand is not exceeding rated<br />
flow rate of Combination Softener unit. These units<br />
are supplied with a SERVICE LINE FLOW<br />
CONTROL to ensure maximum effectiveness is<br />
maintained. Attempting to exceed this flow control<br />
rating will result in a pressure drop. Combination<br />
Softener unit should be increased in size to<br />
compensate for larger demand.<br />
NOTE: Do not remove this FLOW CONTROL<br />
from valve outlet. It will likely result in a<br />
decrease in Combination Softener unit<br />
performance.<br />
2. Pressure loss may be due to fouling from • See troubleshooting notes above on dealing with<br />
Organics, Iron or Calcium Carbonate. fouling problems.<br />
3. Pressure loss may be due to Resin Media being • Try manually regenerating the unit and extending<br />
plugged with Silt and Turbidity. the backwash by unplugging unit during the first<br />
cycle that begins to send water to the drain.<br />
Monitor water to the drain and watch for dirt and<br />
silt. If present, continue this backwash cycle until<br />
water runs clear then plug unit and allow valve<br />
to finish regeneration normally.<br />
• Install multi-media filter or 5 micron cartridge filter<br />
ahead of the unit to remove Silt and Turbidity.<br />
Problem: Combination softener unit appears to be removing most of the colour in the water, but some still<br />
passes through.<br />
1. Raw water may be partially slipping past Combination • Check to see that SERVICE LINE FLOW<br />
Softener unit or the Organics (Tannins) not being CONTROL is in place on the valve outlet.<br />
removed may be impervious to the resin media in the Flowrates higher than recommended through the<br />
Combination Softener unit. unit may be causing some leakage of colour.<br />
• Check to see that BYPASS valve is not partially<br />
open and bleeding some raw water to distribution<br />
lines.<br />
• Check that pipelines after the unit are not lined<br />
with organics that are slowly being stripped away.<br />
Lines may require flushing.<br />
• If all equipment and distribution sources of problem<br />
have been eliminated, consult your water treatment<br />
dealer, who may try to “polish” the remaining colour<br />
after the the unit with an ACTIVATED CARBON<br />
filter or cartridges or other treatment method.<br />
9
GUARANTEE<br />
HYDROTECH guarantees that your new water conditioner is built of quality material and workmanship. When properly<br />
installed and maintained, it will give years of trouble-free service.<br />
FIVE YEAR COMPLETE PARTS GUARANTEE<br />
HYDROTECH will replace any part which fails within 60 months from date of manufacture, provided the failure is due to a<br />
defect in material or workmanship. The only exception shall be when proof of purchase or installation is provided and then<br />
the warranty period shall be from the date thereof.<br />
TEN YEAR GUARANTEE ON MINERAL AND BRINE TANKS<br />
HYDROTECH will provide a replacement mineral or brine tank to any original equipment purchaser in possession of a tank<br />
that fails within 120 months, provided that the water conditioner is at all times operated in accordance with specifications and<br />
not subject to freezing or exposure to direct sunlight.<br />
GENERAL PROVISIONS<br />
HYDROTECH assumes no responsibility for consequential damage as a result of escaped water from the water filter; labor<br />
or expense incurred as a result of a defect or for failure to meet the terms of these guarantees because of circumstances<br />
beyond its control.<br />
WaterGroup Inc. Regina, Saskatchewan<br />
Fridley, Minnesota Cambridge, Ontario<br />
Durham, North Carolina Calgary, Alberta<br />
1-800-354-7867 1-877-299-5999<br />
www.hydrotechwater.com<br />
Printed in Canada