

Mark 300 Series Verification Gage Instructions - Whip Mix
Mark 300 Series Verification Gage Instructions - Whip Mix
Mark 300 Series Verification Gage Instructions - Whip Mix

You also want an ePaper? Increase the reach of your titles
YUMPU automatically turns print PDFs into web optimized ePapers that Google loves.
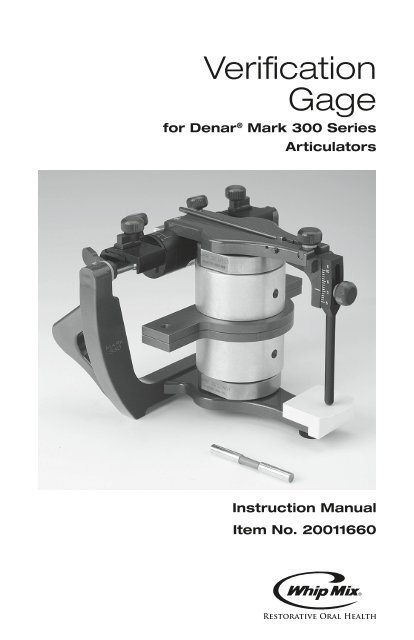
<strong>Verification</strong><br />
<strong>Gage</strong><br />
for Denar ® <strong>Mark</strong> <strong>300</strong> <strong>Series</strong><br />
Articulators<br />
Instruction Manual<br />
Item No. 20011660
<strong>Verification</strong> <strong>Gage</strong> for Denar ® <strong>Mark</strong> <strong>300</strong> <strong>Series</strong> Articulators<br />
Table of Contents<br />
Introduction . . . . . . . . . . . . . . . . . . . . . . . . . . . . . . . . . . . . . . . . . 3<br />
Step 1: Cleaning Surfaces . . . . . . . . . . . . . . . . . . . . . . . . . . . . . . 4<br />
Step 2: Mounting the <strong>Gage</strong> . . . . . . . . . . . . . . . . . . . . . . . . . . . . . 4<br />
Step 3: <strong>Verification</strong> Process . . . . . . . . . . . . . . . . . . . . . . . . . . . . . 4<br />
Step 4: Cleaning the Fossae . . . . . . . . . . . . . . . . . . . . . . . . . . . . 5<br />
Step 5: Checking the Fossae . . . . . . . . . . . . . . . . . . . . . . . . . . . . 5<br />
2 Customer Service 1.800.626.5651
Introduction<br />
The purpose of this verification<br />
gage is to give you a way<br />
to check the calibration of your<br />
<strong>Mark</strong> <strong>300</strong> series articulator in<br />
your office or lab . The <strong>Mark</strong> <strong>300</strong><br />
series articulators are factory set<br />
to within 20 microns of accuracy .<br />
Components:<br />
• Upper <strong>Verification</strong> <strong>Gage</strong><br />
• Lower <strong>Verification</strong> <strong>Gage</strong><br />
• <strong>Verification</strong> Pin<br />
(Figure 1)<br />
Important Note:<br />
Each <strong>Verification</strong> <strong>Gage</strong> pair is<br />
marked with a serial number . It<br />
is vital that the upper and lower<br />
gages match, otherwise the<br />
results may not be accurate .<br />
(Figure 2)<br />
Customer Service 1.800.626.5651<br />
Instruction Manual<br />
Figure 1<br />
Figure 2<br />
3
<strong>Verification</strong> <strong>Gage</strong> for Denar ® <strong>Mark</strong> <strong>300</strong> <strong>Series</strong> Articulators<br />
Step 1: Cleaning Surfaces<br />
Unlatch and remove the upper member .<br />
Loosen the incisal pin and raise it up to<br />
around -5, with the goal being just to move<br />
the pin out of the way . (Figure 3)<br />
Using a q-tip and alcohol, clean the mounting<br />
surfaces of the upper and lower members<br />
of your articulator, and both mounting<br />
surfaces of your gage . If you have an air<br />
nozzle, use it to blow dry all surfaces . Do<br />
make sure the air nozzle is not blowing<br />
particles on to your surfaces .<br />
With tolerances of 20 micron, any particles left on these<br />
surfaces will affect the accuracy of the verification .<br />
Step 2: Mounting the <strong>Gage</strong><br />
Mount the upper and lower gage blocks<br />
to the upper and lower members locating<br />
on the back dimples . The magnet is very<br />
strong, and if you slide the gage into place,<br />
you may scratch the surface . (Figure 4)<br />
Attach the upper member of the articulator<br />
to the lower member, and push the latch<br />
down to lock into place . Make sure that the<br />
instrument settings are zero before beginning<br />
the verification .<br />
Step 3: <strong>Verification</strong> Process<br />
The first step is to check for gap around the<br />
3” diameter of your gage . Using 20 micron<br />
mylar, slide it between the upper and lower<br />
gage and close the gage . Pulling on the<br />
mylar, you should feel a slight to tight drag .<br />
Check this four times at the 1 o’clock, 5<br />
o’clock, 7 o’clock, and 11 o’clock positions .<br />
If the mylar pulls right out, write down what<br />
happened and continue with this process .<br />
We will check this again at a later stage .<br />
(Figure 5)<br />
4<br />
Figure 3<br />
Figure 4<br />
Figure 5<br />
Customer Service 1.800.626.5651
The verification pin will be used to slide<br />
through the holes on each side of the gage .<br />
Set the pin on one of the holes . The pin will<br />
slide all the way through the hole on its own<br />
if the articulator is in calibration . If the pin<br />
doesn’t fall immediately, it may be caught<br />
on the lip of the gage . Wiggle the pin side to<br />
side slightly to see if the pin will fall . Do not<br />
push down on the pin. If you have to force<br />
the pin through the hole on either side of<br />
the gage, the articulator is out of calibration .<br />
(Figure 6)<br />
If the gap check is ok, and the verification<br />
pin falls easily on both sides, your instrument<br />
is in calibration . (Figure 7) Remove the<br />
gage . With the upper and lower members<br />
together and the instrument locked, drop<br />
the incisal pin to sit on the guide table . The<br />
pin should be lined up at the zero mark .<br />
If your instrument is not in calibration, follow<br />
the next steps to see what may be causing<br />
the problem .<br />
Step 4: Cleaning the Fossae<br />
The fossae may be causing the articulator<br />
to be out of calibration due to wear of the<br />
medial insert or dirt particles .<br />
Unlock and remove the upper member .<br />
Check to see if there are dirt particles on<br />
either fossa, and clean if necessary . Repeat<br />
the above verification process . (Figure 8)<br />
If during your check for gap the mylar<br />
continues to pull right out (no resistance),<br />
this instrument will need to be sent to the<br />
factory for repair.<br />
Step 5: Checking the Fossae<br />
If the articulator is still out of calibration after using the<br />
verification pin in step 4, remove the fossae and repeat the<br />
verification process without the fossae as follows .<br />
Unlock and remove the upper member . Loosen both fossae<br />
lock knobs and remove both fossae . Then set the upper<br />
Instruction Manual<br />
Figure 6<br />
Figure 7<br />
Figure 8<br />
Customer Service 1.800.626.5651 5
<strong>Verification</strong> <strong>Gage</strong> for Denar ® <strong>Mark</strong> <strong>300</strong> <strong>Series</strong> Articulators<br />
gage block on top of the lower gage block .<br />
Push the latch down to lock the upper and<br />
lower members into place . Go through the<br />
pin verification process mentioned in step<br />
3 . If the pin now drops easily through each<br />
hole, the issue is with one or both of the<br />
fossae . (Figure 9)<br />
Replace one of the fossa on to the upper<br />
member and tighten with the fossae lock<br />
knob . Place the upper gage block on top<br />
of the lower gage block . Push the latch<br />
down to lock the upper and lower members<br />
into place . Go through the pin verification<br />
process mentioned in step 3 . If the pin now<br />
drops easily through each hole, this fossa is<br />
not causing the problem . (Figure 10)<br />
Put both fossae back on the upper member,<br />
lock into place, and once again repeat<br />
the pin verification process . If both pins do<br />
not drop easily, write down which fossa<br />
appears to be causing the problem.<br />
This instrument will then need to be sent into the<br />
factory for repair.<br />
To return for repair, call (800) 626-5651<br />
Once you have an RMA number, return to:<br />
<strong>Whip</strong> <strong>Mix</strong> Corporation<br />
1730 E . Prospect Rd ., Ste 101<br />
Fort Collins, CO 80525<br />
6<br />
Figure 9<br />
Figure 10<br />
Customer Service 1.800.626.5651
Instruction Manual<br />
Customer Service 1.800.626.5651 7
<strong>Whip</strong> <strong>Mix</strong> Corporation<br />
361 Farmington Avenue<br />
Louisville, KY USA 40209<br />
Toll-Free: 800-626-5651<br />
Fax: 502-634-4512<br />
www.whipmix.com<br />
All trademarks identified with a or ® are<br />
trademarks of <strong>Whip</strong> <strong>Mix</strong> Corporation.<br />
© 2010 <strong>Whip</strong> <strong>Mix</strong> Corporation.


