Arts & Crafts Style Chair - Fine Woodworking
Arts & Crafts Style Chair - Fine Woodworking
Arts & Crafts Style Chair - Fine Woodworking

You also want an ePaper? Increase the reach of your titles
YUMPU automatically turns print PDFs into web optimized ePapers that Google loves.
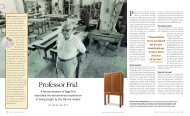
Frid Teaches <strong>Woodworking</strong>: Furniture making<br />
(The Taunton Press, 1985).<br />
Two legs are sandwiched between two<br />
pieces of birch plywood. One side of the jig<br />
is shaped for the outside cut and the other<br />
for the inside cut. Support blocks on each<br />
end and one in the middle of the jig register<br />
the pieces to be cut. Machine screws<br />
through one side thread into T-nuts in the<br />
other side and hold the legs firmly in place.<br />
I applied strips of self-adhesive sandpaper<br />
to the inside of each piece of the plywood<br />
jig to keep the legs from slipping.<br />
I trimmed the legs to size with a 3 hp<br />
router equipped with a -in. template<br />
guide and a 4-in. solid carbide up-cut<br />
spiral bit. I cut the front of each leg first and<br />
then moved it to the other side of the jig<br />
against the registration blocks. You can<br />
avoid too much stress on the bit and prevent<br />
tearout by making several passes with<br />
the router, adjusting the depth of cut a little<br />
at a time.<br />
Cutting the mortises<br />
All the chair parts except for the vertical<br />
slats are connected with -in. mortise-andtenon<br />
joints. Years ago, I developed a simple<br />
jig to cut the mortises for a batch of<br />
screen doors, and I was able to use it again<br />
for this project (see photos 1-4 on pp. 46-<br />
47). This jig is made of -in. plywood with<br />
sides that act as a carriage for the router. A<br />
-in. slot runs down the middle of the jig,<br />
stopping 2 in. from each end. Two adjustable<br />
stop blocks sit square in the carriage<br />
and control the length of the mortise.<br />
I held the piece to be mortised in the jig<br />
by clamping it to the underside, below the<br />
-in. slot. I used my 3 hp router with a<br />
-in. by 4-in. solid carbide up-cut spiral<br />
bit, adjusting the depth of cut with stops on<br />
the router. Even with the jig, this was a<br />
time-consuming process.<br />
Router bits don't cut square-cornered<br />
mortises. Rather than cleaning out all the<br />
corners by hand, I devised a method that<br />
works really well. I chucked a Lie-Nielsen<br />
corner chisel into my drill press (make sure<br />
it's unplugged). I clamped an adjustable<br />
fence to the drill-press table to rest the<br />
stock against and squared the chisel to<br />
the fence. The rack-and-pinion force of the<br />
drill press pared a clean, sharp corner in<br />
the mortise.<br />
Cut the tenons on the tablesaw<br />
All the Stickley chairs that I've seen are<br />
wider in front than in back. The side chair<br />
in Gustav Stickley's Making Authentic<br />
Cutting curved back slats<br />
Cutting the curved back slats—Convex and concave cuts<br />
from lumber yielded -in-thick slats, after the surfaces<br />
were scraped clean. These slats are the only curved pieces<br />
of the chair.<br />
Cutting angled tenons<br />
Double-blade tenoning on the tablesaw—With a custom-<br />
made jig, the author cut angled tenons for the side stretchers<br />
and side seat rails. Sawblades were set at a 4° pitch to the<br />
surface of the saw table and separated by a -in. spacer.