What does the universe look like in color?
What does the universe look like in color?
What does the universe look like in color?

Create successful ePaper yourself
Turn your PDF publications into a flip-book with our unique Google optimized e-Paper software.
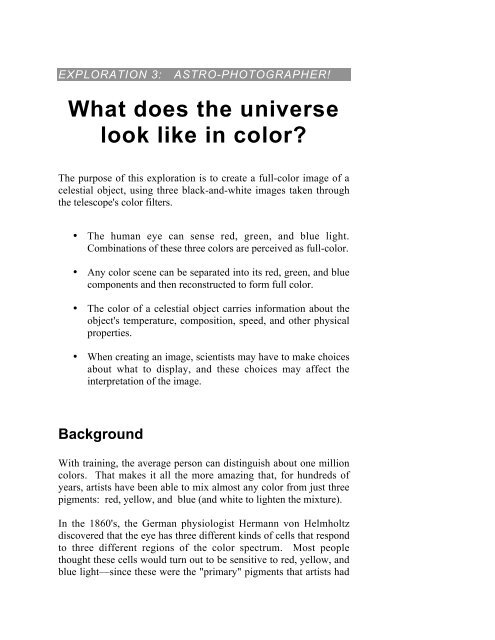
EXPLORATION 3: ASTRO-PHOTOGRAPHER!<br />
<strong>What</strong> <strong>does</strong> <strong>the</strong> <strong>universe</strong><br />
<strong>look</strong> <strong>like</strong> <strong>in</strong> <strong>color</strong>?<br />
The purpose of this exploration is to create a full-<strong>color</strong> image of a<br />
celestial object, us<strong>in</strong>g three black-and-white images taken through<br />
<strong>the</strong> telescope's <strong>color</strong> filters.<br />
• The human eye can sense red, green, and blue light.<br />
Comb<strong>in</strong>ations of <strong>the</strong>se three <strong>color</strong>s are perceived as full-<strong>color</strong>.<br />
• Any <strong>color</strong> scene can be separated <strong>in</strong>to its red, green, and blue<br />
components and <strong>the</strong>n reconstructed to form full <strong>color</strong>.<br />
• The <strong>color</strong> of a celestial object carries <strong>in</strong>formation about <strong>the</strong><br />
object's temperature, composition, speed, and o<strong>the</strong>r physical<br />
properties.<br />
• When creat<strong>in</strong>g an image, scientists may have to make choices<br />
about what to display, and <strong>the</strong>se choices may affect <strong>the</strong><br />
<strong>in</strong>terpretation of <strong>the</strong> image.<br />
Background<br />
With tra<strong>in</strong><strong>in</strong>g, <strong>the</strong> average person can dist<strong>in</strong>guish about one million<br />
<strong>color</strong>s. That makes it all <strong>the</strong> more amaz<strong>in</strong>g that, for hundreds of<br />
years, artists have been able to mix almost any <strong>color</strong> from just three<br />
pigments: red, yellow, and blue (and white to lighten <strong>the</strong> mixture).<br />
In <strong>the</strong> 1860's, <strong>the</strong> German physiologist Hermann von Helmholtz<br />
discovered that <strong>the</strong> eye has three different k<strong>in</strong>ds of cells that respond<br />
to three different regions of <strong>the</strong> <strong>color</strong> spectrum. Most people<br />
thought <strong>the</strong>se cells would turn out to be sensitive to red, yellow, and<br />
blue light—s<strong>in</strong>ce <strong>the</strong>se were <strong>the</strong> "primary" pigments that artists had
long used. But to everyone's surprise, Helmholtz showed that <strong>the</strong><br />
eye's three k<strong>in</strong>ds of <strong>color</strong> receptors have <strong>the</strong>ir peak sensitivity to red,<br />
green, and blue light. These three <strong>color</strong>s are now known as <strong>the</strong><br />
primary <strong>color</strong>s of light, s<strong>in</strong>ce any <strong>color</strong> <strong>the</strong> eye can see can be<br />
produced by stimulat<strong>in</strong>g <strong>the</strong> eye with a comb<strong>in</strong>ation of red, green,<br />
and blue light.<br />
From a scientific po<strong>in</strong>t of view, Helmholtz' discovery was a great<br />
success. It expla<strong>in</strong>ed, for example, <strong>the</strong> phenomenon of after-images.<br />
If you stare at a red circle, for example, for half a m<strong>in</strong>ute or so, and<br />
<strong>the</strong>n <strong>look</strong> at a blank white part of <strong>the</strong> page, you will see a bluishgreen<br />
after-image. Helmholtz <strong>in</strong>terpreted this as <strong>in</strong>dicat<strong>in</strong>g that <strong>the</strong><br />
eye's red-receptors somehow got "used up" <strong>in</strong> star<strong>in</strong>g at <strong>the</strong> <strong>color</strong>,<br />
allow<strong>in</strong>g <strong>the</strong> blue- and green-receptors to dom<strong>in</strong>ate vision and<br />
produce <strong>the</strong> bluish-green afterimage.<br />
Inspired by Helmholtz' early experiments on <strong>color</strong> vision, <strong>the</strong><br />
Scottish physicist James Clerk Maxwell gave an astound<strong>in</strong>g<br />
demonstration to <strong>the</strong> British Academy <strong>in</strong> 1861: He was able to<br />
create a full-<strong>color</strong> image of a Scottish tartan ribbon, from three<br />
black-and-white slides projected through red, green, and blue filters<br />
to form one image. This proved that full-<strong>color</strong> could be recreated<br />
from mix<strong>in</strong>g red, green, and blue light.<br />
Artists were fasc<strong>in</strong>ated by <strong>the</strong>se new scientific discoveries, which<br />
stimulated new styles of art. Georges Seurat, for example, attempted<br />
to stimulate <strong>the</strong> viewer's eye with pa<strong>in</strong>t<strong>in</strong>gs created from thousands<br />
of dots, often us<strong>in</strong>g primary <strong>color</strong>s or complementary <strong>color</strong>s side by<br />
side. But artists quickly found it difficult and unreward<strong>in</strong>g to try to<br />
mimic <strong>the</strong> mix<strong>in</strong>g of light by juxtapos<strong>in</strong>g <strong>color</strong>ed pigments. Today,<br />
<strong>the</strong> primary pigments for artists rema<strong>in</strong> red, yellow, and blue—while<br />
<strong>the</strong> primary <strong>color</strong>s of light are red, green, and blue, as you can see<br />
from closely observely <strong>the</strong> screen of your television set or computer<br />
monitor.<br />
James Clerk Maxwell<br />
(1831-1879) demonstrated<br />
that full <strong>color</strong> could be<br />
recreated from red, blue,<br />
and green images projected<br />
on a screen. He is best<br />
known for his discovery of<br />
<strong>the</strong> laws of<br />
electromagnetism.<br />
Detail from Seurat’s<br />
Bath<strong>in</strong>g at Asnieres.
Color and <strong>the</strong> <strong>universe</strong><br />
The <strong>universe</strong> tells us its story largely through <strong>the</strong> light that it sends<br />
us—and <strong>color</strong> plays a key role <strong>in</strong> <strong>the</strong> story. To <strong>the</strong> eye, <strong>the</strong> objects<br />
<strong>in</strong> <strong>the</strong> night sky <strong>look</strong> unremitt<strong>in</strong>gly white, except for <strong>the</strong> planet Mars<br />
and a few stars, such as Antares, whose reddish glow is noticeable if<br />
you <strong>look</strong> carefully. But through a telescope, <strong>the</strong> <strong>universe</strong> is aglow<br />
with <strong>color</strong>. <strong>What</strong> can <strong>the</strong>se <strong>color</strong>s reveal?<br />
Colors reveal temperature: Stars that are cooler glow red, while<br />
medium-hot stars <strong>like</strong> our Sun glow yellow, and very hot stars glow<br />
a bluish-white. In fact, all objects at <strong>the</strong> same temperature will glow<br />
with <strong>the</strong> same <strong>color</strong>. The ceramic pots <strong>in</strong> <strong>the</strong> kiln at right, heated to<br />
a temperature of several thousand degrees, are glow<strong>in</strong>g with same<br />
dull red <strong>color</strong> as a star at <strong>the</strong> same temperature halfway across <strong>the</strong><br />
<strong>universe</strong>. If we could heat <strong>the</strong> pots just a thousand degrees more,<br />
<strong>the</strong>y would glow with a yellow <strong>in</strong>dist<strong>in</strong>guishable from <strong>the</strong> Sun.<br />
Colors reveal chemical composition: Every chemical element<br />
absorbs and emits light at sharply-def<strong>in</strong>ed wavelengths which are<br />
characteristic of that element. Neon, for example, emits <strong>the</strong> warm<br />
orange light familiar from neon signs. Chemical elements <strong>in</strong> <strong>the</strong> Sun<br />
absorb specific wavelengths of sunlight pass<strong>in</strong>g by; <strong>the</strong> Sun’s<br />
spectrum is darker at <strong>the</strong>se wavelengths (see image). By match<strong>in</strong>g<br />
<strong>the</strong> pattern of <strong>the</strong>se l<strong>in</strong>es to known patterns from laboratory<br />
experiments, astronomers can tell which elements are present, and <strong>in</strong><br />
what amounts.<br />
Colors reveal motion: The <strong>color</strong> of an object actually shifts slightly<br />
depend<strong>in</strong>g on whe<strong>the</strong>r it is mov<strong>in</strong>g towards or away from us. This<br />
phenomenon, called <strong>the</strong> Doppler effect, also applies to sound waves<br />
and accounts for <strong>the</strong> chang<strong>in</strong>g pitch of tra<strong>in</strong> whistles and police<br />
sirens as <strong>the</strong>y pass by. (To hear <strong>the</strong> effect visit http://ADD HERE.)<br />
On Earth, objects don’t move fast enough for <strong>the</strong>ir <strong>color</strong>s to<br />
perceptably change; however, many objects <strong>in</strong> space do. You can<br />
learn more about this effect <strong>in</strong> Exploration 7, “How large and how<br />
old is <strong>the</strong> <strong>universe</strong>?”<br />
The pottery and brick walls<br />
<strong>in</strong> this kiln all glow with <strong>the</strong><br />
same <strong>color</strong>.<br />
A portion of <strong>the</strong> Sun’s<br />
spectrum. Chemical<br />
elements at <strong>the</strong> Sun’s<br />
surface absorb specific<br />
wavelengths of light, seen<br />
here as l<strong>in</strong>es where <strong>the</strong><br />
spectrum appears darker.
The Swan Nebula is a giant sea of gas that absorbs energy from nearby<br />
stars and <strong>the</strong>n emits light <strong>in</strong> <strong>color</strong>s characteristic of its chemical<br />
composition. The <strong>color</strong>s—altered and enhanced here to br<strong>in</strong>g out<br />
detail—reveal <strong>the</strong> elements hydrogen (green), oxygen (blue), and sulfur<br />
(red). NASA/Hubble Space Telescope.<br />
Materials Needed<br />
For each team of students<br />
Color filters: Red, green, and blue 1 . 2” x 2” swatches work well.<br />
For <strong>the</strong> class<br />
Internet access to <strong>the</strong> MicroObservatory onl<strong>in</strong>e telescopes<br />
Image-process<strong>in</strong>g software (MOImage) on your local computer<br />
Optional: Shockwave plug-<strong>in</strong> on your local computer<br />
1 For example, medium red ROSCOLUX #27, dark yellow green ROSCOLUX #90,<br />
primary blue ROSCOLUX #74; available at http://www.roscoca.com/products/filters/filters-roscolux.html<br />
O<strong>the</strong>r suppliers are available; ask for pure<br />
<strong>color</strong> filters for science experiments.
Optional: Pr<strong>in</strong>ter (<strong>color</strong>)<br />
For <strong>the</strong> teacher<br />
Overhead projector<br />
Overhead transparency of eye’s <strong>color</strong> sensitivity 2<br />
Part 1. Students' ideas about light<br />
and <strong>color</strong><br />
In order for students to make sense of <strong>the</strong>ir work with <strong>the</strong> telescopes,<br />
it is important for <strong>the</strong>m to understand <strong>the</strong> three major actors <strong>in</strong>volved<br />
<strong>in</strong> see<strong>in</strong>g or <strong>in</strong> tak<strong>in</strong>g an image: There is <strong>the</strong> source—such as a<br />
star—that emits <strong>the</strong> light. There is <strong>the</strong> receptor—such as <strong>the</strong> eye’s<br />
ret<strong>in</strong>a or <strong>the</strong> telescope’s light-sens<strong>in</strong>g chip—which detects <strong>the</strong> light.<br />
And <strong>the</strong>re may or may not be an <strong>in</strong>termediate object that aborbs<br />
some of <strong>the</strong> light and reflects or transmits <strong>the</strong> rest to <strong>the</strong> observer.<br />
Examples are <strong>the</strong> Moon and planets.<br />
However, students prior ideas about light and <strong>color</strong> are often deeply<br />
held. The follow<strong>in</strong>g discussion with <strong>the</strong> class is important to help<br />
<strong>the</strong> class to sort out <strong>the</strong>ir prior ideas and move towards more<br />
scientific, and more useful, understand<strong>in</strong>gs.<br />
Have students respond to <strong>the</strong> questions and record <strong>the</strong>ir answers <strong>in</strong><br />
<strong>the</strong>ir science journals. Then discuss <strong>the</strong>ir ideas about light and <strong>color</strong>:<br />
Where <strong>does</strong> light come from? How many th<strong>in</strong>gs can you name<br />
that are a source of light?<br />
Ask students for <strong>the</strong>ir responses, and write down <strong>the</strong>ir answers on<br />
<strong>the</strong> blackboard. For each response, ask <strong>the</strong> class whe<strong>the</strong>r <strong>the</strong>y agree<br />
2 Supplied with From <strong>the</strong> Ground Up! materials.
this is a source of light. Examples may <strong>in</strong>clude fire, <strong>in</strong>candescent<br />
lights, fluorescent lights, <strong>the</strong> Sun, <strong>the</strong> stars, TV screens, those funny<br />
light sticks <strong>the</strong>y hand out at carnivals, lum<strong>in</strong>escent dials on watches<br />
and clocks, neon signs, bl<strong>in</strong>k<strong>in</strong>g LED displays, fireflies and o<strong>the</strong>r<br />
glow<strong>in</strong>g creatures, auroras, etc. A traffic light might not be accepted<br />
as a separate example, because <strong>the</strong> source is an ord<strong>in</strong>ary light bulb<br />
<strong>in</strong>side <strong>the</strong> device.<br />
Po<strong>in</strong>t out to students that although we see light <strong>in</strong>doors and out, <strong>the</strong>re<br />
are relatively few different sources of light. These few sources light<br />
our entire world, <strong>in</strong>doors and out.<br />
Which of <strong>the</strong> sources you named are hot?<br />
Go back through <strong>the</strong> class' list and have students identify which<br />
items are sources of light by virtue of be<strong>in</strong>g hot enough to glow.<br />
Examples <strong>in</strong>clude <strong>the</strong> Sun, fire, a glow<strong>in</strong>g oven or hot coals,<br />
<strong>in</strong>candescent bulbs, and <strong>the</strong> stars (though we have no direct<br />
experience with <strong>the</strong> stars).<br />
Many of <strong>the</strong> light sources on <strong>the</strong> list are not hot. Examples are <strong>the</strong><br />
red and green lights (LEDs) <strong>in</strong> electronic equipment, <strong>the</strong> glow of TV<br />
screens, fluorescent bulbs, neon signs, auroras etc. These sources<br />
must produce light by some means o<strong>the</strong>r than be<strong>in</strong>g hot enough to<br />
glow.<br />
Is <strong>the</strong> Moon a source of light? Is <strong>the</strong> daytime sky a source of<br />
light?<br />
The Moon is bright enough to cast shadows at night, but is it <strong>the</strong><br />
source of light? Ask students whe<strong>the</strong>r <strong>the</strong> Moon gives off its own<br />
light, or merely reflects <strong>the</strong> light from some o<strong>the</strong>r source. This is a<br />
good opportunity to rem<strong>in</strong>d students that <strong>the</strong> Sun is <strong>the</strong> source of <strong>the</strong><br />
Moon's light; <strong>the</strong> moonlight we see is reflected light whose source is<br />
<strong>the</strong> Sun.
The daytime sky is an even more subtle example of reflected or<br />
scattered light. To "turn off" <strong>the</strong> sky, we would have to turn off <strong>the</strong><br />
Sun; <strong>the</strong> source of energy for <strong>the</strong> daylight is <strong>the</strong> Sun.<br />
If you close your eyes or if you dream, you can still see <strong>the</strong><br />
sensation of light. Is this light? If so, what's <strong>the</strong> source?<br />
Misconception alert: Many students th<strong>in</strong>k that <strong>the</strong> eye is somehow<br />
a source of light, and that this light helps us see. As evidence,<br />
students may cite <strong>the</strong> "glow" of animals' eyes <strong>in</strong> <strong>the</strong> dark (<strong>in</strong> reality<br />
this is reflected light) or Superman's x-ray vision. The ancient<br />
Greeks po<strong>in</strong>ted out that you can "see" your dreams even with your<br />
eyes closed, so a source of light would seem to come from with<strong>in</strong><br />
your eye. Today we know that <strong>the</strong> eye and bra<strong>in</strong> can create <strong>the</strong><br />
sensation of light, even though <strong>the</strong> eye produces no light of its own.<br />
Which of <strong>the</strong> light sources you mentioned give off <strong>color</strong>ed light?<br />
Does <strong>the</strong> <strong>color</strong> give you <strong>in</strong>formation about <strong>the</strong> source of <strong>the</strong><br />
light? <strong>What</strong> k<strong>in</strong>ds of <strong>in</strong>formation?<br />
All of <strong>the</strong> light sources give off <strong>color</strong>ed light, even if that <strong>color</strong> is<br />
white. For hot objects, <strong>the</strong> <strong>color</strong> gives us <strong>in</strong>formation about <strong>the</strong><br />
object's temperature. For example, if you open <strong>the</strong> oven <strong>in</strong> your<br />
kitchen and see it glow<strong>in</strong>g red, you can tell it is hot, even from far<br />
away. Objects that glow white hot are even hotter. Astronomers can<br />
tell a star's (surface) temperature from observ<strong>in</strong>g its <strong>color</strong>.<br />
A light source's <strong>color</strong> can also tell us about its composition. For<br />
example, <strong>the</strong> <strong>color</strong> of a neon sign depends on which gases are used<br />
<strong>in</strong> <strong>the</strong> sign (neon glows red-orange, but argon glows greenish-blue.)<br />
Astronomers can often tell what a celestial object is made of by<br />
observ<strong>in</strong>g its <strong>color</strong>s.<br />
Insert: Image of<br />
planetary<br />
nebulae, with<br />
<strong>in</strong>fo about<br />
composition
Part 2. Plann<strong>in</strong>g <strong>the</strong> exploration<br />
Experiment 1: All <strong>color</strong>s can be made with 3<br />
primary <strong>color</strong>s<br />
The purpose of this experiment is to <strong>in</strong>vestigate what produces <strong>the</strong><br />
many different <strong>color</strong>s on a TV screen or computer monitor.<br />
• The human eye can sense red, green, and blue light.<br />
Comb<strong>in</strong>ations of <strong>the</strong>se three <strong>color</strong>s are perceived as full-<strong>color</strong>.<br />
This activity works even better with an older computer monitor,<br />
because <strong>the</strong> dot size is larger on older monitors.<br />
1. Use any multi-<strong>color</strong>ed image on <strong>the</strong> screen, or go to this URL<br />
for an image:<br />
http://<br />
2. Have students use a magnify<strong>in</strong>g glass to observe <strong>the</strong> screen.<br />
Alternatively, you can place a s<strong>in</strong>gle drop of water on <strong>the</strong><br />
screen. The water drop will act as a powerful magnify<strong>in</strong>g<br />
glass. CAUTION: Pour<strong>in</strong>g water down <strong>the</strong> screen can<br />
damage <strong>the</strong> monitor.<br />
3. Have students record <strong>the</strong>ir responses to <strong>the</strong> questions <strong>in</strong> <strong>the</strong>ir<br />
science journals.<br />
<strong>What</strong> do you observe beneath <strong>the</strong> water drop?<br />
<strong>What</strong> <strong>color</strong>s are <strong>the</strong> dots or l<strong>in</strong>es you see?<br />
No matter what <strong>color</strong>s are <strong>in</strong> <strong>the</strong> image onscreen, do <strong>the</strong><br />
<strong>color</strong>s of <strong>the</strong> dots rema<strong>in</strong> <strong>the</strong> same?<br />
The image on <strong>the</strong> screen is composed of thousands of t<strong>in</strong>y<br />
red, green, and blue dots (or l<strong>in</strong>es, <strong>in</strong> some screens).
Each <strong>color</strong> <strong>in</strong> an image is a comb<strong>in</strong>ation of <strong>the</strong> red, green, and<br />
blue dots, glow<strong>in</strong>g at different brightnesses. For example, <strong>the</strong><br />
<strong>color</strong> yellow is created from <strong>the</strong> red and green dots glow<strong>in</strong>g<br />
toge<strong>the</strong>r, with very little or no blue. White is created from <strong>the</strong><br />
red, green, and blue dots all glow<strong>in</strong>g toge<strong>the</strong>r. Brown is a<br />
comb<strong>in</strong>ation of dim red and dim green.<br />
Why are <strong>the</strong>re 3 primary <strong>color</strong>s?<br />
4. Expla<strong>in</strong> to students that all <strong>color</strong>s can be created<br />
from just red, green, and blue light. These <strong>color</strong>s<br />
are called <strong>the</strong> primary <strong>color</strong>s of light.<br />
There's a simple reason why red,<br />
green, and blue are <strong>the</strong> primary<br />
<strong>color</strong>s: Your eye has three different<br />
types of <strong>color</strong>-sens<strong>in</strong>g cells that<br />
respond to red, green, and blue light.<br />
The image at right shows a portion of<br />
<strong>the</strong> ret<strong>in</strong>a of your eye, magnified<br />
thousands of times. The circles are <strong>the</strong><br />
<strong>color</strong>-sens<strong>in</strong>g cells, called "cones."<br />
Note that <strong>the</strong>re are 3 different types of cone cells.<br />
(They’ve been <strong>color</strong>ed <strong>in</strong> to make <strong>the</strong>m easier to<br />
dist<strong>in</strong>guish, but don’t <strong>look</strong> this way <strong>in</strong> nature.)<br />
One type is stimulated by red light (cells <strong>color</strong>ed red<br />
here). Ano<strong>the</strong>r is stimulated by green light (<strong>color</strong>ed<br />
green here). And a few cells are switched on by blue<br />
light. (For some reason, <strong>the</strong>re are only 1% as many<br />
blue-sensitive cells as red- and green-sensitive cells.)<br />
5. Use <strong>the</strong> transparency slide (next page) to show why each of<br />
<strong>the</strong> many <strong>color</strong>s you can see can be recreated by mix<strong>in</strong>g red,<br />
green, and blue light. The slide shows <strong>the</strong> response of each of<br />
eye’s three k<strong>in</strong>ds of <strong>color</strong> receptors to light across <strong>the</strong><br />
spectrum.
Note that <strong>the</strong> blue receptor absorbs light ma<strong>in</strong>ly at <strong>the</strong><br />
blue end of <strong>the</strong> spectrum, and similarly for <strong>the</strong> green<br />
and red receptors. But <strong>the</strong>re is some overlap among all<br />
three receptors: As a result, yellow light, e.g.,<br />
stimulates both <strong>the</strong> red and <strong>the</strong> green receptors. We<br />
perceive <strong>the</strong> <strong>color</strong> yellow as a result of <strong>the</strong>se two<br />
receptors be<strong>in</strong>g stimulated.<br />
Therefore, if we show <strong>the</strong> eye red light plus green<br />
light, <strong>the</strong>n we stimulate both <strong>the</strong> red- and greenreceptors,<br />
and this produces <strong>the</strong> perception of yellow.<br />
The eye has no way of tell<strong>in</strong>g whe<strong>the</strong>r it has been<br />
shown one wavelength (“yellow”) that stimulates both<br />
<strong>the</strong> red and green-receptors, versus whe<strong>the</strong>r it has been<br />
shown two primary <strong>color</strong>s of light, red and green. This<br />
is why a television monitor, e.g., can produce all<br />
<strong>color</strong>s, us<strong>in</strong>g just <strong>the</strong> three primary <strong>color</strong>s of<br />
light—red, green, and blue.
TRANSPARENCY<br />
Response to light for <strong>the</strong> eye’s red-,<br />
green-, and blue-sens<strong>in</strong>g cells.
Experiment 2: Work<strong>in</strong>g with <strong>color</strong> filters<br />
The purpose of this activity is to <strong>in</strong>vestigate <strong>the</strong> behavior of <strong>color</strong><br />
filters.<br />
• A red-pass<strong>in</strong>g filter allows red light to pass through, but<br />
blocks green and blue. Similarly, green- and blue-pass<strong>in</strong>g<br />
filters allow green and blue light through, respectively.<br />
Misconception alert: Students often f<strong>in</strong>d filters confus<strong>in</strong>g, because<br />
<strong>the</strong> term<strong>in</strong>ology <strong>in</strong> common use is often <strong>in</strong>consistent. In<br />
photography, for example, a red filter allows red light through, but<br />
an ultraviolet filter blocks—or filters out—ultraviolet light. Does a<br />
filter pass light or filter it out? For this exploration, we recommend<br />
always denot<strong>in</strong>g <strong>the</strong> function of <strong>the</strong> filter by us<strong>in</strong>g term red-pass<strong>in</strong>g,<br />
green-pass<strong>in</strong>g, etc.<br />
1. Have students br<strong>in</strong>g up on <strong>the</strong> computer monitor <strong>the</strong> spectrum<br />
at this Website:<br />
http://mo-www.harvard.edu/Java/M<strong>in</strong>iSpectroscopy.html<br />
2. Have students predict what <strong>the</strong>y will observe when <strong>the</strong>y <strong>look</strong><br />
at <strong>the</strong> spectrum through a red, green, and <strong>the</strong>n blue filter.<br />
Have <strong>the</strong>m record <strong>the</strong>ir predictions <strong>in</strong> <strong>the</strong>ir science journals.<br />
Which part of <strong>the</strong> spectrum do you th<strong>in</strong>k will appear <strong>the</strong><br />
lightest when you <strong>look</strong> at <strong>the</strong> spectrum through <strong>the</strong> bluepass<strong>in</strong>g<br />
filter (<strong>the</strong> filter that lets through only blue light)?<br />
How about <strong>the</strong> green-pass<strong>in</strong>g filter? Which part of <strong>the</strong><br />
spectrum will <strong>look</strong> lightest when seen through <strong>the</strong> greenpass<strong>in</strong>g<br />
filter?<br />
And <strong>the</strong> red-pass<strong>in</strong>g filter?
3. Have students carry out <strong>the</strong> observations, us<strong>in</strong>g each of <strong>the</strong><br />
<strong>color</strong>ed filters.<br />
How <strong>does</strong> what you observe compare with what you<br />
predicted?<br />
Suppose you were <strong>color</strong>-bl<strong>in</strong>d. If you <strong>look</strong>ed at <strong>the</strong> world<br />
through each of <strong>the</strong> three filters, could you tell that <strong>the</strong>y are<br />
different, based on what you saw? How could you tell?<br />
Will images taken with <strong>the</strong> telescope <strong>look</strong> different if you use<br />
different filters—even though <strong>the</strong> telescope only registers<br />
light and dark?<br />
Students should observe that, when viewed through <strong>the</strong> red-pass<strong>in</strong>g<br />
filter, <strong>the</strong> red portion of <strong>the</strong> spectrum will appear <strong>the</strong> brightest, and<br />
<strong>the</strong> o<strong>the</strong>r portions of <strong>the</strong> spectrum will appear darker. Similarly,<br />
when viewed through <strong>the</strong> green-pass<strong>in</strong>g filter, <strong>the</strong> green portion of<br />
<strong>the</strong> spectrum will appear brightest, while <strong>the</strong> o<strong>the</strong>r regions will be<br />
darker. This makes sense, s<strong>in</strong>ce <strong>the</strong> red-pass<strong>in</strong>g filter lets <strong>the</strong> red<br />
light through, but blocks <strong>the</strong> o<strong>the</strong>r <strong>color</strong>s.<br />
If you were completely <strong>color</strong>-bl<strong>in</strong>d, you could still tell that <strong>the</strong> red-,<br />
green-, and blue-pass<strong>in</strong>g filters must be different from each o<strong>the</strong>r.<br />
When <strong>look</strong><strong>in</strong>g through <strong>the</strong> red-pass<strong>in</strong>g filter, <strong>the</strong> parts of <strong>the</strong> world<br />
that were reddish would <strong>look</strong> lighter, whereas <strong>the</strong> o<strong>the</strong>r filters would<br />
make <strong>the</strong> o<strong>the</strong>r parts of <strong>the</strong> scene appear lighter.<br />
Similarly, <strong>the</strong> telescope is "<strong>color</strong>-bl<strong>in</strong>d," because it only records <strong>in</strong><br />
black and white (and greys). But if you image <strong>the</strong> same scene us<strong>in</strong>g<br />
<strong>the</strong> red-, green-, and blue-pass<strong>in</strong>g filters, each image will be different<br />
from <strong>the</strong> o<strong>the</strong>rs.
Experiment 3: "Break<strong>in</strong>g down" a <strong>color</strong> scene,<br />
us<strong>in</strong>g filters<br />
The purpose of this activity is to observe what happens when a full<strong>color</strong><br />
scene is viewed successively through a red-, green-, and <strong>the</strong>n<br />
blue-pass<strong>in</strong>g filter.<br />
• Any <strong>color</strong> scene can be separated <strong>in</strong>to <strong>the</strong> brightness and<br />
darkness of its red, green, and blue components.<br />
1. Have students answer <strong>the</strong> questions and make <strong>the</strong>ir<br />
predictions <strong>in</strong> <strong>the</strong>ir science journals.<br />
<strong>What</strong> are <strong>the</strong> major <strong>color</strong>s <strong>in</strong> this scene?<br />
Which areas of <strong>the</strong> picture do you th<strong>in</strong>k will appear <strong>the</strong><br />
brightest when you <strong>look</strong> through <strong>the</strong> red-pass<strong>in</strong>g filter?<br />
Which will be darkest? How about <strong>the</strong> o<strong>the</strong>r filters?<br />
<strong>What</strong> do you observe?<br />
The major <strong>color</strong>s <strong>in</strong> <strong>the</strong> scene are red, green, blue,<br />
yellow, brown, and white. When viewed through <strong>the</strong><br />
red-pass<strong>in</strong>g filter, <strong>the</strong> brightest areas should be <strong>the</strong> red<br />
areas, namely <strong>the</strong> red flowers. The blue and green areas<br />
will be darker. S<strong>in</strong>ce <strong>the</strong> <strong>color</strong> white has some red <strong>in</strong> it<br />
(it is composed of red, green, and blue), <strong>the</strong> house<br />
should also appear bright. The yellow sunflower will<br />
also appear bright <strong>in</strong> both <strong>the</strong> red-pass<strong>in</strong>g and greenpass<strong>in</strong>g<br />
filters, s<strong>in</strong>ce yellow is made from both red and<br />
green light.
Brightest Areas red flowers,<br />
house<br />
Red-Pass<strong>in</strong>g Filter Green-Pass<strong>in</strong>g Filter Blue-Pass<strong>in</strong>g Filter<br />
leaves, house sky, house<br />
Darkest Areas leaves, sky flowers leaves<br />
2. If time is available, have students try <strong>the</strong> experiment us<strong>in</strong>g <strong>the</strong><br />
kitten's and children's images <strong>in</strong> <strong>the</strong>ir science journals as well.<br />
These images are more challeng<strong>in</strong>g, because <strong>the</strong> <strong>color</strong>s are<br />
not primary <strong>color</strong>s.
Kitten Challenge<br />
Which areas of <strong>the</strong> picture do you<br />
th<strong>in</strong>k will appear <strong>the</strong> brightest<br />
when you <strong>look</strong> through <strong>the</strong> redpass<strong>in</strong>g<br />
filter? Which will be<br />
darkest? How about <strong>the</strong> o<strong>the</strong>r<br />
filters? Fill <strong>in</strong> your predictions:<br />
Brightest Areas<br />
Darkest Areas<br />
Kids Challenge<br />
Which areas of <strong>the</strong> picture do you<br />
th<strong>in</strong>k will appear <strong>the</strong> brightest<br />
when you <strong>look</strong> through <strong>the</strong> redpass<strong>in</strong>g<br />
filter? Which will be<br />
darkest? How about <strong>the</strong> o<strong>the</strong>r<br />
filters? Fill <strong>in</strong> your predictions:<br />
Brightest Areas<br />
Darkest Areas<br />
Red-Pass<strong>in</strong>g Filter Green-Pass<strong>in</strong>g Filter Blue-Pass<strong>in</strong>g Filter<br />
Red-Pass<strong>in</strong>g Filter Green-Pass<strong>in</strong>g Filter Blue-Pass<strong>in</strong>g Filter
Assessment: Can you tell which filter was<br />
used?<br />
This puzzler helps you assess whe<strong>the</strong>r students understand how<br />
filters behave. Have students try to match <strong>the</strong> three black-and-white<br />
images with <strong>the</strong> filters through which <strong>the</strong>y were taken. Discuss with<br />
students why <strong>the</strong>y labeled each image as <strong>the</strong>y did. Then discuss <strong>the</strong><br />
evidence that leads to correctly match<strong>in</strong>g each image with <strong>the</strong> filter<br />
through which it was taken:<br />
In Image #1, <strong>the</strong> blue sky is light, so this was probably taken with<br />
<strong>the</strong> blue-pass<strong>in</strong>g filter. Support<strong>in</strong>g evidence: The yellow sunflower<br />
is completely dark; yellow has red and green <strong>in</strong> it but no blue.<br />
Image #2 <strong>look</strong>s similar to Image #3, except that <strong>the</strong> red flowers and<br />
<strong>the</strong> sunflower are very bright <strong>in</strong> Image #2, so this was taken with <strong>the</strong><br />
red-pass<strong>in</strong>g filter.<br />
Image #3 was taken with <strong>the</strong> green-pass<strong>in</strong>g filter. The green leaves<br />
are <strong>the</strong> lightest <strong>in</strong> this image.<br />
Image #1: Image #2: Image #3:
Experiment 4: Creat<strong>in</strong>g <strong>color</strong> from red, green,<br />
and blue<br />
The purpose of this activity is to recreate a full-<strong>color</strong> image by<br />
merg<strong>in</strong>g its red, green, and blue components with each o<strong>the</strong>r.<br />
• Any <strong>color</strong> scene can be separated <strong>in</strong>to its red, green, and blue<br />
components and <strong>the</strong>n reassembled <strong>in</strong>to a full-<strong>color</strong> image.<br />
1. Have students access <strong>the</strong> <strong>in</strong>teractive learn<strong>in</strong>g tool at <strong>the</strong><br />
follow<strong>in</strong>g URL. (Note: This <strong>in</strong>teractive requires <strong>the</strong> free<br />
Shockwave plug-<strong>in</strong>, which should already be <strong>in</strong>stalled on<br />
your computer.)<br />
http://cfa-www.harvard.edu/webscope/<strong>in</strong>ter/<strong>color</strong><br />
2. By dragg<strong>in</strong>g <strong>the</strong> red, green, and blue components of <strong>the</strong><br />
image so that <strong>the</strong>y are superimposed, students can reconstruct<br />
<strong>the</strong> full-<strong>color</strong> scene.
Experiment 5: Creat<strong>in</strong>g full-<strong>color</strong> images us<strong>in</strong>g<br />
software.<br />
The purpose of this activity is to create a full-<strong>color</strong> image from three<br />
black-and-white images taken through <strong>color</strong> filters, us<strong>in</strong>g <strong>the</strong><br />
MOImage software.<br />
• Any <strong>color</strong> scene can be separated <strong>in</strong>to its red, green, and blue<br />
components and <strong>the</strong>n reconstructed to form full <strong>color</strong>.<br />
In order to create full-<strong>color</strong> images us<strong>in</strong>g <strong>the</strong> telescopes, students<br />
will need to use <strong>the</strong> MOImage software on <strong>the</strong> computer. To get<br />
<strong>the</strong>m started with <strong>the</strong> program, have <strong>the</strong>m reconstruct <strong>the</strong> full-<strong>color</strong><br />
sunflower us<strong>in</strong>g just <strong>the</strong> black-and-white images taken through <strong>the</strong><br />
three red-, green-, and blue-pass<strong>in</strong>g filters.<br />
1. Have students download <strong>the</strong> three black-and-white images<br />
from <strong>the</strong> "From <strong>the</strong> Ground Up!" website at this address:<br />
http://cfa-www.harvard.edu/webscope/activities/<strong>color</strong><br />
2. Students launch <strong>the</strong> MOImage software on <strong>the</strong> computer.<br />
3. Students open <strong>the</strong> flower files that <strong>the</strong>y just downloaded: First<br />
open flowerR.gif. This is <strong>the</strong> red portion of <strong>the</strong> flower image.<br />
Under <strong>the</strong> Process menu, select Color Tables / Red. This<br />
automatically <strong>color</strong>s <strong>the</strong> image red. In <strong>the</strong> same way, open<br />
<strong>the</strong> green image (flowerG.gif) and <strong>color</strong> it green by select<strong>in</strong>g<br />
Process/Color Tables/Green. F<strong>in</strong>ally, open flowerB.gif and<br />
<strong>color</strong> it blue.<br />
4. Under <strong>the</strong> Process menu, select Stack, and select Convert<br />
Images to Stack.<br />
5. Have students take a moment to scroll through <strong>the</strong> stack,<br />
us<strong>in</strong>g <strong>the</strong> or arrows at <strong>the</strong> bottom edge of <strong>the</strong> image. Note
that <strong>the</strong> three images conta<strong>in</strong> very different <strong>in</strong>formation about<br />
<strong>the</strong> picture. The third image is very dark, because <strong>the</strong>re is no<br />
blue <strong>in</strong> <strong>the</strong> scene, except for <strong>the</strong> sky.<br />
6. To create <strong>the</strong> <strong>color</strong> picture, go to <strong>the</strong> Process menu, select<br />
Stack, <strong>the</strong>n Convert Stack to RGB (which stands for red,<br />
green, blue <strong>color</strong>).<br />
The result should be a full-<strong>color</strong> picture of <strong>the</strong> sunflower.<br />
If students mix up <strong>the</strong> <strong>color</strong> of <strong>the</strong> images—for example, <strong>color</strong><strong>in</strong>g<br />
<strong>the</strong> red-<strong>in</strong>formation image green—<strong>the</strong>y'll get a strangely-<strong>color</strong>ed<br />
picture that won't be <strong>the</strong> <strong>color</strong> of <strong>the</strong> orig<strong>in</strong>al image.<br />
Plann<strong>in</strong>g <strong>the</strong> exploration<br />
Students are now ready to use <strong>the</strong> MicroObservatory telescopes to<br />
create a <strong>color</strong> image of an object <strong>in</strong> <strong>the</strong> night sky.<br />
1. Have students discuss with <strong>the</strong>ir team what k<strong>in</strong>d of object<br />
<strong>the</strong>y would <strong>like</strong> to image. Remember that large objects such<br />
as nebulae often form <strong>the</strong> best subjects. Planets may not be<br />
good choices, because <strong>the</strong>y are small and will show little<br />
<strong>color</strong> variation <strong>in</strong> <strong>the</strong> MicroObservatory telescopes. Have<br />
students ei<strong>the</strong>r choose from <strong>the</strong> list of suggested targets, or<br />
use a target not on <strong>the</strong> list.<br />
2. Have each team develop an outl<strong>in</strong>e for how to proceed. They<br />
will be able to use:<br />
• <strong>the</strong> telescopes<br />
• <strong>the</strong> telescopes' filter wheel, conta<strong>in</strong><strong>in</strong>g filters that pass red,<br />
green, and blue light<br />
• MOImage software for comb<strong>in</strong><strong>in</strong>g <strong>the</strong> red, green, and blue<br />
<strong>in</strong>formation to form <strong>color</strong>.
Part 3. Creat<strong>in</strong>g <strong>color</strong> images with<br />
<strong>the</strong> telescope.<br />
Students work <strong>in</strong> teams of three. Have each team select a celestial<br />
object <strong>the</strong>y would <strong>like</strong> to image, us<strong>in</strong>g ei<strong>the</strong>r <strong>the</strong> list of suggestions<br />
provided, or ano<strong>the</strong>r target. It <strong>does</strong> not matter if several teams image<br />
<strong>the</strong> same object, s<strong>in</strong>ce <strong>the</strong>y will be able to compare <strong>the</strong>ir results.<br />
Make sure that students understand <strong>the</strong>y have to take three images<br />
for each celestial object: one each through <strong>the</strong> red-, green-, and<br />
blue-pass<strong>in</strong>g filters.<br />
To ensure that <strong>the</strong>y produce successful images, help students with<br />
<strong>the</strong>se issues:<br />
Make certa<strong>in</strong> that <strong>the</strong> targets <strong>the</strong>y have chosen are above <strong>the</strong><br />
horizon at this time of year.<br />
Have students use a range of exposure times (such as half and<br />
twice <strong>the</strong> recommended exposure time for <strong>the</strong>ir object). For<br />
each exposure time, <strong>the</strong>y should take one image through each<br />
of <strong>the</strong> three <strong>color</strong> filters.<br />
Make certa<strong>in</strong> that students download <strong>the</strong>ir images from <strong>the</strong><br />
Web <strong>in</strong> FITS format (follow <strong>in</strong>structions on <strong>the</strong> Website)<br />
ra<strong>the</strong>r than GIF format, so that <strong>the</strong>y can process <strong>the</strong>ir images.<br />
Rem<strong>in</strong>d students to clearly label <strong>the</strong>ir downloaded images<br />
with <strong>the</strong> name of <strong>the</strong> object and <strong>the</strong> filter <strong>color</strong> that was used.<br />
It is a good idea to pr<strong>in</strong>t <strong>the</strong> Image Info file that comes with<br />
each thumbnail of <strong>the</strong> image, because this conta<strong>in</strong>s all <strong>the</strong><br />
<strong>in</strong>formation about <strong>the</strong> image, <strong>in</strong>clud<strong>in</strong>g <strong>the</strong> <strong>color</strong> filter used.<br />
This <strong>in</strong>formation is also conta<strong>in</strong>ed <strong>in</strong> <strong>the</strong> FITS "header,"<br />
which accompanies every FITS image and which can be read<br />
<strong>in</strong> <strong>the</strong> MOImage program under <strong>the</strong> W<strong>in</strong>dows menu (select<br />
W<strong>in</strong>dows / FITS Header).
Procedure<br />
Tak<strong>in</strong>g and download<strong>in</strong>g <strong>the</strong> images<br />
1. Choose an object you’d <strong>like</strong> to image. Use <strong>the</strong> handy chart<br />
for suggestions, or you can use a target not on <strong>the</strong> list.<br />
2. Take three images of your target—one each us<strong>in</strong>g <strong>the</strong> red-,<br />
green-, and blue-pass<strong>in</strong>g filters. For each image, use <strong>the</strong><br />
exposure time suggested below.<br />
3. When <strong>the</strong> telescope has taken <strong>the</strong> images and posted <strong>the</strong>m on<br />
<strong>the</strong> Web, download <strong>the</strong> three images <strong>in</strong> FITS format. (See<br />
Web page for <strong>in</strong>structions.)<br />
4. Be sure to name <strong>the</strong> files clearly so that you know which<br />
image was taken through which filter (e.g.,<br />
“orionRed.FITS”). The filter <strong>color</strong> is listed <strong>in</strong> <strong>the</strong> Image Info<br />
file and FITS header that comes with each image.<br />
Creat<strong>in</strong>g full-<strong>color</strong> images<br />
5. Open your three images. Launch <strong>the</strong> MOImage process<strong>in</strong>g<br />
program on your computer. Open <strong>the</strong> image taken through<br />
<strong>the</strong> red-pass<strong>in</strong>g filter. Do <strong>the</strong> same for <strong>the</strong> images taken<br />
through <strong>the</strong> green- and blue-pass<strong>in</strong>g filters. You should have<br />
three images open.<br />
6. Adjust brightness and contrast: Under <strong>the</strong> Process menu,<br />
select Adjust Image. When <strong>the</strong> Adjust Image w<strong>in</strong>dow opens,<br />
select <strong>the</strong> Auto button to get a good first <strong>look</strong> at <strong>the</strong> image.<br />
Fur<strong>the</strong>r adjust <strong>the</strong> brightness and contrast as necessary. Do<br />
<strong>the</strong> same for <strong>the</strong> o<strong>the</strong>r two images: Hit <strong>the</strong> auto button to<br />
automatically adjust brightness and contrast.<br />
7. Color each image red, green or blue: Work with <strong>the</strong> redfiltered<br />
image first. Under <strong>the</strong> Process menu, select Color
Tables / Red. Your image will turn red. Then work with <strong>the</strong><br />
green-filtered image, select<strong>in</strong>g Color Table / Green to turn<br />
<strong>the</strong> image green. F<strong>in</strong>ally, <strong>color</strong> <strong>the</strong> blue-filtered image blue.<br />
<strong>What</strong>’s go<strong>in</strong>g on? The areas <strong>in</strong> <strong>the</strong> orig<strong>in</strong>al scene that had a lot of<br />
red became <strong>the</strong> brightest areas <strong>in</strong> <strong>the</strong> red-filtered image. In turn,<br />
<strong>the</strong>se bright areas <strong>in</strong> <strong>the</strong> red-filtered image will become <strong>the</strong> reddest<br />
areas <strong>in</strong> <strong>the</strong> f<strong>in</strong>al image. The same holds for <strong>the</strong> green- and bluefiltered<br />
images.<br />
8. Align <strong>the</strong> images: Your three images will probably be<br />
slightly out of alignment. You’ll need to align, or “shift” <strong>the</strong><br />
images so that when you comb<strong>in</strong>e <strong>the</strong>m <strong>the</strong> result won’t be<br />
blurred. Under <strong>the</strong> Process menu, select Shift. As prompted,<br />
select one of your images as <strong>the</strong> background image over<br />
which you’ll shift (i.e. align) <strong>the</strong> o<strong>the</strong>r two images. Then<br />
select an image to shift. (You should see <strong>the</strong> background<br />
image through <strong>the</strong> slightly transparent foreground image.)<br />
Us<strong>in</strong>g <strong>the</strong> mouse keys and <strong>the</strong> i,j,k,l keys as prompted, align<br />
<strong>the</strong> two images and <strong>the</strong>n hit <strong>the</strong> Okay button. Align <strong>the</strong> third<br />
image <strong>in</strong> <strong>the</strong> same way and hit Okay.<br />
9. Stack <strong>the</strong> images. Under <strong>the</strong> Process menu, select Stack /<br />
Convert Images to Stack. You can flip through <strong>the</strong>se<br />
images if you <strong>like</strong>, to see <strong>the</strong>m <strong>in</strong>dividually.<br />
10. Create <strong>the</strong> f<strong>in</strong>al <strong>color</strong> image. Under <strong>the</strong> Process menu,<br />
select Stack / Convert Stack to RGB. The program now<br />
merges <strong>the</strong> three red, green, and blue images to create <strong>the</strong><br />
f<strong>in</strong>al image. Congratulations!<br />
11. Save <strong>the</strong> f<strong>in</strong>al image. Make sure you save your f<strong>in</strong>al image<br />
and label <strong>the</strong> filename clearly.
Suggested challenges for <strong>color</strong> photographs<br />
Orion Nebula<br />
R.A. 5hr 35.4m<strong>in</strong> Dec: -5° 27’<br />
Exposure: 30-60sec<br />
Best Visible: Oct-Mar from North America<br />
This big cloud of glow<strong>in</strong>g gas is visible by eye <strong>in</strong><br />
<strong>the</strong> constellation Orion. It's easy to tell where <strong>the</strong><br />
stars are that are light<strong>in</strong>g up <strong>the</strong> nebula: <strong>the</strong>y're<br />
right <strong>in</strong> <strong>the</strong> center of <strong>the</strong> cloud.<br />
Trifid Nebula<br />
R.A.: 18hr 02.3m<strong>in</strong> Dec: -23° 02’<br />
Exposure: 60 sec<br />
Best Visible: April-Sept from North America<br />
This is one of <strong>the</strong> few nebulae where you can see<br />
THREE different <strong>color</strong> effects of gas and dust:<br />
fluoresc<strong>in</strong>g red hydrogen, blue reflection from dust<br />
particles, and dark black dust lanes. Also <strong>look</strong> for<br />
differently-<strong>color</strong>ed stars! Telescopes fur<strong>the</strong>r south<br />
get a better view of this nebula.<br />
Eagle Nebula (M16)<br />
R.A.: 18hr 18.8m<strong>in</strong> Dec: -13° 47’<br />
Exposure: 60 sec<br />
Best Visible: Apr-Oct from North America<br />
Swan Nebula (M17)<br />
R.A. 18hr 20.8m<strong>in</strong> Dec: -16° 11’<br />
Exposure: 60 sec<br />
Best Visible: April-Oct from North America<br />
If Orion is not up, try this nebula <strong>in</strong> <strong>color</strong> to see <strong>the</strong><br />
red glow of hydrogen gas. The stars that are<br />
light<strong>in</strong>g up this star-birth nebula are hidden by <strong>the</strong><br />
dust.<br />
Middle<br />
of this<br />
Month<br />
RA<br />
highest at<br />
midnight<br />
Jan 07h<br />
Feb 09<br />
Mar 11<br />
Apr 13<br />
May 15<br />
Jun 17<br />
Jul 19<br />
Aug 21<br />
Sep 23<br />
Oct 01<br />
Nov 03<br />
Dec 05<br />
F<strong>in</strong>d <strong>the</strong> current month<br />
<strong>in</strong> <strong>the</strong> table. The number<br />
at right shows <strong>the</strong> Right<br />
Ascension that will be<br />
highest at midnight.<br />
A Right Ascension that is<br />
several hours less (or<br />
more) than this will be<br />
highest that many hours<br />
earlier (or later) <strong>in</strong> <strong>the</strong><br />
even<strong>in</strong>g.<br />
Example: In March, a<br />
star with RA of 11 will<br />
be highest around<br />
midnight. A star with<br />
RA of 7 will be highest 4<br />
hours before midnight,<br />
at 8 PM.
R<strong>in</strong>g Nebula (M57)<br />
R.A. 18hr 53.5m<strong>in</strong> Dec: 33° 02’<br />
Exposure: 10-30 sec<br />
Best Visible: Feb - Dec from North America<br />
In <strong>the</strong> constellation Lyra. Expand<strong>in</strong>g at about 12<br />
miles per second, formed about 20,000 years ago.<br />
Albireo<br />
R.A. 19hr 28.7 m<strong>in</strong> Dec: 27° 52’<br />
Exposure: 10-30 sec<br />
Best Visible: Feb - Dec from North America<br />
When seen through a telescope, <strong>the</strong> “tail” star of<br />
Cygnus <strong>the</strong> swan just l<strong>in</strong>es up with a much more<br />
distant, dimmer star. One of <strong>the</strong>se is quite red<br />
and <strong>the</strong> o<strong>the</strong>r much bluer. Can you tell which is<br />
which?<br />
NGC 869<br />
R.A. 2hr 8 m<strong>in</strong> Dec: 57° 09’<br />
Exposure: 30 sec<br />
Best Visible: Year round from North America<br />
This “open” cluster of stars is quite young – only<br />
10 million years old or so— and is full of hot blue<br />
stars (and a few red giants as well). It is part of a<br />
double cluster of stars <strong>in</strong> <strong>the</strong> constellation Perseus<br />
that is quite visible with b<strong>in</strong>oculars.<br />
Pleiades (M45)<br />
R.A. 03hr 47.4m<strong>in</strong> Dec: 24° 07’<br />
Exposure: 10-30 sec<br />
Best Visible: July – Mar from North America<br />
The bright stars of <strong>the</strong> Pleiades are noticeably<br />
bluish. If you overexpose your images, you may<br />
be able to just pick out <strong>the</strong> blue reflection off <strong>the</strong><br />
dusty nebulae surround<strong>in</strong>g <strong>the</strong> brightest stars.<br />
The Pleiades stars are about 80-100 million years<br />
old.
Hercules cluster (M13)<br />
R.A. 16hr 41.5 m<strong>in</strong> Dec: 36° 28’<br />
Exposure: 10-30 sec<br />
Best Visible: July – Mar from North America<br />
Because all <strong>the</strong> stars <strong>in</strong> M13 are about 12 billion<br />
years old, it was selected <strong>in</strong> 1974 as target for one<br />
of <strong>the</strong> first radio messages addressed to possible<br />
extra-terrestrial <strong>in</strong>telligent races, and sent by <strong>the</strong><br />
big radio telescope of <strong>the</strong> Arecibo Observatory.<br />
Dumbbell nebula (M27)<br />
R.A. 19hr 59.4 m<strong>in</strong> Dec: 22° 42’<br />
Exposure: 30 sec<br />
The central star is extremely hot. The<br />
nebula is believed less than 2.5 light-years<br />
wide.<br />
The Art of Science: A teachable moment<br />
As students carry out this activity, <strong>the</strong>y must make a decision that<br />
faces astronomers every day: whe<strong>the</strong>r and how much to "boost" <strong>the</strong><br />
red, green, or blue images before comb<strong>in</strong><strong>in</strong>g <strong>the</strong>m. The decision will<br />
affect <strong>the</strong> <strong>color</strong> of <strong>the</strong> f<strong>in</strong>al image. You might th<strong>in</strong>k that to get<br />
accurate <strong>color</strong> <strong>in</strong> <strong>the</strong> f<strong>in</strong>al image, each of <strong>the</strong> three component<br />
images should be processed <strong>in</strong> exactly <strong>the</strong> same way. However, <strong>the</strong><br />
telescope's light-sens<strong>in</strong>g chip is less sensitive to blue than to red<br />
light. Therefore <strong>the</strong> blue image will generally be fa<strong>in</strong>ter than <strong>the</strong> red<br />
and green images; it will need to be brightened dur<strong>in</strong>g image<br />
process<strong>in</strong>g, relative to <strong>the</strong> o<strong>the</strong>r images. Also, <strong>the</strong> three <strong>color</strong> filters<br />
do not pass equal amounts of light. This also will affect <strong>the</strong><br />
accuracy of <strong>the</strong> <strong>color</strong> <strong>in</strong> <strong>the</strong> f<strong>in</strong>al image. Although it is not necessary<br />
to correct for <strong>the</strong>se factors, students should be aware that <strong>the</strong> <strong>color</strong> of<br />
<strong>the</strong>ir f<strong>in</strong>al product may not be an accurate rendition of <strong>the</strong> scene. In<br />
fact, <strong>in</strong> much of astronomy, <strong>the</strong>re is no such th<strong>in</strong>g as "true <strong>color</strong>,"<br />
because <strong>the</strong> astronomer must make unavoidable and sometimes<br />
arbitrary choices about how to display <strong>the</strong> image.
Part 4. Reflect<strong>in</strong>g on <strong>the</strong> results.<br />
Have students record <strong>the</strong>ir responses to <strong>the</strong> follow<strong>in</strong>g questions <strong>in</strong><br />
<strong>the</strong>ir science journals.<br />
Does <strong>the</strong> <strong>color</strong> of <strong>the</strong> object <strong>in</strong> your image tell you anyth<strong>in</strong>g<br />
about <strong>the</strong> object? <strong>What</strong>?<br />
The telescope's light sensor is not equally sensitive to red,<br />
green, and blue light. How might this affect <strong>the</strong> <strong>color</strong> of your<br />
f<strong>in</strong>al image?<br />
When you added <strong>the</strong> three images toge<strong>the</strong>r, did you boost <strong>the</strong><br />
brightness of any of <strong>the</strong> images? If so, how did this affect <strong>the</strong><br />
<strong>color</strong> image?<br />
How closely do you th<strong>in</strong>k that your image captures<br />
"reality"—and why?<br />
Suppose you have imaged a very fa<strong>in</strong>t object that no human<br />
has ever seen with <strong>the</strong> naked eye—because it is so fa<strong>in</strong>t. Do<br />
you th<strong>in</strong>k <strong>the</strong>re is such a th<strong>in</strong>g as how <strong>the</strong> object should <strong>look</strong>?<br />
How would you determ<strong>in</strong>e <strong>the</strong> best <strong>color</strong> balance, or <strong>the</strong> best<br />
image process<strong>in</strong>g?<br />
The telescope’s light-sens<strong>in</strong>g silicon chip is most sensitive to red<br />
light, and least sensitive to blue light. This means that reddish<br />
objects will appear comparatively brighter than bluish objects <strong>in</strong><br />
your black-and-white images. And when you reconstruct <strong>the</strong> <strong>color</strong><br />
scene, <strong>the</strong> f<strong>in</strong>al image will appear redder than <strong>the</strong> actual scene <strong>in</strong><br />
nature.<br />
You can compensate for this, if desired, by boost<strong>in</strong>g <strong>the</strong> brightness<br />
of <strong>the</strong> image taken through <strong>the</strong> blue-pass<strong>in</strong>g filter. This can be done<br />
when image-process<strong>in</strong>g, just before <strong>color</strong>iz<strong>in</strong>g <strong>the</strong> three black-andwhite<br />
images.<br />
Astronomers try to learn as much as <strong>the</strong>y can from <strong>the</strong> images <strong>the</strong>y<br />
take. This <strong>does</strong> not always mean produc<strong>in</strong>g an image that most
closely resembles what you would see with your eyes. For example,<br />
by enhanc<strong>in</strong>g <strong>the</strong> contrast of a scene, you can br<strong>in</strong>g out details of <strong>the</strong><br />
image you might never have noticed if you produced <strong>the</strong> most<br />
natural-<strong>look</strong><strong>in</strong>g image. Scientists sometimes alter <strong>the</strong> <strong>color</strong> of <strong>the</strong>ir<br />
images for <strong>the</strong> same reason: to br<strong>in</strong>g out details that might o<strong>the</strong>rwise<br />
be missed.<br />
The Art of Science<br />
When try<strong>in</strong>g to answer <strong>the</strong> question, “Is that what <strong>the</strong> scene really<br />
<strong>look</strong>s <strong>like</strong>?” it helps to keep <strong>in</strong> m<strong>in</strong>d that most astronomical scenes<br />
are too fa<strong>in</strong>t to see by eye; <strong>the</strong>refore it may not make sense to ask<br />
what <strong>the</strong> scene really <strong>look</strong>s <strong>like</strong>. The most that a scientist can strive<br />
for is to be explicit about how s/he took <strong>the</strong> image; what changes<br />
s/he made <strong>in</strong> <strong>the</strong> brightness, contrast, and <strong>color</strong> balance; and why<br />
those changes were made. That honesty is a cornerstone of <strong>the</strong> ethic<br />
of science.