


You also want an ePaper? Increase the reach of your titles
YUMPU automatically turns print PDFs into web optimized ePapers that Google loves.
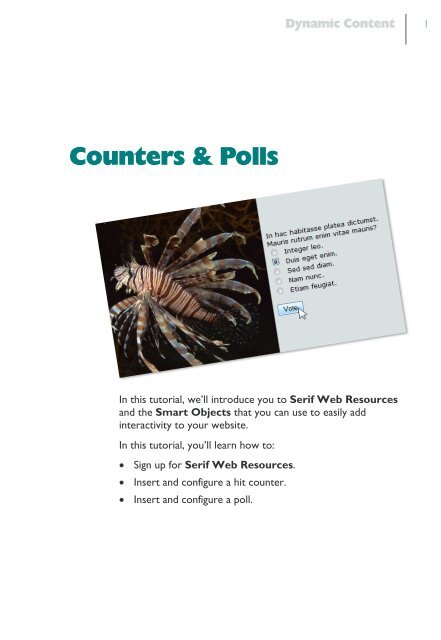
<strong>Counter</strong>s & Polls<br />
Dynamic Content 1<br />
In this tutorial, we’ll introduce you to <strong>Serif</strong> Web Resources<br />
and the Smart Objects that you can use to easily add<br />
interactivity to your website.<br />
In this tutorial, you’ll learn how to:<br />
· Sign up for <strong>Serif</strong> Web Resources.<br />
· Insert and configure a hit counter.<br />
· Insert and configure a poll.
2<br />
Dynamic Content<br />
<strong>Counter</strong>s & Polls<br />
<strong>Counter</strong>s & Polls<br />
It can be really useful to know how many<br />
visitors that your site is receiving. This is<br />
the main use of a hit counter.<br />
A poll is another useful tool to collect<br />
information from your site visitors.<br />
Adding these object is easy when you use<br />
Smart Objects.<br />
Over the next few pages, we’ll show you<br />
how to sign up to an account and how to<br />
add, and manage a hit counter and a poll.<br />
Setting up a <strong>Serif</strong> Web Resources account<br />
To access the Smart objects, you need to log in to <strong>Serif</strong> Web Resources. If<br />
you don’t have a valid username and password you must first create a <strong>Serif</strong><br />
Web Resources account.<br />
To create a <strong>Serif</strong> Web Resources<br />
account<br />
1 On the Web Objects toolbar, click<br />
the Smart Object Tool.<br />
2 In the login dialog, click Create<br />
Account.<br />
3 In the next dialog:<br />
· Type your email address.<br />
· Type your password twice.<br />
· Type your screen name.<br />
· Click Signup.<br />
Note. If your email address is not already associated with a <strong>Serif</strong><br />
account, you will be asked to provide a few extra details. Follow the<br />
instructions in the dialog.<br />
4 A confirmation email is sent to your email address.<br />
WebPlus provides a range of<br />
interactive and dynamic objects,<br />
which all ‘collect’ information<br />
from the object. These objects<br />
are known as Smart objects<br />
and are available from <strong>Serif</strong><br />
Web Resources, a secure<br />
online service which not only<br />
‘hosts’ the objects, but also<br />
stores the associated data on<br />
secure server space designated to<br />
<strong>Serif</strong>.<br />
Click the link in the email and you’re ready to access <strong>Serif</strong> Web<br />
Resources!
To access <strong>Serif</strong> Web Resources<br />
Dynamic Content 3<br />
<strong>Counter</strong>s & Polls<br />
1 On the Web Objects toolbar, click the the Smart Object Tool.<br />
2 In the login dialog:<br />
· Type your username (email<br />
address).<br />
· Type your password.<br />
· Optional: Select Remember<br />
account details.<br />
· Click the Login button.<br />
The Smart Objects dialog opens.<br />
Note that Smart objects are not added directly to the page from <strong>Serif</strong><br />
Web Resources, but are first added to an object library displayed in the<br />
left My Smart Objects pane. Currently, because we have yet to create<br />
any Smart objects, the library is empty.<br />
The Smart objects library lets you manage and edit your objects and add<br />
them to your web pages immediately or later.<br />
We’re now ready to create our Smart objects.
4<br />
Dynamic Content<br />
<strong>Counter</strong>s & Polls<br />
<strong>Hit</strong> <strong>Counter</strong>s<br />
A hit counter provides an easy way to see how many visitors your site is<br />
attracting.<br />
We added our hit counter to the Home page of our Scuba.wpp site.<br />
You can either work through this example using one of the Workspace<br />
project files or your own web page.<br />
In a standard installation, the Workspace folder is installed to the<br />
following location:<br />
C:\Program Files\<strong>Serif</strong>\WebPlus\X4\Tutorials<br />
To add a hit counter to the library<br />
1 In the Smart Objects dialog, beneath the My Smart Objects<br />
Library pane, click New...<br />
2 In the Create Smart Object dialog, select the <strong>Hit</strong> <strong>Counter</strong> option<br />
and click OK.<br />
3 In the dialog:<br />
· Select a hit counter<br />
style.<br />
· Type a name for your<br />
hit counter.<br />
· Choose the number of<br />
digits to display.<br />
· To ensure that multiple<br />
visits made by the same<br />
visitor in one day are<br />
only counted as a single hit, select Filter Daily Duplicates.<br />
· In the Email Frequency box, specify how often you want to be<br />
notified of the count. For example, by default you will receive email<br />
notification each time the counter increments by a multiple of 1000.<br />
· Click Create to add the hit counter object to the library.<br />
In the My Smart Objects<br />
dialog, your hit counter is<br />
listed in the My Smart<br />
Objects Library pane.
To add a hit counter to the page<br />
1 In the Library pane, select the hit counter and<br />
click Insert.<br />
2 Position the cursor where you want the hit<br />
counter to appear and then click on the page.<br />
The hit counter previews automatically.<br />
Dynamic Content 5<br />
<strong>Counter</strong>s & Polls<br />
Great, we’ve added our first Smart object. We can use the same<br />
procedure to add the other Smart objects to our site. Before we go on,<br />
let’s show you how to edit your hit counter.<br />
You can edit Smart objects from the Smart Object Library or by rightclicking<br />
the object on the page.<br />
To edit a hit counter<br />
1 On the Web Objects toolbar, click the Smart Object tool. (If<br />
necessary, log into your account.)<br />
2 In the Smart Objects library, select the hit counter and click Edit.<br />
3 Edit the hit counter as required.<br />
4 Click Save.<br />
To manage a hit counter<br />
1 On the Web Objects toolbar, click the Smart Object tool. (If<br />
necessary, log into your account.)<br />
2 In the Smart Objects library, select the hit counter and click<br />
Manage.<br />
The current count is displayed along with the date and time since<br />
counting began.<br />
3 Click Reset to zero the counter.<br />
4 Click Save.<br />
If your Smart objects do not preview on the page, you can turn previews on.<br />
To turn Smart object previews on:<br />
1 Click Tools, then Options.<br />
2 In the Options dialog, expand the Layout category. In the Layout sub-category,<br />
select the Preview Hosted Objects check box and click OK.
6<br />
Dynamic Content<br />
<strong>Counter</strong>s & Polls<br />
Polls<br />
A poll provides a great way for visitors to interact with your website and<br />
express their opinions. You can add as many poll objects to your website<br />
as you want, but they are best used sparingly so as not to put people off<br />
your site. The trick is to ask only the questions you really want the<br />
answers to!<br />
We added our poll to a ‘Survey’ page that we created on our fictional<br />
SCUBA diving club site. A version of this project file, scuba.wpp, can be<br />
found in the Workspace folder. Alternatively, why not add a poll to your<br />
own web page?<br />
To add a poll<br />
1 Click the Smart Objects Tool.<br />
2 In the Smart Objects dialog, click New...<br />
3 In the next dialog, select Poll, choose a Language option from the<br />
drop-down list, and then<br />
click OK.<br />
4 In the Create Smart<br />
Object dialog:<br />
· Name your object, e.g.,<br />
SCUBA Poll.<br />
· In the text box at the<br />
top of the dialog, type<br />
your poll question.<br />
· In the boxes below, type<br />
the voting options you<br />
want to display.<br />
· Use the other controls<br />
to adjust the appearance<br />
of the poll. You can<br />
change text colour, font, and size.<br />
· Ensure the option to filter daily<br />
duplicates is checked.<br />
· Click Create to add the poll<br />
object to your library.
To view the results of your poll<br />
1 On the Web Objects toolbar, click<br />
the Smart Object Tool. (If<br />
necessary, log into your account.)<br />
2 In the Smart Objects library, select<br />
the poll and click Manage.<br />
The results are displayed for each<br />
answer.<br />
3 Click the link to reset a single poll<br />
option to 0.<br />
- or -<br />
Click Reset All to reset the votes to<br />
0 for all poll options (or click Exit to<br />
leave without making any changes).<br />
Dynamic Content 7<br />
<strong>Counter</strong>s & Polls<br />
5 Click Insert to add the poll to your page.<br />
6 Position the cursor where you<br />
want the poll to appear and then click<br />
on the page.<br />
In our example, we added interest by<br />
using a QuickShape as a background<br />
for our Poll object.<br />
7 Preview the page in your browser to<br />
see how your poll will appear to site<br />
visitors.<br />
Each time a site visitor clicks on one<br />
of the options, the result is recorded<br />
by the smart object.
8<br />
Dynamic Content<br />
<strong>Counter</strong>s & Polls<br />
To edit your poll<br />
1 On the Web Objects toolbar, click the Smart Object Tool. (If<br />
necessary, log into your account.)<br />
2 In the Smart Objects library, select the Poll and click Edit.<br />
3 Edit as required.<br />
4 Click Save.<br />
You can have as many poll objects on your page as you want, so why not<br />
have a go at creating a questionnaire? Don’t forget to have a look at the<br />
other tutorials in this section for a guide on using other smart objects such<br />
as forums and blogs.


