SB168-ES and LS9 Quick Setup Guide - Yamaha Downloads
SB168-ES and LS9 Quick Setup Guide - Yamaha Downloads
SB168-ES and LS9 Quick Setup Guide - Yamaha Downloads

You also want an ePaper? Increase the reach of your titles
YUMPU automatically turns print PDFs into web optimized ePapers that Google loves.
<strong>SB168</strong>-<strong>ES</strong> <strong>and</strong> <strong>LS9</strong><br />
<strong>Quick</strong> <strong>Setup</strong> <strong>Guide</strong><br />
February, 2009
About This <strong>Guide</strong><br />
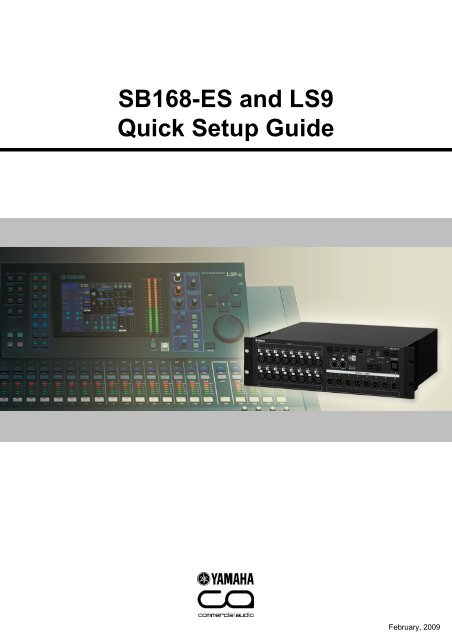
<strong>SB168</strong>-<strong>ES</strong> <strong>and</strong> <strong>LS9</strong> <strong>Quick</strong> <strong>Setup</strong> <strong>Guide</strong><br />
This guide describes quick <strong>and</strong> easy setup of the 32 inputs <strong>and</strong> 16 outputs stagebox system<br />
using two <strong>SB168</strong>-<strong>ES</strong>s <strong>and</strong> <strong>LS9</strong>-32 with MY16-<strong>ES</strong>64 <strong>and</strong> MY16-EX.<br />
STAGE<br />
FOH<br />
The same instructions <strong>and</strong> downloaded files can be used for easy setup of the 16 inputs <strong>and</strong> 8<br />
outputs stagebox system using one <strong>SB168</strong>-<strong>ES</strong> <strong>and</strong> <strong>LS9</strong>-16 with MY16-<strong>ES</strong>64.<br />
STAGE<br />
FOH<br />
1<br />
32<br />
inputs<br />
16<br />
inputs<br />
16<br />
outputs<br />
8<br />
outputs
<strong>SB168</strong>-<strong>ES</strong> <strong>and</strong> <strong>LS9</strong> <strong>Quick</strong> <strong>Setup</strong> <strong>Guide</strong><br />
Step 1: Device <strong>Setup</strong> <strong>and</strong> Connections<br />
Set the MY cards as follows.<br />
DIP switch setting of MY16-<strong>ES</strong>64<br />
DIP switch setting of MY16-EX<br />
2<br />
Set SW1 to the [422] position.<br />
Set SW2 to the [48K] position.<br />
Set SW3 to the [Emu.] position.<br />
Set SW4 to the [OnChip] position.<br />
Leave SW201 permanently set to the<br />
[OFF] position.<br />
Set SW1 to the [1] position.<br />
Set SW2 to the [48K] position.<br />
Set SW3 to the [Emu.] position.<br />
Leave these switches permanently set to<br />
the [OFF] position.
Connect a microphones,<br />
amps, <strong>and</strong> speakers.<br />
<strong>SB168</strong>-<strong>ES</strong> <strong>and</strong> <strong>LS9</strong> <strong>Quick</strong> <strong>Setup</strong> <strong>Guide</strong><br />
Set the <strong>SB168</strong>-<strong>ES</strong> ID#s <strong>and</strong> connect all devices as follows, <strong>and</strong> then turn on all the devices.<br />
ID #1<br />
Set an ID for each <strong>SB168</strong>-<strong>ES</strong> unit via<br />
the DIP switches.<br />
#1 will route to Slot 1<strong>and</strong> #2 to Slot 2.<br />
ID#s can be in either order.<br />
ID #2<br />
MY16-EX #1<br />
Connect the Ethernet port of a PC<br />
<strong>and</strong> MY16-<strong>ES</strong>64 with a CAT5e cable.<br />
CAT5e cable<br />
<strong>ES</strong> IN <strong>ES</strong> OUT <strong>ES</strong> IN<br />
3<br />
Connect the <strong>ES</strong> port of <strong>LS9</strong><br />
<strong>and</strong> two <strong>SB168</strong>-<strong>ES</strong> units in a<br />
daisy chain with CAT5e cables.<br />
<strong>ES</strong> OUT<br />
MY16-<strong>ES</strong>64<br />
Install the two MY cards into <strong>LS9</strong>.<br />
Connect the two MY cards with<br />
CAT5e cables.
<strong>SB168</strong>-<strong>ES</strong> <strong>and</strong> <strong>LS9</strong> <strong>Quick</strong> <strong>Setup</strong> <strong>Guide</strong><br />
Step 2: EtherSound Network <strong>Setup</strong><br />
To setup the EtherSound network, a software application AVS-<strong>ES</strong>Monitor by AuviTran is used.<br />
Download <strong>and</strong> install AVS-<strong>ES</strong>Monitor from AuviTran’s website.<br />
http://www.auvitran.com/<br />
Note: AVS-<strong>ES</strong>Monitor versions 3.5 <strong>and</strong> later support the <strong>SB168</strong>-<strong>ES</strong>.<br />
Initial setup for AVS-<strong>ES</strong>Monitor<br />
Select<br />
Windows Start Menu >> Programs >> AuviTran >> EtherSound Monitor >> <strong>ES</strong>-Control Panel<br />
<strong>Quick</strong> <strong>Setup</strong> procedure<br />
4<br />
- Make sure the Service is ON.<br />
- Select the “EtherSound Adapter”<br />
(Ethernet port of your PC connected to<br />
MY16-<strong>ES</strong>64)<br />
Launch the AVS-<strong>ES</strong>Monitor.<br />
1. Make sure the mode is Online.<br />
2. Click the [Reset <strong>ES</strong> Networks] button.
<strong>SB168</strong>-<strong>ES</strong> <strong>and</strong> <strong>LS9</strong> <strong>Quick</strong> <strong>Setup</strong> <strong>Guide</strong><br />
After the confirm box is checked all the network<br />
patching is done. HA control routing is setup <strong>and</strong><br />
all information is saved to the EtherSound<br />
devices so they will remember after AVS-<br />
<strong>ES</strong>Monitor is disconnected or the power is cycled.<br />
5<br />
Devices being connected on a EtherSound network<br />
will be displayed on the “List” view.<br />
Select any <strong>SB168</strong>-<strong>ES</strong> device.<br />
Note: Devices are listed in order by their MAC address in<br />
the default state, but can be named in the “Properties”<br />
page for easier operation.<br />
The “Properties” page of <strong>SB168</strong>-<strong>ES</strong> is displayed<br />
on the screen.<br />
Click the [Control] tab to open the “Control” Page<br />
of <strong>SB168</strong>-<strong>ES</strong>.<br />
In the <strong>Quick</strong> <strong>Setup</strong> area<br />
- Select [MY16-<strong>ES</strong>64 Slot Internal Connection<br />
(<strong>LS9</strong>)].<br />
- Select [Daisy Chain]. (See Appendix G for<br />
Ring setup information)<br />
- Click the [APPLY] button.
Step 3: <strong>LS9</strong> Console <strong>Setup</strong><br />
<strong>SB168</strong>-<strong>ES</strong> <strong>and</strong> <strong>LS9</strong> <strong>Quick</strong> <strong>Setup</strong> <strong>Guide</strong><br />
Loading the <strong>LS9</strong> Session File available on <strong>Yamaha</strong> Pro Audio website achieves all the<br />
settings of the <strong>LS9</strong>.<br />
–Download the “SB_<strong>LS9</strong>32.L9A” (for <strong>LS9</strong>-32) or “SB_<strong>LS9</strong>16.L9A” (for <strong>LS9</strong>-16) file from the<br />
website to your USB key.<br />
http://www.yamahaproaudio.com/training/self_training/<br />
– Load the “SB_<strong>LS9</strong>32.L9A” or “SB_<strong>LS9</strong>16.L9A” file to your <strong>LS9</strong>.<br />
Note: Loading session file into <strong>LS9</strong> will clear all the existing SCENEs <strong>and</strong> setup data. If you have<br />
existing SCENEs <strong>and</strong>/or setup data on the console, please refer to Appendix F.<br />
–Recall SCENE 001.<br />
The SB_<strong>LS9</strong>32.L9A file patches the slot inputs to the console first layer 1-32 (The XLR inputs on<br />
the console rear are patched to the console second layer 33-64). It also assigns the HA control<br />
information to pass out of the console to remote control the <strong>SB168</strong>-<strong>ES</strong> Head Amps.<br />
Note: Treat SCENE 001 of this file like SCENE 000 on a mixer without <strong>SB168</strong>-<strong>ES</strong>.<br />
<strong>SB168</strong>-<strong>ES</strong> channels are now patched as the image below. In the case of <strong>LS9</strong>-16 there is no<br />
second stagebox <strong>and</strong> further manual patching should be done to access Matrix or other Mix<br />
channels. For manual patching of <strong>LS9</strong> consoles see Appendix C.<br />
If you are to use the <strong>SB168</strong>-<strong>ES</strong> channels to add inputs to the second layer 33-64 (17-32), see<br />
Appendix H.<br />
Ch1 Ch2 Ch3 Ch4 Ch5 Ch6 Ch7 Ch8<br />
Ch9 Ch10 Ch11 Ch12 Ch13 Ch14 Ch15 Ch16<br />
Ch17 Ch18 Ch19 Ch20 Ch21 Ch22 Ch23 Ch24<br />
Ch25 Ch26 Ch27 Ch28 Ch29 Ch30 Ch31 Ch32<br />
All setup procedure has been completed, you are ready to soundcheck!<br />
6<br />
ID #1<br />
Mix1 Mix2 Mix3 Mix4 Mix5 Mix6 St L St R<br />
ID #2<br />
Mix7 Mix8 Mix9 Mix10 Mix11 Mix12 St L St R
Appendices<br />
Appendix<br />
After following the three simple steps your <strong>LS9</strong> <strong>and</strong> <strong>SB168</strong>-<strong>ES</strong> stagebox system is setup <strong>and</strong><br />
ready to work for most situations without any further changes.<br />
However, adding <strong>SB168</strong>-<strong>ES</strong> <strong>and</strong> MY16-<strong>ES</strong>64 to <strong>LS9</strong> does not simply provide remote<br />
input/output. The stagebox solution also adds network functionality using EtherSound<br />
technology. EtherSound provides options for a more flexible, exp<strong>and</strong>able system such as<br />
splits for monitor consoles, digital recording, <strong>and</strong> staying digital from mic preamp right through<br />
to power amp etc... There are more than 30 partners making EtherSound devices so<br />
integration with other manufacturers <strong>and</strong> st<strong>and</strong>ards is made easy.<br />
This Appendix section offers further details to explain your system, how to make patch<br />
changes <strong>and</strong> describes how to work within a more complex system for advanced users.<br />
Contents<br />
A: Which patching system to use when?<br />
B: Signal flow between <strong>SB168</strong>-<strong>ES</strong> <strong>and</strong> <strong>LS9</strong><br />
C: Manual patch of <strong>LS9</strong><br />
D: Manual patch of EtherSound<br />
E: Manual setting of Remote HA<br />
F: Assigning stagebox patch to existing SCENEs<br />
G: Using the Ring setting in <strong>Quick</strong> <strong>Setup</strong><br />
H: Using <strong>SB168</strong>-<strong>ES</strong> inputs on <strong>LS9</strong> second layer<br />
7
Appendix<br />
Appendix A: Which patching system to use when?<br />
Traditional analog systems can be patched at the stagebox or the console rear panel.<br />
Traditional digital systems are the same, but rear panel patching is replaced by software.<br />
<strong>SB168</strong>-<strong>ES</strong> uses a network system that introduces another patch option.<br />
Traditional analog system<br />
Patch<br />
here<br />
Mic 1 Stagebox 1 Fan-out 1 Desk input 1/Channel 1<br />
Traditional digital system<br />
Patch<br />
here<br />
Mic 1 Stagebox 1 Desk input 1/Channel 1<br />
Network system<br />
Patch<br />
here<br />
Splits to other consoles etc.<br />
Use the AVS-<strong>ES</strong>Monitor <strong>Quick</strong> <strong>Setup</strong> feature to achieve network patching in one easy step.<br />
After it is set your system can work just like the traditional digital system, no further network<br />
patching is necessary, unless you redesign the system. However, the addition of a network to<br />
your setup prepares you for future upgrades of your signal path.<br />
Use the network patch system to create digital splits to a recording or add a broadcast or<br />
monitor desk split. Use the network to route channels to signal processors like DME-<strong>ES</strong> or<br />
other manufacturers <strong>ES</strong> equipped units. Use network channels to create tie-lines from one<br />
<strong>SB168</strong> to another without going through console channels. Note; changing the network patch<br />
can affect all the units connected to the network. Use it for setup only. (see Appendix D)<br />
Use the <strong>LS9</strong> patch system where you want to effect only your console patching. Note; the<br />
<strong>LS9</strong> patch is part of the console SCENE recall system, <strong>and</strong> recalling SCENEs does not affect<br />
audio to other units (unless you are remote controlling HA gain <strong>and</strong> +48V via the network) .<br />
(see Appendix C, E)<br />
8<br />
Patch<br />
here<br />
Software Patch here<br />
Software Patch here<br />
Mic 1 Stagebox 1<br />
Software Patch here<br />
Network Channel 1 Desk input 1/Channel 1
Appendix<br />
Appendix B: Signal flow between <strong>SB168</strong>-<strong>ES</strong> <strong>and</strong> <strong>LS9</strong><br />
The signal flow of the stagebox system built in <strong>Quick</strong> <strong>Setup</strong> are shown below. Underst<strong>and</strong>ing<br />
this diagram helps you to build more flexible stagebox solutions using manual settings.<br />
Inputs<br />
Outputs<br />
Upstream EtherSound network<br />
<strong>ES</strong> Ch1-16<br />
<strong>ES</strong> Ch17-32<br />
<strong>ES</strong> Ch33-48<br />
<strong>ES</strong> Ch49-64<br />
MY16-<strong>ES</strong>64 MY16-EX#1<br />
<strong>LS9</strong><br />
Input<br />
1-16<br />
Downstream EtherSound network<br />
<strong>ES</strong> Ch1-8<br />
<strong>ES</strong> Ch9-16<br />
<strong>ES</strong> Ch17-24<br />
<strong>ES</strong> Ch25-32<br />
<strong>ES</strong> Ch33-40<br />
<strong>ES</strong> Ch41-48<br />
<strong>ES</strong> Ch49-56<br />
<strong>ES</strong> Ch57-64<br />
Slot1<br />
1-8<br />
Input<br />
17-32<br />
MY16-<strong>ES</strong>64 MY16-EX#1<br />
Mix1-6<br />
St L<br />
St R<br />
<strong>LS9</strong><br />
Slot1<br />
9-16<br />
Mix7-12<br />
St L<br />
St R<br />
9<br />
Ch1-16<br />
......<br />
<strong>SB168</strong>-<strong>ES</strong> #1<br />
Ch1-8<br />
...<br />
Ch1-16<br />
......<br />
<strong>SB168</strong>-<strong>ES</strong> #2<br />
EtherSound Patch<br />
<strong>LS9</strong> Patch<br />
Ch1-8<br />
...<br />
<strong>SB168</strong>-<strong>ES</strong> #1 <strong>SB168</strong>-<strong>ES</strong> #2<br />
EtherSound Patch<br />
<strong>LS9</strong> Patch
Appendix<br />
Appendix C: Manual patch of <strong>LS9</strong><br />
Input patching<br />
When the <strong>LS9</strong> is in its default state, rear panel Input jacks 1-32 (1-16) are patched to Input<br />
channels 1-32 (1-16). The Slot(s) are patched to the second layer. However, input patching<br />
can be changed as desired.<br />
This example explains how to patch Slot in ports to Input channels 1-32 (1-16) manually.<br />
Move the cursor to the Port select popup button, <strong>and</strong><br />
press the [ENTER] key.<br />
Select SLOT1.<br />
Select port 1 of SLOT1.<br />
Port 1 of SLOT1 has been assigned to Input channel 1.<br />
Assign other slot inports as shown below using the same<br />
way.<br />
Input patching by loading SB_<strong>LS9</strong>32.L9A session file<br />
Input port 1-16 of SLOT1 - Input channels 1-16<br />
Input port 1-16 of SLOT2 - Input channels 17-32<br />
10
Appendix<br />
Output patching<br />
Output patching can also be changed as desired.<br />
This example explains how to patch MIX <strong>and</strong> STEREO channels to Slot out ports manually.<br />
For MIX channels:<br />
Move the cursor to the Port select popup button, <strong>and</strong><br />
press the [ENTER] key.<br />
Select SLOT1 <strong>and</strong> then select Port 1 of SLOT1.<br />
Assign other MIX channels in the same way.<br />
For STEREO channels:<br />
Move the cursor to the Port select popup button, <strong>and</strong> press<br />
the [ENTER] key.<br />
Select SLOT 1 <strong>and</strong> then select Port 7 of SLOT1.<br />
Assign STEREO R to port 8 of SLOT1 in the same way.<br />
Output patching by loading SB_<strong>LS9</strong>32.L9A session file<br />
MIX 1-6, STEREO L/R – Output port 1-8 of SLOT1<br />
MIX 7-12, STEREO L/R – Output port 9-16 of SLOT1<br />
11
Appendix<br />
Appendix D: Manual patch of EtherSound<br />
The <strong>Quick</strong> <strong>Setup</strong> function of the AVS-<strong>ES</strong>Monitor supports up to four <strong>SB168</strong>-<strong>ES</strong> units<br />
connected to an MY16-<strong>ES</strong>64. (In the case of PM5D, DM2000 or DME64N). However, if any<br />
other Ethersound devices are present in the network, <strong>Quick</strong> <strong>Setup</strong> cannot be used.<br />
To edit a network created with <strong>Quick</strong> <strong>Setup</strong> or patch a more complex setup including other<br />
devices, please refer to the <strong>Yamaha</strong> "EtherSound <strong>Setup</strong> <strong>Guide</strong>" at the <strong>Yamaha</strong> Pro Audio<br />
website <strong>SB168</strong>-<strong>ES</strong> product page:<br />
http://www.yamahaproaudio.com/products/<br />
12
Appendix<br />
Appendix E: Manual setting of Remote HA<br />
HA parameters, such as the phantom power (+48V) <strong>and</strong> gain, of <strong>SB168</strong>-<strong>ES</strong> units can be<br />
remotely controlled by performing the following procedures on the <strong>LS9</strong>.<br />
Repeatedly press the [RACK 5-8] key to access the<br />
EXTERNAL HA screen.<br />
Move the cursor to the COMM PORT box, use the dial<br />
or the [DEC]/[INC] keys to select “SLOT1”, <strong>and</strong> press<br />
the [ENTER] key.<br />
Move the cursor to the EXTERNAL HA PORT<br />
SELECT popup button, <strong>and</strong> press the [ENTER] key.<br />
Note: Two <strong>SB168</strong>-<strong>ES</strong> units are displayed as four AD8HR on the screen.<br />
Using the PORT SELECT buttons, select the input ports<br />
to which the external HA (<strong>SB168</strong>-<strong>ES</strong>) is connected in<br />
groups of 8 channels.<br />
Remote HA setting by loading SB_<strong>LS9</strong>32.L9A session file<br />
HA ID #1 – <strong>SB168</strong>-<strong>ES</strong> #1 Ch1-8 (Slot1 1-8)<br />
HA ID #2 – <strong>SB168</strong>-<strong>ES</strong> #1 Ch9-16 (Slot1 9-16)<br />
HA ID #3 – <strong>SB168</strong>-<strong>ES</strong> #2 Ch1-8 (Slot2 1-8)<br />
HA ID #4 – <strong>SB168</strong>-<strong>ES</strong> #2 Ch9-16 (Slot2 9-16)<br />
13
Appendix<br />
Appendix F: Assigning stagebox patch to existing SCENEs<br />
If you are an experienced <strong>LS9</strong> user <strong>and</strong> you have pre-existing SCENEs saved in your console<br />
or on a USB stick, you will find that loading these sessions <strong>and</strong> recalling these SCENEs will<br />
recall the patching that was used when they were created. If the SCENEs were created<br />
before the addition of <strong>SB168</strong>-<strong>ES</strong>, then they will not suit your new <strong>SB168</strong>-<strong>ES</strong> remote stagebox<br />
system.<br />
This appendix explains a method using the “Focus” feature to change the patch information in<br />
existing SCENEs.<br />
This section shows a short-cut method to insert one SCENE into another session without using<br />
Studio Manager. Alternatively, if you prefer, you can do this with Studio Manager by dragging the<br />
SCENE from a second open instance of <strong>LS9</strong> Editor.<br />
Backup<br />
Load Your<br />
file.L9A<br />
1. -15dB<br />
2. +10dB<br />
3. +5dB<br />
4. -21dB<br />
5. -26dB<br />
6. -19dB<br />
7. 0dB<br />
8. +3dB<br />
1. Backup your console session to a USB key.<br />
2. Make a note of HA values as these are not copied<br />
from AD IN to <strong>SB168</strong> HA.<br />
3. Load up the Pre-patched <strong>SB168</strong>-<strong>ES</strong>.L9A session.<br />
4. In the SCENE page, copy the <strong>SB168</strong>-<strong>ES</strong> SCENE to<br />
the Copy buffer (As if you were going to copy <strong>and</strong> paste a<br />
SCENE).<br />
14
Load Your<br />
file.L9A<br />
Appendix<br />
5. Reload your Saved session.<br />
6. Paste the stored <strong>SB168</strong>-<strong>ES</strong> SCENE to a vacant<br />
position in your SCENE LIST.<br />
This section assigns HA remote control information to specified remote units. (Note that <strong>SB168</strong>-<br />
<strong>ES</strong> appears as two AD8HR units.)<br />
7. Open the Rack page <strong>and</strong> go to the External HA screen.<br />
Use the External HA Port Select button to assign all the<br />
displayed HA controllers to the slots. (This setup is not part<br />
of SCENE MEMORY <strong>and</strong> is set for all SCENEs.)<br />
This section moves the <strong>SB168</strong>-<strong>ES</strong> patch from the st<strong>and</strong>ard downloaded SCENE <strong>and</strong> applies it to<br />
your pre-existing SCENE using the “Focus method”.<br />
8. Press the [SCENE MEMORY] key repeatedly to<br />
access the SCENE FOCUS screen.<br />
9. In the SCENE requiring the <strong>SB168</strong> patch,<br />
change focus from [ALL] to [RACK] [HA] …. ….<br />
[IN] [OUT] [With Send].<br />
15
1. -15dB<br />
2. +10dB<br />
3. +5dB<br />
4. -21dB<br />
5. -26dB<br />
6. -19dB<br />
7. 0dB<br />
8. +3dB<br />
Appendix<br />
10. Recall the <strong>SB168</strong> patch SCENE. (This recalls the<br />
IN <strong>and</strong> OUT patches.)<br />
11. Recall the SCENE needing the <strong>SB168</strong> patch. (IN<br />
<strong>and</strong> OUT patches are not recalled because of focus,<br />
the <strong>SB168</strong> patches is used.)<br />
12. Copy HA noted in step 2 to HA of <strong>SB168</strong> manually.<br />
13. Re-store the SCENE with this new patch.<br />
14. Return Focus setting to [ALL].<br />
16
Appendix<br />
Appendix G: Using the Ring setting in <strong>Quick</strong> <strong>Setup</strong><br />
EtherSound data flows bi-directionally in a daisy chain. If the last device in the daisy chain is<br />
connected to the first, a ring is formed <strong>and</strong> data has a choice of directions to reach its<br />
destination. This provides a fault tolerant or redundant system that can survive a cable fault.<br />
However, special setup is required to apply ring patching <strong>and</strong> prevent EtherSound data<br />
traveling endlessly around the loop <strong>and</strong> causing a network crash or audio crackles.<br />
Choosing [Ring] at this stage applies this special setup so that you can link the last device to<br />
the first <strong>and</strong> have a cable redundant system.<br />
After the confirm box is checked all the network<br />
patching is done. HA control routing is setup <strong>and</strong><br />
all information is saved to the EtherSound<br />
devices so they will remember after AVS-<br />
<strong>ES</strong>Monitor is disconnected or the power is cycled.<br />
In Ring redundancy mode the total audio channel count is limited to 64. (In daisy chain mode<br />
it is 64 each direction =128) Use the Channel Allocation slider to allow more input or output<br />
channels at the expense of the other.<br />
For further information on the use of Ring mode, please refer to the <strong>Yamaha</strong> "EtherSound<br />
<strong>Setup</strong> <strong>Guide</strong>" at the <strong>Yamaha</strong> Pro Audio website <strong>SB168</strong>-<strong>ES</strong> product page:<br />
http://www.yamahaproaudio.com/products/<br />
17<br />
In the <strong>Quick</strong> <strong>Setup</strong> area<br />
- Select [MY16-<strong>ES</strong>64 Slot Internal Connection<br />
(<strong>LS9</strong>)].<br />
- Select [Ring].<br />
- Click the [APPLY] button.
Appendix<br />
Appendix H: Using <strong>SB168</strong>-<strong>ES</strong> inputs on <strong>LS9</strong> second layer<br />
All channels arriving at the MY card slots are patched to the second layer in the default state.<br />
Assign External HA remote control setup as shown below. Further details can be found in<br />
Appendix E.<br />
<strong>SB168</strong>-<strong>ES</strong> channels are now patched as the image below, <strong>and</strong> the selected channel HA encoder<br />
will remotely adjust the gain. In the case of <strong>LS9</strong>-16 there is no second stagebox. Further manual<br />
patching should be done to access St L, St R, Matrix or other Mix channels. For manual patching<br />
of <strong>LS9</strong> consoles see Appendix C.<br />
Ch33 Ch34 Ch35 Ch36 Ch37 Ch38 Ch39 Ch40<br />
Ch41 Ch42 Ch43 Ch44 Ch45 Ch46 Ch47 Ch48<br />
Ch49 Ch50 Ch51 Ch52 Ch53 Ch54 Ch55 Ch56<br />
Ch57 Ch58 Ch59 Ch60 Ch61 Ch62 Ch63 Ch64<br />
In the EXTERNAL HA screen, move the cursor to the<br />
COMM PORT box, use the dial or the [DEC]/[INC]<br />
keys to select “SLOT1”, <strong>and</strong> press the [ENTER] key.<br />
Move the cursor to the EXTERNAL HA PORT<br />
SELECT popup button, <strong>and</strong> press the [ENTER] key.<br />
Using the PORT SELECT buttons, select the input ports<br />
to which the external HA (<strong>SB168</strong>-<strong>ES</strong>) is connected in<br />
groups of 8 channels.<br />
18<br />
ID #1<br />
Mix1 Mix2 Mix3 Mix4 Mix5 Mix6 Mix7 Mix8<br />
ID #2<br />
Mix9 Mix10 Mix11Mix12 Mix13 Mix14 Mix15 Mix16