Xedio Ingest Organizer User's Manual - EVS
Xedio Ingest Organizer User's Manual - EVS
Xedio Ingest Organizer User's Manual - EVS
You also want an ePaper? Increase the reach of your titles
YUMPU automatically turns print PDFs into web optimized ePapers that Google loves.
<strong>Xedio</strong> Suite Version 4.2 - User <strong>Manual</strong> – <strong>Ingest</strong> <strong>Organizer</strong><br />
<strong>EVS</strong> Broadcast Equipment – June 2012<br />
GENERAL TAB<br />
Issue 4.2.B<br />
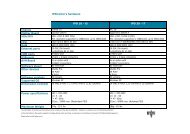
To create an output file, enter the relevant data into the fields displayed in the<br />
General tab:<br />
Field Description<br />
Label Name you give to the file that will be encoded<br />
Id Feed Identification given to a feed that could be provided by a<br />
press agency<br />
External Ref Reference which can help to identify the encoded media,<br />
such as a barcode from a VTR tape.<br />
Media Class Class categorizing the media. The classes are defined in<br />
the Class Manager of the <strong>Xedio</strong> Manager application.<br />
Shooting Date Date on which the media has been filmed. To update the<br />
date, click the Shooting Date button and select a date in<br />
the calendar displayed from the drop-down arrow.<br />
Video Ratio Video ratio of the encoded media.<br />
Possible values:<br />
• if the hi-res encoding profile is HD, the only option<br />
available in the Video Ratio field is Forced 16:9. This<br />
will obviously be the default value in HD.<br />
• if the hi-res encoding profile is SD, the options<br />
available in the Video Ratio field are Auto (it is<br />
automatically detected by the encoder and passed to<br />
<strong>Ingest</strong> <strong>Organizer</strong>), Forced 4:3, Forced 16:9.<br />
Source Original source of the feed.<br />
The default value in SD will be the last one used, per<br />
channel per user.<br />
Routing Free text to describe how the feed was routed to the<br />
system.<br />
Description Optional text to describe the encoded media.<br />
Publish Allows to see the encoded media in the client<br />
workstations database lists.<br />
METADATA TAB<br />
In the Metadata tab, the users can select one of the available metadata profiles by<br />
clicking in the Metadata Profile field. Then, they can enter metadata values for<br />
the encoded media.<br />
7


