Multicam 11.01 Operation Manual - EVS
Multicam 11.01 Operation Manual - EVS
Multicam 11.01 Operation Manual - EVS

You also want an ePaper? Increase the reach of your titles
YUMPU automatically turns print PDFs into web optimized ePapers that Google loves.
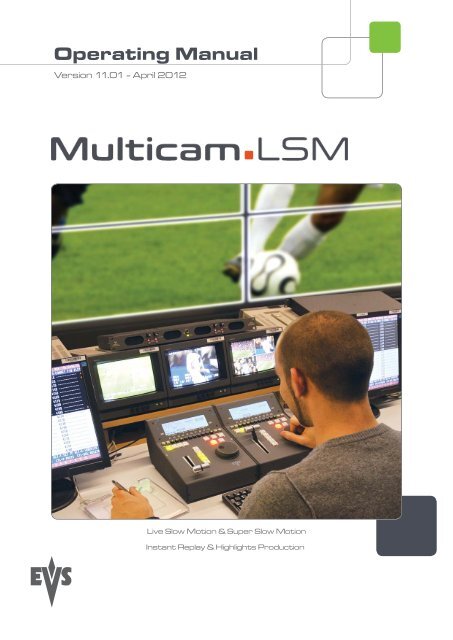
Operating <strong>Manual</strong><br />
Version <strong>11.01</strong> - April 2012<br />
Live Slow Motion & Super Slow Motion<br />
Instant Replay & Highlights Production
<strong>Multicam</strong> - Version <strong>11.01</strong> – Operating <strong>Manual</strong><br />
<strong>EVS</strong> Broadcast Equipment SA – April 2012<br />
Copyright<br />
<strong>EVS</strong> Broadcast Equipment – Copyright © 2002-2012. All rights reserved.<br />
Disclaimer<br />
Issue<br />
<strong>11.01</strong>.C<br />
The information in this manual is furnished for informational use only and subject to<br />
change without notice. While every effort has been made to ensure that the information<br />
contained in this user manual is accurate, up-to-date and reliable, <strong>EVS</strong> Broadcast<br />
Equipment cannot be held responsible for inaccuracies or errors that may appear in this<br />
publication.<br />
Improvement Requests<br />
Your comments will help us improve the quality of the user documentation. Do not<br />
hesitate to send improvement requests, or report any error or inaccuracy on this user<br />
manual by e-mail to doc@evs.tv.<br />
Regional Contacts<br />
The address and phone number of the <strong>EVS</strong> headquarters are usually mentioned in the<br />
Help > About menu in the user interface.<br />
You will find the full list of addresses and phone numbers of local offices at the following<br />
page on the <strong>EVS</strong> website: http://www.evs.tv/contacts<br />
User <strong>Manual</strong>s on <strong>EVS</strong> Website<br />
The latest version of the user manual, if any, and other user manuals on <strong>EVS</strong> products<br />
can be found on the <strong>EVS</strong> download center, on the following webpage:<br />
http://www.evs.tv/downloadcenter<br />
I
Issue<br />
<strong>11.01</strong>.C<br />
II<br />
Table of Contents<br />
<strong>Multicam</strong> - Version <strong>11.01</strong> – Operating <strong>Manual</strong><br />
<strong>EVS</strong> Broadcast Equipment SA – April 2012<br />
TABLE OF CONTENTS ..................................................................................................... II<br />
WHAT’S NEW? .............................................................................................................. 1<br />
OVERVIEW ..................................................................................................................... 2<br />
1. INITIAL CONFIGURATION ......................................................................................... 3<br />
1.1 Application Selection ................................................................................................... 3<br />
1.2 Configuration on LSM Remote .................................................................................... 4<br />
2. REMOTE CONTROLLER .......................................................................................... 5<br />
2.1 General Layout ........................................................................................................... 5<br />
2.2 Led Colours ................................................................................................................ 7<br />
2.3 F-keys & Small Buttons ............................................................................................... 8<br />
2.4 Soft Keys .................................................................................................................... 8<br />
2.5 Transport Controls ...................................................................................................... 9<br />
2.5.1 Jog Dial ................................................................................................................................... 9<br />
2.5.2 Lever ....................................................................................................................................... 9<br />
2.6 Keyboard Locking ..................................................................................................... 10<br />
2.6.1 Locking a Remote .................................................................................................................10<br />
2.6.2 Unlocking a Remote .............................................................................................................10<br />
3. MAIN MENU ........................................................................................................ 11<br />
4. REMOTE PANEL OPERATIONS .............................................................................. 14<br />
4.1 <strong>Operation</strong>s ................................................................................................................ 14<br />
4.1.1 RECORD ..............................................................................................................................14<br />
4.1.2 MARK ...................................................................................................................................14<br />
4.1.3 LAST CUE ............................................................................................................................14<br />
4.1.4 PLAY .....................................................................................................................................14<br />
4.1.5 IN ..........................................................................................................................................14<br />
4.1.6 OUT ......................................................................................................................................15<br />
4.1.7 JOG KNOB ...........................................................................................................................15<br />
4.1.8 FAST JOG ............................................................................................................................15<br />
4.1.9 LEVER ..................................................................................................................................16<br />
4.1.10 PLST .....................................................................................................................................16<br />
4.1.11 BROWSE ..............................................................................................................................16<br />
4.1.12 INSERT .................................................................................................................................16<br />
4.1.13 ENTER ..................................................................................................................................17<br />
4.1.14 MENU ...................................................................................................................................17<br />
4.1.15 CLEAR ..................................................................................................................................17<br />
4.1.16 NETWORK ...........................................................................................................................17<br />
4.1.17 GOTO TC .............................................................................................................................18<br />
4.1.18 GOTO IN / GOTO OUT ........................................................................................................19<br />
4.1.19 LOOP ....................................................................................................................................19<br />
4.1.20 RETURN ...............................................................................................................................19<br />
4.1.21 PAGE ....................................................................................................................................19<br />
4.1.22 Rebooting the System from the LSM Remote ......................................................................20<br />
4.2 Selection of Clip Banks and Playlists ........................................................................ 21<br />
4.3 Clip Numbering Hierarchy ......................................................................................... 22<br />
5. CONTROL MODE .................................................................................................. 23<br />
5.1 Live (E2E) Mode ....................................................................................................... 23
<strong>Multicam</strong> - Version <strong>11.01</strong> – Operating <strong>Manual</strong><br />
<strong>EVS</strong> Broadcast Equipment SA – April 2012<br />
Issue<br />
<strong>11.01</strong>.C<br />
5.2 Search Mode ............................................................................................................ 23<br />
5.3 Playback Mode ......................................................................................................... 23<br />
5.4 Synchronization Mode (Switch To In) ........................................................................ 24<br />
5.5 Definition of Controlled and Primary Channels .......................................................... 24<br />
5.5.1 Controlled Channel ...............................................................................................................24<br />
5.5.2 Primary Channel ...................................................................................................................24<br />
5.6 Preference Mode (PREF) .......................................................................................... 25<br />
5.7 Secondary Controller ................................................................................................ 25<br />
5.7.1 Introduction ...........................................................................................................................25<br />
5.7.2 Interactions between IPDP and <strong>Multicam</strong> ............................................................................25<br />
6. PGM-PRV MODE ............................................................................................... 26<br />
6.1 1PGM+PRV (Press A from MAIN MENU) ................................................................. 26<br />
6.1.1 Secondary Menu ..................................................................................................................26<br />
6.1.2 <strong>Operation</strong>al Menu .................................................................................................................28<br />
6.2 Full Control and Lever Control .................................................................................. 30<br />
7. MULTI PGM MODE .............................................................................................. 31<br />
7.1 1/2/3 PGM modes (press A or B from Main menu) .................................................... 31<br />
7.1.1 Secondary Menu ..................................................................................................................31<br />
7.1.2 <strong>Operation</strong>al Menu .................................................................................................................32<br />
8. VIDEO DELAY ...................................................................................................... 35<br />
9. CLIP MANAGEMENT ............................................................................................. 37<br />
9.1 Introduction ............................................................................................................... 37<br />
9.1.1 Clip Structure ........................................................................................................................37<br />
9.1.2 Clip Availability on Disks .......................................................................................................38<br />
9.2 Using the <strong>EVS</strong> Remote Panel ................................................................................... 38<br />
9.2.1 How to Create a Clip ............................................................................................................38<br />
9.2.2 Storing a Clip ........................................................................................................................39<br />
9.2.3 Recalling a Clip .....................................................................................................................40<br />
9.2.4 Playing Back a Clip ...............................................................................................................41<br />
9.2.5 Recall and Playback of Growing Clips .................................................................................41<br />
9.2.6 Clearing Clips .......................................................................................................................42<br />
9.2.7 Copying or Moving Clips .......................................................................................................43<br />
9.2.8 Secondary Menu in Clip Mode .............................................................................................45<br />
9.2.9 How to Search for Clips by Timecode ..................................................................................49<br />
9.2.10 How to Shorten a Clip ...........................................................................................................50<br />
9.2.11 Restriping the Timecode of a Clip ........................................................................................50<br />
9.3 Using the Clip screen ................................................................................................ 51<br />
9.3.1 Clip screen – Standard View ................................................................................................52<br />
9.3.2 The Title Bar .........................................................................................................................52<br />
9.3.3 The Function Bar ..................................................................................................................53<br />
9.3.4 The Clip Information Area .....................................................................................................56<br />
9.3.5 The Clip Management Area ..................................................................................................57<br />
9.3.6 Selecting a Clip with Tablet and Stylus ................................................................................58<br />
9.3.7 Selecting a Clip with the Keyboard .......................................................................................58<br />
9.3.8 How to Name a Clip ..............................................................................................................59<br />
9.3.9 How to Change the Primary Camera of a Clip .....................................................................59<br />
9.3.10 Recalling a Clip .....................................................................................................................60<br />
9.3.11 How to Cancel a Network Copy on the VGA ........................................................................60<br />
9.3.12 How to Restripe the Timecode of the Current Clip ...............................................................61<br />
9.3.13 Moving and Copying Clips ....................................................................................................62<br />
9.3.14 Clip Screen - Extended View ................................................................................................64<br />
9.4 Using the VDR Panel ................................................................................................ 65<br />
9.4.1 VDR Panel - Lower Section ..................................................................................................65<br />
9.4.2 VDR Panel - Upper Section ..................................................................................................65<br />
9.4.3 VDR Panel - Player Window .................................................................................................66<br />
III
Issue<br />
<strong>11.01</strong>.C<br />
IV<br />
<strong>Multicam</strong> - Version <strong>11.01</strong> – Operating <strong>Manual</strong><br />
<strong>EVS</strong> Broadcast Equipment SA – April 2012<br />
9.4.4 VDR Panel - Recorder WINDOW .........................................................................................69<br />
10. KEYWORD MANAGEMENT ..................................................................................... 71<br />
10.1 Creating and Selecting the Keyword File ................................................................... 71<br />
10.1.1 Creating the Keyword File from a PC ...................................................................................72<br />
10.1.2 Selecting the Current Keyword File ......................................................................................73<br />
10.1.3 Editing the Keyword File from the <strong>Multicam</strong> Application ......................................................74<br />
10.2 Assigning Keywords using the VGA Screen .............................................................. 75<br />
10.2.1 Keyword Windows ................................................................................................................75<br />
10.2.2 How to Assign a Keyword to a Clip ......................................................................................76<br />
10.2.3 How to Clear a Keyword with the Keyboard .........................................................................76<br />
10.2.4 How to Clear a Keyword with the Stylus ..............................................................................76<br />
10.2.5 How to Edit the Ranking of the Current Clip with the Keyboard ...........................................76<br />
10.2.6 How to Edit the Ranking of the Current Clip with the Stylus ................................................76<br />
10.2.7 How to Clear All Keywords and the Ranking of a Clip .........................................................77<br />
10.2.8 How to Name a Clip Using the Keywords: ...........................................................................77<br />
10.3 Searching the Database Using the VGA Screen ....................................................... 77<br />
10.3.1 Search Window ....................................................................................................................77<br />
10.3.2 Search Criteria and Search Options .....................................................................................78<br />
10.3.3 Clearing Keywords in the Search Criteria ............................................................................80<br />
10.3.4 Search Results .....................................................................................................................81<br />
10.4 Assigning Keywords Using the Remote Panel........................................................... 83<br />
10.4.1 Keyword Settings ..................................................................................................................83<br />
10.4.2 Assigning Keywords in List Mode .........................................................................................83<br />
10.4.3 Assigning Keywords in Numeric Mode .................................................................................85<br />
10.5 Searching the Database Using the Remote Panel .................................................... 85<br />
11. PLAYLIST MANAGEMENT ...................................................................................... 88<br />
11.1 General Information .................................................................................................. 88<br />
11.2 Playlist Modes on the Remote Panel ......................................................................... 89<br />
11.2.1 Introduction ...........................................................................................................................89<br />
11.2.2 Accessing the Playlist Edit Mode..........................................................................................89<br />
11.2.3 Accessing the Playlist Playout Mode ....................................................................................90<br />
11.3 Playlist Display on the VGA ....................................................................................... 90<br />
11.3.1 VGA Playlist Bank Screen ....................................................................................................90<br />
11.3.2 VGA Playlist Screen .............................................................................................................91<br />
11.4 Selecting and Loading Playlists ................................................................................. 92<br />
11.4.1 Setting a Current Playlist Versus Loading a Playlist ............................................................92<br />
11.4.2 How to Set a Current Playlist ................................................................................................92<br />
11.4.3 How to Recall and Load a Playlist ........................................................................................93<br />
11.4.4 How to Exit The Playlist Mode ..............................................................................................93<br />
11.5 Deleting Playlists ....................................................................................................... 94<br />
11.5.1 How to Delete a Playlist ........................................................................................................94<br />
11.5.2 How to Delete All Playlists of a Bank ...................................................................................94<br />
11.6 Naming a Playlist or an Element in a Playlist ............................................................ 95<br />
11.6.1 How to Name a Playlist from the VGA Playlist Bank Screen ...............................................95<br />
11.6.2 How to Name the Current Playlist on the VGA Playlist Screen ............................................95<br />
11.6.3 How to Name the Current Element in the Loaded Playlist ...................................................95<br />
11.7 Browsing Within a Playlist ......................................................................................... 96<br />
11.7.1 Possible Browsing Methods .................................................................................................96<br />
11.7.2 Browsing Through a Playlist .................................................................................................96<br />
11.7.3 Browsing Quickly Through a Playlist ....................................................................................96<br />
11.8 Playout Functions with Playlists ................................................................................ 97<br />
11.8.1 Rolling a Playlist ...................................................................................................................97<br />
11.8.2 Functions Available from the VGA Playlist Screen...............................................................97<br />
11.8.3 Functions Available on the Remote in Playlist Playout Mode ..............................................98<br />
11.9 Overview of Editing Functions in Playlist Edit Mode .................................................. 99<br />
11.9.1 Main Menu in Playlist Edit Mode ..........................................................................................99
<strong>Multicam</strong> - Version <strong>11.01</strong> – Operating <strong>Manual</strong><br />
<strong>EVS</strong> Broadcast Equipment SA – April 2012<br />
Issue<br />
<strong>11.01</strong>.C<br />
11.9.2 Secondary Menu in Playlist Edit Mode ...............................................................................100<br />
11.10 Adding & Replacing Clips in a Playlist ..................................................................... 102<br />
11.10.1 Possible Methods for Adding Clips .....................................................................................102<br />
11.10.2 Modifying a Distant Playlist .................................................................................................102<br />
11.10.3 How to Quickly Add Clips to the Current Playlist................................................................102<br />
11.10.4 How to Insert Clips into a Playlist .......................................................................................103<br />
11.10.5 How to Insert the Result of a Clip Search into a Playlist ....................................................103<br />
11.10.6 Inserting Growing Clips into Playlists .................................................................................104<br />
11.10.7 How to Delete Playlist Elements from a Playlist .................................................................105<br />
11.10.8 How to Move an Element Within a Playlist .........................................................................105<br />
11.10.9 How to Change the Camera Angle of a Playlist Element ...................................................105<br />
11.11 Copying Playlists ..................................................................................................... 106<br />
11.11.1 Introduction .........................................................................................................................106<br />
11.11.2 Copy Options ......................................................................................................................106<br />
11.11.3 Possible Copy Actions ........................................................................................................107<br />
11.11.4 How to Copy a Playlist from the Remote Panel .................................................................107<br />
11.11.5 How to Copy a Playlist from the VGA Clip Screen .............................................................108<br />
11.11.6 Copying Playlists with On-Air Clips ....................................................................................109<br />
11.12 Adding Cut in Playlist Elements .............................................................................. 110<br />
11.12.1 Introduction .........................................................................................................................110<br />
11.12.2 Adding Cut Behavior ...........................................................................................................110<br />
11.13 Other Editing Functions for Playlists ........................................................................ 111<br />
11.13.1 How to Trim Clips into a Playlist .........................................................................................111<br />
11.13.2 How to Sort the Playlist Elements by TC IN .......................................................................111<br />
11.13.3 How to Merge Playlists .......................................................................................................111<br />
11.13.4 Consolidating a Playlist ......................................................................................................112<br />
11.13.5 Generating a Continuous Timecode in a Playlist ...............................................................112<br />
11.14 The Auxiliary Audio Clip .......................................................................................... 114<br />
11.14.1 Introduction .........................................................................................................................114<br />
11.14.2 How to Add/Remove an Auxiliary Audio Clip to a Playlist ..................................................114<br />
11.15 Transition Effects .................................................................................................... 114<br />
11.15.1 Description ..........................................................................................................................114<br />
11.15.2 Accessing Commands for Transition Effects ......................................................................115<br />
11.15.3 Default Duration for Video and Audio Transition ................................................................116<br />
11.15.4 Overview of Transitions Effect Types .................................................................................116<br />
11.15.5 How to Define a Transition Effect .......................................................................................117<br />
11.16 Split Audio ............................................................................................................... 118<br />
11.16.1 Introduction .........................................................................................................................118<br />
11.16.2 Menus in Split Audio Mode .................................................................................................119<br />
11.16.3 OSD Display in Advanced Audio Editing ............................................................................120<br />
11.16.4 Default Duration for the Audio and Video Transitions ........................................................120<br />
11.16.5 Associations of Audio and Video Transition Types ............................................................121<br />
11.16.6 Default Mode for Extending a Transition ............................................................................121<br />
11.16.7 Changing the Audio or Video Effect Duration .....................................................................124<br />
11.16.8 Performing A ‘V Base’ Edit .................................................................................................125<br />
11.16.9 Performing an ‘A Base’ Edit ................................................................................................127<br />
11.16.10 How to Insert a Clip into a Playlist with Split Audio .......................................................129<br />
11.17 Swap Audio Tracks ................................................................................................. 130<br />
11.17.1 Introduction .........................................................................................................................130<br />
11.17.2 How to Enable the Audio Swap Mode ................................................................................130<br />
11.17.3 How to Perform a Swap Audio Track in Auto Mode ...........................................................130<br />
11.17.4 How to Perform a Swap Audio Track in <strong>Manual</strong> Mode ......................................................133<br />
11.17.5 Deleting Swap Points .........................................................................................................133<br />
11.17.6 Navigating Among Swap Points .........................................................................................134<br />
11.18 Replace Function .................................................................................................... 134<br />
11.18.1 Introduction .........................................................................................................................134<br />
11.18.2 Entering the Replace Function ...........................................................................................134<br />
11.18.3 Replace Edit and Replace Playback Modes ......................................................................134<br />
11.18.4 Replace with IN/OUT Points or with IN Point Only .............................................................135<br />
V
Issue<br />
<strong>11.01</strong>.C<br />
VI<br />
<strong>Multicam</strong> - Version <strong>11.01</strong> – Operating <strong>Manual</strong><br />
<strong>EVS</strong> Broadcast Equipment SA – April 2012<br />
11.18.5 How to Perform a Replace .................................................................................................135<br />
11.18.6 Loop Mode in the Replace Function ...................................................................................136<br />
12. TIMELINE MANAGEMENT .................................................................................... 138<br />
12.1 Introduction ............................................................................................................. 138<br />
12.1.1 Timeline Creation ...............................................................................................................138<br />
12.1.2 Timeline Editing ..................................................................................................................138<br />
12.1.3 Timeline Playout .................................................................................................................139<br />
12.1.4 Principles for Accessing Timelines .....................................................................................139<br />
12.2 Creating Timelines .................................................................................................. 140<br />
12.2.1 How to Create a Timeline from a playlist from the Remote Panel .....................................140<br />
12.2.2 How to Create a Timeline from a playlist from the VGA .....................................................140<br />
12.3 Copying Timelines .................................................................................................. 140<br />
12.3.1 Overview .............................................................................................................................140<br />
12.4 Timeline Edit Mode ................................................................................................. 141<br />
12.4.1 Accessing the Timeline Edit Mode .....................................................................................141<br />
12.4.2 Controlling the Recorder .....................................................................................................141<br />
12.4.3 OSD Display .......................................................................................................................141<br />
12.4.4 LCD Information .................................................................................................................142<br />
12.5 Timeline Playout Mode ............................................................................................ 142<br />
12.5.1 Accessing the Timeline Playout Mode ...............................................................................142<br />
12.5.2 OSD Display .......................................................................................................................143<br />
12.5.3 LCD Display ........................................................................................................................143<br />
12.6 Editing <strong>Operation</strong>s .................................................................................................. 143<br />
12.6.1 Extend Overwrite ................................................................................................................144<br />
12.6.2 Insert Overwrite ..................................................................................................................146<br />
12.6.3 How to Add a Clip to a Timeline .........................................................................................147<br />
13. OPERATING ON XNET NETWORK ........................................................................ 148<br />
13.1 Introduction ............................................................................................................. 148<br />
13.2 Disconnecting from XNet ........................................................................................ 148<br />
13.3 Selecting a Server on XNet ..................................................................................... 148<br />
13.4 <strong>Operation</strong>s .............................................................................................................. 150<br />
13.4.1 How to Recall/Play Back a Remote Clip ............................................................................150<br />
13.4.2 How to Name a Remote Clip ..............................................................................................151<br />
13.4.3 How to Modify IN/OUT Points of a Remote Clip .................................................................151<br />
13.4.4 How to Insert Remote Clips into a Playlist .........................................................................152<br />
13.4.5 How to Roll a Playlist with Remote Clips ............................................................................152<br />
13.4.6 How to Create Local Clips with Remote Record Trains .....................................................153<br />
13.5 Working with Mapped Network Cameras ................................................................ 153<br />
14. PAINT MODE ..................................................................................................... 154<br />
14.1 Introduction ............................................................................................................. 154<br />
14.2 Paint Mode Monitor Display .................................................................................... 155<br />
14.3 Function Description ............................................................................................... 156<br />
15. TARGET MODE .................................................................................................. 159<br />
15.1 Introduction ............................................................................................................. 159<br />
15.2 Creating a Target Track .......................................................................................... 160<br />
15.2.1 Selecting the Type of Tracking Object ...............................................................................160<br />
15.2.2 Selecting Other Parameters of the Tracking Object ...........................................................160<br />
15.2.3 How to Highlight Video Material .........................................................................................161<br />
15.2.4 Rules When Using Keyframes ............................................................................................161<br />
15.3 Target Mode Monitor Display .................................................................................. 162<br />
16. OFFSIDE LINE MODE .......................................................................................... 165<br />
16.1 Introduction ............................................................................................................. 165
<strong>Multicam</strong> - Version <strong>11.01</strong> – Operating <strong>Manual</strong><br />
<strong>EVS</strong> Broadcast Equipment SA – April 2012<br />
Issue<br />
<strong>11.01</strong>.C<br />
16.1.1 Definition and License Code ...............................................................................................165<br />
16.1.2 Activating the Offside Line Mode ........................................................................................165<br />
16.1.3 Accessing the Offside Line Mode .......................................................................................165<br />
16.1.4 Overview on the Offside Line Commands ..........................................................................166<br />
16.2 How to Mark an Offside Line ................................................................................... 167<br />
16.3 How to Edit an Offside Line ..................................................................................... 168<br />
16.4 How to Play the Offside Sequence .......................................................................... 168<br />
16.5 Cue Points Related to Offside Sequence ................................................................ 169<br />
17. SPLIT SCREEN MODE ........................................................................................ 170<br />
17.1.1 Vertical Split ........................................................................................................................170<br />
17.1.2 Horizontal Split....................................................................................................................172<br />
17.1.3 Split MIX .............................................................................................................................173<br />
17.1.4 Auto-tracking mode ............................................................................................................173<br />
18. HYPERMOTION MODE......................................................................................... 174<br />
18.1 Introduction ............................................................................................................. 174<br />
18.1.1 Definition .............................................................................................................................174<br />
18.1.2 Camera Differences ............................................................................................................174<br />
18.1.3 License Code ......................................................................................................................174<br />
18.1.4 Activating the Hypermotion Mode.......................................................................................174<br />
18.2 Menus ..................................................................................................................... 175<br />
18.2.1 Accessing and Leaving the Hypermotion Mode .................................................................175<br />
18.2.2 Hypermotion Main Menu ....................................................................................................175<br />
18.2.3 Hypermotion Secondary Menu ...........................................................................................176<br />
18.3 Controlling the Hypermotion Camera from the Remote ........................................... 177<br />
18.3.1 Introduction .........................................................................................................................177<br />
18.3.2 The Remote Keys ...............................................................................................................177<br />
18.3.3 Creating a Clip from a Hypermotion Camera .....................................................................179<br />
18.3.4 Managing Cue Points .........................................................................................................179<br />
18.4 Managing the Memory Blocks ................................................................................. 179<br />
18.4.1 Defining the Number of Memory Blocks .............................................................................179<br />
18.4.2 Color Code for Memory Block Status .................................................................................180<br />
18.4.3 Working with Single-Block Memory ....................................................................................181<br />
18.4.4 Working with Multiple-Block Memory .................................................................................181<br />
18.5 Specific Camera Features ....................................................................................... 183<br />
18.5.1 ARRI Camera Hi-Motion I ...................................................................................................183<br />
18.5.2 Photron Camera .................................................................................................................184<br />
18.5.3 Vision Research Camera ....................................................................................................185<br />
18.5.4 NAC Camera Hi-Motion II ...................................................................................................186<br />
18.5.5 For-A VFC-7000 Camera ...................................................................................................187<br />
19. SONY, XTENDD35, ODETICS & VDCP PROTOCOLS ............................................ 188<br />
19.1 Protocol Overview ................................................................................................... 188<br />
GLOSSARY ................................................................................................................ 190<br />
VII
<strong>Multicam</strong> - Version <strong>11.01</strong> – Operating <strong>Manual</strong><br />
<strong>EVS</strong> Broadcast Equipment SA – April 2012<br />
What’s New?<br />
Issue<br />
<strong>11.01</strong>.C<br />
The changes linked to new features on <strong>Multicam</strong> version <strong>11.01</strong> are listed in the table<br />
below, and are identified in the user manual by the ‘New’ logo in the margin<br />
Updates for <strong>Multicam</strong> - Version <strong>11.01</strong><br />
Section 2.6 This section decribes the new “keyboard locking” feature for<br />
the remote controller.<br />
Section 18.5 The Hypermotion chapter includes new supported Hypermotion<br />
cameras (NAC Camera Hi-Motion II and For-A VFC-7000<br />
Camera).<br />
1
Issue<br />
<strong>11.01</strong>.C<br />
2<br />
Overview<br />
<strong>Multicam</strong> - Version <strong>11.01</strong> – Operating <strong>Manual</strong><br />
<strong>EVS</strong> Broadcast Equipment SA – April 2012<br />
The aim of this manual is to familiarize the operator with the <strong>Multicam</strong> software for <strong>EVS</strong><br />
High Definition and Standard Definition servers, and its Remote Panel, so as to learn as<br />
quickly and efficiently as possible the basic operations.<br />
The CLIP & PLAYLIST MANAGEMENT functions allow the operator to keep up to 5400<br />
clips on a server and of course to replay all or some of them. A playlist consists of a list of<br />
clips (90 playlists can be defined) with video and audio transitions.<br />
The XNet option networks XNet servers and other machines into a fully integrated<br />
production environment. Any clip recorded by any server on the network is available<br />
instantly for editing and/or play-out to any other operator.<br />
The SPLITSCREEN (horizontal, vertical or mix) option displays simultaneously two<br />
synchronized actions side by side on the main program output.<br />
The PAINT option (Telestrator) draws and applies keying on the recorded pictures. Sport<br />
actions can be analyzed using different coloured circles, arrows and lines.<br />
The TARGET TRACK option follows a target with a highlighted circle, box or ellipse, and<br />
can zoom in the selected portion of the recorded pictures.<br />
The OFFSIDE LINE option allows you to draw the offside line or area on the screen by<br />
shading a portion of the pitch.
<strong>Multicam</strong> - Version <strong>11.01</strong> – Operating <strong>Manual</strong><br />
<strong>EVS</strong> Broadcast Equipment SA – April 2012<br />
1. Initial Configuration<br />
1.1 Application Selection<br />
Issue<br />
<strong>11.01</strong>.C<br />
The <strong>Multicam</strong> Setup and Configuration modules are used for configuration and<br />
maintenance operations. They are also used to select which application configuration to<br />
run, since <strong>EVS</strong> disk recorders have the ability to run various configurations. In the<br />
associated <strong>Multicam</strong> Setup and Configuration windows, you can also specify the channel<br />
configuration you want to use and several audio and video parameters.<br />
When turning on the <strong>EVS</strong> mainframe, the first step is the PC boot sequence, then the<br />
<strong>Multicam</strong> Setup window is displayed:<br />
• If a default application has been previously selected, this application will start<br />
automatically after a few seconds if no key is hit.<br />
• If a default application hasn't been defined or if the space bar is hit, the system will<br />
remain in the <strong>Multicam</strong> Setup window and wait for the operator's next command.<br />
You will find complete information about the <strong>Multicam</strong> Setup and Configuration windows<br />
in the <strong>EVS</strong> Server Configuration manuals.<br />
3
Issue<br />
<strong>11.01</strong>.C<br />
1.2 Configuration on LSM Remote<br />
4<br />
<strong>Multicam</strong> - Version <strong>11.01</strong> – Operating <strong>Manual</strong><br />
<strong>EVS</strong> Broadcast Equipment SA – April 2012<br />
Before you start using the <strong>Multicam</strong> application in <strong>Multicam</strong> LSM mode, you need to<br />
ensure that the parameters are properly defined in the Setup menu of the Remote Panel,<br />
and in the Setup Configuration module of the <strong>Multicam</strong> application. The new<br />
parameters are saved as soon as they are modified.<br />
Important<br />
Prior to using <strong>Multicam</strong>, the operator should enter the Setup menu and set all<br />
necessary parameters. If clips are stored with certain parameters and the<br />
operator wishes to change them afterwards, those clips and playlists will not<br />
change. It is thus important to set these parameters first.<br />
The <strong>Multicam</strong> Configuration manual includes a detailed description of all settings which<br />
can be defined on the Remote Panel.
<strong>Multicam</strong> - Version <strong>11.01</strong> – Operating <strong>Manual</strong><br />
<strong>EVS</strong> Broadcast Equipment SA – April 2012<br />
2. Remote Controller<br />
2.1 General Layout<br />
Issue<br />
<strong>11.01</strong>.C<br />
The following diagram shows the Remote Panel along with a brief description of each<br />
area.<br />
5
Issue<br />
<strong>11.01</strong>.C<br />
6<br />
Note<br />
<strong>Multicam</strong> - Version <strong>11.01</strong> – Operating <strong>Manual</strong><br />
<strong>EVS</strong> Broadcast Equipment SA – April 2012<br />
The operational buttons have primary and seconday functions and are divided<br />
into upper and lower sections. By pressing the SHIFT button, you gain access<br />
to the secondary functions.<br />
1. F-keys & small buttons Multi-purpose keys<br />
2. Soft keys With LCD display, allows the operator to enter the<br />
<strong>Multicam</strong> MENU system<br />
3. Lever Initiates slow motion and playlist replay<br />
4. Jog dial Used to accurately cue disk recorder<br />
5. <strong>Operation</strong>al block 1<br />
PLST Initiates active playlist<br />
LOOP Records the main output (PGM1) to the first input (CAM<br />
A) of <strong>Multicam</strong>.<br />
BROWSE Used to browse through clips, playlists, cue points<br />
INSERT Used in playlist management to insert clips into a<br />
playlist<br />
IN Sets Mark IN at the current position<br />
GOTO IN Goes to the defined Mark IN<br />
OUT Sets Mark OUT at the current position<br />
GOTO OUT Goes to the defined Mark OUT<br />
TAKE In PGM+PRV mode, pressing this button swaps<br />
cameras on PGM and PRV monitors<br />
In Multi-PGM mode, pressing this button toggles<br />
between CAM selection and PGM selection modes.<br />
In 2 PGM mode, when both PGMs are selected on the<br />
Remote Panel, pressing this button swaps the content<br />
loaded on PGM1 with the one loaded on PGM2 and<br />
vice-versa.<br />
In Playlist Edit mode, pressing this button inserts the<br />
clip loaded on the PRV channel into current playlist.<br />
LEVER Changes the lever range to secondary mode (see setup<br />
menu for range selection)
<strong>Multicam</strong> - Version <strong>11.01</strong> – Operating <strong>Manual</strong><br />
<strong>EVS</strong> Broadcast Equipment SA – April 2012<br />
6. <strong>Operation</strong>al Block 2<br />
PLAY Initiates playback<br />
Issue<br />
<strong>11.01</strong>.C<br />
NETWORK Enters the XNet menu. (connects to other servers on<br />
the network)<br />
LAST CUE Re-cues <strong>EVS</strong> server to previous cue point<br />
GOTO TC Allows timecode entry, with «F» keys<br />
FAST JOG Used with jog dial for rapid, manual re-cue. This mode<br />
is automatically reset after PLAY/LIVE commands.<br />
MARK Used to enter re-usable cue points (256 cycling cues).<br />
RECORD Initiates “E2E” mode<br />
RETURN Inside a clip, allows the operator to return to the same<br />
picture inside the record train, if it still exists.<br />
PRV CTL Enables/disables the Preview Control mode.<br />
PAGE Selects current clip page, from 1 to 10.<br />
7. LCD Display Provides current status of system<br />
2.2 Led Colours<br />
A selected key lights red.<br />
When a key lights green, it means a value in relation with this key exists.<br />
For example: F1 to F0 keys<br />
• Green light means a clip has been stored in relation with the key.<br />
• Green flashing light means a clip is being created.<br />
• Red light means the clip associated to the key is playing or is ready to play.<br />
• Red flashing light means a clip is being deleted (in network mode).<br />
7
Issue<br />
<strong>11.01</strong>.C<br />
2.3 F-keys & Small Buttons<br />
8<br />
F1 F2 F3 F4 F5 F6 F7 F8 F9 F10<br />
<strong>Multicam</strong> - Version <strong>11.01</strong> – Operating <strong>Manual</strong><br />
<strong>EVS</strong> Broadcast Equipment SA – April 2012<br />
MENU SHIFT CLEAR ENTER<br />
MENU<br />
SHIFT<br />
F1 F10<br />
-<br />
CLEAR<br />
ENTER<br />
2.4 Soft Keys<br />
Provides access to the Secondary Menu. Also used as CANCEL in some<br />
messages when confirmation is required.<br />
Note: SHIFT+MENU returns to Main menu<br />
Enables use of the secondary key functions.<br />
Note: This key remains active even if released, until another key has<br />
been hit.<br />
Stores or recalls clips, recalls playlists and enters timecode information.<br />
Is a multi-purpose key used to clear clips or playlists, and to clear IN/OUT<br />
points.<br />
Is used to append clips at the end of the current playlist, and to validate<br />
other options and messages.<br />
The soft keys have primary and secondary functions and are divided into upper and lower<br />
sections.<br />
The LCD display is divided into two menus.<br />
• To access the secondary functions in the operational menu (A’ to D’), press the<br />
SHIFT button.<br />
• To access the secondary menu, press MENU from the remote controller. The
<strong>Multicam</strong> - Version <strong>11.01</strong> – Operating <strong>Manual</strong><br />
<strong>EVS</strong> Broadcast Equipment SA – April 2012<br />
Issue<br />
<strong>11.01</strong>.C<br />
secondary menu is used to define settings that do not require regular changes,<br />
without having to return to the Setup menu.<br />
• To return to the operational menu, press the MENU key again.<br />
• To return to the Main menu in <strong>Multicam</strong>, press SHIFT+MENU.<br />
2.5 Transport Controls<br />
2.5.1 Jog Dial<br />
2.5.2 Lever<br />
The jog dial allows the operator to pass into Search mode and thus to choose<br />
exactly the Short OUT or Short IN image. Move the jog dial clockwise to search forward<br />
and move it counter-clockwise to search backwards. One revolution of the jog dial will<br />
produce a jump of approximately 35 frames. This number can be multiplied by enabling<br />
the Fast mode. The multiplication factor is defined in the Setup menu.<br />
Note<br />
The jog dial is also used to do the following:<br />
• set parameters in the Setup menu. Refer to the ‘Setup Menu’ section for<br />
more information.<br />
• browse inside the clips database, the cue points or the current playlist. Refer<br />
to the explanation of the BROWSE function for more details.<br />
The jog dial is active at all times when the system is in Play & Record modes.<br />
The lever is used to start a play or to modify slow motion speed. Its run can be of<br />
two different types depending on the lever mode. In this mode, the lever run goes from 0<br />
up to 100%.<br />
Different ranges are available to play material from –400% to 400% using the Second<br />
lever range parameter in the <strong>Operation</strong>al Setup menu (p.9.1 F5).<br />
To access this second speed range, press SHIFT+LEVER from the remote controller.<br />
Note<br />
When SD SUPER MOTION material is loaded on the primary channel, the lever<br />
range has a larger, flat step at 33%.<br />
With HD SUPER MOTION, the step is at 33% or 50% depending on the<br />
camera.<br />
The lever is also used to adjust speed, effects type and duration in Playlist Edit mode.<br />
9
Issue<br />
<strong>11.01</strong>.C<br />
2.6 Keyboard Locking<br />
10<br />
<strong>Multicam</strong> - Version <strong>11.01</strong> – Operating <strong>Manual</strong><br />
<strong>EVS</strong> Broadcast Equipment SA – April 2012<br />
You can lock a remote keyboard at any time to protect it against accidental changes, for<br />
example to prevent interruption of a play operation on an unattended device. Only the<br />
locked device is affected, other remotes will stay fully operational.<br />
2.6.1 Locking a Remote<br />
To lock a remote, press the CLEAR key. Then, within 2 seconds, press the MENU key on<br />
the keyboard.<br />
The following confirmation message is displayed:<br />
████████████████████████████████████████<br />
Do you really want to lock this remote?<br />
[Menu] : Cancel<br />
[Enter]: Confirm<br />
████████████████████████████████████████<br />
Press the Enter key to confirm the locking of the remote.<br />
When a remote is locked:<br />
o The CLEAR and MENU keys, used for unlocking, are flashing green.<br />
o All other keys are continuously lighting red.<br />
o The jog brake is activated.<br />
o All keys, the lever and the jog beep if pressed or operated, except the CLEAR<br />
and MENU keys, used for unlocking.<br />
In addition, the following message is displayed in the middle of the current screen:<br />
Msg: Clear+Menu to unlock the remote<br />
2.6.2 Unlocking a Remote<br />
To unlock the remote, press again the CLEAR key then, within 2 seconds, the MENU<br />
key. The remote goes back to its operating mode.
<strong>Multicam</strong> - Version <strong>11.01</strong> – Operating <strong>Manual</strong><br />
<strong>EVS</strong> Broadcast Equipment SA – April 2012<br />
3. Main Menu<br />
Introduction<br />
Issue<br />
<strong>11.01</strong>.C<br />
After the boot sequence of the <strong>Multicam</strong> system, the LCD screen of the Remote Control<br />
panel will display the Main menu:<br />
2Rec 4Play Server Ver:11.00.xx<br />
F1: 1 Remote F6: Exit<br />
F2: 2 Remotes F7: Clear all clips<br />
F3: 3 Remotes F8: Stop Record<br />
F4: 4 Remotes F9: Fill Playlist<br />
F5: Char. On/Off F0: Save Clips+Plist<br />
Split Paint Target Setup<br />
1PGM+PRV 3 PGM<br />
The Main menu has special function key operations as shown above, as well as the “soft”<br />
keys options to enter 1PGM, 1PGM+PRV, 2PGM, or 3PGM modes (if available) and to<br />
enter the Setup menu to configure your remote controller or to add special functions to<br />
your application.<br />
Note<br />
If 2 channels are available for the 1 st Remote, the B key will display 2 PGM. If 3<br />
channels are available, the B key will display 3 PGM.<br />
How to Return to the Main Menu<br />
From any section of the application, except Playlist mode, press SHIFT+MENU on the<br />
first Remote Control panel to return to the main menu.<br />
11
Issue<br />
<strong>11.01</strong>.C<br />
12<br />
Function Keys in the Main Menu<br />
<strong>Multicam</strong> - Version <strong>11.01</strong> – Operating <strong>Manual</strong><br />
<strong>EVS</strong> Broadcast Equipment SA – April 2012<br />
Select the corresponding Function key (F_ key), and then press ENTER to validate the<br />
selection.<br />
Function Key Use<br />
F1 to F4 If desired, the <strong>Multicam</strong> system can be run using 1, 2, 3 or 4<br />
<strong>EVS</strong> Remote Panels. Depending on the number of play<br />
channels available in the current configuration, 1-, 2-, 3- or 4-<br />
Remote modes will be available from the main menu.<br />
F1: 1 Remote One Remote Panel is used in the configuration<br />
F2: 2 Remotes Two Remote Panels are used in the configuration.<br />
If 4 play channels are available, when selecting the 2 Remotes<br />
mode, the operator can choose between two configurations:<br />
• 2 play channels for each remote:<br />
In this configuration, each Remote Panel can select<br />
PGM+PRV or 2PGM mode. Each Remote Panel can<br />
manage video transitions (cut, mix, wipe) in PGM+PRV and<br />
playlist modes.<br />
• 3 play channels for the 1 st remote and 1 play channel<br />
for the second remote.<br />
In this configuration, the 1 st remote can select PGM+PRV or<br />
3PGM mode and can manage video transitions. The 2 nd<br />
remote is forced to 1PGM mode and can only handle cut<br />
transitions.<br />
F3: 3 Remotes Three Remote Panels are used in the configuration.<br />
F4: 4 Remotes Four Remote Panels are used in the configuration.<br />
F5: Char. On/Off Enables or disables the on-screen display (Timecode, Clip ID…) on<br />
the output monitors.<br />
F6: Exit Exits the <strong>Multicam</strong> software and returns to the <strong>EVS</strong> Menu.<br />
F7: Clear all clips Clears all clips. All clips will be lost. A confirmation of this command<br />
is required.<br />
For more information to this action, refer to the section 9.2.6<br />
‘Clearing Clips’, on page 42.<br />
Note: This command is not similar to the Clear Video Disks from<br />
the Maintenance menu. If you wish to refresh completely the server,<br />
i.e. to clear all clips including the protected ones, you need to use<br />
Clear Video Disks rather than Clear all clips.<br />
F8: Stop Record Stops the record. The REC key will go off and the F8 function key is<br />
now used to restart the record.
<strong>Multicam</strong> - Version <strong>11.01</strong> – Operating <strong>Manual</strong><br />
<strong>EVS</strong> Broadcast Equipment SA – April 2012<br />
Issue<br />
<strong>11.01</strong>.C<br />
F9: Fill Playlist «Dump» feature which allows all clips to be «dumped» at the end of<br />
the current playlist. This allows the operator to save all material to<br />
tape, as a backup feature after a show is complete. You can select in<br />
the Setup menu which camera angles have to be included in the Fill<br />
Playlist function.<br />
F0: Technical<br />
setup<br />
Important<br />
If your clips are currently connected to another server on the<br />
network, the clips from that server will be added to your current<br />
playlist.<br />
Make sure that the playlist you have selected is an empty one. This<br />
function will append the clips at the end of an existing playlist.<br />
Gives access to the technical setup menu.<br />
In order to guarantee the validity of data and clips previously saved, it is advised<br />
to properly exit the application by pressing ALT+Q and ENTER from the<br />
keyboard, or F6 and then ENTER from the Remote Panel. DO NOT TURN OFF<br />
THE SYSTEM WHILE THE APPLICATION IS RUNNING.<br />
13
Issue<br />
<strong>11.01</strong>.C<br />
4. Remote Panel <strong>Operation</strong>s<br />
4.1 <strong>Operation</strong>s<br />
4.1.1 RECORD<br />
4.1.2 MARK<br />
14<br />
<strong>Multicam</strong> - Version <strong>11.01</strong> – Operating <strong>Manual</strong><br />
<strong>EVS</strong> Broadcast Equipment SA – April 2012<br />
This key lights red when the system is recording. Pressing this key brings the system in<br />
E/E (“live”) mode, and starts the record if necessary (depending on the settings of the<br />
Setup menu). The E/E mode is actually playing pictures already recorded by the system,<br />
and has a delay of 3 frames compared to the live source, on all audio and video tracks.<br />
This function marks up to 256 cues that can be marked while recording or playing. The<br />
cues are marked on the LIVE or PLAYBACK program depending on the value set in the<br />
Setup menu. When the operator has marked 256 cues, the next one will overwrite the<br />
oldest one.<br />
4.1.3 LAST CUE<br />
4.1.4 PLAY<br />
4.1.5 IN<br />
This function re-cues the <strong>EVS</strong> server to previous cue point relative to the current<br />
timecode position. Each time the Last Cue button is pressed, the <strong>EVS</strong> server re-cues to<br />
the previous cue, etc. When recalling a cue point, the cue number appears in the upper<br />
left corner of the OSD if this option is enabled with the Cue number on OSD parameter<br />
in the <strong>Operation</strong>al Setup menu (p.1.1 F1)<br />
This function initiates a forward motion. It can also be used to start playback of playlists<br />
and clips (refer to PLST command).<br />
When PgmSpd/Var Max is OFF, the default playback speed when pressing the PLAY<br />
key is 100% for standard pictures, 33% for Super Motion pictures with a Triple Speed<br />
camera (SD), and 50% for Super Motion pictures with a Double Speed camera (HD),.<br />
When PgmSpd/Var Max is ON, the value defined in the <strong>Operation</strong>al Setup menu for the<br />
PGM Speed/Var max parameter (p.9.1 F3) is used.<br />
This function defines the IN point of a clip. The key will light differently depending on the<br />
following situations:<br />
Green key The key lights green if an IN point exists but is not the image you see.<br />
Red key The key lights red if the on-air image is at this IN point. This point can
<strong>Multicam</strong> - Version <strong>11.01</strong> – Operating <strong>Manual</strong><br />
<strong>EVS</strong> Broadcast Equipment SA – April 2012<br />
Flashing<br />
(green or red)<br />
key<br />
4.1.6 OUT<br />
be entered while recording.<br />
Issue<br />
<strong>11.01</strong>.C<br />
In Split Audio mode, this key can be flashing green or flashing red.<br />
Refer to the section 11.16 ‘Split Audio’, on page 118 for more details.<br />
During a Replace operation on a playlist, this key will flash red if trying<br />
to insert an IN marker on a transition, as this is not allowed.<br />
During an Extend operation on a timeline, this key will flash red until<br />
you jog. At that time, it will flash green until the operation is confirmed<br />
using the CAM D key.<br />
This function defines the OUT point of a clip. This operates similarly to the IN button.<br />
Note<br />
The OUT point (field) is always excluded. When playing a clip, it will freeze on<br />
the field preceding the OUT point marked by the operator.<br />
Modification of Clip IN / OUT Points<br />
Select the clip that you wish to modify, use the jog dial to position the material at the new<br />
IN or OUT point, and re-mark the IN or OUT point(s) as required.<br />
4.1.7 JOG KNOB<br />
Important<br />
When IN/OUT points are set and a clip is saved, the system automatically writeprotects<br />
a user definable length of material before and after the IN/OUT points<br />
respectively. These are referred to as the guardbands. Their duration can be set<br />
with the Default clip duration parameter in the <strong>Operation</strong>al Setup menu (p.2.2<br />
F2) as required.<br />
The duration of the guardband after the OUT point can be reduced according to<br />
the quantity of video/audio material available when saving the clip.<br />
This function is used to accurately cue material.<br />
4.1.8 FAST JOG<br />
When selected, this option enables fast picture search: the actual speed of this fast jog is<br />
adjustable in the Setup menu. Starting a play or returning to E2E mode resets the Fast<br />
Jog mode.<br />
Important<br />
The jog dial is active at all times when the system is in play & record. The brake<br />
is automatically turned on when starting a playback with the PLAY key or with<br />
the lever, or when returning to E2E mode with the RECORD button.<br />
15
Issue<br />
<strong>11.01</strong>.C<br />
4.1.9 LEVER<br />
4.1.10 PLST<br />
16<br />
<strong>Multicam</strong> - Version <strong>11.01</strong> – Operating <strong>Manual</strong><br />
<strong>EVS</strong> Broadcast Equipment SA – April 2012<br />
This function is used to perform slow motion from 0 to 100% and to playback material<br />
from 100 to + 100% or from 200 to + 200% when Secondary Lever range is selected. The<br />
lever has a continuous, linear range, except when Super Motion material is loaded on the<br />
primary channel. In this case, there is a “flat step” at 33% (SD Super Motion) or 50% (HD<br />
Super Motion) to help the operator locating easily the ideal playback speed.<br />
Important<br />
When playing Super Motion material in slow motion, to obtain the smoothest<br />
replay, it is important that the replay speed is exactly the ideal slow motion<br />
speed, i.e. 33% for SD Super Motion or 50% for HD Super Motion. If the replay<br />
speed is slightly off these ideal values, movements might appear staggered.<br />
These ideal speeds can also be called directly by pressing the PLAY button<br />
when the current element is Super Motion. The PGM speed and Var Max<br />
modes can also be used to facilitate this. See Chapter 6 ‘PGM-PRV Mode’ on<br />
page 26 for a description on these modes.<br />
This function is not active if the current playlist is empty. If the current playlist is not<br />
empty, pressing PLST once enters the Playlist Edit mode.<br />
• Pressing PLST from the Playlist Edit mode enters the Playlist Playout mode.<br />
• Pressing PLST from the Playlist Playout mode re-cues the playlist to its beginning.<br />
• Pressing 3 times PLST will always cue up the playlist ready to roll.<br />
To play back a playlist that has been cued, press the PLAY button and it will roll at the<br />
preset speeds.<br />
4.1.11 BROWSE<br />
When a clip is loaded on the primary channel, pressing the BROWSE key allows the<br />
operator to browse inside all local clips of the database by turning the jog dial.<br />
When a cue point exists for the current picture on the primary channel (the CUE button<br />
lights red), pressing the BROWSE key allows the operator to browse through all existing<br />
cue points by turning the jog dial.<br />
When the current picture on the primary channel is neither a clip nor a cue point, or if the<br />
operator is in Playlist mode, pressing the BROWSE key allows him to browse inside the<br />
clips of the current playlist by turning the jog dial.<br />
4.1.12 INSERT<br />
This function inserts a clip before or after (depending on the Setup menu) the current<br />
position inside the playlist.
<strong>Multicam</strong> - Version <strong>11.01</strong> – Operating <strong>Manual</strong><br />
<strong>EVS</strong> Broadcast Equipment SA – April 2012<br />
4.1.13 ENTER<br />
4.1.14 MENU<br />
Issue<br />
<strong>11.01</strong>.C<br />
This function appends clip(s) at the end of the current playlist. This is also used to confirm<br />
saving of clips, and validate various options and messages.<br />
4.1.15 CLEAR<br />
This function allows the operator to gain access to the secondary menu.<br />
SHIFT+MENU on the Remote gains access to the main menu.<br />
Also used as an ESCAPE key to cancel some options and messages.<br />
This function clears the IN / OUT/ playlist / CLIPS / CUE points.<br />
Note<br />
4.1.16 NETWORK<br />
• To clear one CUE point, recall the desired cue point and press<br />
CLEAR+MARK key.<br />
• To clear all cues: when current picture is not a CUE point, press<br />
CLEAR+MARK key. A message appears to confirm the command.<br />
This function gives access to the clips and/or records trains of other machines on the<br />
network. After the selection of the machine, the way of selecting clips and camera angles<br />
is similar to clips selection on the local LSM system. Refer to the Chapter 13 ‘Operating<br />
on XNet Network’, on page 148 for more details.<br />
17
Issue<br />
<strong>11.01</strong>.C<br />
4.1.17 GOTO TC<br />
18<br />
<strong>Multicam</strong> - Version <strong>11.01</strong> – Operating <strong>Manual</strong><br />
<strong>EVS</strong> Broadcast Equipment SA – April 2012<br />
To jump to a given timecode of the loaded train or clip, you can use the Goto TC option<br />
on the Remote Panel.<br />
To go to a given timecode, proceed as follows:<br />
1. Press SHIFT+GOTO TC key on the Remote.<br />
The GOTO TC window is displayed on the Remote Panel :<br />
2. To specify a date from which the search should be executed, press SHIFT+C, enter<br />
the date in the format dd/mm/yy, using the F1 to F10 keys, and press ENTER on the<br />
Remote.<br />
3. To specify a date up to which the search should be executed, press SHIFT+D and<br />
enter the date in the format dd/mm/yy using the F1 to F10 keys and press ENTER on<br />
the Remote.<br />
4. To specify whether to go to a LTC, USER timecode or any of both (LTC/USER),<br />
press C until the requested timecode type is displayed.<br />
5. Enter the requested timecode using the function keys F1 to F10.<br />
Eight digits: hh:mm:ss;ff (f=frame) are displayed on the LCD screen of the Remote.<br />
• If you enter all 8 digits, <strong>Multicam</strong> will automatically go to the required timecode.<br />
• If you enter less than 8 digits (when the last digits are zeros), press ENTER on<br />
the Remote to validate the entry and reach the requested timecode.<br />
Once you have entered the Goto TC, you can observe it has been correctly entered<br />
on the display of the Remote LCD screen and on the output monitor. This Timecode<br />
display appears in the centre of the LCD display, just above the menu options.<br />
6. Press ENTER on the Remote.<br />
Go to TC xx:xx:xx:xx<br />
[Menu] : Cancel<br />
[Enter] : Go to TC<br />
Reset From Date To Date<br />
Return LTC<br />
If the timecode is from the LTC table, it will be displayed in white on the output monitor.<br />
If the timecode is from the USER TC table, it will be displayed in yellow on the output<br />
monitor.<br />
If nothing happens after confirming the TC entry with ENTER, this means that the field<br />
corresponding to the selected Timecode does not exist on the disk any longer.<br />
To exit the GOTO TC function at any time, press the MENU key.
<strong>Multicam</strong> - Version <strong>11.01</strong> – Operating <strong>Manual</strong><br />
<strong>EVS</strong> Broadcast Equipment SA – April 2012<br />
4.1.18 GOTO IN / GOTO OUT<br />
4.1.19 LOOP<br />
Issue<br />
<strong>11.01</strong>.C<br />
When you are in CLIP mode, this key combination enables the operator to go to IN / OUT<br />
points of clips, instantly.<br />
It enables the internal Loop mode. The button will flash red in this mode and “LOOP” will<br />
appear on the OSD of the output monitors. When the user selects the Loop mode, the<br />
loop has to be cabled from the HD/SD “clean” output of PGM1 to the Loop In connector.<br />
The loop is performed on the audio and video components of the PGM1 output, or on the<br />
video only, depending on the Internal Loop parameter of the <strong>Operation</strong>al Setup menu,<br />
(p.9.2 F6). In audio embedded, the audio is also looped, whatever the value defined for<br />
the Internal Loop parameter.<br />
To leave the loop mode, you need to press SHIFT+LOOP again.<br />
Note<br />
By default, users have to connect the clean SDI output to the Loop In connector<br />
given that the OSD of the output monitors are not disabled. If users want to use<br />
the output monitor with characters out, they have to start the <strong>Multicam</strong><br />
application with the following parameter : /LOOP_SDI_MON.<br />
This is very useful to “consolidate” effects and edits, or adding live sound or music or<br />
voice to previously recorded material when only the video is looped back into the server.<br />
Note<br />
4.1.20 RETURN<br />
4.1.21 PAGE<br />
When playing back at 200% in loop mode, then replaying the looped sequence<br />
at 50%, you can obtain a “film effect”.<br />
Inside a clip, press the RETURN key to remain on the same picture, but inside the record<br />
train instead of the clip (if that picture still exists in the record train). This is useful when a<br />
clip is too tight and you want to use material beyond the current IN or OUT point.<br />
Use this key to select a new clips page. After pressing the SHIFT+PAGE key, you must<br />
press a F_ key to select the corresponding page (1 to 10).<br />
19
Issue<br />
<strong>11.01</strong>.C<br />
20<br />
<strong>Multicam</strong> - Version <strong>11.01</strong> – Operating <strong>Manual</strong><br />
<strong>EVS</strong> Broadcast Equipment SA – April 2012<br />
4.1.22 Rebooting the System from the LSM Remote<br />
« Hard Reboot»<br />
In the event that the system needs to be rebooted, the process can be accomplished from<br />
the Remote Panel. Keep in mind that doing this while <strong>Multicam</strong> is running will of course<br />
force the <strong>Multicam</strong> application to close abruptly, and up to 1 minute of the material being<br />
recorded and not clipped could be lost.<br />
To reboot, press the following key sequence,<br />
Between step 3 and step 4, the RECORD button will flash GREEN and the PAGE button<br />
will flash RED. Hitting the PAGE button will reboot the system. Hitting the RECORD<br />
button will return to normal operation.<br />
« Soft Reboot» from the keyboard<br />
It is also possible to run a «soft reboot» which will exit the software and return the user to<br />
the <strong>EVS</strong> Menu. Here, the software can be selected and entered again without having to<br />
reboot the entire system. When running the following procedure, the system will<br />
automatically save all recorded material (record trains, clips, playlists) upon exit.<br />
Hit ALT+Q on the keyboard or press F6 from the main Menu, and confirm with ENTER or<br />
cancel with ESC. You will exit the <strong>Multicam</strong> software and go back to the <strong>EVS</strong> Menu.
<strong>Multicam</strong> - Version <strong>11.01</strong> – Operating <strong>Manual</strong><br />
<strong>EVS</strong> Broadcast Equipment SA – April 2012<br />
4.2 Selection of Clip Banks and Playlists<br />
SHIFT+F1 - F9 = CLIPS BANK<br />
This allows access to clip banks 1 through 9 within the clip page (1 to 10).<br />
SHIFT+F1 = BANK 1<br />
SHIFT+F2 = BANK 2, etc. (up to bank 9)<br />
Issue<br />
<strong>11.01</strong>.C<br />
Once in the bank, selection of the F1 – F10 keys will call up the respective clips. If Recall<br />
Clip Toggle is enabled in the Setup menu, pressing several times on the same F_ key<br />
will call successively all camera angles of that clip.<br />
The clip numbering system is as follows:<br />
Example: Clip 547 where<br />
• “5” refers to the clip page number (1 to 10).<br />
• “4” refers to the clip bank (1 to 9)<br />
• “7” refers to the clip number (1 to 10) inside the bank<br />
Note<br />
To identify remote clips when using the XNet SDTI network, the number of the<br />
clip is followed by the number of the machine on the network. i.e. Clip 547B/04<br />
SHIFT+F10 = playlist BANK<br />
This combination of keys gives access to the playlists’ banks. There are 10 playlists<br />
within each clip page. Selecting F1-F10 at this point calls up the corresponding playlist.<br />
Example: Playlist 51 where<br />
• “5” refers to the clip page<br />
• “1” refers to the playlist number (1 to 10)<br />
Note<br />
• The playlist bank of page 10 is not available from the <strong>EVS</strong> remote, since it is<br />
actually reserved for the <strong>EVS</strong> AVSP protocol (for Air Box and Air Edit).<br />
• To identify remote playlists when using the XNet SDTI network, the number<br />
of the playlist is followed by the number of the machine on the network, i.e.<br />
Playlist 51/04<br />
21
Issue<br />
<strong>11.01</strong>.C<br />
4.3 Clip Numbering Hierarchy<br />
22<br />
<strong>Multicam</strong> - Version <strong>11.01</strong> – Operating <strong>Manual</strong><br />
<strong>EVS</strong> Broadcast Equipment SA – April 2012<br />
<strong>Multicam</strong> can store up to 900 (multiplied by the number of cameras) clips and 100<br />
playlists in its libraries. 900 clips with up to 6 camera angles per clip result in 5400 clips<br />
on a server. This number is displayed in the upper right window of the VGA Setup screen<br />
(SHIFT+F2 from the PC keyboard).<br />
If you are working with XNet SDTI network, keep in mind that the total number of clips on<br />
the entire network is limited to 6,000 or 16,000, depending on the network settings. This<br />
number is displayed in the same area on the VGA Setup window.<br />
The following diagram represents the hierarchy of the <strong>Multicam</strong> clip numbering system.<br />
As an example, clip number “112” is used:
<strong>Multicam</strong> - Version <strong>11.01</strong> – Operating <strong>Manual</strong><br />
<strong>EVS</strong> Broadcast Equipment SA – April 2012<br />
5. Control Mode<br />
<strong>Multicam</strong> can be set in three different basic modes, depending on commands used.<br />
5.1 Live (E2E) Mode<br />
Issue<br />
<strong>11.01</strong>.C<br />
This mode selected at start-up can also be selected by pushing the RECORD key.<br />
<strong>Multicam</strong> records the input signal and plays it at the same time on the program output.<br />
5.2 Search Mode<br />
This mode is selected by moving the jog dial.<br />
In this mode, the operator has the opportunity to search for an image, in order to define<br />
cue points or clips. Moving the command knob clockwise will force <strong>Multicam</strong> to search<br />
forward, moving the command knob counter-clockwise will force it to search backwards.<br />
The most important thing to note is that <strong>Multicam</strong> never stops recording while searching.<br />
5.3 Playback Mode<br />
Moving the lever or pressing the PLAY key selects this last mode.<br />
<strong>Multicam</strong> plays the incoming signal delayed, a clip or a playlist, in slow motion and of<br />
course continues to record the incoming signal on disks.<br />
As soon as the lever is moved, <strong>Multicam</strong> starts playing back from the current picture. The<br />
playback speed is defined by the lever position. This is used to start the playback of a<br />
normal slow motion, as well as the playback of a clip or a playlist. During playback, the<br />
system never stops recording<br />
Each operation on the Remote Panel with the command KNOB or LEVER will be<br />
associated to the Search or Playback mode respectively.<br />
23
Issue<br />
<strong>11.01</strong>.C<br />
24<br />
<strong>Multicam</strong> - Version <strong>11.01</strong> – Operating <strong>Manual</strong><br />
<strong>EVS</strong> Broadcast Equipment SA – April 2012<br />
5.4 Synchronization Mode (Switch To In)<br />
If the synchronization mode is OFF (SW to IN is not highlighted in the secondary menu),<br />
a request for camera change will produce a jump at the same timecode on the requested<br />
camera. This mode allows synchronous change of camera angle.<br />
If the synchronization mode is ON, a request for a camera change (by pressing CAM A,<br />
CAM B, CAM C or CAM D in the <strong>Multicam</strong> menu) will lead to a jump to a predefined CUE<br />
IN point.<br />
Clip A<br />
Clip B<br />
Clip C<br />
Clip D<br />
If a CUE IN point has not been previously defined, <strong>Multicam</strong> acts as in SW to IN OFF<br />
mode (even if SW to IN ON is shown) because the system has no reference to jump to.<br />
5.5 Definition of Controlled and Primary Channels<br />
Important<br />
The notions of Primary Channel and Controlled Channel are very important and<br />
will be constantly referred to in this manual.<br />
5.5.1 Controlled Channel<br />
A channel is “controlled” when the operator can control it with the jog dial. In this case,<br />
the words “FULL CTRL” are present on the top of the OSD of the output monitor of that<br />
channel.<br />
5.5.2 Primary Channel<br />
The primary channel is the first controlled channel. It is identified by stars around its name<br />
on the OSD of the output monitor and on the LCD display of the Remote Panel (ex:<br />
*PGM1*).<br />
Examples:<br />
Cue In1<br />
Cue In3<br />
Cue In2<br />
Cue In4<br />
Cue In1<br />
Cue In3<br />
Cue In2<br />
Cue In4<br />
• In 3PGM mode, if the operator controls PGM2 and PGM3, the primary channel is<br />
PGM2.<br />
• In PGM+PRV mode with PRV CTRL OFF, the primary channel is PGM.<br />
• In PGM+PRV mode with PRV CTRL ON, the primary channel is PRV.
<strong>Multicam</strong> - Version <strong>11.01</strong> – Operating <strong>Manual</strong><br />
<strong>EVS</strong> Broadcast Equipment SA – April 2012<br />
5.6 Preference Mode (PREF)<br />
Issue<br />
<strong>11.01</strong>.C<br />
When this option is ON and a clip is recalled, the preferred camera will be displayed on<br />
the main output, even if another camera angle was previously loaded on that output.<br />
The preferred camera is the one, which was on the primary output channel when the clip<br />
was created.<br />
The second preferential camera (“secondary camera”) is the one that was loaded on the<br />
next channel when the clip was created.<br />
In the Clip screen, the first preferential camera is indicated by a star: 111B* and the<br />
second preferential camera is indicated by 2 dashes: 111B=.<br />
When the preference option is disabled, the PGM output stays on the camera currently<br />
selected when the clip is called.<br />
5.7 Secondary Controller<br />
5.7.1 Introduction<br />
The 2 nd CTRL function available on the Remote Panel in the main operational menu<br />
allows the operator to swap the control of one or several play channels between the <strong>EVS</strong><br />
Remote Panel and a third-party controller.<br />
Both controllers receive permanently the status of the channel(s), but only one controller<br />
at a time is able to actually control a channel: this is called the exclusive secondary<br />
control mode. The secondary controllers are defined in the <strong>Operation</strong>al Setup menu of<br />
the remote (p.2.2).<br />
5.7.2 Interactions between IPDP and <strong>Multicam</strong><br />
When a Remote Panel and an IPDirector share the control of some PGMs in exclusive<br />
secondary control mode, the following principles apply:<br />
• When a playlist/timeline is controlled by the Remote Panel on a PGM, the<br />
playlist/timeline remains the current one when IPDirector is given the control on the<br />
PGM.<br />
• When a playlist/timeline is controlled by IPDirector on a PGM, the playlist/timeline<br />
remains the current playlist on the Remote Panel when the operator takes back the<br />
PGM control.<br />
• When several playlists/timelines have been controlled by IPDirector on several PGMs<br />
and the operator takes back the PGM control, the current playlist/timeline on the<br />
Remote Panel is the one that was the current playlist when the control was given<br />
away, in other words the current playlist/timeline does not change.<br />
• When the playlist/timeline controlled by IPDirector is not visible by the Remote Panel,<br />
the current playlist/timeline on the Remote Panel is the one that was the current<br />
playlist when the control was given away, in other words the current playlist/timeline<br />
does not change.<br />
25
Issue<br />
<strong>11.01</strong>.C<br />
6. PGM-PRV Mode<br />
26<br />
<strong>Multicam</strong> - Version <strong>11.01</strong> – Operating <strong>Manual</strong><br />
<strong>EVS</strong> Broadcast Equipment SA – April 2012<br />
6.1 1PGM+PRV (Press A from MAIN MENU)<br />
PGM1 CAM A *PRV1* CAM B<br />
Aud.Met. PgmSpd Sort->TC PostRoll<br />
Mix. Sw to IN Search Pref<br />
P.1 B.1 Clips: LOCAL Records: LOCAL<br />
PL 11: <<br />
Msg:<br />
Rst Cam Local Sync Prv 2nd CTRL<br />
Cam A Cam B Cam C Cam D<br />
At least 2 playback channels must be available to run this configuration.<br />
This mode allows the operator to make replays with/or without transition effects between<br />
all outputs. A string of replays can be put together and played back at the operator’s<br />
discretion.<br />
The LCD display is divided in two menus controlled by soft keys (A,B,C,D). To gain<br />
access to the upper menu, press MENU from the Remote Panel.<br />
6.1.1 Secondary Menu<br />
Aud. Met. PgmSpd Sort->TC PostRoll<br />
Mix. Sw to IN Search Pref<br />
Mix / Wipe L>R / Wipe R>L / Wipe U>D / Wipe D>U / Cut<br />
These options determine the transition effect that will occur between the PGM and PRV<br />
pictures. The mix, wipe and cut are on the same location. Pressing this button will browse<br />
through these effects, showing the active one on the LCD menu. Please refer to Setup<br />
menu to select the duration of the transition effect.
<strong>Multicam</strong> - Version <strong>11.01</strong> – Operating <strong>Manual</strong><br />
<strong>EVS</strong> Broadcast Equipment SA – April 2012<br />
PgmSpd/VarMax<br />
Issue<br />
<strong>11.01</strong>.C<br />
Pressing PgmSpd once enables the Program Speed mode and highlights this function on<br />
the LCD. Pressing the key once more enables the Var Max mode and highlights this<br />
function on the LCD. The PLAY key is flashing red while either of these modes is<br />
enabled.<br />
• Program Speed mode: In this mode, only two speed values are available from the<br />
lever: 0% when the lever is in the lower position, or the speed defined in the<br />
<strong>Operation</strong>al Setup menu (p.9.1 F3) for any other position of the lever.<br />
• Var Max mode: the speed range defined by the lever is limited between 0% and the<br />
speed value defined in the <strong>Operation</strong>al Setup menu (p.9.1 F3).<br />
Sw To In<br />
When this function is enabled (highlighted), a camera change will cause a jump to the<br />
corresponding IN point if existing. It will switch in Sync if no IN point exists for the current<br />
element, or if SW to IN is OFF.<br />
Pref<br />
Selecting this function enables the Preference mode (see section 5.6 ‘Preference Mode<br />
(PREF)’ for more details).<br />
Aud.Met.<br />
This option enables/disables the display of audio meters for all channels using the OSD<br />
of the output monitors.<br />
PostRoll<br />
When the Post-Roll mode is enabled, that function is highlighted on the LCD and a “P”<br />
appears on the OSD of the output monitors.<br />
When the user exits <strong>Multicam</strong> with the Post-Roll mode on, this mode will still be enabled<br />
when <strong>Multicam</strong> is restarted.<br />
27
Issue<br />
<strong>11.01</strong>.C<br />
28<br />
<strong>Multicam</strong> - Version <strong>11.01</strong> – Operating <strong>Manual</strong><br />
<strong>EVS</strong> Broadcast Equipment SA – April 2012<br />
The Post-Roll mode works as follows depending on the element played:<br />
• When a clip is played, it will not stop on the Short OUT point, but will continue to play<br />
through the Short OUT point by the Post-Roll duration defined in the Setup Menu.<br />
• When a record train is played, the same will happen if the Record trains OUTs<br />
parameter is set to “Freeze” in the <strong>Operation</strong>al Setup menu (p.2.3 F1).<br />
• When a playlist is played, the Post-Roll will apply only to the last clip of the playlist.<br />
Sort->TC<br />
This function allows the operator to search for all clips that contain a particular timecode.<br />
For more information on this function, refer to the section ‘Sort->TC’, on page 47.<br />
Search<br />
This function allows the operator to search the database using keywords and ranking.<br />
Refer to the chapter 10 “Keyword Management” on page 71 for further details.<br />
To return to the operational menu, press the MENU key from the Remote Panel.<br />
6.1.2 <strong>Operation</strong>al Menu<br />
Rst Cam Local Sync Prv 2nd CTRL<br />
Cam A Cam B Cam C Cam D<br />
CAM A/ B /C /D<br />
If PRV CTL is OFF, select the camera to assign to the PGM output. This camera key will<br />
be highlighted in the menu.<br />
If PRV CTL is ON, select the camera to assign to the PRV output. This camera key will<br />
be highlighted in the menu.<br />
Note<br />
In 5CAM configuration (5 recorder channels and 1 player channel) or when<br />
loading a clip where CAM E or F exists, the operational menu will display:<br />
Rst Cam Local Sync Prv 2nd CTRL<br />
Cam A Cam B Cam C --->
<strong>Multicam</strong> - Version <strong>11.01</strong> – Operating <strong>Manual</strong><br />
<strong>EVS</strong> Broadcast Equipment SA – April 2012<br />
Issue<br />
<strong>11.01</strong>.C<br />
By pressing the D key (---> ), the operator has access to the D, E and F cameras. The<br />
operation menu becomes:<br />
Rst Cam Local Sync Prv 2nd CTRL<br />
Cam D Cam E Cam F
Issue<br />
<strong>11.01</strong>.C<br />
30<br />
<strong>Multicam</strong> - Version <strong>11.01</strong> – Operating <strong>Manual</strong><br />
<strong>EVS</strong> Broadcast Equipment SA – April 2012<br />
Press this function to enter the 2nd CTRL menu, select the channels that you want to<br />
pass to the secondary controller by pressing the corresponding A or B key, then press D<br />
(DONE) to validate your selection. Do the same to bring the control of a channel back to<br />
the <strong>EVS</strong> remote.<br />
6.2 Full Control and Lever Control<br />
Controlling both PGM and PRV is done when PRV CTL (direct access key from the<br />
remote) is not activated.<br />
Once selecting PRV CTL, the operator will have control of the PRV with the jog dial and<br />
most buttons, while the lever and the Play button will control the PGM output. At this<br />
point, selecting clips will call them up on the PRV side.<br />
The combination of the PRV CTL and the SW to IN functions allows the operator to autochain<br />
cameras from the same IN point.<br />
When an IN point has been marked, the operator activates the PRV CTL and sets ON the<br />
SW to IN option. Then the slow motion of one camera can be started from this IN point.<br />
The operator selects another camera in the PRV output and, via the TAKE button, can<br />
auto-chain cameras from the same IN point on the PGM output.
<strong>Multicam</strong> - Version <strong>11.01</strong> – Operating <strong>Manual</strong><br />
<strong>EVS</strong> Broadcast Equipment SA – April 2012<br />
7. Multi PGM Mode<br />
7.1 1/2/3 PGM modes (press A or B from Main<br />
menu)<br />
Issue<br />
<strong>11.01</strong>.C<br />
<strong>Multicam</strong> has two modes for its basic operation, 1 PRV/PGM mode or Multi PGM mode:<br />
• The 1PGM+PRV mode, as described previously, is the more powerful of the two,<br />
allowing interaction between all outputs. Here, synchronized replays can be rolled<br />
and chained between the cameras with either a mix, a wipe, or a cut between them.<br />
• The MULTI PGM mode is more basic, which gives the operator independent control<br />
of all outputs.<br />
In this mode, all outputs can be controlled together (such as jogging back to a certain<br />
action, with all outputs) or they can be controlled individually (either PGM 1, 2, or 3).<br />
PGM1 CAM A *PGM2* CAM B PGM3 CAM C<br />
Aud.Met. PgmSpd Sort->TC Post-Roll<br />
7.1.1 Secondary Menu<br />
Sw to IN Search Pref<br />
P.1 B.1 Clips: LOCAL Records: LOCAL<br />
PL 11: <<br />
Msg:<br />
Rst Cam Local Sync To 2nd CTRL<br />
PGM 1 PGM 2 PGM 3 TOGGLE<br />
The secondary menu can be called by pressing the MENU key and is similar to the<br />
1PGM+PRV mode, except that the A function is empty since it is not possible to create a<br />
transition between the channels in this mode. Please refer to the Chapter 6 ‘PGM-PRV<br />
Mode’, on page 26 for description of the other functions of the secondary menu.<br />
31
Issue<br />
<strong>11.01</strong>.C<br />
7.1.2 <strong>Operation</strong>al Menu<br />
32<br />
<strong>Multicam</strong> - Version <strong>11.01</strong> – Operating <strong>Manual</strong><br />
<strong>EVS</strong> Broadcast Equipment SA – April 2012<br />
The operational menu in Multi PGM mode gives access to the functions detailed in the<br />
following paragraphs:<br />
Rst Cam<br />
This function restores the position of cameras on the active channels: CAM A on PGM1,<br />
CAM B on PGM2, etc.<br />
Sync To<br />
Note<br />
When a clip/playlist is loaded on a channel, switching back to Live mode will<br />
recall the record train, which was last used on that output. This avoids too<br />
frequent uses of the Rst Cam function.<br />
This button allows you to synchronize the selected PGM in use with another one. Press<br />
this button and then select the PGM to be used as a reference. This function is not<br />
available with network trains.<br />
2nd CTRL<br />
This function allows the operator to swap the control of one or several play channels<br />
between the <strong>EVS</strong> remote and a third-party controller. Both controllers receive<br />
permanently the status of the channel(s), but only one controller at a time is able to<br />
actually control a channel. The secondary controllers are defined in page T2.2 of the<br />
Technical Setup menu.<br />
Press this function to enter the 2nd CTRL menu, select the channels that you want to<br />
pass to the secondary controller by pressing the corresponding A, B or C key, then press<br />
D (DONE) to validate your selection. Do the same to bring the control of a channel back<br />
to the <strong>EVS</strong> remote.
<strong>Multicam</strong> - Version <strong>11.01</strong> – Operating <strong>Manual</strong><br />
<strong>EVS</strong> Broadcast Equipment SA – April 2012<br />
Note<br />
Toggle / All<br />
Issue<br />
<strong>11.01</strong>.C<br />
The 1PGM mode is a simplified version of the 2 or 3PGM modes. The<br />
operational menu has less functions:<br />
Local 2nd CTRL<br />
Cam A Cam B Cam C Cam D<br />
Also, the user does not need to select a channel to enable or disable the<br />
secondary controller. Since there is only 1 channel available in this mode, the<br />
operator just has to press SHIFT+D to swap the control between the secondary<br />
controller and the <strong>EVS</strong> remote.<br />
The Toggle function is only available in 3PGM mode:<br />
• Toggle OFF: Selecting an output channel results in controlling that channel and<br />
disables the control on others.<br />
• Toggle ON: Selecting a channel will alternatively enable/disable the control over that<br />
channel without changing the control on the others.<br />
• All: This enables the control on all channels.<br />
How to Assign a Camera to a Channel<br />
In Multi PGM mode, to change the current camera on each PGM, proceed as follows:<br />
7. In the operational menu, select the PGM to which you want to change the current<br />
camera.<br />
The TAKE key at the bottom of the remote is lighting red.<br />
8. Press the TAKE key.<br />
It lights green and the menu on the LCD display changes to let you select the desired<br />
camera.<br />
Rst Cam Local<br />
CAM A CAM B CAM C CAM D<br />
9. Press the camera you want to associate to the selected PGM.<br />
10. Press TAKE again to return to the PGM selection menu.<br />
33
Issue<br />
<strong>11.01</strong>.C<br />
34<br />
Playlist Conditional Mode<br />
<strong>Multicam</strong> - Version <strong>11.01</strong> – Operating <strong>Manual</strong><br />
<strong>EVS</strong> Broadcast Equipment SA – April 2012<br />
This mode is only available in 2PGM and 3PGM modes. It allows the operator to load and<br />
control several playlists simultaneously from the same Remote Panel, or to load a playlist<br />
on one channel while performing other operations on the other channel(s). To use this<br />
mode, the Load Playlist parameter of the <strong>Operation</strong>al Setup menu must be set to<br />
Conditional (p.3.3 F2).<br />
To use this mode, select one channel (for example PGM1), and press the PLST key one,<br />
two or three times to enter the PLST EDIT or the PLST DIFF mode (refer to the “Playlist<br />
Management” Section of this manual for details about these modes). You can notice that<br />
the TAKE key lights green. Pressing the TAKE key will allow the operator to return to the<br />
PGM selection menu, and select another PGM channel where he can start a replay, load<br />
a clip or another playlist, etc.<br />
In this mode, if the operator selects a PGM channel where a playlist is loaded and<br />
presses the TAKE key, he will enter again the PLST EDIT or PLST DIFF mode.<br />
When playlists are loaded on all channels currently controlled by the operator in MULTI<br />
PGM mode, the TAKE key lights red. If the TAKE key is pressed, the remote will enter a<br />
specific PLST DIFF mode, where the operator can control several playlists<br />
simultaneously, and browse them or roll them in sync. NEXT and SKIP functions are also<br />
available and will apply on all controlled playlists. The TAKE button will not light red if one<br />
of the controlled channels does not contain a playlist.<br />
Practical example<br />
The operator builds a playlist with Fills and another playlist with Keys. He sets the<br />
Playlist Load parameter to Conditional in the setup menu, then enters the 2PGM mode,<br />
selects the Fills playlist as current playlist, presses A to gain control on PGM1, presses<br />
PLST two or three times to enter the PLST DIFF mode and cue up the Fills playlist to its<br />
1st clip. Then he presses the TAKE key to return to the PGM selection menu, selects the<br />
Keys playlist as current playlist, presses B to gain control on PGM2, presses PLST two or<br />
three times to enter the PLST DIFF mode and cue up the Keys playlist to its 1st clip. Then<br />
he presses the TAKE key to return to the PGM selection menu, presses D to gain control<br />
on both PGM channels, then presses TAKE to enter the PLST DIFF menu. He will see<br />
the content of both playlists side by side on the LCD screen, and can browse them or play<br />
them in Sync at any speed, and perform SKIP and NEXT commands as needed.
<strong>Multicam</strong> - Version <strong>11.01</strong> – Operating <strong>Manual</strong><br />
<strong>EVS</strong> Broadcast Equipment SA – April 2012<br />
8. Video Delay<br />
Issue<br />
<strong>11.01</strong>.C<br />
When the <strong>Multicam</strong> software has been configured with a base configuration = Video<br />
Delay in the Channel Parameters menu, the Delay Screen will appear automatically<br />
when the application is started. In this case, all play channels will be available from the<br />
Delay screen.<br />
If <strong>Multicam</strong> is running a base configuration different than Video Delay, this screen can be<br />
called manually from the Clip screen, Playlist Screen or Network Screen by pressing<br />
SHIFT + F7 on the keyboard. In this case, only the play channels assigned to user #1 (i.e.<br />
the 1 st <strong>EVS</strong> Remote Panel if the base configuration is LSM or maXS, or the 1 st protocol if<br />
the base configuration is in slave mode).<br />
For each play channel, the operator can adjust:<br />
• the video and audio source (camera angle, and source server if several units are<br />
connected on an SDTI network);<br />
• the desired delay in hh:mm:ss:fr.<br />
For each play channel, the operator can view:<br />
• the actual delay in hh:mm:ss:fr;<br />
• the timecode of the on-air picture<br />
• the timecode of the incoming picture on the associated record channel;<br />
• the status of the associated record channel (Recording / Idle)<br />
35
Issue<br />
<strong>11.01</strong>.C<br />
36<br />
<strong>Multicam</strong> - Version <strong>11.01</strong> – Operating <strong>Manual</strong><br />
<strong>EVS</strong> Broadcast Equipment SA – April 2012<br />
How to Configure the Video Delay Parameters of a Play Channel<br />
To configure the Video Delay Parameters of a Play Channel, proceed as follows:<br />
1. Select the play channel to configure by pressing ALT+the corresponding F_ key on<br />
the PC keyboard (ex: ALT+F1 for PGM1, ALT+F2 for PGM2/PRV, etc)<br />
2. If you want to use another server on the SDTI network as a source, press SHIFT + F7<br />
on the PC keyboard to call up the network list. Use the arrow keys to select a server,<br />
and press ENTER to validate.<br />
3. Select the camera angle: use the left / right arrow keys, or the key to move<br />
the green cursor on the desired camera, the press ENTER. The new camera angle is<br />
loaded on the channel.<br />
4. Set the new value for the delay: use the left / right arrow keys, or the key to<br />
move the green cursor over the TARGET DELAY field, and enter the desired delay<br />
value in hh:mm:ss:fr. Press CTRL+the corresponding F_ key on the PC keyboard to<br />
activate the new delay on the selected channel (ex: CTRL + F1 start the new delay<br />
on PGM1). If the duration of the record train is lower than the target delay, the<br />
channel will pause on the first recorded picture until the record train is long enough<br />
for the desired delay. In this case, the message “WAIT” is displayed on the OSD of<br />
that channel.
<strong>Multicam</strong> - Version <strong>11.01</strong> – Operating <strong>Manual</strong><br />
<strong>EVS</strong> Broadcast Equipment SA – April 2012<br />
9. Clip Management<br />
9.1 Introduction<br />
9.1.1 Clip Structure<br />
Issue<br />
<strong>11.01</strong>.C<br />
A clip is defined by Short IN and Short OUT points. When referring to Short IN and Short<br />
OUT points, the operators usually use the terms IN point and OUT point.<br />
When Short IN and Short OUT points are set, the system automatically write protects a<br />
user definable length of material before and after the Short IN/OUT points respectively,<br />
these are referred to as the guardbands.<br />
For this reason, the IN point before the guardbands and the OUT point after the<br />
guardband are called Protect IN point and Protect OUT point.<br />
It is possible to trim a clip by redefining Short IN and Short OUT points.<br />
If Short IN and Short OUT points are defined, only the fields between those two points will<br />
be played if the sequence is recalled (the same applies when the sequence is included in<br />
a playlist).<br />
Fields between Protect IN and Short IN and fields between Short OUT and Protect OUT<br />
(guardbands) can be reached with the jog. So the Short IN and Short OUT points can be<br />
redefined.<br />
Note<br />
• Protect IN & Protect OUT points of a clip cannot be replaced by new ones.<br />
• Short IN & Short OUT points of a clip can be replaced by new ones.<br />
• Short OUT point is excluded. The clip freezes on previous field when playing<br />
back (with Post-Roll disabled).<br />
• (Short) IN & OUT are always on even fields. This is automatic.<br />
• The guardband beyond the Short OUT point is created with the material<br />
available when the operator saves the clip by pressing the selected F_ key.<br />
Therefore, this guardband can sometimes be shorter than the value defined<br />
in the Setup menu.<br />
37
Issue<br />
<strong>11.01</strong>.C<br />
9.1.2 Clip Availability on Disks<br />
38<br />
<strong>Multicam</strong> - Version <strong>11.01</strong> – Operating <strong>Manual</strong><br />
<strong>EVS</strong> Broadcast Equipment SA – April 2012<br />
Various clip types can be distinguished depending on whether they are available on the<br />
disks or not. Depending on the clip availability on disks, you can perform specific actions<br />
on the given clip or not.<br />
Clip on disk Clips which are protected on disks, and which have Short IN<br />
and Short OUT points present on disks.<br />
All the material is available on the disk.<br />
Growing clip Clips which are protected on disks, and which have a Short IN<br />
point, and possibly Short OUT point defined on disks.<br />
Since the record process is still undergoing, some of the<br />
material is already on the disk but not all of it.<br />
Reserved clip Clips for which the position has been reserved on the SDTI<br />
database but for which there is no Short IN and Short OUT<br />
points, nor any protect present on disks.<br />
9.2 Using the <strong>EVS</strong> Remote Panel<br />
9.2.1 How to Create a Clip<br />
To define a clip, proceed as follows:<br />
1. Select the LIVE mode.<br />
2. Define your Short IN point using the jog dial. Press the IN key to mark your Short IN<br />
point of the clip.<br />
3. Search for the desired Short OUT point and then press the OUT key to mark it.<br />
A clip can be created with only IN point or only OUT point. The system will automatically<br />
define the clip duration according to the default duration defined in the Setup menu.<br />
Note<br />
You can mark an IN or OUT point on a paused record train and go back to live<br />
without losing the point marked by pressing SHIFT+.
<strong>Multicam</strong> - Version <strong>11.01</strong> – Operating <strong>Manual</strong><br />
<strong>EVS</strong> Broadcast Equipment SA – April 2012<br />
9.2.2 Storing a Clip<br />
How to Store a Clip<br />
To store a clip on a given location, proceed as follows:<br />
1. Define a clip by marking the IN and/or OUT points<br />
Issue<br />
<strong>11.01</strong>.C<br />
2. Select the page where the clip will be stored by pressing SHIFT+PAGE+F_ key<br />
corresponding to the page.<br />
Page 1 contains clips 110 to 199. Page 2 contains clip 210 to 299, and so on.<br />
3. Select the bank where the clip will be stored by pressing SHIFT+F_ key<br />
corresponding to the bank, using key F1 to F9. The F10 key is reserved for the<br />
playlist bank available on each page.<br />
4. Select the location of the clip to store by pressing the corresponding F_ key.<br />
The clip is created on the specified location. The primary timecode of the clip is the<br />
primary timecode defined on the train where and when the clip has been created.<br />
Example<br />
To create the clip on the position n°212 (page 2, bank 1, clip location 2):<br />
1. Press SHIFT+PAGE+F2 to select page 2.<br />
2. Press SHIFT+F1 to select bank n°1.<br />
3. Press F2 to select location n°2 on the selected page and bank.<br />
Important<br />
The AUTO-SAVE process automatically saves clips and playlists at least every<br />
minute. Exiting the software (ALT+Q) will also save the clips and playlists.<br />
39
Issue<br />
<strong>11.01</strong>.C<br />
9.2.3 Recalling a Clip<br />
40<br />
How to Recall a Clip<br />
To recall a clip, proceed as follows:<br />
1. Select the Clip page 1, 2, 3… to 10 (PAGE key).<br />
<strong>Multicam</strong> - Version <strong>11.01</strong> – Operating <strong>Manual</strong><br />
<strong>EVS</strong> Broadcast Equipment SA – April 2012<br />
2. Select the bank in which the desired clip is located (the F10 key is reserved for the<br />
playlist bank available on each page).<br />
3. Select the desired clip via the F1 - F10 keys.<br />
Clip Recalled Based on the PREF Setting<br />
If PREF is ON, the preferred camera angle of the clip will appear on the primary channel,<br />
the secondary camera angle on the next controlled channel, then the other camera<br />
angles on the next channels in alphabetical order.<br />
Example: If the preferred camera angle for clip 124 is camera C, when loading the clip,<br />
124C is loaded on the primary channel, whatever the camera present on that channel<br />
before loading the clip.<br />
If PREF is OFF, when recalling the clip, the camera angle will be the same as the one<br />
who was already present on each controlled channel. If that camera angle does not exist,<br />
the first available camera angle of the clip will be used.<br />
Example: If camera B is the current camera on the primary channel, when calling clip<br />
124, it is 124B that appears on the primary channel, even if it is not the preferred camera<br />
angle.<br />
When the operator is controlling only one channel (such as with PrvCtl), the clip will<br />
appear at that location only. In the case of a clip containing a single camera angle (only<br />
an «A», «B», «C» or «D» clip), when in full control of all outputs, the clip recalled will<br />
appear on the primary channel.<br />
Toggling Between the Camera Angles<br />
If Recall clip toggle is enabled in the <strong>Operation</strong>al Setup menu (p.9.1 F6), pressing<br />
several times the F_ key will always recall the first frame of the clip, but showing the next<br />
camera angle every time the F_ key is pressed.
<strong>Multicam</strong> - Version <strong>11.01</strong> – Operating <strong>Manual</strong><br />
<strong>EVS</strong> Broadcast Equipment SA – April 2012<br />
9.2.4 Playing Back a Clip<br />
Playback Speed Features<br />
Issue<br />
<strong>11.01</strong>.C<br />
You can play back a clip using several playback speed features explained above in this<br />
user manual. This section summarizes the various playback speed features and refers to<br />
more detailed sections on these features:<br />
• Playback of a clip at the default playback speed using the PLAY key<br />
• Playback of a clip at a speed varying from 0% to 100% using the lever in a basic way<br />
• Playback of a clip at a speed varying from 0% to a maximum speed defined in the<br />
PGM Speed/Var max parameter (p.9.1 F3) in the <strong>Operation</strong>al Setup menu on the<br />
Remote Panel.<br />
To use this feature, you need to activate the VarMax option available from the<br />
secondary menu in PGM/PRV mode. For more information, refer to the section<br />
‘PgmSpd/VarMax’, on page 27.<br />
• Playback of a clip at a given predefined speed defined in the PGM Speed/Var max<br />
parameter (p.9.1 F3) in the <strong>Operation</strong>al Setup menu on the Remote Panel.<br />
To use this feature, you need to activate the PgmSpd option available from the<br />
secondary menu in PGM/PRV mode. For more information, refer to the section<br />
‘PgmSpd/VarMax’, on page 27.<br />
How to Play Back a Clip<br />
To play back a clip, proceed as follows:<br />
1. Store a clip.<br />
2. Recall the defined clip which will be played, the corresponding F_ key lights red.<br />
3. Press the PLAY key or use the lever to start playing back the clip,<br />
9.2.5 Recall and Playback of Growing Clips<br />
You can recall and play growing clips, i.e. clips that are in the process of being created on<br />
a disk.<br />
As long as the OUT point of a growing clip is not available on the <strong>EVS</strong> server, the LED<br />
corresponding to the growing clip location blinks green when it is called and red when it is<br />
loaded on the Remote Panel. The clip LED will no longer blink as soon as both IN and<br />
OUT points are available on the <strong>EVS</strong> server.<br />
If the play reaches the end of the available material, the play will freeze until new material<br />
is available for playout. When new material is available, the play resumes.<br />
When the OUT point of the clip is known, the remaining time is displayed.<br />
When the OUT point of the clip is not known, the remaining time display switches to --:--:-<br />
-:-- until the entire clip is copied.<br />
41
Issue<br />
<strong>11.01</strong>.C<br />
9.2.6 Clearing Clips<br />
42<br />
Which Clips Can Be Deleted?<br />
You can clear clips available on disks or growing clips.<br />
<strong>Multicam</strong> - Version <strong>11.01</strong> – Operating <strong>Manual</strong><br />
<strong>EVS</strong> Broadcast Equipment SA – April 2012<br />
The function key that corresponds to the clip location on the Remote Panel must be green<br />
for the user to be able to delete it:<br />
• Loaded clips cannot be deleted.<br />
• Clips included in a playlist or currently used by another operator, cannot be cleared<br />
either in network mode.<br />
In all cases, a warning message will appear.<br />
How to Clear a Clip<br />
To clear a clip, proceed as follows:<br />
1. Select the appropriate page and bank where the clip to be erased is stored.<br />
2. Press CLEAR, followed by the F_ key that corresponds to the clip.<br />
Important<br />
In most cases, no confirmation is required and the clip will be instantly deleted.<br />
3. If the clip is protected or if the Confirm del clp/plst parameter is set in the<br />
<strong>Operation</strong>al Setup menu (p.5.1 F3), a warning message appears.<br />
4. Press ENTER to confirm and the selected clip will be erased.<br />
How to Clear Unprotected Clips in a Bank?<br />
To clear all unprotected clips stored on a given bank, proceed as follows:<br />
1. Select the page that includes the bank on which you want to delete the unprotected<br />
clips in a clip bank.<br />
2. Press CLEAR+SHIFT, and the F_ key that corresponds to the requested clip bank.<br />
The following confirmation message will be displayed:<br />
Caution:<br />
This will delete all unprotected clips<br />
stored on bank X<br />
[Menu] : Cancel [Enter] : Confirm<br />
3. Press ENTER to confirm and the unprotected clips on the bank are deleted.
<strong>Multicam</strong> - Version <strong>11.01</strong> – Operating <strong>Manual</strong><br />
<strong>EVS</strong> Broadcast Equipment SA – April 2012<br />
How to Clear All Unprotected Clips<br />
Issue<br />
<strong>11.01</strong>.C<br />
The Clear All Clips command will only delete the non-protected clips. The clips stored on<br />
protected pages as defined in the Setup, as well as the clips protected by another<br />
protocol, or clips included in playlists, will not be deleted by this operation.<br />
To clear all non protected clips, proceed as follows:<br />
1. Go to the main menu (SHIFT+MENU)<br />
2. Press the function key F7 on the Remote.<br />
3. Press ENTER or CLEAR on the Remote Panel to confirm/cancel the operation.<br />
If the system is connected to the XNet network, an additional confirmation is required.<br />
A message on the video monitor will notify the operator when the operation is complete.<br />
Important<br />
The Clear All Clips command is different from the Clear Video Disks<br />
command available from Maintenance menu in <strong>EVS</strong> software.<br />
• The Clear All Clips command only deletes non-protected clips.<br />
• The Clear Video Disks command from <strong>EVS</strong>’ Maintenance menu is more<br />
radical and definitely erases all video and audio data from disks. Clips stored<br />
in protected pages are also deleted.<br />
9.2.7 Copying or Moving Clips<br />
Principles About Copying Clips<br />
Copying a clip gives a new clip which is totally independent from the original. It can<br />
therefore be trimmed, named, deleted, etc. without affecting the original.<br />
Copying clips on the same server does not duplicate the original material on the video<br />
drives: it simply creates a separate reference to the same video material. This means that<br />
the capacity will not decrease when making copies of clips on the same machine. It also<br />
means that deleted copies of clips will not increase the available capacity of the server,<br />
as long as one instance of the clip remains.<br />
Copying clips across the network will reduce the capacity of the server where the clip(s) is<br />
(are) copied by the duration of the clip(s).<br />
Principles About Moving Clips<br />
When moving a clip using the Move function, the reference to this clip in playlists will<br />
automatically be updated. This is very useful when an operator wishes to re-organize his<br />
clips across different pages and banks, since playlists will not be affected. If (s)he copies<br />
the clips and then deletes the originals instead of using the Move function, the reference<br />
to the original clips will be removed from the playlists when deleting these clips.<br />
Settings on Copy/Move Clips<br />
When you copy/move a clip, two settings are available to specify how the clip should be<br />
copied or moved:<br />
43
Issue<br />
<strong>11.01</strong>.C<br />
44<br />
Clip Mode/Cam Mode<br />
<strong>Multicam</strong> - Version <strong>11.01</strong> – Operating <strong>Manual</strong><br />
<strong>EVS</strong> Broadcast Equipment SA – April 2012<br />
Pressing the D key in the Copy/Move LCD window allows the user to select a value for<br />
this setting:<br />
• CLIP mode: all camera angles of the clips will be copied/moved.<br />
• CAM mode: only the camera angles of the clip loaded on the controlled channels will<br />
be copied/moved.<br />
Short/Long Mode<br />
This option is only available for a network copy, not for a local copy or for a move.<br />
Pressing the C key in the Copy/Move LCD window allows the user to select a value for<br />
this setting:<br />
• SHORT mode: only the material between the Short IN and Short OUT points of the<br />
original clip, augmented by the duration of the guardbands defined on the destination<br />
system, will be copied.<br />
• LONG mode: the entire original clip, including its guardbands, will be copied to the<br />
destination system.<br />
Default Settings<br />
The default settings for the COPY/MOVE menu are: COPY, SHORT, CLIP. If the operator<br />
changes these settings, the new settings will be re-used the next time this menu is called.<br />
The default settings will be automatically restored when starting a new <strong>Multicam</strong> session.<br />
How to Copy or Move a Clip<br />
It is possible to copy or move a clip on the same server or to another server. Growing<br />
clips can also be copied and moved.<br />
To copy or move a clip from the Remote Panel, proceed as follows:<br />
1. Select the original clip.<br />
2. Select an empty location on an <strong>EVS</strong> server connected to the network.<br />
A new menu appears on the LCD display of the Remote Panel, with the<br />
corresponding message on the OSD of the output monitors:<br />
Copy Clip 113 to Clip 141<br />
Cam A B<br />
[Menu]: Cancel<br />
[Enter]: Confirm<br />
COPY MOVE SHORT CLIP<br />
3. Select the COPY or MOVE function by pressing the A or B key.<br />
The corresponding function will be highlighted on the LCD and the message on the<br />
OSD will be updated accordingly.<br />
4. Select the CLIP or CAM mode with the D key.<br />
5. Select the SHORT or LONG mode with the C key.
<strong>Multicam</strong> - Version <strong>11.01</strong> – Operating <strong>Manual</strong><br />
<strong>EVS</strong> Broadcast Equipment SA – April 2012<br />
6. Press ENTER to confirm or MENU to cancel.<br />
When doing a network copy, the VGA displays the % copied of each clip.<br />
How to Cancel a Network Copy on the Remote Panel<br />
Issue<br />
<strong>11.01</strong>.C<br />
When the clip is copying, its light flashes green. Pressing CLEAR+the corresponding F_<br />
key allows cancelling the network copy. A confirmation screen comes up to cancel the<br />
network copy: “Cancel network copy ? MENU: Do not cancel copy - ENTER: Cancel<br />
copy”<br />
9.2.8 Secondary Menu in Clip Mode<br />
Overview<br />
In Clip mode, the secondary menu of the Remote Panel is different from the Record Train<br />
mode:<br />
P<br />
PGM1 112A *PRV1* 112B<br />
Push Aux Clip Sort->TC Post-Roll<br />
>Archive *** Name Cam<br />
P.1 B.1 Clips: Local Records: Local<br />
PL 11: < ><br />
Msg:<br />
Rst Cam Local Sync Prv 2nd CTRL<br />
Cam A Cam B Cam C Cam D<br />
Press MENU to access the secondary menu. If no keyword file is selected in the setup,<br />
the LCD display will be:<br />
1keyword890123 2 keyword89012 3 keyword89012<br />
111A<br />
Push Aux Clip Sort->TC Post-Roll<br />
>Archive *** Cam<br />
In this mode of the secondary menu, clips can still be directly recalled using the F1-F10<br />
keys of the Remote Panel.<br />
45
Issue<br />
<strong>11.01</strong>.C<br />
46<br />
If a keyword file is selected in the setup, the LCD display will be:<br />
<strong>Multicam</strong> - Version <strong>11.01</strong> – Operating <strong>Manual</strong><br />
<strong>EVS</strong> Broadcast Equipment SA – April 2012<br />
1 keyword890123 2 keyword89012<br />
F1:action_1 F6:action_6<br />
3 keyword89012<br />
F2:action_2 F7:action_7<br />
F3:action_3 F8:action_8<br />
111A<br />
F4:action_4 F9: p.01<br />
F5:action_5 F0:Next page<br />
Push Aux Clip Sort->TC Post-Roll<br />
>Archive *** Name Cam<br />
In this mode of the secondary menu, the F1-F10 keys are used for keyword assignment,<br />
and thus can no longer be used to recall clips. For a description of the keyword-related<br />
functions, please refer to the “Keyword Management” Section of this manual.<br />
The ID of the current clip appears on the end of line 3 of the LCD display.<br />
Push<br />
Introduction<br />
The Push function allows you to easily send a copy of a clip to another machine on the<br />
network, either via the GigE network or the SDTI network.<br />
Principle<br />
• If one or two default targets (push machines) are defined in the setup, the clip will be<br />
automatically sent to these machines.<br />
• If no default target is defined, the list of machines available on the network will<br />
appear. As soon as the operator selects one of them, the clip is pushed.<br />
Depending on the push settings defined, the default targets or the list of possible targets<br />
submitted to you will contain <strong>EVS</strong> servers on the SDTI network and/or <strong>EVS</strong> servers on<br />
the GigE network.<br />
For more information about the Push settings, refer to the <strong>Operation</strong>al Setup menu on<br />
the Remote Panel, page 7.1.<br />
In both cases, a message appears for a few seconds on the LCD to confirm that the clip<br />
is being pushed and indicate the clip location where it will be stored on the receiving<br />
machine.<br />
If the Receive Page(s) defined on the destination machine is (are) full, the operator who<br />
tries pushing the clip is notified. While this message is being displayed, the operator can<br />
press the MENU key at any time to return to the normal menu. Depending on the<br />
CAM/CLIP mode selected by the D key, only the camera angles loaded on the controlled<br />
channels are pushed (CAM mode), or all camera angles of the clip are pushed at once<br />
(CLIP mode).
<strong>Multicam</strong> - Version <strong>11.01</strong> – Operating <strong>Manual</strong><br />
<strong>EVS</strong> Broadcast Equipment SA – April 2012<br />
>Archive<br />
Issue<br />
<strong>11.01</strong>.C<br />
The Archive function allows the operator to flag a clip to place it in the archive queue of<br />
the XFile 1 defined in the <strong>Operation</strong>al Setup menu (p.7.1 F3).<br />
This function is blinking when the clip is flagged for archiving, but has not yet been<br />
archived. It is permanently highlighted when the archiving of the clip is completed.<br />
Depending on the mode selected with the D key (CLIP/CAM), the >ARCHIVE flag is<br />
assigned only to the camera angles of the clip loaded on the controlled channels (CAM<br />
mode), or to all camera angles of the clip (CLIP mode).<br />
Aux Clip<br />
This function allows assigning a clip as auxiliary audio clip to the current playlist. Press<br />
CLEAR+Aux Clip (CLEAR+SHIFT+B) to remove the current auxiliary clip. Refer to the<br />
chapter 11 ‘Playlist Management’, on page 88 for more details.<br />
Ranking (***)<br />
The Ranking function allows assigning a ranking to the current clip. Pressing several<br />
times this key will scroll through the different values: 0 (***, not highlighted).<br />
Depending on the mode selected with the D key (CLIP/CAM), this ranking is assigned<br />
only to the camera angles of the clip loaded on the controlled channels (CAM mode), or<br />
to all camera angles of the clip (CLIP mode).<br />
If the Keyword info parameter of the <strong>Operation</strong>al Setup menu (p.1.1 F2) is set to “Yes”,<br />
the ranking will appear on the OSD of the output monitors when cueing up the clip.<br />
Sort->TC<br />
The Sort->TC function allows the operator to search the database for all clips or trains<br />
containing a specific timecode. Press SHIFT+C again in Set TC mode to call it.<br />
When calling this function, the timecode of the current picture is used as a default<br />
selection. The operator can immediately perform the search or he can edit that timecode<br />
before starting the search.<br />
For more information on how to search for clips by timecode, refer to the section 9.2.9<br />
1 The <strong>EVS</strong> Xfile is a 2U device with 2 removable hard drives, that can be connected to the XNet<br />
SDTI network. Clips can be archived to/restored from the removable media.<br />
47
Issue<br />
<strong>11.01</strong>.C<br />
48<br />
‘How to Search for Clips by Timecode’, on page 49.<br />
Set TC<br />
<strong>Multicam</strong> - Version <strong>11.01</strong> – Operating <strong>Manual</strong><br />
<strong>EVS</strong> Broadcast Equipment SA – April 2012<br />
The Set TC function is only available in SHIFT+B on the Sort->TC menu. It allows the<br />
operator to restripe the timecode of a clip. This function is explained in details in the<br />
section 9.3.12 ‘How to Restripe the Timecode of the Current Clip’, on page 61.<br />
Depending on the mode selected with the D key (CLIP/CAM), the new timecode value is<br />
assigned only to the camera angle of the clip loaded on the primary channel (CAM<br />
mode), or to all camera angles of the clip (CLIP mode).<br />
Name<br />
The Name function is only available if a keyword file is selected in the Setup menu. It is<br />
used to name a clip based on available keywords. Refer to the chapter 10 ‘Keyword<br />
Management’, on page 71 for more details. When the Name function is selected, pressing<br />
SHIFT+C again will call the Search function.<br />
Search<br />
The Search function is “hidden” behind the Name function. Press SHIFT+C again in<br />
Name mode to call it. It allows the operator to search the database for clips based on<br />
keywords and ranking. Please refer to Chapter 10 ‘Keyword Management’, on page 71<br />
for details.<br />
Post-Roll<br />
This function enables/disables the Post-Roll mode. This mode is explained in details in<br />
the section ‘PostRoll’, on page 27.<br />
Clip/Cam<br />
Pressing the D key will toggle between CAM and CLIP modes on the remote. Please note<br />
that this mode on the remote and on the VGA screens is never synchronized. In CAM<br />
mode, the Push, Archive, Ranking assignment, Keyword assignment, and Name<br />
functions will apply only to the camera angles of the clip loaded on the controlled<br />
channels. In CLIP mode, these functions will apply on all camera angles of the clip.
<strong>Multicam</strong> - Version <strong>11.01</strong> – Operating <strong>Manual</strong><br />
<strong>EVS</strong> Broadcast Equipment SA – April 2012<br />
9.2.9 How to Search for Clips by Timecode<br />
Note<br />
Procedure<br />
Issue<br />
<strong>11.01</strong>.C<br />
The Reset function resets all default parameters, including the ones related to<br />
the material and the TC type to search on.<br />
To search for clips or trains containing a specific TC, proceed as follows:<br />
1. From the main Remote screen in Clip mode or Train mode, press MENU to access<br />
the secondary menu.<br />
2. Press SHIFT+C to access the Sort TC function.<br />
The following screen is displayed:<br />
Sort TC xx:xx:xx:xx<br />
[Menu] : Cancel<br />
[Enter] : Search<br />
Reset Set TC From Date To Date<br />
Return Clip LTC Srch Net<br />
3. If requested, press SHIFT+C to define a date from which the search should be<br />
applied:<br />
a. Type the date in dd/mm/yy format with the F1 to F10 keys.<br />
b. Press ENTER to confirm and exit the field.<br />
4. If requested, press SHIFT+D to define a date to which the search should be applied:<br />
a. Type the date in dd/mm/yy format with the F1 to F10 keys.<br />
b. Press ENTER to confirm and exit the field.<br />
5. Press the B key to specify whether to search for clips (Clip), train (Rec) or both<br />
(Clip+Rec).<br />
Press several times the B key to select the requested value.<br />
6. Press the C key to specify whether to search for the LTC (LTC), the user-defined<br />
timecode type (USER) or whatever TC type (LTC+USER).<br />
Press several times the C soft key to select the requested value.<br />
7. Press the D key to specify whether to search only for local clips (Srch Loc) or on the<br />
entire XNet Network (Srch Net).<br />
Press several times the D key to select the requested value.<br />
8. Press ENTER to launch the search.<br />
49
Issue<br />
<strong>11.01</strong>.C<br />
50<br />
Results<br />
<strong>Multicam</strong> - Version <strong>11.01</strong> – Operating <strong>Manual</strong><br />
<strong>EVS</strong> Broadcast Equipment SA – April 2012<br />
If matching clips are found, the Remote Panel will automatically be in Browse mode (the<br />
BROWSE key is red), allowing the operator to quickly view the frame of each clip<br />
corresponding to the requested timecode by rotating the jog dial.<br />
To be able to jog inside a clip, disable the Browse mode by pressing on the BROWSE<br />
key and move the jog dial. To return to the Browse mode inside the search results, press<br />
the BROWSE key again.<br />
Search results are reset when going by to LIVE mode, or when a new search is<br />
performed.<br />
Examples<br />
• You have loaded the picture of an interesting event, and you want to see all clips that<br />
contain that same event. Call the Sort ->TC function, select the network/local search<br />
option and launch the search. Move the jog dial and you will see the same event on<br />
the same timecode from all available camera angles that have been clipped.<br />
• You know the timecode of a particular event and you want to see all clips containing<br />
that event. Call the Sort ->TC function, edit the timecode to the desired value, select<br />
the network/local search option and press ENTER: you will obtain the same result as<br />
above if the timecode belongs to the same type as the one previously mentioned.<br />
9.2.10 How to Shorten a Clip<br />
To shorten a clip, proceed as follows:<br />
1. Recall the desired clip by pressing the corresponding F_ key.<br />
2. Move the jog dial to browse the clip and reach to the desired Short IN point.<br />
3. Press the IN key to mark a new Short IN point. The new Short IN point is instantly<br />
saved.<br />
4. Move the jog dial to reach the desired Short OUT point.<br />
5. Press the OUT key to mark a new Short OUT point. The new Short OUT point is<br />
instantly saved.<br />
Move the lever or press the PLAY key to play the clip. The replay will stop at the new<br />
Short OUT point (or after the Short OUT point if the Post-Roll mode is enabled).<br />
GOTO IN and GOTO OUT<br />
You can use Goto IN and Goto OUT functions to jump immediately onto Short IN or<br />
Short OUT points respectively.<br />
9.2.11 Restriping the Timecode of a Clip<br />
Restrictions on the Remote Panel<br />
The function to restripe the timecode of a clip via the Remote Panel is more restricted<br />
than via <strong>Multicam</strong> on the VGA:<br />
• You cannot choose which timecode type you modify: you will automatically modify the
<strong>Multicam</strong> - Version <strong>11.01</strong> – Operating <strong>Manual</strong><br />
<strong>EVS</strong> Broadcast Equipment SA – April 2012<br />
primary timecode of the clip.<br />
• You cannot modify the date of the clip.<br />
• You cannot modify the type for the primary timecode of the clip.<br />
Issue<br />
<strong>11.01</strong>.C<br />
If you want to modify the date, the type of the primary timecode or the user-defined<br />
timecode, you need to go to the Set Timecode screen in the VGA. For more information,<br />
refer to the section 9.3.12 ‘How to Restripe the Timecode of the Current Clip’, on page<br />
61.<br />
How to Restripe the Timecode of a Clip<br />
To restripe the timecode of a clip on the Remote Panel, proceed as follows:<br />
1. Recall the clip by pressing the corresponding F_ key.<br />
2. Move the jog dial to reach the picture where you want to define a new timecode.<br />
3. Press the MENU key to access the secondary menu.<br />
4. Press SHIFT+C to call the Set TC function.<br />
5. Enter the new timecode for the current picture.<br />
6. In 59.94 Hz modes (NTSC), you can select between Drop Frame and Non Drop<br />
Frame modes by pressing SHIFT+MENU.<br />
7. Press the D key to select CAM or CLIP mode.<br />
• In CAM mode, only the timecode of the camera angle loaded on the primary<br />
channel will be changed.<br />
• In CLIP mode, the timecode of all camera angles of the clip will be changed.<br />
8. Press ENTER to confirm or MENU to cancel.<br />
The primary timecode of the entire clip is updated according to the new timecode value<br />
so that the timecode remains continuous inside the whole clip. Next time this function is<br />
called, the value previously used will be set as default.<br />
9.3 Using the Clip screen<br />
The VGA Clip screen is accessed by selecting the F9 key on the keyboard. With this<br />
screen, clips can be recalled using the pen and tablet or directly from the keyboard.<br />
Important<br />
The action performed on a channel from the Clip screen is concurrent to any<br />
other controller that might be assigned to that channel: <strong>EVS</strong> Remote Panel or<br />
external protocol. A command sent from the Clip screen to a channel will<br />
overwrite whatever the channel was doing at that time.<br />
51
Issue<br />
<strong>11.01</strong>.C<br />
9.3.1 Clip screen – Standard View<br />
52<br />
<strong>Multicam</strong> - Version <strong>11.01</strong> – Operating <strong>Manual</strong><br />
<strong>EVS</strong> Broadcast Equipment SA – April 2012<br />
The navigation through the Clip screen, and the various functions available on this<br />
screen, can be performed using the tablet and stylus, or the keyboard shortcuts.<br />
9.3.2 The Title Bar<br />
The Title bar contains the status information:<br />
• Number and name of the server currently selected for clips and for record trains (*).<br />
The name is blinking red if it is a network machine.<br />
• Total number of clips (i.e. protects, 1 camera angle counting for 1 clip in this count)<br />
• Total duration of all clips<br />
• Remaining capacity on the server (all record trains together; valid for local server<br />
only)<br />
Note<br />
The abbreviated word “(Loc.)” appears next to the name if the local machine is<br />
currently selected for clips and/or for record trains. The clips displayed in the<br />
clip screen belong to this machine.
<strong>Multicam</strong> - Version <strong>11.01</strong> – Operating <strong>Manual</strong><br />
<strong>EVS</strong> Broadcast Equipment SA – April 2012<br />
9.3.3 The Function Bar<br />
Issue<br />
<strong>11.01</strong>.C<br />
The second line displays the available functions. Each function can be called by the<br />
corresponding F_ key of the keyboard, or by clicking with stylus & tablet on the<br />
corresponding area on this line.<br />
F1: Name<br />
This function is used to name a clip. For more information on how to name a clip in the<br />
VGA, refer to the section 9.3.8 ‘How to Name a Clip’, on page 59.<br />
F2: Clip/Cam<br />
This function toggles between CLIP mode and CAM mode.<br />
• In CLIP mode, actions on a clip will use all available cameras for this clip.<br />
• In CAM mode, actions on a clip will only use the selected camera for this clip.<br />
Other functions such as Name, Delete, Copy, Set TC, >Archive depend on this mode<br />
selection.<br />
F3: Call<br />
The operator can gain immediate access to a local or network clip by typing its ID<br />
number.<br />
53
Issue<br />
<strong>11.01</strong>.C<br />
54<br />
F4: Pref<br />
<strong>Multicam</strong> - Version <strong>11.01</strong> – Operating <strong>Manual</strong><br />
<strong>EVS</strong> Broadcast Equipment SA – April 2012<br />
This option changes the primary camera of a clip. For information on how to change the<br />
primary camera of a clip, refer to the section 9.3.9 ‘How to Change the Primary Camera<br />
of a Clip’, on page 59.<br />
F5: View<br />
This option changes the standard display to the extended display and vice versa. Refer to<br />
the section 9.3.14 ‘Clip Screen – Extended View’, on page 64.<br />
F6: KW1<br />
This option calls the On-Air Keyword screen. Refer to the Chapter 10 ‘Keyword<br />
Management’, on page 71 for more details.<br />
F7: KW2<br />
This option calls the Off-Air Keyword Screen. Refer to the Chapter 10 ‘Keyword<br />
Management’, on page 71 for more details.<br />
SHIFT+F7: Delay<br />
This function calls the Video Delay VGA screen. Refer to the Chapter 8 ‘Video Delay’, on<br />
page 35.<br />
F8: Search<br />
This option calls the VGA Search Screen. Refer to the Chapter 10 ‘Keyword<br />
Management’, on page 71 for more details.<br />
SHIFT+F8: Net<br />
This option switches to the Network Status Screen and allows monitoring the status of the<br />
different machines connected on the network.
<strong>Multicam</strong> - Version <strong>11.01</strong> – Operating <strong>Manual</strong><br />
<strong>EVS</strong> Broadcast Equipment SA – April 2012<br />
F9: Connect<br />
Issue<br />
<strong>11.01</strong>.C<br />
This option calls the CONNECT window. This window allows the operator to connect to<br />
the clips and record trains of other machines on the network.<br />
The following functions can be used in the CONNECT window:<br />
ALT+L: return to LOCAL mode and close the CONNECT window<br />
ALT+C: CLIPS mode - to connect to the clips of a remote machine<br />
ALT+R: RECORD mode - to connect to the record trains of a remote machine<br />
ALT+P: CLIP+REC mode - to connect to the clips and record trains of a remote machine.<br />
After selecting CLIP, RECORD or CLIP+REC mode either with the keyboard or by<br />
clicking with the stylus, select the machine you want to connect to: click on it with the<br />
stylus, or move with the arrow keys and press ENTER on the keyboard.<br />
Pressing ALT+L or clicking with the stylus on “LOCAL” will close the CONNECT window<br />
and return to local clips and record trains.<br />
To close the CONNECT window without changing the connection mode or remote<br />
machine, press ESC.<br />
The “*” next to one of the machine in the list indicates which machine is the active<br />
network server. Refer to the Chapter 13 ‘Operating on XNet Network’, on page 148 for<br />
details.<br />
F0: Playlist<br />
The Playlist screen can be accessed by selecting F10 on the keyboard.<br />
55
Issue<br />
<strong>11.01</strong>.C<br />
9.3.4 The Clip Information Area<br />
56<br />
<strong>Multicam</strong> - Version <strong>11.01</strong> – Operating <strong>Manual</strong><br />
<strong>EVS</strong> Broadcast Equipment SA – April 2012<br />
The next area is the Clip Information Area which displays the clips of the selected page<br />
and bank(s). Two clips’ banks are displayed at a time.<br />
For each clip and camera angle, the following information is available:<br />
Field Description<br />
Clip ID Unique identifier of the clip on the server. Ex: 111A<br />
The clip ID is followed by the “Creating” message when the<br />
clip is in the process of being created, copied or moved to this<br />
location.<br />
For more information on growing clips, refer to the section<br />
9.2.5 ‘Recall and Playback of Growing Clips’, on page 41<br />
Clip “rank” Clip rank depending on the channel on which it has been<br />
created :<br />
• Primary (“*” next to the clip ID)<br />
• Secondary (“=” next to the clip ID)<br />
The clip rank information is highlighted in blue if the clip is<br />
protected.<br />
Clip name Name of the clip, either automatically assigned or defined by<br />
the user.<br />
Archive Status • if the clip ID is blinking green, the clip is flagged for<br />
archiving, but not yet archived<br />
Note<br />
• if the clip ID is permanently highlighted in green, the<br />
archiving of the clip has been completed<br />
In the standard view (cameras A to D), if camera E and/or F exist for a particular<br />
clip, the D-column for this clip is replaced by the mention “More Clips” on blue<br />
background.
<strong>Multicam</strong> - Version <strong>11.01</strong> – Operating <strong>Manual</strong><br />
<strong>EVS</strong> Broadcast Equipment SA – April 2012<br />
9.3.5 The Clip Management Area<br />
Name Capture Field<br />
Issue<br />
<strong>11.01</strong>.C<br />
This is the only capture area of the screen. It is used to enter the name to assign to a<br />
clip/playlist, or to enter the ID of a clip to recall.<br />
Mode Field<br />
It indicates if the clip screen is currently in CLIP or CAM mode. In CLIP mode, actions on<br />
a clip will use all available cameras for this clip. In CAM mode, actions on a clip will only<br />
use the selected camera for this clip. Default value is CAM mode.<br />
Clip Control Area<br />
It is dedicated to play-out control.<br />
Command Description<br />
ALT+P:►/■ Plays at 100% speed except for super motion clips which are<br />
played back at 33% speed; and pause playback on the current<br />
picture.<br />
ALT+R:RECUE Jumps to the Short IN point.Primary.<br />
ALT+T: SET TC Restripes the timecode of the current clip.<br />
ALT+Z:>ARCHIVE Allows the operator to flag a clip to place it in the archive<br />
queue of the XFile 1 defined in the <strong>Operation</strong>al Setup menu<br />
(p.7.1 F1) or in the Setup screen.<br />
When a clip is flagged for archiving, but has not yet been<br />
archived, its ID will be blinking green in the Clip screen. It is<br />
permanently highlighted green when the archiving of the clip is<br />
completed.<br />
Depending on the mode selected with the F2 key (CLIP/CAM),<br />
the >ARCHIVE flag is assigned only to the camera angle of<br />
the clip selected with the green cursor (CAM mode), or to all<br />
camera angles of the clip (CLIP mode).<br />
PGM X Located in the bottom right corner of the clip screen, this field<br />
is only visible if the Call channel VGA function has been<br />
enabled in the <strong>Operation</strong>al Setup menu (p.9.2 F4) or in the<br />
Setup Screen, and is only effective in CAM mode, not in CLIP<br />
mode. It allows the operator to select on which channel clips<br />
called using the keyboard/tablet and VGA should be loaded.<br />
Press ALT+F1 on the keyboard to select PGM1, ALT+F2 for<br />
1 The <strong>EVS</strong> Xfile is a 2U device with 2 removable hard drives, that can be connected to the XNet<br />
SDTI network. Clips can be archived to/restored from the removable media.<br />
57
Issue<br />
<strong>11.01</strong>.C<br />
58<br />
<strong>Multicam</strong> - Version <strong>11.01</strong> – Operating <strong>Manual</strong><br />
<strong>EVS</strong> Broadcast Equipment SA – April 2012<br />
PGM2/PRV, ALT+F3 for PGM3, etc. This function is useful to<br />
load clips on channels that cannot be controlled by an <strong>EVS</strong><br />
Remote Panel, or to allow an AP to browse clips on a play<br />
channel not used by the main operator. Note that if that<br />
channel is in PLST EDIT mode with a PRV, the clip will<br />
automatically cue up on the PRV.<br />
9.3.6 Selecting a Clip with Tablet and Stylus<br />
To select a different page or bank using the stylus, click on the desired page/bank<br />
number on the bottom line of the screen. You can also move to the adjacent page/bank<br />
by clicking on the red arrows on the top, bottom and sides of the screen:<br />
• left/right arrow: go to previous/next page<br />
• up/down arrow: go to previous/next bank<br />
If a clip is present in a certain location, it will be highlighted in blue. Once selected, it will<br />
be highlighted in orange.<br />
To cue up a clip on the primary channel controlled by the first remote, or on the VGA Call<br />
Channel defined in the setup, simply click 1 on it with the stylus. If the channel where the<br />
clip is supposed to be loaded is in Plst Edit mode with a PRV channel attached, the clip<br />
will automatically cue up on the PRV channel.<br />
9.3.7 Selecting a Clip with the Keyboard<br />
The keyboard can also be used to operate within the clip screen. The green arrows<br />
surrounding a clip show the current cursor position. The arrow keys (↑,↓,←,→) on the<br />
keyboard are used to move across the screen. Only 2 banks can be viewed at a time.<br />
To view other banks, use ALT+↑,↓ to scroll vertically between banks and use ALT+←,→<br />
or PgDn, PgUp to scroll horizontally between pages. To go to bank 1 of the current page,<br />
use the HOME key and to go to the Playlist bank of the current page, use the END key 2 .<br />
Once the cursor located on the desired clip, press ENTER to cue up the clip on the<br />
primary channel controlled by the first remote, or on the VGA Call Channel defined in the<br />
setup. If the channel where the clip is supposed to be loaded is in Plst Edit mode with a<br />
PRV channel attached, the clip will automatically cue up on the PRV channel.<br />
If the Clip screen is connected to the clips and playlists of a remote machine, pressing<br />
ALT+L will return the screen immediately to the local clips and playlists.<br />
1 “Clicking with the stylus” means pressing lightly the tip of the stylus onto the tablet.<br />
2 Trying to access the playlist bank of page 10 will cause the Clip screen to jump to the playlist<br />
bank of page 9, since page 10 playlists are reserved for external protocols.
<strong>Multicam</strong> - Version <strong>11.01</strong> – Operating <strong>Manual</strong><br />
<strong>EVS</strong> Broadcast Equipment SA – April 2012<br />
9.3.8 How to Name a Clip<br />
To name a clip, proceed as follows:<br />
1. In the Clip screen, select the clip to name in one of the following ways:<br />
a. Click on the clip with the stylus<br />
b. Position the green arrows around the desired clip with the keyboard.<br />
Issue<br />
<strong>11.01</strong>.C<br />
2. Type in the desired name with the keyboard. All characters available from the<br />
keyboard are accepted, including blanks.<br />
3. Press F1:<br />
a. In CAM mode, only the camera where the cursor is located is named.<br />
b. In CLIP mode, all cameras of the clip where the cursor is located are named.<br />
The entry in the Name field is not cleared by pressing F1 and remains for future use.<br />
Press to delete the last character in the Name field, or press ESC to<br />
clear the whole field.<br />
Note<br />
To be able to name/rename clips on a network machine, the Clip edit by<br />
Network parameter in the <strong>Operation</strong>al Setup menu (P.5.1 F2) of the remote<br />
machine must be set to “Yes”. If you are unable to name a network clip, please<br />
check this setting on the remote machine.<br />
9.3.9 How to Change the Primary Camera of a Clip<br />
To change the primary camera of a clip, proceed as follows:<br />
1. In the Clip screen, move the cursor to the desired camera.<br />
2. Press F4 on the keyboard or click with the stylus on the corresponding area in the<br />
Function bar.<br />
→ This camera becomes the new primary camera.<br />
→ If the selected camera is a secondary camera (indicated by “=”), it becomes the<br />
primary camera and the previous primary camera becomes the secondary camera.<br />
59
Issue<br />
<strong>11.01</strong>.C<br />
9.3.10 Recalling a Clip<br />
60<br />
<strong>Multicam</strong> - Version <strong>11.01</strong> – Operating <strong>Manual</strong><br />
<strong>EVS</strong> Broadcast Equipment SA – April 2012<br />
How to Call a Clip Belonging to the Machine You Are<br />
Connected to<br />
The machine to which you are connected is indicated on the left side of the Title Bar.<br />
To call a clip belonging to the machine you are connected to, proceed as follows:<br />
1. Type either the 3 or 4 digits of the ID. Ex: 111 or 111A. The entry appears in the<br />
Name field.<br />
2. Press F3<br />
• If only 3 digits are entered, the primary camera is selected<br />
• If 4 digits are entered, the clip is selected according to the given camera angle.<br />
• If no clip matches the entry, no selection is done.<br />
Note<br />
ESC key can still be used at any time to clear the Name field.<br />
How to Call a Clip Belonging to Another Machine Than<br />
the One You Are Connected to<br />
To call a clip belonging to another machine than the one you are connected to, proceed<br />
as follows:<br />
1. Type either the first 3 or 4 digits of the ID, followed by a “/” and the network number of<br />
the machine. Ex: 111/03 or 111A/03. To call a local clip, no matter what machine you<br />
are connected to, type 00 as network number. Ex: 111/00 or 111A/00.<br />
2. Press F3.<br />
9.3.11 How to Cancel a Network Copy on the VGA<br />
Select the clip and press the CTRL+DELETE keys. A confirmation screen comes up.<br />
“Cancel network copy? ESC: Do not cancel copy - ENTER: Cancel copy”<br />
If the Copy Clip option copies several cams of the same clip and some of them have<br />
already been copied before the Cancel function, the Cancel does not delete the copied<br />
files, it just cancels the cam(s) that are still copying or to be copied of that clip. It does not<br />
cancel the copying of other clips.<br />
The Cancel function remains possible even if the page where the clip is being copied is<br />
protected.
<strong>Multicam</strong> - Version <strong>11.01</strong> – Operating <strong>Manual</strong><br />
<strong>EVS</strong> Broadcast Equipment SA – April 2012<br />
9.3.12 How to Restripe the Timecode of the Current Clip<br />
To restripe the timecode of the current clip, proceed as follows:<br />
Issue<br />
<strong>11.01</strong>.C<br />
1. Recall the clip by moving the cursor on the desired clip and pressing ENTER, or by<br />
clicking on it with the stylus.<br />
2. Press ALT-T on the keyboard to call the SET TC function.<br />
The Set Timecode screen is displayed (without TC Type field with PAL – refer to note<br />
below):<br />
3. If you want to modify the LTC timecode and date, type in the new timecode for the<br />
Short IN point and date of the clip in the Set TC field below the LTC field.<br />
4. If you want to modify the user-defined timecode and date, type in the new timecode<br />
for the Short IN point and date of the clip in the Set TC field below the USER field.<br />
5. If you want to modify the primary TC for this clip, press the A or B key which<br />
corresponds to the requested primary TC.<br />
6. Press F2 to select CAM or CLIP mode<br />
• In CAM mode, only the timecode of the camera angle loaded on the primary<br />
channel will be changed.<br />
• In CLIP mode, the timecode of all camera angles of the clip will be changed.<br />
7. Press ENTER to confirm or ESC to cancel.<br />
The entire clip is updated according to the new timecode value so that the timecode<br />
remains continuous inside the whole clip.<br />
Note<br />
In 59.94Hz modes (NTSC), you can also select between DROP FRAME and<br />
NON DROP FRAME modes by pressing the space bar.<br />
61
Issue<br />
<strong>11.01</strong>.C<br />
9.3.13 Moving and Copying Clips<br />
62<br />
<strong>Multicam</strong> - Version <strong>11.01</strong> – Operating <strong>Manual</strong><br />
<strong>EVS</strong> Broadcast Equipment SA – April 2012<br />
Copying and moving clips in the VGA are performed using the CUT, COPY and PASTE<br />
functions.<br />
General Principles<br />
• If the clipboard was filled using the Cut function, the original clip(s) is/are deleted<br />
after being pasted to the new location.<br />
• In CAM mode, only the selected camera of the clip is Cut/Copied/Pasted. In CLIP<br />
mode, all camera angles of the clip are Cut/Copied.<br />
• For the Paste function in CLIP mode, only the available camera locations inside the<br />
destination clip will be pasted. If some camera angles already exist for the destination<br />
clip, these will not be overwritten by the corresponding camera in the clipboard.<br />
• A “Cut & Paste” of a clip is equivalent to a “Move Clip”, meaning that any reference<br />
to that clip inside playlists will be updated to the new location of that clip. This is not<br />
the case when doing a “Copy & Paste”, then deleting manually the original clip.<br />
Clipboard Field<br />
This area displays the content of the clipboard: clip number, network number if the copied<br />
clip/playlist is a remote clip/playlist, and the selected camera(s) for a clip.<br />
The rest of the line summarizes the available functions (copy, cut, paste, delete) and their<br />
keyboard shortcuts. These functions can also be called by clicking on the corresponding<br />
area on this line.<br />
CTL+X: CUT<br />
This command is only applicable to clips.<br />
1. Move the cursor to the clip to “cut” from the Clip screen<br />
2. Press CTRL+X on the keyboard or click on the corresponding area on the screen.<br />
The clip removed from the current location and copied to the clipboard.<br />
CTL+C: COPY<br />
1. Move the cursor to the clip/playlist to copy<br />
2. Press CTRL+C on the keyboard or click on the corresponding area on the screen.<br />
The clip is copied to the clipboard.<br />
CTL+V: PASTE (Long Copy)<br />
With the Long copy, the entire original clip is copied, including its guardbands, to the<br />
destination.<br />
1. Move the cursor to the clip/playlist location where the content of the clipboard should<br />
be copied.
<strong>Multicam</strong> - Version <strong>11.01</strong> – Operating <strong>Manual</strong><br />
<strong>EVS</strong> Broadcast Equipment SA – April 2012<br />
2. Press CTRL+V or click to the corresponding area on the screen.<br />
The clip in the clipboard is copied to the selected location in Long mode.<br />
CTL+SHIFT+V: PASTE (Short Copy)<br />
Issue<br />
<strong>11.01</strong>.C<br />
With the Short copy, the material between the Short IN and Short OUT points of the<br />
original clip is copied, augmented by the duration of the default guardbands. This allows<br />
saving space on the <strong>EVS</strong> server.<br />
1. Move the cursor to the clip/playlist location where the content of the clipboard should<br />
be copied.<br />
2. Press CTRL+SHIFT+V.<br />
The clip in the clipboard is copied to the selected location in Short mode.<br />
CTL+DEL: DELETE<br />
1. Move the cursor to the clip/playlist to delete.<br />
2. Press CTRL+DEL or click on the corresponding area on the clip screen.<br />
→ In CAM mode, only the camera selected is deleted<br />
→ In CLIP mode, all cameras of the clip are deleted.<br />
Important<br />
A clip/playlist cannot be deleted while it is on air.<br />
Note<br />
• When a clip is deleted, all playlists are scanned and that clip is removed from<br />
all of them.<br />
• When a clip is protected, or when the Confirm del clp/plst is set to “Yes” in<br />
the <strong>Operation</strong>al Setup menu (p.5.1 F3), a confirmation is required to delete<br />
the selected clip(s).<br />
63
Issue<br />
<strong>11.01</strong>.C<br />
9.3.14 Clip Screen - Extended View<br />
64<br />
<strong>Multicam</strong> - Version <strong>11.01</strong> – Operating <strong>Manual</strong><br />
<strong>EVS</strong> Broadcast Equipment SA – April 2012<br />
The extended view shows cameras A to F instead of A to D. Only 1 bank can be viewed<br />
at a time. The switch between standard and extended view is done by pressing F5 on the<br />
keyboard or by clicking on the “F5:VIEW” area on the screen.
<strong>Multicam</strong> - Version <strong>11.01</strong> – Operating <strong>Manual</strong><br />
<strong>EVS</strong> Broadcast Equipment SA – April 2012<br />
9.4 Using the VDR Panel<br />
Issue<br />
<strong>11.01</strong>.C<br />
The VGA VDR Panel is accessed from any VGA screen by pressing SHIFT+F9 on the<br />
keyboard. The lower section of the VDR Panel is similar to the clip screen, with the same<br />
functions. The upper section of the VDR Panel features two windows that can each take<br />
control of one channel of the server.<br />
Pressing SHIFT+F9 in the VDR Panel returns the VGA to the Clip screen mode.<br />
9.4.1 VDR Panel - Lower Section<br />
The browsing of clips, the viewing modes (normal or extended), the way clips are<br />
recalled, moved and copied, etc. in the VDR Panel is strictly the same as in the Clip<br />
screen. The Connect window is called with F9, and allows to connect to other servers on<br />
the network.<br />
9.4.2 VDR Panel - Upper Section<br />
The two windows of the upper section can be assigned to a different channel of the<br />
server. When entering the VDR Panel for the first time after starting the application, the<br />
control of both windows is disabled.<br />
Press CTRL+F1 to gain control of the left window, or CTRL+F2 to gain control on the right<br />
window. The frame around the corresponding window becomes green. Note that only one<br />
window can be active at a time. Inside the active window, letters/numbers highlighted in<br />
green indicate the keyboard shortcut to the corresponding function: press ALT+the<br />
highlighted letter/number. All functions are also available by clicking with the stylus.<br />
65
Issue<br />
<strong>11.01</strong>.C<br />
66<br />
Important<br />
<strong>Multicam</strong> - Version <strong>11.01</strong> – Operating <strong>Manual</strong><br />
<strong>EVS</strong> Broadcast Equipment SA – April 2012<br />
The control of a channel from the VDR Panel is concurrent to any other<br />
controller that might be assigned to that channel: <strong>EVS</strong> Remote Panel or external<br />
protocol. A command sent from the VDR Panel to a channel will overwrite<br />
whatever the channel was doing at that time.<br />
The name of the channel currently assigned to each window is displayed on the top of<br />
each of them. To assign a new channel to this window, press ALT+H. A new window<br />
appears on the other side to allow the selection of a new channel.<br />
Use the ↑/↓ arrow keys to select the channel and press ENTER, or directly press<br />
ALT+the number of the channel as highlighted in green. The Play channels already<br />
assigned appear in grey and cannot be selected. Select “0 – Disable Window” if you don’t<br />
want to assign any channel to the window. Depending whether a Play or Record channel<br />
is assigned to the VDR Panel window, its content is automatically updated.<br />
9.4.3 VDR Panel - Player Window<br />
ID of the current<br />
element (clip or train)<br />
How to Load a Record Train<br />
Current timecode<br />
Name of the<br />
current<br />
element<br />
List of available<br />
camera angles<br />
(green) and<br />
selected camera<br />
angle (red)<br />
Press ALT+L to go in LIVE mode (or click on the LIVE function), then press ALT+the<br />
letter of the desired record train (A/B/C/D/E/F), or click on it. The letters corresponding to<br />
the available record trains are highlighted in green, and the letter of the current record<br />
train in red.
<strong>Multicam</strong> - Version <strong>11.01</strong> – Operating <strong>Manual</strong><br />
<strong>EVS</strong> Broadcast Equipment SA – April 2012<br />
How to Load a Clip<br />
Issue<br />
<strong>11.01</strong>.C<br />
Use the arrow keys to move the cursor inside the lower section of the VDR Panel to the<br />
desired clip and press ENTER, or click on the desired clip with the stylus, or type the<br />
desired clip ID and press F3. To select a different camera angle inside a clip, press<br />
ALT+the letter of the desired camera (A/B/C/D/E/F), or click on it. Available camera<br />
angles are highlighted in green, the current camera angle in red.<br />
Playing/Browsing the Current Element<br />
Command Description<br />
ALT+P Play from / Pause on the current picture<br />
ALT+Y Play the current clip in endless loop mode. The play will start<br />
from the current picture until the Short OUT point of the clip,<br />
then will automatically loop back to the Short IN point and<br />
keep playing, and so on…<br />
ALT+V PlayVar at the speed specified in the adjacent field. To edit the<br />
Var speed, press ALT+% (without SHIFT key), type the<br />
desired value and press ENTER to confirm.<br />
< / > (without SHIFT<br />
key):<br />
Move 1 field backward / forward<br />
SHIFT+< / > Move 1 second backward / forward<br />
CTRL+< / > Fast Rewind+Fast Forward. The browsing will continue after<br />
the keys are released.<br />
ALT+< / > Goto IN / OUT<br />
ALT+G Goto timecode<br />
How to Create a Clip with the VDR Panel Player<br />
To create a clip with the VDR Panel Player, proceed as follows:<br />
1. Load a record train on the player<br />
2. Browse the record train to reach the desired Short IN or Short OUT point and press<br />
ALT+I / ALT+O to mark the Short IN / Short OUT points on the current picture. The<br />
cursor is automatically placed in the adjacent field, so that the operator can manually<br />
enter the timecode of the desired Short IN / OUT point if needed 1 . Press ENTER to<br />
confirm or ESC to cancel.<br />
3. Repeat this operation for the complementary Short IN / Short OUT points. This is not<br />
mandatory. If only a Short IN or a Short OUT point is marked, the Default clip<br />
duration defined in the <strong>Operation</strong>al Setup menu (p.2.2 F2) will be used to define the<br />
missing point.<br />
1 If the operator knows the timecode of the IN / OUT point, he does not need to browse to that<br />
picture. He can press ALT+I on any picture, then enter the timecode of the IN / OUT point and<br />
confirm with ENTER.<br />
67
Issue<br />
<strong>11.01</strong>.C<br />
68<br />
<strong>Multicam</strong> - Version <strong>11.01</strong> – Operating <strong>Manual</strong><br />
<strong>EVS</strong> Broadcast Equipment SA – April 2012<br />
4. Press ALT+S to save the clip. The Save as window opens, giving the operator the<br />
opportunity to name / rename the clip if needed. Pressing ENTER will save the clip to<br />
the current cursor location in the lower section of the VDR Panel. When the Save as<br />
window is open, the operator still has the possibility to browse the database, select a<br />
different page and bank, and even connect to another machine on the network using<br />
the Connect window. Pressing ALT+U will save the clip to the first available clip<br />
location 1 in the current server.<br />
Editing a Clip with the VDR Panel Player<br />
After loading the desired clip, the following functions are available:<br />
Command Description<br />
ALT+N Renames the clip. Type the desired name and press ENTER<br />
to confirm or ESC to cancel.<br />
ALT+I / ALT+O Marks a new Short IN / Short OUT point on the current picture.<br />
The cursor is automatically placed in the adjacent field, so that<br />
the operator can manually enter the timecode of the desired<br />
Short IN / Short OUT point if needed. Press ENTER to<br />
confirm, or ESC to cancel.<br />
How to Copy a Clip with the VDR Panel Player<br />
To copy a clip with the VDR Panel Player, proceed as follows:<br />
1. Load the original clip<br />
2. Press ALT+S to save the current clip to another location.<br />
This will create a copy of the clip.<br />
The operator has the opportunity to rename the clip during this operation. He can then<br />
save the clip to the current cursor location by pressing ENTER, or to the first available clip<br />
location on the current server by pressing ALT+U.<br />
Note<br />
The Cut / Copy / Paste functions are available at any time to move and copy<br />
clips in the lower section of the VDR Panel, even when one of the upper<br />
windows is active.<br />
1 The first available clip location is the first one where no camera angle is already present.
<strong>Multicam</strong> - Version <strong>11.01</strong> – Operating <strong>Manual</strong><br />
<strong>EVS</strong> Broadcast Equipment SA – April 2012<br />
9.4.4 VDR Panel - Recorder WINDOW<br />
Issue<br />
<strong>11.01</strong>.C<br />
The VDR Panel Recorder can be used to start/stop the record, and to create clips from<br />
the local record trains. For example, it allows the creation of clips on a server that has no<br />
Play channel.<br />
How to Start/Stop the Record<br />
Press ALT+R to start or stop the record on the record channel assigned to the window.<br />
No confirmation is required.<br />
Important<br />
In LSM mode, all recorders will be stopped at once to keep the synchronization<br />
between all record channels.<br />
How to Create a Clip with the VDR Panel Recorder<br />
To create a clip with the VDR Panel Recorder, proceed as follows:<br />
1. Press ALT+I / ALT+O to mark a Short IN / Short OUT point on the last recorded<br />
picture.<br />
The timecode appears in the adjacent field, and the cursor is automatically placed on<br />
that field to allow the operator to edit the timecode of the Short IN / Short OUT point if<br />
desired. Press ENTER to confirm or ESC to cancel.<br />
2. Repeat this operation for the complementary Short IN / OUT point.<br />
This is not mandatory. If only a Short IN or a Short OUT point is marked, the Default<br />
clip duration defined in the <strong>Operation</strong>al Setup menu (p.2.2 F2) will be used to define<br />
the missing point.<br />
3. Select from which record train(s) the clip(s) must be created: press ALT+the letter<br />
(A/B/C/D/E/F) of a record train to select / de-select it.<br />
Letters highlighted in RED means that a clip will be created from the corresponding<br />
record train; letters highlighted in green means that the corresponding record train is<br />
available but will not be used to create a clip.<br />
4. Define the name of the clip before saving it: press ALT+N, type the desired name and<br />
validate with ENTER.<br />
69
Issue<br />
<strong>11.01</strong>.C<br />
70<br />
<strong>Multicam</strong> - Version <strong>11.01</strong> – Operating <strong>Manual</strong><br />
<strong>EVS</strong> Broadcast Equipment SA – April 2012<br />
5. The operator can also restripe the timecode of the IN point of the clip to a new value.<br />
Press ALT+T, type the desired value and confirm with ENTER. When creating the<br />
clip, this timecode will replace the original timecode of the Short IN point.<br />
6. Press ALT+S to save the clip(s). The operator still has the opportunity to rename the<br />
clip during this operation. He can then save the clip to the current cursor location by<br />
pressing ENTER, or to the first available clip location on the current server by<br />
pressing ALT+U.
<strong>Multicam</strong> - Version <strong>11.01</strong> – Operating <strong>Manual</strong><br />
<strong>EVS</strong> Broadcast Equipment SA – April 2012<br />
10. Keyword Management<br />
Issue<br />
<strong>11.01</strong>.C<br />
Each clip of the server can be assigned 3 keywords and a ranking. Values for ranking<br />
are: -, *, **, ***. The keywords are selected from a user defined keywords file that can<br />
contain up to 200 keywords of 12 characters.<br />
This information (keywords, ranking) can then be combined with other criteria (timecode,<br />
dates) to search the server’s database for matching clips.<br />
The keyword and ranking assignment, and the Search functions, can be performed using<br />
the <strong>EVS</strong> Remote Panel or the VGA screen and PC keyboard. These functions are only<br />
available if license codes 124 (database search functions) and 125 (keyword assignment<br />
functions) are installed on the server.<br />
10.1 Creating and Selecting the Keyword File<br />
The keyword file is a simple text file with a name of 8 characters and a .KWD extension.<br />
All keyword files must be located in the <strong>Multicam</strong>\KWD directory of the server. A sample<br />
keyword file (SAMPLE.KWD) is provided by <strong>EVS</strong> when <strong>Multicam</strong> is installed. The content<br />
of a keyword file is similar to the following:<br />
1 = action_1<br />
2 = action_2<br />
3 = action_3<br />
4 = action_4<br />
5 = action_5<br />
6 = action_6<br />
7 = action_7<br />
8 = action_8<br />
9 = action_9<br />
10 = action_10<br />
11 = action_11<br />
12 = action_12<br />
13 = action_13<br />
14 = action_14<br />
15 = action_15<br />
16 = action_16<br />
17 = action_17<br />
18 = action_18<br />
19 = action_19<br />
20 = action_20<br />
21 = player_A1<br />
22 = player_A2<br />
23 = player_A3<br />
24 = player_A4<br />
25 = player_A5<br />
26 = player_A6<br />
27 = player_A7<br />
28 = player_A8<br />
29 = player_A9<br />
30 = player_A10<br />
31 = player_A11<br />
32 = player_A12<br />
33 = player_A13<br />
34 = player_A14<br />
71
Issue<br />
<strong>11.01</strong>.C<br />
72<br />
35 = player_A15<br />
36 = player_A16<br />
37 = player_A17<br />
38 = player_A18<br />
39 = player_A19<br />
40 = player_A20<br />
41 = player_B1<br />
42 = player_B2<br />
43 = player_B3<br />
44 = player_B4<br />
45 = player_B5<br />
46 = player_B6<br />
47 = player_B7<br />
48 = player_B8<br />
49 = player_B9<br />
50 = player_B10<br />
51 = player_B11<br />
52 = player_B12<br />
53 = player_B13<br />
54 = player_B14<br />
55 = player_B15<br />
56 = player_B16<br />
57 = player_B17<br />
58 = player_B18<br />
59 = player_B19<br />
60 = player_B20<br />
…etc… until 200 = last<br />
keyword<br />
<strong>Multicam</strong> - Version <strong>11.01</strong> – Operating <strong>Manual</strong><br />
<strong>EVS</strong> Broadcast Equipment SA – April 2012<br />
Each keyword can have up to 12 characters, including blanks. Avoid accentuated and<br />
special characters since most of them will not be recognized by the <strong>Multicam</strong> application.<br />
If a keyword is longer than 12 characters, only the first 12 characters will be used and the<br />
end of the keyword will automatically be truncated.<br />
10.1.1 Creating the Keyword File from a PC<br />
Creating a keyword file can be done on any PC with a simple text editor. Make sure the<br />
file name does not exceed 8 characters, that all characters in the file name are legal, and<br />
that it has a .KWD extension. The file can then be imported from a floppy disk onto the<br />
server, either manually from the DOS, or by using the Import/Export Keywords Files<br />
from the <strong>EVS</strong> Maintenance menu (refer to the “XT Technical Reference” for more details<br />
about this option).
<strong>Multicam</strong> - Version <strong>11.01</strong> – Operating <strong>Manual</strong><br />
<strong>EVS</strong> Broadcast Equipment SA – April 2012<br />
10.1.2 Selecting the Current Keyword File<br />
Issue<br />
<strong>11.01</strong>.C<br />
In the <strong>Multicam</strong> application, the Keyword file can be selected either from the VGA Setup<br />
screen, or from the <strong>Operation</strong>al Setup menu of the Remote Panel using the Keyword<br />
file parameter (p.6.1 F1).<br />
The operator can select any file from all the .KWD files present in the<br />
<strong>Multicam</strong>\DIRECTORY. If the machine is connected to other systems on the <strong>EVS</strong> SDTI<br />
network, the network server will automatically distribute its current Keyword file to all<br />
other users on the network.<br />
For each system on the network, the operator can choose to work with the file coming<br />
from the network server (set the Keyword file parameter to “SERVER”), or with a local<br />
file.<br />
Note<br />
In a normal situation, the network server is the machine that has been defined<br />
as such in the <strong>EVS</strong> Configuration menu.<br />
However, if for any reason the network has been interrupted or the machine<br />
designated as the network server is not available, another machine on the<br />
network (the Master machine with the highest serial number) will automatically<br />
take over this job, including the distribution of the Keyword file. Even if the<br />
original network server reconnects, it will not necessarily become the actual<br />
network server again.<br />
The machine that actually assumes the role of network server can easily be<br />
identified from the Connect window on the VGA or from the Network menu on<br />
the <strong>EVS</strong> Remote Panel, thanks to the “*” displayed next to its name. That<br />
machine only has the ability to distribute its current Keyword file to the others<br />
on the SDTI network.<br />
73
Issue<br />
<strong>11.01</strong>.C<br />
74<br />
<strong>Multicam</strong> - Version <strong>11.01</strong> – Operating <strong>Manual</strong><br />
<strong>EVS</strong> Broadcast Equipment SA – April 2012<br />
10.1.3 Editing the Keyword File from the <strong>Multicam</strong><br />
Application<br />
The Keyword file can also be edited directly in the <strong>Multicam</strong> application using the Off-Air<br />
Keyword screen (F7). This screen is also used to assign keywords to a clip, but the<br />
keyword assignment functions will be described further in this chapter.<br />
Select a local Keyword file from the Setup. If you select “SERVER” as Keyword file in<br />
the setup, i.e. the file distributed by the network server, you will not be allowed to edit it.<br />
Go to the Off-Air Keyword Screen by pressing F7 on the keyboard. If you want to create a<br />
backup copy of the current file, press F5:SAVE AS in that screen (or click on the function<br />
with the stylus) and enter the name of the file you want to create. This can also be used<br />
to create a local copy of the keywords file distributed by the Network Server.<br />
Note<br />
If a .KWD file with the same name already exists in the KWD directory, it will<br />
automatically be overwritten by the new file.<br />
To edit a keyword in the current file, move the cursor to the desired keyword location,<br />
using either the arrow keys or the stylus, then type the new keyword. This one will appear<br />
in the Name field at the bottom of the screen. Press ESC to clear the whole field or<br />
to delete the last character. To apply the value entered in the name field<br />
to the selected keyword, press F4:UPDATE KWD, or click on that function with the stylus.<br />
Repeat this operation for all keywords to update.<br />
Press PgU/PgDn to toggle between Page 1 (keywords 1 to 100) and Page 2 (keywords<br />
101 to 200), or click on the Up/Down red arrows on the right side of the screen.<br />
If your machine is the actual Network server, the updated file is automatically sent to all<br />
other users on the network every time a keyword is updated.
<strong>Multicam</strong> - Version <strong>11.01</strong> – Operating <strong>Manual</strong><br />
<strong>EVS</strong> Broadcast Equipment SA – April 2012<br />
10.2 Assigning Keywords using the VGA Screen<br />
10.2.1 Keyword Windows<br />
Issue<br />
<strong>11.01</strong>.C<br />
Keywords can be assigned to clips using the On-Air Keyword screen (F6:KW1), or the<br />
Off-Air Keyword screen (F7:KW2).<br />
The On-Air Keyword screen is used to assign keywords to the clip loaded on the primary<br />
channel of the 1 st user, meaning that a play channel is used during this operation.<br />
The Off-Air Keyword screen is used to assign keywords to the clip selected with the green<br />
arrows in the Clip screen or in the VDR Panel, even if this clip is not loaded on any play<br />
channel. This can be useful to allow someone to assist the main operator for logging<br />
operations, without taking any play channel from the system<br />
The operation of both On-Air and Off-Air Keyword screens is entirely similar.<br />
The name of the current keyword file is displayed in the centre of the Title Bar, against a<br />
red background.<br />
Many functions for clip management are similar to the Clip screen: F1:NAME ;<br />
F2:CLIP/CAM ; F3:CALL 1 , ALT+P:PLAY/PAUSE, ALT+R:RECUE, ALT+T:SET TC;<br />
ALT+Z:>ARCHIVE, ALT+Fx:select the Call Channel from VGA is enabled. Refer to the<br />
description of the Clip screen for details about these functions.<br />
The ID and name of the clip that keywords are going to be assigned to is displayed at the<br />
bottom on the screen, along with the keywords, ranking and archive status already<br />
assigned to that clip.<br />
1 When calling a clip with the F3 function in the Off-Air Keyword Screen, the system will<br />
automatically switch to the On-Air Keyword screen, since the clip to assign keywords to has been<br />
loaded on a play channel.<br />
75
Issue<br />
<strong>11.01</strong>.C<br />
10.2.2 How to Assign a Keyword to a Clip<br />
76<br />
<strong>Multicam</strong> - Version <strong>11.01</strong> – Operating <strong>Manual</strong><br />
<strong>EVS</strong> Broadcast Equipment SA – April 2012<br />
Move the cursor to the desired keyword and press ENTER, or click on the keyword with<br />
the stylus. The keyword will be assigned to the first available keyword location on the last<br />
line of the screen. Repeat this to assign more keywords (up to 3) to the current clip.<br />
Depending on the CLIP/CAM mode, the keywords will be assigned to the current camera<br />
angle only (CAM mode), or to all camera angles of the current clip (CLIP mode).<br />
If three keywords are already assigned to the clip, the operator has to clear some of them<br />
to be able to assign new keywords.<br />
10.2.3 How to Clear a Keyword with the Keyboard<br />
Press to move the arrow cursor to the lower area of the screen. Red arrows will<br />
appear around one of the keywords or ranking values. Use the ←/→ arrows to select the<br />
keyword to remove, and press CTRL+DEL. Press the key again to move the<br />
arrow cursor back to the keywords list.<br />
10.2.4 How to Clear a Keyword with the Stylus<br />
Click on the keyword to remove on the last line, the click on the CTRL+DEL:CLR KWD<br />
area on the screen, or press CTRL+DEL.<br />
10.2.5 How to Edit the Ranking of the Current Clip with<br />
the Keyboard<br />
Press the key to move the cursor to the lower area of the screen Use the ←/→<br />
arrows to select the desired ranking, and press ENTER. The selected ranking is<br />
highlighted in green.<br />
10.2.6 How to Edit the Ranking of the Current Clip with<br />
the Stylus<br />
Click on the desired ranking, it becomes highlighted in green.
<strong>Multicam</strong> - Version <strong>11.01</strong> – Operating <strong>Manual</strong><br />
<strong>EVS</strong> Broadcast Equipment SA – April 2012<br />
10.2.7 How to Clear All Keywords and the Ranking of a<br />
Clip<br />
Issue<br />
<strong>11.01</strong>.C<br />
Press ALT+DEL or click on ALT+DEL:CLR ALL: all keywords assigned to the clip will be<br />
removed, and the ranking will be reset to the lowest level (“-“).<br />
10.2.8 How to Name a Clip Using the Keywords:<br />
Move the cursor to the desired keyword and press ALT+N. The keyword is added at the<br />
end of the current name if there is enough space left.<br />
Note<br />
To clear the name of a clip, press ESC to empty the Name field, then press F1<br />
to assign this “empty name” to the clip.<br />
10.3 Searching the Database Using the VGA<br />
Screen<br />
10.3.1 Search Window<br />
Press F8 to access the Search Screen. The VGA Search screen is made up of several<br />
areas that will be named as follows, from the top to the bottom:<br />
1. Title bar Bar containing the following elements from left to right:<br />
• Screen name<br />
• Name of the current keywords file displayed against a red<br />
background in the centre of the Title bar<br />
• Keyword page displayed.<br />
2. Function bar Bar displaying information on the various function keys<br />
available and their purpose.<br />
3. Keyword list Area displaying the list of keyword list on the page specified in<br />
the Title bar.<br />
4. <strong>Operation</strong> tab Tab displaying the key combinations available and the<br />
associated actions.<br />
5. Search Criteria<br />
area<br />
Note<br />
Area displaying the search criteria available<br />
Use the key to shift from the Keyword list to the Search Criteria area<br />
and vice versa.<br />
77
Issue<br />
<strong>11.01</strong>.C<br />
10.3.2 Search Criteria and Search Options<br />
78<br />
Search Criteria<br />
<strong>Multicam</strong> - Version <strong>11.01</strong> – Operating <strong>Manual</strong><br />
<strong>EVS</strong> Broadcast Equipment SA – April 2012<br />
Different criteria can be combined to search the database. They can be defined in the<br />
Search Criteria available at the bottom of the screen.<br />
When you access the Search screen, the criteria that were last defined are still available<br />
on the screen.<br />
Note<br />
If the red cursor is located on another field in the Search Criteria area, use the<br />
←/→ arrow keys to move from one field to the previous or next one, until the red<br />
cursor is positioned on the requested field.
<strong>Multicam</strong> - Version <strong>11.01</strong> – Operating <strong>Manual</strong><br />
<strong>EVS</strong> Broadcast Equipment SA – April 2012<br />
Criteria Description<br />
Issue<br />
<strong>11.01</strong>.C<br />
Timecode This restricts the search to the clips containing the timecode<br />
specified in this field. The timecode search is not applied on<br />
growing clips.<br />
To define a timecode, type the desired value when the red text<br />
cursor is visible in that field.<br />
The key can be used to clear the last digit<br />
entered.<br />
Date from / to This restricts the search to clips created between these 2<br />
dates specified in these fields.<br />
If only Date to field is defined, all clips created before that date<br />
will be considered.<br />
If only Date from field is defined, all clips created after that<br />
date will be considered.<br />
The key can be used to clear the last digit<br />
entered. Press the key again to move the cursor back<br />
to the keywords list.<br />
Level / Ranking This restricts the search to the clips with a ranking equal or<br />
higher to the ranking defined in that screen.<br />
Press the ←/→ arrow keys until reaching the desired ranking,<br />
and press ENTER. The selected ranking is highlighted in<br />
green.<br />
Press the key again to move the cursor back to the<br />
keywords list.<br />
Keywords This restricts the search to the clips containing all keywords<br />
defined in this screen.<br />
To assign a keyword, move the cursor to the desired keyword<br />
and press ENTER, or click on the keyword using the stylus.<br />
A maximum of 3 keywords can be used as search criteria. If all<br />
3 keyword locations are already occupied, the operator needs<br />
to clear some of them to select new keywords.<br />
Archive status This restricts the search to the clips having the archive status<br />
selected.<br />
Parameter On the VGA<br />
None (default) -<br />
clips not archived X<br />
clips to be archived >A<br />
clips archived A<br />
79
Issue<br />
<strong>11.01</strong>.C<br />
80<br />
Search Options<br />
<strong>Multicam</strong> - Version <strong>11.01</strong> – Operating <strong>Manual</strong><br />
<strong>EVS</strong> Broadcast Equipment SA – April 2012<br />
In addition to the Search Criteria available at the bottom of the screen, two search options<br />
are accessible from the Function keys F2 and F4:<br />
Consider Record Trains and / or Clips in the Search<br />
This option allows the inclusion of record trains in the results in searches with timecode<br />
criteria. Press F2 to toggle between CLIP / CLIP+REC / REC.<br />
Consider Timecodes from the LTC and/or USER TC Tables in the Search<br />
This option allows to take into account the timecodes from the LTC and/or the USER TC<br />
tables in searches with timecode criteria. Press F4 to toggle between LTC / USER /<br />
LTC+USER.<br />
10.3.3 Clearing Keywords in the Search Criteria<br />
How to Clear a Keyword with the Keyboard<br />
Press to move the arrow cursor to the lower area of the screen. Use the ←/→<br />
arrows to move the cursor to the keyword to remove, and press CTRL+DEL. Press the<br />
key again to move the arrow cursor back to the keywords list.<br />
How to Clear a Keyword with the Stylus<br />
Click on the keyword to remove on the last line, the click on the CTRL+DEL:CLR KWD<br />
area on the screen, or press CTRL+DEL.<br />
How to Clear all Criteria at Once<br />
Press ALT+DEL or click on ALT+DEL:CLR ALL: all keywords, timecode, Date From and<br />
Date To fields assigned as search criteria will be removed, and the ranking will be reset to<br />
the lowest level (“-“).<br />
When performing the search, only the clips matching all criteria defined by the operator<br />
will be included in the search results. Press CTRL+S (or click on the corresponding area)<br />
to search the local database, or press ALT+S (or click on the corresponding area) to<br />
search the entire network database.
<strong>Multicam</strong> - Version <strong>11.01</strong> – Operating <strong>Manual</strong><br />
<strong>EVS</strong> Broadcast Equipment SA – April 2012<br />
10.3.4 Search Results<br />
Issue<br />
<strong>11.01</strong>.C<br />
The results of the database search are displayed in the Search Results screen. If new<br />
clips which match the search criteria are created after the search, they will be<br />
automatically added to the list.<br />
The Search Results screen includes the following areas:<br />
• At the bottom of the screen, the search criteria are displayed for information.<br />
• In the centre of the screen, a list of all matching clips is displayed.<br />
Clip Information<br />
For each clip, the following information is displayed:<br />
• Position in the list<br />
• Clip ID<br />
• Clip name<br />
• Timecode of Short IN and Short OUT points<br />
o Timecodes from the LTC table are displayed in grey/black.<br />
o Timecodes from the USER TC table are displayed in yellow.<br />
• Ranking<br />
• Archive status<br />
• Current keywords.<br />
81
Issue<br />
<strong>11.01</strong>.C<br />
82<br />
<strong>Multicam</strong> - Version <strong>11.01</strong> – Operating <strong>Manual</strong><br />
<strong>EVS</strong> Broadcast Equipment SA – April 2012<br />
Browsing Through Results and Loading a Clip<br />
The operator can browse this list with the ↑/↓ arrow keys, PgUp, PgDn, Home and End<br />
keys.<br />
If the Browse mode of that screen is ON (F5:BROWSE), the clip will be loaded on the<br />
primary play channel as soon as it is selected.<br />
If the Browse mode is OFF, the operator must press ENTER after selecting the clip to<br />
load it.<br />
Note<br />
When a clip is displayed in the search results with a timecode from the VITC<br />
table (when this search option has been selected), the clip is loaded with this<br />
timecode even if the primary TC is the LTC.<br />
Possible Actions<br />
Many functions from the Clip screen are also available from the Search Results screen:<br />
F1:NAME F2:CLIP/CAM F3:CALL<br />
ALT+P:PLAY/<br />
PAUSE<br />
ALT+R:RECUE ALT+T:SET TC ALT+Z:>ARCHIVE<br />
To return to the Search screen to perform a new search, press ALT+S or F8. The<br />
previous search criteria are kept until the operator selects new criteria.<br />
How to Add a Clip to the Current Playlist from the Remote Panel<br />
To add a clip from that list to the current playlist, call up the clip, then press INSERT or<br />
ENTER on the Remote Panel.<br />
How to Add the Search Results to the Current Playlist from the<br />
VGA<br />
It is possible to directly add one or all search results (clips only) to the current playlist:<br />
• Press INSERT on the selected clip to insert only the highlighted one.<br />
• Press SHIFT+INSERT to insert all clips to the end of the current playlist.
<strong>Multicam</strong> - Version <strong>11.01</strong> – Operating <strong>Manual</strong><br />
<strong>EVS</strong> Broadcast Equipment SA – April 2012<br />
Issue<br />
<strong>11.01</strong>.C<br />
10.4 Assigning Keywords Using the Remote Panel<br />
10.4.1 Keyword Settings<br />
A keywords file must be selected in the Setup to enable the keyword assignment<br />
functions on the <strong>EVS</strong> Remote Panel.<br />
• In the <strong>Operation</strong>al Setup menu of the remote, the operator can choose between two<br />
different modes for the Keyword Mode parameter (P.6.1 F2): “List” (default) or<br />
“Numeric”.<br />
• In LIST mode, the list of keywords will appear on the LCD display by group of 8<br />
keywords, and the operator can select the keyword by pressing the corresponding F_<br />
key. The advantage is that the keywords are visible to the operator, but this mode<br />
can be slow if he has to browse through a long list of keywords.<br />
• In NUMERIC mode, the list of keywords is not visible on the LCD display, and the<br />
operator selects a keyword by entering its position in the list with the F_ keys. He can<br />
know the position either from a hardcopy of the keywords list, or by looking at one of<br />
the VGA Keywords screens, or still from his memory... This mode is faster to operate,<br />
but in most cases the operator will need to have the complete list of keywords<br />
available next to him.<br />
10.4.2 Assigning Keywords in List Mode<br />
To assign keywords to a clip in list mode, recall the clip, then press MENU to access the<br />
secondary clip menu on the Remote Panel.<br />
1 player_B10123 2 action_689012 3 keyword89012<br />
F1:action_1 F6:action_6<br />
F2:action_2 F7:action_7 111A<br />
F3:action_3 F8:action_8<br />
F4:action_4 F9:Prev.page p.01<br />
F5:action_5 F0:Next page<br />
Push Aux Clip Sort->TC Post-Roll<br />
>Archive *** Name Cam<br />
The LCD displays a page containing 8 keywords. Press F9/F10 to access the<br />
previous/next keywords page. To assign a keyword to the current clip, press the F_ key<br />
corresponding to the desired keyword on the LCD display.<br />
Depending on the CLIP/CAM mode defined by the D key, the selected keyword will be<br />
assigned only to the camera angles loaded on the channels fully controlled by the<br />
operator at that time (CAM mode), or to all camera angles of the clip (CLIP mode). The<br />
keyword will be assigned to the first available keyword location on the 1 st line of the LCD<br />
display. If the Keyword Info parameter of the <strong>Operation</strong>al Setup menu (P.1.1 F2) is set<br />
to “Yes”, it will also appear on the OSD of the corresponding output monitors if the current<br />
picture is the Short IN point of the clip.<br />
If all three keywords locations are occupied, the operator has to clear some of them to be<br />
able to assign a new keyword to that clip.<br />
83
Issue<br />
<strong>11.01</strong>.C<br />
84<br />
<strong>Multicam</strong> - Version <strong>11.01</strong> – Operating <strong>Manual</strong><br />
<strong>EVS</strong> Broadcast Equipment SA – April 2012<br />
To clear one of the keywords already assigned, press CLEAR+F1 / F2 / F3 in the<br />
secondary clip menu.<br />
The clip can also be named based on the keywords. Press the Name function (C key) in<br />
the secondary menu, then select keywords. The keywords will be added to the name of<br />
the clip, up to 12 characters. In this mode, the name of the clip is visible on the OSD. It<br />
can also be edited with the following keys:<br />
• CLEAR: erases the last character<br />
• SHIFT+CLEAR: insert a blank<br />
• SHIFT+F1-F10: insert a number (1, 2, 3, …, 8, 9, 0)<br />
Once the name is complete, press ENTER to validate or MENU to cancel.<br />
While the operator is in the secondary menu, he has full control of the current clip with the<br />
lever, PLAY key and jog dial, so he can browse the clip and start a replay at any time.<br />
It is also possible to assign keywords and ranking to a clip before it is created. Indeed,<br />
when a record train is loaded, as soon as the operator marks an IN or OUT point, the<br />
main and secondary menu changes to make the Keyword functions available.<br />
PGM1 Cam A *PRV1* Cam B<br />
Push PgmSpd Sw To In Pref<br />
>Archive *** Name Cam<br />
P.1 B.1 Clips: Local Records: Local<br />
PL 11: < ><br />
Msg:<br />
*** Local Sync Prv 2nd CTRL<br />
Cam A Cam B Cam C Cam D<br />
The SHIFT+A function of the main menu, normally used by the Reset CAM function, can<br />
be used to define the ranking, without entering the secondary menu. For additional<br />
functions like selecting keywords, flagging the future clip for archiving, marking it to be<br />
pushed to another machine, defining its name from the keywords, they can be performed<br />
from the secondary menu, exactly the same way as for a clip already stored. All these<br />
settings are memorized and will be applied to the clip when it is created.
<strong>Multicam</strong> - Version <strong>11.01</strong> – Operating <strong>Manual</strong><br />
<strong>EVS</strong> Broadcast Equipment SA – April 2012<br />
10.4.3 Assigning Keywords in Numeric Mode<br />
Issue<br />
<strong>11.01</strong>.C<br />
To assign keywords to a clip in numeric mode, recall the clip, then press MENU to access<br />
the secondary clip menu on the Remote Panel.<br />
1 player_B10123 2 2action_689012 3 keyword89012<br />
action_889012 111A<br />
Enter keyword # 8 with F_ keys + ENTER<br />
Push Aux Clip Sort->TC PostRoll<br />
>Archive *** Name Cam<br />
Enter the keyword position in the list using the F_ keys. Every time a new digit is entered,<br />
the corresponding keyword is displayed in the highlighted area in the centre of the LCD<br />
screen, to allow the operator to validate the entry before confirming it. If a wrong digit is<br />
entered, press the CLEAR key to delete it. Once the right keyword is found, press<br />
ENTER to confirm or MENU to cancel.<br />
The rules for keyword assignment and deleting keywords are identical between LIST and<br />
NUMERIC modes.<br />
10.5 Searching the Database Using the Remote<br />
Panel<br />
Keywords and ranking assigned to clips can be used to search the clips database.<br />
When the current element on the primary channel is a record train, the Search function is<br />
directly available from the C position in the secondary menu. To call it, press MENU to<br />
enter the secondary train menu, then press once the C key.<br />
When the current element on the primary channel is a clip, the Search function is still<br />
available from the same location, but is “hidden” behind the Name function. To call it in<br />
this case, press MENU to enter the secondary clip menu, then press twice the C key.<br />
In both cases, the LCD display becomes (in LIST mode):<br />
1 keyword89012 2 2 keyword89012 3 keyword89012<br />
F1:action_1 F6:action_6<br />
F2:action_2 F7:action_7<br />
F3:action_3 F8:action_8<br />
F4:action_4 F9:Prev.page p.01<br />
F5:action_5 F0:Next page<br />
Reset Archive FromDate ToDate<br />
Return *** Srch Loc Srch Net<br />
85
Issue<br />
<strong>11.01</strong>.C<br />
86<br />
Keywords<br />
<strong>Multicam</strong> - Version <strong>11.01</strong> – Operating <strong>Manual</strong><br />
<strong>EVS</strong> Broadcast Equipment SA – April 2012<br />
They can be selected to be used as search criteria the same way they were selected to<br />
be assigned to a clip, in LIST or NUMERIC mode. Up to three keywords can be selected<br />
as search criteria. If all three keyword locations are used, some of them must be cleared<br />
before selecting a new keyword. Press CLEAR+F1 / F2 / F3 to clear to corresponding<br />
keyword location.<br />
Ranking<br />
A ranking can also be used as the only search criteria, or can be combined to the<br />
keywords as an additional criterion. Press the B key several times to select the desired<br />
ranking.<br />
The RESET key (SHIFT+A) can be used at any time to clear all three keyword locations<br />
and reset the ranking to the lowest level.<br />
Archive<br />
This field allows selecting archive status for search criteria.<br />
Parameter On the Remote<br />
None (default) Archive<br />
Clips not archived >Archive<br />
Clips to be archived >Archive (blinking)<br />
Clips archived >Archive<br />
It is possible to include trains in the search. The B key allows to toggle between<br />
CLIPS/CLIPS+REC/REC.<br />
From Date / To Date<br />
Selecting a From Date and To Date can be done using the SHIFT+C and SHIFT+D keys.<br />
Pressing on any of those keys changes the display on the key to dd/mm/yy to indicate the<br />
date format. The F keys are used to enter the date, the Clear key being the<br />
.<br />
To search only for a specific date, use the same date twice in the From Date and To<br />
Date fields.<br />
Once a date is entered, pressing Clear SHIFT+C or Clear SHIFT+D reset the FromDate<br />
or ToDate to the default parameter (dd/mm/yy).<br />
RESET<br />
The RESET key: resets the default values of the search criteria (no from/to date) and set<br />
the default TC to the TC of loaded on the PGM.<br />
RETURN<br />
The RETURN key (A) is used to exit the Search function without performing any search.
<strong>Multicam</strong> - Version <strong>11.01</strong> – Operating <strong>Manual</strong><br />
<strong>EVS</strong> Broadcast Equipment SA – April 2012<br />
Search LOC / Search NET<br />
Issue<br />
<strong>11.01</strong>.C<br />
Once the search criteria are defined, press SRCH LOC (C) to search the local clips<br />
database, or SRCH NET (D) to search the entire network database.<br />
The matching clips are the ones that contain all keywords used as search criteria, and<br />
that have at least the requested ranking.<br />
If matching clips are found, the remote will automatically be in Browse mode (the<br />
BROWSE key is red), allowing the operator to quickly view the Short IN of each clip<br />
corresponding to the search criteria by rotating the jog dial. To be able to jog inside a clip,<br />
disable the Browse mode by pressing on the BROWSE key and move the jog dial. To<br />
return to the Browse mode inside the search results, press the BROWSE key again.<br />
Search results are reset when going by to Live mode, or when a new search is<br />
performed.<br />
If no matching clips are found, a message notifies the operator.<br />
Adding the Search Results to the Current Playlist<br />
It is possible to directly add all search results (clips only) to the current playlist.<br />
Press ENTER on the selected clip to insert only that one.<br />
Press SHIFT+ENTER to insert all clips to the end of the current playlist.<br />
87
Issue<br />
<strong>11.01</strong>.C<br />
11. Playlist Management<br />
11.1 General Information<br />
88<br />
Playlist Creation<br />
Playlists can be created on the server<br />
<strong>Multicam</strong> - Version <strong>11.01</strong> – Operating <strong>Manual</strong><br />
<strong>EVS</strong> Broadcast Equipment SA – April 2012<br />
• via the LSM Remote Panel and/or the <strong>Multicam</strong> user interface. The playlists are using<br />
specific banks on each page that can be accessed directly without requiring a<br />
dedicated creation step (please refer to section 11.4 ‘Selecting and Loading<br />
Playlists').<br />
• by means of the Playlist Panel application in IPDirector<br />
• via external protocols..<br />
Limitation on Playlist and Timeline Elements<br />
A playlist can include up to 1000 elements.<br />
Up to 16000 playlist elements can be saved on a server.<br />
Up to 48000 temporary playlist elements, available for undo and redo actions, can be<br />
stored on a server. They will be purged each time the <strong>Multicam</strong> application is closed.<br />
Playlist Location<br />
All playlists created are automatically stored on the banks dedicated to playlists and<br />
timelines on the server, i.e. the bank 10 of each page.<br />
Playlists on page 10 are not available from the <strong>EVS</strong> Remote Panel. These playlists are<br />
reserved for external protocols (Odetics, Louth VDCP, <strong>EVS</strong> AVSP).<br />
Refreshing the Playlist Information<br />
Playlist information is not permanently refreshed on the network. The playlist information<br />
for a remote playlist bank is only transferred when entering that bank. If you are already<br />
connected to a remote playlist bank, you need to press SHIFT+F10 again to refresh the<br />
playlist information for this bank.
<strong>Multicam</strong> - Version <strong>11.01</strong> – Operating <strong>Manual</strong><br />
<strong>EVS</strong> Broadcast Equipment SA – April 2012<br />
11.2 Playlist Modes on the Remote Panel<br />
11.2.1 Introduction<br />
Issue<br />
<strong>11.01</strong>.C<br />
Two modes are available on the Remote Panel to access and manipulate the playlists:<br />
The Playlist Edit mode and the Playlist Playout mode:<br />
• The Playlist Edit mode is used to modify the playlist.<br />
• The Playlist Playout mode is used to roll the playlist on air.<br />
Editing the playlist in Playlist Playout mode is not possible.<br />
11.2.2 Accessing the Playlist Edit Mode<br />
Access<br />
When you load a playlist pressing the PLST key on the Remote Panel, you directly enter<br />
the Playlist Edit mode. The first frame of the element highlighted in the playlist appears on<br />
the PGM. At the start, full control will be on the PGM side; scrolling through the playlist<br />
can be done here.<br />
From the Playlist Playout mode, you need to press the EDIT function (D button) or move<br />
the jog dial to return to the Playlist Edition mode from where you can edit the playlist.<br />
Overview<br />
The main menu in the Playlist Edit mode available on the Remote Panel display is the<br />
following:<br />
Effect Edit All<br />
Insert Speed FX Dur Delete<br />
A secondary menu is also available when you select MENU from the main menu in the<br />
Playlist Edit mode. All commands are not always available in the secondary menu:<br />
Clr Unav. OtherAng Split<br />
Replace MakeLoc Redo Undo<br />
In Playlist Edit mode, the duration displayed in the top right corner of the LCD screen is<br />
the playlist total duration, from the beginning to the end.<br />
For more details on the main and secondary menus of the Playlist Edit mode, refer to the<br />
section 11.9 ‘Overview of Editing Functions in Playlist Edit Mode’, on page 99.<br />
89
Issue<br />
<strong>11.01</strong>.C<br />
11.2.3 Accessing the Playlist Playout Mode<br />
90<br />
<strong>Multicam</strong> - Version <strong>11.01</strong> – Operating <strong>Manual</strong><br />
<strong>EVS</strong> Broadcast Equipment SA – April 2012<br />
When you load a playlist pressing the PLST key on the Remote Panel, you need to press<br />
PLST a second time to enter the Playlist Playout mode.<br />
The first frame of the playlist element following the one on the PGM will be displayed on<br />
the PRV side. This allows the operator to play only parts of the playlist, starting from the<br />
current position.<br />
The menu available from the Playlist Playout mode on the Remote Panel display is the<br />
following:<br />
FilmFX NEXT SKIP<br />
2nd CTRL<br />
EDIT<br />
Note<br />
A third selection of the PLST button cues the playlist to the beginning,<br />
displaying the first playlist element on the PGM side and the following clip on<br />
the PRV.<br />
For more details on the Playlist Playout mode, refer to the section 11.8.3 ‘Functions<br />
Available on the Remote in Playlist Playout Mode’, on page 98.<br />
11.3 Playlist Display on the VGA<br />
11.3.1 VGA Playlist Bank Screen<br />
Pressing END on the keyboard when the Clip screen is displayed allows the users to<br />
access the VGA Playlist Bank screen on the given page. This gives an overview on the<br />
playlists and timelines stored on the bank.
<strong>Multicam</strong> - Version <strong>11.01</strong> – Operating <strong>Manual</strong><br />
<strong>EVS</strong> Broadcast Equipment SA – April 2012<br />
For each playlist the following information is displayed:<br />
Field Description<br />
Playlist ID Unique identifier of the playlist on the server. Ex: PL16<br />
Issue<br />
<strong>11.01</strong>.C<br />
Playlist Name Name of the playlist. It cannot exceed 12 characters. Ex:<br />
”game edit<br />
X clips Number of available clips in the playlist (unavailable network<br />
clips are not taken into account).<br />
Ex: 98 clips<br />
Dur: --:--:--:-- Total playback duration with available clips.<br />
Ex: 00:04:34:12<br />
Aux Clip Aux Clip ID and name of the audio auxiliary clip.<br />
11.3.2 VGA Playlist Screen<br />
Introduction<br />
Pressing F10 on the keyboard calls the VGA Playlist screen. The Playlist screen displays<br />
information on the clips included in the current or loaded playlist. Several transport<br />
functions are available from this screen. For more information, refer to section 11.8.2<br />
‘Functions Available from the VGA Playlist Screen’, on page 97.<br />
91
Issue<br />
<strong>11.01</strong>.C<br />
92<br />
<strong>Multicam</strong> - Version <strong>11.01</strong> – Operating <strong>Manual</strong><br />
<strong>EVS</strong> Broadcast Equipment SA – April 2012<br />
Display Depending on the Load Playlist Setting<br />
When the Load Playlist parameter is set to ‘Conditional’ in the <strong>Operation</strong>al Setup menu<br />
on the Remote Panel (P3.3 F2), the information displayed on the VGA Playlist Screen will<br />
differ depending on whether a playlist is loaded on the PGM1 or not:<br />
If a playlist is loaded on the PGM1:<br />
• All the information displayed on the Playlist Screen refers to the loaded playlist.<br />
• The PLAY, SKIP, NEXT and RECUE commands are displayed on the bluehighlighted<br />
section at the bottom of the page.<br />
If no playlist is loaded on the PGM1:<br />
• The information displayed on the Playlist screen refers to the current playlist, except<br />
the remaining time, which is not displayed.<br />
• The PLAY, SKIP, NEXT and RECUE commands are NOT displayed on the bluehighlighted<br />
section at the bottom of the page.<br />
11.4 Selecting and Loading Playlists<br />
11.4.1 Setting a Current Playlist Versus Loading a Playlist<br />
A distinction is made between setting a current playlist and loading a playlist:<br />
• When you set a current playlist, you access the playlist location on the server but you<br />
do not load it on a player channel. You can insert clips directly in the current playlist<br />
without having to load the playlist onto a channel.<br />
When <strong>Multicam</strong> is switched on, the current playlist is automatically the Playlist 11, i.e.<br />
the playlist 1 on bank 10 of page 1.<br />
• When you load a playlist, you actually load it on a given player channel either to edit it<br />
or to play it out.<br />
11.4.2 How to Set a Current Playlist<br />
You can set a playlist as the current playlist via the Remote Panel or via the VGA screen.<br />
Via the Remote Panel<br />
To set a current playlist via the Remote Panel, proceed as follows:<br />
1. Do one of the following:<br />
a. To set a local playlist as the current playlist, go directly to step 2.<br />
b. To set a distant playlist as the current playlist, press the SHIFT+Network keys<br />
and select the F_ key corresponding to the server on which the playlist is located.
<strong>Multicam</strong> - Version <strong>11.01</strong> – Operating <strong>Manual</strong><br />
<strong>EVS</strong> Broadcast Equipment SA – April 2012<br />
Issue<br />
<strong>11.01</strong>.C<br />
2. Go to the requested page by pressing SHIFT+PAGE+the F_ key corresponding to<br />
the requested page.<br />
3. Go to the playlist bank of the page by pressing SHIFT+F10.<br />
4. Select the playlist as required (press F1 - F10)<br />
PAGE 1 contains Playlists 10 to 19, PAGE 2 contains 20 to 29, PAGE 3 contains 30<br />
to 39, and so on.<br />
5. Press ENTER on the Remote Panel to confirm.<br />
Via the VGA Clip Screen<br />
To set a current playlist via the VGA clip screen, proceed as follows:<br />
1. From the clip screen, press END to access the playlist bank.<br />
2. Press the down arrow until you select the playlist to define as the current playlist.<br />
3. Pressing ENTER on the selected playlist sets it to the current playlist.<br />
11.4.3 How to Recall and Load a Playlist<br />
You can only recall and load a playlist if this is not empty.<br />
To load a playlist on a player channel, proceed as follows:<br />
1. Access the desired playlist bank by pressing F10 from the requested page.<br />
2. Select the playlist to load with the F1-F10 keys.<br />
The selected playlist becomes current and is displayed on the LCD display.<br />
3. Press PLST key on the Remote Panel to load the current playlist.<br />
If the new playlist is not empty, it is automatically loaded on the selected player channel<br />
(in 3 PGM mode) or on the PGM (in PGM/PRV mode) and it becomes the current playlist.<br />
If the new playlist is empty, the system will ask you whether you want to copy the current<br />
playlist at this new location.<br />
11.4.4 How to Exit The Playlist Mode<br />
Press the RECORD key on the Remote Panel to exit the playlist mode and return to E2E<br />
mode.<br />
93
Issue<br />
<strong>11.01</strong>.C<br />
11.5 Deleting Playlists<br />
11.5.1 How to Delete a Playlist<br />
94<br />
<strong>Multicam</strong> - Version <strong>11.01</strong> – Operating <strong>Manual</strong><br />
<strong>EVS</strong> Broadcast Equipment SA – April 2012<br />
Deleting a playlist deletes all the playlist elements from the playlist and the playlist<br />
definition in the database.<br />
To delete a playlist, proceed as follows:<br />
1. Access the playlist bank where the playlist to delete is stored, by pressing F10 from<br />
the requested page.<br />
2. Press CLEAR+the F_ key corresponding to the playlist you want to delete.<br />
You will be asked or not to confirm the deletion action, depending on the value defined for<br />
the Confirm del clp/plst parameter in the <strong>Operation</strong>al Setup menu of the Remote Panel<br />
(p.5.1 F3). The empty playlist location remains available.<br />
11.5.2 How to Delete All Playlists of a Bank<br />
To clear all playlists stored on a given bank, proceed as follows:<br />
1. Select the page that includes the bank on which you want to delete the playlists.<br />
2. Press CLEAR+SHIFT, and the F10 key that corresponds to the requested playlist<br />
bank.<br />
The following confirmation message will be displayed:<br />
3. Press ENTER to confirm and the playlists and timelines on the playlist bank of the<br />
selected page will be deleted.<br />
Caution:<br />
This will delete all playlists/timelines<br />
stored on bank 0<br />
[Menu] : Cancel [Enter] : Confirm
<strong>Multicam</strong> - Version <strong>11.01</strong> – Operating <strong>Manual</strong><br />
<strong>EVS</strong> Broadcast Equipment SA – April 2012<br />
11.6 Naming a Playlist or an Element in a Playlist<br />
Issue<br />
<strong>11.01</strong>.C<br />
You can name a playlist from the VGA Playlist Bank screen or from the VGA Playlist<br />
screen.<br />
11.6.1 How to Name a Playlist from the VGA Playlist Bank<br />
Screen<br />
To name a playlist from the VGA Playlist Bank screen, proceed as follows:<br />
1. From the Clip screen, press END to go to the Playlist Bank screen of the requested<br />
page.<br />
2. Press the down arrow several times until the playlist to name is selected.<br />
3. Type the desired name on the keyboard.<br />
It appears in the Name field at the bottom of the screen. Use to<br />
delete the last character, or ESC to clear the entire field.<br />
4. Press F1 to assign the new name to the current playlist.<br />
The playlist name will appear in the title bar next to the playlist number.<br />
11.6.2 How to Name the Current Playlist on the VGA<br />
Playlist Screen<br />
To name the current playlist from the VGA Playlist screen, proceed as follows:<br />
1. Press the F10 key on the keyboard to open the VGA Playlist screen.<br />
The current playlist is displayed.<br />
2. Type the desired name on the keyboard.<br />
It appears in the Name field at the bottom of the screen. Use to<br />
delete the last character, or ESC to clear the entire field.<br />
3. Press SHIFT+F1 to assign the new name to the current playlist.<br />
The playlist name will appear in the title bar next to the playlist number.<br />
11.6.3 How to Name the Current Element in the Loaded<br />
Playlist<br />
Note<br />
Naming the current element of the loaded playlist will affect the original clips.<br />
This function is only available when the playlist is the current one in Playlist Edit mode<br />
(PLST EDIT) or Playlist Playout mode (PLST DIFF) on the <strong>EVS</strong> Remote Panel.<br />
To name the current element in the loaded playlist from the VGA Playlist screen, proceed<br />
as follows:<br />
1. Press the F10 key on the keyboard to open the VGA Playlist screen.<br />
95
Issue<br />
<strong>11.01</strong>.C<br />
96<br />
<strong>Multicam</strong> - Version <strong>11.01</strong> – Operating <strong>Manual</strong><br />
<strong>EVS</strong> Broadcast Equipment SA – April 2012<br />
The loaded playlist is displayed and the current playlist element on the Remote Panel<br />
is selected.<br />
2. Type the desired name for the element on the keyboard.<br />
It appears in the Name field at the bottom of the screen. Use to<br />
delete the last character, or ESC to clear the entire field.<br />
3. Press F1 to assign the new name to the current element.<br />
The name for the current element will appear in the Name column of the selected<br />
element.<br />
11.7 Browsing Within a Playlist<br />
11.7.1 Possible Browsing Methods<br />
You can browse within a playlist in different ways:<br />
• Browse quickly by jumping to the first field of each clip in the playlist:<br />
For more information, see the section 11.7.3 ‘Browsing Quickly Through a Playlist’,<br />
on page 96.<br />
• Browse through the content of each clip in the playlist:<br />
For more information, see the section 11.7.2 ‘Browsing Through a Playlist’, on page<br />
96.<br />
11.7.2 Browsing Through a Playlist<br />
When you load a playlist, the default playlist mode allows you to scroll up and down<br />
through all the playlist elements.<br />
11.7.3 Browsing Quickly Through a Playlist<br />
When you are neither in Playlist nor in Clip mode, pressing the BROWSE key on the<br />
Remote Panel automatically enters the current playlist in Browse mode.<br />
In this mode, you can quickly jump to the first field of each clip inside the playlist by<br />
moving the jog dial. To return to the normal Playlist Edit mode, press the BROWSE key<br />
again.<br />
When you are in Playlist Edit mode, you can of course also activate the Browse mode by<br />
pressing the BROWSE key.<br />
PL11 LSM01 Paola LOC TDUR=00:00:02:22<br />
111A/04 Clipname0123 00:00:29 Unk W00:10<br />
112B Clipname4567 00:53:29 Unk W00:10<br />
112B/02 Clipname8910 00:53:29 Unk W00:10<br />
Effect Edit All<br />
Insert Speed FX Dur Delete
<strong>Multicam</strong> - Version <strong>11.01</strong> – Operating <strong>Manual</strong><br />
<strong>EVS</strong> Broadcast Equipment SA – April 2012<br />
11.8 Playout Functions with Playlists<br />
11.8.1 Rolling a Playlist<br />
Rolling Action<br />
Issue<br />
<strong>11.01</strong>.C<br />
After recalling a playlist, you will roll the playlist using the pre-defined speed of each clip.<br />
Use the PLAY key to start rolling the playlist.<br />
Playlist Speed<br />
As soon as the lever is used to start the playback or during playback, the pre-set speed<br />
for the current clip is cancelled and set by the lever position only. The playlist will return to<br />
pre-set speed mode as soon as another clip with a pre-set speed is found.<br />
Note<br />
When using the PLAY key to start the playlist, it is recommended to set the<br />
lever at the top position (100%). If the lever is in low position and the operator<br />
touches it by mistake while the playlist is rolling, the playlist could freeze on-air.<br />
If the speed for a Super Motion clip is set to “UNK”, pressing the PLAY key on that clip<br />
will start the playback of the playlist at 33%.<br />
11.8.2 Functions Available from the VGA Playlist Screen<br />
To use the following commands, you must be in Playlist Edit or Playlist Playout mode:<br />
• To enter the Playlist Edit mode, press the PLST key on the <strong>EVS</strong> Remote. The LCD<br />
screen of the Remote displays the information about the previous, current and next<br />
three clips of the playlist.<br />
• To enter the Playlist Playout mode, press the PLST key again.<br />
The following operations can be performed from the VGA playlist screen:<br />
Criteria Description<br />
Naming a playlist For more information, refer to the section 11.6.1 ‘How to Name<br />
a Playlist From the VGA Playlist Bank Screen’, on page 95.<br />
Naming the current clip For more information, refer to the section 11.6.3 'How to Name<br />
the Current Element in the Loaded Playlist’, on page 95.<br />
PLAY/pause Press ALT+P to start the playback / pause of the playlist from<br />
the current position.<br />
RECUE Press ALT+R to recue to the beginning of the playlist and<br />
pause.<br />
97
Issue<br />
<strong>11.01</strong>.C<br />
98<br />
Criteria Description<br />
<strong>Multicam</strong> - Version <strong>11.01</strong> – Operating <strong>Manual</strong><br />
<strong>EVS</strong> Broadcast Equipment SA – April 2012<br />
NEXT Press ALT+N while the playlist is playing to force immediately<br />
the transition to the next clip in the playlist.<br />
SKIP Press ALT+S while the playlist is playing to skip the next clip.<br />
The current clip will play until the defined OUT point, than the<br />
playlist will skip the next one and play the one after instead.<br />
11.8.3 Functions Available on the Remote in Playlist<br />
Playout Mode<br />
Once the playlist is cued and ready to roll, the menu below is displayed on the Remote<br />
LCD. This menu gives the operator the ability to manipulate the playlist while it is playing.<br />
The duration displayed in the top right corner of the LCD screen in Playlist Playout mode<br />
is the remaining duration until the end of the playlist.<br />
PL11 LSM 04 Albert LOC LEFT=00:00:02:22<br />
111A Clipname0123 00:00:29 Unk W00:10<br />
112B/03 Clipname4567 00:53:29 Unk M00:10<br />
112B Clipname8910 00:53:29 Unk M00:10<br />
Film FX Next Skip<br />
2nd CTRL<br />
Edit<br />
Film FX<br />
Selecting this function will create a film style effect during the playout of the playlist by<br />
repeating one field every two fields. Please note that the audio is also affected by this<br />
effect, making it unusable and therefore, muted. This mode is deactivated when exiting a<br />
playlist.
<strong>Multicam</strong> - Version <strong>11.01</strong> – Operating <strong>Manual</strong><br />
<strong>EVS</strong> Broadcast Equipment SA – April 2012<br />
Next<br />
Issue<br />
<strong>11.01</strong>.C<br />
While the playlist is rolling on air, selecting the Next function will start the transition of the<br />
next clip with the transition effect listed on the playlist. This can be used if a clip is running<br />
too long and it is necessary to shorten up the playing time.<br />
Skip<br />
While the playlist is rolling, the next clip in the sequence is always displayed on the PRV<br />
screen. The Skip function allows the operator to discard clips before they go on-air. The<br />
clip that will be «skipped» is the one displayed on the PRV screen. This function does not<br />
remove the clip from the playlist, but it simply allows it to be skipped during playback.<br />
Edit<br />
Selecting the Edit function gets the user back to the Playlist Edit mode.<br />
11.9 Overview of Editing Functions in Playlist Edit<br />
Mode<br />
The following section presents the various editing functions available from the main and<br />
secondary Playlist Edit Mode.<br />
11.9.1 Main Menu in Playlist Edit Mode<br />
Introduction<br />
The main menu in the Playlist Edit mode is available when you select the location of the<br />
requested playlist, and press PLST on the Remote Panel:<br />
Effect Edit All<br />
Insert Speed FX Dur Delete<br />
In the Playlist Edit mode, the first frame of the playlist element loaded (highlighted on the<br />
Remote Panel LCD display) can be seen on the PGM. To change any of the options on a<br />
clip, simply browse to the requested clip, then select a function from the menu displayed<br />
above and use the control lever to adjust to the desired value (when applicable).<br />
Edit All<br />
If you want to edit all clips of the playlist at the same time, select Edit All (SHIFT+D)<br />
before you perform the requested editing action with one of the following playlist<br />
commands: Speed, Effect, FX Dur.<br />
99
Issue<br />
<strong>11.01</strong>.C<br />
100<br />
Insert<br />
<strong>Multicam</strong> - Version <strong>11.01</strong> – Operating <strong>Manual</strong><br />
<strong>EVS</strong> Broadcast Equipment SA – April 2012<br />
The Insert function (A key) allows the operator to insert a clip into the playlist. The same<br />
operation can be achieved using the TAKE key.<br />
See also the section 11.10.4 ‘How to Insert Clips into a Playlist’, on page 103.<br />
Speed<br />
The Speed function (B key) allows defining the speed at which one or all clips of a playlist<br />
will be played. Select the playback speed of the clip with the lever, then press ENTER to<br />
validate. Values are ‘Unknown’ and from 0 to 100%.<br />
Operators have access to the secondary lever control like when clips are replayed. While<br />
editing the speed of a clip, pressing SHIFT+Lever on the Remote allows to access the<br />
secondary lever speed defined in the menu.<br />
FX Dur<br />
The FX Dur function (C key) sets the duration of the transition effect. The default value<br />
that initially appears is determined by the value set in the Setup menu. The effect<br />
duration will affect the transition at the beginning of the selected clip. Use the lever to<br />
adjust the value, then press ENTER to confirm.<br />
Effect<br />
The Effect function (SHIFT+C key) is used to select the type of transition effect<br />
(Mix/Wipe/Cut/Fade). Move the lever to set the type of effect, when Effect is highlighted.<br />
Press ENTER to validate.<br />
For more information on the effects types, refer to the section 11.15 ‘Transition Effects’,<br />
on page 114.<br />
Delete<br />
The Delete function allows the operator to quickly edit a playlist by removing the selected<br />
clip. The clip that has been «cut» can then be inserted into another location. This clip is<br />
displayed on the second PRV output. To insert it at another position in the playlist, simply<br />
go to that position using the jog dial and press the Insert key (or TAKE).<br />
11.9.2 Secondary Menu in Playlist Edit Mode<br />
Introduction<br />
You can access the secondary menu of the Playlist Edit mode pressing MENU on the<br />
Remote Panel when you are in the main menu of the Playlist Edit mode.<br />
Clr Unav. OtherAng Add cut<br />
Replace MakeLoc Redo Undo
<strong>Multicam</strong> - Version <strong>11.01</strong> – Operating <strong>Manual</strong><br />
<strong>EVS</strong> Broadcast Equipment SA – April 2012<br />
Replace<br />
Issue<br />
<strong>11.01</strong>.C<br />
The Replace function makes it possible to replace a portion of a playlist by the same A/V<br />
material to which effects have been added (externally or internally). This consolidates the<br />
effects within the playlist. For more information, refer to the section 11.18 ‘Replace<br />
Function’, on page 134.<br />
Clr Unav.<br />
The Clr Unav. (Clear Unavailable) function (SHIFT+A key) allows the user to remove the<br />
clips that are not available on the network from all local playlists. This function is only<br />
visible when unavailable clips are present and when the Split Audio Editing is turned off.<br />
MakeLoc<br />
The MakeLoc (Make Local) function (B key) offers the possibility to copy locally remote<br />
clips in a playlist. In the playlist secondary menu, select on the B position MakeLoc.<br />
When the function is called, the remote clips are replaced by short copies of the local<br />
ones as soon as they are available.<br />
Undo/Redo<br />
The last modifications of a playlist can be undone/redone for as long as the operator does<br />
not exit the Playlist mode (e.g.: returning to Live).<br />
Pressing the Undo command (D key) will undo the last modification. Up to 9<br />
modifications can be undone. Once a modification has been undone, it is possible to redo<br />
it by pressing the Redo key (C key).<br />
OtherAng<br />
The OtherAng (Other Angle) function (SHIFT+C key) allows the operator to replace the<br />
current playlist element by another playlist element showing a different angle of the<br />
recorded material.<br />
When the OtherAng option is selected, <strong>Multicam</strong> loads the local and network trains that<br />
include the TC IN of the playlist element to replace. The trains are loaded on the PRV<br />
channel, at the current TC of the loaded element. The jog is used to shift from one record<br />
train to the other.<br />
Once the requested record train is displayed on the PRV channel, pressing ENTER<br />
replaces the current playlist element by the one created from the selected angle.<br />
See also the section 11.10.9 ‘How to Change the Camera Angle of a Playlist Element’, on<br />
page 105.<br />
Add cut<br />
The Add cut function (SHIFT+D key) allows the operator to split an existing clip into two<br />
independent clips at a selected point. Both resulting clips are duplicates of the original<br />
one with additional short-in and short-out points added at the split point.<br />
For more information, refer to the section 11.12 ‘Adding Cut in Playlist Elements’ on page<br />
110.<br />
101
Issue<br />
<strong>11.01</strong>.C<br />
102<br />
<strong>Multicam</strong> - Version <strong>11.01</strong> – Operating <strong>Manual</strong><br />
<strong>EVS</strong> Broadcast Equipment SA – April 2012<br />
11.10 Adding & Replacing Clips in a Playlist<br />
11.10.1 Possible Methods for Adding Clips<br />
You can add clips to a playlist in different ways:<br />
• Adding clips at the end of the current playlist without entering the Playlist Edit mode.<br />
See the section 11.10.3 ‘How to Quickly Add Clips to the Current Playlist’, on page<br />
102.<br />
• Inserting clips before or after the clip selected in the loaded playlist.<br />
See the section 11.10.4 ‘How to Insert Clips into a Playlist’, on page 103.<br />
• Adding one or more clips returned by a search at the end of the current playlist.<br />
See the section 11.10.5 ‘How to Insert the Result of a Clip Search into a Playlist’, on<br />
page 103.<br />
11.10.2 Modifying a Distant Playlist<br />
Remote playlists are available as ‘Read Only’, and cannot be edited. If you want to modify<br />
a network playlist, you have to create a local copy on your machine first. This operation is<br />
done instantly if the clips remain in their original location. For details about copying<br />
playlists, refer to the section 11.11 ‘Copying Playlists’, on page 106.<br />
11.10.3 How to Quickly Add Clips to the Current Playlist<br />
You can create a playlist very quickly. The experienced operator can include a clip at the<br />
end of the playlist containing an action that happened seconds before the playlist is<br />
played on air. To add clips quickly at the end of the current playlist, you do not have to<br />
enter the Edit mode.<br />
To add clips to the current playlist, proceed as follows:<br />
1. Activate a playlist as the current playlist.<br />
For more information, refer to the section 11.4.2 ‘How to Set a Current Playlist’, on<br />
page 92<br />
2. Recall the first clip for your playlist. For more information, refer to the section 9.2.3<br />
‘Recalling a Clip’, on page 40.<br />
3. Press ENTER on the Remote Panel.<br />
The clip is added at the end of the current playlist.<br />
4. Repeat as many times as necessary until the last clip is entered.
<strong>Multicam</strong> - Version <strong>11.01</strong> – Operating <strong>Manual</strong><br />
<strong>EVS</strong> Broadcast Equipment SA – April 2012<br />
11.10.4 How to Insert Clips into a Playlist<br />
The following rules apply to the procedure below:<br />
Issue<br />
<strong>11.01</strong>.C<br />
• You need to be in PGM/PRV mode to be able to use the TAKE key on the Remote<br />
Panel to insert a clip.<br />
• Depending on what is selected for the Insert in playlist parameter in the<br />
<strong>Operation</strong>al Setup menu (p.3.1 F6), the clip will be inserted before or after this<br />
selected position.<br />
To insert a clip into a playlist, proceed as follows:<br />
1. Using the Playlist Edit mode or the Browse mode, scroll to the location where the clip<br />
must be inserted.<br />
2. Call the selected clip. It appears on the PRV output.<br />
3. Do one of the following to insert the selected clip in the playlist, at the position shown<br />
on the PGM output:<br />
• Press the A key (INSERT function) on the Remote Panel<br />
• Press the TAKE key on the Remote Panel<br />
• Press the SHIFT+INSERT keys on the Remote Panel<br />
A confirmation message will appear if that option has been enabled in the Setup menu.<br />
After the clip has been inserted, you can press PLST to return to the playlist at the current<br />
position.<br />
11.10.5 How to Insert the Result of a Clip Search into a<br />
Playlist<br />
In Playlist Edit mode with a PRV channel, when PRV CTL is enabled, the operator has<br />
full control of the PRV channel while the playlist remains loaded on the PGM channel.<br />
On the PRV channel, he can perform all clip-related functions, including database search<br />
using timecode, keywords and ranking, from the VGA Search Screen as well as from the<br />
secondary clip menu of the Remote Panel.<br />
Once the desired clip(s) is(are) found, it(they) can easily be inserted in the playlist that is<br />
still loaded on the PGM output. By switching PRV CTRL ON or OFF, the operator can<br />
very easily combine playlist editing and database search functions.<br />
103
Issue<br />
<strong>11.01</strong>.C<br />
104<br />
<strong>Multicam</strong> - Version <strong>11.01</strong> – Operating <strong>Manual</strong><br />
<strong>EVS</strong> Broadcast Equipment SA – April 2012<br />
To insert one or more clips from a search result at the end of the current playlist, proceed<br />
as follows:<br />
1. From the main menu, activate the current playlist as explained in the section 11.4.2<br />
‘How to Set a Current Playlist’, on page 92<br />
2. Press MENU+C to enter the Search mode:<br />
Enter the search criteria as explained in the section 10.5 ‘Searching the Database<br />
using the Remote Panel’, on page 85.<br />
3. Launch the search on the local server or on the whole network by pressing<br />
respectively the C (Srch Loc) or D (Srch Net) keys on the Remote Panel.<br />
4. Do one of the following:<br />
a. To insert only one clip into the playlist, browse to the clip and press the INSERT<br />
key on the Remote Panel.<br />
b. To insert all clips returned in the search result, press the SHIFT+INSERT keys on<br />
the Remote Panel.<br />
The clip(s) are inserted at the end of the current playlist.<br />
11.10.6 Inserting Growing Clips into Playlists<br />
Growing clips can be inserted in playlists in the same way as other clips. However, their<br />
display has the following characteristics:<br />
Display<br />
PGM1 CAM A *PRV1* CAM B<br />
Aud.Met. PgmSpd Sort->TC PostRoll<br />
Mix. Sw to IN Search Pref<br />
P.1 B.1 Clips: LOCAL Records: LOCAL<br />
PL 11: <<br />
Msg:<br />
Rst Cam Local Sync Prv 2nd CTRL<br />
Cam A Cam B Cam C Cam D<br />
1 keyword89012 2 2 keyword89012 3 keyword89012<br />
F1:action_1 F6:action_6<br />
F2:action_2 F7:action_7<br />
F3:action_3 F8:action_8<br />
F4:action_4 F9:Prev.page p.01<br />
F5:action_5 F0:Next page<br />
Reset Archive FromDate ToDate<br />
Return *** Srch Loc Srch Net<br />
They will be displayed with the ‘Creating’ message in the playlist on the VGA.<br />
The growing clips ID will be blinking on the mini playlist display and on the playlist screen<br />
on the Remote Panel, as well as on the OSD.
<strong>Multicam</strong> - Version <strong>11.01</strong> – Operating <strong>Manual</strong><br />
<strong>EVS</strong> Broadcast Equipment SA – April 2012<br />
Remaining Time<br />
Issue<br />
<strong>11.01</strong>.C<br />
The remaining time in playlists containing growing clips with only an IN point is displayed<br />
as --:--:-- on the screens (OSD, VGA, Remote Panel screen) where this information is<br />
shown.<br />
11.10.7 How to Delete Playlist Elements from a Playlist<br />
To delete a playlist element in a playlist using the Remote Panel, proceed as follows:<br />
1. While you are in Playlist Edit mode, scroll within the playlist to the element that needs<br />
to be deleted.<br />
If the Browse mode is active, the first frame will appear on the display as each clip is<br />
scrolled through.<br />
2. Select Delete from the Playlist Edit menu.<br />
The selected element will be removed from the playlist. A confirmation message will<br />
appear if the Confirm Ins/Del clips parameter has been enabled in the <strong>Operation</strong>al<br />
Setup menu (p.3.2 F1).<br />
11.10.8 How to Move an Element Within a Playlist<br />
The action to move a playlist element is described in this section as it uses the Delete<br />
command.<br />
To move a playlist element within a playlist using the Remote Panel, proceed as follows:<br />
1. While you are in Playlist Edit mode, scroll within the playlist to the clip that needs to<br />
be moved.<br />
2. Select Delete from the Playlist Edit menu. The clip is sent to the clipboard and loaded<br />
on the PRV channel.<br />
3. Scroll to the location in the playlist where you want to insert the clip.<br />
Remember that the position where the clip is inserted will depend on the value of the<br />
Insert in playlist parameter in the <strong>Operation</strong>al Setup menu (p3.1 F6), that is to say<br />
before or after the selected playlist element.<br />
4. Press TAKE or INSERT on the Remote Panel to insert the clip from the clipboard at<br />
the requested location.<br />
The playlist element is inserted at the requested location.<br />
If the playlist element has been trimmed before being moved, the element will be<br />
reinserted in the new position with the new guardbands.<br />
11.10.9 How to Change the Camera Angle of a Playlist<br />
Element<br />
You can change the camera angle of a playlist element if the material is still available in a<br />
local or distant record train.<br />
To change the camera angle of a playlist element, proceed as follows:<br />
1. When you are in Playlist Edit mode, scroll within the playlist to the playlist element.<br />
2. Press MENU to access the secondary menu:<br />
105
Issue<br />
<strong>11.01</strong>.C<br />
106<br />
<strong>Multicam</strong> - Version <strong>11.01</strong> – Operating <strong>Manual</strong><br />
<strong>EVS</strong> Broadcast Equipment SA – April 2012<br />
OtherAng<br />
Replace MakeLoc<br />
3. Press SHIFT+C to search and load the local and distant record trains that include the<br />
same TC IN as the playlist element.<br />
The first record train is loaded on the PRV channel, at the current TC of the loaded<br />
element.<br />
4. Press Browse and use the jog to move within one record train to browse its content.<br />
5. Once you have loaded the requested camera angle on the PRV channel, press<br />
ENTER.<br />
This will replace the current playlist element by a new clip having the same TC IN and TC<br />
OUT. The new clip is stored on the playlist receive page. The effects, the split audio and<br />
the swap points defined on the initial playlist element are preserved.<br />
11.11 Copying Playlists<br />
11.11.1 Introduction<br />
From the VGA Clip screen, you can perform cut, copy and paste actions with playlists, in<br />
the same way as you do with clips. For more information on these actions, refer to the<br />
section 9.3.13 ‘Moving and Copying Clips’, on page 62.<br />
From the Remote Panel, you can only copy a playlist, but not move (cut & paste) it to<br />
another location.<br />
11.11.2 Copy Options<br />
When you copy a distant playlist from the VGA, or a local/distant playlist from the Remote<br />
Panel to the local <strong>EVS</strong> server, you have different options:<br />
EDL only or EDL+Clips Copy<br />
• The EDL copy copies only the playlist definition and the playlist elements themselves<br />
remain at the original location.<br />
• The EDL+Clips copy copies the playlist definition and the playlist elements to the<br />
server on which the copy is requested.<br />
Long or Short Copy<br />
When you copy the material of the playlist elements, you can perform a long or short<br />
copy:<br />
• The short copy copies the material between the IN and OUT points of the playlist<br />
elements, with clip guardbands as defined on the destination system.
<strong>Multicam</strong> - Version <strong>11.01</strong> – Operating <strong>Manual</strong><br />
<strong>EVS</strong> Broadcast Equipment SA – April 2012<br />
Issue<br />
<strong>11.01</strong>.C<br />
• The long copy copies the original clips, not only the material defined as the playlist<br />
element. This makes a difference when the playlist element has been trimmed<br />
compared to the original clip.<br />
11.11.3 Possible Copy Actions<br />
The following table provides an overview on the possible actions on the Remote Panel<br />
and on the VGA:<br />
Local PL<br />
to local<br />
position<br />
VGA Remote Panel<br />
Distant<br />
PL to<br />
local<br />
position<br />
Distant<br />
PL to<br />
distant<br />
position<br />
Local PL<br />
to local or<br />
distant<br />
position<br />
Distant<br />
PL to<br />
local<br />
position<br />
Distant<br />
PL to<br />
distant<br />
position<br />
Copy (EDL) Yes Yes No Yes Yes Yes<br />
Copy<br />
(EDL+Short<br />
Clip copy)<br />
Copy<br />
(EDL+Long<br />
Clip copy)<br />
No Yes No Yes Yes Yes<br />
No Yes No Yes Yes Yes<br />
11.11.4 How to Copy a Playlist from the Remote Panel<br />
From the Remote Panel, you can copy playlists from local or distant servers to local or<br />
distant servers.<br />
To copy a playlist from the Remote Panel, proceed as follows:<br />
1. Go to playlist bank (local or from another machine on the network).<br />
2. Select the original playlist to copy by pressing the corresponding F_ key on the<br />
Remote.<br />
3. Select an empty playlist location on your local machine.<br />
A new menu appears on the LCD display of the Remote Panel, with the<br />
corresponding message on the OSD of the output monitors, asking whether you want<br />
to copy the original playlist to the new location or whether you simply want to select a<br />
new, empty playlist (default choice):<br />
Select New Playlist 13 ?<br />
[Menu]: Cancel<br />
[Enter]: Confirm<br />
COPY NEW PLST<br />
107
Issue<br />
<strong>11.01</strong>.C<br />
108<br />
<strong>Multicam</strong> - Version <strong>11.01</strong> – Operating <strong>Manual</strong><br />
<strong>EVS</strong> Broadcast Equipment SA – April 2012<br />
4. Press COPY (A key) to select the copy option. The menu becomes:<br />
Copy Playlist 11/03<br />
to Playlist 13 ?<br />
[Menu]: Cancel<br />
[Enter]: Confirm<br />
COPY PLST+CLP NEW PLST<br />
5. To specify whether to copy the EDL with or without the clips, do one of the following:<br />
• If you want to copy only the EDL without copying the elements contained in the<br />
original playlist, press ENTER. The copy is done instantly since there is no<br />
material to transfer.<br />
• If you want to copy the EDL and the playlist elements themselves to your local<br />
machine, press PLST+CLP (B key). The display becomes:<br />
Copy Playlist 11/03 and all net. clips<br />
to Playlist 13 ?<br />
[Menu]: Cancel<br />
[Enter]: Confirm<br />
COPY PLST+CLP SHORT NEW PLST<br />
6. To specify whether to perform a Short or Long copy, select the desired value<br />
(SHORT or LONG) pressing the C key.<br />
• SHORT mode (default): only the section of the elements between the Short IN<br />
and Short OUT as defined in the playlist will be copied, increased by the duration<br />
of the guardbands, as defined on the destination system.<br />
• LONG mode: the entire original clips, including their guardbands, will be copied<br />
on the destination system.<br />
7. Once the various options have been decided, press ENTER to confirm the copy, or<br />
MENU to cancel.<br />
The F_ key of the destination playlist will flash until all clips have been copied. This<br />
playlist can be recalled during that process for browsing, editing or playback. If some clips<br />
have not yet been copied, the original network clip is used instead.<br />
11.11.5 How to Copy a Playlist from the VGA Clip Screen<br />
From the VGA screen, you can copy:<br />
• the EDL of a playlist from the local server to the same server<br />
• the EDL, with or without the playlist elements, from a distant server to the local<br />
server.<br />
How to Copy a Local Playlist<br />
To copy a local playlist from the VGA Clip Screen, proceed as follows:
<strong>Multicam</strong> - Version <strong>11.01</strong> – Operating <strong>Manual</strong><br />
<strong>EVS</strong> Broadcast Equipment SA – April 2012<br />
Issue<br />
<strong>11.01</strong>.C<br />
1. From the VGA Clip Screen, open the playlist bank by pressing END on the keyboard.<br />
2. Select the playlist to copy and press CTRL+C.<br />
3. Go to the empty playlist location on the same server where you want to copy the<br />
playlist and press CTRL+V.<br />
The EDL of the playlist is copied to the requested location.<br />
How to Copy a Distant Playlist<br />
To copy a distant playlist from the VGA Clip Screen, proceed as follows<br />
1. From the VGA Clip Screen, press F9 to open the Connect window.<br />
2. With the ↓ and ↑ keys, select the distant server from which you want to copy a playlist<br />
and press ENTER.<br />
3. On the requested page, go to playlist bank by pressing END on the keyboard.<br />
4. Select the original playlist to copy with the ↓ and ↑ keys and click CTRL+C.<br />
5. Press F9, select the local server and ENTER to come back to the local server.<br />
6. On the requested playlist bank, select an empty playlist location on your local<br />
machine and press CTRL+V to copy the playlist.<br />
The following dialog box pops up:<br />
Copy Playlist xx/xx to yy.<br />
Select Copy Playlist Mode (Space Bar)<br />
Playlist Only<br />
Playlist with Clips: Short Mode<br />
Playlist with Clips: Long Mode<br />
Esc: Cancel - Enter: Confirm<br />
7. Select the requested copy option pressing the space bar.<br />
8. Press ENTER to confirm.<br />
The playlist is copied to the requested location.<br />
11.11.6 Copying Playlists with On-Air Clips<br />
Seamless Process<br />
Long or short copies of a playlist are performed as a background process, which is<br />
seamless to the user. If the destination playlist is recalled and the on-air playlist element<br />
has not yet been transferred to the local machine, the on-air element played out is the<br />
original one. The on-air element will be automatically copied locally when the playlist will<br />
be removed from the playout channel.<br />
Impossibility to Queue Copy Processes<br />
COPY PLST+CLIPS processes cannot be queued. If the operator tries starting a new<br />
COPY PLST+CLIPS process while the previous one is still running, a message will ask<br />
him whether he wants to stop the previous process to start the new one, or cancel his<br />
new request.<br />
109
Issue<br />
<strong>11.01</strong>.C<br />
11.12 Adding Cut in Playlist Elements<br />
11.12.1 Introduction<br />
110<br />
<strong>Multicam</strong> - Version <strong>11.01</strong> – Operating <strong>Manual</strong><br />
<strong>EVS</strong> Broadcast Equipment SA – April 2012<br />
The Add cut command duplicates a playlist element (clip, record train...) and adjusts the<br />
short-in and short-out points of these new duplicated elements.<br />
On both these elements, the guardbands and other effects are kept unchanged as in the<br />
original one.<br />
In the first duplicated element, the short-in point is left unchanged while the short-out<br />
point is adjusted to the cut point.<br />
In the second duplicated element, the short-out point is left unchanged while the short-in<br />
point is adjusted to the cut point as illustrated hereunder.<br />
11.12.2 Adding Cut Behavior<br />
When adding a cut to a clip, <strong>Multicam</strong> will behave as follows:<br />
• The transition applied at the cut point is a cut (for both audio and video).<br />
• The speed of the cut elements is the same as the original element, even if it is<br />
“Unknown”.<br />
• The stop and start modes of the cut elements are auto.<br />
• Any loop defined on the playlist that includes the original element conserves and<br />
includes the cut elements.<br />
• Any tag defined and active on the original element at the cut point is recreated at the<br />
short-in of the second cut element.<br />
The adding cut is not possible in the following cases:<br />
• Within a video effect.<br />
• Within an audio effect beginning or finishing the original element.
<strong>Multicam</strong> - Version <strong>11.01</strong> – Operating <strong>Manual</strong><br />
<strong>EVS</strong> Broadcast Equipment SA – April 2012<br />
11.13 Other Editing Functions for Playlists<br />
11.13.1 How to Trim Clips into a Playlist<br />
Issue<br />
<strong>11.01</strong>.C<br />
Every playlist element can be trimmed independently of all other instances of the same<br />
clip number.<br />
To trim clips into a playlist, proceed as follows:<br />
1. Browse to the desired element in the playlist.<br />
2. Re-mark a new Short IN or Short OUT.<br />
If the clip duration is too short, clear the IN or OUT point by selecting CLEAR and<br />
then set the new IN or OUT point at the desired position.<br />
Note<br />
Clearing restores the existing IN or OUT point to the end of the guardbands of<br />
the clip.<br />
11.13.2 How to Sort the Playlist Elements by TC IN<br />
From the VGA, it is possible to sort (reorder) the playlist elements by TC IN. The sort is<br />
done on the TC displayed in the TC IN column, whatever the type of TC displayed (User<br />
TC or LTC).<br />
Note<br />
This operation will change the order of the playlist elements, and reset the<br />
transitions to the default transitions defined on the Remote Panel.<br />
To reorder the playlists elements by TC IN in a playlist, proceed as follows:<br />
1. Open the playlist in the VGA Playlist screen.<br />
2. Press the TAB key until you highlight the Sort by TC IN field in the Playlist<br />
management area at the bottom of the screen.<br />
3. Press ENTER to validate, and press ENTER a second time to confirm the operation.<br />
The playlist elements are reordered by TC IN.<br />
You can undo the operation using the Undo command available in Playlist Edit mode on<br />
the Remote Panel.<br />
11.13.3 How to Merge Playlists<br />
From the VGA, it is possible to merge two playlists by copying a playlist and pasting it to<br />
an existing playlist. The copied playlist will be added at the end of the destination playlist.<br />
111
Issue<br />
<strong>11.01</strong>.C<br />
11.13.4 Consolidating a Playlist<br />
112<br />
Overview<br />
<strong>Multicam</strong> - Version <strong>11.01</strong> – Operating <strong>Manual</strong><br />
<strong>EVS</strong> Broadcast Equipment SA – April 2012<br />
Using the internal loop, you can record a playlist back to the server as a big clip if you<br />
want, for example, to record the playlist effects (split screen, target tracking, painting,<br />
etc.) as regular video inside the server.<br />
Depending on the Internal Loop -parameter in the <strong>Operation</strong>al Setup menu (p.9.2 F6),<br />
both video and audio can be looped back into the system, or only the video track is<br />
looped and the system keeps recording the live audio at the same time.<br />
How to Loop Back a Playlist into the Server<br />
To consolidate a playlist using the internal Loop mode, proceed as follows:<br />
1. Add the requested effects to the playlist.<br />
2. Recue the playlist.<br />
3. Activate the Loop mode via the SHIFT+LOOP key.<br />
4. Roll the playlist.<br />
The playlist will be recorded onto the disks (Channel 1 – CAM A) as a continuous<br />
video/audio stream.<br />
When you exit the playlist mode, go back to LIVE record and simply jog back, you will see<br />
the playlist recorded with all its transitions and at the speed they were played.<br />
11.13.5 Generating a Continuous Timecode in a Playlist<br />
Overview<br />
You can regenerate a continuous timecode for the whole playlist or for each clip of a<br />
playlist. This can be useful when:<br />
• you do not want to have a playlist with disrupted timecodes from the various playlist<br />
elements<br />
• you want to change the timecode type in the VITC or LTC timecode
<strong>Multicam</strong> - Version <strong>11.01</strong> – Operating <strong>Manual</strong><br />
<strong>EVS</strong> Broadcast Equipment SA – April 2012<br />
Process<br />
To regenerate the timecode in a given playlist, proceed as follows:<br />
Issue<br />
<strong>11.01</strong>.C<br />
1. Activate the TC Regeneration and define the related settings on the Playlist page<br />
(F10), in the blue-highlighted area at the bottom of the page. This feature is defined<br />
for each playlist individually:<br />
2. Activate the internal loop using the SHIFT+LOOP keys<br />
3. Roll the playlist.<br />
This will record the playlist back into the recorder channel 1 (CAM A) with the<br />
regenerated timecode.<br />
Activating the Continuous Timecode Regeneration<br />
To activate the continuous timecode regeneration, proceed as follows:<br />
1. In the Playlist page (F10), press several times until the ON/OFF field after<br />
‘Regeneration of TC’ is green highlighted.<br />
2. Press the right arrow key to toggle the function to ‘ON’.<br />
The continuous timecode regeneration function is now active. However, the timecode will<br />
effectively be regenerated when you replay the playlist after activating a loop. To<br />
deactivate the function, press the left arrow on the field to toggle the function to ‘OFF’.<br />
Settings for Continuous Timecode in Playlists<br />
The following table describes the various parameters that should be defined when<br />
regenerating the timecode in a playlist:<br />
Parameter Description Possible Values<br />
Continuous in … Specifies whether the timecode should<br />
be continuous for the whole playlist or<br />
for each playlist element.<br />
From … Specifies the initial TC value to be used<br />
for the timecode regeneration<br />
In … Specifies the TC type in which the<br />
timecode should be regenerated<br />
PLST, CLIP<br />
Timecode, LTC TC,<br />
User TC<br />
LTC or VITC in SD<br />
HANC VITC, HANC<br />
LTC or both<br />
113
Issue<br />
<strong>11.01</strong>.C<br />
11.14 The Auxiliary Audio Clip<br />
11.14.1 Introduction<br />
114<br />
<strong>Multicam</strong> - Version <strong>11.01</strong> – Operating <strong>Manual</strong><br />
<strong>EVS</strong> Broadcast Equipment SA – April 2012<br />
This option allows adding a new stereo audio track (e.g. sport comments, music, jingles,<br />
ambient sound) to the original video clips. This stereo audio track is available on the PVW<br />
output and on analogue outputs 7/8 or on digital outputs 15/16. The selection of the track<br />
output is done with the Audio slow motion parameter in the <strong>Operation</strong>al Setup menu<br />
(p.8.1 F1). The original audio tracks are still available on outputs 1/2 (3/4). The auxiliary<br />
audio clip selected is always played back with normal speed (100%), whatever the<br />
selected playback speed for the video.<br />
When the playback of the playlist is not started from the beginning, the system calculates<br />
the offset between the current position and the beginning of the playlist, and applies the<br />
same offset to the Aux. Clip, so that it can remain synchronized with the playlist. If the<br />
duration of the Aux Clip is longer than the playlist duration, the auxiliary audio clip keeps<br />
playing even after the video has stopped. Otherwise, the audio clip ends itself before the<br />
end of the playlist, when the audio clip reaches its OUT point.<br />
11.14.2 How to Add/Remove an Auxiliary Audio Clip to a<br />
Playlist<br />
To add/remove an auxiliary audio clip to a playlist, proceed as follows:<br />
1. Activate the Aux. Clip button by selecting a clip from the clip bank.<br />
This can be done outside of the PLST EDIT mode, or in PLST EDIT mode with PRV<br />
CTRL ON. You will see the Aux Clip option appearing in the secondary menu on the<br />
LCD of the Remote Panel.<br />
2. Press MENU to call the secondary menu, then Aux Clip button (SHIFT+B)<br />
The ID of the Aux Clip appears in the title bar of the Playlist screen (F10)<br />
3. To remove the current aux. clip, load the aux clip, call the secondary menu by<br />
pressing MENU, then press CLEAR+SHIFT+(B) (Aux. Clip) on the Remote.<br />
11.15 Transition Effects<br />
11.15.1 Description<br />
You can apply effects on the audio and video transitions of a clip in a playlist. For each<br />
transition, you define the effect type and duration.<br />
The Split Audio option will be handled in the next chapter.
<strong>Multicam</strong> - Version <strong>11.01</strong> – Operating <strong>Manual</strong><br />
<strong>EVS</strong> Broadcast Equipment SA – April 2012<br />
Normal Playlist with Cuts<br />
Playlist with 1:00 sec Effect Duration<br />
Issue<br />
<strong>11.01</strong>.C<br />
In an LSM playlist, the video and audio effects end at the OUT point of a clip, so the<br />
duration of clips is shortened by the length of the effect.<br />
11.15.2 Accessing Commands for Transition Effects<br />
The functions related to transition effects are available from the main menu of the Playlist<br />
Edit mode, and the effects applied are also displayed on the same LCD display:<br />
115
Issue<br />
<strong>11.01</strong>.C<br />
116<br />
<strong>Multicam</strong> - Version <strong>11.01</strong> – Operating <strong>Manual</strong><br />
<strong>EVS</strong> Broadcast Equipment SA – April 2012<br />
11.15.3 Default Duration for Video and Audio Transition<br />
It is possible to set a default value for the duration of the video and audio transitions in the<br />
Setup Menu. Once this is defined, each time a clip is entered or inserted into a playlist,<br />
transitions are applied with the default values.<br />
The Video effect duration parameter is available in the <strong>Operation</strong>al Setup menu (p.3.1<br />
F1), and ranges up to 20:00 secs.<br />
The Audio effect duration parameter is available in the <strong>Operation</strong>al Setup menu (p.3.1<br />
F3). When the split audio is disabled, the value for this setting is ‘Lock to video’, and the<br />
Audio effect duration is the same as the Video effect duration.<br />
11.15.4 Overview of Transitions Effect Types<br />
Default Transition Effect<br />
A default mix transition effect (audio and video) is applied to each new clip inserted into<br />
the playlist. However, you can change the type of transition effect in the main menu of the<br />
Playlist Edit mode. For more information, refer to the section 11.15.5 ‘How to Define a<br />
Transition Effect’, on page 117.<br />
Possible Transition Effects<br />
The following video transition effects can be defined. By default, the audio transition is<br />
always a mix when the split audio mode is disabled.<br />
Effect Type Description<br />
Cut No transition effect is applied between both elements.<br />
Mix Dissolve effect between both elements.<br />
Wipe The last frame of the previous element is gradually replaced by the first<br />
frames of the next element.<br />
Fade from<br />
color (
<strong>Multicam</strong> - Version <strong>11.01</strong> – Operating <strong>Manual</strong><br />
<strong>EVS</strong> Broadcast Equipment SA – April 2012<br />
Effect Type Description<br />
Fade to color<br />
(>)<br />
Fade to/from<br />
color (V fade)<br />
Note<br />
Issue<br />
<strong>11.01</strong>.C<br />
A fade in effect to a defined color is applied on the previous clip up to<br />
the transition in cut mode to the next clip (on which the effect is<br />
defined).<br />
In the drawing below, the previous clip is displayed in red, the next clip<br />
is green, and the fade in black:<br />
A fade in effect to a defined color is applied on the previous clip up to its<br />
OUT point and a fade out effect from the same color is applied on the<br />
next clip (on which the effect is defined) from its IN point. The effect<br />
duration must be a multiple of 2 frames.<br />
In the drawing below, the previous clip is displayed in red, the next clip<br />
is green, and the fade in black:<br />
The color of the fade effects is defined with the Fade to/from colour parameter<br />
in the Playlist settings of the <strong>Operation</strong>al Setup menu (p.3.3 F1).<br />
11.15.5 How to Define a Transition Effect<br />
You can add transitions on one or all elements of a playlist as follows, or more precisely<br />
modify the default effect applied (mix):<br />
1. Select the playlist location and press PLST to open it in Playlist Edit mode. The main<br />
menu appears:<br />
Effect Edit All<br />
Insert Speed FX Dur Delete<br />
2. Browse to the playlist element at the beginning of which you want to modify the effect<br />
or press Edit All (SHIFT+D) to modify the effect on all playlist elements.<br />
3. To modify the effect, press Effect (SHIFT+C) and move the lever until the requested<br />
effect is displayed on the LCD display.<br />
The effect type is displayed as a letter/symbol in the information corresponding to the<br />
loaded element (see highlighted letter):<br />
111A/04 Clipname0123 00:00:29 Unk W00:10<br />
The following effect types are available:<br />
117
Issue<br />
<strong>11.01</strong>.C<br />
118<br />
<strong>Multicam</strong> - Version <strong>11.01</strong> – Operating <strong>Manual</strong><br />
<strong>EVS</strong> Broadcast Equipment SA – April 2012<br />
• C: Cut • W: Wipe • : Fade to color • V: Fade to/from color<br />
4. To modify the default duration for the transition effect, press FX Dur (C) and move<br />
the lever until the requested duration is displayed in the last field of the corresponding<br />
element:<br />
111A/04 Clipname0123 00:00:29 Unk W00:20<br />
5. Press ENTER to validate the modifications in effect type and/or duration.<br />
11.16 Split Audio<br />
11.16.1 Introduction<br />
Purpose<br />
The split audio makes it possible to:<br />
• Apply transition effect types and durations which are different on the audio and video<br />
tracks.<br />
• Delay or advance the beginning of an audio or video transition.<br />
Activating the Split Audio Mode<br />
Enter the Setup menu as described in the <strong>Multicam</strong> Configuration manual and enable the<br />
Advanced audio editing parameter in the <strong>Operation</strong>al Setup menu (p.3.2 F2).<br />
Note<br />
You need to have the license code 112 installed to be able to use the split audio<br />
functionality. For more information on the required license key, contact the<br />
Support or Sales team.<br />
Limitations to the Split Audio Mode<br />
When you play a playlist containing a split audio, the speed cannot be adjusted while<br />
playing. Changing the speed has to be set in the playlist itself.<br />
As long as a growing clip is present in a playlist, the split audio is not allowed.
<strong>Multicam</strong> - Version <strong>11.01</strong> – Operating <strong>Manual</strong><br />
<strong>EVS</strong> Broadcast Equipment SA – April 2012<br />
11.16.2 Menus in Split Audio Mode<br />
Issue<br />
<strong>11.01</strong>.C<br />
In Playlist Edit mode, the LCD screen displays V Base (SHIFT+A) and A Base (SHIFT+B)<br />
commands:<br />
V Base A Base Effect Edit all<br />
Insert Speed Fx Dur Delete<br />
Activating the V Base option gives access to the following additional menu:<br />
V Base A Base Swap<br />
A Advance A Delay A Fx Dur A Split<br />
Command Description<br />
A Advance Advances the beginning of the audio transition.<br />
A Delay Delays the beginning of the audio transition.<br />
A Fx Extends the duration of the audio transition on both sides. This<br />
creates an audio delay or advance depending on the<br />
modification applied to the effect duration.<br />
A Split Performs an audio advance or delay by specifying the TC for<br />
the beginning of the transition.<br />
The A Base menu is similar and allows corresponding actions on video transitions.<br />
119
Issue<br />
<strong>11.01</strong>.C<br />
120<br />
<strong>Multicam</strong> - Version <strong>11.01</strong> – Operating <strong>Manual</strong><br />
<strong>EVS</strong> Broadcast Equipment SA – April 2012<br />
11.16.3 OSD Display in Advanced Audio Editing<br />
In the Output Monitor display, additional information is also displayed when the split audio<br />
mode is active:<br />
The information displayed below the playback speed will display the audio delay/advance<br />
or video delay/advance in frames depending on the editing action applied, or ‘no split’ if<br />
no delay or advance is applied.<br />
11.16.4 Default Duration for the Audio and Video<br />
Transitions<br />
General Use<br />
It is possible to set a default value for the duration of the video and audio transitions in the<br />
Setup Menu. Once this is defined, each time a clip is entered or inserted into a playlist,<br />
transitions are applied with the default values.<br />
The Video effect duration parameter is available in the <strong>Operation</strong>al Setup menu (p.3.1<br />
F1), and ranges up to 20:00 secs.<br />
The Audio effect duration parameter is available in the <strong>Operation</strong>al Setup menu (p.3.1<br />
F3) and ranges up to 20:00 secs or takes the Lock to video value.<br />
Use with Split Audio<br />
The simplest type of Split Audio edit that can be performed on an LSM is to make the<br />
video and audio transitions at the beginning of the clip have different durations, such as a<br />
12 Frame Video Mix with a 2 sec Audio cross fade.<br />
The value of the Audio effect duration parameter of the <strong>Operation</strong>al Setup menu (p.3.1
<strong>Multicam</strong> - Version <strong>11.01</strong> – Operating <strong>Manual</strong><br />
<strong>EVS</strong> Broadcast Equipment SA – April 2012<br />
Issue<br />
<strong>11.01</strong>.C<br />
F3) is only taken into account when the Advanced Audio Editing mode is enabled.<br />
Otherwise, the audio effect duration is always locked to the video effect duration,<br />
whatever the value of these parameters.<br />
If the Audio effect duration parameter in the setup is set to Lock to video, it will never<br />
be possible to adjust independently the duration of the audio and video transitions. If you<br />
want to adjust one of these transitions and the other one follows, please check the Audio<br />
effect duration parameter in the setup, and make sure it is NOT set to Lock to Video.<br />
11.16.5 Associations of Audio and Video Transition Types<br />
The following table shows the possible associations of audio and video transition effects<br />
when the Audio effect duration parameter is not locked to the video in the <strong>Operation</strong>al<br />
Setup menu (p.3.1. F3):<br />
Video Effect<br />
Audio Effect Cut Mix Fade<br />
from<br />
Mute<br />
Cut √ √<br />
Mix √<br />
Wipe Left -> Right √<br />
Wipe Right -> Left √<br />
Fade from color √<br />
Fade to<br />
Mute<br />
Fade to color √<br />
V Fade<br />
to/from<br />
Mute<br />
V Fade (to/from Black) √<br />
11.16.6 Default Mode for Extending a Transition<br />
Introduction<br />
Whenever you make a video or audio split, the transition originally set is changed, which<br />
means extended on either or both sides of the transition boundaries. In the <strong>Operation</strong>al<br />
Setup menu, use the Extend split transition parameter (p.3.2 F3) to set the default<br />
mode for extending transition effects, this means you specify where the effect is<br />
extended.<br />
121
Issue<br />
<strong>11.01</strong>.C<br />
122<br />
Transition Modes<br />
The following table summarizes the various transition modes:<br />
Criteria Description<br />
<strong>Multicam</strong> - Version <strong>11.01</strong> – Operating <strong>Manual</strong><br />
<strong>EVS</strong> Broadcast Equipment SA – April 2012<br />
Center (on) Cut The transition is extended equally in both directions. This is<br />
the default value.<br />
End (on) Cut The transition is extended to the left, so that the end of the<br />
transition is not changed.<br />
Start (on) Cut The transition is extended to the right, so that the start of the<br />
transition is not changed.<br />
Ask Asks the operator to choose one of the 3 options above each<br />
time he edits a transition.<br />
Possible Cases<br />
You can build different types of playlists depending on:<br />
• the transition mode in video or audio split<br />
• the transition duration<br />
The following schemas show, for each transition mode, a playlist with:<br />
• the same video and audio transitions (no audio or video split)<br />
on playlists 10, 13 and 16.<br />
• an extended audio transition (V Base edit)<br />
on playlists 11, 14 and 17.<br />
• an extended video transition (A Base edit)<br />
on playlists 12, 15 and 18.
<strong>Multicam</strong> - Version <strong>11.01</strong> – Operating <strong>Manual</strong><br />
<strong>EVS</strong> Broadcast Equipment SA – April 2012<br />
Center On Cut<br />
PL 10<br />
Vx 2 – Ax 2<br />
PL 11<br />
Vx 2 – Ax 4<br />
PL 12<br />
Vx 4 – Ax 2<br />
Start On Cut<br />
PL 13<br />
Vx 2 – Ax 2<br />
PL 14<br />
Vx 2 – Ax 4<br />
PL 15<br />
Vx 4 – Ax 2<br />
V<br />
A<br />
V<br />
A<br />
V<br />
A<br />
V<br />
A<br />
V<br />
A<br />
V<br />
A<br />
Issue<br />
<strong>11.01</strong>.C<br />
123
Issue<br />
<strong>11.01</strong>.C<br />
124<br />
End On Cut<br />
PL 16<br />
Vx 2 – Ax 2<br />
PL 17<br />
Vx 2 – Ax 4<br />
PL 18<br />
Vx 4 – Ax 2<br />
V<br />
A<br />
V<br />
A<br />
V<br />
A<br />
<strong>Multicam</strong> - Version <strong>11.01</strong> – Operating <strong>Manual</strong><br />
<strong>EVS</strong> Broadcast Equipment SA – April 2012<br />
11.16.7 Changing the Audio or Video Effect Duration<br />
Introduction<br />
When you change the video or audio effect duration, you extend or reduce the duration of<br />
the video or audio transition:<br />
• In case of Center on cut, the transition is extended/reduced on both sides. This<br />
creates an audio delay or advance depending on whether you reduce or extend the<br />
transition duration.<br />
• In case of Start on cut, the transition is extended/reduced at its end point.<br />
• In case of End on cut, the transition is extended/reduced at its start point.<br />
How to Change the Video Effect Duration<br />
To change the video effect duration, proceed as follows:<br />
1. Enter the Playlist Edit mode.<br />
2. Browse to the desired clip in the playlist.<br />
3. Press SHIFT+A BASE (A).<br />
4. Press to highlight V Fx Dur (C).<br />
5. Move the lever to adjust the value.
<strong>Multicam</strong> - Version <strong>11.01</strong> – Operating <strong>Manual</strong><br />
<strong>EVS</strong> Broadcast Equipment SA – April 2012<br />
How to Change the Audio Effect Duration<br />
To change the audio effect duration, proceed as follows:<br />
1. Enter the Playlist Edit mode.<br />
2. Browse to the desired clip in the playlist.<br />
3. Press SHIFT+V Base (A).<br />
4. Press to highlight A Fx Dur (C).<br />
5. When you move the Lever to adjust the value.<br />
11.16.8 Performing A ‘V Base’ Edit<br />
Issue<br />
<strong>11.01</strong>.C<br />
In a V Base edit, you delay or advance the beginning of the audio transition compared to<br />
the video transition of the clip.<br />
How to Perform an Audio Delay<br />
In this case, the beginning of the audio transition will be delayed compared to the video<br />
transition.<br />
The Start on Cut and End on Cut are not taken into account in these editing actions.<br />
1. Enter the Playlist Edit mode.<br />
2. Browse to the desired clip in the playlist.<br />
3. Press to highlight V Base (SHIFT+A).<br />
4. Press to highlight A Delay (B).<br />
5. Enter a value with the F_ keys including leading zeros<br />
(0+2+1+2= 2:12), OR move the lever and press ENTER.<br />
The value entered will be present on the PRV SCREEN when the clip is next to play in a<br />
playlist.<br />
Edit Point (V BASE)<br />
Audio is extended from the end of the previous clip and the audio on the clip being edited<br />
is shortened.<br />
125
Issue<br />
<strong>11.01</strong>.C<br />
126<br />
How to Perform an Audio Advance<br />
<strong>Multicam</strong> - Version <strong>11.01</strong> – Operating <strong>Manual</strong><br />
<strong>EVS</strong> Broadcast Equipment SA – April 2012<br />
In this case, the audio transition will be advanced compared to the video transition.<br />
The Start on Cut and End on Cut are not taken into account in these editing actions.<br />
1. Enter the Playlist Edit mode.<br />
2. Browse to the desired clip in the playlist.<br />
3. Press to highlight V Base (SHIFT+A).<br />
4. Press to highlight A Advance (A).<br />
5. Enter a value on the F_ keys including leading zeros (0+2+1+2= 2:12), OR move the<br />
lever and press ENTER.<br />
The value entered will be present on the PRV SCREEN when the clip is next to play in a<br />
playlist.<br />
Edit Point (V Base)<br />
Audio is shortened on the previous clip and the beginning of the clip being edited is<br />
extended.<br />
Note<br />
When editing a playlist in V Base or A Base, the video transition information will<br />
be on the top line of the OSD display, whereas the audio transition information<br />
will be on the bottom line of the OSD display.<br />
How to Perform an Audio Split<br />
When you perform an audio split, you specify the TC for the beginning or the end of the<br />
audio transition. In this case, you can choose whether you perform an audio delay or<br />
advance.<br />
1. Enter the Playlist Edit mode.<br />
2. Browse to the desired clip in the playlist.<br />
3. Press to highlight V Base (SHIFT+A).<br />
4. Press to highlight A Split (D).<br />
5. Jog to the point where you want to set your transition.<br />
6. Do one of the following:<br />
o Mark an OUT point if you do an audio delay.<br />
o Mark an IN point if you do an audio advance.<br />
The value entered will be present on the PRV screen when the clip is next to play in a<br />
playlist.
<strong>Multicam</strong> - Version <strong>11.01</strong> – Operating <strong>Manual</strong><br />
<strong>EVS</strong> Broadcast Equipment SA – April 2012<br />
11.16.9 Performing an ‘A Base’ Edit<br />
Issue<br />
<strong>11.01</strong>.C<br />
In an A Base edit, you delay or advance the beginning of the video transition compared to<br />
the audio transition of the clip.<br />
How to Perform a Video Advance<br />
In this case, the beginning of the video transition will be advanced compared to the audio<br />
transition.<br />
1. Enter the Playlist Edit mode.<br />
2. Browse to the desired clip in the playlist.<br />
3. Press SHIFT+A Base (B).<br />
4. Press to highlight V Advance (SHIFT+A)<br />
5. At the on screen prompt, enter a value on the F_ keys including leading zeros<br />
(0+2+1+2= 2:12), OR move the lever and press ENTER.<br />
The value entered will be present on the PRV SCREEN when the clip is next to play in a<br />
playlist.<br />
Edit point (A Base)<br />
Video is shortened in the previous clip and the video from the clip being edited is<br />
extended.<br />
How to Perform a Video Delay<br />
In this case, the beginning of the video transition is delayed compared to the audio<br />
transition.<br />
1. Enter the Playlist Edit mode.<br />
2. Browse to the desired clip in the playlist.<br />
3. Press SHIFT+A Base (B).<br />
4. Press to highlight V DELAY (SHIFT+B)<br />
5. At the on screen prompt, enter a value on the F_ keys including leading zeros<br />
(0+2+1+2= 2:12), OR move the lever and press ENTER.<br />
The value entered will be present on the PRV SCREEN when the clip is next to play in a<br />
playlist.<br />
127
Issue<br />
<strong>11.01</strong>.C<br />
128<br />
Edit point (A BASE)<br />
<strong>Multicam</strong> - Version <strong>11.01</strong> – Operating <strong>Manual</strong><br />
<strong>EVS</strong> Broadcast Equipment SA – April 2012<br />
Video from the previous clip is extended and video from the clip being edited is<br />
shortened.<br />
Note<br />
When editing using the Video IN/OUT as the reference point (V Base), the video<br />
will be the top line on the OSD display. When editing using the audio IN/OUT as<br />
the reference point (A Base), the audio will be the top line on the OSD display.<br />
How to Perform a Video Split<br />
When you perform a video split, you specify the TC for the beginning or end of the video<br />
transition.<br />
1. Enter the Playlist Edit mode.<br />
2. Browse to the desired clip in the playlist.<br />
3. Press to highlight A Base (SHIFT+B)<br />
4. Press to highlight V SPLIT (D)<br />
5. Jog to the point where you want to set your transition<br />
6. Do one of the following:<br />
o Mark an OUT point if you do a video delay.<br />
o Mark an IN point if you do a video advance.<br />
The value entered will be present on the PRV SCREEN when the clip is next to play in a<br />
playlist.<br />
IN Key Colors in Playlist Mode<br />
When the Playlist is sitting on the Video and Audio IN point of a Clip, the IN key will light<br />
red.<br />
When the Playlist is sitting on the Video IN point of a Clip, the IN key will also light red.<br />
When the Playlist is sitting on the Audio IN point of a Clip, the IN key will flash red.<br />
If the Playlist is in a position where the Audio and Video are synchronous, the IN/OUT<br />
keys will be green.<br />
If the Playlist is in a position where the Audio and Video IN points have been split, the IN<br />
key will flash green.
<strong>Multicam</strong> - Version <strong>11.01</strong> – Operating <strong>Manual</strong><br />
<strong>EVS</strong> Broadcast Equipment SA – April 2012<br />
OUT Key Colors in Playlist Mode<br />
Issue<br />
<strong>11.01</strong>.C<br />
When the Playlist is sitting on the Video and Audio OUT point of a Clip, the OUT key will<br />
light red.<br />
When the Playlist is sitting on the Video OUT point of a Clip, the OUT key will light green.<br />
When the Playlist is sitting on the Audio OUT point of a Clip, the OUT key will flash red.<br />
If the Playlist is in a position where the Audio and Video are synchronous, the IN/OUT<br />
keys will be green.<br />
If the Playlist is in a position where the Audio and Video OUT points have been split, the<br />
OUT key will flash green.<br />
Example on Audio Delay Edit<br />
Note<br />
Transitions are reset to zero on INSERT and DELETE functions.<br />
11.16.10 How to Insert a Clip into a Playlist with Split<br />
Audio<br />
To insert a clip into a playlist with split audio, proceed as follows:<br />
1. Enter the Playlist Edit mode.<br />
2. Browse to the desired clip in the playlist.<br />
3. Press to highlight V Base (SHIFT+A)<br />
4. Press to highlight A Split (D)<br />
5. Jog to the point where you want to set your transition and mark an OUT point if you<br />
do an audio delay or mark an IN point if you do an audio advance.<br />
129
Issue<br />
<strong>11.01</strong>.C<br />
11.17 Swap Audio Tracks<br />
11.17.1 Introduction<br />
130<br />
<strong>Multicam</strong> - Version <strong>11.01</strong> – Operating <strong>Manual</strong><br />
<strong>EVS</strong> Broadcast Equipment SA – April 2012<br />
The swap audio tracks mode allows swapping audio tracks between two points in a<br />
playlist.<br />
In four-track mode, the “auto” mode replaces audio tracks 1&2 by audio tracks 3&4 in four<br />
audio mode. It replaces audio track 1 by audio track 2 in stereo mode.<br />
The manual mode lets you choose which tracks to replace.<br />
Note<br />
In 8- and 16-track modes, you only have access to the manual mode.<br />
11.17.2 How to Enable the Audio Swap Mode<br />
To enable the Audio Swap mode, proceed as follows:<br />
1. Enter the Setup menu.<br />
2. Select the Swap audio tracks parameter value in the <strong>Operation</strong>al Setup menu<br />
(p.3.2 F4).<br />
3. Choose a value between “Auto” and “<strong>Manual</strong>”.<br />
Please note that the Advanced audio editing parameter has to be enabled in the<br />
<strong>Operation</strong>al Setup menu (p.3.2 F2). This option requires a specific license code. If<br />
that code is not installed on the server, this option cannot be turned on.<br />
11.17.3 How to Perform a Swap Audio Track in Auto<br />
Mode<br />
To perform a swap audio track in Auto mode, proceed as follows:<br />
1. In Playlist Edit mode, select the Video Base mode (V Base). The LCD screen will now<br />
display additional function:<br />
PL11 LSM01 Paola LOC TDUR=00:00:02:22<br />
111A/04 Clipname0123 00:00:29 Unk W00:10<br />
112B Clipname4567 00:53:29 Unk W00:10<br />
112B/02 Clipname8910 00:53:29 Unk W00:10<br />
V Base A Base Swap<br />
A Advanc A Delay A FX DUR A Split<br />
2. Press the SWAP function (SHIFT+D).<br />
3. Jog your playlist until you reach the point where you want to change the audio tracks.<br />
Mark an IN point.<br />
The OSD screen indicates the following information:
<strong>Multicam</strong> - Version <strong>11.01</strong> – Operating <strong>Manual</strong><br />
<strong>EVS</strong> Broadcast Equipment SA – April 2012<br />
In dual stereo mode<br />
*PL11/03* LEFT 06:42:22<br />
V Mix 02:25 Spd.Unk<br />
A Mix 02:25 A.Del. 00:00<br />
IN-00:00:00 OUT+00:00:27<br />
00:10<br />
1→3 3→3<br />
2→4 4→4<br />
12:23:45:13 00:07:13 100<br />
112B/04 ClipName 999/999<br />
In stereo mode<br />
*PL11/03* LEFT 06:42:22<br />
V Mix 02:25 Spd.Unk<br />
A Mix 02:25 A.Del. 00:00<br />
IN-00:00:00 OUT+00:00:27<br />
00:10<br />
1→2<br />
2→2<br />
12:23:45:13 00:07:13 100<br />
112B/04 ClipName 999/999<br />
4. Press the Swap function again(SHIFT+D).<br />
Issue<br />
<strong>11.01</strong>.C<br />
5. Jog your playlist until you reach the point where you want to reset the original audio<br />
tracks. Mark an OUT point.<br />
The OSD screen indicates the following information:<br />
In eight tracks mode<br />
*PL11/03* LEFT 06:42:22<br />
V Mix 02:25 Spd.Unk<br />
A Mix 02:25 A.Del. 00:00<br />
IN-00:00:00 OUT+00:00:27<br />
00:10<br />
1→3 3→3 5→5 7→7<br />
2→4 4→4 6→6 8→8<br />
12:23:45:13 00:07:13 100<br />
112B/04 ClipName 999/999<br />
131
Issue<br />
<strong>11.01</strong>.C<br />
132<br />
In dual stereo mode<br />
*PL11/03* LEFT 06:42:22<br />
V Mix 02:25 Spd.Unk<br />
A Mix 02:25 A.Del. 00:00<br />
IN-00:00:00 OUT+00:00:27<br />
00:10<br />
3→1 3→3<br />
4→2 4→4<br />
12:23:45:13 00:07:13 100<br />
112B/04 ClipName 999/999<br />
In stereo mode<br />
*PL11/03* LEFT 06:42:22<br />
V Mix 02:25 Spd.Unk<br />
A Mix 02:25 A.Del. 00:00<br />
IN-00:00:00 OUT+00:00:27<br />
00:10<br />
2→1<br />
2→2<br />
12:23:45:13 00:07:13 100<br />
112B/04 ClipName 999/999<br />
One can set as many swap points as needed.<br />
<strong>Multicam</strong> - Version <strong>11.01</strong> – Operating <strong>Manual</strong><br />
<strong>EVS</strong> Broadcast Equipment SA – April 2012<br />
If only an IN swap point is set for one clip, the audio tracks will be reset by default for the<br />
next clip in the playlist.<br />
Please note that when a swap point is set, a cross-fade is played between the original<br />
audio track and the new track. The duration of the cross-fade is the default audio<br />
transition.<br />
When a swap point is present in a playlist, the display on the VGA and on the OSD<br />
changes: a “*” is added next to the audio Fx information.<br />
Display on the VGA<br />
Display on the OSD<br />
LOOP<br />
*PL11/03* LEFT 06:42:22<br />
V Mix 02:25 Spd.Unk<br />
A Mix*02:25 A.Del. 00:00<br />
IN-00:00:00 OUT+00:00:27
<strong>Multicam</strong> - Version <strong>11.01</strong> – Operating <strong>Manual</strong><br />
<strong>EVS</strong> Broadcast Equipment SA – April 2012<br />
12:23:45:13 00:07:13 100<br />
112B/04 ClipName 999/999<br />
11.17.4 How to Perform a Swap Audio Track in <strong>Manual</strong><br />
Mode<br />
Issue<br />
<strong>11.01</strong>.C<br />
If the <strong>Manual</strong> mode is selected for the Swap audio tracks parameter value in the<br />
<strong>Operation</strong>al Setup menu (p.3.2 F4), the swap operates in a similar way but asks the<br />
operator which track to swap when setting the swap points.<br />
Step 1<br />
First the operator is being asked to select the original track:<br />
• In 2-Track mode: you select between the tracks 1,2 or MENU to cancel.<br />
• In 4-Track mode: you select among the tracks 1 to 4, or MENU to cancel.<br />
• In 8-Track mode: you select among the tracks 1 to 8, or MENU to cancel.<br />
• In 16-Track mode: you select among the tracks 1 to 16, or MENU to cancel. The<br />
tracks 1-8 are displayed on a 1 st page and the tracks 9-16 are available via F10 on a<br />
2 nd page.<br />
The function keys are used to select the track to change.<br />
Step 2<br />
When the choice is made, the operator selects by which track the selected one has to be<br />
replaced:<br />
• In 2-Track mode: you select the new track between 1, 2 or 0.<br />
• In 4-Track mode: you select the new track among 1 to 4, or 0<br />
• In 8-Track mode: you select the new track among 1 to 8, or 0<br />
• In 16-Track mode: you select the new track among 1 to 16, or 0. The tracks 1-8 are<br />
displayed on a 1 st page and the tracks 9-16 are available via F10 on a 2 nd page.<br />
Several swap points can be set on the same timecode (e.g.: 1 -> 3, 2 -> 4).<br />
Note<br />
Selecting track 0 will mute the output until the next swap point or the end of<br />
the clip.<br />
11.17.5 Deleting Swap Points<br />
When the operator is on a swap point, pressing CLEAR+IN/OUT deletes the current swap<br />
point. All swap points for that timecode are deleted.<br />
When the operator is not on a swap point, pressing CLEAR+IN/OUT brings up a<br />
confirmation message to delete all swap points for the current clip.<br />
133
Issue<br />
<strong>11.01</strong>.C<br />
11.17.6 Navigating Among Swap Points<br />
134<br />
<strong>Multicam</strong> - Version <strong>11.01</strong> – Operating <strong>Manual</strong><br />
<strong>EVS</strong> Broadcast Equipment SA – April 2012<br />
When the operator is in Swap mode, the previous swap point can be reached by pressing<br />
the Go to In button on the Remote. The next swap point is reached by pressing the Go to<br />
Out button. The function works in loop mode.<br />
11.18 Replace Function<br />
11.18.1 Introduction<br />
The purpose of the Replace function is to automate a routine used by operators to create<br />
effects in a playlist: the operator would loop a section or an entire playlist back to<br />
themselves and, during the playback, add some effects externally (graphic insertion for<br />
instance) or internally (changing the speed).<br />
While the operator would play the playlist back, and insert the requested effects, the<br />
playback result would be re-injected into the playlist from a predefined IN frame. The OUT<br />
point of the replaced section would be predefined or manually defined in the record<br />
process.<br />
Note<br />
The Replace function is not allowed on playlists containing growing clips.<br />
11.18.2 Entering the Replace Function<br />
A secondary menu with the Replace function has been added to the Playlist Edit mode.<br />
Pressing MENU in Playlist Edit mode brings up the following menu:<br />
Clr Unav. OtherAng<br />
Replace MakeLoc Redo Undo<br />
Select Replace in this secondary menu to enter the Replace function.<br />
11.18.3 Replace Edit and Replace Playback Modes<br />
Similar to the playlist, the Replace function has two modes:<br />
The Replace Edit Mode<br />
This mode allows to specify the following information for the Replace:<br />
• IN point and OUT point, for the section to replace in the playlist. The OUT point can<br />
also be defined during the Replace itself.<br />
• Loop mode parameters. See also the section ‘Loop Mode in the Replace Function’,<br />
on page 136.<br />
In the Replace Edit mode, the playlist is considered as one entity on which you can mark<br />
one IN point and one OUT point (pressing the IN and OUT points does not retrim the<br />
current playlist clip).<br />
Those IN and OUT points will be used to determine what portion of the playlist will be
<strong>Multicam</strong> - Version <strong>11.01</strong> – Operating <strong>Manual</strong><br />
<strong>EVS</strong> Broadcast Equipment SA – April 2012<br />
replaced.<br />
The Replace Playback Mode<br />
Issue<br />
<strong>11.01</strong>.C<br />
In this mode, you play the playlist back and insert the new section between the defined IN<br />
and OUT points.<br />
After you have selected the required settings for the Replace function, the Replace<br />
Playback mode is automatically activated: the playlist is cued before the IN point (to<br />
create guardbands), ready to be initiated.<br />
The playlist is played at the speed defined in the playlist but the lever can also be used to<br />
vary the playback speed.<br />
When the Protect OUT point of the clip is reached, a clip containing the IN and OUT<br />
points with the guardbands is created on the Receive page defined in the Setup menu.<br />
The loop is stopped and the user switches back to match Frame Edit mode.<br />
11.18.4 Replace with IN/OUT Points or with IN Point Only<br />
You can perform a Replace action in two ways:<br />
• by defining an IN and OUT points in the Replace Edit mode.<br />
• by defining only an IN point in the Replace Edit mode, and defining the OUT point<br />
while you perform the Replace in the Replace Playback mode.<br />
For more information on how to perform a Replace, refer to the section ‘How to Perform a<br />
Replace’, on page 135.<br />
Important<br />
The IN and OUT points cannot be marked on a transition (including split audio<br />
transitions and swap zones) or on a split zone (the key will flash red when it is<br />
the case).<br />
11.18.5 How to Perform a Replace<br />
You first define the Replace function in the Replace Edit mode. Then, you execute the<br />
Replace function in the Replace Playback mode.<br />
To perform a Replace, proceed as follows:<br />
1. Open the playlist in which you want to replace a section in Playlist Edit mode.<br />
2. In Playlist Edit mode, press Menu on the Remote Panel to access the secondary<br />
menu.<br />
3. Press the A key to enter the Replace Edit mode.<br />
4. Use the jog dial to reach the desired IN point for the Replace section and press the IN<br />
key to mark it.<br />
When the IN point has been marked, the display switches to:<br />
Cam A +2fields<br />
Replace Int.Loop Ext.Loop<br />
5. If you want to specify the OUT point for the Replace section at this stage, jog to the<br />
requested point and press the OUT key. Otherwise, you can define the OUT point<br />
while you perform the Replace.<br />
135
Issue<br />
<strong>11.01</strong>.C<br />
136<br />
The Int. Loop (B) and Ext. Loop (C) keys are blinking.<br />
<strong>Multicam</strong> - Version <strong>11.01</strong> – Operating <strong>Manual</strong><br />
<strong>EVS</strong> Broadcast Equipment SA – April 2012<br />
5. If you want to specify the OUT point for the Replace section at this stage, jog to the<br />
requested point and press the OUT key. Otherwise, you can define the OUT point<br />
while you perform the Replace.<br />
6. Press the B or C key to select whether you will use the internal loop or external loop<br />
to perform the Replace.<br />
For more information on the loop type and additional parameters, refer to the section<br />
‘Loop Mode in the Replace Function’, on page 136.<br />
The playlist is cued before the IN point (to create guardbands), ready to be initiated.<br />
A message appears on Remote: “Start Replace: lever or play button”.<br />
7. Push the lever or press the Play key on the Remote Panel to shift to the Replace<br />
Playback mode and start the Replace process.<br />
8. If you have not defined the OUT point for the Replace in step 5, press the OUT key<br />
when you reach the desired OUT point.<br />
While the Replace is being performed, the following messages are displayed on the<br />
OSD:<br />
“Replace in Progress”<br />
“Clipping guardbands”<br />
“Replace by clip xxx”<br />
On the Remote Panel, a confirmation message pops up:<br />
Replace in/out by clip xxx ?<br />
MENU: Cancel – ENTER: OK.<br />
9. Press Enter on the Remote Panel to validate the Replace:<br />
The material between the IN and OUT points is replaced with the newly created clip.<br />
The playlist returns to Playlist Edit mode, positioned at the end of the inserted clip.<br />
You can also cancel the Replace by pressing the Menu key on the Remote Panel.<br />
11.18.6 Loop Mode in the Replace Function<br />
Loop Type<br />
When the IN point has been marked, the display switches to:<br />
Cam A +2fields<br />
Replace Int.Loop Ext.Loop<br />
The Int. Loop and Ext. Loop keys are blinking.<br />
Before entering the Replace Playback mode, the operator has to choose between Internal<br />
Loop or External Loop.<br />
The Internal Loop is the same loop as the existing loop process.<br />
The External Loop allows you to select on which channel you will physically re-record the<br />
output of your PGM. The link is physical: it is necessary to make the video link manually<br />
with a router or video/audio cables; it is not done inside the server.
<strong>Multicam</strong> - Version <strong>11.01</strong> – Operating <strong>Manual</strong><br />
<strong>EVS</strong> Broadcast Equipment SA – April 2012<br />
Additional Loop Parameters<br />
Additional parameters are available for the external loop:<br />
Issue<br />
<strong>11.01</strong>.C<br />
• With the Cam A function (SHIFT+C), you can select the camera the PGM will be<br />
recorded to for the external LOOP process. Press SHIFT+C until the desired camera<br />
is selected.<br />
• With the +2 fields function (SHIFT+D), you can select by how much the video coming<br />
back to your record channel will be delayed. If you are using a DVE, it could introduce<br />
a delay. This system is based on the assumption that audio and video are in sync<br />
when they hit the record channel. The delay value cannot be negative.<br />
Select SHIFT+D to highlight the delay value; the display allows you to add frames or<br />
fields of delay to the delay value. Pressing either MENU or SHIFT+D will leave this<br />
mode.<br />
137
Issue<br />
<strong>11.01</strong>.C<br />
12. Timeline Management<br />
12.1 Introduction<br />
12.1.1 Timeline Creation<br />
138<br />
Note<br />
<strong>Multicam</strong> - Version <strong>11.01</strong> – Operating <strong>Manual</strong><br />
<strong>EVS</strong> Broadcast Equipment SA – April 2012<br />
The timeline feature is a software option, which requires the license code 112<br />
being installed. For more information on the required license key, contact the<br />
Support or Sales team.<br />
The timeline editing feature allows for video and audio inserts in a linear way.<br />
In <strong>Multicam</strong>, the editing is based on an existing playlist converted into a timeline. The<br />
timeline mode synchronizes one video track and two audio tracks. Each audio track is<br />
composed of one mono audio.<br />
Timelines can be created on the server<br />
• via the Remote Panel or in the <strong>Multicam</strong> user interface<br />
• by means of the IPEdit application in IPDirector<br />
In IPEdit, the timelines include 1 video track and can include up to 4 audio tracks. Each<br />
audio track is composed of one to four mono or stereo audio channels.<br />
12.1.2 Timeline Editing<br />
Supported Editing Features<br />
In <strong>Multicam</strong>, two main editing features are available from version 8.00.00:<br />
• Extend Overwrite: This operation extends the duration of any clip on any track<br />
across the entire duration of the timeline.<br />
• Insert Overwrite: This operation inserts video or audio independently on any of the<br />
tracks or on all tracks at the same time.<br />
All timeline editing operations performed with the Remote Panel are done in a linear<br />
manner: each insert or extend operation will take out some existing material and replace<br />
it with a new one. Because the process is destructive, undo and redo are available during<br />
the edition of a timeline as long as the LIVE button (REC) is not used. When operators go<br />
live, the undo history is lost. You can undo and redo up to nine actions.<br />
Editing IPEdit Timelines in <strong>Multicam</strong><br />
The users can create and edit more advanced timelines in IPEdit. For more information,<br />
refer to the IPEdit user manual.<br />
For this reason, you will be able to edit IPEdit timelines with the Remote Panel only if they<br />
include features supported by <strong>Multicam</strong>, that is to say:
<strong>Multicam</strong> - Version <strong>11.01</strong> – Operating <strong>Manual</strong><br />
<strong>EVS</strong> Broadcast Equipment SA – April 2012<br />
• One video track and two audio tracks.<br />
• No effect on any of the tracks<br />
Editing <strong>Multicam</strong> Timelines in IPEdit<br />
Issue<br />
<strong>11.01</strong>.C<br />
In IPEdit, you can edit any timeline created in <strong>Multicam</strong>. Once a timeline has been edited<br />
in IPEdit and contains features unsupported in <strong>Multicam</strong>, it is no longer editable with the<br />
Remote Panel.<br />
12.1.3 Timeline Playout<br />
You can play out:<br />
• any local or remote timeline that has been created on the Remote Panel or in IPEdit.<br />
• a local timeline that is still being edited by a Remote Panel or in IPEdit.<br />
12.1.4 Principles for Accessing Timelines<br />
The access to timelines from IPEdit and the Remote Panel follows the principles defined<br />
below:<br />
• Two player channels are required to load a timeline. This pair of player channels is<br />
called the timeline engine.<br />
o In <strong>Multicam</strong>, you need to be in PGM/PRV mode to load a timeline.<br />
o In IPEdit, you need to select a timeline engine (PGM1/PGM2 or PGM3/PGM4)<br />
before you load or create a timeline.<br />
• It is not possible to load or play the same timeline at a time using the same timeline<br />
engine. However, you can load or play the same timeline on two different timeline<br />
engines. When the parallel control mode is set up, the control switches to exclusive<br />
mode on the channels where a timeline is loaded.<br />
• It is not possible to edit the same timeline at a time from IPEdit and from the Remote<br />
Panel using different timeline engines.<br />
139
Issue<br />
<strong>11.01</strong>.C<br />
12.2 Creating Timelines<br />
140<br />
<strong>Multicam</strong> - Version <strong>11.01</strong> – Operating <strong>Manual</strong><br />
<strong>EVS</strong> Broadcast Equipment SA – April 2012<br />
In <strong>Multicam</strong>, the timelines have to be created from an existing playlist or copied from an<br />
existing timeline. After the transformation, the duration of the timeline cannot be changed.<br />
Note<br />
It is not allowed to insert growing clips in a timeline.<br />
12.2.1 How to Create a Timeline from a playlist from the<br />
Remote Panel<br />
To transform a playlist to a timeline with the Remote Panel, proceed as follows:<br />
1. Select the playlist you want to convert.<br />
2. Press an empty playlist position.<br />
3. Select the CopyToTL option (B) on the Remote to copy the playlist to a timeline on<br />
the selected empty position.<br />
4. Press ENTER on the Remote to confirm the CopyToTL<br />
The playlist is converted into a timeline at the playlist position you selected.<br />
12.2.2 How to Create a Timeline from a playlist from the<br />
VGA<br />
To transform a playlist to a timeline in the VGA, proceed as follows:<br />
1. Select the playlist you want to convert.<br />
2. Press CTRL+C on the keyboard to copy it.<br />
3. Paste it into an empty playlist position using the CTRL+T keys (rather than CTRL+V)<br />
The timeline appears on the Remote as “TL” for timeline, rather than “PL” for playlists. On<br />
the Clip screen, they appear with a blue background (similar to the protected clip<br />
identifier).<br />
All audio tracks in the playlist are placed on the timeline as follows:<br />
• Each timeline has two audio edit tracks containing each single audio.<br />
• Independently from the audio configuration, the first audio input is edited on the first<br />
audio track, the second input on the second audio track.<br />
• The Mono per group parameter in the <strong>Operation</strong>al Setup menu (p.4.1 F1) can be<br />
used to set how many audio mono tracks can be used for each edit track.<br />
12.3 Copying Timelines<br />
12.3.1 Overview<br />
Copying a timeline works exactly in the same way as copying a playlist. For this reason,
<strong>Multicam</strong> - Version <strong>11.01</strong> – Operating <strong>Manual</strong><br />
<strong>EVS</strong> Broadcast Equipment SA – April 2012<br />
this section will only provide an overview on the possible timeline copies.<br />
Issue<br />
<strong>11.01</strong>.C<br />
For more details on how to copy a timeline from the VGA and from the Remote Panel,<br />
refer to the section 11.11 ‘Copying Playlists’, on page 106.<br />
The following table provides an overview on the possible actions on the Remote Panel<br />
and on the VGA:<br />
Local TL<br />
to local<br />
position<br />
VGA Remote Panel<br />
Distant<br />
TL to<br />
local<br />
position<br />
Distant<br />
TL to<br />
distant<br />
position<br />
Local TL<br />
to local or<br />
distant<br />
position<br />
Distant<br />
TL to<br />
local<br />
position<br />
Distant<br />
TL to<br />
distant<br />
position<br />
Copy (EDL) Yes Yes No Yes Yes Yes<br />
Copy<br />
(EDL+Short<br />
Clip copy)<br />
Copy<br />
(EDL+Long<br />
Clip copy)<br />
12.4 Timeline Edit Mode<br />
No Yes No Yes Yes Yes<br />
No Yes No Yes Yes Yes<br />
12.4.1 Accessing the Timeline Edit Mode<br />
When the current playlist is a timeline, pressing the PLST button enters the Timeline Edit<br />
mode.<br />
The first user of the server gets its first two outputs assigned in this manner:<br />
• Output 1: TL Recorder. It always shows the edit.<br />
• Output 2: TL Player<br />
It works the same way as when the server is on a train or on a clip with one PGM,<br />
including all mark IN - mark OUT functions, network access, etc.<br />
12.4.2 Controlling the Recorder<br />
In the Timeline Edit mode, operators work by default on the recorder: the jog dial and the<br />
lever control the recorder. Operators listen to all the timeline audio tracks.<br />
12.4.3 OSD Display<br />
The following information is displayed on the OSD when the timeline is loaded in Timeline<br />
Edit mode:<br />
141
Issue<br />
<strong>11.01</strong>.C<br />
142<br />
For each track:<br />
• track description (V, A1, A2)<br />
<strong>Multicam</strong> - Version <strong>11.01</strong> – Operating <strong>Manual</strong><br />
<strong>EVS</strong> Broadcast Equipment SA – April 2012<br />
• asterisk next to the track description showing the selected tracks, on which the editing<br />
action will be applied<br />
• current clip ID<br />
• remaining time<br />
• relative position in the track.<br />
12.4.4 LCD Information<br />
The same information as on the OSD is displayed on the Remote Panel with the current<br />
timecode of the clip in addition:<br />
TL13 LEFT=00:00:00:00<br />
V * 112B 01/04 00:00:25 11:15:15:11<br />
A1* 113B 02/04 00:07:13 11:15:10:08<br />
A2* 113B 02/04 00:07:13 11:15:10:08<br />
The ABCD Soft keys on the Remote Panel are as follows:<br />
Video Audio 1 Audio 2<br />
The red blinking keys of the Remote Panel and the black background on the LCD display<br />
show on which track(s) the Insert and Extend actions will be carried out. In other words, if<br />
video only is selected when users do an insert, only the video will be inserted.<br />
12.5 Timeline Playout Mode<br />
12.5.1 Accessing the Timeline Playout Mode<br />
When you load a timeline pressing the PLST key on the Remote Panel, you need to<br />
press PLST a second time to enter the Timeline playout mode.<br />
The first frame of the timeline element following the one on the PGM will be displayed on<br />
the PRV side.
<strong>Multicam</strong> - Version <strong>11.01</strong> – Operating <strong>Manual</strong><br />
<strong>EVS</strong> Broadcast Equipment SA – April 2012<br />
Note<br />
12.5.2 OSD Display<br />
Timeline (TL)<br />
location<br />
TL control<br />
track TC<br />
TL element TC<br />
Issue<br />
<strong>11.01</strong>.C<br />
A third selection of the PLST button cues the timeline to the beginning,<br />
displaying the first timeline element on the PGM side and the following clip on<br />
the PRV.<br />
The following information is displayed on the OSD when the timeline is loaded in Timeline<br />
Playout mode:<br />
Remaining time<br />
to end of TL<br />
Remaining time<br />
to end of element<br />
Additional elements can be displayed on the OSD for timelines created with IPEdit. For<br />
more information on the OSD display with these timelines, refer to the IPEdit user<br />
manual.<br />
12.5.3 LCD Display<br />
The same information as in the Timeline Edit mode is displayed on the Remote Panel:<br />
TL13 LEFT=00:00:00:00<br />
V * 112B 01/04 00:00:25 11:15:15:11<br />
A1* 113B 02/04 00:07:13 11:15:10:08<br />
A2* 113B 02/04 00:07:13 11:15:10:08<br />
The ABCD Soft keys on the Remote Panel are as follows:<br />
Video Audio 1 Audio 2 Edit<br />
The user can press the D key to access the Timeline Edit mode, or press the PLST key.<br />
12.6 Editing <strong>Operation</strong>s<br />
The timeline editing operations on the remote require marking IN and OUT points on the<br />
recorder before performing the extend or insert actions. These IN and OUT points can be<br />
marked anywhere on the timeline as in the Replace mode since the timeline is equivalent<br />
to a record train.<br />
143
Issue<br />
<strong>11.01</strong>.C<br />
12.6.1 Extend Overwrite<br />
144<br />
<strong>Multicam</strong> - Version <strong>11.01</strong> – Operating <strong>Manual</strong><br />
<strong>EVS</strong> Broadcast Equipment SA – April 2012<br />
The Extend feature in <strong>Multicam</strong> consists in extending the length of a timeline element by<br />
extending the IN or OUT points of a clip as explained below, as long as the material is<br />
available.<br />
If the required material is not available, the Remote Panel will beep. The Extend is always<br />
performed in Overwrite mode, which means that the material ‘covered’ by the Extend is<br />
deleted from the timeline.<br />
Extend From IN<br />
This editing action shifts the OUT point of the timeline element which includes the Mark<br />
IN to the defined Mark OUT. The following schema shows an example with only the video<br />
track selected.<br />
V<br />
A1<br />
A2<br />
V<br />
A1<br />
A2<br />
Original Timeline<br />
Extend from IN<br />
Extend From OUT<br />
IN OUT<br />
111A 111B 146A 184C<br />
111A 111B 146A 184C<br />
111A 111B 146A 184C<br />
111A 111B 184C<br />
111A 111B 146A 184C<br />
111A 111B 146A 184C<br />
This editing action shifts the IN point of the timeline element which includes the Mark<br />
OUT to the defined Mark IN. The following schema shows an example with only the video<br />
track selected.
<strong>Multicam</strong> - Version <strong>11.01</strong> – Operating <strong>Manual</strong><br />
<strong>EVS</strong> Broadcast Equipment SA – April 2012<br />
V<br />
A1<br />
A2<br />
V<br />
A1<br />
A2<br />
Original Timeline<br />
Extend from IN<br />
111A 111B 146A 184C<br />
111A 111B 146A 184C<br />
111A 111B 146A 184C<br />
111A 111B 184C<br />
111A 111B 146A 184C<br />
111A 111B 146A 184C<br />
How to Perform an Extend<br />
IN OUT<br />
To perform an Extend on the Remote Panel, proceed as follows:<br />
Issue<br />
<strong>11.01</strong>.C<br />
1. Recall the requested timeline by selecting its page (SHIFT+Page+F_ key) and bank<br />
(SHIFT+F10) and the timeline position (F_ key).<br />
2. Press PLST to load the timeline in Timeline Edit mode.<br />
3. Use the jog dial to position on the requested Mark IN point and press the IN key.<br />
4. Use the jog dial to position on the requested Mark OUT point and press the OUT key.<br />
‘IN’ and ‘OUT’ are displayed on the OSD.<br />
The Extend option is displayed on the LCD menu:<br />
Video Audio 1 Audio 2 Extend<br />
5. Press the D key (Extend) on the Remote Panel to perform the Extend action.<br />
The LCD display and menu changes become the following one:<br />
Extend?<br />
[Menu]: Cancel [Enter] : Confirm<br />
From In From OUT<br />
6. Press the A (Extend from IN) or B key (Extend from OUT) to select the Extend action.<br />
145
Issue<br />
<strong>11.01</strong>.C<br />
12.6.2 Insert Overwrite<br />
146<br />
Definition<br />
<strong>Multicam</strong> - Version <strong>11.01</strong> – Operating <strong>Manual</strong><br />
<strong>EVS</strong> Broadcast Equipment SA – April 2012<br />
The Insert feature in <strong>Multicam</strong> consists of inserting new material within the timeline. The<br />
timeline is loaded on the recorder and the new clip to insert is loaded on the player.<br />
The Insert is always done with three points; this means that at least three marks must be<br />
defined on the recorder and on the player for <strong>Multicam</strong> to be able to perform the Insert<br />
action:<br />
IN OUT<br />
Recorder X X<br />
Player X<br />
IN OUT<br />
Recorder X<br />
Player X X<br />
How to Perform an Insert<br />
IN OUT<br />
Recorder X X<br />
Player X<br />
IN OUT<br />
Recorder X<br />
Player X X<br />
To perform an Insert on the Remote Panel, proceed as follows:<br />
1. Recall the requested timeline by selecting its page (SHIFT+Page+F_ key) and bank<br />
(SHIFT+F10) and the timeline position (F_ key).<br />
2. Press PLST to load the timeline in Timeline Edit mode.<br />
3. If desired, use the jog dial to position on the requested Mark IN point and press the IN<br />
key.<br />
4. If desired, use the jog dial to position on the requested Mark OUT point and press the<br />
OUT key.<br />
At least one IN or OUT needs to be defined on the timeline.<br />
5. Press the Preview Control key (PRV CTL) to access the player.<br />
6. Recall the clip containing the new material to insert.<br />
7. Place an IN and/or OUT mark in the clip.<br />
8. When the three IN and/or OUT marks have been defined on the timeline and the clip,<br />
press INSERT or TAKE on the Remote Panel to execute the Insert.<br />
A portion of the clip selected on the player has been inserted:<br />
• between the IN and OUT marks defined in the timeline<br />
• after the IN mark defined in the timeline<br />
• before the OUT mark defined in the timeline.
<strong>Multicam</strong> - Version <strong>11.01</strong> – Operating <strong>Manual</strong><br />
<strong>EVS</strong> Broadcast Equipment SA – April 2012<br />
12.6.3 How to Add a Clip to a Timeline<br />
Issue<br />
<strong>11.01</strong>.C<br />
From the Remote Panel, you can add a clip at the end of a timeline created either with<br />
IPEdit or with <strong>Multicam</strong>.<br />
To add a clip to a timeline, proceed as follows:<br />
1. Recall the requested timeline by selecting its page (SHIFT+Page+F_ key) and bank<br />
(SHIFT+F10) and the timeline position (F_ key).<br />
This becomes the current timeline.<br />
2. Recall the clip to insert at the end of the timeline by selecting its page, bank and<br />
position.<br />
3. Press the ENTER key on the Remote Panel.<br />
The clip is inserted at the end of the timeline.<br />
147
Issue<br />
<strong>11.01</strong>.C<br />
13. Operating on XNet Network<br />
13.1 Introduction<br />
148<br />
<strong>Multicam</strong> - Version <strong>11.01</strong> – Operating <strong>Manual</strong><br />
<strong>EVS</strong> Broadcast Equipment SA – April 2012<br />
The XNet Network is set up in the <strong>EVS</strong> application. For more information, on how to set<br />
up the XNet Network and connect to the XNet network, refer to the section ‘XNet SDTI<br />
Network’ in the <strong>Multicam</strong> Configuration manual and to the XT Tech Ref Software manual.<br />
13.2 Disconnecting from XNet<br />
When you work on the XNet Network and exit <strong>Multicam</strong>, the system checks if other<br />
systems are still connected to your server.<br />
In this case, the following message appears:<br />
Other users are connected to your LSM<br />
on XNet network. Are you really sure that<br />
you want to close the <strong>Multicam</strong> application ?<br />
[ESC] =CANCEL [ENTER]=YES<br />
Press ESC to cancel the command and return to the application.<br />
Press ENTER to exit the <strong>Multicam</strong> application.<br />
13.3 Selecting a Server on XNet<br />
Selecting the NETWORK key (SHIFT+PLAY on the Remote) displays the Network menu:<br />
Select a LSM on XNET Page 1/4<br />
F1 MICHEL F6 MACHINE6<br />
F2 PIERRE F7 MACHINE7<br />
F3 PAUL F8 MACHINE8<br />
F4 JACQUES F9 MACHINE9<br />
F5 ANDRE (LOCAL) F0 MACHINE0<br />
Previous Next<br />
Local Clips Records Clip+Rec<br />
The LCD screen of the Remote displays the complete list of available systems on the<br />
network. The list is organized by the order of connection to the network. Up to 4 pages<br />
are available to display up to 31 servers.<br />
The PREVIOUS and NEXT keys appear only when some machines are not visible on the<br />
current page.
<strong>Multicam</strong> - Version <strong>11.01</strong> – Operating <strong>Manual</strong><br />
<strong>EVS</strong> Broadcast Equipment SA – April 2012<br />
Local mode<br />
Issue<br />
<strong>11.01</strong>.C<br />
The local system is identified with the Local sign after the name of the system. The Local<br />
function (A) gives direct access to the Local mode and is highlighted when Local mode is<br />
activated.<br />
Clips Mode<br />
The Clip function (B) allows the operator to connect to the clip banks of another LSM<br />
connected to the network. In other words, the VGA clip screen and the F_ keys of the<br />
Remote show the clips from the selected LSM. If the operator presses the RECORD key,<br />
he goes in Live mode on the local record trains.<br />
Records Mode<br />
When the operator selects one of the LSM in the network menu, he connects the record<br />
trains to this LSM. This means that the next time he presses the Records function (C) the<br />
active channels will go in Live mode (or Near Live mode for remote trains 1 ) on the record<br />
trains of the selected LSM. The clips remain connected to the LSM they were connected<br />
to.<br />
Clips+Records Mode<br />
The Clip+Rec function (D) allows the operator to connect both to the clips banks and to<br />
the record trains of a remote server. The VGA clip screen and the F_ keys of the Remote<br />
Panel show the clips from the selected server. The next time the operator presses the<br />
RECORD key, the active channels will go in Live mode (or Near Live mode for remote<br />
trains) on the record trains of the selected LSM.<br />
Select the function key corresponding to the remote system, then the LCD display returns<br />
to the normal mode:<br />
PGM1 112B/04 *PRV1* CAM B<br />
MIX<br />
AUX Clip<br />
Sw to IN PGMSpd PREF<br />
P.1 B.1 Clips: ALBERT Records: MICHEL<br />
PL 11: <<br />
Msg:<br />
LOCAL SYNC PRV<br />
CAM A CAM B CAM C CAM D<br />
149
Issue<br />
<strong>11.01</strong>.C<br />
150<br />
<strong>Multicam</strong> - Version <strong>11.01</strong> – Operating <strong>Manual</strong><br />
<strong>EVS</strong> Broadcast Equipment SA – April 2012<br />
The names of the remote systems are now displayed after the Page and Bank<br />
information and in the Title bar of the Clip screen.<br />
Note<br />
13.4 <strong>Operation</strong>s<br />
It is possible from the VGA to connect back to the last machine connected by<br />
pressing ALT+.<br />
When the remote system is selected, the operation with remote clips or remote trains is<br />
similar to the operations on the local system.<br />
13.4.1 How to Recall/Play Back a Remote Clip<br />
To recall/play back a remote clip, proceed as follows:<br />
1. Select the Clip mode in the Network menu.<br />
2. Select the Remote LSM from the list:<br />
The LCD display returns to the normal mode<br />
3. Select the clip page 1, 2, 3 … to 10 (PAGE key).<br />
When selecting a server, it will automatically reconnect to the page and bank that was<br />
last used.<br />
4. Select the bank in which the desired clip is located<br />
5. Choose the required clip (F1 - F10).<br />
6. If all clips are present (from Camera A, B, C and D), they will appear in their<br />
respective locations (Channel A, B, C or D).<br />
The label of a remote clip is different in order to identify it easily among other clips:
<strong>Multicam</strong> - Version <strong>11.01</strong> – Operating <strong>Manual</strong><br />
<strong>EVS</strong> Broadcast Equipment SA – April 2012<br />
13.4.2 How to Name a Remote Clip<br />
To name a remote clip, proceed as follows:<br />
1. Select the Clip mode in the Network menu.<br />
2. Select the Remote LSM in the list.<br />
3. Go to the Clip screen on the VGA, all banks of remote system are now displayed.<br />
4. Select the clip to name.<br />
5. Type the desired name on the keyboard.<br />
6. Press F1 to name the remote clip.<br />
→ In CAM mode, only the camera where the cursor is located is named<br />
→ In CLIP mode, all cameras of the clip where the cursor is located are named.<br />
Note<br />
Issue<br />
<strong>11.01</strong>.C<br />
To be able to rename a clip on a remote server, the Clip Edit by Network<br />
parameter must be enabled in the Setup menu.<br />
13.4.3 How to Modify IN/OUT Points of a Remote Clip<br />
To modify IN/OUT points of a remote clip, proceed as follows:<br />
1. Recall the desired clip.<br />
2. Browse inside the clip until you reach the desired frame.<br />
3. Press IN / OUT to mark a new Short IN / Short OUT points.<br />
Note<br />
To be able to trim a clip on a remote server, the Clip Edit by Network<br />
parameter must be enabled in the Setup menu of the remote machine.<br />
151
Issue<br />
<strong>11.01</strong>.C<br />
152<br />
<strong>Multicam</strong> - Version <strong>11.01</strong> – Operating <strong>Manual</strong><br />
<strong>EVS</strong> Broadcast Equipment SA – April 2012<br />
13.4.4 How to Insert Remote Clips into a Playlist<br />
To insert remote clips into a playlist, proceed as follows:<br />
1. Select the Remote LSM via the Network menu.<br />
2. Select a remote clip in the banks.<br />
The corresponding F_ key lights red.<br />
3. Press ENTER on the Remote.<br />
4. Repeat the three first steps as many times as necessary until the last clip is entered.<br />
In Playlist Edit mode, the remote display gives all needed information regarding this<br />
playlist and this information is updated each time a clip is stored in the playlist.<br />
PL11 LSM01 MICHEL LOC TDUR=00:00:58:22<br />
152A/03 Clip 0112 00:01:20 Unk W00:10<br />
111A/04 Clip Foot 00:10:25 Unk W00:10<br />
112B Clipname4567 00:04:29 Unk W00:10<br />
112B/02 Clip 0113 00:01:10 Unk W00:10<br />
552C/08 noname01234 00:02:50 Unk W00:10<br />
EFFECT EDIT ALL<br />
INSERT SPEED FX Dur DELETE<br />
13.4.5 How to Roll a Playlist with Remote Clips<br />
To roll a playlist with remote clips, proceed as follows:<br />
1. Once the playlist is cued and ready to roll, select the playlist from the playlist bank.<br />
2. Press the PLST key on the Remote Panel.<br />
3. Move the lever to start the playback or press the PLAY key.<br />
Clips Unavailable on the XNet Network<br />
While the playlist is rolling on air, a remote clip might be unavailable due to a network<br />
problem or simply if the Remote LSM has left the network. In this case, the clip is marked<br />
as ‘NOT AVAILABLE’ on the playlist screen and is skipped when the playlist is rolling. If a<br />
clip is available again, it will re-appear automatically and be played at the right position in<br />
the playlist.<br />
Unavailable clips are shown on the VGA monitor but not on the LCD of the remote.<br />
The operator can decide to definitively remove the unavailable clips from all local playlists<br />
by using the Clr Unav. function (SHIFT+B) in Playlist Edit mode. Note that this function is<br />
only visible when unavailable clips are present and with Split Audio Editing turned off.
<strong>Multicam</strong> - Version <strong>11.01</strong> – Operating <strong>Manual</strong><br />
<strong>EVS</strong> Broadcast Equipment SA – April 2012<br />
13.4.6 How to Create Local Clips with Remote Record<br />
Trains<br />
To create local clips with remote record trains, proceed as follows:<br />
1. Select the Records mode in the Network menu.<br />
2. Select the Remote LSM in the list.<br />
The LCD display returns to the normal mode<br />
3. Press the RECORD key to select the Live mode.<br />
A two to three-second delay to Live has been defined to ensure safe operations.<br />
4. Use the JOG key to go in search mode.<br />
Issue<br />
<strong>11.01</strong>.C<br />
5. Change camera angles if necessary. The changing camera angles on<br />
network train will always switch in pause on the new camera.<br />
Refer to the note below about the remote camera name.<br />
6. Press the IN key to mark your Short IN point of the clip.<br />
7. Search the Short OUT point and press the OUT key to mark it.<br />
8. Select the clip location to store and press the corresponding F_ key.<br />
Note<br />
The label of the remote camera is different in order to identify it easily<br />
CAM<br />
B/02<br />
Note<br />
Camera<br />
Remote LSM<br />
The key flashes during transfer. When the key lights green, the transfer is<br />
completed and the clip is available for playback from the local system.<br />
13.5 Working with Mapped Network Cameras<br />
If you have activated the Authorize cam mapping parameter (p.10.1 F1) and defined<br />
mapped network cameras (p.10.1) in the <strong>Operation</strong>al Setup menu of the Remote Panel,<br />
you can use other network cameras as if there were local cameras.<br />
The clipping on mapped cameras follows the same rule as for local cameras. Clips<br />
created will be copied as local clips in the corresponding positions.<br />
Two limitations must be noted in the mapped camera mode:<br />
• All cameras are delayed so that in Live mode all cameras are on the same timecode.<br />
• Recalling local clips will not be instantly available: the network copy of the remote<br />
cameras will occur before the clip can be recalled.<br />
153
Issue<br />
<strong>11.01</strong>.C<br />
14. Paint Mode<br />
14.1 Introduction<br />
154<br />
Note<br />
<strong>Multicam</strong> - Version <strong>11.01</strong> – Operating <strong>Manual</strong><br />
<strong>EVS</strong> Broadcast Equipment SA – April 2012<br />
The Paint mode is a software option, which requires the license code 114 being<br />
installed. For more information on the required license key, contact the Support<br />
or Sales teams.<br />
The Paint mode is not available on <strong>EVS</strong> servers working with 10-bit codecs.<br />
The functionality of this software package can be operated using the tablet and the stylus,<br />
or a touch screen. The normal pointing device is the tablet. It is selected in the Setup<br />
menu.<br />
Change the Pointing device parameter in the <strong>Operation</strong>al Setup menu (p.9.2 F2) to<br />
toggle between the tablet and the touch screen (only when the touch screen is available).<br />
The touch screen must always be connected to the RS422 port #6 and defined with the<br />
RS422 #6 parameter in the <strong>Operation</strong>al Setup menu (p.T2.2 F6).<br />
The use of the Loop function allows the operator to record the effect back into the 1 st<br />
record channel of the server, and to create a clip with the paint feature. Rolling a clip<br />
while in the Loop mode, in Painting, and dissolving paint image on/off allow for a very<br />
powerful feature.
<strong>Multicam</strong> - Version <strong>11.01</strong> – Operating <strong>Manual</strong><br />
<strong>EVS</strong> Broadcast Equipment SA – April 2012<br />
14.2 Paint Mode Monitor Display<br />
Issue<br />
<strong>11.01</strong>.C<br />
This section presents the available functions on the Paint Mode monitor display. For more<br />
information, refer to the subsections below.<br />
Displayed letter Function<br />
C (clear) Clears screen.<br />
L Enables line mode («one-shot»). See also Section 14.3.<br />
C / c (circle) Selects large / small circle («one-shot»). See also Section<br />
14.3.<br />
A Automatic arrow at end of freehand drawing. See also Section<br />
14.3.<br />
D Selects brush color and thickness. See also Section 14.3.<br />
Br1 / Br2 Toggles between Brush1 and Brush2.<br />
155
Issue<br />
<strong>11.01</strong>.C<br />
156<br />
Displayed Letter Function<br />
<strong>Multicam</strong> - Version <strong>11.01</strong> – Operating <strong>Manual</strong><br />
<strong>EVS</strong> Broadcast Equipment SA – April 2012<br />
E Erases unwanted portion of graphic. See also Section 14.3.<br />
k / >k< Keyer off / on. See also Section 14.3.<br />
L Calls the Library module where drawing, logos, … can be<br />
saved.<br />
C Marks CUE OUT point on current clip.<br />
S Plays back the clip at slow motion speed. The speed of slow<br />
motion is predefined in the PGM Speed/Var max parameter in<br />
the <strong>Operation</strong>al Setup menu (p.9.1 F3).<br />
P Plays back the current clip at normal speed<br />
The clip countdown displays the field time. This means that the countdown matches the<br />
slow motion speed.<br />
Note<br />
Selecting C (clear) from the monitor enters the Clear menu and the DFC menu.<br />
DFC menu allows you to select the brush color from a YUV color palette<br />
If working in network mode, Painting can be performed on remote clips as well as on local<br />
clips.<br />
14.3 Function Description<br />
Straight Line / Broken Line Drawing (L)<br />
Select L on the Paint Mode monitor display. You will then be prompted to enter the first<br />
point of the line.<br />
Place the pen at the start point and press lightly. Then place the pen at the next point and<br />
press lightly again. A straight line appears to connect these 2 points. Repeat this as many<br />
times as necessary until the line is complete, then place the pen over the “ESC” area in<br />
the top right corner of the OSD and press lightly. The system automatically defaults back<br />
to Freehand Drawing mode.<br />
Circle Drawing (O)<br />
Select this menu to draw circles.<br />
A menu allows you to choose between the following options:<br />
• Set centre (default): A pointer appears on the screen to let you choose the centre of<br />
the circle. The radius will be the one last used or the default one if none has been<br />
defined before.<br />
• Define: This option allows you to change the size of a circle.<br />
Click on the Define menu and follow the instructions:
<strong>Multicam</strong> - Version <strong>11.01</strong> – Operating <strong>Manual</strong><br />
<strong>EVS</strong> Broadcast Equipment SA – April 2012<br />
o Set the centre of the circle<br />
o Set the radius<br />
You can then choose to save or not the new circle:<br />
• ESC: no circle is drawn.<br />
Ellipse Drawing (0)<br />
Issue<br />
<strong>11.01</strong>.C<br />
Select this menu to draw ellipses. A menu allows you to choose between the following<br />
options:<br />
• Set centre (default): a pointer appears on the screen to let you choose the centre of<br />
the ellipse. The shape will be the one last used or the default one if none has been<br />
defined before.<br />
• Define: allows you to change the shape of an ellipse, click on the Define menu and<br />
follow the instructions:<br />
o Set the left corner.<br />
o Set the opposite corner.<br />
You can then choose to save or not the new ellipse.<br />
• ESC: no ellipse is drawn.<br />
Arrow (A)<br />
Select A. When you draw on the tablet and remove the pen, a «neat» arrow appears at<br />
the end of the line. This facility remains «on». Select A again.<br />
Color & Density (D)<br />
Select D on the Paint Mode monitor display. Choose the desired color from the display,<br />
then choose the desired thickness.<br />
This will be stored as Br1 or Br2 depending on which one is currently selected when<br />
entering the D option. Thus, two types can be stored.<br />
Erase (E)<br />
Selecting E on the Paint Mode monitor display allows the pen to be used as an eraser.<br />
This facility remains «on». When no longer required, select E again to disable it and<br />
return to the previous active drawing mode.<br />
Clear (C)<br />
Selecting C on the Paint Mode monitor display allows clearing of the entire drawing. Once<br />
selected, you can choose between 3 options: Clr to clear, DfC to define customized<br />
colors or you may escape (ESC) this function without clearing any drawing.<br />
If you select Define Colour (DfC), a new screen will appear including a U-V selection<br />
area, and an Y level selection area. Select first the color you want to edit on the top of the<br />
screen, then select the U-V and Y values by moving the pen on the right location of each<br />
selection area. When the adjustment is made, move the pen to an empty zone of the<br />
screen.<br />
The CLEAR function is also available from the Remote Panel (SHIFT+B) No confirmation<br />
157
Issue<br />
<strong>11.01</strong>.C<br />
158<br />
is required.<br />
Keyer (K)<br />
<strong>Multicam</strong> - Version <strong>11.01</strong> – Operating <strong>Manual</strong><br />
<strong>EVS</strong> Broadcast Equipment SA – April 2012<br />
Can be selected with the pen, click on K (arrows appear/disappear) on the Paint Mode<br />
monitor display, or press SHIFT+A on the Remote Panel menu. This feature will cause<br />
the drawing to dissolve on and off using the Paint/target transition parameter in the<br />
<strong>Operation</strong>al Setup menu (p.12.1 F1).<br />
Library (L)<br />
Selecting L allows entering into a library where the user can load or save entire drawings<br />
and logos.
<strong>Multicam</strong> - Version <strong>11.01</strong> – Operating <strong>Manual</strong><br />
<strong>EVS</strong> Broadcast Equipment SA – April 2012<br />
15. Target Mode<br />
15.1 Introduction<br />
Note<br />
Issue<br />
<strong>11.01</strong>.C<br />
The Target mode is a software option, which requires the license code 114<br />
being installed. For more information on the required license key, contact the<br />
Support or Sales team.<br />
The Target mode is not available on <strong>EVS</strong> servers working with 10-bit codecs.<br />
This software option enables the tracking of an object/action by use of a circle, arrow,<br />
ellipse or rectangle 1 , focusing the attention on certain details. The user can choose the<br />
size, color and thickness of the border as well as the darkness of the background for a<br />
highlight feature. The addition of the Loop function allows the operator to store this effect<br />
as a clip.<br />
The facilities within this software package can be operated using the tablet and the stylus,<br />
or a touch screen. Change the Pointing device parameter in the <strong>Operation</strong>al Setup<br />
menu (p.9.2 F2) to toggle between the tablet and the touch screen (only when the touch<br />
screen is available). The touch screen must always be connected to the RS422 port #6<br />
and defined with the RS422 #6 parameter in the <strong>Operation</strong>al Setup menu (p.T2.2 F6).<br />
1 In this chapter, we use the words “tracking object” to refer to the type of shape selected by the<br />
operator (circle, arrow, ellipse or rectangle).<br />
159
Issue<br />
<strong>11.01</strong>.C<br />
15.2 Creating a Target Track<br />
160<br />
<strong>Multicam</strong> - Version <strong>11.01</strong> – Operating <strong>Manual</strong><br />
<strong>EVS</strong> Broadcast Equipment SA – April 2012<br />
Begin by selecting all the appropriate types of tracking object, their size, color, etc.<br />
15.2.1 Selecting the Type of Tracking Object<br />
The character on the left of the “T” letter on the 1 st line of the OSD shows the current<br />
object:<br />
O (letter “o”) Indicates a circle (default option)<br />
0 (zero) Indicates an ellipse<br />
↓ / ↑ / → / ← Indicates an arrow<br />
█ Indicates a rectangle<br />
Z Indicates the zoom mode is active (circle only available in this<br />
mode)<br />
15.2.2 Selecting Other Parameters of the Tracking Object<br />
T: Selects the background shade (Transparency level).<br />
E: Selects the border thickness (Edge).<br />
S: Selects the size of the tracking object (Size).<br />
C: Selects the border color (Colour).<br />
Note<br />
To select the size of the tracking object when it is a rectangle or an ellipse,<br />
click on S on the first line of the OSD. You must define the position of two<br />
opposite corners of the rectangle (in case of an ellipse, you must define the<br />
opposite corners of the rectangle the ellipse is enclosed in). When these two<br />
corners are defined, the system draws the resulting rectangle or ellipse. You<br />
can confirm by clicking on OK or clear the screen by clicking on CLEAR and<br />
redefine a new shape.
<strong>Multicam</strong> - Version <strong>11.01</strong> – Operating <strong>Manual</strong><br />
<strong>EVS</strong> Broadcast Equipment SA – April 2012<br />
15.2.3 How to Highlight Video Material<br />
To highlight video material, proceed as follows:<br />
Issue<br />
<strong>11.01</strong>.C<br />
1. Select the material that you wish to highlight (this may be a clip, or simply a cued<br />
replay).<br />
2. Position the material on the field corresponding to the target start point and place the<br />
pen on the tablet.<br />
At this point the tracking object will appear on the screen. If the tracking object is an<br />
arrow, it will appear slightly off the cursor position, so that the object remains visible.<br />
3. When the circle is positioned correctly, mark a keyframe:<br />
o by pressing the button of the stylus,<br />
o by clicking on the M sign on the monitoring screen<br />
The K will now appear in the upper left corner indicating that a keyframe has been<br />
marked.<br />
4. Re-position the material, and mark the next keyframe, and so on...<br />
When the final keyframe has been marked, the replay can be re-cued.<br />
When the replay is animated, the illustration will appear with a dissolve effect at the first<br />
keyframe and disappear, with a dissolve effect, at the last.<br />
Run through the material in Loop mode and the effect can now be retrieved and stored as<br />
a new clip with the target tracking.<br />
This can be repeated several times to include multiple circles. Refer to the ‘Loop’<br />
explanation on page 19.<br />
15.2.4 Rules When Using Keyframes<br />
1. The first / last keyframes can be at the IN / OUT points of the clip.<br />
2. If, when a replay is viewed, the action is not accurately followed, stop the replay<br />
where the tracking object has drifted away from the target and use the pen to move<br />
the circle to the correct point, marking an additional keyframe. This can be done as<br />
many times as necessary.<br />
3. When checking / modifying a track, the arrows that appear at the bottom left of the<br />
screen may be used to select the next/previous marked keyframe.<br />
4. If one keyframe is to be erased, use the arrows to get to the appropriate keyframe<br />
and then select ERASE (E). Erasing ALL keyframes can be done using RESET (R).<br />
5. If working in network mode, target tracking can be performed on remote clips as well<br />
as local clips.<br />
161
Issue<br />
<strong>11.01</strong>.C<br />
15.3 Target Mode Monitor Display<br />
162<br />
Displayed Letter Function<br />
<strong>Multicam</strong> - Version <strong>11.01</strong> – Operating <strong>Manual</strong><br />
<strong>EVS</strong> Broadcast Equipment SA – April 2012<br />
T Selects the darkness of the background (8 choices).<br />
S Selects the size of the circle (8 choices) .<br />
E Selects the border thickness (8 choices).<br />
C Selects the border color (8 choices).<br />
Indicates a keyframe has been marked on current field.<br />
E Erases currently displayed keyframe.<br />
R Erases all keyframes in the current clip.<br />
Z Toggles between Zoom, Static Zoom and normal highlight.<br />
Displayed Letter Function
<strong>Multicam</strong> - Version <strong>11.01</strong> – Operating <strong>Manual</strong><br />
<strong>EVS</strong> Broadcast Equipment SA – April 2012<br />
Issue<br />
<strong>11.01</strong>.C<br />
M Allows you to mark a keyframe directly from the touch screen<br />
or from the tablet. If this option is active, touching a point on<br />
the screen automatically creates the keyframe. This option<br />
becomes inactive after each keyframe creation.<br />
C Marks CUE OUT point on current field.<br />
S Starts slow-motion (preset in Prg Spd).<br />
P Plays back the current clip.<br />
> Searches the material (clip or live recording). A single click<br />
with the stylus move one frame forward or one frame back.<br />
Zoom Options<br />
On the Remote Panel display, selecting the Zoom option (soft key A) on the Remote will<br />
cause the tracking object to be changed to the Zoom function. The circle will magnify 4x<br />
the highlighted area of the image. This is a great feature for showing, for example, a close<br />
call like a foot on a line or a ball in/out of bounds.<br />
Note<br />
The dissolve effect is not available when using the Zoom effect. The T, S, E and<br />
C parameters are not available either in Zoom mode.<br />
Selecting Zoom again will switch to Static Zoom mode. Keep in mind, when selecting the<br />
Zoom option, that the software will take a few seconds to apply the change.<br />
The Static Zoom allows the user to zoom an area of the picture via a picture in picture<br />
display.<br />
In the Static Zoom mode, at the bottom left of the screen, a “P” appears on the OSD to<br />
163
Issue<br />
<strong>11.01</strong>.C<br />
164<br />
define the position of the static zoom.<br />
<strong>Multicam</strong> - Version <strong>11.01</strong> – Operating <strong>Manual</strong><br />
<strong>EVS</strong> Broadcast Equipment SA – April 2012<br />
Just click on the P and move the cursor to indicate where the static zoom should be.<br />
Keyframe Information Display<br />
On the OSD, a second line is added to indicate the number of keyframes marked and the<br />
position of the current keyframe.<br />
The information displayed can be interpreted as follows:<br />
Display Meaning<br />
---/--- No keyframes are defined.<br />
---/021 21 keyframes are defined but the user is not on a keyframe.<br />
012/021 21 keyframes are defined and the user is on keyframe 12 of<br />
21.<br />
Transparency Options<br />
Select the last choice in the transparency options to set the background in black and<br />
white.
<strong>Multicam</strong> - Version <strong>11.01</strong> – Operating <strong>Manual</strong><br />
<strong>EVS</strong> Broadcast Equipment SA – April 2012<br />
16. Offside Line Mode<br />
16.1 Introduction<br />
16.1.1 Definition and License Code<br />
Note<br />
Issue<br />
<strong>11.01</strong>.C<br />
The internal Offside Line mode is a software option, which requires the license<br />
code 114 being installed. For more information on the required license key,<br />
contact the Support or Sales teams.<br />
The internal Offside Line mode is not available on <strong>EVS</strong> servers working with 10bit<br />
codecs.<br />
The internal Offside Line mode makes it possible to make the offside line visible on the<br />
screen by shading a portion of the pitch. You can use this feature on clips or trains loaded<br />
on the PGM1. This effect can then be recorded in the loop of the server and reinserted in<br />
the feed of a recorder channel.<br />
The external Offside Line mode offers a more advanced offside line feature, as well as<br />
other live tools, when the <strong>EVS</strong> server is used in combination with the Epsio application.<br />
For more information, refer to the Epsio user manual.<br />
16.1.2 Activating the Offside Line Mode<br />
To activate the Offside Line mode, you need to set as follows the parameters in the<br />
<strong>Operation</strong>al Setup menu on the Remote Panel:<br />
The Offside Line parameter (p.12.3 F1) has to be set to ‘Yes’.<br />
The External Offside parameter (p.12.3 F2) has to be set to ‘No’.<br />
When you activate the offside line, you can no longer use a second controller.<br />
16.1.3 Accessing the Offside Line Mode<br />
When the offside line mode is active, the Offside Line option is available from the<br />
operational menu in the PGM/PRV or Multi PGM mode:<br />
Rst Cam Local Sync Prv OFFSIDE<br />
Cam A Cam B<br />
You access this mode by pressing the SHIFT+D key.<br />
165
Issue<br />
<strong>11.01</strong>.C<br />
166<br />
<strong>Multicam</strong> - Version <strong>11.01</strong> – Operating <strong>Manual</strong><br />
<strong>EVS</strong> Broadcast Equipment SA – April 2012<br />
16.1.4 Overview on the Offside Line Commands<br />
Main Menu<br />
The offside line menu displays as follows and the Mark key is blinking:<br />
TRANSP OSD QUIT<br />
SHIFT SIDE REDO UNDO<br />
The following table summarizes the various available commands:<br />
OSD Command Meaning<br />
SHIFT/TILT (A) Moves the line horizontally (Shift) or around its pivot point (tilt).<br />
SIDE (B) Changes the shaded area from side.<br />
REDO (C) Redoes the last undone action.<br />
You can redo the last 10 undone actions.<br />
UNDO (D) Undoes the last action.<br />
You can undo the last 10 actions.<br />
TRANSP (SHIFT+B) Allows the user to change the transparency level with the jog<br />
or lever. Press Enter to validate the action.<br />
OSD (SHIFT+C) Allows the user to hide or display again the information on the<br />
OSD.<br />
QUIT (SHIFT+D) Exits the offside line mode.<br />
Secondary Menu<br />
Pressing the MENU key opens a secondary menu that allows you to specify the following<br />
offside line settings:<br />
Setting Description<br />
Pause duration Time (in frames) between the train or clip is paused and the<br />
offside line mark is displayed.<br />
Fade in/out duration Duration (in frames) of the fading effect on the IN and OUT<br />
points of the offside sequence.<br />
Preroll duration Preroll (in seconds) before the offside sequence automatically<br />
defined as a cue when the sequence is saved.
<strong>Multicam</strong> - Version <strong>11.01</strong> – Operating <strong>Manual</strong><br />
<strong>EVS</strong> Broadcast Equipment SA – April 2012<br />
16.2 How to Mark an Offside Line<br />
To mark an offside line on a clip or record train, proceed as follows:<br />
Issue<br />
<strong>11.01</strong>.C<br />
1. Load the clip or train on the PGM1 and jog to the position where the offside line<br />
should be marked.<br />
2. Press SHIFT+D to access the offside line menu:<br />
TRANSP OSD QUIT<br />
SHIFT SIDE REDO UNDO<br />
The SHIFT function is active by default.<br />
3. Jog to position the line horizontally with the SHIFT function active.<br />
4. Press the A key to toggle from the SHIFT to the TILT function.<br />
5. Jog to tilt the line to the requested angle with the TILT function active.<br />
If desired, you can move the position of the pivot point used to set the inclination of<br />
the line.<br />
6. From step 3 to step 5, you can redefine the frame at any time by pressing PRV CTL<br />
and jogging to the requested frame. Click again PRV CTL to continue to edit the<br />
offside sequence.<br />
7. Once the 1 st line is set, press TAKE to fix it.<br />
8. If desired, you can then jog to move the pivot point and press TAKE a second time.<br />
Then you can jog to break the line and change its inclination from the pivot point.<br />
You can repeat this step several times to precisely delimit an offside zone on the<br />
pitch.<br />
9. At any time, you can do one of the following:<br />
• Press the B key (Side) to change the side of the shaded area for the offside zone<br />
along the offside line. By default, this is defined on the left of the offside line.<br />
• Press the SHIFT+B key (Trans.) to change the transparency of the offside zone<br />
with the lever or the jog.<br />
10. Press Mark to validate the line position.<br />
The offside line is marked and can be replayed as long as you are in the Offside Line<br />
mode.<br />
If you want to define another offside sequence, you need to quit the Offside Line mode<br />
and come back to it.<br />
167
Issue<br />
<strong>11.01</strong>.C<br />
16.3 How to Edit an Offside Line<br />
168<br />
<strong>Multicam</strong> - Version <strong>11.01</strong> – Operating <strong>Manual</strong><br />
<strong>EVS</strong> Broadcast Equipment SA – April 2012<br />
Once the offside line has already been created, you can still load the sequence and edit<br />
it.<br />
To edit an existing offside sequence, proceed as follows:<br />
1. In the Offside Line mode, press Last Cue until you reach the cue corresponding to<br />
the requested offside sequence.<br />
The following menu is displayed on the Remote Panel:<br />
OSD QUIT<br />
EDIT SIDE UNDO<br />
2. Press the A key (Edit).<br />
3. Jog to move the pivot point to the position where you want to break the line.<br />
4. Press TAKE to fix the pivot point.<br />
5. Jog to break the line and change its inclination from the pivot point.<br />
6. Repeat steps 3 to 5 for each new pivot point you want to define.<br />
7. Press Mark to validate your changes.<br />
16.4 How to Play the Offside Sequence<br />
Once the offside line has been defined, you can play it as long as you are in Offside Line<br />
mode. It will be played based on the settings defined in the secondary menu. For more<br />
information, see the section 16.1.4 ‘Overview on the Offside Line Commands’, on page<br />
166.<br />
To play back an existing offside sequence, proceed as follows:<br />
1. In the offside mode, press Last Cue until you reach the preroll cue for the requested<br />
offside sequence.<br />
2. Press PLAY to play the sequence.<br />
The offside sequence is replayed according to the speed defined by the operator. When<br />
the sequence reaches the keyframe, it is paused and the offside line is displayed<br />
according to the fade in/out duration and the pause duration defined in the secondary<br />
menu. You need to move the lever or press PLAY on the Remote Panel.
<strong>Multicam</strong> - Version <strong>11.01</strong> – Operating <strong>Manual</strong><br />
<strong>EVS</strong> Broadcast Equipment SA – April 2012<br />
16.5 Cue Points Related to Offside Sequence<br />
Issue<br />
<strong>11.01</strong>.C<br />
When an offside sequence is created, a cue point is automatically defined on two<br />
positions:<br />
• The position where the offside line is defined.<br />
• The position corresponding to the preroll before the outside sequence.<br />
When the offside mode is active, the user can press Last Cue to find back one of these<br />
cues related to the offside sequences. Once you have reached the first cue in the train or<br />
clip and press again on Last Cue, you come back to the last cue.<br />
169
Issue<br />
<strong>11.01</strong>.C<br />
17. Split Screen Mode<br />
170<br />
<strong>Multicam</strong> - Version <strong>11.01</strong> – Operating <strong>Manual</strong><br />
<strong>EVS</strong> Broadcast Equipment SA – April 2012<br />
The Split Screen mode, which is a software option, allows a simple split screen effect on<br />
PGM 1. This mode operates very similarly to the 2PGM mode, except that the two<br />
outputs are now left and right parts of the screen (vertical split screen) or top and bottom<br />
part of the screen (horizontal split screen) or mixed together on the entire screen (Split<br />
Mix mode). The Split mode also allows for DVE-like adjustment of the video within the<br />
split effect, for optimum positioning of the material.<br />
Note<br />
17.1.1 Vertical Split<br />
The horizontal Split Screen mode is not available in HD Supermotion 3x in<br />
DVCPro HD and MPEG 2 i-frame 1080i.<br />
PGM1 CAM A *PGM2* CAM B<br />
Aud.Met. PgmSpd Sort->TC PostRoll<br />
Sw to IN Search Pref<br />
P.1 B.1 Clips: LOCAL Records: LOCAL<br />
PL 11: <<br />
Msg:<br />
V Split Swap Sync<br />
Left Right L & R SHIFT<br />
Press the SHIFT key (D) to switch between normal and special commands:<br />
V Split Swap Sync<br />
SHIFT<br />
Command Description<br />
LEFT To control the left part of the monitor<br />
RIGHT To control the right part of the monitor<br />
L & R To control both sides together<br />
SHIFT Access / Exit special commands<br />
� LF � To centre the left picture<br />
� RG � To centre the right picture<br />
� WP � To move the separation line
<strong>Multicam</strong> - Version <strong>11.01</strong> – Operating <strong>Manual</strong><br />
<strong>EVS</strong> Broadcast Equipment SA – April 2012<br />
Command Description<br />
V SPLIT /<br />
H SPLIT<br />
Toggles between horizontal and vertical Split screen menus<br />
SWAP To swap sources from both sides<br />
Issue<br />
<strong>11.01</strong>.C<br />
SYNC To synchronize the selected PGM with the other one. Press<br />
this button and select the PGM to use as a reference.<br />
Press the LEFT key to take control of the left side of the screen, and recall the desired<br />
clip for this side. Use the command knob to search inside the clip until the desired picture<br />
is reached.<br />
Press the RIGHT key to take control of the right side of the screen, and repeat the same<br />
operation with the clip you want to display on the right side.<br />
You can also shift horizontally the clips on both sides, so that the action is in the centre of<br />
the picture.<br />
Press the SHIFT key (D) to enter this mode. The menu will change, as shown above.<br />
Press the � LF � key, and move the command knob to centre the left side picture.<br />
Press the � RG � key and do the same operation for the right side picture.<br />
To restore the default positions, press CLEAR+� LF �, � RG �.<br />
Pressing the � WP � key allows moving the border. To restore the default position of<br />
the border, press CLEAR+� WP �.<br />
To exit the SHIFT mode, press the SHIFT key (D) again.<br />
If working in network mode, split screen can be performed on remote clips as well as on<br />
local clips.<br />
171
Issue<br />
<strong>11.01</strong>.C<br />
17.1.2 Horizontal Split<br />
172<br />
PGM1 CAM A *PGM2* CAM B<br />
<strong>Multicam</strong> - Version <strong>11.01</strong> – Operating <strong>Manual</strong><br />
<strong>EVS</strong> Broadcast Equipment SA – April 2012<br />
Aud.Met. PgmSpd Sort->TC PostRoll<br />
Sw to IN Search Pref<br />
P.1 B.1 Clips: LOCAL Records: LOCAL<br />
PL 11: <<br />
Msg:<br />
H Split Swap Sync<br />
Top Bottom T & B SHIFT<br />
Press the SHIFT key (D) to switch between normal and special commands.<br />
All commands are similar to the Horizontal Split Screen commands.
<strong>Multicam</strong> - Version <strong>11.01</strong> – Operating <strong>Manual</strong><br />
<strong>EVS</strong> Broadcast Equipment SA – April 2012<br />
17.1.3 Split MIX<br />
PGM1 CAM A *PGM2* CAM B<br />
Aud.Met. PgmSpd Sort->TC PostRoll<br />
Issue<br />
<strong>11.01</strong>.C<br />
This mode works similar to the H and V Split modes, except that there is no position<br />
adjustment since both pictures are shown full frame.<br />
The D key allows the operator to adjust the mix percentage between the two sources.<br />
Press the D key to highlight the function, then move the lever to adjust the mix level<br />
between the two sources.<br />
17.1.4 Auto-tracking mode<br />
Sw to IN Search Pref<br />
P.1 B.1 Clips: LOCAL Records: LOCAL<br />
PL 11: <<br />
Msg:<br />
SplitMix Swap Sync<br />
Left Right L & R 050-050%<br />
The Auto-tracking mode applies only to the Vertical Split mode, and allows to adjust the<br />
horizontal position of a sequence to make sure it is as close as possible to the centre of<br />
the left/right part of the screen.<br />
To use the Auto-tracking, the first step is to track the object that must be kept in the<br />
centre of the frame. Using the Target Track mode the keyframes are marked to determine<br />
the path of the object. Refer to the Chapter 15 ‘Target Mode’, on page 159 for more<br />
details.<br />
When the tracking is completed in the desired clips, enter the Split Screen mode and<br />
recall these clips on the left and right side of the screen. If keyframes have been marked<br />
inside selected clips, the word “TRACKED” will appear on the corresponding side of the<br />
output monitor. At playback, the picture will be shifted horizontally to keep the tracked<br />
object in the centre of its frame.<br />
To disable temporarily the auto-tracking without leaving the Split Screen mode, press<br />
CLEAR+LEFT (disables Auto-tracking on left side) or CLEAR+RIGHT (disables Autotracking<br />
on right side).<br />
173
Issue<br />
<strong>11.01</strong>.C<br />
18. Hypermotion Mode<br />
18.1 Introduction<br />
18.1.1 Definition<br />
174<br />
<strong>Multicam</strong> - Version <strong>11.01</strong> – Operating <strong>Manual</strong><br />
<strong>EVS</strong> Broadcast Equipment SA – April 2012<br />
The Hypermotion mode allows the server to control a hypermotion camera. Such<br />
cameras record images at a frame rate much higher than standard cameras.<br />
They record a buffer of images in an internal memory. This buffer can then be ingested<br />
into an <strong>EVS</strong> server via the standard SDI connection. In doing so, a hypermotion camera<br />
is considered as a standard camera by the server.<br />
18.1.2 Camera Differences<br />
The aim of the hypermotion mode is to enable the use of a standard <strong>EVS</strong> Remote to<br />
control the hypermotion camera. Though most commands are identical for such cameras,<br />
the last part of this chapter lists some of the supported cameras model along with their<br />
specific features.<br />
18.1.3 License Code<br />
The hypermotion mode is a software option which requires the installation of the license<br />
code 20. For more information on this required license key, contact the Support or Sales<br />
team.<br />
18.1.4 Activating the Hypermotion Mode<br />
To access the hypermotion mode, you should ensure that:<br />
• The mandatory license code is activated.<br />
• The Hypermotion parameter is activated in the <strong>Operation</strong>al Setup menu of the<br />
remote (p.11.1 F1), or see also the <strong>Multicam</strong> Configuration manual.<br />
• You have correctly selected the number of remotes in the main menu according to<br />
the Remote mode parameter defined in the <strong>Operation</strong>al Setup menu of the remote<br />
(p.11.1 F3), or see the Tech Ref Software manual.<br />
Depending on the selected Remote mode, you will control the hypermotion camera<br />
only or the hypermotion camera and a PGM of the server.
<strong>Multicam</strong> - Version <strong>11.01</strong> – Operating <strong>Manual</strong><br />
<strong>EVS</strong> Broadcast Equipment SA – April 2012<br />
18.2 Menus<br />
18.2.1 Accessing and Leaving the Hypermotion Mode<br />
Issue<br />
<strong>11.01</strong>.C<br />
To access the hypermotion menu, press SHIFT+D (HyperMo) in your Remote perational<br />
menu.<br />
To leave the hypermotion menu or switch to the PGM control, press again SHIFT+D in<br />
the operational menu.<br />
Note<br />
In hypermotion+LSM mode, the D’ key displays LSM Mode.<br />
18.2.2 Hypermotion Main Menu<br />
The hypermotion main menu displays the memory blocks that have been selected in the<br />
# Blocks parameter of the hypermotion secondary menu. The memory blocks use is<br />
described later in this chapter.<br />
Only the activated blocks will be displayed and the highlighted block is the one the<br />
operator is currently working on.<br />
Block 1 Block 2<br />
LSM Mode<br />
175
Issue<br />
<strong>11.01</strong>.C<br />
18.2.3 Hypermotion Secondary Menu<br />
176<br />
<strong>Multicam</strong> - Version <strong>11.01</strong> – Operating <strong>Manual</strong><br />
<strong>EVS</strong> Broadcast Equipment SA – April 2012<br />
From the hypermotion main menu, press the MENU key to open the hypermotion<br />
secondary menu illustrated hereunder.<br />
# Blocks Pre-Roll PGMSpeed 2ndLever<br />
2 00s10fr 50% +- 1000<br />
This secondary menu lists the hypermotion settings described in the table below. To<br />
modify a setting, press the corresponding softkey and jog to select the requested value.<br />
Setting Description Values<br />
# Blocks Number of memory blocks of the hypermotion<br />
camera to be used, if the connected camera<br />
supports this feature.<br />
The number of blocks displayed in the main<br />
menu depends on the number of blocks<br />
specified in this parameter.<br />
Pre-Roll Length of the pre-roll for the cue points defined<br />
on the material recorded from the hypermotion<br />
camera.<br />
The Last Cue command will go to the desired<br />
TC - pre-roll if the material is available. If not, the<br />
pre-roll is not applied.<br />
PGMSpeed PGM speed that is to be applied for playing back<br />
material recorded on the hypermotion camera<br />
using the SHIFT+PLAY keys.<br />
2ndLever Secondary lever range to be applied for playing<br />
back material recorded on the hypermotion<br />
camera.<br />
Note<br />
1 to 4<br />
(default: 1)<br />
From 0s01fr to<br />
05s00fr<br />
(default: 00s00fr)<br />
50, 100, 200, 300,<br />
400, 1000 (see note)<br />
(default: 100)<br />
0-1000, +- 1000<br />
(default: +-1000)<br />
The 1000 value for PGMSpeed is not available for all camera models.
<strong>Multicam</strong> - Version <strong>11.01</strong> – Operating <strong>Manual</strong><br />
<strong>EVS</strong> Broadcast Equipment SA – April 2012<br />
Issue<br />
<strong>11.01</strong>.C<br />
18.3 Controlling the Hypermotion Camera from the<br />
Remote<br />
18.3.1 Introduction<br />
This section presents the various commands you can use on the remote panel to control<br />
the hypermotion camera. The corresponding command on the hypermotion camera is<br />
mentioned when available.<br />
The standard behavior, applicable to all cameras (Photron, Vision Research and ARRI) is<br />
first explained. When a given camera has a specific behavior, this is explicitly mentioned.<br />
18.3.2 The Remote Keys<br />
PLAY<br />
This key corresponds to the ‘Play’ command on hypermotion cameras.<br />
Press the PLAY key on the remote to initiate a replay from the first available frame on the<br />
current memory block.<br />
The corresponding CAM key flashes green to indicate the playback status.<br />
SHIFT+PLAY<br />
There is no corresponding command on hypermotion cameras.<br />
Press the SHIFT+PLAY keys on the remote to initiate a replay on the current memory<br />
block at the speed defined in the PGMSpeed parameter.<br />
Press again PLAY, SHIFT+PLAY, or PRV CTL to return to the normal playing speed.<br />
The corresponding CAM key flashes green to indicate the playback status.<br />
Mark<br />
This key corresponds to the ‘Mark Cue Point’ command on hypermotion cameras.<br />
With a single-block memory, press Mark to mark a cue point on the current block. You<br />
can mark up to 255 cue points on a memory block.<br />
This function is not available on all cameras with multiple-block memory.<br />
Last Cue<br />
This key corresponds to the ‘search’ command on hypermotion cameras.<br />
If cue points have been defined, press Last Cue to go to the previous cue point of the<br />
current memory block.<br />
If no cue points have been defined, press Last Cue to stop the recording and go back to<br />
the first recorded frame of the current memory block.<br />
177
Issue<br />
<strong>11.01</strong>.C<br />
178<br />
RECORD<br />
<strong>Multicam</strong> - Version <strong>11.01</strong> – Operating <strong>Manual</strong><br />
<strong>EVS</strong> Broadcast Equipment SA – April 2012<br />
This key corresponds to the ‘ARM’ or ‘REC’ commands on hypermotion cameras.<br />
When you press RECORD for the first time, all the A/V material recorded in the memory<br />
block(s) of the camera is deleted.<br />
Please refer to the camera models specific features at the end of this chapter for more<br />
information about the behavior of your camera when pressing the RECORD key on a<br />
recording memory block.<br />
TAKE<br />
This key corresponds to the ‘Trig/Stop Rec’ command on hypermotion cameras.<br />
With a single-block memory or when the last block is reached, press TAKE to stop the<br />
recording.<br />
With a multiple-block memory, press TAKE to stop the record on the current block and<br />
automatically start the record on the first free block, if available.<br />
Lever<br />
There is no corresponding command on hypermotion cameras.<br />
Press the Lever key to shift to the secondary lever range (defined in the 2ndLever<br />
parameter in the hypermotion secondary menu) for material played out using the<br />
hypermotion feature.<br />
CAM Keys<br />
Press a CAM key corresponding to a recorded block to load the last recorded frame of<br />
the selected block in play mode.<br />
If you press a CAM key corresponding to an empty block, the remote beeps.<br />
CLEAR<br />
Note<br />
The CLEAR button is only active on some cameras.<br />
Press the CLEAR key to clear the recorded material on a block. It can be used in the<br />
following ways:<br />
• To clear the record on a given block that is not in PLAY mode, press CLEAR and the<br />
CAM key corresponding to the requested block.<br />
• To clear the record on a block when the block is in PLAY mode, press CLEAR. The<br />
PLAY is stopped, the recorded material is deleted from the block, and the camera<br />
automatically starts recording again in this block if it is not recording on any other<br />
block yet.
<strong>Multicam</strong> - Version <strong>11.01</strong> – Operating <strong>Manual</strong><br />
<strong>EVS</strong> Broadcast Equipment SA – April 2012<br />
18.3.3 Creating a Clip from a Hypermotion Camera<br />
Issue<br />
<strong>11.01</strong>.C<br />
When the camera is replaying its content into the <strong>EVS</strong> server, you can clip it automatically<br />
directly from the remote controlling the camera.<br />
Use the IN and OUT keys and the F_ keys to clip the record train corresponding to the<br />
hypermotion camera and to store it at a clip position. So you can clip the hypermotion<br />
camera without having the control on a PGM, and without having to wait for all the<br />
content to be recorded on the server.<br />
Once you have played back the material recorded in the hypermotion camera, it is<br />
available in the record train of the camera as defined in the Recorder setting (p6.4, F2).<br />
You can now create clips with this material.<br />
To do this, proceed as follows:<br />
1. Come back to the LSM mode with SHIFT+D (with remote in hypermotion+LSM mode)<br />
or use another remote (with remote in hypermotion only mode).<br />
2. Load the relevant record train on the PGM.<br />
3. Jog in the material and add a MARK IN, MARK OUT as usual to create the requested<br />
clip.<br />
18.3.4 Managing Cue Points<br />
When the controller controls the camera, press Mark to define and set up to 255 cue<br />
points. You can add the cue points on the current block in record mode.<br />
Press the Last Cue key to call back the cue points. As cue points are managed by block,<br />
select first the requested block to be able to recall the cue points defined in this block.<br />
Please refer to the camera models specific features at the end of this chapter<br />
for more information about cue points management on your system.<br />
18.4 Managing the Memory Blocks<br />
18.4.1 Defining the Number of Memory Blocks<br />
Some cameras allow the users to split the memory into several blocks of the same size.<br />
Before recording material on the hypermotion camera, you should specify how many<br />
memory blocks you are going to use (1, 2, 3, or 4 blocks). By default, only one memory<br />
block is defined.<br />
Note<br />
When using more than one memory block, the blocks are considered as<br />
independant units. That means that you have to manually shift from one block<br />
to the other to continue recording on the next block.<br />
179
Issue<br />
<strong>11.01</strong>.C<br />
180<br />
<strong>Multicam</strong> - Version <strong>11.01</strong> – Operating <strong>Manual</strong><br />
<strong>EVS</strong> Broadcast Equipment SA – April 2012<br />
To define the number of memory blocks on a hypermotion camera, proceed as follows:<br />
1. In the hypermotion menu, press MENU to open the secondary menu.<br />
2. Press A to activate the # Blocks field. This field specifies into how many memory<br />
blocks the camera memory will be split.<br />
3. Jog to select the number of blocks (1 to 4).<br />
4. Press MENU again to validate your choice and come back to the hypermotion main<br />
menu.<br />
The camera memory is now split into the requested number of blocks, all with the same<br />
size. The A to D CAM keys now correspond to the 1 to 4 memory blocks respectively.<br />
18.4.2 Color Code for Memory Block Status<br />
The memory blocks status are displayed using a common color code both directly on the<br />
corresponding CAM keys on the LSM remote, and on the OSD monitoring of the recorder<br />
corresponding to the hypermotion camera.<br />
On the OSD monitoring, the block system is displayed as a suite of 4 squares, ����,<br />
each corresponding to a memory block.<br />
The common color code is as follows:<br />
Color CAM Key Block<br />
Symbol<br />
Steady white Block 1<br />
Steady green Block 1<br />
Blinking green Block 1<br />
Steady red Block 1<br />
�<br />
�<br />
�<br />
�<br />
Memory Block Status<br />
Empty block<br />
Recorded block<br />
Block in PLAY<br />
Block in REC
<strong>Multicam</strong> - Version <strong>11.01</strong> – Operating <strong>Manual</strong><br />
<strong>EVS</strong> Broadcast Equipment SA – April 2012<br />
18.4.3 Working with Single-Block Memory<br />
Issue<br />
<strong>11.01</strong>.C<br />
The general recording and playback process when controlling the camera using a singleblock<br />
memory is the following:<br />
1. Start the recording on the camera by pressing RECORD on the remote controlling the<br />
hypermotion camera.<br />
2. During the recording, you can set cue points (up to 255) on the recorded material by<br />
pressing Mark.<br />
3. Stop the recording in one of the following ways:<br />
• Press Last cue to position the camera on the previous cue, taking the pre-roll<br />
into account.<br />
• Jog the dial to position the camera on the requested image.<br />
• Press TAKE to stop the recording.<br />
4. Press PLAY to start the playback.<br />
During the playback, the material played on the hypermotion camera is recorded into<br />
the server via the SDI connection.<br />
18.4.4 Working with Multiple-Block Memory<br />
The general recording and playback process when controlling the camera using a<br />
multiple-block memory is the following:<br />
1. Press the A to D CAM key corresponding to the memory block (1 to 4) on which you<br />
want to record the material.<br />
2. Start the recording on the camera by pressing RECORD on the remote controlling the<br />
hypermotion camera. The material starts recording in loop mode on a memory block.<br />
• If this is the first use of the RECORD key, all memory blocks are erased and the<br />
recording starts on the first one.<br />
• Otherwise, the recording starts on the currently selected memory block if this is a<br />
subsequent use of the key.<br />
• If no block is selected, the recording starts on the first available block.<br />
3. Press TAKE to stop recording on the current block and start recording on the first<br />
free block, if available.<br />
4. Stop the recording in one of the following ways:<br />
• Press Last cue to position the camera and cue to the first recorded frame of the<br />
block.<br />
• Jog the dial to position the camera on the requested image.<br />
• Select another block, to load the first frame recorded on this block in play mode.<br />
5. Press PLAY to start the playback.<br />
During the playback, the material played on the hypermotion camera is recorded into<br />
the server via the SDI connection.<br />
181
Issue<br />
<strong>11.01</strong>.C<br />
182<br />
Example<br />
<strong>Multicam</strong> - Version <strong>11.01</strong> – Operating <strong>Manual</strong><br />
<strong>EVS</strong> Broadcast Equipment SA – April 2012<br />
The following steps provide an example for a typical use of the LSM remote commands<br />
with a hypermotion camera:<br />
1. Initially, the blocks are recorded or empty<br />
Block 1 Block 2 Block 3 Block 4<br />
2. Press RECORD on the remote to delete any recorded material on the blocks and<br />
start the recording in loop mode on block 1 (first use of this key).<br />
Block 1 Block 2 Block 3 Block 4<br />
3. Press TAKE to stop recording on the current block, and start recording on the next<br />
available one (block 2). At the same time, the playback starts on block 1.<br />
Block 1 Block 2 Block 3 Block 4<br />
4. Press CLEAR to stop the playback on block 1 and delete the material recorded on<br />
that block. As the block 2 is being recorded, no record is started on block 1.<br />
Block 1 Block 2 Block 3 Block 4<br />
5. Press TAKE to stop the record on Block 2 and start it on the first available block<br />
(block 1). Playback starts on block 2.<br />
Block 1 Block 2 Block 3 Block 4<br />
6. Press TAKE again to stop the record on block 1 and start it on the first available<br />
block (block 3). The running playback on block 2 is not affected.<br />
Block 1 Block 2 Block 3 Block 4<br />
7. Press CAM A to cue block 2 at the beginning, and load the last recorded frame on<br />
block 1 in play mode. The record carries on block 3.<br />
Block 1 Block 2 Block 3 Block 4<br />
8. Press CAM C to stop the recording on block 3 and start it on the first available<br />
block (block 4). The last recorded frame on block 3 is loaded in play mode.<br />
Block 1 Block 2 Block 3 Block 4<br />
9. Press TAKE to stop the record on block 4. As no free block is available, the<br />
recording does not start on another block.<br />
Block 1 Block 2 Block 3 Block 4<br />
10. Press CLEAR to stop the play on block 3, delete the material on block 3 and start<br />
recording on block 3.<br />
Block 1 Block 2 Block 3 Block 4<br />
Once block 3 has been recorded, the record ends as all the other blocks contain<br />
recorded material.
<strong>Multicam</strong> - Version <strong>11.01</strong> – Operating <strong>Manual</strong><br />
<strong>EVS</strong> Broadcast Equipment SA – April 2012<br />
18.5 Specific Camera Features<br />
Note<br />
Issue<br />
<strong>11.01</strong>.C<br />
The following topics describe the differences and variations of several camera<br />
models against the standard features described previoulsy in this chapter.<br />
18.5.1 ARRI Camera Hi-Motion I<br />
Application Start<br />
At application start, this camera is in ARM mode and the recording starts on the first<br />
memory block.<br />
Configuration Parameter Values<br />
The PGMSpeed parameter value 1000 is available.<br />
Key Behavior<br />
• TAKE: this key is operational in ARM mode.<br />
• RECORD: the remote does not beep if the CAM key refers to an empty block.<br />
• RECORD: pressing this key while the current block is recording does not send any<br />
command to the camera.<br />
• CLEAR: this key has no effect.<br />
Cue points management<br />
• When a new ARM/REC command is issued on a block, all its cue points are cleared.<br />
• If the Last Cue command cannot access the desired TC-pre-roll, the player remains<br />
on the current cue point.<br />
• If the Last Cue command refers to a TC that does not exist anymore, the player<br />
jumps to the beginning of the current memory block.<br />
• Cue points can not be marked when working on several memory blocks.<br />
183
Issue<br />
<strong>11.01</strong>.C<br />
18.5.2 Photron Camera<br />
184<br />
Application Start<br />
<strong>Multicam</strong> - Version <strong>11.01</strong> – Operating <strong>Manual</strong><br />
<strong>EVS</strong> Broadcast Equipment SA – April 2012<br />
At application start, this camera is in ARM mode and the recording starts on the first<br />
memory block.<br />
Configuration Parameter Values<br />
The PGMSpeed parameter value 1000 is available.<br />
Key Behavior<br />
• TAKE: this key is operational in ARM mode.<br />
• RECORD: the remote does not beep if the CAM key refers to an empty block.<br />
• RECORD: pressing this key while the current block is recording does not send any<br />
command to the camera.<br />
• CLEAR: this key has no effect.<br />
Cue points management<br />
• When a new ARM/REC command is issued on a block, all its cue points are cleared.<br />
• If the Last Cue command cannot access the desired TC-pre-roll, the player remains<br />
on the current cue point.<br />
• If the Last Cue command refers to a TC that does not exist anymore, the player<br />
jumps to the beginning of the current memory block.<br />
• Cue points can not be marked when working on several memory blocks.
<strong>Multicam</strong> - Version <strong>11.01</strong> – Operating <strong>Manual</strong><br />
<strong>EVS</strong> Broadcast Equipment SA – April 2012<br />
18.5.3 Vision Research Camera<br />
Application Start<br />
At application start, the recording does not start automatically.<br />
Configuration Parameter Values<br />
The PGMSpeed parameter value 1000 is available.<br />
Key Behavior<br />
• TAKE: this key is operational in any mode.<br />
• RECORD: the remote beeps if the CAM key refers to an empty block.<br />
Issue<br />
<strong>11.01</strong>.C<br />
• RECORD: pressing this key while the current block is recording clears all memory<br />
blocks and starts recording on the first one.<br />
• CLEAR: press this key to delete the current memory block data.<br />
Cue points management<br />
• When a new ARM/REC command is issued on a block, all its cue points are cleared.<br />
• If the Last Cue command cannot access the desired TC-pre-roll, the player remains<br />
on the current cue point.<br />
• If the Last Cue command refers to a TC that does not exist anymore, the key beeps<br />
but the OSD still displays the number of the cue that you wanted to go to.<br />
• Cue points can be marked across several blocks but the recall is limited to the<br />
currently selected block.<br />
Example:<br />
o While recording on memory block 1, mark cue points 1, 2, and 3 on memory<br />
block 1.<br />
o Press TAKE to start recording on block 2 and mark cue points 1, 2, and 3.<br />
o Press TAKE and select memory block 2. The Last Cue command scrolls through<br />
the cue points of block 2.<br />
o To go through cue points of another block, select that block first then press Last<br />
Cue.<br />
• On OSD, the first information, displayed in white, refers to the cue points on the<br />
playing block while the second information, displayed in red, refers to the recording<br />
block.<br />
185
Issue<br />
<strong>11.01</strong>.C<br />
18.5.4 NAC Camera Hi-Motion II<br />
186<br />
Application Start<br />
<strong>Multicam</strong> - Version <strong>11.01</strong> – Operating <strong>Manual</strong><br />
<strong>EVS</strong> Broadcast Equipment SA – April 2012<br />
At application start, this camera is in ARM mode and the recording starts on the first<br />
memory block.<br />
Configuration Parameter Values<br />
The PGMSpeed parameter value 1000 is available.<br />
Key Behavior<br />
• TAKE: this key is operational in ARM mode.<br />
• RECORD: the remote beeps if the CAM key refers to an empty block.<br />
• RECORD: pressing this key while the current block is recording does not send any<br />
command to the camera.<br />
• CLEAR: press this key to delete the current memory block data.<br />
Cue points management<br />
• When a new ARM/REC command is issued on a block, all its cue points are cleared.<br />
• If the Last Cue command cannot access the desired TC-pre-roll, the player remains<br />
on the current cue point.<br />
• If the Last Cue command refers to a TC that does not exist anymore, the player<br />
jumps to the beginning of the current memory block.<br />
• Cue points can be marked across several blocks but the recall is limited to the<br />
currently selected block.<br />
Example:<br />
o While recording on memory block 1, mark cue points 1, 2, and 3 on memory<br />
block 1.<br />
o Press TAKE to start recording on block 2 and mark cue points 1, 2, and 3.<br />
o Press TAKE and select memory block 2. The Last Cue command scrolls through<br />
the cue points of block 2.<br />
o To go through cue points of another block, select that block first then press Last<br />
Cue.<br />
• On OSD, the first information, displayed in white, refers to the cue points on the<br />
playing block while the second information, displayed in red, refers to the recording<br />
block.
<strong>Multicam</strong> - Version <strong>11.01</strong> – Operating <strong>Manual</strong><br />
<strong>EVS</strong> Broadcast Equipment SA – April 2012<br />
18.5.5 For-A VFC-7000 Camera<br />
Application Start<br />
At application start, the recording starts on the first memory block.<br />
Configuration Parameter Values<br />
The PGMSpeed parameter value 1000 is not available.<br />
Key Behavior<br />
• TAKE: this key is operational in ARM mode.<br />
• RECORD: the remote beeps if the CAM key refers to an empty block.<br />
Issue<br />
<strong>11.01</strong>.C<br />
• RECORD: pressing this key while the current block is recording clears all memory<br />
blocks and starts recording on the first one.<br />
• CLEAR: press this key to delete the current memory block data.<br />
Cue points management<br />
• NOTE: the cue points are only operational when all memory blocks have been<br />
recorded once.<br />
• When a new ARM/REC command is issued on a block, all its cue points are cleared.<br />
• If the Last Cue command cannot access the desired TC-pre-roll, the player remains<br />
on the current cue point.<br />
• If the Last Cue command refers to a TC that does not exist anymore, the key beeps<br />
but the OSD still displays the number of the cue that you wanted to go to.<br />
• Cue points can be marked across several blocks but the recall is limited to the<br />
currently selected block.<br />
Example:<br />
o While recording on memory block 1, mark cue points 1, 2, and 3 on memory<br />
block 1.<br />
o Press TAKE to start recording on block 2 and mark cue points 1, 2, and 3.<br />
o Press TAKE and select memory block 2. The Last Cue command scrolls through<br />
the cue points of block 2.<br />
o To go through cue points of another block, select that block first then press Last<br />
Cue.<br />
• On OSD, the first information, displayed in white, refers to the cue points on the<br />
playing block while the second information, displayed in red, refers to the recording<br />
block.<br />
187
Issue<br />
<strong>11.01</strong>.C<br />
188<br />
<strong>Multicam</strong> - Version <strong>11.01</strong> – Operating <strong>Manual</strong><br />
<strong>EVS</strong> Broadcast Equipment SA – April 2012<br />
19. Sony, XtenDD35, Odetics & VDCP<br />
Protocols<br />
19.1 Protocol Overview<br />
These protocols allow the server to be controlled by external devices.<br />
Sony BVW75 Protocol<br />
This protocol allows the server to be seen as a VTR by the controlling device. On a<br />
playback channel, all usual transport commands (play, PlayVar, pause, goto timecode,<br />
pause, stop, etc…) are supported. On a record channel, only Rec and Stop commands<br />
are supported.<br />
This protocol is the simplest one but does not support clip management. It should be<br />
used when the controlling device does not support the XtenDD35, Odetics or Louth<br />
VDCP protocols (ex: edit controllers, NLE applications, some video switchers, VTR<br />
controllers, etc.)<br />
XtenDD35 Protocol<br />
This protocol is based on the Sony BVW75 protocol for all standard transport commands.<br />
It has extended commands so that it supports clip management: using this protocol, the<br />
controlling device can create, name, recall and delete clips.<br />
This protocol can be used with Thomson/GVG XtenDD range of switchers, and with DNF<br />
ST300-<strong>EVS</strong> and 4040CL-<strong>EVS</strong> controllers.<br />
Odetics Protocol<br />
This protocol is based on the Sony BVW75 protocol for all standard transport commands.<br />
It has extended commands so that it supports clip and playlist management: using this<br />
protocol, the controlling device can create, name, recall and delete clips, but it can also<br />
manage playlists.<br />
This protocol can be used with many different control devices and automations software,<br />
including DNF ST300 and 4040CL controllers.<br />
Non standard commands in Sony, XtenDD35 and Odetics protocols on the play channel<br />
of an <strong>EVS</strong> server:<br />
REC: when a REC command is sent to a play channel, this channel will return in E2E<br />
mode on its default record train. If the default record channel associated to that player is<br />
currently stopped, it will jump to the last recorded picture and pause.<br />
EJECT: if the play channel is not yet in E2E mode when the command is sent, it will<br />
return to E2E mode on its default record train (similar to receiving a REC command). If<br />
the play channel is already in E2E mode, it will switch to the next record channel available<br />
(A�B�C�…�A�…). This is for example useful with a BVE edit controller to allow the<br />
editor to select the record train he wants to work with.
<strong>Multicam</strong> - Version <strong>11.01</strong> – Operating <strong>Manual</strong><br />
<strong>EVS</strong> Broadcast Equipment SA – April 2012<br />
Louth VDCP Protocol<br />
Issue<br />
<strong>11.01</strong>.C<br />
This protocol is a more complex protocol mainly used by automation systems but also by<br />
Sony switchers. It is not based on the Sony BVW75, and can handle clips as well as<br />
playlists.<br />
IPDP Protocol<br />
For more information on how the IP Director application controls the server, refer to the IP<br />
Director Technical Reference manual and User manual.<br />
189
Issue<br />
<strong>11.01</strong>.C<br />
190<br />
Glossary<br />
<strong>Multicam</strong> - Version <strong>11.01</strong> – Operating <strong>Manual</strong><br />
<strong>EVS</strong> Broadcast Equipment SA – April 2012<br />
HANC LTC Horizontal Ancillary timecode LTC as defined in the<br />
XMPTE 259M and RP188 standards.<br />
HANC VITC Horizontal Ancillary timecode VITC as defined in the<br />
XMPTE 259M and RP188 standards.<br />
LTC Longitudinal (or Linear) timecode (LTC) is a timing<br />
signal that is part of an audio tape recording. It is<br />
recorded on a track that runs lengthwise along the<br />
tape, which is why it is called longitudinal. It can only<br />
be read if the tape is playing.<br />
LTC table Timecode jump table in which the jumps in LTC<br />
timecodes are stored.<br />
OSD On-Screen Display. Information displayed on the<br />
output monitor.<br />
Protected clip Clip that has been created on an <strong>EVS</strong> server and that<br />
cannot be manually deleted by users.<br />
Such clips are clips:<br />
• stored on server pages defined as protected pages<br />
in the parameters,<br />
• stored on pages dedicated to a protocol,<br />
• inserted in a playlist or timeline,<br />
In this case, the user can however force the<br />
deletion.<br />
• being on-air,<br />
In this case, the clip is rather ‘locked’, not really<br />
‘protected’.<br />
Protect IN point Position, i.e. timecode, which represents the first<br />
image of the protected video material for a clip, i.e.<br />
the first image before the IN guardband.<br />
Protect OUT point Position, i.e. timecode, which represents the last<br />
image of the protected video material for a clip, i.e.<br />
the last image after the OUT guardband.<br />
Short IN point Position, i.e. timecode, which represents the first<br />
image of a clip. This is also called IN point in this<br />
user manual.<br />
Short OUT point Position, i.e. timecode, which represents the last<br />
image of a clip. This is also called OUT point in this<br />
user manual.<br />
Unprotected clip Clips that users can manually delete via a Delete<br />
action. These clips are however write-protected: they
<strong>Multicam</strong> - Version <strong>11.01</strong> – Operating <strong>Manual</strong><br />
<strong>EVS</strong> Broadcast Equipment SA – April 2012<br />
Issue<br />
<strong>11.01</strong>.C<br />
(or non-protected clip) will never be automatically deleted by the record<br />
train.<br />
VITC Vertical interval timecode (VITC) is a timing signal<br />
that is part of a video recording. It is recorded in the<br />
vertical blanking intervals between successive picture<br />
frames, hence the "vertical interval."<br />
VITC table Timecode jump table in which the user defined<br />
timecode type is stored. This will usually be the VITC<br />
in SD and HANC VITC in HD but could be another<br />
timecode type.<br />
191
<strong>EVS</strong> Broadcast Equipment<br />
Liège Science Park<br />
16, rue Bois St Jean<br />
B-4102 Ougrée<br />
Belgium<br />
Corporate<br />
Headquarters<br />
+32 4 361 7000<br />
North & Latin America<br />
Headquarters<br />
+1 973 575 7811<br />
To learn more about <strong>EVS</strong> go to www.evs.tv<br />
Asia & Pacific<br />
Headquarters<br />
+852 2914 2501<br />
Other regional offices<br />
available on<br />
www.evs.tv/contact