CADD 1 Legacy Operation Manual
CADD 1 Legacy Operation Manual
CADD 1 Legacy Operation Manual
You also want an ePaper? Increase the reach of your titles
YUMPU automatically turns print PDFs into web optimized ePapers that Google loves.
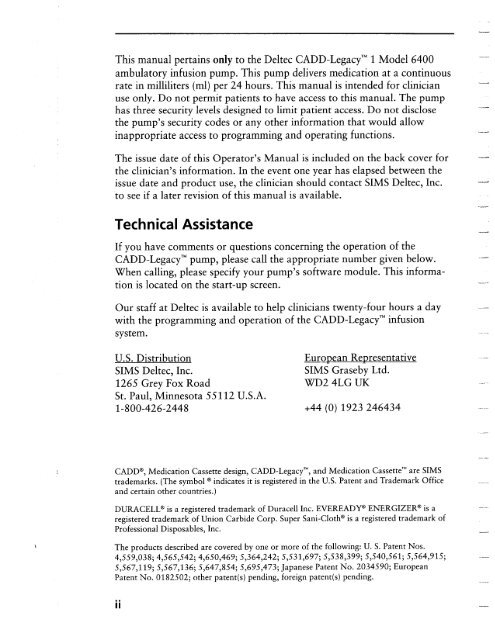
This manual pertains only to the Deltec <strong>CADD</strong>-<strong>Legacy</strong>’” 1 Model 6400<br />
ambulatory infusion pump. This pump delivers medication at a continuous<br />
rate in milliliters (ml) per 24 hours. This manual is intended for clinician<br />
use only. Do not permit patients to have access to this manual. The pump<br />
has three security levels designed to limit patient access. Do not disclose<br />
the pump’s security codes or any other information that would allow<br />
inappropriate access to programming and operating functions.<br />
The issue date of this Operator’s <strong>Manual</strong> is included on the back cover for<br />
the clinician’s information. In the event one year has elapsed between the<br />
issue date and product use, the clinician should contact SIMS Deltec, Inc.<br />
to see if a later revision of this manual is available.<br />
Technical Assistance<br />
If you have comments or questions concerning the operation of the<br />
<strong>CADD</strong>-<strong>Legacy</strong>’” pump, please call the appropriate number given below.<br />
When calling, please specify your pump’s software module. This information<br />
is located on the start-up screen.<br />
Our staff at Deltec is available to help clinicians twenty-four<br />
with the programming and operation of the <strong>CADD</strong>-<strong>Legacy</strong>’”<br />
system.<br />
U.S. Distribution<br />
SIMS Deltec, Inc.<br />
126.5 Grey Fox Road<br />
St. Paul, Minnesota 55112 U.S.A.<br />
l-800-426-2448<br />
The products described are covered by one or more of the following: U. S. Patent Nos.<br />
4,559,038; 4,565,542; 4,650,469; 5,364,242; 5,531,697; 5,538,399; $540,561; 5,564,915;<br />
5,567,119; 5,567,136; 5,647,854; 5,695,473; Japanese Patent No. 2034590; European<br />
Patent No. 0182502; other patent(s) pending, foreign patent(s) pending.<br />
ii<br />
+44 (0) 1923 246434<br />
hours a day<br />
infusion<br />
Eurooean Renresentative<br />
SIMS Graseby Ltd.<br />
WD2 4LG UK<br />
<strong>CADD</strong>@, Medication Cassette design, <strong>CADD</strong>-<strong>Legacy</strong>’“, and Medication Cassette” are SIMS<br />
trademarks. (The symbol<br />
and certain other countries.)<br />
@ indicates it is registered in the U.S. Patent and Trademark Office<br />
DURACELL@’ is a registered trademark of Duracell Inc. EVEREADY@ ENERGIZER@ is a<br />
registered trademark of Union Carbide Corp. Super Sani-Cloth@ is a registered trademark of<br />
Professional Disposables, Inc.<br />
-<br />
-<br />
-<br />
-<br />
-<br />
-<br />
.-<br />
-<br />
_--<br />
--_<br />
-<br />
~~-<br />
-_ .-<br />
--<br />
--<br />
-<br />
_-<br />
-_-<br />
-
Read this entire Operator’s <strong>Manual</strong> before operating the<br />
<strong>CADD</strong>-<strong>Legacy</strong>’” ambulatory infusion pump.<br />
Failure to properly follow warnings, cautions, and instructions could<br />
result in death or serious injury to the patient.<br />
Warnings<br />
0<br />
0<br />
0<br />
This Operator’s <strong>Manual</strong> should be used by clinicians only. Do<br />
not permit patients to have access to this manual, as the information<br />
contained would allow the patient complete access to all<br />
programming and operating functions. Improper programming<br />
could result in death or serious injury to the patient.<br />
For those patients who are likely to be adversely affected by<br />
unintended operations and failures, including interrupted medication<br />
or fluid delivery from the device, close supervision and<br />
provision for immediate corrective action should be provided.<br />
If the pump is used to deliver life-sustaining medication, an<br />
additional pump must be available.<br />
The pump is not to be used for delivery of blood or cellular<br />
blood products.<br />
If the pump is dropped or hit, inspect the pump for damage. Do not<br />
use a pump that is damaged or is not functioning properly. Contact<br />
Customer Service to return the pump for service.<br />
Do not administer drugs to the epidural or subarachnoid space<br />
unless indicated for such use. To prevent the infusion of drugs<br />
that are not indicated for epidural or subarachnoid space infusion,<br />
do not use administration sets that incorporate injection<br />
sites.<br />
If a reservoir, cassette, or administration set is used for drug<br />
delivery into the epidural or subarachnoid space, clearly differentiate<br />
such reservoirs, cassettes, or administration sets from those<br />
used for other routes of infusion, for example, by color coding,<br />
or other means of identification.<br />
. . .<br />
III
iv<br />
Prior to starting infusion, inspect the fluid path for kinks, a<br />
closed clamp, or other upstream obstructions, and remove any<br />
air to prevent air embolism.<br />
Do not use rechargeable NiCad or nickel metal hydride<br />
batteries. Do not use carbon zinc (“heavy duty”) batteries.<br />
Always have extra new batteries available for replacement.<br />
Ensure that the battery door is securely latched.<br />
Ensure that the cassette is properly attached.<br />
Close the fluid path tubing with the clamp before removing the<br />
reservoir or administration set from the pump.<br />
Use only <strong>CADD</strong>@ Extension Set with Anti-Siphon Valve or a<br />
<strong>CADD</strong>@ Administration Set with either an integral or an Add On<br />
Anti-Siphon Valve to protect against unregulated gravity infusion<br />
that can result from an improperly attached reservoir or may<br />
result in delivery inaccuracies.<br />
Use of a syringe with the <strong>CADD</strong>@ Administration Set may result<br />
in UNDER-DELIVERY of medication. Syringe function can be<br />
adversely affected by variations in plunger dimension and lubricity,<br />
which can result in greater force required to move the syringe<br />
plunger. A syringe plunger will lose lubrication as it ages and, as<br />
a result, the amount of under-delivery will increase which could<br />
on occasion, be significant. Therefore, the type of medication<br />
and delivery accuracy required must be considered when using a<br />
syringe with the <strong>CADD</strong>@ pump.<br />
Clinicians must regularly compare the volume remaining in the<br />
syringe to the pump’s displayed values such as RES VOL and<br />
GIVEN in order to determine whether under-delivery of medication<br />
is occurring and if necessary, take appropriate action.<br />
(NiMH)<br />
System delivery inaccuracies may occur as a result of back pressure<br />
or fluid resistance, which depends upon drug viscosity, catheter<br />
size, and extension set tubing (for example, microbore tubing).<br />
.<br />
.<br />
-<br />
-<br />
_-<br />
-<br />
._.._<br />
~_.
Do not prime the fluid path with the tubing connected to a<br />
patient.<br />
For detailed instructions and warnings pertaining to administration<br />
sets, please refer to the instructions supplied with those<br />
products.<br />
Frozen medication must be thawed at room temperature only.<br />
Do not heat the Medication Cassette” reservoir in a microwave<br />
oven.
Cautions<br />
Do not operate the pump at temperatures below<br />
above 40°C (104°F).<br />
Do not store the pump at temperatures below -20°C (-4°F) or<br />
above 60°C (140°F). Do not store the pump with the cassette or<br />
. ..administration<br />
set attached. Use the protective cassette provided.<br />
._._<br />
Do not expose the pump to humidity levels below 20% or above<br />
90 % relative humidity.<br />
Do not store the pump for prolonged periods with the batteries<br />
installed.<br />
Do not immerse the pump in cleaning fluid or water or allow<br />
solution to soak into the pump, accumulate on the keypad, or<br />
enter the battery compartment.<br />
Do not clean the pump with acetone, other plastic solvents, or<br />
abrasive cleaners.<br />
Do not expose the pump to therapeutic levels of ionizing radiation.<br />
Do not expose the pump directly to ultrasound.<br />
Do not use the pump in the vicinity of magnetic resonance<br />
imaging (MRI) equipment.<br />
Do not use the pump near ECG equipment.<br />
Do not sterilize the pump.<br />
Do not use the pump in the presence of flammable anesthetics or<br />
explosive gases.<br />
Use only Deltec accessories as using other brands may adversely<br />
affect the operation of the pump.<br />
Check appropriate medication stability for time and temperature<br />
to assure stability with actual pump delivery conditions.<br />
vi<br />
+2”C (36°F) or<br />
-<br />
I_<br />
_-__L<br />
.___<br />
_~<br />
,_
Warnings<br />
Cautions<br />
Table of Contents<br />
Section 1: General Description 1<br />
Introduction ................................................................................ 1<br />
Indications .................................................................................. 1<br />
EpiduraVSubarachnoid Administration ....................................... 1<br />
Symbols ...................................................................................... 3<br />
Pump Diagram ............................................................................ 4<br />
Description of the Keys, Display, and Features .......................... 5<br />
The Main Screen ......................................................................... 8<br />
Lock Levels ................................................................................. 9<br />
Security Codes ............................................................................ 9<br />
Lock Level Table ........................................................................ 10<br />
Section 2: Pump Setup and Programming<br />
11<br />
Installing or Replacing the Batteries ............................................ 11<br />
Watching Power Up .................................................................... 16<br />
Changing to Lock Level 0 (LLO) ................................................ 17<br />
Programming the Pump: General Instructions ............................. 18<br />
Delivery Mode ............................................................................ 19<br />
Programming Screens .................................................................. 19<br />
Programming for Continuous Delivery Mode ............................. 21<br />
Removing a Used Reservoir or Administration Set ...................... 23<br />
Attaching a New Reservoir or Administration Set ...................... 24<br />
Priming the Tubing and Connecting to the Patient ...................... 26<br />
Inserting the Tubing into the Air Detector .................................. 28<br />
Setting the Lock Level for the Patient .......................................... 30<br />
Programming with Upper Limits, Adjusting Rate in<br />
Lock Level 1 ............................................................................ 31<br />
. . .<br />
Ill<br />
vi<br />
vii
Section 3: Operating the Pump 32<br />
Starting the Pump<br />
Stopping the Pump<br />
.......................................................................<br />
......................................................................<br />
32<br />
32<br />
Turning the Pump On/Off .......................................................... 33<br />
Resetting the Reservoir Volume .................................................. 33<br />
Section 4: Biomed Functions 34<br />
Overview: Accessing the Biomed Functions . . . . . . . . . . . . . . . . . . . . . . . . . . . . . . . . 34<br />
Air Detector On/Off . . . . . . . . . . . . . . . . . . . . . . . . . . . . . . . . . . . . . . . . . . . . . . . . . . ..*....*......... 3.5<br />
Upstream Sensor On/Off . . . . . . . . . . . . . . . . . . . . . . . . . . . . . . . . . . . . . . . . . . . . . . . . . . . . . . . . . . . . . 36<br />
Section 5: Reference 37 ---<br />
Messages and Alarms, Alphabetical List .................................... 37<br />
Cleaning the Pump and Accessories ............................................ 41 ----<br />
Exposure to Radiation, Ultrasound, Magnetic Resonance<br />
Imaging (MRI), or Use near ECG Equipment .......................... 43<br />
Technical Description ................................................................. 44 ....<br />
Specifications (Nominal) ....................................................... 4.5<br />
Accuracy Test Results ........................................................... 49<br />
Software Safety Features ....................................................... 52 -~.<br />
Data Handling Software Safety Features ............................... 53<br />
Inspection Procedures ........................................................... 54<br />
Testing Procedures ................................................................ 56<br />
.<br />
Occlusion Pressure Range Tests ............................................ 61<br />
Accuracy Tests ...................................................................... 64<br />
Index .......................................................................................... 69<br />
Limited Warranty ....................................................................... 71 ..<br />
.<br />
VIII<br />
. .<br />
Safety Features and Fault Detection ...................................... SO<br />
..--<br />
-“_.<br />
Y-d<br />
rb<br />
.s_ _.,<br />
-_
1 .O General Description<br />
Introduction<br />
The <strong>CADD</strong>-<strong>Legacy</strong>” 1 ambulatory infusion pump provides measured<br />
drug therapy to patients in hospital or outpatient settings.<br />
Therapy should always be overseen by a physician or a certified,<br />
licensed healthcare professional. As appropriate to the situation, the<br />
patient should be instructed in using and troubleshooting the pump.<br />
Indications<br />
Section 1: General<br />
The <strong>CADD</strong>-<strong>Legacy</strong>” 1 pump is indicated for intravenous, intraarterial,<br />
subcutaneous, intraperitoneal, epidural space, or subarachnoid<br />
space infusion. The pump is intended for therapies that require<br />
a continuous rate of infusion.<br />
EpiduraVSubarachnoid Administration<br />
The selected drug must be used in accordance with the indications<br />
included in the package insert accompanying the drug. Administration<br />
of any drug by this pump is limited by any warnings, precautions,<br />
or contraindications in the drug labeling.<br />
Analgesics<br />
Administration of analgesics to the epidural space is limited to use<br />
with indwelling catheters specifically indicated for either short-or<br />
long-term drug delivery.<br />
Administration of analgesics to the subarachnoid space is limited to<br />
use with indwelling catheters specifically indicated for short-term<br />
drug delivery.<br />
Anesthetics<br />
Administration of anesthetics to the epidural space is limited to use<br />
with indwelling catheters specifically indicated for short-term drug<br />
delivery.<br />
Descrbtion
Section 1: General Description<br />
WARNING:<br />
0<br />
2<br />
Administration of drugs to the epidural space or subarachnoid<br />
space other than those indicated for administration to those<br />
spaces could result in death or serious injury to the patient.<br />
To prevent the infusion of drugs that are not indicated for<br />
epidural space or subarachnoid space infusion, do not use administration<br />
sets that incorporate injection sites. The inadvertent<br />
use of injection sites for infusion of such drugs could result in<br />
death or serious injury to the patient.<br />
If a reservoir, cassette, or administration set is used for drug<br />
delivery into the epidural or subarachnoid space, clearly differentiate<br />
such reservoirs, cassettes, or administration sets from those<br />
used for other routes of infusion, for example, by color coding,<br />
or other means of identification. Drugs not intended for epidural<br />
or subarachnoid space infusion could result in death or serious<br />
injury to the patient.<br />
-
Symbols<br />
N<br />
n!<br />
0 cl<br />
@I<br />
II’X4<br />
cdl<br />
REF<br />
SN<br />
Alternating Current (Power Jack)<br />
Accessory Jack<br />
Attention, consult accompanying documents<br />
(read Instructions JOY Use)<br />
Class II Equipment<br />
Type CF Equipment<br />
Splashproof - water splashed against pump housing will<br />
have no harmful effects (see Cleaning the Pump and<br />
Accessories, Section 5, for additional important information)<br />
Date of Manufacture<br />
Catalog (reorder) number<br />
Serial Number<br />
Section 1: General Description<br />
3
4<br />
Section 1: General<br />
Pump Diagram<br />
Display<br />
Power Jack<br />
Accessory Jack ><br />
\<br />
AC Indicator<br />
.<br />
Air Detector<br />
Keypad<br />
Cassette<br />
Threaded<br />
Mounting<br />
Hole<br />
Battery<br />
Compartment<br />
Cassette Lock<br />
Descrbtion<br />
Front<br />
View<br />
/ Power Jack<br />
symbol<br />
Accessory<br />
Jack symbol<br />
Rear<br />
View<br />
--<br />
.___
AC Indicator Light<br />
-*<br />
. . .<br />
. . . .<br />
4<br />
‘1 he green mdicator light is on when you are<br />
to power the pump.<br />
0i%<br />
0Ei<br />
0 PRIME<br />
0LOCK<br />
0<br />
NEXT<br />
starts and stops pump delivery; silences alarms.<br />
Section 1: General Description<br />
Description of the Keys, Display, and Features<br />
. .- .<br />
usmg the AC adapter<br />
Display<br />
The Liquid Crystal Display (LCD) shows programming information<br />
and messages. In this manual, the term “display” is synonymous<br />
with display panel or LCD.<br />
Keypad<br />
The keys on the keypad are described below. A key beeps when<br />
pressed if it is operable in the current lock level.<br />
is used to enter (save) a new value in the pump’s memory<br />
when programming pump settings or to clear values from<br />
record-keeping screens. It is also used to return from the<br />
Biomed Functions to the main screen (Section 4).<br />
is used to fill the extension tubing and to remove air bubbles<br />
from the fluid path.<br />
is used to view or change the pump’s current lock level. Lock<br />
levels are used to limit patient access to certain programming<br />
and operating functions. (See Lock Levels, this section.)<br />
is used to move from one programming screen to the next<br />
without changing the setting or value displayed; silences alarms.<br />
allows you to “scroll up” or increase a value or scroll through<br />
items on a menu.<br />
allows you to “scroll down” or decrease a value, or scroll<br />
through items on a menu.<br />
is used to put the pump into a low power state when not in<br />
use or back into full power.<br />
5
Section 1: General Description --<br />
Power Jack<br />
You may plug an AC Adapter into the Power jack as an alternate<br />
source of power. The indicator light on the front of the pump will<br />
illuminate when the AC Adapter is in use.<br />
Accessory Jack<br />
This jack is used for accessory cables. See the Instructions for Use<br />
supplied with those accessories.<br />
Air Detector<br />
The Air Detector is on the pump in the area shown in the diagram.<br />
If air is detected in the part of the tubing that passes through the Air<br />
Detector, an alarm sounds and delivery stops. (See Section 6 for Air<br />
Detector specifications.) If an Air Detector is not desired, it may be<br />
turned off. (See Section 4, Biomed Functions.)<br />
WARNING: When the Air Detector is turned off, the pump will not<br />
detect air in the fluid path. Periodically inspect the fluid path and<br />
remove any air to prevent air embolism. Air embolism could result<br />
in death or serious injury to the patient.<br />
Cassette<br />
The cassette is the portion of the reservoir or administration set<br />
that attaches to the bottom of the pump. The fluid path of the<br />
following single-use products is sterile and compatible with the<br />
<strong>CADD</strong>-<strong>Legacy</strong>’” pump:<br />
6<br />
Medication Cassette’” reservoir (50 or 100 ml), used with<br />
the <strong>CADD</strong>@ Extension Set with Anti-Siphon Valve<br />
<strong>CADD</strong>@ Administration Set with integral Anti-Siphon Valve<br />
<strong>CADD</strong>@ Administration Set with Add On Anti-Siphon Valve<br />
WARNING: You must use a <strong>CADD</strong>@ Extension Set with<br />
Anti-Siphon Valve or a <strong>CADD</strong>@ Administration Set with<br />
.-.^_<br />
._^_<br />
--<br />
_-<br />
--<br />
_<br />
. i.
Section 1: General<br />
Descrbtion<br />
either an integral or an Add On Anti-Siphon Valve to<br />
protect against unregulated gravity infusion that can result<br />
from an improperly attached reservoir. Unregulated gravity<br />
infusion could result in death or serious injury to the patient.<br />
Threaded Mounting Hole<br />
The optional Polemount Bracket<br />
mounting hole in the back of the<br />
pump on an IV pole.<br />
Adapter attaches to the threaded<br />
pump, allowing you to hang the<br />
Battery Compartment<br />
Two AA batteries fit into the battery compartment. The AA batteries<br />
serve as the primary source of power, or as a backup when an<br />
AC Adapter is in use.<br />
Cassette Lock<br />
This attaches the cassette (the part of the reservoir or administration<br />
set that attaches to the pump) to the pump. This allows you to<br />
secure the cassette to the pump. If the cassette becomes unlocked<br />
while the pump is running, delivery will stop and<br />
occur. If the cassette becomes unlocked while the<br />
an alarm will occur.<br />
an alarm will<br />
pump is stopped,<br />
Other Features Not Shown<br />
Upstream Occlusion Sensor: The pump contains an upstream<br />
occlusion sensor. This feature may be turned on or off (see Section<br />
4, Biomed Functions). When the sensor is turned on, and an upstream<br />
occlusion (between pump and reservoir) is detected, an<br />
alarm will sound, delivery will stop, and the display will show<br />
“Upstream Occlusion.”<br />
WARNING: When the Upstream Occlusion Sensor is turned off,<br />
the pump will not detect occlusions upstream (between pump and<br />
reservoir). Periodically inspect the reservoir for decreasing reservoir<br />
volume, inspect the fluid path for kinks, a closed clamp, or other<br />
7
Section 1: General Description<br />
upstream obstructions. Upstream occlusions could result in<br />
or non-delivery of medications. If undetected, these occlusions<br />
could result in death or serious injury to the patient.<br />
calculates that 5 ml remain in the reservoir, beeps sound and<br />
“ResVol Low” appears on the main screen. This alarm recurs at<br />
every subsequent decrease of 1 ml until the Reservoir Volume<br />
reaches 0 ml, at which point the pump stops and the Reservoir<br />
Volume empty alarm sounds.<br />
The Main Screen<br />
The main screen is the starting point for programming<br />
the pump’s settings.<br />
If no keys are pressed for a period of time (2 minutes), the display<br />
reverts to the main screen. When the two AA batteries are low,<br />
“LowBat” appears on the main screen.<br />
8<br />
When<br />
runnina:<br />
Mode of Reservoir pump<br />
Volume<br />
When stopped:<br />
Mode of pump<br />
under-<br />
Downstream Occlusion Sensor: The pump contains a downstream<br />
occlusion sensor. When a downstream occlusion (between the pump<br />
and patient access site) is detected, an alarm will sound, delivery<br />
will stop, and the display will show “High Pressure.”<br />
Reservoir Volume Alarm: The Reservoir Volume alarm indicates<br />
when the fluid in the reservoir is low or depleted. Each time you<br />
change the reservoir, you may reset the Reservoir Volume to the<br />
originally programmed volume. Then, as medication is delivered,<br />
the Reservoir Volume automatically decreases. When the pump<br />
or viewing<br />
Battery Status<br />
/<br />
Status of Reservoir<br />
Volume
Section 1: General<br />
Lock Levels<br />
Lock levels are used to limit patient access to certain programming<br />
and operating functions. The table on the next page lists the functions<br />
that are accessible in Lock Level 0 (LLO), Lock Level 1 (LLl),<br />
and Lock Level 2 (LL2). When a function is accessible, the key<br />
associated with the function beeps when pressed. If a function is not<br />
accessible, the pump ignores the key press and a beep does not<br />
sound. Section 2, Pump Setup and Programming, describes how to<br />
change the lock level.<br />
Security Codes<br />
The following security codes are preset by the manufacturer<br />
clinician’s use:<br />
The Biomed Functions Code, 164 (Lock Level Code +<br />
allows access to the Biomed Functions. (See Section 4.)<br />
WARNING: Do not disclose to the patient the pump’s<br />
security codes or any other information that would allow<br />
the patient complete access to all programming and operating<br />
functions. Improper programming could result in death<br />
or serious injury to the patient.<br />
Descrbtion<br />
for the<br />
The Lock Level Code, 64 (the first two digits of the pump’s<br />
model number), allows you to change the pump’s lock level.<br />
loo),<br />
9
Section 1: General Description<br />
Lock Level Table<br />
This table lists the operations that are accessible in each lock level<br />
while the pump is stopped and running. LLO permits complete<br />
access to all programming and operating functions. LLl permits<br />
limited control of pump programming and operations. LL2 permits<br />
only minimal control of pump operations.<br />
Pump <strong>Operation</strong>s<br />
and Programming<br />
\<br />
Stop/Start the pump<br />
Biomed Functions<br />
Access to Functions<br />
Air Detector On/Off<br />
Upstream Occlusion<br />
Sensor On/Off<br />
10<br />
Reset Reservoir Volume<br />
Prime<br />
Change the lock level<br />
Change Continuous Rate<br />
Clear Given amount<br />
LLO<br />
Yes Yes Yes Yes<br />
Yes Yes Yes NO<br />
Yes Yes No No<br />
Yes, w/code Yes,<br />
Stopped<br />
LLI LL2<br />
w/code Yes,<br />
NO<br />
Yes, w/code No No No<br />
Yes, w/code View only View Only View Only<br />
Yes, w/code View only View Only View Only<br />
Nd<br />
Yes Up to LLO value No No<br />
Yes Yes No<br />
w/code<br />
Running<br />
At+<br />
Lock Level<br />
-<br />
__
2.0 Pump Setup and Programming<br />
Section 2: Pump Setup and Programming<br />
Installing or Replacing the Batteries<br />
Use new, AA alkaline batteries such as DURACELL* or<br />
EVEREADY@ ENERGIZER@ batteries. The pump retains all programmed<br />
values while the batteries are removed.<br />
WARNING:<br />
Do not use rechargeable<br />
NiCad or nickel metal hydride (NiMH)<br />
batteries. Do not use carbon zinc (“heavy duty”) batteries. They<br />
do not provide sufficient power for the pump to operate properly,<br />
which could result in death or serious injury to the patient.<br />
Always have new batteries available for replacement. If power is<br />
lost, nondelivery of drug, and, depending on the type of drug<br />
being administered, death or serious injury to the patient could<br />
result.<br />
If the pump is dropped or hit, the battery door or tabs may<br />
break. Do not use the pump if the battery door or tabs are<br />
damaged because the batteries will not be properly secured; this<br />
may result in loss of power, nondelivery of drug, and, depending<br />
on the type of drug being administered, death or serious injury to<br />
the patient.<br />
11
Section 2: Pump Setup and Programming<br />
In order to install or replace the batteries, be sure the pump is<br />
Stopped. Then, follow these steps:<br />
12<br />
1. Push down and hold the arrow button while sliding the<br />
door off.<br />
2. Remove the used batteries. Pulling on the end of the battery<br />
strap will make battery removal easier.<br />
3. Install the new batteries in the compartment, making sure<br />
the battery strap is positioned correctly under the batteries.<br />
NOTE:<br />
s,ure to match the polarity markings of the new batteries<br />
(+ and -) with those labeled in the battery compartment. If<br />
you put the batteries in backwards, the display panel will be<br />
blank, and you will not bear a beep.<br />
Be<br />
-<br />
-<br />
.“_I<br />
____
Section 2: Pump Setup and Programming<br />
9 Use two new, AA alkaline batteries to power the pump. You<br />
may use any alkaline batteries, including DURACELL@<br />
Alkaline and EVEREADY@ ENERGIZER@ Alkaline, for<br />
example.<br />
4. Place the battery door over the battery compartment and<br />
slide the door closed.<br />
5. Ensure that the door is latched by trying to remove the door<br />
without pressing the arrow button.<br />
NOTE: The power-up sequence will start, the pump will go<br />
through an electronic self-test, and the pump will beep six times<br />
at the end of the power-up sequence. All of the display indicators,<br />
the software revision level, and each parameter will appear<br />
briefly.<br />
13
Section 2: Pump Setup and Programming<br />
14<br />
WARNING: If a gap is present anywhere between the battery<br />
door and the pump housing, the door is not properly latched. If<br />
the battery door becomes detached or loose, the batteries will<br />
not be properly secured; this could result in loss of power,<br />
nondelivery of drug, and, depending on the type of drug being<br />
administered, death or serious injury to the patient.<br />
-<br />
-<br />
--<br />
. .<br />
-ril<br />
-,
6. Resume operation of the current program by pressing and<br />
holding<br />
@ to start the pump or proceed to program the<br />
pump.<br />
NOTE:<br />
The life of the batteries is dependent on the amount of<br />
medication delivered, delivery rate, battery age, and the<br />
temperature.<br />
At the rate of one SO ml Medication Cassette’” reservoir per<br />
day, alkaline batteries will usually last about seven days.<br />
<br />
Section 2: Pump Setup and Programming<br />
The power of the batteries will be quickly depleted at temperatures<br />
below +lO”C (50°F).<br />
CAUTION: Do not store the pump for prolonged periods of<br />
time with the batteries installed. Battery leakage could damage<br />
the pump.<br />
15
Section 2: Pump Setup and Programming<br />
Watching Power Up<br />
When you install the batteries, the pump will start its power up<br />
sequence during which it performs self-tests and displays programmed<br />
values. Watch for the following:<br />
16<br />
.<br />
Pump model number and last error code (“LEC”) if any,<br />
will appear.<br />
The software version will appear.<br />
The display will turn on, showing a series of blocks. Look<br />
for any blank areas, which would indicate a faulty display.<br />
The display will turn off briefly.<br />
The pump’s program screens will appear, followed by<br />
screens showing the Air Detector status, Upstream Occlusion<br />
sensor status, and lock level setting. The pump will<br />
beep after each screen. If messages appear, see the Messages<br />
and Alarms Table in Section 5 of this manual for further<br />
explanation and instruction.<br />
When power up is complete, six beeps will sound, and the<br />
pump will be stopped on the main screen.<br />
NOTE: To move quickly through the power-up screens,<br />
PTess<br />
@ repeatedly. To skip the automatic review entirely,<br />
press \z/. If you attempt to skip screens before the pump is<br />
powered up, it will not respond.
1. Make sure the pump is stopped. Press<br />
@. The current<br />
lock level will appear. (If the lock level is already LLO, press<br />
2.<br />
3.<br />
4.<br />
0NFJT<br />
to exit.)<br />
Press<br />
Press<br />
Press<br />
WARNING: Do not disclose to the patient the pump’s<br />
security codes or any other information that would allow<br />
the patient complete access to all programming and operating<br />
functions. Improper programming could result in death<br />
or serious injury to the patient.<br />
5. Press<br />
& or<br />
@ again or<br />
\z/ until “LLO” appears.<br />
@. “Code<br />
0” will appear.<br />
a or \/ v until the Lock Level Code “64” appears.<br />
@ or @ to set the new lock level.<br />
Section 2: Pump Setup and Programming<br />
Changing to Lock Level 0 (LLO)<br />
Before programming the pump, make sure the pump is set to LLO.<br />
LLO allows the clinician to access all programming and operating<br />
functions.<br />
17
Section 2: Pump Setup and Programming<br />
Programming the Pump: General Instructions<br />
The procedure for changing a programmed setting is similar for<br />
most programming screens.<br />
18<br />
.<br />
0<br />
0<br />
.<br />
Make sure the pump is stopped and in Lock Level 0.<br />
To begin programming, start at the main screen and press<br />
0NEXT .<br />
To change a setting, press fl\ or \3/ until the desired<br />
setting appears. (Press and hold these keys to change values<br />
with increasing speed.)<br />
Press (@ within 2.5 seconds to confirm a change or the<br />
screen will revert to the previous setting.<br />
If any key other than @ is pressed, “Value not saved”<br />
will appear. Press @ to return to the screen being programmed,<br />
scroll to the desired value, and press ($@.<br />
Press<br />
@ to advance to the next screen.<br />
To leave a setting unchanged, press<br />
screen.<br />
@ to go to the next
Delivery Rate<br />
I<br />
(ml /24 hrs) -<br />
Programming Screens<br />
These are the programming screens for the <strong>CADD</strong>-<strong>Legacy</strong>’”<br />
pump. Descriptions of the screens follow.<br />
Reservoir Volume<br />
Continuous Rate<br />
(ml/24 hr)<br />
Given<br />
Air Detector (Off,<br />
On-High, or On-Low)<br />
Upstream Sensor<br />
(Off or On)<br />
Section 2: Pump Setup and Programming<br />
Delivery Mode<br />
The <strong>CADD</strong>-<strong>Legacy</strong>’” 1 pump provides delivery in milliliters per 24<br />
hours:<br />
Continuous Rate (up to 3000 ml per 24 hours)<br />
1<br />
19
Section 2: Pump Setup and Programming<br />
Reservoir Volume<br />
Enter the volume of fluid contained in a filled reservoir. The Reservoir<br />
Volume value decreases as the pump delivers fluid or as you<br />
prime the tubing. When you change the reservoir, reset the reservoir<br />
volume on this screen. If you do not wish to use the Reservoir<br />
Volume feature, scroll down to “Not In Use” (located before 1 and<br />
after 9999 in the range of values).<br />
The reservoir volume could be set higher than the capacity of the<br />
medication reservoir. Be sure to program the reservoir volume to<br />
reflect the actual volume of the medication being used<br />
Continuous Rate<br />
Enter the continuous rate of medication delivery in mi<br />
hours. The maximum rate is 3000 ml/24 hrs.<br />
NOTE: If you intend to run the pump in Lock Level 1 so the<br />
Continuous Rate can be varied, you should enter the maximum<br />
allowable rate while programming in Lock Level 0. After programming,<br />
you may then change to Lock Level 1 and decrease the rate<br />
to its starting value. See Programming with Upper Limits, Adjusting<br />
Rate in LLl at the end of Section 2.<br />
Given<br />
This screen shows the total amount of drug delivered since the last<br />
time this value was cleared. The amount shown is rounded to the<br />
nearest 0.05 ml. If this value reaches 99999.95, it automatically<br />
returns to 0 and continues counting. The Given amount does not<br />
include drug used when priming the tubing.<br />
Air Detector Status<br />
This screen indicates whether the Air Detector is on high sensitivity,<br />
low sensitivity or turned off. The Air Detector status cannot be<br />
changed without entering the Biomed Functions Code (See Section<br />
4, Biomed Functions, to change the setting).<br />
20<br />
.Ililiters<br />
per 24<br />
-<br />
.-<br />
-_<br />
c_I<br />
~<br />
--_<br />
--<br />
--<br />
-<br />
._-
NOTE: Remember the pump is programmed in<br />
ml/24 hr.<br />
1. Begin at the main screen.<br />
Make sure the pump is in LLO.<br />
Make sure STOPPED appears on the main screen.<br />
Press<br />
0 Press a or \z/ to select the volume of a filled reservoir.<br />
(If you do not wish to use the Reservoir Volume feature,<br />
scroll down to “Not In Use” located before 1.)<br />
Press<br />
Press<br />
. Press<br />
Press<br />
Press<br />
<br />
@.<br />
4. Clear the Milliliters Given.<br />
Press<br />
@ to begin.<br />
2. Enter the Reservoir Volume.<br />
@.<br />
@.<br />
3. Enter the Continuous Rate in ml per 24 hours.<br />
a or<br />
(@.<br />
Pl-eSS NEXT .<br />
0<br />
Section 2: Pump Setup and Programming<br />
Upstream Sensor Status<br />
This screen indicates whether the Upstream Occlusion Sensor is<br />
turned on or turned off. The Upstream Sensor status cannot be<br />
changed without entering the Biomed Functions Code (See Section<br />
4, Biomed Functions, to change the setting).<br />
Programming for Continuous Delivery Mode<br />
To program the pump, enter the prescribed values.<br />
\J/ to select the desired rate.<br />
(@ if you wish to clear the amount given.<br />
21
Section 2: Pump Setup and Programming<br />
22<br />
5. Verify the Air Detector status.<br />
Make sure the desired setting is displayed. This screen<br />
will show whether the Air Detector is turned on (hig,h or<br />
low) or off.<br />
WARNING: When the Air Detector is turned off, the pump<br />
will not detect air in the fluid path. Periodically inspect the<br />
fluid path and remove any air to prevent air embolism. Air<br />
embolism could result in death or serious injury to the<br />
patient.<br />
If you need to change the Air Detector setting, see Section<br />
4, Biomed Functions.<br />
Press 0NEXT<br />
Make sure the desired setting is displayed. This screen<br />
will show whether the Upstream Occlusion Sensor is<br />
turned on or off.<br />
WARNING: When the Upstream Occlusion Sensor is<br />
turned off, the pump will not detect occlusions upstream<br />
(between pump and reservoir). Periodically inspect the<br />
reservoir for decreasing reservoir volume, inspect the fluid<br />
path for kinks, a closed clamp, or other upstream obstructions.<br />
Upstream occlusions could result in under- or nondelivery<br />
of medications. If undetected, these occlusions<br />
could result in death or serious injury to the patient.<br />
If you need to change the Upstream Occlusion Sensor<br />
setting, see Section 4, Biomed Functions.<br />
Press<br />
.<br />
6. Verify the Upstream Occlusion Sensor status.<br />
@.<br />
.<br />
.<br />
-__<br />
-a<br />
____<br />
-<br />
-_
7. Review the program.<br />
Press<br />
@ repeatedly to review the programming screens. If<br />
you need to reprogram a setting, press @ until the appropriate<br />
screen appears and change the setting as described in<br />
this section.<br />
Removing a Used Reservoir or Administration Set<br />
WARNING: Close the fluid path tubing with the clamp before<br />
removing the reservoir or administration set from the pump to<br />
prevent unregulated gravity infusion, which could result in death or<br />
serious injury to the patient.<br />
1.<br />
2.<br />
3.<br />
4.<br />
5.<br />
Stop the pump.<br />
Close the tubing clamp.<br />
Section 2: Pump Setup and Programrning<br />
Insert a coin into the lock and turn it clockwise. The lock<br />
will pop out when you unlock the cassette.<br />
A continuous alarm will sound and the pump will disp1a.y<br />
“No Disposable, Clamp Tubing.” The alarm may be silenced<br />
by pressing @ or @.<br />
Remove the cassette hooks from the pump hinge pins.<br />
23
Section 2: Pump Setup and Programming<br />
Attaching a New Reservoir or Administration Set<br />
Obtain a new, filled reservoir, or an administration set attached to a<br />
non-vented, flexible IV bag. Refer to the instructions for use supplied<br />
with the reservoir or administration set for information on<br />
filling the reservoir, attaching a<br />
<strong>CADD</strong>@ Extension Set with Anti-<br />
Siphon Valve or an Add On Anti-Siphon Valve, and preparing the<br />
product for use.<br />
After attaching the cassette, proceed to the Reservoir Volume screen<br />
to reset the value for the volume, and then prime the tubing.<br />
WARNING: Frozen medication must be thawed at room temperature<br />
only. Do not heat the Medication Cassette’” reservoir in a<br />
microwave oven as this may damage the medication, the reservoir,<br />
or cause leakage.<br />
To attach the cassette to the pump<br />
24<br />
1. Clamp the tubing.<br />
2. Insert the cassette hooks into the hinge pins on the pump.<br />
3. Place the pump upright on a firm, flat surface. Press down<br />
so the cassette fits tightly against the pump.<br />
-<br />
-_I+<br />
-1<br />
-.<br />
__<br />
~-<br />
. ..-
Section 2: Pump Setup and Programming<br />
4. Insert a coin into the lock, push in, and turn counterclockwise<br />
until the line on the lock lines up with the arrow on the<br />
side of the pump and you feel the lock click into place.<br />
WARNING: Attach the cassette properly. An improperly<br />
attached or detached cassette could result in unregulated<br />
gravity infusion of medication from the reservoir or a reflux<br />
of blood, which could result in death or serious injury to the<br />
patient.<br />
You must use a<br />
<strong>CADD</strong>@ Extension Set with Anti-Siphon<br />
Valve or a <strong>CADD</strong>@ Administration Set with either an integral<br />
or an Add On Anti-Siphon Valve to protect against<br />
unregulated gravity infusion that can result from an improperly<br />
attached reservoir.<br />
5. Gently twist, push, and pull on the cassette to make sure it is<br />
firmly attached. If the cassette is not secure, return to step 1.<br />
25
Section 2: Pump Setup and Programming<br />
Priming the Tubing and Connecting to the Patient<br />
The pump must be stopped and in LLO or<br />
LLl in order to prime the<br />
fluid path. If the pump is in LL2, you cannot prime the fluid path.<br />
NOTE: If you are not changing the cassette but wish to prime the<br />
fluid path, you may prime the pump as described below.<br />
WARNING: Do not prime the fluid path with the tubing connected<br />
to a patient as this could result in overdelivery of medication or air<br />
embolism, which could result in death or serious injury to the<br />
patient.<br />
26<br />
1. Make sure the tubing is disconnected from the patient and<br />
the tubing clamp is open.<br />
2. Press and hold @. You will hear a single beep, and the<br />
word “Prime” will appear on the display.<br />
3. After “Prime” and three sets of dashes appear, and you hear<br />
three beeps, release @.<br />
4. Press and hold @ again<br />
to fill the fluid path and to<br />
1’ .<br />
enmmate air bubbles. The screen displays “Priming<br />
and you will hear a short beep each time the pump goes<br />
through a delivery cycle.<br />
NOTE:<br />
<br />
The air detector alarm is automatically<br />
priming.<br />
disabled<br />
. . .”<br />
wb en<br />
Fluid delivered during priming is subtracted from the<br />
Reservoir Volume, but is not added to the Given screen<br />
since this fluid is not delivered to the patient.<br />
5. If the tubing is not yet fully primed, press and hold @<br />
again. If the tubing is primed, press<br />
main screen.<br />
@ to return to the
Section 2: Pump Setup and Programming<br />
NOTE: Each time you press and bold<br />
@, you pump a<br />
maximum of 1.0 ml of fluid into the tubing. The pumping<br />
action will stop automatically when 1 .O ml has been delivered.<br />
If all of the air has not been removed from the fluid<br />
path, repeat the above priming procedure.<br />
6. If the Air Detector is in use, go to the next section. If not,<br />
connect the tubing to the patient’s infusion set or indwelling<br />
catheter and go to Setting the Lock Level for the Patient.<br />
WARNING: Ensure that the entire fluid path is free of a.11<br />
air bubbles before connecting to the patient to prevent air<br />
embolism. Air embolism could result in death or serious<br />
injury to the patient.<br />
NOTE: If the fluid path contains an air eliminating filter, it<br />
is acceptable for air bubbles to be present on the vent side of<br />
the filter.<br />
27
Section 2: Pump Setup and Programming<br />
Inserting the Tubing into the Air Detector<br />
WARNING: When the Air Detector is turned off, the pump will not<br />
detect air in the fluid path. Periodically inspect the fluid path and<br />
remove any air to prevent air embolism. Air embolism could result<br />
in death or serious injury to the patient.<br />
(See Section 4, Biomed Functions, for instructions on how to turn<br />
the air detector on and off.)<br />
28<br />
1. If the Air Detector is in use, make a small loop of tubing<br />
underneath the air detector and hold it with your thumb.<br />
2. Place the tubing over the groove in<br />
it under the catch.<br />
Catch<br />
the air detector and tuck<br />
-<br />
w-<br />
Yl<br />
--I<br />
__I
Section 2: Pump Setup and Programming<br />
3. To seat the tubing into the groove, gently pull the tubing<br />
upward, until it is under the retention nubs and flat in the<br />
groove.<br />
4. Connect the tubing to the patient’s infusion set or indwelling<br />
catheter.<br />
WARNING: Ensure that the entire fluid path is free of<br />
air bubbles before connecting to the patient to prevent air<br />
embolism. Air embolism could result in death or serious<br />
injury to the patient.<br />
NOTE: If the fluid path contains an air eliminating filter, it<br />
is acceptable for air bubbles to be present on the vent side of<br />
the filter.<br />
all1<br />
29
Section 2: Pump Setup and Programming<br />
Setting the Lock Level for the Patient<br />
The Lock Level must be changed to<br />
LLl or LL2 to prevent the<br />
patient from having complete access to all programming and operating<br />
functions.<br />
NOTE: You may change the lock level at any time by stopping the<br />
pump and following the procedure below.<br />
To change the lock level<br />
30<br />
1. Press<br />
4. Press<br />
5. Press<br />
6. Press<br />
@.<br />
2. The current lock level will appear.<br />
3. Press (I\ or<br />
appears.<br />
0<br />
LOCK again or<br />
@<br />
Or<br />
@ or<br />
\z/ until the desired lock<br />
m 0 . “Code<br />
0” wi 11 appear.<br />
v until the Lock Level Code<br />
w<br />
@ to set the new lock level.<br />
: level<br />
(LLl or<br />
LL2)<br />
“64” appears.<br />
WARNING: Do not disclose to the patient the pump’s<br />
security codes or any other information that would allow<br />
the patient complete access to all programming and operating<br />
functions. Improper programming could result in dieath<br />
or serious injury to the patient.<br />
--a<br />
--<br />
___^<br />
___<br />
-_
If a prescription allows for the Continuous Rate to be adjusted<br />
during the course of therapy, you may wish to operate the pump<br />
LLl. Then, when necessary, you can adjust the Continuous Rate<br />
to the maximum value that was programmed in LLO.<br />
Programming the pump to use this feature<br />
1. During initial programming in LLO, enter the upper limit<br />
value for the Continuous Rate. (This will be the maximum<br />
value when the pump is in LLl.)<br />
2. After you are finished programming, change the lock level<br />
to LLl.<br />
3. Decrease the Continuous Rate to its starting value, then<br />
press (@.<br />
Adjusting the rate while the pump is in use<br />
If it becomes necessary to increase the Continuous Rate during<br />
course of therapy, stop the pump but remain in LLI.<br />
1. Press<br />
2. Press<br />
@ until the Continuous Rate screen appears.<br />
@ or<br />
3. Restart the pump if appropriate.<br />
Section 3: Operating the Pump<br />
Programming with Upper Limits, Adjusting Rate<br />
in Lock Level<br />
1<br />
@ to select the desired value, then press<br />
in<br />
UP<br />
t-he<br />
@@.<br />
31
Section 3: Operating the Pump<br />
3.0 Operating the Pump<br />
Starting the Pump<br />
When you start the pump, programmed values will be automatically<br />
reviewed. Then fluid delivery will begin as programmed, and<br />
“RUN” will appear on the main screen. If the pump will not start, a<br />
message will appear on the display. Refer to the Messages and<br />
Alarms Table in Section 5.<br />
To start the pump<br />
Stopping the Pump<br />
Stopping the pump stops delivery. When the pump is stopped,<br />
STOPPED will appear on the main screen, and you will hear tlhree<br />
beeps every 5 minutes.<br />
To stop the pump<br />
32<br />
1. Press and hold<br />
2. Release @ after the last set of dashes disappears, and the<br />
pump beeps. All of the programming screens appear for<br />
your review one after the other.<br />
1. Press and hold<br />
@.<br />
Three sets of dashes appear on the display; then they disappear<br />
one-by-one, each accompanied by a single beep.<br />
@.<br />
Three sets of dashes will appear one-by-one on the pump’s<br />
display, each accompanied by a single beep.<br />
2. Release @$ after the third set of dashes appears and the<br />
pump beeps.<br />
a**<br />
-<br />
-..n
pump*<br />
To turn the pump off<br />
Press and hold<br />
Press and hold @. The pump will power up and automatically<br />
review all screens.<br />
Resetting the Reservoir Volume<br />
To reset the Reservoir Volume to the value programmed in LLO, the<br />
pump may be in any lock level.<br />
1. Stop the pump.<br />
2. Press<br />
3. Press<br />
@.<br />
Three sets of dots will appear one-by-one on the pump’s<br />
display, each accompanied by a single beep.<br />
To turn the pump on<br />
@ to display the Reservoir Volume screen.<br />
Section 4: Biomed Functions<br />
Turning the Pump On/Off<br />
When the pump is stopped, you may put the pump into a low<br />
power state by turning it off. The pump may be turned off when it<br />
is disconnected from the patient and it is going to be stored for<br />
short periods of time.<br />
CAUTION: Do not store the pump for prolonged periods of time<br />
with the batteries installed. Battery leakage could damage the<br />
@ to reset the volume to the programmed value.<br />
33
Section 4: Biomed Functions<br />
4.0 Biomed Functions<br />
Overview: Accessing the Biomed Functions<br />
The Biomed Functions are pump configurations that are less frequently<br />
changed. The Biomed Functions are accessible only when<br />
the pump is stopped and in Lock Level 0.<br />
To Access the Biomed Functions<br />
34<br />
1. Press<br />
2. Press<br />
3. Press @ or 0v<br />
until the Biomed Functions Code “164”<br />
appears (Lock Level Code + 100). Then press @ or<br />
WARNING: Do not disclose to the patient the pump’s<br />
security codes or any other information that would allow<br />
the patient complete access to all programming and operating<br />
functions. Improper programming could result in death<br />
or serious injury to the patient.<br />
4. Press @ to select the setting you wish to view or change,<br />
then follow the instructions in this section for the appropriate<br />
screen.<br />
NOTE: To leave a Biomed Function unchanged, press<br />
5. To exit the Biomed Functions, press @ until you get to<br />
the screen that reads,<br />
main. ”<br />
“NEXT for Biomed, ENTER for<br />
6. Press<br />
@. The current lock level will appear.<br />
@ or<br />
(@. “Code<br />
0” will appear.<br />
@ to return to the main screen.<br />
@.<br />
@.<br />
.--<br />
-._.
3. Use<br />
5. Press<br />
\z/ to select On-high, On-low, or off.<br />
On-high is the highest sensitivity, where the smallest<br />
bubbles will be detected.<br />
On-low is lower sensitivity, where only the larger bubbles<br />
will be detected. See Specifications in Section 5.<br />
4. Press<br />
@ until “Air Detector” appears.<br />
a or<br />
@ to enter the change.<br />
@ to go to the next screen.<br />
Section 4: Biomed Functions<br />
Air Detector On/Off<br />
The Air Detector screen can be set to on-high, on-low or off.<br />
WARNING: When the Air Detector is turned off, the pump will not<br />
detect air in the fluid path. Periodically inspect the fluid path and<br />
remove any air to prevent air embolism. Air embolism could result<br />
in serious injury or death to the patient.<br />
1. With the pump stopped and in LLO, access the Biomed<br />
Functions loop. (Refer to the beginning of the Biomed<br />
Functions section for instructions on how to access the<br />
Biomed Functions loop.)<br />
2. Press<br />
35
Section 4: Biomed Functions<br />
Upstream Sensor On/Off<br />
The Upstream Occlusion Sensor screen can be set to on or off. If<br />
this screen is set to on, and an upstream occlusion (between pump<br />
and reservoir) is detected, an alarm will sound, delivery will stop,<br />
and the display will show “Upstream Occlusion.”<br />
WARNING: When the Upstream Occlusion Sensor is turned off,<br />
the pump will not detect occlusions upstream (between pump and<br />
reservoir). Periodically inspect the reservoir for decreasing reservoir<br />
volume, inspect the fluid path for kinks, a closed clamp, or<br />
oth.er<br />
upstream obstructions. Upstream occlusions could result in underor<br />
non-delivery of medications. If undetected, these occlusions<br />
could result in death or serious injury to the patient.<br />
36<br />
1. With the pump stopped and in LLO, access the Biomed<br />
Functions loop. (Refer to the beginning of the Biomed<br />
Functions section for instructions on how to access the<br />
Biomed Functions loop.)<br />
2. Press<br />
3. Press<br />
4. Press<br />
@ until “Upstream Sensor” appears.<br />
a or<br />
\z/ to select off or on.<br />
@ to enter the change.<br />
-_-
5.0 Reference<br />
Messages and Alarms, Alphabetical List<br />
Messages and Alarms Description<br />
/ Corrective Action<br />
Air In Line<br />
Detected<br />
TWO -TONE ALARM<br />
Battery Depleted<br />
TWO -TONE ALARM<br />
Battery Removed<br />
Pump won’t run<br />
TWO -TONE ALARM<br />
Section 5: Reference<br />
The Air Detector has detected air in the<br />
fluid path; the fluid path may contain air<br />
bubbles, or the tubing may not be fully<br />
threaded through the Air Detector. Press<br />
@ or @ to silence the alarm, then:<br />
Make sure the tubing is threaded<br />
properly.<br />
If the fluid path contains air bubbles,<br />
close the clamps and disconnect the fluid<br />
path from the patient. Then follow the<br />
instructions for removing air by priming<br />
the pump, described in Section 2. Restart<br />
the pump.<br />
The battery power is too low to operate<br />
the pump. The pump is now stopped.<br />
Change the batteries immediately.<br />
Press and hold @ to restart the<br />
Pump.<br />
With the AC adapter attached, the AA<br />
batteries have been removed while the<br />
pump is running, or you have tried to<br />
start the pump with depleted batteries.<br />
The pump is now stopped. Press @ or<br />
@ to silence the alarm. Reinstall<br />
batteries or install new batteries. Press<br />
and hold @ to restart the pump.<br />
37
Section 5: Reference<br />
Messages and Alarms Description<br />
/ Corrective Action<br />
[No MESSAGE]<br />
TWO -TONE ALARM<br />
Error<br />
TWO-TONE AL ARM<br />
High Pressure<br />
TWO -TONE<br />
Key pressed,<br />
Please release<br />
TWO -TONE ALARM<br />
LowBat The batteries are low, but the pump is<br />
THREE TWO -TONE BEEPS EVERY 5 MINUTES still operable.<br />
Change the batteries soon.<br />
38<br />
ALARM<br />
With no AC adapter attached, the<br />
batteries have been removed while the<br />
pump is running. The pump is now<br />
stopped and unpowered. Install batteries<br />
to silence the alarm.<br />
OR<br />
Batteries were removed within approximately<br />
15 seconds after stopping the<br />
pump. Install new batteries to silence the<br />
alarm, if desired. Otherwise, the alarm<br />
will stop within a short period of time.<br />
An error has occurred. Remove the pump<br />
from service and contact Customer<br />
Service to return the pump for service.<br />
The pump has detected high pressure,<br />
which may be resulting from a downstream<br />
blockage, kink in the fluid path,<br />
or a closed tubing clamp. Remove the<br />
obstruction to resume operation. Or,<br />
press @ or @ to stop the pump and<br />
silence the alarm for 2 minutes, then<br />
remove the obstruction and restart the<br />
PUMP-<br />
If a key is being pressed, stop pressing it.<br />
If the alarm persists, close the tubing<br />
clamp and remove the pump from use.<br />
Contact Customer Service to return the<br />
pump for service.<br />
-<br />
-__<br />
-.-
Messages and Alarms Description<br />
/ Corrective Action<br />
Motor Locked,<br />
remove all power<br />
TWO -TONE ALARM<br />
No Disposable,<br />
Clamp Tubing<br />
TWO-TONE AL ARM<br />
No Disposable,<br />
Pump won’t run<br />
TWO -TONE ALARM<br />
Power lost while<br />
pump was on<br />
TWO -TONE ALARM<br />
Reservoir Volume<br />
Empty<br />
TWO -TONE ALARM<br />
ResVol Low reservoir soon. See Reservoir Volume<br />
THREE SINGLE BEEPS Alarm in Section 1 for more information.<br />
Service Due<br />
TWO -TONE ALARM<br />
Section 5: Reference<br />
Batteries are depleted and the pump was<br />
powered up with the AC Adapter. Install<br />
new AA batteries, reconnect the AC<br />
adapter, and restart the pump.<br />
The disposable (administration set or<br />
cassette) was removed. Clamp the tubing<br />
immediately. A disposable must be<br />
attached in order for the pump to run.<br />
Press @ or @ to silence the alarm.<br />
You have tried to start the pump without<br />
a disposable attached. A disposable must<br />
be attached in order for the pump to run.<br />
Press @ or @ to silence the alarm.<br />
The pump was on and running when<br />
power was removed. Stop the pump<br />
before changing the battery or removing<br />
the power source. Press (@ or @ to<br />
silence the alarm.<br />
The Reservoir Volume has reached<br />
0.0 ml. Press @ or @ to stop the<br />
alarm. Then install a new reservoir if<br />
appropriate and reset the reservoir<br />
volume.<br />
RUN The Reservoir Volume is low. Change the<br />
Service is due for this pump based on<br />
clock battery age or total motor revolutions.<br />
This screen will appear while in<br />
LLO only for 60 days and then in all lock<br />
levels until returned for service.<br />
39
Section 5: Reference<br />
Messages and Alarms Description<br />
Upstream Occlusion<br />
TWO-TONE AL ARM<br />
Value not saved A value was not saved by pressing @.<br />
Press @ to resume programming.<br />
Verify all programming screens before<br />
moving to the next screen or starting the<br />
pump.<br />
40<br />
/ Corrective Action<br />
Fluid is not flowing from the reservoir to<br />
the pump. Check for a kink in the tubing<br />
or a closed clamp between the reservoir<br />
and pump. Press @ or @ to stop the<br />
pump and silence the alarm for 2 minutes,<br />
then remove the obstruction and<br />
press @@ to restart the pump.<br />
”<br />
-<br />
-***<br />
--<br />
_...-<br />
l___
Cleaning the Pump and Accessories<br />
CAUTION:<br />
Use any of the following<br />
ries:<br />
solutions to clean the pump and<br />
accesso-<br />
0 Soap solution<br />
0 Benzalkonium Chloride concentrate (0.13 % )<br />
0 Glutaral Concentrate, USP (2%)<br />
. 10 percent solution of household bleach (one part household<br />
bleach to nine parts water)<br />
0 Alcohol, USP (93%)<br />
0 Isopropyl Alcohol, USP (99 %)<br />
0 Chlorohexidine (70 % )<br />
. PDI-<br />
Super Sani-Cloth@<br />
. Mada Medical - MadaCide<br />
1.<br />
2.<br />
Dampen a soft, lint-free cloth with cleaning solution and<br />
wipe the exterior surface of the pump. Do not allow the<br />
solutiolz to soak &to the pump.<br />
Wipe the entire surface dry with another soft,<br />
Allow the pump to dry completely before use.<br />
Section 5: Reference<br />
Do not immerse the pump in cleaning fluid or water. Do not<br />
allow solution to soak into the pump, accumulate on the keypad,<br />
or enter the battery compartment. Moisture build-up inside the<br />
pump may damage the pump.<br />
Do not clean the pump with acetone, other plastic solvents, or<br />
abrasive cleaners, as damage to the pump may occur.<br />
Routinely clean the pump to keep it free of dirt, liquids, and foreign<br />
objects.<br />
lint-free cloth.<br />
41
Section 5: Reference<br />
Cleaning the Battery Contacts<br />
Routinely clean the battery contacts, possibly as part of the preventative<br />
maintenance cycle, to remove buildup of foreign material on<br />
the contacts.<br />
Use the following to clean the battery contacts:<br />
42<br />
. Cotton swab wetted with Isopropyl Alcohol (70% minimum)<br />
.<br />
1.<br />
2.<br />
3.<br />
NOTE: Do not use an alcohol formulation that contains<br />
components other than alcohol and water.<br />
OR<br />
Pre-moistened alcohol swab<br />
Using a swab wetted with alcohol, rub the entire battery<br />
contact for a minimum of ten back and forth cycles (twenty<br />
total wipes over the contact).<br />
Using a clean surface of the swab, repeat process for second<br />
battery contact.<br />
Using a clean swab wetted with alcohol, rub each battery<br />
contact again, a minimum of four back and forth cycles<br />
(eight total wipes over the contact).<br />
4. Allow the contacts to dry completely before use.<br />
-.y<br />
-<br />
--<br />
-- _<br />
I<br />
._” ;*
Section 5: Reference<br />
Exposure to Radiation, Ultrasound, Magnetic<br />
Resonance Imaging (MRI), or Use near ECG<br />
Equipment<br />
CAUTION:<br />
Do not expose the pump to therapeutic levels of ionizing radiation<br />
as permanent damage to the pump’s electronic circuitry may<br />
occur. The best procedure to follow is to remove the pump from<br />
the patient during therapeutic radiation sessions. If the pump<br />
must remain in the vicinity during a therapy session, it should be<br />
shielded, and its ability to function properly should be confirmed<br />
following treatment.<br />
Do not expose the pump directly to ultrasound, as permanent<br />
damage to the pump’s electronic circuitry may occur.<br />
Do not use the pump in the vicinity of magnetic resonance<br />
imaging (MRI) equipment as magnetic fields may adversely affect<br />
the operation of the pump. Remove the pump from the patient<br />
during MRI procedures and keep it at a safe distance from<br />
magnetic energy.<br />
Do not use the pump near ECG equipment as the pump may<br />
interfere with the operation of the equipment. Monitor ECG<br />
equipment carefully when using this pump.<br />
43
Section 5: Reference<br />
Technical Description<br />
Standards used in Development of the Pump<br />
The following standards were used in whole or part in the development<br />
of the pump.<br />
Medical Electrical Equipment<br />
IEC 60601-1, Medical Electrical Equipment, Part 1: General Requirements<br />
for Safety.<br />
IEC 60601-l-1, Medical Electrical Equipment, Part 1: General<br />
Requirements for Safety. Collateral Standard: Safety requirements<br />
for medical electrical systems.<br />
IEC 60601-l-2<br />
(1993), General Requirements for Safety, Part 2:<br />
Electromagnetic Compatibility - Requirements and Tests.<br />
IEC 60601-l-2, (2nd Edition, 0 1 -June- 1996) Medical Electrical<br />
Equipment, Part 1: General Requirements for Safety. 2. Collateral<br />
Standard: Electromagnetic Compatibility - Requirements and<br />
Tests.<br />
IEC 60601-l-4, Medical Electrical Equipment, Part 1: General<br />
Requirements for Safety - 4. Collateral standard: Programmable<br />
electrical medical systems.<br />
IEC 60601-2-24, Medical Electrical Equipment, Part 2: Particular<br />
Requirements for the Safety of Infusion Pumps and Controllers.<br />
Electromagnetic Compatibility<br />
RTCA/DO -lGOC, Radiated Emissions Only, Category A<br />
CISPRll, Radiated and Conducted Emissions, Group 1, Class B.<br />
& Z Limit.<br />
CISPR14, Radiated and Conducted Emissions, device powered by<br />
AC adapter only.<br />
For CISPRll and CISPR14 tests, the pump was fitted with an<br />
administration set with its inlet connected to a 250 ml bag and its<br />
outlet routed back to the bag forming a closed loop system. A total<br />
of six feet of tubing was used to form the closed loop.<br />
IEC 61000-3-2, Harmonic Distortion, Class A equipment, only for<br />
devices powered @ 220 VAC or greater.<br />
-<br />
_yI<br />
-<br />
-rub<br />
-<br />
..-<br />
1_1-<br />
--<br />
-<br />
-..<br />
___<br />
._._.<br />
_--
IEC 61000-3-3, Voltage Functions and Flicker, only for devices<br />
powered<br />
@ 220 VAC or greater.<br />
IEC 61000-4-2, 8<br />
IEC 61000-4-4, AC Fast Transients, at k500 volts, *lo00 volts, and<br />
22000 volts - AC mains plug.<br />
IEC 61000-4-5, AC Surges, 1<br />
mode.<br />
IEC 61000-4-6, Conducted Disturbances, AC mains plug, 3V, 150<br />
kHz - 80 MHz.<br />
IEC 61000-4-8, AC Magnetic field, at 400 Amperes/meter at 50 Hz.<br />
IEC 61000-4-11, AC Steady State, Dropout<br />
ENV 50204, Digital Radio Telephone, 10 V/m, 900 f 5 MHz, 50%<br />
duty cycle and 200 rep. frequency.<br />
Specifications (Nominal)<br />
General Pump Specifications<br />
Resolution<br />
Size<br />
.*,.*..................... Medication CassetteTM reservoir or<br />
<strong>CADD</strong>@ Administration Set, 0.050 ml per<br />
pump stroke nominal<br />
. . . . . . . . . . . . . . . . . . . . . . . . . . . . . . ., . . . . .<br />
kV contact discharge, 1.5<br />
IEC 61000-4-3, Radiated Susceptibility, 26 MHz to 2500 MHz,<br />
10 V/m, 1 kHz - 80% AM modulation.<br />
kV differential mode, 2<br />
Weight . . . . . . . . . . . . . . . . . . . . . . . . . . . . . . . . 392 g (13.8 oz.) including two AA<br />
batteries, empty 100 ml Medication<br />
CassetteTM reservoir, excluding other<br />
accessories<br />
Classification<br />
(IEC 601-l) . . . . . . . . . . . . . . . . . . . . . . . . CF , Class II <br />
Moisture Protection . . . . . . . . . . Splashproof (IPX4<br />
kV air discharge.<br />
& Slow Sags/Surges.<br />
. 4.1 cm x 9.5 cm x 11.2 cm (1.6 in. x 3.8<br />
in. x 4.4 in.) excluding cassette or other<br />
accessories<br />
)<br />
Section 5: Reference<br />
kV common<br />
45
Section 5: Reference<br />
46<br />
Pump Alarms . . . . . . . . . . . . . . . . . . . . . Low battery power; depleted battery<br />
power; battery dislodged; pump stopped;<br />
pump fault; low reservoir volume; high<br />
delivery pressure; air in line; disposable<br />
nor attached when run attempted; motor<br />
locked; upstream occlusion; reservoir<br />
volume empty; key stuck; disposable<br />
detached.<br />
Maximum Infusion<br />
Pressure . . . . . . . . . . . . . . . . . . . . . . . . . . . . . . 40.0 psi<br />
[2.76 bar]<br />
Maximum Time to<br />
Occlusion Alarm . . . . . . . . . . . . . . . <strong>CADD</strong>@ Administration Set with<br />
siphon valve: 2.0 hours<br />
Bolus Volume at<br />
Occlusion Alarm<br />
Pressure . . . . . . . . . . . . . . , . . . . . . . . . . . . . . . 0.050 ml resolution sets/reservoirs:<br />
co.15 ml<br />
Power Sources . . . . . . . . . . . . . . . . . . . Two AA alkaline batteries<br />
System Operating<br />
Temperature . . . . . . . . . . . . . . . . .<br />
..-.. +2OC to 40°C (35°F to 104°F)<br />
anti-<br />
; AC Adapter.<br />
The expected life of two AA batteries is<br />
15 hours at 125 ml/hour, or approximately<br />
14 days at 10 ml/day (nominal).<br />
This estimate is based on laboratory tests<br />
conducted at room temperature using<br />
two new batteries. Actual battery life will<br />
vary depending on the brand of battery,<br />
battery shelf life, temperature conditions,<br />
and delivery rate. It is recommended that<br />
two new AA batteries be kept available<br />
for replacement if necessary.<br />
An internal battery powers the clock.<br />
When it is depleted, it cannot reliably<br />
maintain the clock time. This battery<br />
must be replaced by the manufacturer.<br />
The internal battery has an expected life<br />
of 5 years.<br />
-<br />
a-<br />
%a_<br />
-.<br />
I_._<br />
._--
System Storage<br />
Temperature . . . . . . . . . . . . . . . . . . . . . . -20°C to 60°C (-4°F to 140°F)<br />
System Delivery<br />
Accuracy . . . . . . . . . . . . . . . . . . . . . . . . . . . .<br />
k 6% (nominal)<br />
System Definition . . . . . . . . . . . . . . System is defined as a <strong>CADD</strong>-<strong>Legacy</strong>’”<br />
pump with an attached Medication<br />
CassetterM reservoir and <strong>CADD</strong>@ Extension<br />
Set with integral anti-siphon valve,<br />
or an attached <strong>CADD</strong>O Administration<br />
Set with integral or add-on anti-siphon<br />
valve.<br />
High Pressure Alarm . . . . . . . . 26<br />
Maximum Volume<br />
Infused under Single<br />
Fault Condition . . . . . . . . . . . . . . . . . <strong>CADD</strong>O Administration Set with<br />
anti-siphon valve: 0.2 ml<br />
Delivery Rate during<br />
priming . . . . . . . . . . . . . . . . . . . . . . . . . . . . . . . Approx. 180<br />
Alarm Disabled during<br />
priming . . . . . . . . . . . . . . . . . . . . . . . . . . . . ..I Air Detector<br />
+ 14 psi [I.79 -e 0.97 bar].<br />
Air Detector Alarm . . . . . . . . . . . Single bubble<br />
Low sensitivity = greater than 0.250 ml<br />
High Sensitivity = greater than 0.100 ml<br />
Multi-bubble = 1.0 ml nominal<br />
ml/hr<br />
Section 5: Reference<br />
47
Section 5: Reference<br />
Continuous Delivery Mode Specifications<br />
Given . . . . . . . . . . . . . . . . . . . . . . . . . . . . . . . . . . 0 to 99999.95 in 0.05 ml increments<br />
Biomed Functions<br />
48<br />
Reservoir Volume . . . . . . . . . . . . . . 1 to 9999 or Not In Use; programmable<br />
in 1 ml increments, displayed in 0.1 ml<br />
increments<br />
Default: 1.0 ml<br />
Units . . . . . . . . . . . . . . . . . . . . . . . . . . . . . . . . . . . Milliliters (ml)<br />
Continuous Rate . . . . . . . . . . . . . . . 1 to 3000 ml J 24 hr; programmable in<br />
1 ml / 24 hr increments<br />
Default: 1.0 ml<br />
Air Detector . . . . . . . . . . . . . . . . . . . . . . . Off<br />
On-low<br />
On-high<br />
Default: On-high<br />
Upstream Sensor . . . . . . . . . . . . . . . Off<br />
On<br />
Default: On<br />
-<br />
_._<br />
-l<br />
---<br />
_._<br />
_.*i_


