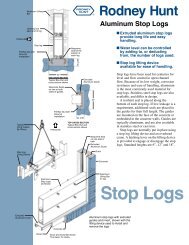
Instruction Manual - Rodney Hunt Company
Instruction Manual - Rodney Hunt Company
Instruction Manual - Rodney Hunt Company

Create successful ePaper yourself
Turn your PDF publications into a flip-book with our unique Google optimized e-Paper software.
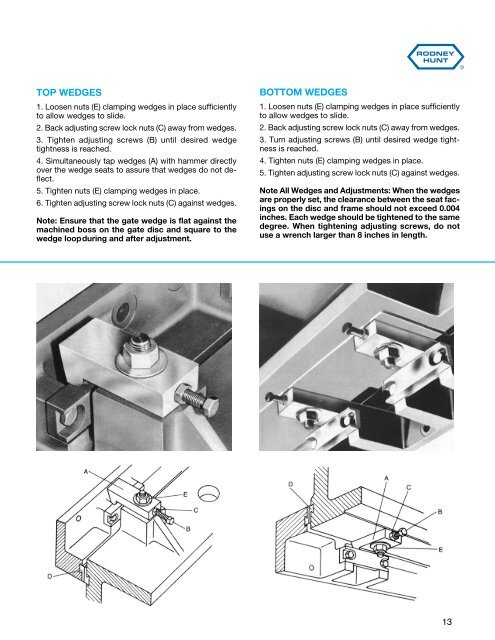
TOP WEDGES<br />
1. Loosen nuts (E) clamping wedges in place sufficiently<br />
to allow wedges to slide.<br />
2. Back adjusting screw lock nuts (C) away from wedges.<br />
3. Tighten adjusting screws (B) until desired wedge<br />
tightness is reached.<br />
4. Simultaneously tap wedges (A) with hammer directly<br />
over the wedge seats to assure that wedges do not deflect.<br />
5. Tighten nuts (E) clamping wedges in place.<br />
6. Tighten adjusting screw lock nuts (C) against wedges.<br />
Note: Ensure that the gate wedge is flat against the<br />
machined boss on the gate disc and square to the<br />
wedge loop during and after adjustment.<br />
BOTTOM WEDGES<br />
1. Loosen nuts (E) clamping wedges in place sufficiently<br />
to allow wedges to slide.<br />
2. Back adjusting screw lock nuts (C) away from wedges.<br />
3. Turn adjusting screws (B) until desired wedge tightness<br />
is reached.<br />
4. Tighten nuts (E) clamping wedges in place.<br />
5. Tighten adjusting screw lock nuts (C) against wedges.<br />
Note All Wedges and Adjustments: When the wedges<br />
are properly set, the clearance between the seat facings<br />
on the disc and frame should not exceed 0.004<br />
inches. Each wedge should be tightened to the same<br />
degree. When tightening adjusting screws, do not<br />
use a wrench larger than 8 inches in length.<br />
13