- Page 1 and 2:
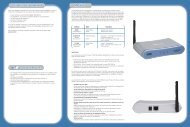
Barricade Dual WAN Port Load Balanc
- Page 3 and 4:
LIMITED WARRANTY Limited Warranty S
- Page 5 and 6:
CONSEQUENTIAL DAMAGES FOR CONSUMER
- Page 7 and 8:
RFI Emission: • Limit class A acc
- Page 9 and 10:
Veuillez lire à fond l’informati
- Page 11 and 12:
Warnings and Cautionary Messages Wa
- Page 13 and 14:
Audience The guide is intended for
- Page 15 and 16:
CHAPTER 8 AUTHENTICATION ..........
- Page 17 and 18:
Chapter 1 Administrator Administrat
- Page 19 and 20:
Admin Adding a new Sub Administrato
- Page 21 and 22:
Add Remote Management IPs STEP 1.Ad
- Page 23 and 24:
Software Update STEP 1.Select Softw
- Page 25 and 26:
Define the required fields of Setti
- Page 27 and 28:
NAT Mode: It allows Internal Netwo
- Page 29 and 30:
Setting System Settings- Exporting
- Page 31 and 32:
Restoring Factory Default Settings
- Page 33 and 34:
Enabling E-mail Alert Notification
- Page 35 and 36:
Date / Time Date/Time Settings STEP
- Page 37 and 38:
Adding Multiple Subnet Add the foll
- Page 39 and 40:
Route Table To connect two differen
- Page 41 and 42:
STEP 3.Enter the following setting
- Page 43 and 44:
DHCP STEP 1.Select DHCP in System a
- Page 45 and 46:
DDNS Dynamic DNS Settings STEP 1.Se
- Page 47 and 48:
Host Table STEP 1.Select Host Table
- Page 49 and 50:
Chapter 3 Interface Interface In th
- Page 51 and 52:
Connect Mode: Display the current
- Page 53 and 54:
We set up four Interface Address ex
- Page 55 and 56:
WAN Setting WAN Interface Address S
- Page 57 and 58:
STEP 3.Select the Connecting way:
- Page 59 and 60:
Dynamic IP Address (Cable Modem Use
- Page 61 and 62:
Static IP Address (Figure3-9) 1. Se
- Page 63 and 64:
DMZ Setting DMZ Interface Address (
- Page 65 and 66:
Chapter 4 Address Address The SMC B
- Page 67 and 68:
We set up two Address examples in t
- Page 69 and 70:
STEP 2.Adding the following setting
- Page 71 and 72:
Setup a policy that only allows par
- Page 73 and 74:
STEP 3.Enter the following settings
- Page 75 and 76:
Chapter 5 Service Service TCP and U
- Page 77 and 78:
Define the required fields of Servi
- Page 79 and 80:
Custom Allow external user to commu
- Page 81 and 82:
Under general circumstances, the ra
- Page 83 and 84:
Group Setting service group and res
- Page 85 and 86:
STEP 2.In LAN Group of Address func
- Page 87 and 88:
Example To configure the valid time
- Page 89 and 90:
Chapter 7 QOS QoS By configuring th
- Page 91 and 92:
Define the required fields of QoS W
- Page 93 and 94:
Example Setting a policy that can r
- Page 95 and 96:
Chapter 8 Authentication Authentica
- Page 97 and 98:
When the user connect to external n
- Page 99 and 100:
Auth-User Name: The user account f
- Page 101 and 102:
Example Setting specific users to c
- Page 103 and 104:
STEP 3.Add a policy in Outgoing Pol
- Page 105 and 106:
Chapter 9 Content Blocking Content
- Page 107 and 108:
Sub-name file Blocking: Prevent us
- Page 109 and 110:
URL Restrict the Internal Users onl
- Page 111 and 112:
STEP 2.Add a Outgoing Policy and us
- Page 113 and 114: STEP 2.Add a new Outgoing Policy an
- Page 115 and 116: STEP 2.Add a new Outgoing Policy an
- Page 117 and 118: Step2. In Policy Outgoing, add one
- Page 119 and 120: Chapter 10 Virtual Server Virtual S
- Page 121 and 122: Define the required fields of Virtu
- Page 123 and 124: Example Make a single server that p
- Page 125 and 126: STEP 7.Complete the setting of prov
- Page 127 and 128: STEP 2.Enter the following data in
- Page 129 and 130: The external user use VoIP to conne
- Page 131 and 132: STEP 5.Add a new Incoming Policy, w
- Page 133 and 134: Make several servers that provide s
- Page 135 and 136: STEP 4.Enter the following data in
- Page 137 and 138: STEP 7.Complete the setting of prov
- Page 139 and 140: Define the required fields of VPN:
- Page 141 and 142: Define the required fields of IPSec
- Page 143 and 144: Define the required fields of PPTP
- Page 145 and 146: We set up two VPN examples in this
- Page 147 and 148: STEP 4.Select Preshare in Authentic
- Page 149 and 150: STEP 9.Enter the following setting
- Page 151 and 152: STEP 11.Enter the following setting
- Page 153 and 154: STEP 4.Select Remote Gateway-Fixed
- Page 155 and 156: STEP 10.Enter the following setting
- Page 157 and 158: STEP 12.Enter the following setting
- Page 159 and 160: Setting PPTP VPN connection between
- Page 161 and 162: STEP 2.Add the following settings i
- Page 163: STEP 4.Enter the following setting
- Page 167 and 168: STEP 3.Enter the following setting
- Page 169 and 170: STEP 5.Complete PPTP VPN Connection
- Page 171 and 172: (4) LAN to DMZ: The source IP is in
- Page 173 and 174: Option: To display if every functi
- Page 175 and 176: We set up six Policy examples in th
- Page 177 and 178: STEP 2.Complete the setting of Logg
- Page 179 and 180: Forbid the users to access to speci
- Page 181 and 182: STEP 2.Enter as following in WAN an
- Page 183 and 184: STEP 4.Enter the following setting
- Page 185 and 186: STEP 3.Enter the following setting
- Page 187 and 188: STEP 3.Enter the following in Incom
- Page 189 and 190: STEP 4.Enter the following in WAN t
- Page 191 and 192: STEP 4.Enter the following setting
- Page 193 and 194: STEP 8.Add the following setting in
- Page 195 and 196: Define the required fields of Hacke
- Page 197 and 198: Detect Ping of Death Attack: Selec
- Page 199 and 200: Internet Alert SMC BR21VPN Alarm an
- Page 201 and 202: Figure16-4 NetBIOS Alert Notificati
- Page 203 and 204: Chapter 14 Attack Alarm Attack Alar
- Page 205 and 206: Internal Alarm To record the DDoS a
- Page 207 and 208: STEP 2.When Hacker attacks the SMC
- Page 209 and 210: We set up four LOG examples in the
- Page 211 and 212: STEP 3.Click Traffic Log. It will s
- Page 213 and 214: STEP 5.Click on Download Logs and s
- Page 215 and 216:
Event Log To record the detailed ma
- Page 217 and 218:
STEP 3.Click Clear Logs and click O
- Page 219 and 220:
STEP 2.Click on Download Logs and s
- Page 221 and 222:
Log Backup To save or receive the r
- Page 223 and 224:
Chapter 16 Accounting Report Accoun
- Page 225 and 226:
Inbound Accounting Report It is the
- Page 227 and 228:
Figure19-1 Outbound Source IP Stati
- Page 229 and 230:
Figure19-2 Outbound Destination IP
- Page 231 and 232:
Accounting Report. 230
- Page 233 and 234:
Inbound STEP 1.Enter Inbound in Acc
- Page 235 and 236:
Enter Inbound in Accounting Report
- Page 237 and 238:
STEP 2.Enter Inbound in Accounting
- Page 239 and 240:
Chapter 17 Statistics Statistics WA
- Page 241 and 242:
WAN Statistics STEP 1.Enter WAN in
- Page 243 and 244:
Policy Statistics STEP 1.If you had
- Page 245 and 246:
Chapter 18 Status Status The users
- Page 247 and 248:
Figure21-1 Interface Status 246
- Page 249 and 250:
ARP Table STEP 1.Enter ARP Table in
- Page 251:
20 Mason • Irvine, CA 92618 • P