

SEP-10S Plus SEP-12S Plus SP-12S Pro - Med-E-Quip Locators
SEP-10S Plus SEP-12S Plus SP-12S Pro - Med-E-Quip Locators
SEP-10S Plus SEP-12S Plus SP-12S Pro - Med-E-Quip Locators

You also want an ePaper? Increase the reach of your titles
YUMPU automatically turns print PDFs into web optimized ePapers that Google loves.
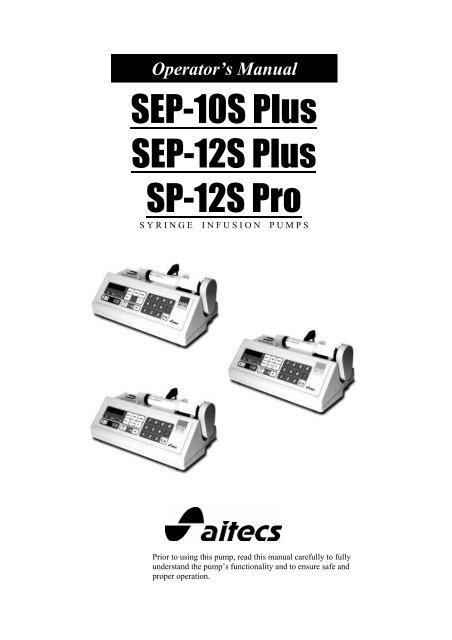
Operator’s Manual<br />
<strong>SEP</strong>-<strong>10S</strong> <strong>Plus</strong><br />
<strong>SEP</strong>-<strong>12S</strong> <strong>Plus</strong><br />
<strong>SP</strong>-<strong>12S</strong> <strong>Pro</strong><br />
S Y R I N G E I N F U S I O N P U M P S<br />
Prior to using this pump, read this manual carefully to fully<br />
understand the pump’s functionality and to ensure safe and<br />
proper operation.
Document history<br />
2<br />
Original issue (BN037047EN): September 2006, firmware version: <strong>SP</strong>P02.<br />
Revision 1.0 (BN037047EN-P01): November 2006, firmware version: <strong>SP</strong>P02.<br />
Revision 2.0 (BN037047EN-P02): March 2007, firmware version: <strong>SP</strong>P03.<br />
<strong>SEP</strong>-<strong>10S</strong> PLUS, <strong>SEP</strong>-<strong>12S</strong> PLUS, <strong>SP</strong>-<strong>12S</strong> PRO<br />
PUMP MANUAL
CONTENTS<br />
Document history.........................................................................................................................................................2<br />
CONTENTS ....................................................................................................................................................................3<br />
Compliance ..................................................................................................................................................................6<br />
Material Specifications ................................................................................................................................................7<br />
Hazardous components to be separated at the end of life............................................................................................7<br />
INTRODUCTION ..........................................................................................................................................................8<br />
Overview ......................................................................................................................................................................8<br />
Pump description .........................................................................................................................................................8<br />
Serial Number Description ..........................................................................................................................................8<br />
Items supplied with pump.............................................................................................................................................9<br />
Operational Warnings and Cautions ...........................................................................................................................9<br />
Symbol definition .......................................................................................................................................................10<br />
Warnings....................................................................................................................................................................11<br />
Cautions.....................................................................................................................................................................12<br />
Notes ..........................................................................................................................................................................14<br />
1. PUMP DESCRIPTION ............................................................................................................................................15<br />
Front view of <strong>SEP</strong>-<strong>10S</strong> <strong>Plus</strong>.......................................................................................................................................15<br />
Front view of <strong>SEP</strong>-<strong>12S</strong> <strong>Plus</strong>, <strong>SP</strong>-<strong>12S</strong> <strong>Pro</strong> ..................................................................................................................15<br />
Rear Panel Assembly .................................................................................................................................................16<br />
Keypad indicators reference guide ............................................................................................................................17<br />
Keypad keys reference guide......................................................................................................................................17<br />
2. BASIC OPERATION...............................................................................................................................................18<br />
Switching pump on.....................................................................................................................................................18<br />
Switching pump off.....................................................................................................................................................19<br />
Loading the syringe....................................................................................................................................................19<br />
Syringe removal .........................................................................................................................................................21<br />
Purging ......................................................................................................................................................................21<br />
Recommended Syringes .............................................................................................................................................23<br />
3. PROGRAMMING OF INFUSION PARAMETERS ............................................................................................24<br />
Selecting drug name...................................................................................................................................................24<br />
Selecting dose mode (only in <strong>SEP</strong>-<strong>12S</strong> <strong>Plus</strong> and <strong>SP</strong>-<strong>12S</strong> <strong>Pro</strong>)...................................................................................24<br />
<strong>Pro</strong>gramming drug concentration (only in <strong>SEP</strong>-<strong>12S</strong> <strong>Plus</strong> and <strong>SP</strong>-<strong>12S</strong> <strong>Pro</strong>) .............................................................25<br />
<strong>Pro</strong>gramming patient’s weight (only in <strong>SEP</strong>-<strong>12S</strong> <strong>Plus</strong> and <strong>SP</strong>-<strong>12S</strong> <strong>Pro</strong>) ..................................................................25<br />
<strong>Pro</strong>gramming infusion rate or volume over time.......................................................................................................25<br />
<strong>Pro</strong>gramming volume to be infused (VTBI) ...............................................................................................................26<br />
<strong>SEP</strong>-<strong>10S</strong> PLUS, <strong>SEP</strong>-<strong>12S</strong> PLUS, <strong>SP</strong>-<strong>12S</strong> PRO<br />
PUMP MANUAL<br />
3
4<br />
<strong>Pro</strong>gramming bolus rate............................................................................................................................................26<br />
<strong>Pro</strong>gramming bolus dose ...........................................................................................................................................27<br />
<strong>Pro</strong>gramming occlusion pressure level......................................................................................................................27<br />
4. INFUSION.................................................................................................................................................................28<br />
Starting and stopping infusion ...................................................................................................................................28<br />
Bolus dose injection ...................................................................................................................................................28<br />
Review of programmed parameters ...........................................................................................................................29<br />
Change of programmed parameters ..........................................................................................................................29<br />
Standby mode.............................................................................................................................................................30<br />
Clearing infused drug volume, total infused volume..................................................................................................30<br />
Locking and unlocking keypad...................................................................................................................................31<br />
Viewing date and time................................................................................................................................................31<br />
Turning off/on the display backlight (night mode).....................................................................................................31<br />
5. ADVANCED FEATURES .......................................................................................................................................32<br />
Drug protocols (optional in <strong>SEP</strong>-<strong>12S</strong> <strong>Plus</strong> and <strong>SP</strong>-<strong>12S</strong> <strong>Pro</strong>, unavailable in <strong>SEP</strong>-<strong>10S</strong> <strong>Plus</strong>) ....................................32<br />
Parameters used to configure drug protocol .............................................................................................................32<br />
Creating drug protocol ..............................................................................................................................................32<br />
Modyfing drug protocol .............................................................................................................................................34<br />
Infusion of drug with protocol ...................................................................................................................................34<br />
Drug protocol review.................................................................................................................................................34<br />
6. SETUP MENU ..........................................................................................................................................................35<br />
Pump mode ................................................................................................................................................................35<br />
Event history review (optional)..................................................................................................................................35<br />
Syringe set..................................................................................................................................................................35<br />
Drug set .....................................................................................................................................................................35<br />
Default drug set .........................................................................................................................................................36<br />
Language set..............................................................................................................................................................36<br />
Date and Time setting ................................................................................................................................................36<br />
Parameter set.............................................................................................................................................................36<br />
7. VISUAL AND AUDIBLE ALARM SIGNALS......................................................................................................38<br />
8. MAINTENANCE AND STORAGE........................................................................................................................40<br />
Cleaning Overview.....................................................................................................................................................40<br />
Preventive Maintenance.............................................................................................................................................41<br />
Battery Operation Overview ......................................................................................................................................41<br />
Storage.......................................................................................................................................................................41<br />
Test routines...............................................................................................................................................................42<br />
Repair ........................................................................................................................................................................42<br />
9. TECHNICAL <strong>SP</strong>ECIFICATIONS .........................................................................................................................43<br />
<strong>SEP</strong>-<strong>10S</strong> PLUS, <strong>SEP</strong>-<strong>12S</strong> PLUS, <strong>SP</strong>-<strong>12S</strong> PRO<br />
PUMP MANUAL
Volumetric Accuracy of the System............................................................................................................................45<br />
Startup Graph Description ........................................................................................................................................45<br />
How Trumpet Curve Graphs are Interpreted.............................................................................................................46<br />
How Trumpet Curves Can Be Used ...........................................................................................................................46<br />
Startup and Trumpet Curves......................................................................................................................................47<br />
Influences of Back Pressure at 5 ml/h........................................................................................................................47<br />
Maximum Infusion Pressure Generated.....................................................................................................................48<br />
Alarm Delay at Occlusion..........................................................................................................................................48<br />
Bolus Volume at Occlusion........................................................................................................................................48<br />
Automatic Bolus volume accuracy.............................................................................................................................48<br />
10. GUIDANCE AND MANUFACTURER'S DECLARATION ON ELECTROMAGNETIC EMISSIONS.....49<br />
Electromagnetic Compatibility Statement..................................................................................................................49<br />
11. DRAWING OF CABLES FOR MULTIFUNCTIONAL CONNECTOR (MFC).............................................55<br />
12. WARRANTY AND SERVICE INFORMATION................................................................................................56<br />
Warranty....................................................................................................................................................................56<br />
Service Information....................................................................................................................................................56<br />
13. ACCESSORIES ......................................................................................................................................................57<br />
<strong>SEP</strong>-<strong>10S</strong> PLUS, <strong>SEP</strong>-<strong>12S</strong> PLUS, <strong>SP</strong>-<strong>12S</strong> PRO<br />
PUMP MANUAL<br />
5
This symbol represents compliance with the essential requirements according to MDD 93/42/EEC (14 June<br />
1993) of the European Communities concerning medical devices.<br />
Compliance<br />
The pumps comply with IEC 60601-1, IEC 60601-1-2, IEC 60601-2-24 standards.<br />
<strong>SEP</strong>-<strong>10S</strong> <strong>Plus</strong> and <strong>SP</strong>-<strong>12S</strong> <strong>Pro</strong> intended for use in road ambulances comply with EN 1789:1999.<br />
<strong>SEP</strong>-<strong>10S</strong> <strong>Plus</strong> and <strong>SP</strong>-<strong>12S</strong> <strong>Pro</strong> - FDA approved.<br />
The pumps have been manufactured by the company, which has implemented and maintains a Quality<br />
Assurance System meeting the requirements of the standards EN ISO 9001:2000 and EN ISO 13485:2003.<br />
Devices: <strong>SEP</strong>-<strong>10S</strong> <strong>Plus</strong>, <strong>SEP</strong>-<strong>12S</strong> <strong>Plus</strong>, <strong>SP</strong>-<strong>12S</strong> <strong>Pro</strong> (hereinafter – the pump)<br />
Manufacturer: Viltechmeda, 125 Kalvariju Str., 08221 Vilnius, Lithuania.<br />
6<br />
<strong>SEP</strong>-<strong>10S</strong> PLUS, <strong>SEP</strong>-<strong>12S</strong> PLUS, <strong>SP</strong>-<strong>12S</strong> PRO<br />
PUMP MANUAL
Material Specifications<br />
Steel<br />
Stainless Steel<br />
Copper<br />
Aluminium<br />
Bronze<br />
Brass<br />
Polyamide PA6 (PA)<br />
Polycarbonate (PC)<br />
Composition of Polycarbonate and ABS (PC+ABS)<br />
Battery NiMH<br />
Hazardous components to be separated at the end of life<br />
Battery NiMH<br />
Printed circuit boards containing brominated flame retardant<br />
(TBBA 79-94-7) and lead<br />
Electrolyte capacitors<br />
AC power lead<br />
<strong>SEP</strong>-<strong>10S</strong> PLUS, <strong>SEP</strong>-<strong>12S</strong> PLUS, <strong>SP</strong>-<strong>12S</strong> PRO<br />
PUMP MANUAL<br />
7
INTRODUCTION<br />
Overview<br />
Pump description<br />
Serial Number Description<br />
8<br />
- The pump is designed to meet the fluid and drug delivery<br />
requirements of today’s changing clinical environment.<br />
- The pump is indicated for infusion via intravenous (IV), intraarterial<br />
(IA), epidural, or subcutaneous routes of administration.<br />
Infusion rates are programmable from 0.1 to 1500 ml/h.<br />
- The pump accepts wide range, single-use syringes with volumes<br />
from 10 to 100 ml, optional – 5 ml.<br />
- The pump can be custom-configured to select key features that<br />
meet specific requirements. The selected options can be easily<br />
reviewed and the chosen configuration can be changed to meet<br />
new or different requirements.<br />
<strong>SEP</strong>-<strong>10S</strong> <strong>Plus</strong> – General ward syringe pump<br />
<strong>SEP</strong>-<strong>12S</strong> <strong>Plus</strong> – Anaesthesia syringe pump<br />
<strong>SP</strong>-<strong>12S</strong> <strong>Pro</strong> – Universal syringe pump<br />
XXXX yy<br />
<strong>SEP</strong>-<strong>10S</strong> PLUS, <strong>SEP</strong>-<strong>12S</strong> PLUS, <strong>SP</strong>-<strong>12S</strong> PRO<br />
PUMP MANUAL<br />
year the pump was manufactured<br />
sequential number (0001 – 9999)
Items supplied with pump 1. The pump<br />
2. Operator‘s manual<br />
3. AC power cord<br />
4. Packaging<br />
5. Spare parts: cap B8123009 – 2 pcs.<br />
Operational Warnings and Cautions<br />
Additional items supplied with pump to be used in ambulance:<br />
1. The pump with clamp for Draeger bar mounting<br />
2. 12VDC cable<br />
General<br />
- If a software change occurs and the operation/specification for<br />
the device changes, new or additional operating instructions will<br />
be issued, if needed.<br />
- Although the pumps have been designed and manufactured to<br />
exact specifications, it is not intended to replace trained personnel<br />
in the supervision of IV infusions.<br />
- In accordance with the international standard, IEC 60601-1<br />
<strong>Med</strong>ical Electrical Equipment – Part 1: General Requirements for<br />
Safety, the pump is classified as:<br />
• Class II<br />
• Type CF<br />
• IPX4 (splashproof)<br />
• Not suitable for use with flammable anesthetic mixtures with air,<br />
oxygen or nitrous oxide<br />
• Continuous operation<br />
- Prior to operating the pump, the user should carefully read this<br />
manual to fully understand the functionality and to ensure safe and<br />
proper operation.<br />
- This manual has been developed with consideration to the<br />
requirements in the International Standard, IEC 60601-2-24<br />
<strong>Med</strong>ical Electrical Equipment – Part 2-24: Particular Requirements<br />
for Safety of Infusion Pumps and Controllers. Data presented in<br />
the Technical Specifications reflect specific test conditions defined<br />
in this standard. Other external factors such as, varying back<br />
pressure, temperature, head height, set usage, fluid restrictions,<br />
solution viscosity, or combinations of these factors, may result in<br />
deviations from the performance data enclosed.<br />
Definitions:<br />
Warning messages indicate a possible hazard which, if not<br />
avoided, could result in severe personal injury or death.<br />
Caution messages indicate a problem or unsafe practice which, if<br />
not avoided, could result in minor or moderate personal injury,<br />
product or property damage.<br />
Note messages provide supplemental information to the<br />
accompanying text.<br />
<strong>SEP</strong>-<strong>10S</strong> PLUS, <strong>SEP</strong>-<strong>12S</strong> PLUS, <strong>SP</strong>-<strong>12S</strong> PRO<br />
PUMP MANUAL<br />
9
Symbol definition<br />
10<br />
IPX4<br />
RS 232<br />
Attention consult accompanying documents<br />
<strong>Pro</strong>tection Class II<br />
CF type device (leak currents protection)<br />
Splashing water protected<br />
Complies with MDD 93/42/EEC directive<br />
Nurse call connector (optional)<br />
RS232 interface<br />
Do not dispose of this product as unsorted municipal waste.<br />
Follow local municipal waste ordinances for proper disposal provisions<br />
to reduce the environmental impact of waste electrical and electronic<br />
equipment (WEEE).<br />
Complies with the directive 95/54/EEC concerning the suppression of<br />
radio interference in road ambulances (optional in <strong>SEP</strong>-<strong>10S</strong> <strong>Plus</strong> and <strong>SP</strong>-<br />
<strong>12S</strong> <strong>Pro</strong>).<br />
<strong>SEP</strong>-<strong>10S</strong> PLUS, <strong>SEP</strong>-<strong>12S</strong> PLUS, <strong>SP</strong>-<strong>12S</strong> PRO<br />
PUMP MANUAL
Warnings<br />
Possible explosion hazard if used in the presence of flammable<br />
anesthetics.<br />
Always read and follow the instructions which accompany the<br />
syringe and extension sets you are using. Carefully follow the<br />
instructions for priming the set, as well as the recommended set<br />
change interval. Set use should not exceed the label set change<br />
interval.<br />
Viltechmeda will assume no responsibility for incidents which<br />
may occur if the product is not used in accordance with product<br />
labeling.<br />
The pump has no means to detect air presence in the extension<br />
set. The pump operator shall ensure there is no air in the<br />
extension set<br />
Do not mount the pump in a vertical position with the syringe<br />
pointing upwards as this could lead to an infusion of air which<br />
may be in the syringe.<br />
Do not connect the IV extension set to the patient when purging.<br />
This device should be used only with Viltechmeda accessories<br />
specified for this device. There are risks associated with using<br />
anything other than the recommended accessories with this<br />
device.<br />
The specified accuracy of the syringe pump can only be<br />
maintained when recommended syringe and accessories are<br />
used.<br />
Inter-connection of several devices into a single infusion system<br />
can have substantial influence on the accuracy of the infusion<br />
rate, at least for one of these devices. In such situations, the<br />
operation of devices using gravitational forces can be unstable<br />
or impossible at all.<br />
The syringe should be disposed of in an appropriate manner,<br />
considering the nature of the residual fluid that may be<br />
contained within, in accordance with the hospital disposal<br />
practices.<br />
Though the factory-supplied configuration settings are suitable<br />
for most therapies, the operator and hospital professionals<br />
should verify that the pump settings are appropriate for the<br />
clinical application.<br />
Do not use hard or sharp objects on the keypad.<br />
Be sure to PURGE THE SYSTEM OF ALL AIR BEFORE<br />
ADMINISTERING ANY MEDICATION. Failure to follow this normal<br />
infusion procedure could precipitate serious consequences.<br />
Remember that the volume of fluid contained in the connecting<br />
tubing is a residual amount and cannot be infused. Allow for this<br />
extra volume of fluid when initially filling the syringe.<br />
<strong>SEP</strong>-<strong>10S</strong> PLUS, <strong>SEP</strong>-<strong>12S</strong> PLUS, <strong>SP</strong>-<strong>12S</strong> PRO<br />
PUMP MANUAL<br />
11
Cautions<br />
12<br />
CAUTION must be employed to assure that the pump<br />
is in good working order before putting it into use. If the pump is<br />
being operated on battery power alone, ensure<br />
that the battery has been charged as described in this manual.<br />
Verify all program data before pressing START.<br />
Wipe off spills immediately. Do not allow fluid or residues to<br />
remain on the pump.<br />
Caution must be exercised in the selection of drugs intended to<br />
be delivered via any infusion pump. If the drug contained in the<br />
syringe will be exposed to extreme environmental conditions for<br />
prolonged time periods, IT IS IMPORTANT TO SELECT DRUGS<br />
THAT WILL NOT CHANGE PHARMACOLOGICALLY UPON SUCH<br />
EXPOSURE.<br />
Epidural administration of drugs other than those indicated for<br />
epidural use could result in serious injury to the patient.<br />
• Epidural administration of anesthetics is limited to short term<br />
infusion (not to exceed 96 hours) with indwelling catheters<br />
specifically indicated for short term anesthetic epidural drug<br />
delivery.<br />
• Epidural administration of analgesics is limited to use with<br />
indwelling catheters specifically indicated for either short term<br />
or long term analgesic epidural drug delivery.<br />
• To prevent infusion of drugs not indicated for epidural use, do<br />
not use IV administration sets incorporating injection sites<br />
during epidural delivery.<br />
• Clearly distinguish pumps used for epidural drug delivery from<br />
pumps used for other routes of administration.<br />
As with all medical electronic equipment, care must be<br />
exercised to avoid exposing this device to powerful sources of<br />
electromagnetic interference. This device design has been<br />
tested to current European standards and guidelines for medical<br />
devices. The device was not found to be affected adversely by<br />
these susceptibility tests and will perform safely. The device’s<br />
emissions also were found to be acceptable.<br />
Using the pump near operating equipment which radiate high<br />
energy radio frequencies (such as electrosurgical/cauterising<br />
equipment, two-way radios, or cellular telephones)<br />
may cause false alarm conditions. If this happens, reposition<br />
the pump away from the source of interference; or<br />
turn off the pump.<br />
This unit emits a certain level of electromagnetic radiation, which<br />
is within the levels specified by IEC 60601-2-24 and IEC 60601-1-<br />
2.<br />
<strong>SEP</strong>-<strong>10S</strong> PLUS, <strong>SEP</strong>-<strong>12S</strong> PLUS, <strong>SP</strong>-<strong>12S</strong> PRO<br />
PUMP MANUAL
The RS232 is a standard (optional – <strong>SEP</strong>-<strong>10S</strong> <strong>Plus</strong>) feature on the<br />
syringe pump. Connection to the computer while pump is<br />
connected to the patient is prohibited.<br />
Accessory equipment connected to the analog and digital<br />
interfaces must be certified according to the respective IEC<br />
standards (e.g. IEC 950 for data processing equipment and IEC<br />
60601-1 for medical equipment). Furthermore all configurations<br />
shall comply with the valid version of the system standard IEC<br />
60601-1-1. Everybody who connects additional equipment to the<br />
signal output configures a medical system, and is therefore<br />
responsible that the system complies with the requirements of<br />
the valid version of the system standard IEC 60601-1-1. If in<br />
doubt, consult manufacturer’s service department.<br />
Refer to the Service Manual for further information regarding the<br />
RS232 interface.<br />
The assessment for suitability of any software used in the<br />
clinical environment to receive data from syringe pump lies with<br />
the user of the equipment.<br />
When infusing through a central line catheter, Viltechmeda<br />
recommends using sets with a Luer lock adaptor.<br />
Follow the cleaning schedule and methods defined under<br />
Chapter 8 Maintenance and Storage, to ensure proper<br />
maintenance of the device.<br />
Do not clean, disinfect, or sterilise any part of the device by<br />
autoclaving or with ethylene oxide gas. Doing so may damage<br />
the device and void the warranty. Only external parts of the<br />
device should be disinfected.<br />
Do not use the following chemicals on the device, as they will<br />
damage the front panel: acetone, acetoaldehyde, ammonia,<br />
benzene, hydroxytoluene, methylene chloride, and ozone. Do not<br />
use cleaners containing n-alkyl dimethyl ethylbenzyl ammonium<br />
chloride unless they appear in the list of recommended cleaners<br />
in chapter 8.<br />
When attaching the pump to an IV pole or other<br />
mounting locations, ensure it has been securely clamped.<br />
Ensure device is mounted where main body is easily accessible<br />
and syringe can be installed in the loading mechanism without<br />
stretching or kinking the tubing.<br />
To avoid personal injury, ensure that the IV pole is stable and<br />
secure. Ensure that the pole is able to support the pump, along<br />
with any other devices, without tipping or falling.<br />
Only use approved and pressure proved syringes with Luer lock<br />
connections and lines in accordance with chapter 2.<br />
It is recommended that the extension lines are changed<br />
according to hospital protocols.<br />
It is recommended to minimize number of parameters, types of<br />
syringes, drug names and other functions leaving only that<br />
<strong>SEP</strong>-<strong>10S</strong> PLUS, <strong>SEP</strong>-<strong>12S</strong> PLUS, <strong>SP</strong>-<strong>12S</strong> PRO<br />
PUMP MANUAL<br />
13
Notes<br />
14<br />
necessary for work. It will help to avoid errors in parameters<br />
programming and thereby decrease patient’s risk.<br />
Before initially powering on the device, charge the battery.<br />
<strong>SEP</strong>-<strong>10S</strong> PLUS, <strong>SEP</strong>-<strong>12S</strong> PLUS, <strong>SP</strong>-<strong>12S</strong> PRO<br />
PUMP MANUAL
1. PUMP DESCRIPTION<br />
Front view of <strong>SEP</strong>-<strong>10S</strong> <strong>Plus</strong><br />
1. Display 2. Indicators 3. Keypad<br />
Front view of <strong>SEP</strong>-<strong>12S</strong> <strong>Plus</strong>, <strong>SP</strong>-<strong>12S</strong> <strong>Pro</strong><br />
1. Display 2. Indicators 3. Keypad 4. Key to select dimensions<br />
of parameters<br />
<strong>SEP</strong>-<strong>10S</strong> PLUS, <strong>SEP</strong>-<strong>12S</strong> PLUS, <strong>SP</strong>-<strong>12S</strong> PRO<br />
PUMP MANUAL<br />
15
Rear Panel Assembly<br />
16<br />
1. Syringe driver arm 7. Cap<br />
2. Slot for inserting the push-button of 8. Mounting pole clamp<br />
the syringe plunger 9. Fuse holder<br />
3. Rubber bellows 10. Mains inlet<br />
4. Slot for inserting the finger grips of 11. MFC*<br />
the syringe barrel 12. Audio volume control<br />
5. Syringe clamp<br />
6. Mounting clamp handle<br />
* - optional in <strong>SEP</strong>-<strong>10S</strong> <strong>Plus</strong><br />
<strong>SEP</strong>-<strong>10S</strong> PLUS, <strong>SEP</strong>-<strong>12S</strong> PLUS, <strong>SP</strong>-<strong>12S</strong> PRO<br />
PUMP MANUAL
Keypad indicators reference guide<br />
The green BATTERY LED lights when the pump is<br />
operating on battery power. Flashing if LOW BATTERY<br />
alarm condition occurs.<br />
The green MAINS LED lights when the pump is connected<br />
to the AC and battery is charging.<br />
During infusion, three yellow LEDs are sequentially<br />
flashing. If the rightmost LED is on permanently – the<br />
infusion is stopped.<br />
Keypad keys reference guide<br />
Key to switch the pump on/off; keep it pressed for several<br />
seconds in order to switch off.<br />
Key to start/stop the infusion.<br />
Key to move the syringe driver arm rapidly to the left-hand<br />
side during syringe insertion or to initiate the Bolus mode;<br />
it is also intended for air removal from the extension set<br />
after syringe insertion.<br />
Key to move the syringe driver arm to the right-hand side.<br />
Keys to scroll up/down the list of parameters and syringe<br />
brands or answer positively or negatively the dialog<br />
questions.<br />
Key to select dimensions of parameters when programming<br />
(only in <strong>SEP</strong>-<strong>12S</strong> <strong>Plus</strong> and <strong>SP</strong>-<strong>12S</strong> <strong>Pro</strong>).<br />
Key to program (modify) parameters. Pressing it once more<br />
restores previous values.<br />
Key to confirm the selected parameter.<br />
Numerical keys to enter digits of the parameter being<br />
programmed.<br />
Key to select additional functions or to review programmed<br />
parameters.<br />
Key to cancel the numerical value or the meaning of the<br />
parameter or silence the alarm signal. It deletes TOTAL<br />
INFUSED and INFUSED DOSE values and clears the<br />
numerical value on display when programming.<br />
<strong>SEP</strong>-<strong>10S</strong> PLUS, <strong>SEP</strong>-<strong>12S</strong> PLUS, <strong>SP</strong>-<strong>12S</strong> PRO<br />
PUMP MANUAL<br />
17
2. BASIC OPERATION<br />
Switching pump on<br />
18<br />
1. Fasten the pump to the stand by turning the pole clamp handle.<br />
2. Connect the power cord to the corresponding socket on the<br />
pump.<br />
3. Secure the power cord to the pump by means of the metal<br />
clamp.<br />
4. Connect the power cord into the mains receptacle. The green<br />
indicator will light on.<br />
5. Switch the pump on by pressing the ON/OFF key.<br />
There are three possible situations:<br />
a) the following message is displayed:<br />
Insert SYRINGE<br />
into SLOTS!<br />
Insert the syringe filled and with the extension set connected (see<br />
Section - Loading the syringe);<br />
or b) the following message is displayed:<br />
Close CLAMP!<br />
Remove air from the extension set and fasten the syringe by means<br />
of the clamp (see Section - Loading the syringe);<br />
or c) the following message is displayed (if syringe inserted prior<br />
to switching the pump on):<br />
Syringe:<br />
XX ml (syringe brand name)<br />
Confirm syringe size and name (see Section - Loading the syringe)<br />
NOTES:<br />
1. If the following message is displayed:<br />
<strong>SEP</strong>-<strong>10S</strong> PLUS, <strong>SEP</strong>-<strong>12S</strong> PLUS, <strong>SP</strong>-<strong>12S</strong> PRO<br />
PUMP MANUAL
Switching pump off<br />
Loading the syringe<br />
NO MAINS!!!<br />
Check power cord<br />
after pressing the ON/OFF key, it means the pump is not<br />
connected to the mains. Either connect the pump to the mains or<br />
confirm by pressing the C key that the pump will be powered with<br />
the internal battery.<br />
2. If the message:<br />
VERY LOW BATTERY<br />
is displayed after pressing the ON/OFF key when the pump is<br />
connected to the mains, then switch it off by pressing the ON/OFF<br />
key once more and wait for approximately 15 min to allow the<br />
internal battery to charge. Then the pump will be prepared for<br />
syringe insertion and infusion parameter programming.<br />
The internal battery may be charged permanently because<br />
it is protected against overcharging. In order to have the battery<br />
fully charged, keep the pump constantly connected to the mains.<br />
The pump is switched off by keeping the ON/OFF key pressed for<br />
3 sec.<br />
1. Lift the syringe clamp to its upper position.<br />
2. Turn the syringe clamp counter-clockwise by 90°.<br />
3. Pressing the key move the syringe driver arm to the right<br />
to the distance needed for syringe insertion.<br />
Insert the filled syringe into the pump when the following message<br />
is displayed:<br />
Insert SYRINGE<br />
into SLOTS!<br />
<strong>SEP</strong>-<strong>10S</strong> PLUS, <strong>SEP</strong>-<strong>12S</strong> PLUS, <strong>SP</strong>-<strong>12S</strong> PRO<br />
PUMP MANUAL<br />
19
20<br />
4. Insert the syringe push-button into the syringe driver arm slot to<br />
the depth to ensure minimal distance between the syringe barrel<br />
and the pump body.<br />
5. Holding the syringe by hand, keep pressing the BOLUS key<br />
until the syringe finger grips will fit into the corresponding pump<br />
slot.<br />
6. By pressing the syringe barrel and push-button down, insert<br />
fully the syringe finger grips and push-button into corresponding<br />
pump slots.<br />
The cylindrical syringe barrel shall lay on the pump body with no<br />
gap. Axes of the syringe barrel and its plunger shall be on the<br />
same line.<br />
The following message is displayed:<br />
Close CLAMP!<br />
7. Turn the syringe clamp clockwise by 90°.<br />
8. Lower the syringe clamp onto the syringe barrel.<br />
The syringe size sensor determines the syringe size automatically.<br />
The following message is displayed:<br />
Syringe:<br />
XX ml(syringe brand name)<br />
where: XX – syringe size.<br />
9. If the syringe size and brand are correct, press the ENTER key.<br />
10. Otherwise press the PROG key.<br />
11. Select the required syringe name with the scrolling keys.<br />
12. Confirm the selected syringe name and size selected by<br />
pressing the ENTER key.<br />
Use of syringes not pre-programmed or incorrect insertion of the<br />
syringe increase patient’s risk.<br />
<strong>SEP</strong>-<strong>10S</strong> PLUS, <strong>SEP</strong>-<strong>12S</strong> PLUS, <strong>SP</strong>-<strong>12S</strong> PRO<br />
PUMP MANUAL
Syringe removal<br />
Purging<br />
NOTES:<br />
1. When you insert a syringe having a diameter not complying with<br />
any syringe installed, the following message is displayed:<br />
ILLEGAL SYRINGE!<br />
Change SYRINGE!<br />
2. When you insert a syringe of different type (brand or size) than<br />
used previously, the following message is displayed:<br />
CHECK SYRINGE!<br />
(syringe size and brand)?<br />
If inserted syringe size and brand are the same as displayed, press<br />
the YES key or the ENTER key. Otherwise press the PROG key and<br />
select different syringe type or check the correctness of syringe<br />
insertion.<br />
3. User can minimize syringe list through setup menu in<br />
accordance with the chapter 6.<br />
13. Lift the syringe clamp to its upper position.<br />
14. Turn the syringe clamp counter-clockwise by 90°.<br />
15. Remove the syringe.<br />
Air can be removed from the extension set after syringe is inserted<br />
and brand confirmed, before entering the STOP mode (before<br />
pressing the YES key when the message<br />
<strong>SEP</strong>-<strong>10S</strong> PLUS, <strong>SEP</strong>-<strong>12S</strong> PLUS, <strong>SP</strong>-<strong>12S</strong> PRO<br />
PUMP MANUAL<br />
21
22<br />
Total: XXX ml<br />
Ready to run?<br />
is displayed.)<br />
In order to remove air from the extension set press the BOLUS<br />
key. The following message is displayed:<br />
PURGE?<br />
press BOLUS<br />
The syringe extension set should not be connected to the<br />
patient during air removal.<br />
<strong>SEP</strong>-<strong>10S</strong> PLUS, <strong>SEP</strong>-<strong>12S</strong> PLUS, <strong>SP</strong>-<strong>12S</strong> PRO<br />
PUMP MANUAL
Recommended Syringes<br />
5 ml<br />
(optional)<br />
10 ml 20 ml 30 ml 50/60 ml 100 ml<br />
BD PLASTIPAK √ √ √ √ √<br />
BD PRECISE √ √<br />
BD PrecisG √<br />
BD PERFUSOR √<br />
BD USA √<br />
MONOJECT (Kendall) √ √ √ √ √<br />
OMNIFIX (BBraun) √ √<br />
PERFUSOR (BBraun) √<br />
IVAC √<br />
INJECTOMAT (Fresenius) √<br />
TERUMO (Europe) √ √ √<br />
TERUMO (USA) √ √ √ √<br />
NIPRO √ √ √ √<br />
JMS √<br />
KD-JECT III √ √ √ √<br />
ELVIONY √<br />
EXELMED √<br />
DIMES √ √<br />
DI<strong>SP</strong>OMED √<br />
PolfaBol √<br />
PolfaLub √ √<br />
JANPOL √<br />
HAYAT PERF √<br />
HAYAT 10, 20, 50 √ √ √<br />
MAYBOD YAS √<br />
WEIHAI √ √ √<br />
XINHUA √ √ √<br />
HONGDA √<br />
HUI CHUN √ √ √<br />
YAZD √<br />
POMAT √<br />
MEDIZ √<br />
SHIFA √ √ √<br />
INFUJECT √ √<br />
PENTAFERTE √<br />
ONCE √ √ √<br />
MK BG √<br />
USC √<br />
DI<strong>SP</strong>O VAN √ √ √<br />
VITTA √ √ √<br />
ROMSONS √ √ √<br />
V.MED<br />
NOTE:<br />
√<br />
The Manufacturer of the pump can change the syringe list, including syringes of new brands or removing<br />
the included ones. The list of syringe brands is dependant on the software version of the pump.<br />
Only use approved and pressure proved syringes with Luer lock<br />
connections and lines.<br />
<strong>SEP</strong>-<strong>10S</strong> PLUS, <strong>SEP</strong>-<strong>12S</strong> PLUS, <strong>SP</strong>-<strong>12S</strong> PRO<br />
PUMP MANUAL<br />
23
3. PROGRAMMING OF INFUSION<br />
PARAMETERS<br />
3<br />
Selecting drug name<br />
24<br />
All parameters can be programmed after syringe is loaded and<br />
syringe make confirmed. When all the parameters are programmed<br />
and infusion started pump keypad can be locked.<br />
Previously programmed parameters are reviewed using the<br />
scrolling up/down keys. It is necessary to confirm all the<br />
parameters. To confirm the parameter press the ENTER key or the<br />
scrolling up key. Only then the pump will switch to STOP mode.<br />
In order to modify the selected parameter, press the PROG<br />
key. Enter the parameter value using the numerical keys and press<br />
the ENTER key to confirm it. Using the ml↔mg, during<br />
programming of parameter value, it is possible to select the<br />
required measurement unit (only in <strong>SEP</strong>-<strong>12S</strong> <strong>Plus</strong> and <strong>SP</strong>-<strong>12S</strong><br />
<strong>Pro</strong>).<br />
When the parameter has no numerical value, then select the<br />
required message by means of the scroll keys and confirm it by<br />
pressing the ENTER key. To cancel newly entered (selected) value<br />
and restore previous value press the PROG.<br />
1. After syringe is inserted and brand confirmed, press the PROG<br />
key.<br />
2. Select the required drug name by the scrolling keys.<br />
3. Press the ENTER key to confirm selected drug name.<br />
NOTES:<br />
1. If you don’t want the drug name to be displayed select<br />
“NONE” from the drug list and press ENTER.<br />
2. You can enter new drug name to the list in accordance with<br />
instruction given in the chapter 6 of this manual.<br />
Selecting dose mode (only in <strong>SEP</strong>-<strong>12S</strong> <strong>Plus</strong> and <strong>SP</strong>-<strong>12S</strong> <strong>Pro</strong>)<br />
Select the message<br />
Dose mode:<br />
1. Press the PROG key.<br />
2. Select the required infusion rate unit by pressing the ml↔mg<br />
key.<br />
3. Press the Enter key to confirm the selected dose mode.<br />
<strong>SEP</strong>-<strong>10S</strong> PLUS, <strong>SEP</strong>-<strong>12S</strong> PLUS, <strong>SP</strong>-<strong>12S</strong> PRO<br />
PUMP MANUAL
NOTE:<br />
Available only if mass units enabled in setup menu.<br />
<strong>Pro</strong>gramming drug concentration (only in <strong>SEP</strong>-<strong>12S</strong> <strong>Plus</strong> and <strong>SP</strong>-<strong>12S</strong> <strong>Pro</strong>)<br />
Select the message<br />
Concentration:<br />
on the display.<br />
1. Press the PROG key.<br />
2. Select the required drug concentration measurement unit using<br />
the ml↔mg key.<br />
3. Enter the required value of drug concentration using the<br />
numerical keypad.<br />
4. Confirm drug concentration by pressing the ENTER key.<br />
NOTES:<br />
1. In order to have drug concentration calculated from entered<br />
drug mass and diluent volume, select the message<br />
Calculate<br />
concentration?<br />
using the ml↔mg key.<br />
Press the YES key. Enter drug mass and diluent volume<br />
analogously to concentration programming above.<br />
2. Drug concentration can be programmed only if infusion rate is<br />
set in mass units.<br />
3. Drug concentration value can not be set to 0.<br />
<strong>Pro</strong>gramming patient’s weight (only in <strong>SEP</strong>-<strong>12S</strong> <strong>Plus</strong> and <strong>SP</strong>-<strong>12S</strong> <strong>Pro</strong>)<br />
Select the message<br />
<strong>Pro</strong>gramming infusion rate or volume over time<br />
Patient weight:<br />
on the display.<br />
1. Press the PROG key.<br />
2. Enter the patient weight using the numerical keypad.<br />
3. Press the ENTER key to confirm the selected patient weight.<br />
NOTE:<br />
The programmed patient’s weight shall not exceed the value of<br />
200 kg.<br />
Select the message<br />
Infusion rate:<br />
on the display.<br />
1. Press the PROG key.<br />
<strong>SEP</strong>-<strong>10S</strong> PLUS, <strong>SEP</strong>-<strong>12S</strong> PLUS, <strong>SP</strong>-<strong>12S</strong> PRO<br />
PUMP MANUAL<br />
25
26<br />
2. Enter the required value of infusion rate using the numerical<br />
keypad.<br />
3. Press the Enter key to confirm the selected infusion rate.<br />
NOTE:<br />
In order to have infusion rate calculated from entered volume to<br />
be infused (VTBI) value and time, press the F key during<br />
infusion rate programming (i.e. after pressing the PROG key).<br />
The following message is displayed:<br />
Volume over<br />
time?<br />
<strong>Pro</strong>gramming volume to be infused (VTBI)<br />
<strong>Pro</strong>gramming bolus rate<br />
Press the YES key. Enter VTBI value and Time analogously to<br />
infusion rate programming above.<br />
Select the message<br />
VTBI:<br />
on the display.<br />
1. Press the PROG key.<br />
2. Enter VTBI value using the numerical keypad.<br />
3. Press the ENTER key to confirm VTBI value.<br />
NOTE:<br />
To reset previously entered value and execute the infusion without<br />
the preset VTBI, set the VTBI value to 0.<br />
Select the message<br />
BOLUS rate:<br />
on the display.<br />
1. Press the PROG key.<br />
2. Enter the required value of Bolus rate with the numeric keypad.<br />
When Bolus function is not required, the Bolus rate value will be<br />
set to zero.<br />
3. Press the ENTER key to confirm the selected Bolus rate.<br />
NOTE:<br />
Bolus rate can be programmed only if BOLUS RATE<br />
PROGRAMMING feature enabled in Setup menu (see chapter 6).<br />
<strong>SEP</strong>-<strong>10S</strong> PLUS, <strong>SEP</strong>-<strong>12S</strong> PLUS, <strong>SP</strong>-<strong>12S</strong> PRO<br />
PUMP MANUAL
<strong>Pro</strong>gramming bolus dose<br />
Select the message<br />
BOLUS dose:<br />
on the display.<br />
<strong>Pro</strong>gramming occlusion pressure level<br />
1. Press the PROG key.<br />
2. Select the required Bolus dose measurement unit using the<br />
ml↔mg key (only in <strong>SEP</strong>-<strong>12S</strong> <strong>Plus</strong> and <strong>SP</strong>-<strong>12S</strong> <strong>Pro</strong>).<br />
3. Enter the required value of Bolus dose using the numeric<br />
keypad.<br />
4. Press the ENTER key to confirm the selected Bolus dose.<br />
NOTE:<br />
When the Bolus rate value is set to zero, the Bolus dose can not be<br />
programmed as well.<br />
Occlusion pressure level can only be programmed for 50/60 and<br />
100 ml syringes. For syringes from 5 to 30 ml only HIGH<br />
occlusion pressure level is available.<br />
Select the message<br />
Occlusion level:<br />
on the display.<br />
1. Press the PROG key.<br />
2. Select the required occlusion pressure level using the scroll<br />
keys.<br />
3. Confirm selected occlusion pressure level by pressing the<br />
ENTER key.<br />
NOTE:<br />
The pump has an anti-bolus function which reduces the pressure<br />
in the syringe and the extension set in case of occlusion and at the<br />
same time diminishes the volume of unwanted Bolus injected to the<br />
patient after removal of the occlusion cause.<br />
<strong>SEP</strong>-<strong>10S</strong> PLUS, <strong>SEP</strong>-<strong>12S</strong> PLUS, <strong>SP</strong>-<strong>12S</strong> PRO<br />
PUMP MANUAL<br />
27
4. INFUSION<br />
Starting and stopping infusion<br />
Bolus dose injection<br />
28<br />
The infusion is started from the STOP mode when the following<br />
message is displayed:<br />
Stop ... X.X ml<br />
XX ml/h<br />
(X.X – amount of drug in ml, mg or µg, infused during observation<br />
time, i.e. period from the last clearing of this parameter by means<br />
of the C key or by switching the pump off; XX – programmed<br />
infusion rate.)<br />
1. Press the START/STOP key.<br />
Segments of the indicator begin to flash sequentially.<br />
2. You may review the following parameters using the scroll keys:<br />
(drug name)<br />
XXX ml/h<br />
(XXX– infusion rate);<br />
VTBI: XX ml<br />
TIME: XX:XX.XX<br />
(X – Volume to be infused;<br />
XX:XX.XX – time remaining to the end of VTBI);<br />
Infused: X.X ml<br />
Total: XX ml<br />
(X.X – amount of drug infused during current session;<br />
XX – total infused amount of drug);<br />
3. Press the START/STOP key when you wish to stop the infusion.<br />
Segments of the indicator stop flashing and the rightmost<br />
segment only is left on.<br />
Bolus may be injected during infusion only.<br />
1. Press the BOLUS key.<br />
The following message is displayed:<br />
BOLUS?<br />
Press YES/BOLUS<br />
<strong>SEP</strong>-<strong>10S</strong> PLUS, <strong>SEP</strong>-<strong>12S</strong> PLUS, <strong>SP</strong>-<strong>12S</strong> PRO<br />
PUMP MANUAL
Review of programmed parameters<br />
NOTE:<br />
While the keypad lock is active bolus injection is prevented. To<br />
inject bolus, first unlock the keypad.<br />
2. If you want to inject the programmed Bolus dose, press the YES<br />
key.<br />
During Bolus performance the following message is displayed:<br />
BOLUS ...X.X ml<br />
XXX ml/h<br />
(X.X – amount of drug injected in Bolus mode,<br />
XXX – Bolus rate).<br />
3. If you want to inject Bolus manually, press and keep the<br />
BOLUS key depressed. Infusion is performed at the Bolus rate<br />
until BOLUS key is released and is accompanied by short beeps.<br />
<strong>Pro</strong>grammed parameters may be reviewed during the infusion or<br />
after stopping it.<br />
1. Press the F key.<br />
2. Select the following message by the scrolling keys:<br />
SETTINGS<br />
REVIEW<br />
or<br />
SETTINGS<br />
Change of programmed parameters<br />
3. Press the ENTER key.<br />
4. It is possible to review all the programmed parameters by<br />
pressing the scroll up key.<br />
5. It is possible to exit REVIEW mode by pressing the C key.<br />
<strong>Pro</strong>grammed parameters may be modified only when the<br />
infusion is stopped (Infusion rate can be changed<br />
(Titration) during infusion as well as in the stop mode).<br />
1. Press the F key.<br />
2. Select the following message using the scroll keys:<br />
SETTINGS<br />
3. Press the ENTER key.<br />
4. Select the parameter to be modified by the scroll keys.<br />
5. Press the PROG key.<br />
Enter or select the new value of the parameter (see chapter 3).<br />
6. Confirm the new value of the parameter by pressing the<br />
ENTER key.<br />
<strong>SEP</strong>-<strong>10S</strong> PLUS, <strong>SEP</strong>-<strong>12S</strong> PLUS, <strong>SP</strong>-<strong>12S</strong> PRO<br />
PUMP MANUAL<br />
29
Standby mode<br />
30<br />
NOTES:<br />
1. It is possible to change following parameters:<br />
Infusion rate<br />
Bolus rate<br />
Bolus dose<br />
VTBI<br />
Occlusion pressure level<br />
2. Another way to change parameters in the stop mode is as<br />
follows:<br />
Open and close the syringe clamp. When the message<br />
Continue<br />
infusion?<br />
is displayed, press the NO key.<br />
3. If keypad locked, first unlock the keypad to change the<br />
parameters.<br />
Standby mode can be activated if such feature is enabled in<br />
setup menu.<br />
1. Stop the infusion by pressing the START/STOP key.<br />
2. Press the ENTER key.<br />
The following message is displayed:<br />
STANDBY!<br />
Duration: min<br />
3. Enter the pause duration using the numeric keys.<br />
4. Confirm the pause duration by pressing the ENTER key.<br />
The following message is displayed:<br />
STANDBY!<br />
Rest: XX:XX.XX<br />
(X:XX.XX – time remaining to the end of pause).<br />
5. Press the C key to cancel the pause.<br />
Clearing infused drug volume, total infused volume<br />
(available only when infusion is stopped)<br />
1. Select the parameter to be cleared with the scroll keys:<br />
or<br />
2. Press the C key.<br />
Stop ... X.X ml<br />
XX ml/h<br />
Total infused:<br />
X X ml<br />
<strong>SEP</strong>-<strong>10S</strong> PLUS, <strong>SEP</strong>-<strong>12S</strong> PLUS, <strong>SP</strong>-<strong>12S</strong> PRO<br />
PUMP MANUAL
The appropriate question is displayed:<br />
CLEAR infused<br />
volume?<br />
or<br />
CLEAR total<br />
infused volume?<br />
3. Press the YES key, and the corresponding parameter value is<br />
cleared.<br />
Locking and unlocking keypad<br />
Keypad lock feature is enabled/disabled through the setup menu.<br />
When keypad lock feature enabled in setup menu:<br />
1. After infusion parameters have been set and the infusion started<br />
or following the bolus infusion (or after parameter change) the<br />
following message is displayed:<br />
Viewing date and time<br />
Lock keypad?<br />
Press YES/NO<br />
To enable the keypad lock function press the YES key. Press the<br />
NO key if the keypad lock is not required.<br />
NOTE:<br />
The keypad is locked automatically if none of keys is pressed in<br />
response to above message within 10 sec.<br />
2. In order to disable keypad lock (if enabled) first press the F key,<br />
when message<br />
Keypad LOCKED!<br />
ENTER to unlock<br />
is displayed, press the ENTER key.<br />
3. In order to enable keypad lock (if disabled) first press the F key,<br />
when message<br />
Keypad UNLOCKED!<br />
ENTER to lock<br />
is displayed, press the ENTER key.<br />
Date and time can be selected for temporary viewing by means of<br />
the F key and scroll keys in STOP mode and during infusion.<br />
Turning off/on the display backlight (night mode)<br />
Display backlight can be turned off/on using the key. When<br />
running from the internal battery, display backlight is turned off<br />
automatically.<br />
<strong>SEP</strong>-<strong>10S</strong> PLUS, <strong>SEP</strong>-<strong>12S</strong> PLUS, <strong>SP</strong>-<strong>12S</strong> PRO<br />
PUMP MANUAL<br />
31
5. ADVANCED FEATURES<br />
Drug protocols (optional in <strong>SEP</strong>-<strong>12S</strong> <strong>Plus</strong> and <strong>SP</strong>-<strong>12S</strong> <strong>Pro</strong>, unavailable in <strong>SEP</strong>-<strong>10S</strong> <strong>Plus</strong>)<br />
32<br />
There is a possibility to configure 5 profiles with up to 10 steps<br />
each. <strong>Pro</strong>file scheme can be custom configured for various<br />
applications, i.e. it is possible to set (or disable if unnecessary)<br />
induction dose and pause time after it, program each step rate in<br />
different units and duration, set post profile rate. The profile mode<br />
can be used for <strong>Pro</strong>pofol, Dobutamine, Remifentanil and other<br />
drugs infusion requiring special drug administration schemes,<br />
using the best hospital practice.<br />
Parameters used to configure drug protocol<br />
- Drug name<br />
- Dose mode (ml/h, mg/h, mg/min, mg/kg/h, mg/kg/min,<br />
µg/h, µg/min, µg/kg/h, µg/kg/min)<br />
- Concentration (mg/ml, µg/ml)<br />
- Maximum patient weight<br />
- Induction/Loading dose/Initial bolus (mg(µg)/kg, mg, µg, ml)<br />
- Duration<br />
- Step count (0-10)<br />
- Rate N (ml/h, mg/h, mg/min, mg/kg/h, mg/kg/min, µg/h,<br />
µg/min, µg/kg/h, µg/kg/min)<br />
- Time N<br />
- Post-profile mode<br />
Creating drug protocol To create drug name with protocol enter Drug Set (code 147).<br />
Drug name<br />
Press the PROG key, the following message is displayed:<br />
Replace<br />
drug name?<br />
Press the YES key to edit selected drug name or the NO key and<br />
afterwards the YES key in response to message (to add drug<br />
name):<br />
Add<br />
drug name?<br />
- Enter the new drug name using keys in accordance with the table<br />
shown in chapter 6.<br />
- Having entered required drug name press the F key to place<br />
symbol at the end of drug name ( symbol initiates programming<br />
of protocol).<br />
- Confirm the new drug name by pressing the ENTER key.<br />
<strong>SEP</strong>-<strong>10S</strong> PLUS, <strong>SEP</strong>-<strong>12S</strong> PLUS, <strong>SP</strong>-<strong>12S</strong> PRO<br />
PUMP MANUAL
Dose mode<br />
Press the PROG key. Select the required rate units using the<br />
ml↔mg key and press the ENTER key.<br />
Concentration (available if dose mode in mass<br />
units)<br />
Press the PROG key. Select the required units using the ml↔mg<br />
key and enter concentration value using the numerical keypad.<br />
Press the ENTER key to confirm.<br />
MAXIMUM PATIENT WEIGHT (available if dose<br />
mode based on patient weight)<br />
Press the PROG key. Enter maximum patient weight using the<br />
numerical keypad and press the ENTER key.<br />
Induction/Loading dose/Initial bolus<br />
Press the PROG key. Select the required units using the ml↔mg<br />
key and enter required value using the numerical keypad.<br />
NOTE:<br />
Using the F key during programming it is possible to select the<br />
naming of parameter: Induction, Loading dose or Initial Bolus.<br />
Duration<br />
Press the PROG key. Enter the Induction/Loading dose/Initial<br />
bolus duration (h:min.sec) using the numerical keypad. Use the<br />
key to skip between hours, minutes and seconds.<br />
NOTES:<br />
1) When duration is disabled (set to 0), Induction/Loading<br />
dose/Initial bolus will be infused at the bolus rate.<br />
2) In order to set the pause after Induction/Loading dose/Initial<br />
bolus it is necessary to leave profile first step rate 0 and set the<br />
step duration conforming to the required pause time (see below 8.<br />
Rate N, Time N).<br />
Step count<br />
Press the PROG key and enter the number of steps using the<br />
numerical keypad. Confirm the entered value by pressing the<br />
ENTER key.<br />
Rate N, Time N<br />
Select one by one and program parameters of each step, pressing<br />
the PROG key and having entered required value confirm it<br />
pressing the ENTER key.<br />
Post profile mode<br />
Press the PROG key, set the post profile rate and press the ENTER<br />
key to confirm (set 0 to stop the infusion after profile completion).<br />
<strong>SEP</strong>-<strong>10S</strong> PLUS, <strong>SEP</strong>-<strong>12S</strong> PLUS, <strong>SP</strong>-<strong>12S</strong> PRO<br />
PUMP MANUAL<br />
33
Modyfing drug protocol<br />
34<br />
NOTES:<br />
1) It is possible to exit drug protocol programming by pressing the<br />
START key and afterwards the YES key. In such case all previous<br />
settings are discarded.<br />
2) To review the programmed protocol, select the drug name with<br />
symbol and press the F key. When the message<br />
PROTOCOL review<br />
is indicated, press the ENTER key and review the drug protocol<br />
using the scroll keys. Press the C key to exit review mode.<br />
Enter Drug set and select the drug name with symbol. Press the<br />
PROG key. Following message will be displayed:<br />
Modify protocol?<br />
Press the YES key to start modifying protocol as described above.<br />
Pressing the NO key allows to add new drug name to library.<br />
Infusion of drug with protocol<br />
Infusion of drug protocol can be started after confirmation of<br />
loaded syringe, selection drug name with symbol, setting patient<br />
weight (if rate units based on patient weight), programming of<br />
bolus rate and/or dose (if enabled in set up menu) and setting the<br />
occlusion level.<br />
User is able to change rate and duration of the current step of the<br />
drug profile during infusion.<br />
Use the scroll keys to review current parameters during infusion.<br />
NOTES:<br />
1. Having achieved the required therapeutic level it is possible to<br />
terminate the profile by pressing the STOP key. The following<br />
message will appear:<br />
Drug protocol review<br />
End <strong>Pro</strong>file?<br />
YES/NO<br />
1.1. Press the YES key. If you press the START key afterwards<br />
infusion will be continued with the rate profile was terminated at<br />
until syringe is emptied.<br />
1.2. Press the NO key. If you press the START key afterwards<br />
infusion will be continued from the point profile was terminated.<br />
2. To stop the Induction/Loading dose/Initial bolus during their<br />
delivery and switch to the first step execution, press the STOP key<br />
and afterwards the START.<br />
To review drug protocol parameters, press the F key (available<br />
only having selected and confirmed drug name). The following<br />
message will be displayed:<br />
<strong>Pro</strong>tocol review<br />
Press the ENTER key. Review the protocol profile parameters<br />
using the scroll keys.<br />
<strong>SEP</strong>-<strong>10S</strong> PLUS, <strong>SEP</strong>-<strong>12S</strong> PLUS, <strong>SP</strong>-<strong>12S</strong> PRO<br />
PUMP MANUAL
6. SETUP MENU<br />
Pump mode<br />
(code: 100)<br />
In order to access optional functions or certain parameters, keep<br />
the START key in pressed position and switch the pump on by<br />
pressing the ON/OFF key. When short beep is heard, release the<br />
START key, enter appropriate code (see codes below) using the<br />
numerical keys. Confirm it by pressing the ENTER key.<br />
List of optional functions may be reviewed using the scroll keys. If<br />
displayed name is marked with the asterisk, it means that function<br />
is active. To activate an inactive function press the ENTER key,<br />
and the asterisk will appear in front of the item name.<br />
To deactivate a function, press the C key. The asterisk shall<br />
disappear.<br />
To exit setup menu press the START/STOP key.<br />
This option is used to set the infusion mode the pump will operate<br />
in. Following infusion modes are available: Continuous rate mode,<br />
Easy pump mode.<br />
Event history review (optional)<br />
(code:111)<br />
This option is used to review the event history. Use the scroll keys<br />
to review the events. In order to get more detailed information on<br />
events use the Event History utility to upload the event history to<br />
PC.<br />
Syringe set<br />
(code: 137)<br />
This option is used to configure the type and size of syringe<br />
permitted for use on the pump. Select all possible syringes, which<br />
may be used, and disable any that should not be used.<br />
Drug set<br />
(code: 147)<br />
This option allows to compose drug library to be used on the<br />
pump. Drug library can comprise up to 30 drug names.<br />
To replace drug name open the drug list and select the drug name<br />
to be replaced by the new one. Press the PROG key, the following<br />
message is displayed:<br />
Replace<br />
drug name?<br />
<strong>SEP</strong>-<strong>10S</strong> PLUS, <strong>SEP</strong>-<strong>12S</strong> PLUS, <strong>SP</strong>-<strong>12S</strong> PRO<br />
PUMP MANUAL<br />
35
Default drug set<br />
(code: 157)<br />
Language set<br />
(code: 337)<br />
Date and Time setting<br />
(code: 637)<br />
Parameter set<br />
(code: 237)<br />
36<br />
Function name<br />
Press the YES key to edit selected drug name or the NO key and<br />
afterwards the YES key in response to message (to add drug<br />
name):<br />
Add<br />
drug name?<br />
Enter the new drug name using keys in accordance with the table<br />
below (e.g. to enter letter Z press the 9 key four times):<br />
Key 1 2 3 4 5 6 7 8 9 0 . YES NO, C<br />
Character 1 A,B, D,E, G,H, J, K, M, N, P,Q, T, U, W, X, 0, /, -, . Space Backspace<br />
C,2 F, 3 I, 4 L, 5 O, 6 R, S, 7 V, 8 Y, Z, 9 #, %<br />
Confirm the new drug name by pressing the ENTER key.<br />
NOTES:<br />
1. Entered character can be reset by means of the C or NO keys.<br />
2. Old drug name can be restored by means of the PROG key until<br />
new name is confirmed.<br />
This option restores default (manufacturer‘s) drug set.<br />
This option allows the language of the pump to be set.<br />
This option allows to set of date and time.<br />
Enables/disables<br />
VTBI programming of volume to be infused<br />
Factory<br />
default<br />
<strong>SEP</strong>-<strong>10S</strong> PLUS, <strong>SEP</strong>-<strong>12S</strong> PLUS, <strong>SP</strong>-<strong>12S</strong> PRO<br />
PUMP MANUAL<br />
<strong>SEP</strong>-<strong>10S</strong><br />
<strong>Plus</strong><br />
<strong>SEP</strong>-<strong>12S</strong><br />
<strong>Plus</strong><br />
<strong>SP</strong>-<strong>12S</strong><br />
<strong>Pro</strong><br />
* √ √ √<br />
VOLUME OVER<br />
TIME<br />
programming of VTBI over time<br />
- √ √ √<br />
INFUSION RATE<br />
LIMIT: XXXX ml/h<br />
programming of infusion rate upper<br />
limit<br />
1500 ml/h √ √ √ 1,5<br />
MANUAL BOLUS manual bolus infusion * √ √ √ 2<br />
AUTOMATIC BOLUS delivery of preprogrammed bolus<br />
volume * √ √ √ 2<br />
BOLUS RATE<br />
PROGRAMMING<br />
programming of bolus rate<br />
- √ √ √<br />
Notes
BOLUS RATE<br />
LIMIT:XXXX ml/h<br />
programming of bolus rate upper<br />
limit<br />
1500 ml/h √ √ √ 1<br />
40, 80, 120 kPa programming occlusion pressure<br />
level<br />
for 50/60 and 100 ml syringes<br />
40, 80, 120<br />
kPa<br />
X X √<br />
30, 60, 90 kPa – “ –<br />
RATE: mg (µg)/h programming of infusion rate in mass<br />
units * X √ √<br />
RATE:<br />
mg (µg)/kg/h (min)<br />
programming of infusion rate in<br />
mg/kg/h;µg/kg/h; mg/kg/min;<br />
µg/kg/min<br />
* X √ √<br />
CALCULATION OF<br />
CONCENTRATION<br />
calculation of concentration from<br />
entered drug mass and diluent<br />
volume<br />
- X √ √<br />
TOTAL VOLUME<br />
DI<strong>SP</strong>LAY<br />
displaying of total infused volume<br />
* √ √ √<br />
AUTOSAVE saving of settings and total infused<br />
volume after switching the pump off * √ √ √<br />
DRUG NAME<br />
DI<strong>SP</strong>LAY<br />
display of drug name<br />
* √ √ √<br />
TITRATION programming of infusion rate without<br />
stopping the infusion * √ √ √<br />
STANDBY programming of standby time - √ √ √<br />
KEYPAD LOCK protection of the keypad against<br />
accidental or unauthorized usage - √ √ √<br />
QUIET MODE short beep accompanying any<br />
keystroke - √ √ √<br />
NO MAINS ALARM<br />
AT POWER UP<br />
alarm on condition the pump is<br />
powered<br />
up while not connected to the mains<br />
* √ √ √<br />
KOR FUNCTION executing of KOR function * √ √ √<br />
KOR RATE:<br />
XX ml/h<br />
programming of KOR rate<br />
- √ √ √<br />
DATE and TIME<br />
DI<strong>SP</strong>LAY<br />
displaying of date and time<br />
* √ √ √<br />
* – enabled<br />
- – disabled<br />
√ – available<br />
X – unavailable<br />
NOTES:<br />
1. To modify the value of parameter, press the PROG key, enter the new value using the numerical<br />
keypad and confirm it by pressing the ENTER key.<br />
2. These parameters are not displayed when both Manual and Automatic boluses disabled.<br />
3. Parameter is not indicated when KOR FUNCTION disabled.<br />
4. If parameter disabled, default KOR rate is 5.0 ml/h.<br />
5. Does not affect infusion rates set in drug protocols.<br />
<strong>SEP</strong>-<strong>10S</strong> PLUS, <strong>SEP</strong>-<strong>12S</strong> PLUS, <strong>SP</strong>-<strong>12S</strong> PRO<br />
PUMP MANUAL<br />
37<br />
1, 3,<br />
4
7. VISUAL AND AUDIBLE ALARM<br />
SIGNALS<br />
Table 1 Troubleshooting Pump Alarm Messages<br />
38<br />
Alarm signals are issued by means of sound, flashing display<br />
backlight and corresponding message displayed. Alarm signals<br />
are cancelled by pressing the C key. Sound volume can be<br />
adjusted with rotary switch (optional) on the bottom of the<br />
pump.<br />
MESSAGE CAUSE CORRECTION CHECKING<br />
NO MAINS<br />
Check power cord<br />
LOW BATTERY*<br />
(and BATTERY LED<br />
flashing)<br />
VERY LOW BATTERY<br />
OCCLUSION!!!<br />
OCCLUSION or END<br />
The pump has been<br />
disconnected from the AC<br />
power supply and is<br />
operating on internal battery.<br />
Battery charge low.<br />
The internal battery is<br />
depleted<br />
Pressure in the extension set<br />
and the syringe has reached<br />
the alarm limit.<br />
The pump ceased its<br />
operation due to blockage in<br />
the extension set, syringe or<br />
drive or if the syringe<br />
plunger has reached the end<br />
of its travel. It may happen<br />
when syringe was not fully<br />
filled.<br />
SYRINGE EMPTY!* The syringe is empty.<br />
Stop X.X ml<br />
KOR XX ml/h**<br />
END OF INFUSION!<br />
KOR XX ml/h**<br />
Infusion has been stopped<br />
and not resumed within 2<br />
min.<br />
The pump has reached the<br />
end of infusion.<br />
Reconnect the pump to AC<br />
power supply or press the<br />
CANCEL key to silence the<br />
alarm and continue operation<br />
on internal battery.<br />
Connect the pump to AC<br />
power supply and charge the<br />
internal battery.<br />
Connect the pump to AC<br />
power supply.<br />
Identify and remove the<br />
cause of the blockage in the<br />
extension set, syringe or<br />
drive.<br />
If the cause of stopping is an<br />
occlusion, remove the cause<br />
of blockage and resume<br />
infusion by pressing the<br />
START / STOP key.<br />
When the cause of stopping<br />
is the syringe plunger<br />
reaching the end of its travel,<br />
the syringe shall be replaced.<br />
Replace the syringe or turn<br />
the pump off.<br />
Resume the infusion or press<br />
the CANCEL key to silence<br />
the alarm.<br />
Replace the syringe or turn<br />
the pump off.<br />
<strong>SEP</strong>-<strong>10S</strong> PLUS, <strong>SEP</strong>-<strong>12S</strong> PLUS, <strong>SP</strong>-<strong>12S</strong> PRO<br />
PUMP MANUAL<br />
Connect the mains cable to the<br />
pump. Switch on the pump and<br />
launch infusion. After few<br />
seconds disconnect the mains<br />
cable.<br />
Run the pump on battery until<br />
alarm signal is generated.<br />
Run the pump on battery until it is<br />
depleted completely.<br />
While infusion is in progress<br />
block the extension line and wait<br />
until alarm is generated.<br />
Use BD Plastipak 50 ml syringe.<br />
Pull out syringe plunger to the<br />
value of 1 ml. Launch the infusion<br />
and wait until alarm is generated.<br />
Use BD Plastipak 50 ml syringe.<br />
Pull out syringe plunger to the<br />
value of 20 ml. Launch the<br />
infusion and wait until syringe is<br />
emptied.<br />
In the setup menu switch on the<br />
KOR FUNCTION. Launch the<br />
infusion and after few seconds<br />
stop it. Wait until alarm is<br />
generated.<br />
In the setup menu switch on the<br />
KOR FUNCTION. Set the<br />
Volume limit. Launch the infusion<br />
and wait until preset volume limit<br />
is infused.
Table 1 Troubleshooting Pump Alarm Messages-continued<br />
MESSAGE CAUSE CORRECTION CHECKING<br />
SYRINGE EMPTY!<br />
KOR XX ml/h**<br />
ATTENTION!<br />
2 min INACTIVE!<br />
STANDBY TIME<br />
ELAPSED<br />
X min. PREALARM!<br />
ILLEGAL SYRINGE!<br />
Change SYRINGE!<br />
CLAMP<br />
OPENED!<br />
PLUNGER<br />
NOT FITTED!<br />
ERROR: XX<br />
(XX-error code)<br />
The syringe is empty.<br />
The pump is left for 2 min<br />
without starting the<br />
operation.<br />
The preprogrammed standby<br />
time interval elapsed.<br />
The pump is nearing the end<br />
of infusion.<br />
Loaded syringe having a<br />
diameter not complying with<br />
any syringe from the pump<br />
syringe library.<br />
The syringe barrel clamp has<br />
been opened during infusion.<br />
The syringe plunger has been<br />
displaced during infusion.<br />
The pump has detected an<br />
internal malfunction.<br />
Replace the syringe or turn<br />
the pump off.<br />
Press the CANCEL key.<br />
Press the CANCEL key.<br />
Press the CANCEL key.<br />
Load the proper syringe.<br />
Close the clamp and resume<br />
the infusion.<br />
Check the correctness of<br />
syringe position.<br />
Remove the pump from<br />
service and have the pump<br />
checked by qualified<br />
personnel.<br />
<strong>SEP</strong>-<strong>10S</strong> PLUS, <strong>SEP</strong>-<strong>12S</strong> PLUS, <strong>SP</strong>-<strong>12S</strong> PRO<br />
PUMP MANUAL<br />
In the setup menu switch on the<br />
KOR FUNCTION. Launch the<br />
infusion and wait until syringe is<br />
emptied.<br />
Switch on the pump and wait for 2<br />
min.<br />
In the setup menu switch on the<br />
STANDBY function. Launch<br />
infusion, and after few seconds<br />
stop it. Set standby time to 3 min<br />
and wait until it is elapsed.<br />
Use BD Plastipak 50 ml syringe.<br />
Pull out syringe plunger to the<br />
value of 20 ml. Launch the<br />
infusion and wait until alarm is<br />
generated.<br />
Load BD Plastipak 50 ml syringe.<br />
Slowly lift up the syringe barrel<br />
clamp until message is indicated<br />
on the display.<br />
While infusion is in progress lift<br />
up the syringe barrel clamp.<br />
Load syringe barrel without<br />
plunger. Insert fixture between the<br />
grippers to keep them in plunger<br />
inserted position. Launch infusion<br />
and after few seconds pull the<br />
fixture out of grippers.<br />
---------------------<br />
* - Audible signal accompanying these messages is an intermittent one.<br />
** - The purpose of the function KOR (Keep Open Rate) is to continue infusion of very small amount of<br />
drug after the end of infusion.<br />
39
8. MAINTENANCE AND STORAGE<br />
Cleaning Overview<br />
40<br />
The pump has to be switched off and must be<br />
unplugged from the line for cleaning.<br />
Do not clean, disinfect, or sterilise any part of the device by<br />
autoclaving or with ethylene oxide gas. Doing so may<br />
damage the device and void the warranty. Only external<br />
parts of the device should be disinfected.<br />
Do not use the following chemicals on the device, as they<br />
will damage the front panel: acetone, acetoaldehyde,<br />
ammonia, benzene, hydroxytoluene, methylene, chloride,<br />
and ozone.<br />
Do not use cleaners containing n-alkyl, dimethyl,<br />
ethylbenzyl, ammonium chloride unless they appear in the<br />
list of recommended cleaners overleaf.<br />
Keep the syringe pump clean and dry.<br />
After cleaning, check for the absence of liquid in the mains<br />
inlet. The presence of liquid can cause shortening of the<br />
contacts. Clean the mains inlet using a dry pad of gauze<br />
and only then reconnect the pump to the mains.<br />
The exterior of the device may be cleaned with a soft cloth,<br />
sparingly dampened with any of the cleaners listed below. Do not<br />
spray cleaners directly into the syringe mechanism, the area<br />
where the power cord enters the device or the interface<br />
connectors. Do not use hard instruments for cleaning. Follow<br />
the manufacturer’s dilution instructions for concentrated cleaners.<br />
Always clean/disinfect the device after each use. For a device that<br />
has been in an Isolation Area, select those agents from the list<br />
below that both clean and disinfect.<br />
While the product design safeguards against fluid spillage, if fluid<br />
enters the pump, contact your dealer or manufacturer’s servicing<br />
department for assistance. This should be done immediately to<br />
minimise any potential difficulties with the solutions pooling and<br />
drying on the mechanism.<br />
Recommended cleaners<br />
Before using a cleaner on the pump, it should be tested on a<br />
small area beforehand.<br />
- A solution of 3% hydrogen peroxide<br />
- Soapy water<br />
- Ethyl alcohol<br />
<strong>SEP</strong>-<strong>10S</strong> PLUS, <strong>SEP</strong>-<strong>12S</strong> PLUS, <strong>SP</strong>-<strong>12S</strong> PRO<br />
PUMP MANUAL
Preventive Maintenance<br />
The table below contains a schedule of basic maintenance tasks<br />
that should be performed on the device. If the device cannot be<br />
cleaned using the basic methods described earlier or components<br />
are missing or damaged, discontinue use and notify the appropriate<br />
authorised service personnel.<br />
Check Action<br />
Perform as required but recommended after every use<br />
Housings Clean housing and front panel as recommended in the cleaning instructions in this section.<br />
Check for cracks and large dents.<br />
Labels Clean as recommended in the cleaning instructions. Check for scratches, cuts or<br />
obliterated words.<br />
Power cord Verify that the power cord is undamaged over the entire length of the cord and the<br />
moulded plug.<br />
Rear housing accessory Verify that there are no loose or missing parts and that connectors and accessories are<br />
undamaged.<br />
Battery Recharge by plugging into mains power outlet. Check that the MAINS LED is<br />
illuminated during this time.<br />
Perform as required but recommended every 24 months.<br />
Entire device Schedule operational checkout by qualified biomedical personnel or authorised service<br />
representative.<br />
Battery Operation Overview<br />
The device can be battery operated in emergency situations and for<br />
temporary portable applications. When operating on battery the<br />
Battery LED lights.<br />
Storage<br />
Battery Charging<br />
The battery is charging whenever the device is plugged into mains<br />
outlet, regardless of whether the device is on or off. If the pump is<br />
not used for a long time, the battery should be charged at least<br />
once in a 2 months.<br />
In general, the more often a battery is discharged and recharged,<br />
the sooner it will need to be replaced. Notify a authorised service<br />
person for replacement. Batteries should only be replaced by<br />
authorized service personnel.<br />
Battery Disposal<br />
Battery should be disposed of as outlined by the local country<br />
regulation.<br />
It is recommended that the device remain plugged in during<br />
storage to maintain the battery at full charge. Do not store the<br />
device with the key ON and the device unplugged.<br />
When unpackaged, ensure the product is stored in a clean and dry<br />
<strong>SEP</strong>-<strong>10S</strong> PLUS, <strong>SEP</strong>-<strong>12S</strong> PLUS, <strong>SP</strong>-<strong>12S</strong> PRO<br />
PUMP MANUAL<br />
41
Test routines<br />
Repair<br />
42<br />
(20-95%, RH, non-condensing) environment to safeguard against<br />
prolonged exposure to dust and moisture. In conditions falling<br />
outside the Environmental Operating Limits (see the Technical<br />
Specifications Table in chapter 9), Viltechmeda recommends that<br />
the device be repackaged in the original shipping materials.<br />
The test routines are designed to allow confirmation of many of<br />
pump parameters, functions and calibration without requiring<br />
internal inspection. Refer to Service Manual for a complete list of<br />
test and calibration procedures.<br />
The right to repair the pump or carry out periodical part<br />
replacements is reserved only to the Manufacturer authorised service<br />
representative.<br />
The pump as well as its replaceable spare parts shall be disposed of<br />
taking local legislation into consideration. Do not send back to the<br />
manufacturer. None of the pump’s components does not pose<br />
hazard to environment and can be safely disposed of in accordance<br />
with hospital protocols.<br />
Table 1 Pump part to be periodically replaced<br />
Part Part Name Periodicity of Criterion for<br />
Number<br />
Replacement* Replacement<br />
B6640001 Battery 3–4 years Cordless work time has<br />
diminished more than twice<br />
(check at 25 o C)<br />
B8123009 Cap 3–4 years Damages (cracks, etc.)<br />
* - periodicity of replacement depends mainly on the frequency<br />
of use for each part<br />
<strong>SEP</strong>-<strong>10S</strong> PLUS, <strong>SEP</strong>-<strong>12S</strong> PLUS, <strong>SP</strong>-<strong>12S</strong> PRO<br />
PUMP MANUAL
9. TECHNICAL <strong>SP</strong>ECIFICATIONS<br />
Syringe sizes<br />
Infusion rates<br />
Volumetric accuracy<br />
Mechanical accuracy<br />
Component<br />
Volume To Be Infused (VTBI)<br />
Bolus rates<br />
KOR (Keep Open Rate) rate<br />
KOR volume<br />
Standby time<br />
Volume infused<br />
Occlusion alarm pressure<br />
Concentration<br />
<strong>SEP</strong>-<strong>10S</strong> PLUS, <strong>SEP</strong>-<strong>12S</strong> PLUS, <strong>SP</strong>-<strong>12S</strong> PRO<br />
PUMP MANUAL<br />
Description<br />
<strong>SEP</strong>-<strong>10S</strong> <strong>Plus</strong> <strong>SEP</strong>-<strong>12S</strong> <strong>Plus</strong>, <strong>SP</strong>-<strong>12S</strong> <strong>Pro</strong><br />
10-100 ml of main brands;<br />
5 ml – optional.<br />
0.1 to 99.9 ml/h in 0.1 ml/h steps;<br />
100 to 1500 ml/h in 1 ml/h steps.<br />
Note:<br />
Maximal infusion and Bolus rates:<br />
– 200 ml/h for syringe 5 ml;<br />
– 450 ml/h for syringe 10 ml;<br />
– 750 ml/h for syringe 20 ml;<br />
– 950 ml/h for syringe 30 ml;<br />
– 1500 ml/h for syringes 50/60 ml and 100 ml.<br />
+/- 2% or +/- 0.1 ml/h (the greater of these values) – with approved<br />
syringes<br />
+/- 1%<br />
0.1 to 99.9 ml 0.1 ml steps;<br />
100 to 999 ml in 1 ml steps;<br />
unlimited volume.<br />
0; 10 to 1500 ml/h in 1 ml/h steps;<br />
0.1 - 10.0 ml/h in 0.1 ml/h steps (or set rate if lower than KOR).<br />
1.0 % of syringe volume.<br />
1 to 999 min in 1min steps.<br />
0.1 to 99999 ml<br />
high – 120 kPa ± 25 kPa;<br />
medium – 80 kPa ± 20 kPa ;<br />
low – 40 kPa ± 15 kPa;<br />
or (only for <strong>SP</strong>-<strong>12S</strong> <strong>Pro</strong>)<br />
high – 90 kPa ± 20 kPa<br />
medium – 60 kPa ± 15 kPa<br />
low – 30 kPa ± 15 kPa<br />
<strong>Med</strong>ium and low levels for 50/60 ml and 100 ml syringes only.<br />
____________<br />
0.01 to 9.99 (µg)mg/ml in 0.01<br />
(µg)mg/ml steps;<br />
10.0 to 99.9 (µg)mg/ml in 0.1<br />
(µg)mg/ml steps;<br />
100 to 999 (µg)mg/ml in 1<br />
(µg)mg/ml steps.<br />
43
Infusion rate in mass units<br />
Bolus doses<br />
Patient weight<br />
Mounting<br />
AC power supply<br />
External DC power supply<br />
Battery:<br />
Battery type<br />
44<br />
Battery operation<br />
Battery charging time<br />
Power consumption<br />
Fuses<br />
<strong>Pro</strong>tection against current leakage<br />
<strong>Pro</strong>tection against electrical shocks<br />
<strong>Pro</strong>tection against splashing liquid<br />
CE 0408<br />
Electrical safety and EMC<br />
Maximum volume under single fault condition<br />
____________<br />
0.1 to 99.9 ml in 0.1 ml steps;<br />
__________<br />
- table top operation<br />
- universal pole clamp<br />
- Draeger bar (optional)<br />
- Mains splitter (optional)<br />
220-230 VAC ±10%, 50/60 Hz, or<br />
115 VAC (optional) ±10%, 50/60 Hz<br />
12 VDC<br />
NiMH, 9.6 V / 1300 mAh<br />
8 h @ 5 ml/h<br />
Up to 24 hours to 100% charge<br />
10 VA (max).<br />
T80 mA/L250 V (for 220-230 VAC);<br />
T160 mA/L250 V (for 115 VAC).<br />
Type CF equipment<br />
Class II<br />
IPX4 (splashing water protected)<br />
<strong>SEP</strong>-<strong>10S</strong> PLUS, <strong>SEP</strong>-<strong>12S</strong> PLUS, <strong>SP</strong>-<strong>12S</strong> PRO<br />
PUMP MANUAL<br />
0.01 to 9.99 (µg)mg/h,<br />
(µg)mg/kg/h(min) in 0.01 (µg)mg/h,<br />
(µg)mg/kg/h(min) steps;<br />
10.0 to 99.9 (µg)mg/h,<br />
(µg)mg/kg/h(min) in 0.1 (µg)mg/h,<br />
(µg)mg/kg/h(min) steps;<br />
100 to 999 (µg)mg/h,<br />
(µg)mg/kg/h(min) in 1 (µg)mg/h,<br />
(µg)mg/kg/h(min) steps;<br />
0.1 to 99.9 ml in 0.1 ml steps;<br />
0.01 to 9.99 µg,mg,(µg)mg/kg in 0.01<br />
µg,mg,(µg)mg/kg steps;<br />
10.0 to 99.9 µg,mg,(µg)mg/kg in 0.1<br />
µg,mg,(µg)mg/kg steps;<br />
100 to 999 µg,mg,(µg)mg/kg in 1<br />
µg,mg,(µg)mg/kg steps;<br />
no automatic bolus.<br />
0.4 to 99.9 kg in 0.1 kg steps;<br />
100 to 200 kg in 1 kg steps.<br />
Council Directive 93/42/EEC (14 June 1993) concerning medical devices<br />
IEC 60601-(1, 1-2, 2-24)<br />
Operating temperature range<br />
Transport and storage temperature<br />
Operating atmospheric pressure<br />
Permissible relative humidity<br />
Memory retention<br />
Event log<br />
Infusion modes<br />
Use in ambulances<br />
Interfaces<br />
Dimensions (WxHxD)<br />
Weight<br />
Transport<br />
+5°C – +40°C<br />
-20°C – +40°C<br />
60 kPa – 106 kPa<br />
20 - 90%, no condensation<br />
For more than 10 years when not powered up.<br />
up to 2000 events<br />
Continuous, <strong>Pro</strong>file (optional in <strong>SEP</strong>-<strong>12S</strong> <strong>Plus</strong>, <strong>SP</strong>-<strong>12S</strong> <strong>Pro</strong>)<br />
Optional in <strong>SEP</strong>-<strong>10S</strong> <strong>Plus</strong> and <strong>SP</strong>-<strong>12S</strong> <strong>Pro</strong><br />
RS 232 (optional in <strong>SEP</strong>-<strong>10S</strong> <strong>Plus</strong>)<br />
Nursecall (optional)<br />
305 x 135 x 195 mm<br />
2.6 kg<br />
In the original packaging<br />
Volumetric Accuracy of the System<br />
The pump, using the appropriate syringe (identified in<br />
Chapter 2), maintains a volumetric accuracy with delivery errors<br />
not exceeding ±2% for any one hour period over 72 hours at 5<br />
ml/h.<br />
Startup Graph Description<br />
Note that flow fluctuations can be caused by unusual conditions or<br />
combinations of conditions that may involve, but are not limited<br />
to, the following: fluid density, positive and negative pressure and<br />
the environment. Flow fluctuations are most likely to occur when<br />
the conditions mentioned above are exacerbated or when the<br />
device is operated in conditions outside of its normal limits.<br />
The accuracy figures as stated are based upon operation at a room<br />
temperature of 22°C.<br />
NOTE:<br />
The all data shown is for the BD Plastipak 50 ml syringe with<br />
BALTON, PPI/LL – 120 cm extension set<br />
The Startup Graph was developed in accordance with IEC 60601-<br />
2-24.<br />
The Startup data shown in the graph illustrates the startup<br />
performance of the pump during the first 120 minutes of operation<br />
with a sampling period of 30 seconds.<br />
<strong>SEP</strong>-<strong>10S</strong> PLUS, <strong>SEP</strong>-<strong>12S</strong> PLUS, <strong>SP</strong>-<strong>12S</strong> PRO<br />
PUMP MANUAL<br />
45
46<br />
Startup Graph Example<br />
How Trumpet Curve Graphs are Interpreted<br />
Trumpet Graph Example<br />
A Startup graph of flow versus time illustrates initial stability with<br />
time.<br />
Even with the proper components and set up, the flow of any<br />
manufacturer’s pump may be erratic during the 120-minute startup<br />
period. Therefore, we have included the startup, or stabilisation<br />
data. It should be noted that as the time interval over which<br />
accuracy is measured is lengthened, all pumps show considerable<br />
improvement in flow accuracy.<br />
The trumpet curve provides a graphical view of the maximum<br />
deviation in flow rate from the programmed delivery rate for<br />
specific segments of delivery time. The horizontal axis does not<br />
represent elapsed delivery time, but rather acts as a graphical<br />
reference for selecting specific observation time intervals. The<br />
widest area of the trumpet curve (greatest deviation) reflects the<br />
smallest sampling intervals or observation windows. As the sizes<br />
of the sampling intervals increase (in minutes), the deviations in<br />
flow from the programmed delivery rate are reduced as the<br />
deviations are spread out over the longer periods of time. This<br />
results in the narrowing of the trumpet curve giving a more<br />
realistic representation of the device’s average flow rate accuracy<br />
over longer intervals of time.<br />
For example, if you were to look at the maximum and minimum<br />
percentage error points corresponding to the 5-minute interval<br />
point on the Observation Interval axis, you would be looking at the<br />
average flow variance for any 5-minute period throughout the<br />
infusion.<br />
Similarly, if you were to look at the 60-minute interval point on<br />
the Observation Interval axis, you would be looking at the average<br />
flow variance for any 60-minute period throughout the infusion.<br />
How Trumpet Curves Can Be Used<br />
Trumpet curves can be important sources of information for the<br />
medical professional who must decide whether a certain infusion<br />
pump can be used with a particular drug. For example, when<br />
delivering a drug with a short half-life, very small deviations in<br />
flow over the course of an infusion would be desirable to ensure<br />
that the deviations in plasma level also remained small. The<br />
device’s ability to deliver very closely to the programmed rate<br />
would ensure that the drug’s efficacy was being maintained. In this<br />
example, the medical professional would be wise to select a device<br />
whose trumpet curve indicated a small or narrow range of<br />
deviations in flow rate.<br />
<strong>SEP</strong>-<strong>10S</strong> PLUS, <strong>SEP</strong>-<strong>12S</strong> PLUS, <strong>SP</strong>-<strong>12S</strong> PRO<br />
PUMP MANUAL
Startup and Trumpet Curves<br />
Startup graph. BD Plastipak 50 ml @ 1 ml/h<br />
Trumpet graph. BD Plastipak 50 ml @ 1 ml/h<br />
Influences of Back Pressure at 5 ml/h<br />
Startup graph. BD Plastipak 50 ml (+100 mmHg)<br />
Trumpet graph. BD Plastipak 50 ml (+100 mmHg)<br />
<strong>SEP</strong>-<strong>10S</strong> PLUS, <strong>SEP</strong>-<strong>12S</strong> PLUS, <strong>SP</strong>-<strong>12S</strong> PRO<br />
PUMP MANUAL<br />
Startup graph. BD Plastipak 50 ml @ 5 ml/h<br />
Trumpet graph. BD Plastipak 50 ml @ 5 ml/h<br />
Startup graph. BD Plastipak 50 ml (-100 mmHg)<br />
Trumpet graph. BD Plastipak 50 ml (-100 mmHg)<br />
47
Maximum Infusion Pressure Generated<br />
Alarm Delay at Occlusion<br />
48<br />
Rate<br />
1 ml/h<br />
5 ml/h<br />
Bolus Volume at Occlusion<br />
The maximum infusion pressure prior to alarm activation is 145 kPa.<br />
Occlusion alarm<br />
pressure level<br />
Low<br />
High<br />
Low<br />
High<br />
<strong>SEP</strong>-<strong>10S</strong> PLUS, <strong>SEP</strong>-<strong>12S</strong> PLUS, <strong>SP</strong>-<strong>12S</strong> PRO<br />
PUMP MANUAL<br />
Time to Alarm activation (max)<br />
low – 40 kPa ± 15 kPa;<br />
high – 120 kPa ± 25 kPa.<br />
1 h 20 min<br />
2 h<br />
15 min<br />
25 min<br />
low – 30 kPa ± 15 kPa;<br />
high – 90 kPa ± 20 kPa.<br />
1 h<br />
1 h 40 min<br />
10 min<br />
20 min<br />
Rate Occlusion alarm pressure level Bolus volume (max)<br />
5 ml/h<br />
Automatic Bolus volume accuracy<br />
Set value<br />
Low<br />
High<br />
0.3 ml<br />
0.5 ml<br />
The information in the following table represents laboratory testing<br />
conducted per Sub-Clause 50.106 of IEC 60601-2-24 Part 2.<br />
Mean<br />
Deviation<br />
Maximum positive Maximum negative<br />
0.1 ml - 0.6 % + 2.0 % - 4.0 %<br />
1 ml + 0.5 % + 1.2 % - 0.2 %<br />
20 ml + 0.3 % + 1.4 % - 0.3 %
10. GUIDANCE AND MANUFACTURER'S<br />
DECLARATION ON ELECTROMAGNETIC<br />
EMISSIONS<br />
Electromagnetic Compatibility Statement<br />
This statement and the information provided in the following<br />
tables are required by IEC 60601-1-2:2001. The tables can be<br />
used to identify what EMC (electromagnetic compatibility)<br />
standards <strong>SEP</strong>-<strong>10S</strong> <strong>Plus</strong>, <strong>SEP</strong>-<strong>12S</strong> <strong>Plus</strong>, <strong>SP</strong>-<strong>12S</strong> <strong>Pro</strong> syringe<br />
pumps (hereinafter – Syringe pump) were subjected to, the<br />
minimum test level identified in the standard, the level that the<br />
pump meets and general guidance on the EMC environment. The<br />
pump is intended for use in the electromagnetic environment<br />
specified in the following tables. As with most microprocessorbased<br />
electronic products, syringe pump creates RF (radio<br />
frequency) energy as a side effect of its internal functions.<br />
Precautions should be taken to avoid exposing syringe pump to<br />
powerful sources of electromagnetic radiation such as MRI<br />
(magnetic resonance imaging) and ESU (electro-surgical<br />
equipment).<br />
Note that portable and mobile communications equipment such as<br />
cell phones can affect MEDICAL ELECTRICAL EQUIPMENT<br />
such as syringe pump.<br />
The use of ACCESSORIES and cables other than those<br />
specified in the Operator’s Manual may result in increased<br />
EMISSIONS or decreased IMMUNITY of syringe pump.<br />
Syringe pump should not be used adjacent to or stacked<br />
with other equipment and if adjacent or stacked use is<br />
necessary, syringe pump should be observed to verify<br />
normal operation in the configuration in which it will be<br />
used.<br />
<strong>SEP</strong>-<strong>10S</strong> PLUS, <strong>SEP</strong>-<strong>12S</strong> PLUS, <strong>SP</strong>-<strong>12S</strong> PRO<br />
PUMP MANUAL<br />
49
Table 1 Guidance and manufacturer's declaration - electromagnetic emissions<br />
Syringe pump is intended for use in the electromagnetic environment specified below. The customer or the user of<br />
syringe pump should assure that it is used in such an environment.<br />
Emission test Compliance<br />
Electromagnetic environment -<br />
guidance<br />
RF emissions<br />
Group 1 Syringe pump uses RF energy only for its<br />
CI<strong>SP</strong>R 11<br />
internal function. Therefore, its RF emissions<br />
are very low and are not likely to cause any<br />
interference in nearby electronic equipment.<br />
RF emissions<br />
CI<strong>SP</strong>R 11<br />
Harmonic emissions<br />
IEC 61000-3-2<br />
Voltage fluctuations/flicker<br />
emissions<br />
IEC 61000-3-3<br />
50<br />
Class B<br />
Class A<br />
Complies<br />
<strong>SEP</strong>-<strong>10S</strong> PLUS, <strong>SEP</strong>-<strong>12S</strong> PLUS, <strong>SP</strong>-<strong>12S</strong> PRO<br />
PUMP MANUAL<br />
Syringe pump is suitable for use in all<br />
establishments including domestic<br />
establishments and those directly connected<br />
to the public low-voltage power supply<br />
network that supplies buildings used for<br />
domestic purposes.<br />
Table 2 Guidance and manufacturer's declaration – electromagnetic immunity<br />
Syringe pump is intended for use in the electromagnetic environment specified below. The customer or the user of<br />
syringe pump should assure that it is used in such an environment.<br />
Immunity test<br />
Electrostatic<br />
discharge (ESD)<br />
IEC 61000-4-2<br />
Electrical fast<br />
transient burst<br />
IEC 61000-4-4<br />
Surge<br />
IEC 61000-4-5<br />
IEC 60601<br />
test level<br />
+/- 6 kV contact<br />
+/- 8 kV air<br />
+/- 2 kV for power<br />
supply lines<br />
+/- 1kV for<br />
input/output lines<br />
+/- 1kV<br />
differential mode<br />
+/- 2 kV common<br />
mode<br />
Compliance<br />
level<br />
+/- 8 kV contact (1)<br />
+/- 15 kV air (1)<br />
+/- 2 kV for power<br />
supply lines<br />
+/- 1kV for<br />
input/output lines<br />
+/- 1kV<br />
differential mode<br />
+/- 2 kV common<br />
mode<br />
Electromagnetic environment - guidance<br />
Floors should be wood, concrete, or ceramic tile. If the<br />
floors are covered with synthetic material, the relative<br />
humidity should be at least 30%.<br />
Mains power quality should be that of a typical<br />
commercial or hospital environment.<br />
Mains power quality should be that of a typical<br />
commercial or hospital environment.
Table 2 Guidance and manufacturer's declaration – electromagnetic immunity – continued<br />
Syringe pump is intended for use in the electromagnetic environment specified below. The customer or the user of<br />
syringe pump should assure that it is used in such an environment.<br />
Immunity test<br />
Voltage dips, short<br />
interruptions and<br />
voltage variations<br />
on power supply<br />
input lines<br />
IEC 61000-4-11<br />
Power frequency<br />
(50/60 Hz)<br />
magnetic field<br />
IEC 61000-4-8<br />
IEC 60601<br />
test level<br />
95%<br />
dip in UT) for 0.5<br />
cycle<br />
40% UT (60% dip<br />
in UT) for 5 cycles<br />
70% UT (30%dip<br />
in UT ) for 25<br />
cycles<br />
< 5% UT (>95%<br />
dip in UT ) for 5<br />
sec<br />
Compliance<br />
level<br />
95%<br />
dip in UT) for 0.5<br />
cycle<br />
40% UT (60% dip<br />
in UT) for 5 cycles<br />
70% UT (30%dip<br />
in UT ) for 25<br />
cycles<br />
< 5% UT (>95%<br />
dip in UT ) for 5<br />
sec (2)<br />
3 A/m 3 A/m<br />
400 A/m (1)<br />
<strong>SEP</strong>-<strong>10S</strong> PLUS, <strong>SEP</strong>-<strong>12S</strong> PLUS, <strong>SP</strong>-<strong>12S</strong> PRO<br />
PUMP MANUAL<br />
Electromagnetic environment - guidance<br />
Mains power quality should be that of a typical<br />
commercial or hospital environment. If the user of the<br />
syringe pump requires continued operation during<br />
power mains interruptions, it is recommended that the<br />
syringe pump be powered from an uninterruptible<br />
power supply or a battery.<br />
User should always have battery installed per<br />
Operator’s Manual.<br />
Power frequency magnetic characteristic of a typical<br />
location in a typical commercial or hospital<br />
environment.<br />
The pump functions normally when exposed to power<br />
frequency magnetic fields of 400 A/m.<br />
Note 1: Syringe pump was designed to meet the requirements of EN 60601-1-2: 2001 and IEC 60601-2-24: 1998<br />
Note 2: Pump automatically transfers to battery operation if there is a loss of main power.<br />
51
52<br />
Table 3 Guidance and manufacturer's declaration - electromagnetic immunity - for<br />
LIFE-SUPPORTING EQUIPMENT and SYSTEMS<br />
Syringe pump is intended for use in the electromagnetic environment specified below. The customer or<br />
the user of syringe pump should assure that it is used in such an environment.<br />
Immunity test IEC 60601<br />
test level<br />
Conducted RF<br />
IEC 61000-4-6<br />
Radiated RF<br />
IEC 61000-4-3<br />
3 Vrms<br />
150 KHz TO 80<br />
MHz outside ISM<br />
bands a<br />
10 Vrms<br />
150 kHz to 80 MHz<br />
in ISM bands b<br />
10 V/m<br />
80 MHz to 2.5 GHz<br />
Compliance<br />
level<br />
3 Vrms<br />
10 Vrms<br />
10 V/m<br />
Electromagnetic environment - guidance<br />
Portable and mobile RF communications equipment should<br />
be used no closer to any part of syringe pump, including<br />
cables, than the recommended separation distance<br />
calculated from the equation applicable to the frequency of<br />
the transmitter.<br />
Recommended separation distance<br />
d=1.17√P<br />
d=1.2√P<br />
NOTE 1 At 80 MHz and 800 MHz, the higher frequency range applies.<br />
d=1.2√P 80 MHz to 800 MHz<br />
d=2.3√P 800 MHz to 2.5 GHz<br />
where P is the maximum output power rating of the<br />
transmitter in watts (W) according to the transmitter<br />
manufacturer and d is the recommended separation<br />
distance in meters (m). b<br />
Field strengths from fixed RF transmitters, as determined<br />
by an electromagnetic site survey, c should be less than the<br />
compliance level in each frequency range. d<br />
Interference may occur in the vicinity of equipment marked<br />
with the following symbol:<br />
NOTE 2 These guidelines may not apply in all situations. Electromagnetic propagation is affected by absorption<br />
and reflection from structures, objects and people.<br />
a The ISM (industrial, scientific and medical) bands between 150 kHz and 80 MHz are 6.765 MHz to 6.795 MHz;<br />
13.553 MHz to 13.567 MHz; 26.957 MHz to 27.283 MHz; and 40.66 MHz to 40.70 MHz.<br />
b The compliance levels in the ISM frequency bands between 150 kHz and 80 MHz and in the frequency range 80<br />
MHz to 2.5 GHz are intended to decrease the likelihood that mobile/portable communications equipment could<br />
cause interference if it is inadvertently brought into patient areas. For this reason, an additional factor of 10/3 is<br />
used in calculating the recommended separation distance for transmitters in these frequency ranges.
Table 3 Guidance and manufacturer's declaration - electromagnetic immunity - for LIFE-<br />
SUPPORTING EQUIPMENT and SYSTEMS – continued<br />
Syringe pump is intended for use in the electromagnetic environment specified below. The customer or the user of<br />
syringe pump should assure that it is used in such an environment.<br />
Immunity test IEC 60601<br />
test level<br />
Compliance<br />
level<br />
<strong>SEP</strong>-<strong>10S</strong> PLUS, <strong>SEP</strong>-<strong>12S</strong> PLUS, <strong>SP</strong>-<strong>12S</strong> PRO<br />
PUMP MANUAL<br />
Electromagnetic environment - guidance<br />
c Field strengths from fixed transmitters, such as base stations for radio (cellular/cordless) telephones and land<br />
mobile radios, amateur radio, AM and FM radio broadcast and TV broadcast cannot be predicted theoretically<br />
with accuracy. To assess the electromagnetic environment due to fixed RF transmitters, an electromagnetic site<br />
survey should be considered. If the measured field strength in the location in which syringe pump is used exceeds<br />
the applicable RF compliance level above, syringe pump should be observed to verify normal operation. If<br />
abnormal performance is observed, additional measures may be necessary, such as reorienting or relocating<br />
syringe pump.<br />
d Over the frequency range 150 kHz to 80 MHz, field strengths should be less than 3 V/m.<br />
Table 4 Recommended separation distances between portable and mobile RF<br />
communications equipment and syringe pump - for LIFE - SUPPORTING EQUIPMENT and<br />
SYSTEMS<br />
Syringe pump is intended for use in an electromagnetic environment in which radiated RF disturbances are<br />
controlled. The customer or the user of syringe pump can help prevent electromagnetic interference by<br />
maintaining a minimum distance between portable and mobile RF communications equipment (transmitters) and<br />
syringe pump as recommended below, according to the maximum output power of the communications<br />
equipment.<br />
Rated<br />
maximum<br />
output power<br />
of transmitter<br />
W<br />
0.01<br />
0.1<br />
1<br />
10<br />
100<br />
150 kHz to 80 MHz<br />
outside ISM bands<br />
d=1.17√P<br />
0.12<br />
0.37<br />
1.17<br />
3.70<br />
11.70<br />
Separation distance according to frequency of transmitter<br />
m<br />
150 kHz to 80 MHz<br />
in ISM bands<br />
d=1.2√P<br />
0.12<br />
0.38<br />
1.20<br />
3.80<br />
12.00<br />
80 MHz to 800<br />
MHz<br />
d=1.2√P<br />
0.12<br />
0.38<br />
1.20<br />
800 MHz to 2.5<br />
GHz<br />
d=2.3√P<br />
For transmitters rated at a maximum output power not listed above, the recommended separation distance d in<br />
meters (m) can be estimated using the equation applicable to the frequency of the transmitter, where P is the<br />
maximum output power rating of the transmitter in watts (W) according to the transmitter manufacturer.<br />
3.80<br />
12.00<br />
0.23<br />
0.73<br />
2.30<br />
7.28<br />
23.00<br />
53
Table 4 Recommended separation distances between portable and mobile RF<br />
communications equipment and syringe pump - for LIFE - SUPPORTING EQUIPMENT and<br />
SYSTEMS – continued<br />
54<br />
Syringe pump is intended for use in an electromagnetic environment in which radiated RF disturbances are<br />
controlled. The customer or the user of syringe pump can help prevent electromagnetic interference by<br />
maintaining a minimum distance between portable and mobile RF communications equipment (transmitters) and<br />
syringe pump as recommended below, according to the maximum output power of the communications<br />
equipment.<br />
Rated<br />
maximum<br />
output power<br />
of transmitter<br />
W<br />
150 kHz to 80 MHz<br />
outside ISM bands<br />
d=1.17√P<br />
Separation distance according to frequency of transmitter<br />
m<br />
150 kHz to 80 MHz<br />
in ISM bands<br />
d=1.2√P<br />
80 MHz to 800<br />
MHz<br />
d=1.2√P<br />
NOTE 1 At 80 MHz and 800 MHz, the separation distance of the higher frequency range applies.<br />
800 MHz to 2.5<br />
GHz<br />
d=2.3√P<br />
NOTE 2 The ISM (industrial, scientific and medical) bands between 150 kHz and 80 MHz are 6.765 MHz to<br />
6.795 MHz; 13.553 MHz to 13.567 MHz; 26.957 MHz to 27.283 MHz; and 40.66 MHz to 40.70 MHz.<br />
NOTE 3 An additional factor of 10/3 is used in calculating the recommended separation distance for transmitters<br />
in the ISM frequency bands between 150 kHz and 80 MHz and in the frequency range 80 MHz to 2.5 GHz to<br />
decrease the likelihood that mobile/portable communications equipment could cause interference if it is<br />
inadvertently brought into patient areas.<br />
NOTE 4 These guidelines may not apply in all situations. Electromagnetic propagation is affected by absorption<br />
and reflection from structures, objects and people.
11. DRAWING OF CABLES FOR<br />
MULTIFUNCTIONAL CONNECTOR<br />
(MFC)<br />
Connection Data:<br />
Ground (GND)<br />
Normally Closed (NC)<br />
Common (COM)<br />
Normally Open (NO)<br />
*<br />
NOTE:<br />
Use standard D Type - 9 Pin connectors.<br />
* – the internal batteries are not fully charged when operating<br />
from 12VDC. When operating pump from 12 VDC permanently<br />
recharge the internal batteries (connect pump to the MAINS)<br />
after 1 week of operation.<br />
<strong>SEP</strong>-<strong>10S</strong> PLUS, <strong>SEP</strong>-<strong>12S</strong> PLUS, <strong>SP</strong>-<strong>12S</strong> PRO<br />
PUMP MANUAL<br />
55
12. WARRANTY AND SERVICE<br />
INFORMATION<br />
Warranty<br />
Service Information<br />
56<br />
The Manufacturer warrants that pump is free from defects in<br />
material and workmanship under normal use and service for a<br />
period of 12 months after the purchase date.<br />
The Manufacturer or its authorised representative takes<br />
obligation to carry out the warranty repair of the pump or to<br />
replace the pump with an operational one in case the Manufacturer<br />
or its authorised representative determines that the cause of the<br />
pump’s failure was related to the manufacturing process.<br />
If the customer finds a defect in the pump during the<br />
Warranty period, he must report it and inform the Manufacturer or<br />
its authorised representative within 30 days.<br />
A pump sent for testing, repair or replacement shall be<br />
submitted to the Manufacturer or its authorised representative in its<br />
original or equivalent packaging. The pump is sent for repair and<br />
back at customer expense.<br />
If no defect is found during testing, the Manufacturer or its<br />
authorised representative reserves the right to submit the invoice to<br />
the customer for the work carried out.<br />
This Warranty is not applicable to pumps with damaged seal<br />
or when failure was caused by violations of requirements of this<br />
Operation Manual, by mains voltage non-conformity to the<br />
requirements of IEC, by spills of liquids, by mechanical damages<br />
caused by shocks or a pump being dropped, by pump damages<br />
caused during transportation, or when packaging is damaged.<br />
For service and repair contact manufacturer:<br />
Viltechmeda, 125 Kalvariju Str., 08221 Vilnius, Lithuania.<br />
Tel.: (+370 5) 2776 745, 2737 508, 2737 506<br />
Fax: (+370 5) 2763 867<br />
E-mail: service@aitecs.com<br />
Shipping costs for all units returned to Viltechmeda shall be paid<br />
for by the customer. The unit must be packed in its original<br />
container or in another Viltechmeda approved container that will<br />
provide adequate protection during shipment. To ensure prompt<br />
return, a Viltechmeda’s authorised dealer must be notified before<br />
shipping any unit for repair.<br />
When calling for service, please be prepared to provide model and<br />
serial number of the unit. A brief written description of the<br />
problem should be attached to the instrument when it is returned<br />
for service.<br />
Viltechmeda will not be responsible for unauthorised returns or for<br />
units damaged in shipment due to improper packing.<br />
<strong>SEP</strong>-<strong>10S</strong> PLUS, <strong>SEP</strong>-<strong>12S</strong> PLUS, <strong>SP</strong>-<strong>12S</strong> PRO<br />
PUMP MANUAL
13. ACCESSORIES<br />
Model:<br />
Serial No:<br />
Delivery date:<br />
<strong>SEP</strong>-<strong>10S</strong> PLUS, <strong>SEP</strong>-<strong>12S</strong> PLUS, <strong>SP</strong>-<strong>12S</strong> PRO<br />
PUMP MANUAL<br />
Description Part Number<br />
Headboard/footboard mounting<br />
clamp<br />
Clamp for mounting in ambulance<br />
cars, required by EN<br />
1789:1999+A1:2003<br />
Quality inspector:<br />
B6302003<br />
B6090003<br />
RS 232 cable B6650007<br />
12VDC cable B6650008<br />
Mains splitter MS-04 B2087019<br />
IV stand I-235<br />
Clamp for Draeger bar mounting B6302019-01<br />
Nurse Call cable B6650009<br />
57


