HVLP SPRAY GUN KIT - Harbor Freight Tools
HVLP SPRAY GUN KIT - Harbor Freight Tools
HVLP SPRAY GUN KIT - Harbor Freight Tools
Create successful ePaper yourself
Turn your PDF publications into a flip-book with our unique Google optimized e-Paper software.
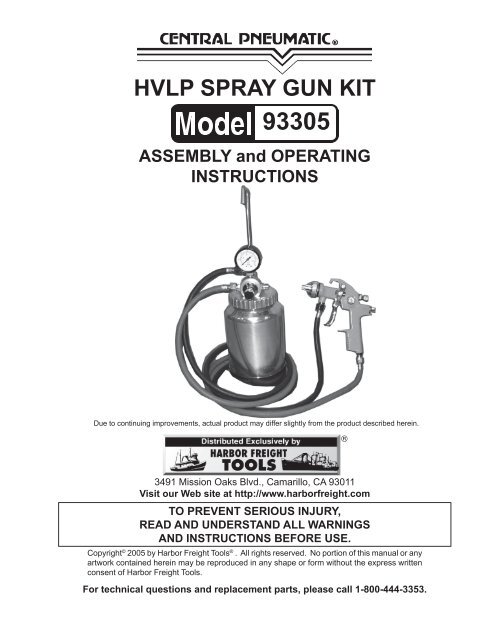
<strong>HVLP</strong> <strong>SPRAY</strong> <strong>GUN</strong> <strong>KIT</strong><br />
93305<br />
ASSEMBLY and OPERATING<br />
INSTRUCTIONS<br />
Due to continuing improvements, actual product may differ slightly from the product described herein.<br />
3491 Mission Oaks Blvd., Camarillo, CA 93011<br />
Visit our Web site at http://www.harborfreight.com<br />
TO PREVENT SERIOUS INjURY,<br />
REAd ANd UNdERSTANd ALL WARNINGS<br />
ANd INSTRUCTIONS BEFORE USE.<br />
Copyright © 2005 by <strong>Harbor</strong> <strong>Freight</strong> <strong>Tools</strong> ® . All rights reserved. No portion of this manual or any<br />
artwork contained herein may be reproduced in any shape or form without the express written<br />
consent of <strong>Harbor</strong> <strong>Freight</strong> <strong>Tools</strong>.<br />
For technical questions and replacement parts, please call 1-800-444-3353.<br />
®
IMPORTANT: Before using for the first time, the spray gun must be cleaned<br />
using a solvent based thinner. If not removed, the red oil used by the<br />
manufacturer for testing and corrosion protection may contaminate paint.<br />
IMPORTANT: The Spray Gun must be cleaned immediately after use.<br />
Improper cleaning is a common reason for the Spray Gun not to work.<br />
Contents<br />
Specifications ................................................................................................. 3<br />
Safety Warnings and Precautions ................................................................ 3<br />
Unpacking ....................................................................................................... 5<br />
Air Connection ................................................................................................ 6<br />
Control Layout ................................................................................................ 6<br />
A Comparison: Conventional versus <strong>HVLP</strong> Spray Guns ............................ 7<br />
Preparation...................................................................................................... 8<br />
Fan direction and Pattern Adjustment ......................................................... 8<br />
Techniques .................................................................................................... 10<br />
Maintenance ...................................................................................................11<br />
Parts List ...................................................................................................... 12<br />
Assembly Diagram ....................................................................................... 13<br />
Troubleshooting ........................................................................................... 14<br />
Limited 1 Year Warranty ............................................................................... 16<br />
SKU 93305<br />
For technical questions, please call 1-800-444-3353;<br />
Page 2<br />
Troubleshooting section at end of manual.
Specifications<br />
Inlet PSI 30 - 43 PSI, 43 PSI MAX<br />
Average Air Consumption 10 CFM @ 40 PSI<br />
Paint Capacity 2 Quart<br />
Air Inlet 1/4” - 18 NPS<br />
Nozzle Size .057”<br />
Save This Manual<br />
You will need the manual for the safety warnings and precautions, assembly instructions,<br />
operating and maintenance procedures, parts list and diagram. Keep your invoice with this<br />
manual. Write the invoice number on the inside of the front cover. Keep the manual and<br />
invoice in a safe and dry place for future reference.<br />
Safety Warnings and Precautions<br />
WARNING: When using tool, basic safety precautions should always be followed to<br />
reduce the risk of personal injury and damage to equipment.<br />
Read all instructions before using this tool!<br />
1. Keep work area clean. Cluttered areas invite injuries.<br />
2. Observe work area conditions. Do not use machines or power tools in damp or wet<br />
locations. Don’t expose to rain. Keep work area well lit. Do not use air tools in the<br />
presence of flammable gases or liquids.<br />
3. Keep children away. Children must never be allowed in the work area. Do not let<br />
them handle machines, tools, extension cords, or air hoses.<br />
4. Store idle equipment. When not in use, tools must be stored in a dry location to inhibit<br />
rust. Always lock up tools and keep out of reach of children.<br />
5. Use the right tool for the job. Do not attempt to force a small tool or attachment<br />
to do the work of a larger industrial tool. There are certain applications for which this<br />
tool was designed. It will do the job better and more safely at the rate for which it was<br />
intended. Do not modify this tool and do not use this tool for a purpose for which it was<br />
not intended.<br />
6. Dress properly. Do not wear loose clothing or jewelry as they can be caught in<br />
moving parts. Protective, electrically nonconductive clothes and nonskid footwear are<br />
recommended when working. Wear restrictive hair covering to contain long hair.<br />
7. Use eye and ear protection. Always wear ANSI approved impact safety goggles.<br />
Always wear an ANSI approved dust mask or respirator when using this Spray<br />
Gun.<br />
For technical questions, please call 1-800-444-3353;<br />
SKU 93305 Page 3<br />
Troubleshooting section at end of manual.
8. do not overreach. Keep proper footing and balance at all times. Do not reach over<br />
or across running machines or air hoses.<br />
9. Maintain tools with care. Keep tools clean for better and safer performance. Follow<br />
instructions for lubricating and changing accessories. Inspect tool cords and air hoses<br />
periodically and, if damaged, have them repaired by an authorized technician. The<br />
handle must be kept clean, dry, and free from oil and grease at all times.<br />
10. Disconnect air supply. Disconnect air hose when not in use, when changing<br />
accessories, and during maintenance.<br />
11. Remove adjusting wrenches. Check that adjusting wrenches are removed from the<br />
tool before attaching to the air source.<br />
12. Avoid unintentional starting. Be sure the trigger is in the Off position when not in<br />
use and before attaching to the air source. Do not carry any tool with your finger on<br />
the trigger, whether it is attached to the air compressor or not.<br />
13. Stay alert. Watch what you are doing, use common sense. Do not operate any tool<br />
when you are tired.<br />
14. Check for damaged parts. Before using any tool, any part that appears damaged<br />
should be carefully checked to determine that it will operate properly and perform its<br />
intended function. Check for alignment and binding of moving parts; any broken parts<br />
or mounting fixtures; and any other condition that may affect proper operation. Any part<br />
that is damaged should be properly repaired or replaced by a qualified technician. Do<br />
not use the tool if the trigger does not operate properly.<br />
15. Replacement parts and accessories. When servicing, use only identical replacement<br />
parts. Use of any other parts will void the warranty. Only use accessories intended for<br />
use with this tool. Approved accessories are available from <strong>Harbor</strong> <strong>Freight</strong> <strong>Tools</strong>.<br />
16. Do not operate tool if under the influence of alcohol or drugs. Read warning labels<br />
if taking prescription medicine to determine if your judgement or reflexes are impaired<br />
while taking drugs. If there is any doubt, do not operate the tool.<br />
17. Use proper size and type extension cord. If an extension cord is required for the<br />
compressor, it must be of the proper size and type to supply the correct current to the<br />
compressor without heating up. Otherwise, the extension cord could melt and catch<br />
fire, or cause electrical damage to the compressor. Check your compressor’s manual<br />
for the appropriate size cord.<br />
18. Maintenance. For your safety, maintenance should be performed regularly by a qualified<br />
technician and the unit must be thoroughly cleaned out after every use. Improper<br />
cleaning of the Spray Gun is a common reason for the Spray Gun to jam or not<br />
perform properly.<br />
19. Compressed air only. Never use combustible gas as a power source. Never exceed<br />
the recommended operating pressure of the any of the parts (i.e. hoses, fittings, gun)<br />
For technical questions, please call 1-800-444-3353;<br />
SKU 93305 Page 4<br />
Troubleshooting section at end of manual.
of the Sprayer system.<br />
20. Do not spray near open flames, pilot lights, stoves, heaters, the air compressor, or<br />
any other heat source. Most solvents and coatings are highly flammable, particularly<br />
when sprayed. Maintain a distance of at least 25 feet from the air compressor. If possible,<br />
locate the air compressor in a separate room. Do not smoke while spraying.<br />
21. Read all of the information concerning coating products and cleaning solvents.<br />
Chlorinated solvents (e.g. 1-1-1 Trichlorethylene and Methylene Chloride, also known<br />
as methyl chloride) can chemically react with aluminum and may explode. Many paint<br />
sprayers contain aluminum. If you have any doubt about potential chemical reactions,<br />
contact the solvent or coating manufacturer.<br />
22. Materials used when painting or cleaning may be harmful or fatal if inhaled or<br />
swallowed. Only use in an area with adequate ventilation. Use a respirator or mask<br />
when painting or using cleaning solvents.<br />
23. Never release the sprayer lid while the cup is pressurized.<br />
24. Industrial applications must follow OSHA requirements.<br />
25. Never point a spray gun at a person or animal. Serious injury could occur.<br />
26. Spraying hazardous materials may result in serious injury or death. Do not spray<br />
pesticides, acids, corrosive materials, fertilizers, and toxic chemicals.<br />
27. WARNING: The brass components of this product contain lead, a chemical known to<br />
the State of California to cause birth defects (or other reproductive harm).<br />
(California Health & Safety Code § 25249.5, et seq.)<br />
Note: Performance of the compressor (if powered by line voltage) may vary depending<br />
on variations in local line voltage. Extension cord usage may also affect tool performance.<br />
WARNING: The warnings, cautions, and instructions discussed in this instruction<br />
manual cannot cover all possible conditions and situations that may occur. It must be<br />
understood by the operator that common sense and caution are factors which cannot<br />
be built into this product, but must be supplied by the operator.<br />
Unpacking<br />
When unpacking, check to make sure the product is intact and undamaged. If any parts<br />
are missing or broken, please call <strong>Harbor</strong> <strong>Freight</strong> <strong>Tools</strong> at the number on the cover of this<br />
manual as soon as possible.<br />
For technical questions, please call 1-800-444-3353;<br />
SKU 93305 Page 5<br />
Troubleshooting section at end of manual.
Air Connection<br />
For best service you should incorporate a regulator and inline filter, as shown in the diagram<br />
above. Hoses, couplers, regulators, and filters are all available at <strong>Harbor</strong> <strong>Freight</strong> <strong>Tools</strong>.<br />
Note: Compressor pumps discharge condensed water, oil, or other contaminants along with<br />
the compressed air. Condensation causes “fish eyes” to appear in paint patterns. To avoid<br />
this problem, install water/oil removal filters and controls (not included) as close to the Spray<br />
Gun as possible. If run through the Gun, water and oil will cause damage.<br />
1. You will need to prepare a 1/4” air connector (sold separately) to connect to the air inlet<br />
on the Spray Gun. First, wrap the 1/4” air connector (not included) with pipe thread<br />
seal tape before threading it into the Air Inlet (36). Connect the Red Air Hose (41) to<br />
the Air Outlet Connector (36). Attach the other end of the Red Air Hose (41) to the Air<br />
Inlet (80) on the Gun.<br />
2. Set the air pressure on your compressor to 30-43 PSI. Do not exceed the maximum<br />
air pressure of 43 PSI. Also, set the air pressure on the Air Regulator to 10-30 PSI, as<br />
shown on the Gauge (38).<br />
3. Check the air connection for leaks and then disconnect the tool from the air source.<br />
FIGURE 1<br />
Air Cap Set (45)<br />
Trigger (78)<br />
Fluid Inlet<br />
Control Layout<br />
Air Adjustment Knob (73)<br />
Pattern Control Knob (57)<br />
Fluid Control Knob (67)<br />
Air Inlet (80)<br />
For technical questions, please call 1-800-444-3353;<br />
SKU 93305 Page 6<br />
Troubleshooting section at end of manual.
IMPORTANT: Before using for the first time, the spray gun must be cleaned<br />
using a solvent based thinner. If not removed, the red oil used by the<br />
manufacturer for testing and corrosion protection may contaminate paint.<br />
IMPORTANT: The Spray Gun must be cleaned immediately after use.<br />
Improper cleaning is a common reason for the Spray Gun not to work.<br />
FIGURE 2<br />
A Comparison: Conventional versus <strong>HVLP</strong> Spray Guns<br />
Because conventional spray guns require a much higher air cap pressure to atomize<br />
the paint than <strong>HVLP</strong> Spray Guns, conventional guns have lower transfer efficiencies<br />
and more overspray.<br />
This translates to a significant paint/material savings for <strong>HVLP</strong> guns, in addition to<br />
making them more environmentally friendly.<br />
To qualify as <strong>HVLP</strong>, the dynamic air pressure going in the Air Cap must be a maximum<br />
of 10 PSI. The lower the air pressure, the less bounce back and overspray.<br />
Note: Due to the viscosity of latex and other water-based paints, they are not<br />
recommended for use with this or other <strong>HVLP</strong> (High Volume Low Pressure) sprayers.<br />
See FIGURE 3 below.<br />
FIGURE 3<br />
Fluid Outlet (39)<br />
Safety Valve (2)<br />
Fluid Flow Knob (11)<br />
Air Outlet Connector (36)<br />
Conventional<br />
<strong>HVLP</strong><br />
Air Inlet Connector (36)<br />
Air Regulator (24)<br />
SKU 93305<br />
For technical questions, please call 1-800-444-3353;<br />
Page 7<br />
Troubleshooting section at end of manual.
IMPORTANT: Before using for the first time, the spray gun must be cleaned<br />
using a solvent based thinner. If not removed, the red oil used by the<br />
manufacturer for testing and corrosion protection may contaminate paint.<br />
IMPORTANT: The Spray Gun must be cleaned immediately after use.<br />
Improper cleaning is a common reason for the Spray Gun not to work.<br />
Fan direction and Pattern Adjustment<br />
Fan direction<br />
To change the direction of the fan from horizontal to vertical, loosen the Lock Ring and<br />
turn the Air Cap (45) 90 degrees. After the adjustment, tighten the Lock Ring by hand.<br />
See FIGURE 4 below.<br />
FIGURE 4<br />
Lock Ring<br />
Preparation<br />
Note: Proper paint material mixture helps to ensure less problems. Be sure to follow the manufacturer’s<br />
directions. Most materials will spray readily if they are thinned properly.<br />
General tips for Preparation:<br />
1. Mix and thin the paint/materials thoroughly according to the manufacturer’s<br />
directions.<br />
2. Carefully strain the paint/material through a paint strainer or piece of cheese cloth.<br />
3. Remove (un-thread) the Cup (16) from the Unit. Fill the Cup (16) to approximately 3/4<br />
full. Thread it back onto the unit. Connect the Fluid Hose (40) form the Fluid Outlet<br />
(39) to the Fluid Inlet on the Spray Gun.<br />
4. Start the air compressor.<br />
5. To adjust the spray pattern, set up a piece of scrap material to practice on. While<br />
practicing on the scrap material, check to see that the material you are spraying has<br />
the appropriate consistency. If it appears to thin, add a very small amount of thinner<br />
(not included). BE CAREFUL when thinning. Proceed slowly, adding very minimal<br />
amounts. NEVER exceed the manufacturer’s thinning recommendations.<br />
Air Cap<br />
Horizontal Fan<br />
Vertical Fan<br />
SKU 93305<br />
For technical questions, please call 1-800-444-3353;<br />
Page 8<br />
Troubleshooting section at end of manual.
IMPORTANT: Before using for the first time, the spray gun must be cleaned<br />
using a solvent based thinner. If not removed, the red oil used by the<br />
manufacturer for testing and corrosion protection may contaminate paint.<br />
IMPORTANT: The Spray Gun must be cleaned immediately after use.<br />
Improper cleaning is a common reason for the Spray Gun not to work.<br />
Pattern Adjustment<br />
Warning!! Never exceed the Maximum Inlet PSI of 43 PSI.<br />
1. Adjust the Gauge (38) pressure to 10-30 PSI using the Air Regulator (24). If you need<br />
to reduce the air pressure for specific areas, adjust the Air Adjustment Knob (73).<br />
2. To set the pattern size specific to the job, use the Pattern Control Knob (57) (see FIG-<br />
URE 1 on page 6). By turning it counterclockwise (all the way open), the pattern will<br />
flatten. Turn the Pattern Control Knob (57) clockwise for a round pattern.<br />
See FIGURE 5 below.<br />
3. Close the Fluid Control Knob (67) and fully open the Fluid Flow Knob (11). See FIGURE<br />
1 on page 6.<br />
4. After setting up a piece of scrap material, squeeze the Trigger (78) in short bursts while<br />
turning the Fluid Control Knob (67) counterclockwise and observe the spray patterns<br />
until you see the pattern you want. Also, look at the pattern for consistency. Too much<br />
air may cause the spray to come out too fine. Reduce the air pressure or allow more<br />
material to come out by opening the Fluid Control Knob (67). If the spray appears too<br />
thick (you see globs of paint), close down the Fluid Control Knob (67) slowly, checking<br />
the mixture after each adjustment.<br />
See FIGURE 6 below.<br />
Too Coarse<br />
(Tighten)<br />
FIGURE 5<br />
Flat/Open Round/Closed<br />
FIGURE 6<br />
Correct<br />
Too Fine<br />
(Loosen)<br />
SKU 93305<br />
For technical questions, please call 1-800-444-3353;<br />
Page 9<br />
Troubleshooting section at end of manual.
IMPORTANT: Before using for the first time, the spray gun must be cleaned<br />
using a solvent based thinner. If not removed, the red oil used by the<br />
manufacturer for testing and corrosion protection may contaminate paint.<br />
IMPORTANT: The Spray Gun must be cleaned immediately after use.<br />
Improper cleaning is a common reason for the Spray Gun not to work.<br />
Techniques<br />
Note: Before spraying, mask all objects you do not want sprayed and lay cloths (not included)<br />
on the floors.<br />
1. Always keep the gun at right angles to the workpiece (See FIGURE 7). Pull the Trigger<br />
(78) slowly and move the Spray Gun in parallel strokes to the object being painted.<br />
Keep the distance from the object being painted at 6” to 9”. This may slightly differ<br />
depending on the flow adjustment and the material being sprayed. Do not stop the<br />
gun movement while spraying. If you stop the gun for even just a slight pause while<br />
spraying, the paint will build up and run down the workpiece.<br />
2. To ensure you don’t allow paint to build up, start moving the Spray Gun before you<br />
Squeeze the Trigger (78). When you are finished spraying, release the Trigger (78)<br />
before you stop moving the Spray Gun. Doing so will eliminate distinct overlaps,<br />
producing a blended (feathered) affect. See FIGURE 8 below.<br />
Begin<br />
Stroke<br />
Incorrect<br />
Correct (90 o )<br />
Squeeze<br />
Trigger (78)<br />
FIGURE 7<br />
FIGURE 8<br />
(Top View)<br />
(Heavier coat on one<br />
side, uneven coverage)<br />
(Even coverage)<br />
Release<br />
Trigger (78)<br />
End<br />
Stroke<br />
Note: The speed of the stroke, the adjustment of the Fluid Control Knob (67), and the distance<br />
from the workpiece, will determine how much paint is being applied. To get the best<br />
results, try to apply two thin coats of paint versus one thick coat.<br />
3. Clean out the gun thoroughly after EVERY use, according to the instructions<br />
found on the next page.<br />
SKU 93305<br />
For technical questions, please call 1-800-444-3353;<br />
Page 10<br />
Troubleshooting section at end of manual.
Maintenance<br />
SOLVENT SELECTION<br />
Always follow the paint manufacturer’s recommendations for cleaning,<br />
solvent type, and disposing of used solvent.<br />
Note: Due to the viscosity of latex and other water-based paints, they are not recommended<br />
for use with this or other <strong>HVLP</strong> (High Volume Low Pressure) sprayers.<br />
Oil Based Paints: Use mineral spirits.<br />
IF A FLAMMABLE SOLVENT NEEdS TO BE USEd, AdHERE TO THE FOLLOWING:<br />
After each use:<br />
1. Follow all of the solvent manufacturer’s clean up instructions and<br />
safety precautions at all times.<br />
2. Always flush the Spray Gun a full hose length from the air compressor.<br />
3. If collecting flushed solvents into a metal container, transfer into a larger<br />
nonmetal container, and flush the metal container.<br />
4. Work far away from any ignition sources in a vapor free area.<br />
1. Empty the Paint Cup (16) and clean it with the solvent.<br />
2. Fill the Paint Cup (16) with solvent and spray it through the Gun into a container, while<br />
shaking the gun. Once the Paint Cup (16) is empty, repeat the process until the solvent<br />
comes out clean.<br />
disconnect from the air source. After disconnecting, be aware that air pressure<br />
may still remain in the Spray Gun. Point the Gun into the spent solvent container and<br />
squeeze the Trigger again to make sure no air remains.<br />
3. Remove the Air Cap and soak it in solvent until it is clean. Use an old toothbrush and<br />
toothpicks to remove any material. do not use metal objects to clean the Air Cap<br />
or you may damage the drilled passages. Inspect the fluid needle and make sure<br />
it is not bent. If it is bent, have it replaced by a certified service technician.<br />
Warning!! Do not immerse the Spray Gun Body in solvent!<br />
4. Use the appropriate solvent (depending on the material sprayed) to wipe down the Gun<br />
body.<br />
5. Always lubricate the Spray Gun after cleaning. You may use a non-silicon oil or a light<br />
lubricant on all threaded connections prior to storing the unit.<br />
6. disposal: After cleaning your Spray Gun, properly dispose of your cleaning solutions<br />
according to the solution manufacturer’s direction and local hazardous waste<br />
standards.<br />
For technical questions, please call 1-800-444-3353;<br />
SKU 93305 Page 11<br />
Troubleshooting section at end of manual.
Parts List<br />
Part description Part description<br />
1 Handle 40 Fluid Hose<br />
2 Safety Valve 41 Air Hose (Red)<br />
3 Lock Nut 42 Ring<br />
4 Spring 43 Lock Ring<br />
5 Valve 44 Gasket<br />
6 Valve Gasket 45 Air Cap Set<br />
7 Valve Seat 46 Fluid Nozzle<br />
8 Connector 47 Seat<br />
9 Screw 48 Sealing Gasket<br />
10 Nut 49 Packing Nut<br />
11 Fluid Flow Knob 50 Sealing Screw<br />
12 Spring 51 Gasket<br />
13 Cap 52 Gun Body<br />
14 Suction Tube 53 Needle<br />
15 Gasket 54 Needle Adapter<br />
16 Cup 55 Spring<br />
17 Rivet 56 Fixed Screw<br />
18 Gasket 57 Pattern Control Knob<br />
19 Tube 58 Rivet<br />
20 Screw 59 Gasket<br />
21 Spring 60 Sealing Screw<br />
22 Rivet (Qty. 2) 61 Adjusting Level<br />
23 E-clip 62 Valve Seat<br />
24* Air Regulator 63 Spring<br />
25* Lock Nut 64 Rivet<br />
26* Air Adjusting Seat 65 Air Adjusting Valve<br />
27* Spring Seat 66 O-ring<br />
28* Air Adjusting Seat 67 Fluid Control Knob<br />
27* Spring Seat 68 Gasket<br />
28* Air Adjusting Screw 69 E-clip<br />
29* Sealing Nut 70 Fan Adjusting Screw<br />
30* Sealing Gasket 71 Fan Adjusting Stopper<br />
31* Valve Gasket 72 O-ring<br />
32* Nut 73 Air Adjustment Knob<br />
33* Needle Seat 74 Rivet<br />
34* Air Needle 75 E-clip<br />
35* Spring 76 Trigger Stud<br />
36 Connector (Qty. 2) 77 Trigger Stud<br />
37* Gauge Seat 78 Trigger<br />
38 Gauge 79 Fluid Connector<br />
39 Fluid Outlet Valve 80 Air Inlet<br />
*Parts 24 through 35 and 37 are available as a kit.<br />
PLEASE REAd THE FOLLOWING CAREFULLY<br />
THE MANUFACTURER AND/OR DISTRIBUTOR HAS PROVIDED THE PARTS DIAGRAM IN THIS<br />
MANUAL AS A REFERENCE TOOL ONLY. NEITHER THE MANUFACTURER NOR DISTRIBUTOR MAKES<br />
ANY REPRESENTATION OR WARRANTY OF ANY KIND TO THE BUYER THAT HE OR SHE IS QUALI-<br />
FIED TO MAKE ANY REPAIRS TO THE PRODUCT OR THAT HE OR SHE IS QUALIFIED TO REPLACE<br />
ANY PARTS OF THE PRODUCT. IN FACT, THE MANUFACTURER AND/OR DISTRIBUTOR EXPRESSLY<br />
STATES THAT ALL REPAIRS AND PARTS REPLACEMENTS SHOULD BE UNDERTAKEN BY CERTIFIED<br />
AND LICENSED TECHNICIANS AND NOT BY THE BUYER. THE BUYER ASSUMES ALL RISK AND LIABIL-<br />
ITY ARISING OUT OF HIS OR HER REPAIRS TO THE ORIGINAL PRODUCT OR REPLACEMENT PARTS<br />
THERETO, OR ARISING OUT OF HIS OR HER INSTALLATION OF REPLACEMENT PARTS THERETO.<br />
For technical questions, please call 1-800-444-3353;<br />
SKU 93305 Page 12<br />
Troubleshooting section at end of manual.
40<br />
41<br />
Assembly Diagram<br />
NOTE: Some parts are listed and shown for illustration purposes only and are not available<br />
individually as replacement parts.<br />
For technical questions, please call 1-800-444-3353; REV 01/07<br />
SKU 93305 Page 13<br />
Troubleshooting section at end of manual.<br />
80
Problem 1:<br />
Troubleshooting<br />
Spray Pattern Diagnosis<br />
The Patterns below resemble symptoms of spray pattern problems. Please refer to<br />
the accompanying possible problems if you are experiencing similar difficulties. The<br />
solution to each problem follows the problem in parentheses.<br />
1. The Pattern Control Knob (57) is partially closed. (Open Pattern Control Knob (57).)<br />
2. The material is too thick. (Thin material according to the manufacturer’s instructions.)<br />
3. The air pressure is too low. (Increase air pressure. Make sure air pressure feeding into<br />
the pot is within the proper range (30-43 PSI) & air pressure as shown on the Gauge (38)<br />
is within the proper range (10-30 PSI).)<br />
Problem 2:<br />
1. High air pressure. (Reduce air pressure at gun.)<br />
2. Not enough fluid. (Increase fluid.)<br />
3. Pattern Control Knob (57) open too much. (Partially close Pattern Control Knob (57).)<br />
Problem 3:<br />
1. Air Cap plugged. (Clean the Air Cap.)<br />
2. Air cap loose or dirty seat. (Clean and tighten.)<br />
3. Dried material on fluid tip. (Use a nonmetallic point to clean the Air Cap.)<br />
Problem 4:<br />
1. Dirt on one side of the fluid tip. (Clean the fluid tip.)<br />
2. Holes on one side of the Air cap are plugged. (Clean the Air cap with a nonmetallic<br />
point.)<br />
If the steps above do not solve the problem or if the repairs involved are too<br />
complex, contact a qualified technician.<br />
SKU 93305 For technical questions, please call 1-800-444-3353. Page 14
Troubleshooting (continued)<br />
Problem Cause Solution<br />
Sputtering Spray 1. Low material level<br />
1. Refill<br />
2. Cup tipped too far<br />
2. Hold upright<br />
3. Clogged Air Vent<br />
3. Clean vent hole<br />
4. Loose fluid inlet connections 4. Tighten<br />
5. Dry or loose fluid needle 5. Lubricate and/or tighten<br />
Packing Nut<br />
6. Loose/damaged fluid tip/seat<br />
6. Adjust or replace<br />
Will Not Spray 1. No pressure at gun<br />
1. Check air hoses<br />
2. Fluid control not open enough 2. Open fluid control<br />
3. Fluid too thick<br />
3. Thin fluid or increase pressure<br />
(within Maximum range)<br />
Overspray 1. Improper application speed 1. Move moderately and parallel<br />
2. Improper distance from<br />
workpiece<br />
2. Adjust distance<br />
3. Too much pressure<br />
3. Reduce air pressure<br />
Fluid Tip Leakage 1. Dirty tip<br />
1. Clean<br />
2. Tight Packing Nut<br />
2. Loosen Packing Nut<br />
3. Broken fluid needle spring 3. Replace<br />
4. Worn or damaged tip<br />
4. Replace tip and/or needle<br />
Air Leaking from Air Cap 1. Dirty air valve/seat<br />
1. Clean<br />
2. Sticking air valve<br />
2. Lubricate<br />
3. Damaged air valve spring 3. Replace<br />
4. Worn/damaged air valve/seat<br />
5. Bent valve stem<br />
4. Replace<br />
5. Replace<br />
Fluid Leaking from Packing Nut 1. Packing Nut loose<br />
1. Tighten without restricting<br />
2. Packing worn or dry<br />
2. Replace or lubricate (nonsilicone)<br />
If the steps above do not solve the problem or if the repairs involved are too<br />
complex, contact a qualified technician.<br />
SKU 93305 For technical questions, please call 1-800-444-3353. Page 15
90 Day Warranty<br />
<strong>Harbor</strong> <strong>Freight</strong> <strong>Tools</strong> Co. makes every effort to assure that its products meet high quality<br />
and durability standards, and warrants to the original purchaser that this product is free<br />
from defects in materials and workmanship for the period of 90 days from the date of purchase.<br />
This warranty does not apply to damage due directly or indirectly, to misuse, abuse,<br />
negligence or accidents, repairs or alterations outside our facilities, criminal activity, improper<br />
installation, normal wear and tear, or to lack of maintenance. We shall in no event<br />
be liable for death, injuries to persons or property, or for incidental, contingent, special or<br />
consequential damages arising from the use of our product. Some states do not allow the<br />
exclusion or limitation of incidental or consequential damages, so the above limitation of<br />
exclusion may not apply to you. THIS WARRANTY IS EXPRESSLY IN LIEU OF ALL OTH-<br />
ER WARRANTIES, EXPRESS OR IMPLIED, INCLUDING THE WARRANTIES OF MER-<br />
CHANTABILITY AND FITNESS.<br />
To take advantage of this warranty, the product or part must be returned to us with transportation<br />
charges prepaid. Proof of purchase date and an explanation of the complaint must<br />
accompany the merchandise. If our inspection verifies the defect, we will either repair or<br />
replace the product at our election or we may elect to refund the purchase price if we cannot<br />
readily and quickly provide you with a replacement. We will return repaired products at<br />
our expense, but if we determine there is no defect, or that the defect resulted from causes<br />
not within the scope of our warranty, then you must bear the cost of returning the product.<br />
This warranty gives you specific legal rights and you may also have other rights which vary<br />
from state to state.<br />
3491 Mission Oaks Blvd. • PO Box 6009 • Camarillo, CA 93011 • (800) 444-3353<br />
REV 08c<br />
For technical questions, please call 1-800-444-3353;<br />
SKU 93305 Page 16<br />
Troubleshooting section at end of manual.


