5' 3-POINT ROUGH CUT MOWER - Harbor Freight Tools
5' 3-POINT ROUGH CUT MOWER - Harbor Freight Tools
5' 3-POINT ROUGH CUT MOWER - Harbor Freight Tools
Create successful ePaper yourself
Turn your PDF publications into a flip-book with our unique Google optimized e-Paper software.
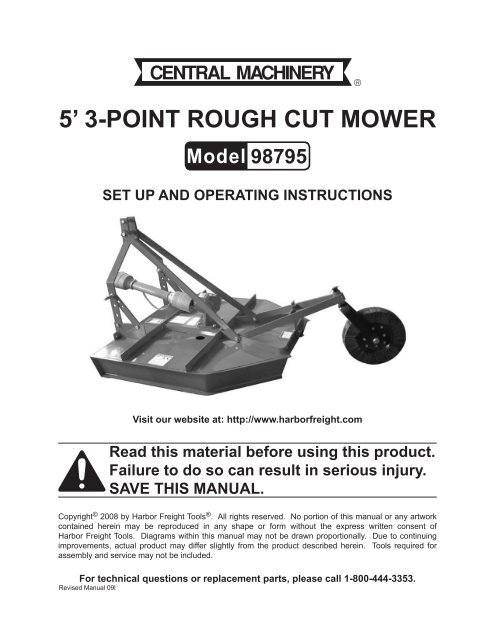
5’ 3-<strong>POINT</strong> <strong>ROUGH</strong> <strong>CUT</strong> <strong>MOWER</strong><br />
98795<br />
SET UP AND OPERATING INSTRUCTIONS<br />
Visit our website at: http://www.harborfreight.com<br />
Read this material before using this product.<br />
Failure to do so can result in serious injury.<br />
SAVE THIS MANUAL.<br />
Copyright © 2008 by <strong>Harbor</strong> <strong>Freight</strong> <strong>Tools</strong> ® . All rights reserved. No portion of this manual or any artwork<br />
contained herein may be reproduced in any shape or form without the express written consent of<br />
<strong>Harbor</strong> <strong>Freight</strong> <strong>Tools</strong>. Diagrams within this manual may not be drawn proportionally. Due to continuing<br />
improvements, actual product may differ slightly from the product described herein. <strong>Tools</strong> required for<br />
assembly and service may not be included.<br />
For technical questions or replacement parts, please call 1-800-444-3353.<br />
Revised Manual 09l
SAVE THIS MANUAL<br />
Keep this manual for the safety warnings<br />
and precautions, assembly, operating,<br />
inspection, maintenance and cleaning<br />
procedures. Write the product’s serial<br />
number in the back of the manual near the<br />
assembly diagram (or month and year of<br />
purchase if product has no number). Keep<br />
this manual and the receipt in a safe and<br />
dry place for future reference.<br />
IMPORTANT SAFETY<br />
INSTRUCTIONS<br />
In this manual, on the labeling,<br />
and all other information<br />
provided with this product:<br />
This is the safety alert<br />
symbol. It is used to alert<br />
you to potential personal<br />
injury hazards. Obey all<br />
safety messages that<br />
follow this symbol to avoid<br />
possible injury or death.<br />
DANGER indicates<br />
a hazardous<br />
situation which, if not<br />
avoided, will result in death or<br />
serious injury.<br />
WARNING<br />
indicates a<br />
hazardous situation which, if<br />
not avoided, could result in<br />
death or serious injury.<br />
CAUTION, used<br />
with the safety<br />
alert symbol, indicates a<br />
hazardous situation which, if<br />
not avoided, could result in<br />
minor or moderate injury.<br />
NOTICE is used to<br />
address practices<br />
not related to personal injury.<br />
CAUTION, without<br />
the safety alert<br />
symbol, is used to address<br />
practices not related to<br />
personal injury.<br />
When using<br />
Mowers, basic<br />
safety precautions should<br />
always be followed to reduce<br />
the risk of fire and personal<br />
injury, including the following:<br />
READ ALL INSTRUCTIONS<br />
Personal Safety<br />
1. Dress Properly - Do not wear loose<br />
clothing or jewelry. They can be<br />
caught in moving parts. Use steel<br />
toed footwear is recommended when<br />
working outdoors. Wear protective<br />
hair covering to contain long hair.<br />
2. Wear ANSI-approved safety<br />
goggles and heavy-duty<br />
work gloves. Use NIOSH<br />
approved face or dust mask if operation<br />
is dusty.<br />
3. Use ear protection during operation;<br />
sound levels over 85 dB can cause<br />
permanent hearing damage.<br />
4. Do not Overreach - Keep proper footing<br />
and balance at all times.<br />
5. Stay Alert - Watch what you are<br />
doing. Use common sense. Do not<br />
operate Mower when you are tired.<br />
6. Do not grasp the cutting<br />
blades.<br />
SKU 98795 For technical questions, please call 1-800-444-3353. Page 2
7.<br />
Keep hands and feet away<br />
from cutting area.<br />
8. Keep hands away from<br />
blades.<br />
9. Wear thick jeans and<br />
steel-toed work boots to<br />
help prevent injury<br />
caused by flying debris.<br />
Mower Use and Care<br />
1. Avoid Dangerous Environment<br />
- Do not use in damp or wet locations.<br />
2. Do not Use In Rain.<br />
3. Keep Children Away - All visitors<br />
should be kept at a distance of at<br />
least 20 yards from work area.<br />
4. When servicing use only identical<br />
replacement parts.<br />
5. Use Right Mower - Do not use the<br />
Mower for any job except that for<br />
which it is intended.<br />
6. Do not Force the Mower - It will do<br />
the job better and with less likelihood<br />
of injury at the rate for which it was<br />
designed. Do not exceed 3 MPH during<br />
use.<br />
7. Raise Mower, secure it in the upright<br />
position, and do not exceed 20 MPH<br />
during transport. Do not transport<br />
Mower on public roads.<br />
8. Store Idle Mowers Indoors - When<br />
not in use, Mowers should be stored<br />
indoors in a dry, locked-up place - out<br />
of reach of children.<br />
9. Maintain Mower With Care - Keep<br />
cutting edge sharp and clean for best<br />
performance and to reduce the risk of<br />
injury. Follow instructions for lubricating<br />
and changing accessories. Keep<br />
surfaces dry, clean, and free from oil<br />
and grease.<br />
10. Before use of the Mower. Check for<br />
alignment of moving parts, binding<br />
of moving parts, breakage of parts,<br />
mounting, and any other condition<br />
that may affect its operation. A guard<br />
or other part that is damaged should<br />
be properly repaired or replaced by a<br />
qualified technician.<br />
11. Disconnect the Mower from the<br />
tractor when not in use, before servicing,<br />
and when changing accessories<br />
such as blades, and the like.<br />
12. Keep guards in place and in working<br />
order.<br />
13. Keep blades sharp.<br />
14. Do not use this Mower for edging<br />
operations. Debris may be forcefully<br />
thrown out resulting in serious<br />
injury.<br />
General Safety<br />
1. Read and follow all instructions in the<br />
tractor manual that the Mower will be<br />
connected to.<br />
2. Keep this manual in the storage tube<br />
that is connected to the mower, so<br />
that it will not get lost.<br />
3. Use a tractor equipped with a<br />
R.O.P.S. (Roll-Over Protective Structure)<br />
and wear the seat belt.<br />
4. Do not allow riders on tractor or<br />
mower.<br />
SKU 98795 For technical questions, please call 1-800-444-3353. Page 3
5. Clear area of stones and debris before<br />
mowing.<br />
6. Use on level lawns only. Do not use<br />
Mower for other than intended use.<br />
7. Do not install on a tractor over 40 HP.<br />
Do not exceed tractor PTO of 540<br />
RPM at the drive shaft.<br />
8. Do not stand between the tractor<br />
and the mower when it is running.<br />
The P.T.O. shaft spins rapidly and<br />
can grab loose clothing or equipment<br />
causing serious personal injury. Do<br />
not operate this product if the<br />
P.T.O. shield is damaged.<br />
9. CARBON MONOXIDE<br />
HAZARD<br />
Using an engine indoors<br />
CAN KILL YOU IN<br />
MINUTES.<br />
Tractor exhaust contains carbon<br />
monoxide. This is a poison you<br />
cannot see or smell.<br />
11. Do not operate Mower without all<br />
guards and shields in place.<br />
12. Maintain labels and nameplates on<br />
the Mower. These carry important<br />
safety information. If unreadable or<br />
missing, contact <strong>Harbor</strong> <strong>Freight</strong> <strong>Tools</strong><br />
for a replacement.<br />
13. The warnings, precautions, and instructions<br />
discussed in this instruction<br />
manual cannot cover all possible conditions<br />
and situations that may occur.<br />
It must be understood by the operator<br />
that common sense and caution are<br />
factors which cannot be built into this<br />
product, but must be supplied by the<br />
operator.<br />
SAVE THESE<br />
INSTRUCTIONS.<br />
NEVER use inside a barn or garage,<br />
EVEN IF doors and windows are<br />
open.<br />
Only use OUTSIDE and far away<br />
from windows, doors, and vents.<br />
10. Professional applications must meet<br />
OSHA standards.<br />
SKU 98795 For technical questions, please call 1-800-444-3353. Page 4
Tractor<br />
Requirements<br />
Recommended<br />
Operating Speed<br />
SPECIFICATIONS<br />
P.T.O. Shaft Type<br />
P.T.O. Speed<br />
Minimum 20 HP<br />
Maximum 40 HP<br />
1.5 to 3 MPH<br />
1-3/8” Diameter 6-spline<br />
Shaft<br />
Maximum 540 RPM<br />
Driveline Size ASAE Category 3<br />
Product Drive Ratio 1:2.83<br />
Blade<br />
Cutting Width 57-1/4”<br />
23-3/8” Long blade<br />
sharpened to a 1/32”<br />
edge<br />
Cutting Height 3/4” to 4-3/4”<br />
Hitch Type<br />
Gearbox Lubrication<br />
Belt Requirements<br />
Category 1, 3-Point<br />
Hitch<br />
SAE 90 EP Oil<br />
1/2” wide V-belts<br />
UNPACKING<br />
When unpacking, check to make sure<br />
that the item is intact and undamaged. If<br />
any parts are missing or broken, please<br />
call <strong>Harbor</strong> <strong>Freight</strong> <strong>Tools</strong> at the number<br />
shown on the cover of this manual as soon<br />
as possible.<br />
Assembly<br />
1. Assemble the Mower on a firm, level<br />
surface.<br />
2. Connect the right Side Bar (31) to the<br />
Support Bar (39) using a Draw Pin<br />
(35) Flat Washer (36), Lock Washer<br />
(37) and Nut (38). The Support Bar<br />
has one hole punched larger than the<br />
other. The larger hole fastens with the<br />
Draw Pin. The Side Bar and Support<br />
Bar should be fastened to the outside<br />
of the lift arm bracket, as shown<br />
above.<br />
SET UP INSTRUCTIONS<br />
Read the ENTIRE IMPORTANT<br />
SAFETY INSTRUCTIONS<br />
section at the beginning of this<br />
manual including all text under<br />
subheadings therein before set<br />
up or use of this product.<br />
Note: For additional information regarding<br />
the parts listed in the following pages,<br />
refer to the Assembly Diagram near<br />
the end of this manual.<br />
3. Remove the two Nuts (5) and Washers<br />
(3, 4) for the Wheel Assembly<br />
(23), but leave the Bolts (6) in place.<br />
SKU 98795 For technical questions, please call 1-800-444-3353. Page 5
Lift Arm Brace (24)<br />
f. the Flat Washer (3) and Lock Washer<br />
(4)<br />
11, 12, 13<br />
24<br />
31<br />
10<br />
10<br />
4.<br />
Attach both Lift Arm Braces (24) by<br />
sliding them over the two A-frame<br />
tailwheel bolts. Start the Nuts on the<br />
bolts, but do not tighten them. Allow<br />
the lift arm braces to rotate forward<br />
and rest against the Lift Arm Brace<br />
(24).<br />
6.<br />
31<br />
Pull the right side lift arm to the outside<br />
of the lift arm bracket and fasten<br />
with the Nut (13).<br />
7. Place the Sleeve (14) between the<br />
arms on the Hitch Bracket (16) and<br />
attach it to the holes at the top of the<br />
assembly with Bolt (7). Secure with<br />
Washers (3, 4) and Nut (5).<br />
8. Tighten all hardware.<br />
Attaching the Wheel.<br />
9. Raise and secure the back of the<br />
Mower.<br />
5. Insert Mounting Bolt (10) through<br />
a. the hole in the left side Lift Arm<br />
Brace,<br />
b. the lower hole in the left side lift arm,<br />
c. the Spacer (40),<br />
d. the lower holes in the right side lift<br />
arm,<br />
e. the right side lift arm brace.<br />
10. Attach the Wheel (20) to the Wheel<br />
Assembly (23) with Lock Pin (53) and<br />
Nut (57).<br />
11. Tighten all hardware.<br />
12. Lubricate according to directions in<br />
the “Maintenance and Servicing” section<br />
before first use.<br />
Add SAE 90 EP oil to the gearbox of the<br />
Mower before first use. See directions<br />
under the “Maintenance and Servicing”<br />
section for directions.<br />
SKU 98795 For technical questions, please call 1-800-444-3353. Page 6
Attaching the Mower to the<br />
Tractor<br />
TO PREVENT<br />
SERIOUS INJURY<br />
OR DEATH. Back the tractor<br />
up to the mower so that the<br />
lower draft arms are in<br />
alignment with the mower lift<br />
pins. Stop the engine, lock the<br />
brakes, place the tractor in<br />
park, and remove the key from<br />
the ignition.<br />
1. Read the tractor manufacturer’s directions<br />
for P.T.O. connections to the<br />
tractor.<br />
2. Shorten or remove the tractor drawbar<br />
so it will not interfere with the up<br />
and down movement of the mower.<br />
3. Connect the tractor and stabilizer<br />
bars to the lower lift pins. Adjust the<br />
top link so it will connect to the top<br />
holes in the A-Frame or into the holes<br />
in the floating top link.<br />
4. Slide yoke onto the tractor P.T.O.<br />
shaft.<br />
5. Move yoke back and forth until locking<br />
pin has engaged on the P.T.O.<br />
shaft groove. When attaching the<br />
driveline yoke to the tractor P.T.O.<br />
shaft; the spring activated locking<br />
pin must seat properly in the tractor<br />
P.T.O. shaft groove.<br />
6. Secure the P.T.O. shaft guard with the<br />
chains connected to the main unit.<br />
7. Use stabilizer bars or sway blocks<br />
appropriate to the tractor to prevent<br />
side sway of the mower.<br />
OPERATING INSTRUCTIONS<br />
Read the ENTIRE IMPORTANT<br />
SAFETY INFORMATION section<br />
at the beginning of this manual<br />
including all text under<br />
subheadings therein before set<br />
up or use of this product.<br />
1. The gearbox of the Mower must be<br />
filled with a SAE 90 EP oil before<br />
first use of the Mower.<br />
2. Before operating the Mower, put on<br />
ANSI-approved safety goggles and<br />
other safety gear. Safety goggles<br />
and other safety gear are sold separately.<br />
3. Attach the Mower to the tractor.<br />
4. Raise the Mower and brace it up<br />
securely before adjusting the wheel<br />
for height of grass desired. Always<br />
brace the Mower when it is raised;<br />
hydraulic systems can fail causing<br />
the mower to fall onto the operator.<br />
5. Start the tractor and allow it to warm<br />
up and achieve idle speed.<br />
6. To transport the Mower, disengage<br />
the P.T.O. and raise it to full transport<br />
height before moving to the mowing<br />
area.<br />
7. Lower the Mower. Reduce engine<br />
speed and engage the tractor P.T.O.<br />
Gradually increase the engine speed<br />
to develop full P.T.O. speed of 540<br />
RPM.<br />
8. Enter the area to be cut with the<br />
cutter operating at P.T.O. speed. If<br />
it becomes necessary to regulate<br />
engine speed during operation do so<br />
gradually.<br />
SKU 98795 For technical questions, please call 1-800-444-3353. Page 7
9. This Mower is only recommended for<br />
light duty use on level lawns. Cutting<br />
speed will depend upon the height,<br />
type, and density of the grass to be<br />
cut. Tall or thick grass should be cut<br />
at low speed, while short, thin grass<br />
can be cut faster. Grass should be<br />
cut when dry; wet grass will stick to<br />
the Mower and clog it up.<br />
10. If the mower contacts a hidden obstruction,<br />
immediately stop operation.<br />
Raise the mower, turn off the tractor,<br />
and disconnect the drive shaft. Secure<br />
the mower in the upright position.<br />
Verify that the mower is not<br />
damaged before continuing.<br />
IN ORDER TO AVOID<br />
PERSONAL INJURY OR<br />
PROPERTY DAMAGE. When<br />
attempting to stop a tractor<br />
which does not have a live<br />
P.T.O, the momentum created<br />
by the blades of a mower can<br />
cause the tractor to be<br />
pushed forward. Do not<br />
operate this mower unless the<br />
tractor has a live or<br />
independent P.T.O.<br />
11. When finished, move the Mower to<br />
the intended storage area, and allow<br />
the P.T.O. to rotate to a stop before<br />
getting off the tractor.<br />
12. To prevent accidents, disconnect<br />
the mower from the tractor after use.<br />
Clean, then store the appliance indoors<br />
out of children’s reach.<br />
SKU 98795 For technical questions, please call 1-800-444-3353. Page 8
MAINTENANCE AND<br />
SERVICING<br />
Procedures not specifically<br />
explained in this manual<br />
must be performed only by a<br />
qualified technician.<br />
TO PREVENT<br />
SERIOUS INJURY<br />
FROM ACCIDENTAL<br />
OPERATION:<br />
Turn the tractor “OFF” and<br />
disconnect the mower before<br />
performing any inspection,<br />
maintenance, or cleaning<br />
procedures.<br />
TO PREVENT SERIOUS<br />
INJURY FROM TOOL<br />
FAILURE:<br />
Do not use damaged<br />
equipment. If abnormal noise<br />
or vibration occurs, have the<br />
problem corrected before<br />
further use.<br />
Cleaning, Maintenance, and<br />
Lubrication<br />
1. BEFORE EACH USE, inspect the<br />
general condition of the Mower.<br />
Check for loose screws, misalignment<br />
or binding of moving parts, cracked or<br />
broken parts, and any other condition<br />
that may affect its safe operation.<br />
2. AFTER USE, clean external surfaces<br />
of the appliance with clean cloth.<br />
Lubrication<br />
1. The Wheel axle (9), Blade Spindles<br />
and U-joints must be lubricated with<br />
white lithium grease before each use<br />
and after every eight hours of operation.<br />
Additional lubrications points<br />
are indicated in the following diagram.<br />
Filling the Gearbox<br />
2. THE GEARBOX OF THE <strong>MOWER</strong><br />
MUST BE FILLED WITH SAE 90 EP<br />
OIL BEFORE FIRST USE.<br />
3.<br />
Filler<br />
Plug<br />
Test<br />
Plug<br />
Place the Mower on a flat, level surface.<br />
4. Place an approved container underneath<br />
the Test Plug.<br />
5. Remove the Filler and Test Plugs.<br />
6. Add oil into the Filler Plug until it<br />
begins to run out the Test Plug.<br />
Replace the Test Plug, clean up any<br />
spilled oil, and replace the Filler Plug.<br />
7. Check the gearbox oil level after every<br />
eight hours of operation.<br />
SKU 98795 For technical questions, please call 1-800-444-3353. Page 9
Wheel Lubrication<br />
8. The Hex Bolt (9) and Flat Plate (52)<br />
of the Wheel should be lubricated<br />
before each use and after every eight<br />
hours of operation with white lithium<br />
grease.<br />
before each use and after eight hours<br />
of operation.<br />
Cap (58)<br />
(removed)<br />
Driveshaft Lubrication<br />
Grease<br />
Fitting<br />
9.<br />
The U-joints at each end of the drive<br />
shaft must be lubricated before each<br />
use and after eight hours of operation.<br />
Blade Removal and Installation<br />
1. With the Mower disconnected from<br />
the tractor, position it so that the<br />
blades are exposed and secure the<br />
Mower in place.<br />
2. Prevent blade rotation by securing it<br />
above the blade with a wrench and<br />
remove the Nut (19).<br />
10. Periodically, the metal telescoping<br />
tubes inside the tractor end of<br />
the driveshaft must be lubricated.<br />
Spread white lithium grease evenly<br />
around the inside of the driveshaft.<br />
3. Have a qualified technician sharpen<br />
both sides of the cutting surface<br />
of the blade to a 1/32” blunt point.<br />
Sharpening both edges of the blade<br />
maintains blade balance. Do not<br />
sharpen the back edges of the blade.<br />
4. Replace the blade and secure with<br />
the nut.<br />
Blade Lubrication<br />
11. The blade can be lubricated through<br />
the hole on the main deck. Remove<br />
the Cap (58) on the deck of the<br />
Mower and rotate the Blade Holder<br />
(26) until the grease fitting is accessible.<br />
Both spindles must be lubricated<br />
REV 09l<br />
SKU 98795 For technical questions, please call 1-800-444-3353. Page 10
Troubleshooting<br />
Problem Possible Causes Likely Solutions<br />
Uneven cutting 1. Slow blade tip speed.<br />
1. Operate P.T.O. at 540 RPM.<br />
Grass discharges from<br />
mower unevenly or in<br />
bunches<br />
Heavy vibration<br />
Gearbox overheating<br />
P.T.O. contacts mower<br />
when raised<br />
Mower requires<br />
excessive power<br />
2. Dull blade tips.<br />
3. Worn blade tips.<br />
4. Mowing too fast.<br />
5. Blade loose on spindle.<br />
6. Conditions are too wet for mowing.<br />
1. Grass is too high or coarse.<br />
2. Grass is wet.<br />
1. Blade speed too fast.<br />
2. Bent or broken blade.<br />
3. Unbalanced blade.<br />
4. Debris caught on blade.<br />
1. Lubricant is low.<br />
2. Excessive material build-up around<br />
gearbox.<br />
1. Raising mower too high.<br />
2. Incorrect adjustment of tractor top<br />
link.<br />
1. Cutting too quickly.<br />
2. Hitting ground.<br />
3. Worn blades.<br />
4. Tractor too small.<br />
5. Grass wet.<br />
2. Sharpen blades.<br />
3. Replace blades.<br />
4. Slow down.<br />
5. Tighten blade nut.<br />
6. Allow grass to dry before mowing.<br />
1. Slow the tractor’s speed. Raise<br />
blade for first pass and lower for<br />
second pass. Try mowing at a 90°<br />
angle to the first cut.<br />
2. Allow grass to dry before mowing.<br />
1. Do not exceed 540 RPM P.T.O.<br />
2. Replace blade.<br />
3. Grind blade uniformly.<br />
4. Stop operation, disconnect mower,<br />
and clean blade.<br />
1. Fill gearbox.<br />
2. Clean gearbox.<br />
1. Do not raise mower as high.<br />
2. Adjust top link or lift stops.<br />
1. Slow tractor down.<br />
2. Raise mower deck.<br />
3. Sharpen or replace blades.<br />
4. Use at least a 20 HP tractor.<br />
5. Allow grass to dry before mowing.<br />
Follow all safety precautions whenever diagnosing or servicing the<br />
appliance. Disconnect power supply before service.<br />
PLEASE READ THE FOLLOWING CAREFULLY<br />
THE MANUFACTURER AND/OR DISTRIBUTOR HAS PROVIDED THE PARTS LIST AND ASSEMBLY<br />
DIAGRAM IN THIS MANUAL AS A REFERENCE TOOL ONLY. NEITHER THE MANUFACTURER OR<br />
DISTRIBUTOR MAKES ANY REPRESENTATION OR WARRANTY OF ANY KIND TO THE BUYER THAT<br />
HE OR SHE IS QUALIFIED TO MAKE ANY REPAIRS TO THE PRODUCT, OR THAT HE OR SHE IS<br />
QUALIFIED TO REPLACE ANY PARTS OF THE PRODUCT. IN FACT, THE MANUFACTURER AND/<br />
OR DISTRIBUTOR EXPRESSLY STATES THAT ALL REPAIRS AND PARTS REPLACEMENTS SHOULD<br />
BE UNDERTAKEN BY CERTIFIED AND LICENSED TECHNICIANS, AND NOT BY THE BUYER. THE<br />
BUYER ASSUMES ALL RISK AND LIABILITY ARISING OUT OF HIS OR HER REPAIRS TO THE<br />
ORIGINAL PRODUCT OR REPLACEMENT PARTS THERETO, OR ARISING OUT OF HIS OR HER<br />
INSTALLATION OF REPLACEMENT PARTS THERETO.<br />
SKU 98795 For technical questions, please call 1-800-444-3353. Page 11
PARTS LIST<br />
Part Description Qty<br />
1 Cotter Pin 5x50 1<br />
2 Hex Head Bolt M16x45 10<br />
3 Flat Washer 14<br />
4 Lock Washer 14<br />
5 Hex Nut M16 14<br />
6 Hex Head Bolt M16x70 2<br />
7 Bolt M16x130 1<br />
8 Hex Nut M16 1<br />
9 Hex Bolt M24x180 1<br />
10 Mounting Bolt M14x130 1<br />
11 Flat Washer 1<br />
12 Lock Washer 1<br />
13 Nut M14 1<br />
14 Sleeve 1<br />
15 U-Bracket 1<br />
16 Hitch Bracket 1<br />
17 Hex Nut 2<br />
18 Flat Washer 2<br />
19 Nut M24 1<br />
20 Tail Wheel 1<br />
21 Deck 1<br />
22 Lock Washer 2<br />
23 Wheel Assembly 1<br />
24 Lift Arm Brace 2<br />
25 Gear Box 1<br />
26 Blade Holder 1<br />
27 Adjusting Bar 1<br />
28 Blade 2<br />
29 Bolt 2<br />
30 Wheel Yoke 1<br />
31 Side Bar 2<br />
PARTS LIST<br />
Part Description Qty<br />
32 P.T.O. 1<br />
33 Hairpin 1<br />
34 Pin 1<br />
35 Draw Pin 2<br />
36 Flat Washer 2<br />
37 Lock Washer 2<br />
38 Nut M22 2<br />
39 Support Bar 2<br />
40 Sleeve 1<br />
41 Flat Washer 1<br />
42 Carriage Bolt M12x30 4<br />
43 Link Plate 1<br />
44 Flat Washer 4<br />
45 Lock Washer 4<br />
46 Nut M12 4<br />
47 Chain 24<br />
48 Chain Plate 1<br />
49 Bolt M6x25 2<br />
50 Chain Rod 1<br />
51 Lock Nut M6 2<br />
52 Flat Plate 1<br />
53 Lock Pin 1<br />
54 Bolt M10x35 2<br />
55 Flat Washer 2<br />
56 Lock Washer 2<br />
57 Nut 2<br />
58 Cap 1<br />
59 Lock Washer 1<br />
60 Bolt M12x85 1<br />
61 Lock Nut M12 1<br />
Record Product’s Serial Number Here:<br />
Note: If product has no serial number, record month and year of purchase instead.<br />
Note: Some parts are listed and shown for illustration purposes only, and are not available<br />
individually as replacement parts.<br />
SKU 98795 For technical questions, please call 1-800-444-3353. Page 12
ASSEMBLY DIAGRAM<br />
SKU 98795 For technical questions, please call 1-800-444-3353. Page 13
90 Day Warranty<br />
<strong>Harbor</strong> <strong>Freight</strong> <strong>Tools</strong> Co. makes every effort to assure that its products meet high quality<br />
and durability standards, and warrants to the original purchaser that this product is free<br />
from defects in materials and workmanship for the period of 90 days from the date of<br />
purchase. This warranty does not apply to damage due directly or indirectly, to misuse,<br />
abuse, negligence or accidents, repairs or alterations outside our facilities, criminal<br />
activity, improper installation, normal wear and tear, or to lack of maintenance. We<br />
shall in no event be liable for death, injuries to persons or property, or for incidental,<br />
contingent, special or consequential damages arising from the use of our product.<br />
Some states do not allow the exclusion or limitation of incidental or consequential<br />
damages, so the above limitation of exclusion may not apply to you. THIS WARRANTY<br />
IS EXPRESSLY IN LIEU OF ALL OTHER WARRANTIES, EXPRESS OR IMPLIED,<br />
INCLUDING THE WARRANTIES OF MERCHANTABILITY AND FITNESS.<br />
To take advantage of this warranty, the product or part must be returned to us with<br />
transportation charges prepaid. Proof of purchase date and an explanation of the<br />
complaint must accompany the merchandise. If our inspection verifies the defect, we<br />
will either repair or replace the product at our election or we may elect to refund the<br />
purchase price if we cannot readily and quickly provide you with a replacement. We will<br />
return repaired products at our expense, but if we determine there is no defect, or that<br />
the defect resulted from causes not within the scope of our warranty, then you must<br />
bear the cost of returning the product.<br />
This warranty gives you specific legal rights and you may also have other rights which<br />
vary from state to state.<br />
3491 Mission Oaks Blvd. • PO Box 6009 • Camarillo, CA 93011 • (800) 444-3353<br />
SKU 98795 For technical questions, please call 1-800-444-3353. Page 14


