

vacuum pump - Harbor Freight Tools
vacuum pump - Harbor Freight Tools
vacuum pump - Harbor Freight Tools

Create successful ePaper yourself
Turn your PDF publications into a flip-book with our unique Google optimized e-Paper software.
<strong>vacuum</strong> <strong>pump</strong><br />
98074 1.2 CFM<br />
98076 2.5 CFM<br />
Set up And Operating Instructions<br />
®<br />
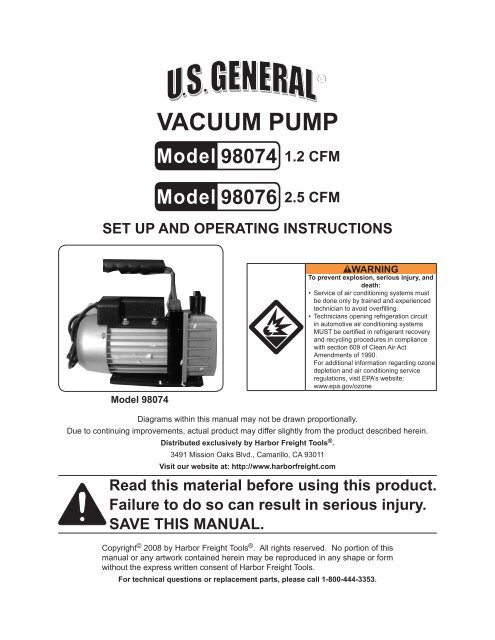
Model 98074<br />
WARNING<br />
To prevent explosion, serious injury, and<br />
death:<br />
• Service of air conditioning systems must<br />
be done only by trained and experienced<br />
technician to avoid overfilling.<br />
• Technicians opening refrigeration circuit<br />
in automotive air conditioning systems<br />
MUST be certified in refrigerant recovery<br />
and recycling procedures in compliance<br />
with section 609 of Clean Air Act<br />
Amendments of 1990.<br />
For additional information regarding ozone<br />
depletion and air conditioning service<br />
regulations, visit EPA’s website:<br />
www.epa.gov/ozone<br />
Diagrams within this manual may not be drawn proportionally.<br />
Due to continuing improvements, actual product may differ slightly from the product described herein.<br />
Distributed exclusively by <strong>Harbor</strong> <strong>Freight</strong> <strong>Tools</strong> ® .<br />
3491 Mission Oaks Blvd., Camarillo, CA 93011<br />
Visit our website at: http://www.harborfreight.com<br />
Read this material before using this product.<br />
Failure to do so can result in serious injury.<br />
Save this manual.<br />
Copyright © 2008 by <strong>Harbor</strong> <strong>Freight</strong> <strong>Tools</strong> ® . All rights reserved. No portion of this<br />
manual or any artwork contained herein may be reproduced in any shape or form<br />
without the express written consent of <strong>Harbor</strong> <strong>Freight</strong> <strong>Tools</strong>.<br />
For technical questions or replacement parts, please call 1-800-444-3353.
Save This Manual<br />
Keep this manual for the safety warnings<br />
and precautions, assembly, operating,<br />
inspection, maintenance and cleaning<br />
procedures. Write the product’s serial<br />
number in the back of the manual near the<br />
assembly diagram (or month and year of<br />
purchase if product has no number). Keep<br />
this manual and the receipt in a safe and<br />
dry place for future reference.<br />
Important SAFETY<br />
Information<br />
In this manual, on the labeling, and all other<br />
information provided with this product:<br />
This is the safety alert<br />
symbol. It is used to alert<br />
you to potential personal<br />
injury hazards. Obey all<br />
safety messages that<br />
follow this symbol to avoid<br />
possible injury or death.<br />
DANGER indicates<br />
a hazardous<br />
situation which, if not<br />
avoided, will result in death or<br />
serious injury.<br />
WARNING<br />
indicates a<br />
hazardous situation which, if<br />
not avoided, could result in<br />
death or serious injury.<br />
CAUTION, used<br />
with the safety<br />
alert symbol, indicates a<br />
hazardous situation which, if<br />
not avoided, could result in<br />
minor or moderate injury.<br />
NOTICE is used to<br />
address practices<br />
not related to personal injury.<br />
CAUTION, without<br />
the safety alert<br />
symbol, is used to address<br />
practices not related to<br />
personal injury.<br />
General Pneumatic & Power Tool<br />
Safety Warnings<br />
1.<br />
2.<br />
WARNING Read all safety warnings and<br />
instructions. Failure to follow the warnings<br />
and instructions may result in electric shock,<br />
fire and/or serious injury. Save all warnings<br />
and instructions for future reference.<br />
The term ″power tool″ in the warnings refers to<br />
your (corded), pneumatic power tool.<br />
Work area safety<br />
a. Keep work area clean and well lit.<br />
Cluttered or dark areas invite accidents.<br />
b. NEVER use this Vacuum Pump to<br />
vent refrigerants into the air. It is illegal<br />
to do so, harmful to the environment<br />
and poses a serious health risk.<br />
c. Do not operate power tools in<br />
explosive atmospheres, such as in<br />
the presence of flammable liquids,<br />
gases or dust. Power tools create<br />
sparks which may ignite the dust or<br />
fumes.<br />
d. Keep children and bystanders<br />
away while operating a power tool.<br />
Distractions can cause you to lose<br />
control.<br />
Electrical safety<br />
Power tool plugs must match the<br />
a.<br />
outlet. Never modify the plug in<br />
any way. Do not use any adapter<br />
plugs with grounded power tools.<br />
98074 & 98076 For technical questions, please call 1-800-444-3353.<br />
Page 2
3.<br />
4.<br />
Unmodified plugs and matching outlets<br />
will reduce risk of electric shock.<br />
NOTE: This Vacuum Pump has a<br />
3-prong grounded plug.<br />
b. Do not expose this Vacuum Pump<br />
to rain or wet conditions. Use in<br />
DRY locations only.<br />
c. Do not abuse the cord. Never use<br />
the cord for carrying, pulling or<br />
unplugging the power tool. Keep<br />
cord away from heat, oil, sharp<br />
edges or moving parts. Damaged<br />
or entangled cords increase the risk<br />
of electric shock.<br />
d. When operating this Vacuum Pump<br />
outdoors, use an extension cord<br />
suitable for outdoor use. Use of a<br />
cord suitable for outdoor use reduces<br />
the risk of electric shock.<br />
Personal safety<br />
a. Stay alert, watch what you are do-<br />
ing and use common sense when<br />
operating this Vacuum Pump. Do<br />
not use while you are tired or under<br />
the influence of drugs, alcohol<br />
or medication. A moment of inattention<br />
while operating power tools may<br />
result in serious personal injury.<br />
b. Use safety equipment. Always<br />
wear eye protection. Safety equipment<br />
such as dust mask, non-skid<br />
safety shoes, hard hat, or hearing<br />
protection used for appropriate conditions<br />
will reduce personal injuries.<br />
Power tool use and care<br />
1.<br />
2.<br />
b. Disconnect the plug from the<br />
power source before storing power<br />
tool. Such preventive safety measures<br />
reduce the risk of starting the<br />
Vacuum Pump accidently.<br />
c. Store this Vacuum Pump out of the<br />
reach of children and do not allow<br />
persons unfamiliar with this Vacuum<br />
Pump or these instructions to<br />
operate. Power tools are dangerous<br />
in the hands of untrained users.<br />
d. Maintain power tools. Check for<br />
any condition that may affect the<br />
Vacuum Pump’s operation. If damaged,<br />
have it repaired before use.<br />
Many accidents are caused by poorly<br />
maintained power tools.<br />
e. Use the Vacuum Pump in accor-<br />
dance with these instructions,<br />
taking into account the working<br />
conditions and the work to be performed.<br />
Use of this Vacuum Pump<br />
for operations different from those<br />
intended could result in a hazardous<br />
situation.<br />
f. Have your Vacuum Pump serviced<br />
by a qualified repair person. This<br />
will ensure that the safety of the<br />
Vacuum Pump is maintained.<br />
Specific Safety Warnings<br />
Avoid over filling. Do not service air<br />
conditioning systems improperly.<br />
Read entire manual before set up<br />
and/or use.<br />
a. Do not use this Vacuum Pump if<br />
the switch does not turn it on and<br />
off. Any tool that cannot be controlled<br />
with the switch is dangerous<br />
and must be repaired.<br />
3.<br />
4.<br />
Wear ANSI-approved safety goggles<br />
during set up and/or use.<br />
Certification is required by law for<br />
technicians opening refrigeration<br />
circuit.<br />
98074 & 98076 For technical questions, please call 1-800-444-3353.<br />
Page 3
5.<br />
6.<br />
7.<br />
8.<br />
9.<br />
10.<br />
Use in DRY locations only.<br />
DO NOT cover this unit. This Vacuum<br />
<strong>pump</strong> gets very hot when in use.<br />
Do not use near combustibles and let<br />
the unit cool down completely after<br />
using, and/or before moving or storage.<br />
Maintain labels and nameplates on<br />
the tool. These carry important safety<br />
information. If unreadable or missing,<br />
contact <strong>Harbor</strong> <strong>Freight</strong> <strong>Tools</strong> for a<br />
replacement.<br />
Do not leave this Vacuum Pump<br />
unattended when it is plugged into an<br />
electrical outlet. Turn off the Pump<br />
and unplug it from its electrical outlet<br />
before leaving.<br />
This product is not a toy. Keep it out<br />
of reach of children.<br />
People with pacemakers should<br />
consult their physician(s) before use.<br />
Electromagnetic fields in close proximity<br />
to heart pacemaker could cause<br />
pacemaker interference or pacemaker<br />
failure. In addition, people with<br />
pacemakers should:<br />
• Avoid operating alone.<br />
• Do not use with power switch locked<br />
on.<br />
• Properly maintain and inspect to<br />
avoid electrical shock.<br />
• Any power cord must be properly<br />
grounded. Ground Fault Circuit Interrupter<br />
(GFCI) should also be implemented<br />
– it prevents sustained electrical<br />
shock.<br />
12.<br />
(California Health & Safety code §<br />
25249.5 et seq.)<br />
The warnings, precautions, and instructions<br />
discussed in this instruction<br />
manual cannot cover all possible conditions<br />
and situations that may occur.<br />
It must be understood by the operator<br />
that common sense and caution are<br />
factors which cannot be built into this<br />
product, but must be supplied by the<br />
operator.<br />
Save these<br />
instructions.<br />
Grounding<br />
To prevent<br />
electric shock<br />
and death from<br />
incorrect grounding<br />
wire connection:<br />
Check with a qualified<br />
electrician if you are in doubt<br />
as to whether the outlet is<br />
properly grounded. Do not<br />
modify the power cord plug<br />
provided with the tool. Never<br />
remove the grounding prong<br />
from the plug. Do not use the<br />
tool if the power cord or plug<br />
is damaged. If damaged, have<br />
it repaired by a service facility<br />
before use. If the plug will not<br />
fit the outlet, have a proper<br />
outlet installed by a qualified<br />
electrician.<br />
11.<br />
WARNING: The brass components<br />
of this product contain lead,<br />
a chemical known to the state of<br />
California to cause birth defects<br />
(or other reproductive harm).<br />
98074 & 98076 For technical questions, please call 1-800-444-3353.<br />
Page 4
Grounded <strong>Tools</strong>: <strong>Tools</strong> with Three<br />
Prong Plugs<br />
Double Insulated <strong>Tools</strong>: <strong>Tools</strong><br />
with Two Prong Plugs<br />
3-Prong Plug and Outlet<br />
1. <strong>Tools</strong> marked with “Grounding Required”<br />
have a three wire cord and<br />
three prong grounding plug. The<br />
plug must be connected to a properly<br />
grounded outlet. If the tool should<br />
electrically malfunction or break<br />
down, grounding provides a low<br />
resistance path to carry electricity<br />
away from the user, reducing the risk<br />
of electric shock. (See 3-Prong Plug<br />
and Outlet.)<br />
2.<br />
3.<br />
4.<br />
The grounding prong in the plug is<br />
connected through the green wire inside<br />
the cord to the grounding system<br />
in the tool. The green wire in the cord<br />
must be the only wire connected to<br />
the tool’s grounding system and must<br />
never be attached to an electrically<br />
“live” terminal. (See 3-Prong Plug<br />
and Outlet.)<br />
The tool must be plugged into an<br />
appropriate outlet, properly installed<br />
and grounded in accordance with all<br />
codes and ordinances. The plug and<br />
outlet should look like those in the<br />
preceding illustration. (See 3-Prong<br />
Plug and Outlet.)<br />
NOTE: This Vacuum Pump comes<br />
with a 3-Prong plug attached to its<br />
power cord.<br />
Outlets for 2-Prong Plug<br />
1. <strong>Tools</strong> marked “Double Insulated” do<br />
not require grounding. They have<br />
a special double insulation system<br />
which satisfies OSHA requirements<br />
and complies with the applicable<br />
standards of Underwriters Laboratories,<br />
Inc., the Canadian Standard<br />
Association, and the National Electrical<br />
Code. (See Outlets for 2-Prong<br />
Plug.)<br />
2.<br />
Double insulated tools may be used<br />
in either of the 120 volt outlets shown<br />
in the preceding illustration. (See<br />
Outlets for 2-Prong Plug.)<br />
Extension Cords<br />
1. Grounded tools require a three wire<br />
extension cord. Double Insulated<br />
tools can use either a two or three<br />
wire extension cord.<br />
2.<br />
As the distance from the supply outlet<br />
increases, you must use a heavier<br />
gauge extension cord. Using extension<br />
cords with inadequately sized<br />
wire causes a serious drop in voltage,<br />
resulting in loss of power and possible<br />
tool damage.<br />
(See Table A.) The smaller the<br />
gauge number of the wire, the greater<br />
the capacity of the cord. For ex-<br />
98074 & 98076 For technical questions, please call 1-800-444-3353.<br />
Page 5
3.<br />
4.<br />
5.<br />
6.<br />
7.<br />
ample, a 14 gauge cord can carry a<br />
higher current than a 16 gauge cord.<br />
(See Table A.)<br />
When using more than one extension<br />
cord to make up the total length,<br />
make sure each cord contains at<br />
least the minimum wire size required.<br />
(See Table A.)<br />
If you are using one extension cord<br />
for more than one tool, add the<br />
nameplate amperes and use the sum<br />
to determine the required minimum<br />
cord size. (See Table A.)<br />
If you are using an extension cord<br />
outdoors, make sure it is marked with<br />
the suffix “W-A” (“W” in Canada) to<br />
indicate it is acceptable for outdoor<br />
use.<br />
Make sure the extension cord is properly<br />
wired and in good electrical condition.<br />
Always replace a damaged<br />
extension cord or have it repaired by<br />
a qualified electrician before using it.<br />
Protect the extension cords from<br />
sharp objects, excessive heat, and<br />
damp or wet areas.<br />
RECOMMENDED MINIMUM WIRE<br />
GAUGE FOR EXTENSION CORDS*<br />
(120/240 VOLT)<br />
NAMEPLATE<br />
AMPERES<br />
(at full load)<br />
25’<br />
EXTENSION CORD<br />
LENGTH<br />
50’<br />
75’<br />
100’<br />
150’<br />
0 – 2.0 18 18 18 18 16<br />
2.1 – 3.4 18 18 18 16 14<br />
3.5 – 5.0 18 18 16 14 12<br />
5.1 – 7.0 18 16 14 12 12<br />
7.1 – 12.0 18 14 12 10 -<br />
12.1 – 16.0 14 12 10 - -<br />
16.1 – 20.0 12 10 - - -<br />
TABLE A<br />
V~<br />
A<br />
n 0 xxxx/min.<br />
* Based on limiting the line<br />
voltage drop to five volts at<br />
150% of the rated amperes.<br />
Symbology<br />
Double Insulated<br />
Canadian Standards Association<br />
Underwriters Laboratories, Inc.<br />
Volts Alternating Current<br />
Amperes<br />
No Load Revolutions per Minute<br />
(RPM)<br />
98074 & 98076 For technical questions, please call 1-800-444-3353.<br />
Page 6
1.2 CFM<br />
Model SKU 98074<br />
Specifications<br />
Motor:Rotary Vane,<br />
Single Stage, 1/6 HP,<br />
1720 RPM<br />
115VAC/60HZ<br />
Displacement: 1.2 CFM<br />
Inlet Ports: 1/2” Acme,<br />
1/4” SAE<br />
Service: R-12, R-22 &<br />
R-134A Systems<br />
Oil Type:<br />
Vacuum Pump Oil<br />
Capacity: 160CC<br />
Ultimate Vacuum<br />
2.5 CFM<br />
Model SKU 98076<br />
Motor: Rotary Vane,<br />
Single Stage, 1/6HP,<br />
1720RPM<br />
115VAC/60HZ<br />
Displacement: 2.5 CFM<br />
Inlet Ports: 1/2” Acme,<br />
1/4” SAE<br />
Service: R-12, R-22 &<br />
R-134A Systems<br />
Oil Type:<br />
Vacuum Pump Oil<br />
Capacity: 200CC<br />
Ultimate Vacuum<br />
75 Microns (0.1 mbar) 75 Microns (0.1 mbar)<br />
10 Pa (2.95 x 10 -3 in Hg) 10 Pa (2.95 x 10 -3 in Hg)<br />
Air Flow: 1.2 CFM<br />
Unpacking<br />
Air Flow: 2.5 CFM<br />
When unpacking, check to make sure<br />
that the item is intact and undamaged. If<br />
any parts are missing or broken, please<br />
call <strong>Harbor</strong> <strong>Freight</strong> <strong>Tools</strong> at the number<br />
shown on the cover of this manual as soon<br />
as possible.<br />
To prevent<br />
serious injury<br />
from accidental<br />
operation:<br />
Turn the Power Switch of the<br />
tool to its “OFF” position and<br />
unplug the tool from its<br />
electrical outlet before<br />
assembling or making any<br />
adjustments to the tool.<br />
Note: For additional information regarding<br />
the parts listed in the following pages,<br />
refer to the Assembly Diagram near<br />
the end of this manual.<br />
Functions<br />
This Vacuum Pump is useful for <strong>pump</strong>ing<br />
gas from sealed containers, for example;<br />
refrigerators, medical appliances, printing<br />
machinery, <strong>vacuum</strong> packing and many different<br />
types of high-<strong>vacuum</strong> equipment.<br />
Operating Instructions<br />
1.<br />
2.<br />
3.<br />
Read the entire Important<br />
Safety Information<br />
section at the beginning of this<br />
manual including all text under<br />
subheadings therein before set<br />
up or use of this product.<br />
Tool Set Up<br />
To prevent<br />
serious injury<br />
from accidental<br />
operation:<br />
Turn off before performing<br />
any inspection, maintenance,<br />
or cleaning procedures.<br />
General Operating Instructions<br />
It is unlawful and hazardous to discharge<br />
refrigerants into the atmosphere.<br />
Before beginning work with<br />
this Vacuum Pump, safely capture<br />
refrigerants using an approved refrigerant<br />
recovery system and dispose of<br />
them properly. Contact the EPA for<br />
important certification regulations and<br />
other regulations that apply. (See<br />
front cover).<br />
Always add a good quality <strong>vacuum</strong><br />
<strong>pump</strong> oil before operating the <strong>vacuum</strong><br />
<strong>pump</strong>. Always check the oil level<br />
before each use.<br />
Check the oil level by placing the<br />
Vacuum Pump on a flat level surface<br />
98074 & 98076 For technical questions, please call 1-800-444-3353.<br />
Page 7
and looking at the Oil Level Glass<br />
located on the end of the Pump. The<br />
Oil should be at the fill line on the<br />
<strong>pump</strong> cover. If oil is needed, Unscrew<br />
the “RED” Oil Filler Plug (21),<br />
fill, (do not over fill) with HFV-100A<br />
only.<br />
12.<br />
The <strong>vacuum</strong> will build for approximately<br />
2 minutes before reaching<br />
full power. Allow the Pump to draw<br />
<strong>vacuum</strong> on the system for approximately<br />
10 minutes to thoroughly<br />
remove all moisture and any gas from<br />
the system.<br />
4.<br />
5.<br />
6.<br />
7.<br />
Replace the “RED” Oil Filler Plug<br />
and tighten securely to prevent oil<br />
from escaping under pressure during<br />
use. Inspect the Sealing O-Rings<br />
(22) each time the Oil Filler Plug<br />
(21) is removed. Look for possible<br />
tears, cracks or damage. Replace if<br />
needed.<br />
Use only one of the “L” Brass Inlet<br />
Fitting (23) at a time. Keep the other<br />
part of the “L” Fitting capped while<br />
not in use.<br />
Turn vehicle and AC system OFF.<br />
Attach shop AC Refrigerant Recovery<br />
System. Drain refrigerant.<br />
13.<br />
14.<br />
15.<br />
16.<br />
The Gauge (not supplied) should<br />
show negative pressure and maintain<br />
that reading for 10 minutes. If, during<br />
that time the pressure reading rises<br />
back toward “0”, there may be a leak<br />
in the system.<br />
Turn the Vacuum Pump off with the<br />
Switch (13) before disconnecting the<br />
hose from the <strong>vacuum</strong> fitting.<br />
To prevent accidents, turn off the tool<br />
and disconnect its power cord from<br />
the electrical outlet after use.<br />
Let the Vacuum Pump thoroughly<br />
cool before wiping down and storing<br />
indoors out of children’s reach.<br />
8.<br />
9.<br />
10.<br />
After reaching 26 to 28 in/hg <strong>vacuum</strong>,<br />
stop and disconnect the Shop Recovery<br />
System.<br />
Attach this Vacuum Pump and run for<br />
10 minutes to further raise the <strong>vacuum</strong><br />
level inside the AC system.<br />
As appropriate, attach the R-12, R-22<br />
or R-134A manifold to the AC drain<br />
port of the vehicle. This is a quick<br />
release fitting. The drain port is generally<br />
the lower of the two manifold<br />
ports and will be located downstream<br />
from the compressor in the vehicle.<br />
Refer to the vehicle’s owners manual<br />
for vehicle-specific information.<br />
Tightly cap the unused port.<br />
NOTE: The Operational process is the<br />
same for both vehicle and/or other<br />
refrigeration systems.<br />
11. Turn on the Vacuum Pump using the<br />
Switch (13).<br />
98074 & 98076 For technical questions, please call 1-800-444-3353.<br />
REV 08h<br />
Page 8
Maintenance And<br />
Servicing<br />
Procedures not specifically<br />
explained in this manual<br />
must be performed only by a<br />
qualified technician.<br />
To prevent<br />
serious injury<br />
from accidental<br />
operation:<br />
Turn the Power Switch of the<br />
tool to its “OFF” position and<br />
unplug the tool from its<br />
electrical outlet before<br />
performing any inspection, or<br />
cleaning procedures.<br />
To prevent serious<br />
injury from tool<br />
failure:<br />
Do not use damaged<br />
equipment. If abnormal noise<br />
or vibration occurs, have the<br />
problem corrected before<br />
further use.<br />
PLEASE READ THE FOLLOWING<br />
CAREFULLY<br />
The manufacturer and/or distributor<br />
has provided the parts list and assembly<br />
diagram in this manual as a reference<br />
tool only. Neither the manufacturer or<br />
distributor makes any representation<br />
or warranty of any kind to the buyer<br />
that he or she is qualified to make any<br />
repairs to the product, or that he or<br />
she is qualified to replace any parts of<br />
the product. In fact, the manufacturer<br />
and/or distributor expressly states<br />
that all repairs and parts replacements<br />
should be undertaken by certified and<br />
licensed technicians, and not by the<br />
buyer. The buyer assumes all risk and<br />
liability arising out of his or her repairs<br />
to the original product or replacement<br />
parts thereto, or arising out of his or<br />
her installation of replacement parts<br />
thereto.<br />
Cleaning, Maintenance, and<br />
Lubrication<br />
1. BEFORE EACH USE, inspect the<br />
general condition of the tool. Check<br />
for loose screws, cracked or broken<br />
parts, damaged electrical wiring, and<br />
any other condition that may affect its<br />
safe operation.<br />
2. After Use, clean external surfaces<br />
of the tool with clean cloth.<br />
3. WARNING! If the supply cord of<br />
this power tool is damaged, it must<br />
be replaced only by a qualified<br />
service technician.<br />
98074 & 98076 For technical questions, please call 1-800-444-3353.<br />
Page 9
Parts List<br />
Part Description Qty.<br />
1 Fan Cover 1<br />
2 Long Screw 4<br />
3 Screw 1<br />
4 Fan 1<br />
5 Motor Cover 1<br />
6 Centrifugal Switch 1<br />
7 Screw 1<br />
8 Rotor 1<br />
9 Power Cable 1<br />
10 Bearing 1<br />
11 Waveform Gasket 1<br />
12 Insulating Bushing 1<br />
13 Switch 1<br />
14 Rotor Shield 1<br />
15 Handle Cover 1<br />
16 Screw 2<br />
17 Capacitor 1<br />
18 Motor Cover 1<br />
19 Handle 1<br />
20 Nut for Handle 1<br />
21 Oil Filling Plug 1<br />
22 O-Ring 1<br />
23 Inlet “L” Fiting 1<br />
24 Bracket 1<br />
25 Oil Seal 1<br />
26 Rotary-Vane 1<br />
27 Spring 1<br />
28 Pump Rotor 1<br />
29 Pump Body 1<br />
30 Screw 4<br />
31 Back Pump Cover 1<br />
32 Cap Board 1<br />
33 Oil Gas Separator 1<br />
34 O-Ring 1<br />
35 Oil Tank 1<br />
36 Oil Level Glass 1<br />
37 Oil Seal Cap 1<br />
38 Seal Gasketq 1<br />
39 O-Ring 1<br />
Parts List<br />
Part Description Qty.<br />
40 Bolt 4<br />
41 Rubber Feet 4<br />
42 Nut 4<br />
43 Flat Washer 4<br />
44 Screw 4<br />
45 Baseboard 1<br />
46 Bearing Pad 1<br />
47 Screw 4<br />
.NOTE: When using this “Parts List” to order parts<br />
for either Model 98074 or 98076 Vacuum Pump, be<br />
sure to specify which Model you own in order to insure<br />
the correct size and type of part you wish to<br />
receive.<br />
98074 & 98076 For technical questions, please call 1-800-444-3353.<br />
Page 10
ASSEMBLY DIAGRAM<br />
Record Product’s Serial Number Here:<br />
Note: If product has no serial number, record month and year of purchase instead.<br />
Note: Some parts are listed and shown for illustration purposes only, and are not available<br />
individually as replacement parts.<br />
98074 & 98076 For technical questions, please call 1-800-444-3353.<br />
Page 11
Limited 1 Year warranty<br />
<strong>Harbor</strong> <strong>Freight</strong> <strong>Tools</strong> Co. makes every effort to assure that its products meet high<br />
quality and durability standards, and warrants to the original purchaser that this product<br />
is free from defects in materials and workmanship for the period of one year from the<br />
date of purchase (90 days if used by a professional contractor or if used as rental equipment).<br />
This warranty does not apply to damage due directly or indirectly, to misuse,<br />
abuse, negligence or accidents, repairs or alterations outside our facilities, normal wear<br />
and tear, or to lack of maintenance. We shall in no event be liable for death, injuries<br />
to persons or property, or for incidental, contingent, special or consequential damages<br />
arising from the use of our product. Some states do not allow the exclusion or limitation<br />
of incidental or consequential damages, so the above limitation of exclusion may not apply<br />
to you. This warranty is expressly in lieu of all other warranties,<br />
express or implied, including the warranties of merchantability<br />
and fitness.<br />
To take advantage of this warranty, the product or part must be returned to us with<br />
transportation charges prepaid. Proof of purchase date and an explanation of the complaint<br />
must accompany the merchandise. If our inspection verifies the defect, we will either<br />
repair or replace the product at our election or we may elect to refund the purchase<br />
price if we cannot readily and quickly provide you with a replacement. We will return repaired<br />
products at our expense, but if we determine there is no defect, or that the defect<br />
resulted from causes not within the scope of our warranty, then you must bear the cost<br />
of returning the product.<br />
This warranty gives you specific legal rights and you may also have other rights<br />
which vary from state to state.<br />
3491 Mission Oaks Blvd. • PO Box 6009 • Camarillo, CA 93011 • (800) 444-3353<br />
98074 & 98076 For technical questions, please call 1-800-444-3353.<br />
Page 12


