MATRIX Spine System – Degenerative. The total solution ... - Synthes
MATRIX Spine System – Degenerative. The total solution ... - Synthes
MATRIX Spine System – Degenerative. The total solution ... - Synthes

You also want an ePaper? Increase the reach of your titles
YUMPU automatically turns print PDFs into web optimized ePapers that Google loves.
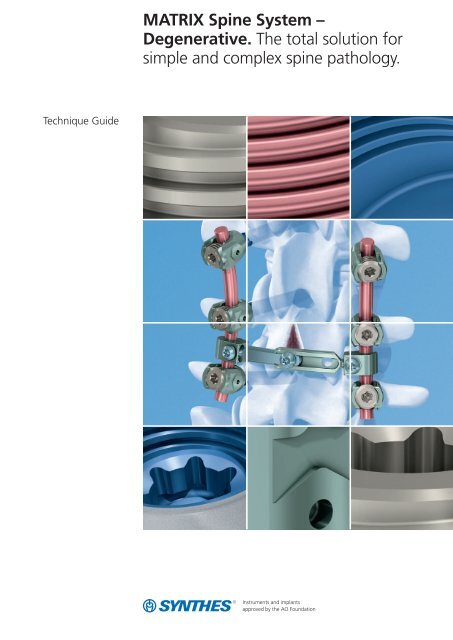
Technique Guide<br />
<strong>MATRIX</strong> <strong>Spine</strong> <strong>System</strong> <strong>–</strong><br />
<strong>Degenerative</strong>. <strong>The</strong> <strong>total</strong> <strong>solution</strong> for<br />
simple and complex spine pathology.
Table of Contents<br />
Introduction<br />
Surgical Technique<br />
Product Information<br />
Biomaterials Implants 78<br />
Image intensifier control<br />
Warning<br />
This description alone does not provide sufficient background for direct use of<br />
the instrument set. Instruction by a surgeon experienced in handling these<br />
instruments is highly recommended.<br />
Reprocessing, Care and Maintenance of<br />
<strong>Synthes</strong> Instruments<br />
For general guidelines, function control and dismantling of multi-part instruments,<br />
please refer to: www.synthes.com/reprocessing<br />
<strong>MATRIX</strong> <strong>Spine</strong> <strong>System</strong> <strong>–</strong> <strong>Degenerative</strong> 2<br />
AO Principles 6<br />
Indications and Contraindications 7<br />
Surgical Technique 8<br />
Optional Technique 29<br />
Screw Insertion with Retaining Sleeve, Locking 29<br />
Unassembled Pedicle Screw Insertion 31<br />
Polyaxial Head Removal 33<br />
Reduction Screws 34<br />
Adding Transverse Connectors 36<br />
Distraction for Posterior Interbody Fusion 37<br />
Locking Cap Removal 40<br />
How to Disassemble Instruments for Cleaning 45<br />
Implants 49<br />
Instruments 64<br />
<strong>MATRIX</strong> <strong>Spine</strong> <strong>System</strong> <strong>–</strong> <strong>Degenerative</strong> Technique Guide <strong>Synthes</strong> 1
<strong>MATRIX</strong> <strong>Spine</strong> <strong>System</strong> <strong>–</strong><br />
<strong>Degenerative</strong>. <strong>The</strong> <strong>total</strong> <strong>solution</strong> for<br />
simple and complex spine pathology.<br />
<strong>The</strong> <strong>Synthes</strong> <strong>MATRIX</strong> <strong>Spine</strong> <strong>System</strong> is a universal set<br />
of instruments and implants that cover degenerative<br />
disorders (open or minimally invasive access), deformities<br />
and trauma indications.<br />
Unique Dual Core /<br />
Double Lead Screw Design<br />
<strong>–</strong> Fast and controlled insertion<br />
<strong>–</strong> Increased pull-out resistance due to optimal bone<br />
purchase<br />
<strong>–</strong> Safe handling thanks to atraumatic tip and self<br />
tapping thread<br />
PrimeLock <strong>–</strong> Screwdriver <strong>–</strong><br />
Screw Interlock<br />
<strong>–</strong> Toggle free screw insertion<br />
<strong>–</strong> Precise and controlled screw placement<br />
<strong>–</strong> Direction of screw insertion possible<br />
2 <strong>Synthes</strong> <strong>MATRIX</strong> <strong>Spine</strong> <strong>System</strong> <strong>–</strong> <strong>Degenerative</strong> Technique Guide
Modularity <strong>–</strong> Click-on and<br />
Preassembled Screws<br />
<strong>–</strong> For better visualization of the anatomical<br />
structure<br />
<strong>–</strong> Multiple screw head removal and replacement<br />
without removing the bone screw from the<br />
pedicle<br />
<strong>–</strong> Customized inventory possible<br />
Snap-on Swiveling<br />
Transverse Connector<br />
<strong>–</strong> Offers fast and simple in-situ placement<br />
<strong>–</strong> Simple anatomical adjustment possible<br />
<strong>MATRIX</strong> <strong>Spine</strong> <strong>System</strong> <strong>–</strong> <strong>Degenerative</strong> Technique Guide <strong>Synthes</strong> 3
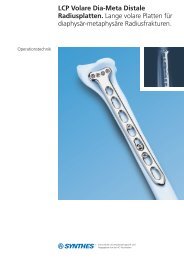
<strong>MATRIX</strong> <strong>Spine</strong> <strong>System</strong> <strong>–</strong> <strong>Degenerative</strong>. <strong>The</strong> <strong>total</strong> <strong>solution</strong> for<br />
simple and complex spine pathology.<br />
Implants<br />
Preassembled Polyaxial and<br />
Reduction Pedicle Screw<br />
<strong>–</strong> Allows up to 50° of angulation to ease in situ connection<br />
to the longitudinal rod<br />
<strong>–</strong> <strong>The</strong> rod reduction features are located at the top of the<br />
polyaxial head<br />
<strong>–</strong> Dual Core/Double Lead thread designed to securely<br />
anchor the screw in cortical and cancellous bone<br />
<strong>–</strong> Threaded T25 Stardrive recess designed to deliver torque<br />
effectively<br />
Pedicle Screw<br />
<strong>–</strong> Increased visual access to the anatomical structures<br />
<strong>–</strong> Allows for improved access to the surgical field<br />
<strong>–</strong> Dual Core/Double Lead thread designed to securely<br />
anchor the screw in cortical and cancellous bone<br />
<strong>–</strong> Threaded T25 Stardrive recess designed to deliver torque<br />
effectively<br />
Click-on Polyaxial and Reduction<br />
Screw Head<br />
<strong>–</strong> <strong>The</strong> polyaxial head of the implant is designed for rod<br />
reduction<br />
<strong>–</strong> To ease intraoperative planning, the polyaxial heads can<br />
be removed and replaced without removing the pedicle<br />
screw from the pedicle<br />
<strong>–</strong> <strong>The</strong> reduction head allows for 15 mm rod reduction<br />
4 <strong>Synthes</strong> <strong>MATRIX</strong> <strong>Spine</strong> <strong>System</strong> <strong>–</strong> <strong>Degenerative</strong> Technique Guide<br />
50° 50°<br />
15 mm
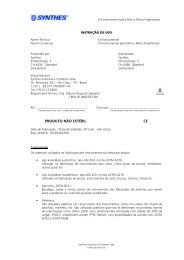
Rods<br />
<strong>–</strong> Available in three material strengths: Hard pure titanium,<br />
extra-hard titanium alloy (TAN), and extra-hard cobaltchromium<br />
alloy, diameter 5.5 mm<br />
<strong>–</strong> A choice of straight and curved rods to facilitate intraoperative<br />
construct assembly and technique maneuvers<br />
Locking Cap<br />
<strong>–</strong> Square thread design minimizes cross threading under<br />
high reduction loads<br />
<strong>–</strong> T25 Stardrive recess designed to reduce the risk of<br />
damage at high loads<br />
<strong>–</strong> 1-step locking cap allows for complete fixation in one step<br />
(polyaxiality and run on rod)<br />
Transverse Connector<br />
<strong>–</strong> <strong>The</strong> snap-on transverse connector is preassembled and<br />
requires only final positioning and tightening<br />
<strong>–</strong> <strong>The</strong> jaws of the transverse connector swivel and are<br />
spring loaded<br />
<strong>–</strong> Telescoping body is arched to accommodate grafts and<br />
anatomical structures and is available in a range of<br />
lengths<br />
<strong>–</strong> <strong>The</strong> locking screws use a T15 Stardrive which minimizes<br />
drive stripping while final tightening<br />
Instruments<br />
<strong>–</strong> Ergonomically designed handles<br />
<strong>–</strong> Intuitive, easy to use<br />
<strong>–</strong> Convenient, interchangeable options<br />
<strong>MATRIX</strong> <strong>Spine</strong> <strong>System</strong> <strong>–</strong> <strong>Degenerative</strong> Technique Guide <strong>Synthes</strong> 5
AO Principles<br />
In 1958, the AO formulated four basic principles, which have<br />
become the guidelines for internal fixation. 1 <strong>The</strong>y are:<br />
<strong>–</strong> Anatomic reduction<br />
<strong>–</strong> Stable internal fixation<br />
<strong>–</strong> Preservation of blood supply<br />
<strong>–</strong> Early, active mobilization<br />
<strong>The</strong> fundamental aims of fracture treatment in the limbs and<br />
fusion of the spine are the same. A specific goal in the<br />
spine is returning as much function as possible to the injured<br />
neural elements. 2<br />
AO Principles as Applied to the <strong>Spine</strong> 3<br />
Anatomic alignment<br />
Restoration of normal spinal alignment to improve the<br />
biomechanics of the spine.<br />
Stable internal fixation<br />
Stabilization of the spinal segment to promote bony fusion.<br />
Preservation of blood supply<br />
Creation of an optimal environment for fusion.<br />
Early, active mobilization<br />
Minimization of damage to the spinal vasculature, dura, and<br />
neural elements, which may contribute to pain reduction and<br />
improved function for the patient.<br />
1 Müller ME, Allgöwer M, Schneider R, Willenegger H (1995) Manual of Internal<br />
Fixation. 3rd, expanded and completely revised ed. 1991. Berlin, Heidelberg,<br />
New York: Springer<br />
2 Ibid.<br />
3 Aebi M, Arlet V, Webb JK (2007). AOSPINE Manual (2 vols.), Stuttgart, New York:<br />
Thieme<br />
6 <strong>Synthes</strong> <strong>MATRIX</strong> <strong>Spine</strong> <strong>System</strong> <strong>–</strong> <strong>Degenerative</strong> Technique Guide
Indications and Contraindications<br />
<strong>The</strong> <strong>MATRIX</strong> <strong>Spine</strong> <strong>System</strong> is a posterior pedicle screw and<br />
hook fixation system (T1 <strong>–</strong> S2) intended to provide precise<br />
and segmental stabilization of the spine for use in skeletally<br />
mature patients.<br />
Indications<br />
<strong>–</strong> <strong>Degenerative</strong> disc disease<br />
<strong>–</strong> Spondylolisthesis<br />
<strong>–</strong> Trauma (i.e. fracture or dislocation)<br />
<strong>–</strong> Tumor<br />
<strong>–</strong> Stenosis<br />
<strong>–</strong> Pseudarthrosis<br />
<strong>–</strong> Failed previous fusion<br />
<strong>–</strong> Deformities (i.e. scoliosis, kyphosis and/or lordosis)<br />
Contraindications<br />
<strong>–</strong> Osteoporosis<br />
<strong>–</strong> In fractures and tumors with severe anterior vertebral<br />
body disruption, an additional anterior support or column<br />
reconstruction is required<br />
<strong>MATRIX</strong> <strong>Spine</strong> <strong>System</strong> <strong>–</strong> <strong>Degenerative</strong> Technique Guide <strong>Synthes</strong> 7
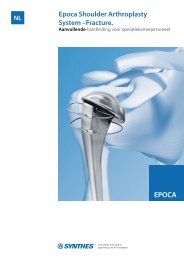
Surgical Technique<br />
1<br />
Prepare pedicles and determine screw lengths<br />
Instruments<br />
388.656 Pedicle Awl 4.0 mm<br />
with Silicone Handle, length 255 mm,<br />
for Pedicle Screws 4.0 to 7.0 mm<br />
388.655 Pedicle Probe 3.7 mm<br />
with Silicone Handle, length 240 mm,<br />
for Pedicle Screws 5.0 to 7.0 mm<br />
Locate pedicles and use the awl to perforate the cortex. Use<br />
the probe to open the pedicle canal. Using radiographic<br />
imaging, confirm pedicle location, orientation and depth by<br />
inserting the probe. When selecting the appropriate length<br />
screw, use the markings on the probe to determine the<br />
pedicle depth.<br />
All <strong>MATRIX</strong> pedicle screws are self-tapping; however, if tapping<br />
is preferred, use the appropriate tap and tap handle.<br />
8 <strong>Synthes</strong> <strong>MATRIX</strong> <strong>Spine</strong> <strong>System</strong> <strong>–</strong> <strong>Degenerative</strong> Technique Guide
Optional instruments<br />
03.632.057 Pedicle Marker for Matrix<br />
03.632.058 Inserter for Pedicle Marker, for Matrix<br />
388.657 Pedicle Probe 3.8 mm, curved,<br />
with Silicone Handle, length 290 mm,<br />
for Pedicle Screws 5.0 to 7.0 mm<br />
388.536 Pedicle Probe for Screws 4.2 mm,<br />
length 240 mm<br />
388.545 Feeler for Screw Channel, straight,<br />
2.3 mm, length 275 mm<br />
388.546 Feeler for Screw Channel, curved,<br />
2.3 mm, length 275 mm<br />
388.549 Feeler, straight, with rounded tip<br />
03.632.103 Tap for Pedicle Screws 3.5 mm,<br />
length 180 mm<br />
03.632.104 Tap for Pedicle Screws 4.0 mm,<br />
length 180 mm<br />
03.632.105 Tap for Pedicle Screws 5.0 mm,<br />
length 180 mm<br />
03.632.155 Tap for Pedicle Screws 5.5 mm,<br />
length 180 mm<br />
03.632.106 Tap for Pedicle Screws 6.0 mm,<br />
length 180 mm<br />
03.632.107 Tap for Pedicle Screws 7.0 mm,<br />
length 180 mm<br />
03.632.108 Tap for Pedicle Screws 8.0 mm,<br />
length 180 mm<br />
03.632.109 Tap for Pedicle Screws 9.0 mm,<br />
length 180 mm<br />
388.654 Ratchet with Handle,<br />
with Hexagonal Quick Coupling 6.0 mm<br />
<strong>MATRIX</strong> <strong>Spine</strong> <strong>System</strong> <strong>–</strong> <strong>Degenerative</strong> Technique Guide <strong>Synthes</strong> 9
Surgical Technique<br />
2<br />
Assemble screwdriver<br />
Instruments<br />
03.632.036 Retaining Sleeve, long, for Matrix 5.5<br />
03.632.072 Screwdriver Shaft Stardrive, T25, long,<br />
for Matrix 5.5<br />
03.620.061 T-Handle with Ratchet Wrench and<br />
with Torque Limiter, 10 Nm<br />
Slide retaining sleeve on the screwdriver shaft and attach the<br />
ratchet handle.<br />
Optional instruments<br />
03.616.043 Retaining Sleeve, locking, long<br />
03.632.074 Screwdriver Stardrive, T25, long,<br />
with T-Handle, for Matrix 5.5<br />
03.632.075 Screwdriver Stardrive, T25, long,<br />
with straight handle, for Matrix<br />
03.616.042 Retaining Sleeve, locking<br />
03.632.001 Retaining Sleeve, standard, for Matrix 5.5<br />
03.632.002 Screwdriver Shaft Stardrive, T25, standard,<br />
for Matrix 5.5<br />
03.632.004 Screwdriver Stardrive, with T-Handle,<br />
standard, for Matrix 5.5<br />
03.632.005 Screwdriver Stardrive, T25, with straight<br />
handle, standard, for Matrix 5.5<br />
10 <strong>Synthes</strong> <strong>MATRIX</strong> <strong>Spine</strong> <strong>System</strong> <strong>–</strong> <strong>Degenerative</strong> Technique Guide
3<br />
Pick up screw<br />
Instruments<br />
03.632.036 Retaining Sleeve, long, for Matrix 5.5<br />
03.632.072 Screwdriver Shaft Stardrive, T25, long,<br />
for Matrix 5.5<br />
03.620.061 T-Handle with Ratchet Wrench and<br />
with Torque Limiter, 10 Nm<br />
Choose the appropriate screw diameter and length based on<br />
pedicle probe feedback.<br />
Insert the screwdriver tip into the recess of the pedicle screw<br />
and rotate the green knob of the retaining sleeve clockwise<br />
until the tip of the sleeve is firmly attached to the pedicle<br />
screw.<br />
Verify the screw length with the template provided in the<br />
screw module.<br />
Note: Set the ratchet to the neutral position before picking<br />
up a screw.<br />
Optional instruments<br />
03.616.043 Retaining Sleeve, locking, long<br />
03.632.074 Screwdriver Stardrive, T25, long,<br />
with T-Handle, for Matrix 5.5<br />
03.632.075 Screwdriver Stardrive, T25, long,<br />
with straight handle, for Matrix<br />
03.616.042 Retaining Sleeve, locking<br />
03.632.001 Retaining Sleeve, standard, for Matrix 5.5<br />
03.632.002 Screwdriver Shaft Stardrive, T25, standard,<br />
for Matrix 5.5<br />
03.632.004 Screwdriver Stardrive, with T-Handle,<br />
standard, for Matrix 5.5<br />
03.632.005 Screwdriver Stardrive, T25, with straight<br />
handle, standard, for Matrix 5.5<br />
<strong>MATRIX</strong> <strong>Spine</strong> <strong>System</strong> <strong>–</strong> <strong>Degenerative</strong> Technique Guide <strong>Synthes</strong> 11
Surgical Technique<br />
4<br />
Insert screw<br />
Instruments<br />
03.632.036 Retaining Sleeve, long, for Matrix 5.5<br />
03.632.072 Screwdriver Shaft Stardrive, T25, long,<br />
for Matrix 5.5<br />
03.620.061 T-Handle with Ratchet Wrench and<br />
with Torque Limiter, 10 Nm<br />
Insert the screw. Hold the black part of the retaining sleeve<br />
during screw insertion.<br />
To disengage the retaining sleeve, rotate the green knob<br />
counterclockwise and remove screwdriver.<br />
Notes:<br />
<strong>–</strong> Do not grasp the green knob during screw insertion as<br />
this will cause the retaining sleeve to disengage from the<br />
screw.<br />
<strong>–</strong> Ensure that the polyaxial screw head remains free to adapt<br />
its position and is not restricted by, or does not rest on,<br />
bony structures. If necessary, adjust the screw height<br />
and/or ream space for the screw head.<br />
<strong>–</strong> When countersinking, care should be taken in reaming<br />
the most superior (and inferior) level to protect the facet<br />
joints.<br />
<strong>–</strong> If pedicle screws with separate polyaxial heads are used,<br />
follow the optional technique described on page 29.<br />
12 <strong>Synthes</strong> <strong>MATRIX</strong> <strong>Spine</strong> <strong>System</strong> <strong>–</strong> <strong>Degenerative</strong> Technique Guide
Optional Instruments<br />
03.616.043 Retaining Sleeve, locking, long<br />
03.632.074 Screwdriver Stardrive, T25, long,<br />
with T-Handle, for Matrix 5.5<br />
03.632.075 Screwdriver Stardrive, T25, long,<br />
with straight handle, for Matrix<br />
03.616.042 Retaining Sleeve, locking<br />
03.632.001 Retaining Sleeve, standard, for Matrix 5.5<br />
03.632.002 Screwdriver Shaft Stardrive, T25, standard,<br />
for Matrix 5.5<br />
03.632.004 Screwdriver Stardrive, with T-Handle,<br />
standard, for Matrix 5.5<br />
03.632.005 Screwdriver Stardrive, T25, with straight<br />
handle, standard, for Matrix .5.5<br />
<strong>MATRIX</strong> <strong>Spine</strong> <strong>System</strong> <strong>–</strong> <strong>Degenerative</strong> Technique Guide <strong>Synthes</strong> 13
Surgical Technique<br />
5<br />
Select, cut and bend rod<br />
Instruments<br />
03.632.007 Alignment Tool for polyaxial Screw Head,<br />
for Matrix 5.5<br />
388.906 Trial Rod 5.0 mm, length 150 mm<br />
03.632.017 Rod Bender with Silicone Handle<br />
Use the head alignment tool to rotate and align the screw<br />
heads.<br />
Use the trial rod to determine contour and length of the rod.<br />
Select precontoured rod, or use rod bender to form rod<br />
according to the template.<br />
Notes:<br />
<strong>–</strong> <strong>The</strong> screw height must be adjusted to the rod. If necessary,<br />
adjust the screw height using a screwdriver without retaining<br />
sleeve.<br />
<strong>–</strong> To restore polyaxiality of a screw head that has already<br />
been tightened, insert the alignment tool in the screw<br />
head and apply sufficient pressure to release the lock.<br />
14 <strong>Synthes</strong> <strong>MATRIX</strong> <strong>Spine</strong> <strong>System</strong> <strong>–</strong> <strong>Degenerative</strong> Technique Guide
Optional instruments<br />
03.632.017 Rod Bender with Silicone Handle<br />
388.750 USS Rod Cutting and Bending Device<br />
388.720 Bolt Cutter<br />
Notes:<br />
<strong>–</strong> <strong>The</strong> USS rod cutting and bending device must be used to<br />
cut cobalt chromium rods.<br />
<strong>–</strong> Do not reverse bend rods. Reverse bending may produce<br />
internal stresses, which may become the focal point for<br />
eventual breakage of the implant.<br />
<strong>MATRIX</strong> <strong>Spine</strong> <strong>System</strong> <strong>–</strong> <strong>Degenerative</strong> Technique Guide <strong>Synthes</strong> 15
Surgical Technique<br />
6<br />
Insert rod<br />
Instrument<br />
03.632.081 Rod Holding Forceps for Rods 5.5 mm<br />
Insert the rod using the rod holding forceps.<br />
Optional instrument<br />
03.632.202 Holding Forceps for Rods 5.5 and<br />
6.0 mm<br />
16 <strong>Synthes</strong> <strong>MATRIX</strong> <strong>Spine</strong> <strong>System</strong> <strong>–</strong> <strong>Degenerative</strong> Technique Guide
7<br />
Reduce rod<br />
Option A: Reduce rod with a rod pusher<br />
Instruments<br />
03.632.006 Rod Pusher/Counter Torque, standard,<br />
for Matrix 5.5<br />
03.632.080 Handle, detachable, for Matrix<br />
Connect detachable handle to the octagonal end of the rod<br />
pusher/counter torque.<br />
Advance rod into the screw head using the rod pusher/<br />
countertorque.<br />
Optional instruments<br />
03.632.076 Rod Pusher/Counter Torque, long,<br />
for Matrix 5.5<br />
03.632.169 Rod Pusher for Rods 5.5/6.0 mm,<br />
for Matrix<br />
03.632.000 Distraction Fork<br />
<strong>MATRIX</strong> <strong>Spine</strong> <strong>System</strong> <strong>–</strong> <strong>Degenerative</strong> Technique Guide <strong>Synthes</strong> 17
Surgical Technique<br />
Option B:<br />
Reduce rod with a rocker fork<br />
Instruments<br />
03.632.010 Rocker Fork, small, for Matrix 5.5<br />
03.632.012 Rocker Fork, medium, for Matrix 5.5<br />
03.632.011 Rocker Fork, footed, for Matrix 5.5<br />
Use a rocker fork to lever the rod into the head of the<br />
pedicle screw.<br />
Reduction travels:<br />
Small Rocker Fork = 8.5 mm<br />
Medium Rocker Fork = 13.5 mm<br />
Footed Rocker Fork = 7.5 mm<br />
Technique tip: Use the footed <strong>MATRIX</strong> rocker fork to aid in<br />
reducing the rod into adjacent screw heads.<br />
18 <strong>Synthes</strong> <strong>MATRIX</strong> <strong>Spine</strong> <strong>System</strong> <strong>–</strong> <strong>Degenerative</strong> Technique Guide
Option C:<br />
Reduce rod with a rod persuader<br />
Instrument<br />
03.632.009 Rod Persuader, standard, for Matrix 5.5<br />
Ensure that the ratchet handle is fully open. Place the rod<br />
persuader over rod and onto the screw head. Press down<br />
firmly until the tips engage the head of the screw. Squeeze<br />
the handle to seat the rod into the head of the pedicle screw.<br />
Reduction travel:<br />
15 mm<br />
Note: <strong>The</strong> rod persuader can be used as counter torque<br />
for final tightening of the locking cap.<br />
Optional instrument<br />
03.632.079 Rod Persuader, long, for Matrix 5.5<br />
<strong>MATRIX</strong> <strong>Spine</strong> <strong>System</strong> <strong>–</strong> <strong>Degenerative</strong> Technique Guide <strong>Synthes</strong> 19
Surgical Technique<br />
Option D: Reduce rod with a reduction instrument<br />
for Spondylolisthesis<br />
Instruments<br />
03.632.408 Reduction Instrument for Spondylolisthesis,<br />
standard, for Matrix 5.5<br />
388.654 Ratchet with Handle, with<br />
Hexagonal Quick Coupling 6.0 mm<br />
03.620.091 Socket, hexagonal 6.0 mm<br />
To assemble the instrument, slide the inner tube through the<br />
outer tube. Insert the black nut and press down firmly until<br />
audible feedback. Push the inner tube up towards the black<br />
nut and turn the black nut clockwise until the black line is<br />
visible at the 30 line.<br />
Place the reduction instrument over the screw head. Press<br />
down firmly until the tips engage. Load the hexagonal socket<br />
into the ratchet handle and insert it into the top of the<br />
reduction instrument.<br />
Rotate the ratchet handle clockwise to reduce the rod into<br />
the screw head. Full reduction is achieved when the black<br />
line on the side of the instrument is visible at the 0 line.<br />
Remove the hexagonal sockel to insert a locking cap through<br />
the instrument.<br />
To remove the instrument from the screw head, turn the<br />
palm handle counter-clockwise until the line on the side of<br />
the instrument is visible at the 30 line.<br />
Reduction travel:<br />
30 mm<br />
20 <strong>Synthes</strong> <strong>MATRIX</strong> <strong>Spine</strong> <strong>System</strong> <strong>–</strong> <strong>Degenerative</strong> Technique Guide
Parallel reduction can be achieved by the simultaneous use<br />
of two reduction instruments on the same vertebral body.<br />
Note: <strong>The</strong> reduction instrument for spondylolisthesis can be<br />
used as counter torque for final tightening of the locking cap.<br />
Optional instrument<br />
03.632.409 Reduction Instrument for<br />
Spondylolisthesis, long, for Matrix 5.5<br />
<strong>MATRIX</strong> <strong>Spine</strong> <strong>System</strong> <strong>–</strong> <strong>Degenerative</strong> Technique Guide <strong>Synthes</strong> 21
Surgical Technique<br />
8<br />
Insert 1-step locking cap<br />
Instruments<br />
03.632.006 Rod Pusher/Counter Torque, standard,<br />
for Matrix 5.5<br />
03.632.080 Handle, detachable, for Matrix<br />
03.632.002 Screwdriver Shaft Stardrive, T25, standard,<br />
for Matrix 5.5<br />
03.620.061 T-Handle with Ratchet Wrench and<br />
with Torque Limiter, 10 Nm<br />
Insert the tip of the screwdriver shaft into the T25 recess of<br />
the locking cap. Press down firmly. <strong>The</strong> screwdriver shaft is<br />
self-retaining.<br />
To ensure optimal cap alignment, insert the locking cap<br />
through the rod pusher/counter torque. Thread the locking<br />
cap clockwise into the implant head.<br />
Apply a light torque to provisionally tighten the locking cap<br />
and maintain the desired rod position. Place the remaining<br />
caps and provisionally tighten.<br />
22 <strong>Synthes</strong> <strong>MATRIX</strong> <strong>Spine</strong> <strong>System</strong> <strong>–</strong> <strong>Degenerative</strong> Technique Guide
Note:<br />
Confirm that the rod is fully aligned to the polyaxial head. (1)<br />
Examples of misalignment:<br />
<strong>–</strong> <strong>The</strong> rod is sitting high in the polyaxial head. (2)<br />
<strong>–</strong> <strong>The</strong> rod is not perpendicular to the polyaxial head.(3)<br />
<strong>–</strong> A severe bend is positioned within the polyaxial head.<br />
(4a, 4b)<br />
1 2<br />
<br />
3<br />
4a<br />
4b<br />
<br />
<br />
<br />
<strong>MATRIX</strong> <strong>Spine</strong> <strong>System</strong> <strong>–</strong> <strong>Degenerative</strong> Technique Guide <strong>Synthes</strong> 23
9<br />
Distract<br />
Instruments<br />
388.410 Spreader Forceps for Pedicle Screws,<br />
length 330 mm<br />
03.632.401 Screwdriver Shaft Stardrive, T25, long,<br />
straight tip, with Hexagonal Coupling,<br />
for Matrix<br />
03.620.061 T-Handle with Ratchet Wrench and<br />
with Torque Limiter, 10 Nm<br />
03.632.049 Counter Torque, standard, for Matrix 5.5<br />
Precaution: Ensure all locking caps are fully reduced and<br />
provisionally tightened (see “Insert 1-step locking cap”). Failure<br />
to do so could potentially lead to a misalignment.<br />
Finally tighten one locking cap completely to create a fixed<br />
point for distraction (see “Perform final tightening”). Reverse<br />
the locking cap of the screw to be relocated a quarter of a<br />
turn.<br />
Use the distraction forceps to distract the construct. Once in<br />
the desired position, tighten the locking caps with the screwdriver.<br />
<strong>The</strong> holding forceps can be used as a temporary point of<br />
distraction when adjacent pedicle screws are too distant<br />
from each other.<br />
24 <strong>Synthes</strong> <strong>MATRIX</strong> <strong>Spine</strong> <strong>System</strong> <strong>–</strong> <strong>Degenerative</strong> Technique Guide
Note: Always fully seat the counter torque on the rod. <strong>The</strong><br />
instrument must be perpendicular to the rod during tightening.<br />
Optional instruments<br />
03.632.202 Holding Forceps for Rods 5.5 and<br />
6.0 mm<br />
03.632.072 Screwdriver Shaft Stardrive, T25, long,<br />
for Matrix<br />
03.632.074 Screwdriver Stardrive, T25, long, with<br />
T-Handle, for Matrix 5.5<br />
03.632.075 Screwdriver Stardrive, T25, long, with<br />
straight handle, for Matrix<br />
03.632.400 Screwdriver Shaft Stardrive, T25, standard,<br />
straight tip, with Hexagonal Coupling,<br />
for Matrix<br />
03.632.002 Screwdriver Shaft Stardrive, T25, standard,<br />
for Matrix 5.5<br />
03.632.004 Screwdriver Stardrive, with T-Handle,<br />
standard, for Matrix 5.5<br />
03.632.005 Screwdriver Stardrive, T25, with straight<br />
handle, standard, for Matrix .5.5<br />
Correct<br />
<br />
Incorrect<br />
<strong>MATRIX</strong> <strong>Spine</strong> <strong>System</strong> <strong>–</strong> <strong>Degenerative</strong> Technique Guide <strong>Synthes</strong> 25
Surgical Technique<br />
10<br />
Compress<br />
Instruments<br />
388.422 Compression Forceps, length 335 mm,<br />
for Pedicle Screws<br />
03.632.401 Screwdriver Shaft Stardrive, T25, long,<br />
straight tip, with Hexagonal Coupling,<br />
for Matrix<br />
03.620.061 T-Handle with Ratchet Wrench and<br />
with Torque Limiter, 10 Nm<br />
03.632.049 Counter Torque, standard, for Matrix 5.5<br />
Precaution: Ensure all locking caps are fully reduced and<br />
provisionally tightened (see “Insert 1-step locking cap”). Failure<br />
to do so could potentially lead to a misalignment.<br />
Finally tighten one locking cap completely to create a fixed<br />
point for distraction (see “Perform final tightening”). Reverse<br />
the locking cap of the screw to be relocated a quarter of a<br />
turn.<br />
Use the compression forceps to compress the construct.<br />
Once in the desired position, tighten the locking caps with<br />
the screwdriver.<br />
<strong>The</strong> rod holding forceps can be used as a temporary point of<br />
compression when adjacent pedicle screws are too distant.<br />
Note: Always fully seat the counter torque on the rod. <strong>The</strong><br />
instrument must be perpendicular to the rod during tightening.<br />
Optional instrument<br />
03.632.202 Holding Forceps for Rods 5.5<br />
and 6.0 mm<br />
26 <strong>Synthes</strong> <strong>MATRIX</strong> <strong>Spine</strong> <strong>System</strong> <strong>–</strong> <strong>Degenerative</strong> Technique Guide<br />
Correct<br />
<br />
Incorrect
11<br />
Perform final tightening<br />
Instruments<br />
03.620.061 T-Handle with Ratchet Wrench and<br />
with Torque Limiter, 10 Nm<br />
03.632.400 Screwdriver Shaft Stardrive, T25, standard,<br />
straight tip, with Hexagonal Coupling,<br />
for Matrix<br />
03.632.049 Counter Torque, standard, for Matrix 5.5<br />
03.632.080 Handle, detachable, for Matrix<br />
Precaution: Ensure all locking caps are fully reduced and<br />
provisionally tightened (see “Insert 1-step locking cap”). Failure<br />
to do so could potentially lead to a misalignment.<br />
Note: <strong>The</strong> handle of the counter torque must be oriented<br />
laterally or medially. Do not orient the handle of the countertorque<br />
in line with the rod. This action could cause misalignment<br />
of the rod with the implant.<br />
Place the counter torque over the head of the screw. Attach<br />
the screwdriver shaft T-handle with ratchet wrench and with<br />
torque limiter. Insert the instrument through the counter<br />
torque cannula into the drive recess of the locking cap. Ensuring<br />
that the polyaxial head is perpendicular to the rod,<br />
tighten until there is a tactile release. This indicates that the<br />
required 10 Nm of torque has been applied. Repeat for all<br />
locking caps.<br />
After initial final tightening of all screws, sequentially revisit<br />
all locking caps. Start at the caudal left screw of the construct<br />
and proceed clockwise to systematically repeat final<br />
tightening of all locking caps of the construct.<br />
Warning: Final tightening of the locking caps should only<br />
be performed with a <strong>Synthes</strong> 10 Nm torque handle. <strong>MATRIX</strong><br />
screw implants achieve performance standard only when<br />
tightened to the required 10 Nm tightening torque.<br />
<br />
Correct<br />
Incorrect<br />
<strong>MATRIX</strong> <strong>Spine</strong> <strong>System</strong> <strong>–</strong> <strong>Degenerative</strong> Technique Guide <strong>Synthes</strong> 27
Surgical Technique<br />
Notes:<br />
<strong>–</strong> Alternatively, the reduction instrument for spondylo -<br />
listhesis and the rod persuader can be used as counter<br />
torque for final tightening of the locking cap.<br />
<strong>–</strong> Always fully seat the rod pusher/counter torque on the<br />
rod. <strong>The</strong> instrument must be perpendicular to the rod<br />
during final tightening.<br />
Optional instruments<br />
03.632.006 Rod Pusher/Counter Torque, standard,<br />
for Matrix 5.5<br />
03.632.008 Reduction Instrument for<br />
Spondylolisthesis, standard, for Matrix 5.5<br />
03.632.009 Rod Persuader, standard, for Matrix 5.5<br />
03.632.076 Rod Pusher/Counter Torque, long,<br />
for Matrix 5.5<br />
03.632.078 Reduction Instrument for<br />
Spondylolisthesis, long, for Matrix 5.5<br />
03.632.079 Rod Introduction Pliers, long,<br />
for Matrix 5.5<br />
03.632.099 Counter Torque, long, for Matrix 5.5<br />
28 <strong>Synthes</strong> <strong>MATRIX</strong> <strong>Spine</strong> <strong>System</strong> <strong>–</strong> <strong>Degenerative</strong> Technique Guide<br />
Correct<br />
<br />
Incorrect
Optional Technique<br />
Screw Insertion with Retaining<br />
Sleeve, Locking<br />
Insert screw with retaining sleeve, locking<br />
Instruments<br />
03.632.074 Screwdriver Stardrive, T25, long,<br />
with T-Handle, for Matrix 5.5<br />
03.616.043 Retaining Sleeve, locking, long,<br />
for Matrix 5.5<br />
To assemble the screwdriver and the retaining sleeve, depress<br />
the loading collar on the proximal end of the retaining sleeve<br />
(1).<br />
<strong>The</strong>n slide the sleeve toward the handle on the shaft until it<br />
stops (2).<br />
Release the loading collar and verify that the retaining sleeve<br />
is firmly attached to the screwdriver (3).<br />
Retract the green locking ring towards the handle (4).<br />
Place the screwdriver tip securely into the T25 StarDrive<br />
recess of the pedicle screw (5).<br />
1<br />
2<br />
3<br />
4<br />
5<br />
<strong>MATRIX</strong> <strong>Spine</strong> <strong>System</strong> <strong>–</strong> <strong>Degenerative</strong> Technique Guide <strong>Synthes</strong> 29
Optional Technique<br />
Screw Insertion with Retaining Sleeve, Locking<br />
When using a ratchet handle, make sure to set it to neutral<br />
setting.<br />
Rotate the grey knob of the retaining sleeve clockwise. Firmly<br />
tighten to secure the implant, using the handle as countertorque<br />
(6).<br />
Push the green locking ring toward the grey knob (7). If<br />
required, set the ratchet handle to the forward setting to<br />
insert the screw.<br />
To release the screw from the retaining sleeve, retract the<br />
grey locking ring towards the handle, rotate the silver knob<br />
counterclockwise and remove the screwdriver (8)<br />
Notes:<br />
<strong>–</strong> Polyaxial screwheads need to remain free and mobile after<br />
insertion to allow accurate alignment to the rod during<br />
locking cap insertion and final tightening.<br />
<strong>–</strong> <strong>The</strong> mobility of the screwhead cannot be assessed while<br />
the holding sleeve is attached.<br />
Optional instruments<br />
03.632.072 Screwdriver Shaft Stardrive, T25, long,<br />
for Matrix<br />
03.632.075 Screwdriver Stardrive, T25, long,<br />
with straight handle, for Matrix<br />
03.632.042 Retaining Sleeve, locking, standard,<br />
for Matrix 5.5<br />
03.632.004 Screwdriver Stardrive, T25, standard,<br />
with T-Handle, for Matrix<br />
03.632.002 Screwdriver Shaft Stardrive, T25, standard,<br />
for Matrix 5.5<br />
03.632.005 Screwdriver Stardrive, T25, with straight<br />
handle, standard, for Matrix 5.5<br />
30 <strong>Synthes</strong> <strong>MATRIX</strong> <strong>Spine</strong> <strong>System</strong> <strong>–</strong> <strong>Degenerative</strong> Technique Guide<br />
6<br />
7<br />
8
Optional Technique<br />
Unassembled Pedicle Screw Insertion<br />
1<br />
Insert unassembled pedicle screw<br />
Instruments<br />
03.632.074 Screwdriver Stardrive, T25, long,<br />
with T-Handle, for Matrix 5.5<br />
03.632.046 Reamer for Pedicle Screws, for Matrix 5.5<br />
Prepare the pedicle and insert unassembled pedicle screws as<br />
recommended in steps 1 to 4 of the surgical technique<br />
(pages 8 <strong>–</strong>13).<br />
Slide reamer over screwdriver shaft. Engage tip of screwdriver<br />
in unassembled pedicle screw. Ream until the black<br />
line is visible on the shaft. This indicates that there is enough<br />
room for the implant head.<br />
Note: When reaming the most superior and inferior levels<br />
take care to protect the facet joints.<br />
Optional instruments<br />
03.620.061 T-Handle with Ratchet Wrench and with<br />
Torque Limiter, 10 Nm<br />
03.632.072 Screwdriver Shaft Stardrive, T25, long,<br />
for Matrix<br />
03.632.075 Screwdriver Stardrive, T25, long, with<br />
straight handle, for Matrix<br />
03.632.004 Screwdriver Stardrive, with T-Handle,<br />
standard, for Matrix 5.5<br />
03.632.002 Screwdriver Shaft Stardrive, T25,<br />
standard, for Matrix 5.5<br />
03.632.005 Screwdriver Stardrive, T25, with<br />
straight handle, standard, for Matrix 5.5<br />
<strong>MATRIX</strong> <strong>Spine</strong> <strong>System</strong> <strong>–</strong> <strong>Degenerative</strong> Technique Guide <strong>Synthes</strong> 31
Optional Technique<br />
Unassembled Pedicle Screw Insertion<br />
2<br />
Assemble polyaxial head<br />
Instruments<br />
03.632.037 Positioning Instrument for<br />
Polyaxial Screw Heads, for Matrix 5.5<br />
68.632.125 Loading Station for Matrix 5.5<br />
Insert the inner shaft of the positioning instrument into the<br />
handle and tighten in the clockwise direction.<br />
To pick up a screwhead, align the positioning instrument for<br />
polyaxial screw heads to the rod slot features on the poly -<br />
axial head implant and press down.<br />
Position the placement tool with the polyaxial head over the<br />
unassembled pedicle screw and press down. To ensure the<br />
polyaxial head is securely attached to the unassembled pedicle<br />
screw, gently lift up on the placement tool and angulate<br />
the polyaxial head.<br />
To release the head placement tool, press the button located<br />
at the distal end of the instrument.<br />
Notes:<br />
<strong>–</strong> If the polyaxial head does not successfully attach to the<br />
head of the unassembled pedicle screw, additional reaming<br />
or screw height adjustment may be required to ensure<br />
sufficient space exists to allow free mobility of the head.<br />
<strong>–</strong> Polyaxial screw heads can be removed a maximum of<br />
three times without removing the pedicle screw; a new<br />
head must be used for each assembly.<br />
32 <strong>Synthes</strong> <strong>MATRIX</strong> <strong>Spine</strong> <strong>System</strong> <strong>–</strong> <strong>Degenerative</strong> Technique Guide
Optional Technique<br />
Polyaxial Head Removal<br />
Instruments<br />
03.632.045 Removal Instrument<br />
for Polyaxial Screw Heads, for Matrix 5.5<br />
388.654 Ratchet with Handle,<br />
with Hexagonal Quick Coupling 6.0 mm<br />
If required, the polyaxial head can be removed from the<br />
pedicle screw intraoperatively.<br />
Remove any existing locking cap and the rod.<br />
Connect the inner shaft of the removal tool for polyaxial<br />
screw heads to the ratchet and insert into the handle of the<br />
removal tool.<br />
Ensure that the black line is visible on the inner shaft of the<br />
head removal tool.<br />
Press the tip of the head removal tool into the polyaxial head.<br />
A tactile feedback may be felt as the tip of the head removal<br />
tool mates with the collet of the polyaxial head. While holding<br />
the handle, thread the inner shaft clockwise until it stops.<br />
Lift to remove the head.<br />
To remove the implant head from the instrument, turn the<br />
ratchet counter-clockwise until the black line is visible. Pull<br />
the head off the instrument.<br />
Notes:<br />
<strong>–</strong> <strong>The</strong> head removal tool can be used to remove the polyaxial<br />
head of both unassembled as well as preassembled<br />
screws.<br />
<strong>–</strong> To remove the polyaxial reduction head, the tabs must<br />
first be broken off.<br />
<strong>MATRIX</strong> <strong>Spine</strong> <strong>System</strong> <strong>–</strong> <strong>Degenerative</strong> Technique Guide <strong>Synthes</strong> 33
Optional Technique<br />
Reduction Screws<br />
Instruments<br />
03.632.004 Screwdriver Stardrive, with T-Handle,<br />
standard, for Matrix 5.5<br />
03.632.042 Rod Pusher / Counter Torque<br />
for Reduction Screw, for Matrix 5.5<br />
03.632.080 Handle, detachable, for Matrix<br />
03.632.026 Rod Pusher / Counter Torque<br />
for Reduction Screws, for Matrix 5.5<br />
03.632.030 Tab Remover for Reduction Screws,<br />
for Matrix 5.5<br />
Reduction screws are available in preassembled form or as<br />
click-on versions for subsequent assembly.<br />
Follow the technique for preassembled polyaxial screw<br />
(page 10) or unassembled pedicle screw (page 30) to insert<br />
screw.<br />
Pick up a locking cap from the screw module with a T25<br />
screwdriver shaft. <strong>The</strong> screwdriver shaft is self-retaining.<br />
Place the rod pusher/counter torque for reduction screws<br />
(03.632.042) over the screw head. Insert the locking cap<br />
through the counter torque. Turning the locking cap will<br />
reduce the rod into the screw head.<br />
Optional instruments<br />
03.620.061 T-Handle with Ratchet Wrench and with<br />
Torque Limiter, 10 Nm<br />
03.632.002 Screwdriver Shaft Stardrive, T25, standard,<br />
for Matrix 5.5<br />
03.632.005 Screwdriver Stardrive, T25, with<br />
straight handle, standard, for Matrix 5.5<br />
03.632.025 Counter Torque for Reduction Screws,<br />
for Matrix 5.5<br />
03.632.074 Screwdriver Stardrive, T25, long, with<br />
T-Handle, for Matrix<br />
34 <strong>Synthes</strong> <strong>MATRIX</strong> <strong>Spine</strong> <strong>System</strong> <strong>–</strong> <strong>Degenerative</strong> Technique Guide<br />
15 mm<br />
Reduction
To break off the reduction screw tabs, place the rod<br />
pusher/counter torque for reduction screws (03.632.026)<br />
with the handle over the screw head. Gently rock the tab<br />
removal tool medial then lateral to break the tab wall free<br />
from the polyaxial head.<br />
Alternative technique for locking cap insertion<br />
Instrument<br />
03.632.029 Holding Crown for Reduction Screws,<br />
for Matrix 5.5<br />
<strong>The</strong> holding crown for reduction screws can be used instead<br />
of the counter torque to provide guidance for the locking<br />
cap insertion.<br />
<strong>MATRIX</strong> <strong>Spine</strong> <strong>System</strong> <strong>–</strong> <strong>Degenerative</strong> Technique Guide <strong>Synthes</strong> 35
Optional Technique<br />
Adding Transverse Connectors<br />
Instruments<br />
03.632.053 Measuring Device for Transverse<br />
Connectors, Snap-on, for Matrix<br />
03.632.204 Torque-limiting Handle, 3 Nm<br />
03.632.052 Screwdriver Stardrive, T15, short,<br />
for Matrix<br />
03.632.050 Retaining Sleeve for Transverse<br />
Connectors, Snap-on, for Matrix<br />
Use the measuring device for transverse connectors to estimate<br />
the distance between the two rods. On the crossbar of<br />
the measuring device note the size of the appropriate transverse<br />
connector (1 <strong>–</strong> 8).<br />
<strong>The</strong> transverse connectors are marked with sizes 1 <strong>–</strong> 8,<br />
matching the figures on the measuring device. Select the<br />
appropriate transverse connector.<br />
<strong>The</strong> ends of the transverse connector can be clicked onto the<br />
rod to secure it at the desired point.<br />
Use the screwdriver and the torque limiting handle to secure<br />
the transverse connector to the rods. When tightening the<br />
setscrews a tactile release is felt.<br />
Note: Always use retaining sleeve when tightening the<br />
setscrew.<br />
Warning: <strong>The</strong> <strong>MATRIX</strong> transverse connector contains Nitinol<br />
components. Implants that contain nitinol should not be<br />
used in patients with nickel sensitivities or allergies.<br />
36 <strong>Synthes</strong> <strong>MATRIX</strong> <strong>Spine</strong> <strong>System</strong> <strong>–</strong> <strong>Degenerative</strong> Technique Guide
Optional Technique<br />
Distraction for Posterior Interbody<br />
Fusion<br />
Instruments<br />
03.632.074 Screwdriver Stardrive, T25, long,<br />
with T-Handle, for Matrix 5.5<br />
03.632.085 Retaining Sleeve, detachable,<br />
for Matrix 5.5<br />
03.632.083 Distractor Tip, for Bone Screws,<br />
for Matrix 5.5<br />
03.632.087 Toothed Rack Retractor, for Matrix<br />
Slide detachable retaining sleeve over long T25 screw driver.<br />
Slide the distractor tip over the screwdriver tip and press<br />
firmly into the detachable retaining sleeve.<br />
Insert the tip of the screwdriver shaft into the screw head.<br />
Make sure that the tip of the screwdriver is fully seated in the<br />
recess of the screw head. Turn the green knob clockwise.<br />
Insert two pedicle screws.<br />
To release the detachable retaining sleeve from the distractor<br />
tip, pull the green knob towards the handle. Remove the<br />
screwdriver and retaining sleeve and repeat the procedure<br />
for the second pedicle screw.<br />
<strong>MATRIX</strong> <strong>Spine</strong> <strong>System</strong> <strong>–</strong> <strong>Degenerative</strong> Technique Guide <strong>Synthes</strong> 37
Optional Technique<br />
Distraction for Posterior Interbody Fusion<br />
Insert both posts of the distractor into the distractor tips.<br />
Lock the angular position of the rotatable distractor arm (1)<br />
by turning the lever. Switch the rocker lever (2) to the distraction<br />
position (D) and rotate the wing nut screw clockwise until<br />
the desired distraction is achieved.<br />
Perform discectomy and interbody fusion.<br />
Turn the rocker lever (2) to neutral (N) to unlock the angular<br />
position and remove the distractor.<br />
Reattach the screwdriver/detachable retaining sleeve and<br />
turn the green knob counterclockwise.<br />
Note: Do not allow the assembled tips to cross over otherwise<br />
the distractor will not work correctly. If necessary, use a<br />
different type of tip (see page 37).<br />
38 <strong>Synthes</strong> <strong>MATRIX</strong> <strong>Spine</strong> <strong>System</strong> <strong>–</strong> <strong>Degenerative</strong> Technique Guide<br />
2<br />
1
Alternative instruments<br />
03.632.083 Distractor Tip, for Bone Screws,<br />
for Matrix 5.5<br />
03.632.084 Distractor Tip, for Screw Heads,<br />
for Matrix 5.5<br />
03.632.089 Distractor Tip, with Hook End,<br />
for Matrix 5.5<br />
Alternative distractor tips and techniques<br />
Three different distractor tips are available, which can be<br />
used in a variety of combinations.<br />
<strong>The</strong> distractor tip for screws (1) can be used with pedicle,<br />
polyaxial, and polyaxial reduction screws. Parallel distraction<br />
can be performed.<br />
<strong>The</strong> distractor tip with screw heads (2) can be used with<br />
polyaxial, polyaxial reduction, and monoaxial screws. <strong>The</strong>y<br />
are attached to the polyaxial screw head after insertion of<br />
the pedicle screw. If firmly tightened the screw becomes<br />
monoaxial, parallel distraction can be performed. <strong>The</strong>se tips<br />
are particularly suitable for cases where the tips for bone<br />
screws would cross over as a result of pronounced lordotic<br />
curvature of the spine.<br />
<strong>The</strong> distractor tip with hook end (3) can be used with pedicle,<br />
polyaxial, and polyaxial reduction screws. Distraction can be<br />
performed.<br />
1<br />
2<br />
3<br />
<strong>MATRIX</strong> <strong>Spine</strong> <strong>System</strong> <strong>–</strong> <strong>Degenerative</strong> Technique Guide <strong>Synthes</strong> 39
Optional Technique<br />
Locking Cap Removal<br />
Loosen locking cap<br />
Instruments<br />
03.620.061 T-Handle with Ratchet Wrench and<br />
with Torque Limiter, 10 Nm<br />
03.632.400 Screwdriver Shaft Stardrive, T25, standard,<br />
straight tip, with Hexagonal Coupling,<br />
for Matrix<br />
03.632.049 Counter Torque, standard, for Matrix 5.5<br />
03.632.080 Handle, detachable, for Matrix 5.5<br />
To remove a locking cap, slide the counter torque with detachable<br />
handle over the screwhead. Place the ratchet of the<br />
torque limiting handle in the neutral position, engage a T25<br />
screwdriver with the Stardrive recess of the locking cap and<br />
turn counter-clockwise.<br />
Note: Locking caps are designed to lock the construct safely<br />
and minimize the chance of post-operative loosening and<br />
rod-push-through. <strong>The</strong>refore, in certain cases, the loosening<br />
torque may be higher than 10 Nm. In such cases, use the<br />
following techniques to remove a locking cap.<br />
40 <strong>Synthes</strong> <strong>MATRIX</strong> <strong>Spine</strong> <strong>System</strong> <strong>–</strong> <strong>Degenerative</strong> Technique Guide
Sequentially turn clockwise and then immediately counterclockwise.<br />
Turn until tactile or audible feedback from the<br />
implant is experienced. Repeat the steps until the locking cap<br />
is loose.<br />
Notes:<br />
<strong>–</strong> For this technique, always use the torque limiting handle<br />
(03.620.061) to reduce risk of damage to the T25 screwdriver<br />
shaft.<br />
<strong>–</strong> If this method does not produce the desired result, follow<br />
the technique according to Option A (page 42) or Option<br />
B (page 44).<br />
Optional instruments<br />
03.632.002 Screwdriver Shaft Stardrive, T25,<br />
standard, for Matrix 5.5<br />
03.632.401 Screwdriver Shaft Stardrive, T25, long,<br />
straight tip, with Hexagonal Coupling,<br />
for Matrix<br />
03.632.072 Screwdriver Shaft Stardrive, T25, long,<br />
for Matrix<br />
<strong>MATRIX</strong> <strong>Spine</strong> <strong>System</strong> <strong>–</strong> <strong>Degenerative</strong> Technique Guide <strong>Synthes</strong> 41
Optional Technique<br />
Locking Cap Removal<br />
If after multiple attempts to loosen the locking cap the<br />
torque is still excessive, following techniques should be used:<br />
Option A: Counter torque on a adjacent screw<br />
Instruments<br />
03.620.061 T-Handle with Ratchet Wrench and<br />
with Torque Limiter, 10 Nm<br />
03.632.400 Screwdriver Shaft Stardrive, T25, standard,<br />
straight tip, with Hexagonal<br />
Coupling, for Matrix<br />
03.632.049 Counter Torque, standard, for Matrix 5.5<br />
03.632.006 Rod Pusher/Counter Torque, standard,<br />
for Matrix 5.5<br />
03.632.080 Handle, detachable, for Matrix<br />
Place the rod pusher / counter torque with detachable handle<br />
over an adjacent screw on the same rod (i.e. one level higher<br />
or lower). Simultaneously place the countertorque over the<br />
locking cap to be loosened and engage the screwdriver shaft<br />
and torque limiting handle with the stardrive recess of the<br />
locking cap. Place the ratchet of the torque limiting handle in<br />
the neutral position and begin to sequentially turn clockwise<br />
and then immediately counter-clockwise. Turn until tactile or<br />
audible feedback from the implant is experienced. Repeat<br />
the steps until the locking cap is loose.<br />
42 <strong>Synthes</strong> <strong>MATRIX</strong> <strong>Spine</strong> <strong>System</strong> <strong>–</strong> <strong>Degenerative</strong> Technique Guide
Notes:<br />
<strong>–</strong> For this technique, always use the torque limiting handle<br />
(03.620.061) to reduce risk of damage to the T25 screwdriver<br />
shaft.<br />
<strong>–</strong> Retighten the locking cap on which the counter torque<br />
was applied to 10 Nm.<br />
<strong>–</strong> To loosen the last locking cap, replace the counter torque,<br />
consisting of rod pusher/counter torque and handle, with<br />
a rod persuader.<br />
<strong>–</strong> If this method does not produce the desired result, follow<br />
the technique according to Option B (page 44).<br />
Optional instruments<br />
03.632.002 Screwdriver Shaft Stardrive, T25,<br />
standard, for Matrix 5.5<br />
03.632.009 Rod Persuader, standard, for Matrix 5.5<br />
03.632.401 Screwdriver Shaft Stardrive, T25, long,<br />
straight tip, with Hexagonal Coupling,<br />
for Matrix<br />
03.632.072 Screwdriver Shaft Stardrive, T25, long,<br />
for Matrix<br />
03.632.079 Rod Introduction Pliers, long,<br />
for Matrix 5.5<br />
<strong>MATRIX</strong> <strong>Spine</strong> <strong>System</strong> <strong>–</strong> <strong>Degenerative</strong> Technique Guide <strong>Synthes</strong> 43
Optional Technique<br />
Locking Cap Removal<br />
Option B:<br />
Apply a downward force to the rod<br />
Instruments<br />
03.620.061 T-Handle with Ratchet Wrench and<br />
with Torque Limiter, 10 Nm<br />
03.632.401 Screwdriver Shaft Stardrive, T25, long,<br />
straight tip, with Hexagonal Coupling,<br />
for Matrix<br />
03.632.079 Rod Introduction Pliers, long,<br />
for Matrix 5.5<br />
Apply a downward force to the rod. Place the Rod Persuader<br />
on the screw and firmly squeeze the handles. Place the<br />
ratchet of the torque limiting handle in the neutral position.<br />
With the reduction load applied begin to sequentially turn<br />
clockwise and then immediately counter-clockwise. Turn until<br />
tactile or audible feedback from the implant is experienced.<br />
Repeat the steps until the locking cap is loose.<br />
Notes:<br />
<strong>–</strong> For this technique, always use the torque limiting handle<br />
(03.620.061) to reduce risk of damage to the T25 screwdriver<br />
shaft.<br />
<strong>–</strong> If this method does not produce the desired result, follow<br />
the technique according to Option A (page 42).<br />
Optional Instruments<br />
03.632.072 Screwdriver Shaft Stardrive, T25, long,<br />
for Matrix<br />
03.632.400 Screwdriver Shaft Stardrive, T25, standard,<br />
straight tip, with Hexagonal Coupling,<br />
for Matrix<br />
03.632.002 Screwdriver Shaft Stardrive, T25, standard,<br />
for Matrix 5.5<br />
03.632.009 Rod Persuader, standard, for Matrix 5.5<br />
44 <strong>Synthes</strong> <strong>MATRIX</strong> <strong>Spine</strong> <strong>System</strong> <strong>–</strong> <strong>Degenerative</strong> Technique Guide
How to Disassemble Instruments<br />
for Cleaning<br />
Screwdriver with retaining sleeve<br />
1<br />
Screwdriver with detachable retaining sleeve<br />
1<br />
4<br />
2<br />
2<br />
5<br />
3<br />
3<br />
<strong>MATRIX</strong> <strong>Spine</strong> <strong>System</strong> <strong>–</strong> <strong>Degenerative</strong> Technique Guide <strong>Synthes</strong> 45
How to Disassemble Instruments for Cleaning<br />
Counter torque<br />
1<br />
Positioning instrument for polyaxial screw heads<br />
1<br />
46 <strong>Synthes</strong> <strong>MATRIX</strong> <strong>Spine</strong> <strong>System</strong> <strong>–</strong> <strong>Degenerative</strong> Technique Guide<br />
1<br />
2<br />
2<br />
2
Head removal tool<br />
1 2<br />
Torque limiting handle<br />
1 2<br />
2<br />
1<br />
<strong>MATRIX</strong> <strong>Spine</strong> <strong>System</strong> <strong>–</strong> <strong>Degenerative</strong> Technique Guide <strong>Synthes</strong> 47
How to Disassemble Instruments for Cleaning<br />
Reduction instrument for spondylolisthesis <strong>MATRIX</strong><br />
1<br />
Rod persuader <strong>MATRIX</strong><br />
1<br />
48 <strong>Synthes</strong> <strong>MATRIX</strong> <strong>Spine</strong> <strong>System</strong> <strong>–</strong> <strong>Degenerative</strong> Technique Guide<br />
2 3<br />
2 3
Implants*<br />
Pedicle Screw Matrix 5.5 Polyaxial 4.0 mm,<br />
preassembled, Titanium Alloy (TAN)<br />
length (mm)<br />
04.632.420 20<br />
04.632.425 25<br />
04.632.430 30<br />
04.632.435 35<br />
04.632.440 40<br />
04.632.445 45<br />
Pedicle Screw Matrix 5.5 Polyaxial 5.0 mm,<br />
preassembled, Titanium Alloy (TAN)<br />
length (mm)<br />
04.632.520 20<br />
04.632.525 25<br />
04.632.530 30<br />
04.632.535 35<br />
04.632.540 40<br />
04.632.545 45<br />
Pedicle Screw Matrix 5.5 Polyaxial 5.5 mm,<br />
preassembled, Titanium Alloy (TAN)<br />
length (mm)<br />
04.632.120 20<br />
04.632.125 25<br />
04.632.130 30<br />
04.632.135 35<br />
04.632.140 40<br />
04.632.145 45<br />
04.632.150 50<br />
04.632.155 55<br />
04.632.160 60<br />
*All implants are also available sterile packed. Add suffix “S” to article number.<br />
<strong>MATRIX</strong> <strong>Spine</strong> <strong>System</strong> <strong>–</strong> <strong>Degenerative</strong> Technique Guide <strong>Synthes</strong> 49
Implants*<br />
Pedicle Screw Matrix 5.5 Polyaxial 6.0 mm,<br />
preassembled, Titanium Alloy (TAN)<br />
length (mm)<br />
04.632.620 20<br />
04.632.625 25<br />
04.632.630 30<br />
04.632.635 35<br />
04.632.640 40<br />
04.632.645 45<br />
04.632.650 50<br />
04.632.655 55<br />
04.632.660 60<br />
04.632.665 65<br />
Pedicle Screw Matrix 5.5 Polyaxial 7.0 mm,<br />
preassembled, Titanium Alloy (TAN)<br />
length (mm)<br />
04.632.725 25<br />
04.632.730 30<br />
04.632.735 35<br />
04.632.740 40<br />
04.632.745 45<br />
04.632.750 50<br />
04.632.755 55<br />
04.632.760 60<br />
04.632.765 65<br />
04.632.770 70<br />
04.632.775 75<br />
04.632.780 80<br />
04.632.785 85<br />
04.632.790 90<br />
04.632.795 95<br />
04.632.799 100<br />
*All implants are also available sterile packed. Add suffix “S” to article number.<br />
50 <strong>Synthes</strong> <strong>MATRIX</strong> <strong>Spine</strong> <strong>System</strong> <strong>–</strong> <strong>Degenerative</strong> Technique Guide
Pedicle Screw Matrix 5.5 Polyaxial 8.0 mm,<br />
preassembled, Titanium Alloy (TAN)<br />
length (mm)<br />
04.632.825 25<br />
04.632.830 30<br />
04.632.835 35<br />
04.632.840 40<br />
04.632.845 45<br />
04.632.850 50<br />
04.632.855 55<br />
04.632.860 60<br />
04.632.865 65<br />
04.632.870 70<br />
04.632.875 75<br />
04.632.880 80<br />
04.632.885 85<br />
04.632.890 90<br />
04.632.895 95<br />
04.632.899 100<br />
Pedicle Screw Matrix 5.5 Polyaxial 9.0 mm,<br />
preassembled, Titanium Alloy (TAN)<br />
length (mm)<br />
04.632.930 30<br />
04.632.935 35<br />
04.632.940 40<br />
04.632.945 45<br />
04.632.950 50<br />
04.632.955 55<br />
04.632.960 60<br />
04.632.965 65<br />
04.632.970 70<br />
04.632.975 75<br />
04.632.980 80<br />
04.632.985 85<br />
04.632.990 90<br />
04.632.995 95<br />
04.632.999 100<br />
<strong>MATRIX</strong> <strong>Spine</strong> <strong>System</strong> <strong>–</strong> <strong>Degenerative</strong> Technique Guide <strong>Synthes</strong> 51
Implants*<br />
Reduction Screw Matrix 5.5, 4.0 mm, preassembled,<br />
Titanium Alloy (TAN)<br />
length (mm)<br />
04.634.420 20<br />
04.634.425 25<br />
04.634.430 30<br />
04.634.435 35<br />
04.634.440 40<br />
04.634.445 45<br />
Reduction Screw Matrix 5.5, 5.0 mm, preassembled,<br />
Titanium Alloy (TAN)<br />
length (mm)<br />
04.634.520 20<br />
04.634.525 25<br />
04.634.530 30<br />
04.634.535 35<br />
04.634.540 40<br />
04.634.545 45<br />
04.634.550 50<br />
04.634.555 55<br />
Reduction Screw Matrix 5.5, 5.5 mm, preassembled,<br />
Titanium Alloy (TAN)<br />
length (mm)<br />
04.634.120 20<br />
04.634.125 25<br />
04.634.130 30<br />
04.634.135 35<br />
04.634.140 40<br />
04.634.145 45<br />
04.634.150 50<br />
04.634.155 55<br />
04.634.160 60<br />
*All implants are also available sterile packed. Add suffix “S” to article number.<br />
52 <strong>Synthes</strong> <strong>MATRIX</strong> <strong>Spine</strong> <strong>System</strong> <strong>–</strong> <strong>Degenerative</strong> Technique Guide
Reduction Screw Matrix 5.5, 6.0 mm, preassembled,<br />
Titanium Alloy (TAN)<br />
length (mm)<br />
04.634.620 20<br />
04.634.625 25<br />
04.634.630 30<br />
04.634.635 35<br />
04.634.640 40<br />
04.634.645 45<br />
04.634.650 50<br />
04.634.655 55<br />
04.634.660 60<br />
04.634.665 65<br />
Reduction Screw Matrix 5.5, 7.0 mm, preassembled,<br />
Titanium Alloy (TAN)<br />
length (mm)<br />
04.634.725 25<br />
04.634.730 30<br />
04.634.735 35<br />
04.634.740 40<br />
04.634.745 45<br />
04.634.750 50<br />
04.634.755 55<br />
04.634.760 60<br />
04.634.765 65<br />
Reduction Screw Matrix 5.5, 8.0 mm, preassembled,<br />
Titanium Alloy (TAN)<br />
length (mm)<br />
04.634.825 25<br />
04.634.830 30<br />
04.634.835 35<br />
04.634.840 40<br />
04.635.845 45<br />
04.635.850 50<br />
04.635.855 55<br />
04.635.860 60<br />
04.635.865 65<br />
<strong>MATRIX</strong> <strong>Spine</strong> <strong>System</strong> <strong>–</strong> <strong>Degenerative</strong> Technique Guide <strong>Synthes</strong> 53
Implants*<br />
Pedicle Screw Matrix 5.5 4.0 mm,<br />
Titanium Alloy (TAN)<br />
length (mm)<br />
04.639.420 20<br />
04.639.425 25<br />
04.639.430 30<br />
04.639.435 35<br />
04.639.440 40<br />
04.639.445 45<br />
Pedicle Screw Matrix 5.5 5.0 mm,<br />
Titanium Alloy (TAN)<br />
length (mm)<br />
04.639.520 20<br />
04.639.525 25<br />
04.639.530 30<br />
04.639.535 35<br />
04.639.540 40<br />
04.639.545 45<br />
04.639.550 50<br />
04.639.555 55<br />
Pedicle Screw Matrix 5.5 5.5 mm,<br />
Titanium Alloy (TAN)<br />
length (mm)<br />
04.639.120 20<br />
04.639.125 25<br />
04.639.130 30<br />
04.639.135 35<br />
04.639.140 40<br />
04.639.145 45<br />
04.639.150 50<br />
04.639.155 55<br />
04.639.160 60<br />
54 <strong>Synthes</strong> <strong>MATRIX</strong> <strong>Spine</strong> <strong>System</strong> <strong>–</strong> <strong>Degenerative</strong> Technique Guide
Pedicle Screw Matrix 5.5 6.0 mm,<br />
Titanium Alloy (TAN)<br />
length (mm)<br />
04.639.620 20<br />
04.639.625 25<br />
04.639.630 30<br />
04.639.635 35<br />
04.639.640 40<br />
04.639.645 45<br />
04.639.650 50<br />
04.639.655 55<br />
04.639.660 60<br />
04.639.665 65<br />
Pedicle Screw Matrix 5.5 7.0 mm,<br />
Titanium Alloy (TAN)<br />
length (mm)<br />
04.639.725 25<br />
04.639.730 30<br />
04.639.735 35<br />
04.639.740 40<br />
04.639.745 45<br />
04.639.750 50<br />
04.639.755 55<br />
04.639.760 60<br />
04.639.765 65<br />
04.639.770 70<br />
04.639.775 75<br />
04.639.780 80<br />
04.639.785 85<br />
04.639.790 90<br />
04.639.795 95<br />
04.639.799 100<br />
<strong>MATRIX</strong> <strong>Spine</strong> <strong>System</strong> <strong>–</strong> <strong>Degenerative</strong> Technique Guide <strong>Synthes</strong> 55
Implants*<br />
Pedicle Screw Matrix 5.5 8.0 mm,<br />
Titanium Alloy (TAN)<br />
length (mm)<br />
04.639.825 25<br />
04.639.830 30<br />
04.639.835 35<br />
04.639.840 40<br />
04.639.845 45<br />
04.639.850 50<br />
04.639.855 55<br />
04.639.860 60<br />
04.639.865 65<br />
04.639.870 70<br />
04.639.875 75<br />
04.639.880 80<br />
04.639.885 85<br />
04.639.890 90<br />
04.639.895 95<br />
04.639.899 100<br />
56 <strong>Synthes</strong> <strong>MATRIX</strong> <strong>Spine</strong> <strong>System</strong> <strong>–</strong> <strong>Degenerative</strong> Technique Guide
Pedicle Screw Matrix 5.5 9.0 mm,<br />
Titanium Alloy (TAN)<br />
length (mm)<br />
04.639.930 30<br />
04.639.935 35<br />
04.639.940 40<br />
04.639.945 45<br />
04.639.950 50<br />
04.639.955 55<br />
04.639.960 60<br />
04.639.965 65<br />
04.639.970 70<br />
04.639.975 75<br />
04.639.980 80<br />
04.639.985 85<br />
04.639.990 90<br />
04.639.995 95<br />
04.639.999 100<br />
Also available:<br />
<strong>–</strong> Pedicle Screw Matrix 5.5, polyaxial, cannulated<br />
<strong>–</strong> Pedicle Screw Matrix 5.5, perforated<br />
<strong>–</strong> Intermediate lengths available upon request<br />
Screw heads<br />
04.632.001 Screw Head, polyaxial, for Matrix 5.5,<br />
Titanium Alloy (TAN)<br />
04.634.002 Reduction Head, polyaxial, for Matrix 5.5,<br />
Titanium Alloy (TAN)<br />
<strong>MATRIX</strong> <strong>Spine</strong> <strong>System</strong> <strong>–</strong> <strong>Degenerative</strong> Technique Guide <strong>Synthes</strong> 57
Implants*<br />
Curved rods<br />
Rods 5.5 mm, hard, curved, Pure Titanium (TiCP)<br />
04.636.030 30<br />
04.636.035 35<br />
04.636.040 40<br />
04.636.045 45<br />
04.636.050 50<br />
04.636.055 55<br />
04.636.060 60<br />
04.636.065 65<br />
04.636.070 70<br />
04.636.075 75<br />
04.636.080 80<br />
04.636.085 85<br />
04.636.125 125<br />
length (mm)<br />
Rods 5.5 mm, extra-hard, curved,<br />
Cobalt-Chrome Alloy (CoCrMo)<br />
length (mm)<br />
09.636.030 30<br />
09.636.035 35<br />
09.636.040 40<br />
09.636.045 45<br />
09.636.050 50<br />
09.636.055 55<br />
09.636.060 60<br />
09.636.065 65<br />
09.636.070 70<br />
09.636.075 75<br />
09.636.080 80<br />
09.636.085 85<br />
09.636.125 125<br />
58 <strong>Synthes</strong> <strong>MATRIX</strong> <strong>Spine</strong> <strong>System</strong> <strong>–</strong> <strong>Degenerative</strong> Technique Guide
Straight rods<br />
Rods 5.5 mm, hard, straight, Pure Titanium (TiCP)<br />
04.634.230 30<br />
04.634.235 35<br />
04.634.240 40<br />
04.634.245 45<br />
04.634.250 50<br />
04.634.255 55<br />
04.634.260 60<br />
04.634.265 65<br />
04.634.270 70<br />
04.634.275 75<br />
04.634.280 80<br />
04.634.285 85<br />
04.634.290 90<br />
04.634.295 95<br />
04.633.290 100<br />
04.634.325 125<br />
04.633.291 150<br />
04.633.292 200<br />
04.633.293 300<br />
04.633.294 400<br />
04.633.500 500<br />
04.633.700* 700<br />
length (mm)<br />
*Available nonsterile packed only<br />
<strong>MATRIX</strong> <strong>Spine</strong> <strong>System</strong> <strong>–</strong> <strong>Degenerative</strong> Technique Guide <strong>Synthes</strong> 59
Implants*<br />
Straight rods<br />
Rods 5.5 mm, extra-hard, straight,<br />
Titanium Alloy (TAN)<br />
length (mm)<br />
04.616.130 30<br />
04.616.135 35<br />
04.616.140 40<br />
04.616.145 45<br />
04.616.150 50<br />
04.616.155 55<br />
04.616.160 60<br />
04.616.165 65<br />
04.616.170 70<br />
04.616.175 75<br />
04.616.180 80<br />
04.616.185 85<br />
04.616.190 90<br />
04.616.195 95<br />
04.633.279 100<br />
04.616.225 125<br />
04.633.281 150<br />
04.616.275 175<br />
04.633.282 200<br />
04.633.283 300<br />
04.633.284 400<br />
04.633.285 500<br />
04.616.700* 700<br />
*Available nonsterile packed only<br />
60 <strong>Synthes</strong> <strong>MATRIX</strong> <strong>Spine</strong> <strong>System</strong> <strong>–</strong> <strong>Degenerative</strong> Technique Guide
Straight rods<br />
Rods 5.5 mm, hard, straight,<br />
Cobalt-Chrome Alloy (CoCrMo)<br />
length (mm)<br />
09.631.030 30<br />
09.631.035 35<br />
09.631.040 40<br />
09.631.045 45<br />
09.631.050 50<br />
09.631.055 55<br />
09.631.060 60<br />
09.631.065 65<br />
09.631.070 70<br />
09.631.075 75<br />
09.631.080 80<br />
09.631.085 85<br />
09.631.090 90<br />
09.631.095 95<br />
09.633.100 100<br />
09.631.125 125<br />
09.633.150 150<br />
09.631.175 175<br />
09.633.190 200<br />
09.633.191 300<br />
09.633.192 400<br />
09.633.193 500<br />
09.631.700* 700<br />
*Available nonsterile packed only<br />
<strong>MATRIX</strong> <strong>Spine</strong> <strong>System</strong> <strong>–</strong> <strong>Degenerative</strong> Technique Guide <strong>Synthes</strong> 61
Implants*<br />
Connecting rods<br />
Connecting Rod, length 500 mm,<br />
Pure Titanium (TiCP)<br />
diameter (mm/mm)<br />
04.633.187 5.5/6.0<br />
Connecting Rods, length 500 mm,<br />
Titanium Alloy (TAN)<br />
diameter (mm/mm)<br />
04.633.190 5.5/3.5<br />
04.633.191 5.5/4.0<br />
04.633.188 5.5/6.0<br />
Connecting Rod, length 500 mm, Cobalt-chrome alloy<br />
(CoCrMo)<br />
diameter (mm/mm)<br />
09.633.187 5.5/6.0<br />
Also available:<br />
<strong>–</strong> Pelvic Rods 5.5 mm, prebent<br />
For an overview, please refer to www.synthes.com/e-catalog.<br />
62 <strong>Synthes</strong> <strong>MATRIX</strong> <strong>Spine</strong> <strong>System</strong> <strong>–</strong> <strong>Degenerative</strong> Technique Guide
Locking cap<br />
04.632.000 Locking Cap, one-step, for Matrix 5.5<br />
Titanium Alloy (TAN)<br />
Snap-On Transverse Connector<br />
length size<br />
04.633.317 17 <strong>–</strong> 22 mm 1<br />
04.633.321 21 <strong>–</strong> 26 mm 2<br />
04.633.326 26 <strong>–</strong> 31 mm 3<br />
04.633.330 30 <strong>–</strong> 33 mm 4<br />
04.633.333 33 <strong>–</strong> 38 mm 5<br />
04.633.338 38 <strong>–</strong> 47 mm 6<br />
04.633.347 47 <strong>–</strong> 62 mm 7<br />
04.633.364 62 <strong>–</strong> 90 mm 8<br />
<strong>MATRIX</strong> <strong>Spine</strong> <strong>System</strong> <strong>–</strong> <strong>Degenerative</strong> Technique Guide <strong>Synthes</strong> 63
Instruments<br />
For pedicle preparation<br />
03.632.057 Pedicle Marker for Matrix<br />
03.632.058 Inserter for Pedicle Marker, for Matrix<br />
Awls and probes with palm handle<br />
388.656 Pedicle Awl 4.0 mm with<br />
Silicone Handle, length 255 mm,<br />
for Pedicle Screws 4.0 to 7.0 mm<br />
388.536 Pedicle Probe for Screws 4.2 mm,<br />
length 240 mm<br />
388.655 Pedicle Probe 3.7 mm<br />
with Silicone Handle, length 240 mm,<br />
for Pedicle Screws 5.0 to 7.0 mm<br />
388.657 Pedicle Probe 3.8 mm, curved,<br />
with Silicone Handle, length 290 mm,<br />
for Pedicle Screws 5.0 to 7.0 mm<br />
64 <strong>Synthes</strong> <strong>MATRIX</strong> <strong>Spine</strong> <strong>System</strong> <strong>–</strong> <strong>Degenerative</strong> Technique Guide
Ball tip feelers<br />
388.545 Feeler for Screw Channel, straight,<br />
2.3 mm, length 275 mm<br />
388.546 Feeler for Screw Channel, curved,<br />
2.3 mm, length 275 mm<br />
388.549 Feeler, straight, with rounded tip<br />
Tap for Pedicle Screws,<br />
length 180 mm<br />
03.632.103 3.5 mm<br />
03.632.104 4.0 mm<br />
03.632.105 5.0 mm<br />
03.632.155 5.5 mm<br />
03.632.106 6.0 mm<br />
03.632.107 7.0 mm<br />
03.632.108 8.0 mm<br />
03.632.109 9.0 mm<br />
<strong>MATRIX</strong> <strong>Spine</strong> <strong>System</strong> <strong>–</strong> <strong>Degenerative</strong> Technique Guide <strong>Synthes</strong> 65
Instruments<br />
For screw insertion<br />
Retaining Sleeves<br />
03.632.001 Retaining Sleeve, standard, for Matrix 5.5<br />
03.632.036 Retaining Sleeve, long, for Matrix 5.5<br />
03.616.042 Retaining Sleeve, locking<br />
03.616.043 Retaining Sleeve, locking, long<br />
Screwdriver Shafts Stardrive T25<br />
03.632.002 Screwdriver Shaft Stardrive, T25, standard,<br />
for Matrix 5.5<br />
03.632.072 Screwdriver Shaft Stardrive, T25, long,<br />
for Matrix 5.5<br />
03.632.400 Screwdriver Shaft Stardrive, T25, standard,<br />
straight tip, with Hexagonal<br />
Coupling, for Matrix<br />
03.632.401 Screwdriver Shaft Stardrive, T25, long,<br />
straight tip, with Hexagonal Coupling,<br />
for Matrix<br />
Screwdrivers Stardrive T25 with T-Handle<br />
03.632.004 Screwdriver Stardrive, with T-Handle,<br />
standard, for Matrix 5.5<br />
03.632.074 Screwdriver Stardrive, T25, long,<br />
with T-Handle, for Matrix 5.5<br />
66 <strong>Synthes</strong> <strong>MATRIX</strong> <strong>Spine</strong> <strong>System</strong> <strong>–</strong> <strong>Degenerative</strong> Technique Guide
Screwdrivers Stardrive T25 with straight handle<br />
03.632.005 Screwdriver Stardrive, T25,<br />
with straight handle, standard,<br />
for Matrix 5.5<br />
03.632.075 Screwdriver Stardrive, T25, long,<br />
with straight handle, for Matrix 5.5<br />
Handles with hexagonal coupling<br />
03.620.019 Torque-limiting Handle, 10 Nm, for Pangea<br />
03.636.008 T-Handle with Hexagonal Coupling 6.0 mm<br />
03.632.090 T-Handle with Ratchet Wrench, with<br />
Hexagonal Coupling 6.0 mm<br />
03.632.091 Handle with Ratchet Wrench, straight,<br />
with Hexagonal Coupling 6.0 mm<br />
<strong>MATRIX</strong> <strong>Spine</strong> <strong>System</strong> <strong>–</strong> <strong>Degenerative</strong> Technique Guide <strong>Synthes</strong> 67
Instruments<br />
For assembly and removal of polyaxial screw heads<br />
03.632.007 Alignment Tool for polyaxial Screw Head,<br />
for Matrix 5.5<br />
03.632.037 Positioning Instrument for Polyaxial Screw<br />
Heads, for Matrix 5.5<br />
03.632.045 Removal Instrument for Polyaxial Screw<br />
Heads, for Matrix 5.5<br />
03.632.046 Reamer for Pedicle Screws, for Matrix 5.5<br />
68.632.125 Loading Station for Matrix 5.5<br />
68 <strong>Synthes</strong> <strong>MATRIX</strong> <strong>Spine</strong> <strong>System</strong> <strong>–</strong> <strong>Degenerative</strong> Technique Guide
For rod cutting and bending<br />
388.906 Trial Rod 5.0 mm, length 150 mm<br />
03.632.017 Rod Bender with Silicone Handle<br />
388.750 USS Rod Cutting and Bending Device<br />
388.720 Bolt Cutter<br />
<strong>MATRIX</strong> <strong>Spine</strong> <strong>System</strong> <strong>–</strong> <strong>Degenerative</strong> Technique Guide <strong>Synthes</strong> 69
Instruments<br />
For rod insertion<br />
03.632.081 Rod Holding Forceps for Rods 5.5 mm<br />
03.632.202 Holding Forceps for Rods 5.5 and<br />
6.0 mm<br />
03.632.169 Rod Pusher for Rods 5.5 / 6.0 mm,<br />
for Matrix<br />
70 <strong>Synthes</strong> <strong>MATRIX</strong> <strong>Spine</strong> <strong>System</strong> <strong>–</strong> <strong>Degenerative</strong> Technique Guide
For distraction and compression<br />
03.632.000 Distraction Fork<br />
388.410 Spreader Forceps for Pedicle Screws,<br />
length 330 mm<br />
03.620.018 Distraction Forceps, for Lumbar <strong>Spine</strong><br />
388.422 Compression Forceps, length 335 mm,<br />
for Pedicle Screws<br />
03.620.017 Compression Forceps, for Lumbar <strong>Spine</strong><br />
<strong>MATRIX</strong> <strong>Spine</strong> <strong>System</strong> <strong>–</strong> <strong>Degenerative</strong> Technique Guide <strong>Synthes</strong> 71
Instruments<br />
Instruments for toothed rack retractor<br />
03.632.083 Distractor Tip, for Bone Screws,<br />
for Matrix 5.5<br />
03.632.084 Distractor Tip, for Screw Heads,<br />
for Matrix 5.5<br />
03.632.089 Distractor Tip, with Hook End,<br />
for Matrix 5.5<br />
03.632.085 Retaining Sleeve, detachable,<br />
for Matrix 5.5<br />
03.632.087 Toothed Rack Retractor, for Matrix<br />
72 <strong>Synthes</strong> <strong>MATRIX</strong> <strong>Spine</strong> <strong>System</strong> <strong>–</strong> <strong>Degenerative</strong> Technique Guide
For cap introduction and tightening<br />
03.620.061 T-Handle with Ratchet Wrench and<br />
with Torque Limiter, 10 Nm<br />
Rod Pusher/Counter Torques<br />
03.632.006 Rod Pusher/Counter Torque, standard,<br />
for Matrix 5.5<br />
03.632.076 Rod Pusher/Counter Torque, long,<br />
for Matrix 5.5<br />
03.632.049 Counter Torque, standard, for Matrix 5.5<br />
03.632.099 Counter Torque, long, for Matrix 5.5<br />
03.632.080 Handle, detachable, for Matrix<br />
<strong>MATRIX</strong> <strong>Spine</strong> <strong>System</strong> <strong>–</strong> <strong>Degenerative</strong> Technique Guide <strong>Synthes</strong> 73
Instruments<br />
For transverse connectors<br />
03.632.050 Retaining Sleeve for Transverse<br />
Connectors, Snap-on, for Matrix<br />
03.632.052 Screwdriver Stardrive, T15, short,<br />
for Matrix<br />
03.632.053 Measuring Device for Transverse<br />
Connectors, Snap-on, for Matrix<br />
03.632.204 Torque-limiting Handle, 3 Nm<br />
74 <strong>Synthes</strong> <strong>MATRIX</strong> <strong>Spine</strong> <strong>System</strong> <strong>–</strong> <strong>Degenerative</strong> Technique Guide
For rod reduction<br />
Reduction instruments<br />
03.632.408 Reduction Instrument for Spondylolisthesis,<br />
standard, for Matrix 5.5<br />
03.632.409 Reduction Instrument for Spondylolisthesis,<br />
long, for Matrix 5.5<br />
388.654 Ratchet with Handle,<br />
with Hexagonal Quick Coupling 6.0 mm<br />
03.620.091 Socket, hexagonal 6.0 mm<br />
<strong>MATRIX</strong> <strong>Spine</strong> <strong>System</strong> <strong>–</strong> <strong>Degenerative</strong> Technique Guide <strong>Synthes</strong> 75
Instruments<br />
Rod persuader/ Rod introduction pliers<br />
03.632.009 Rod Persuader, standard, for Matrix 5.5<br />
03.632.079 Rod Introduction Pliers, long,<br />
for Matrix 5.5<br />
Rocker forks<br />
03.632.010 Rocker Fork, small, for Matrix 5.5<br />
03.632.012 Rocker Fork, medium, for Matrix 5.5<br />
03.632.011 Rocker Fork, footed, for Matrix 5.5<br />
76 <strong>Synthes</strong> <strong>MATRIX</strong> <strong>Spine</strong> <strong>System</strong> <strong>–</strong> <strong>Degenerative</strong> Technique Guide
Instruments for reduction screws<br />
03.632.042 Rod Pusher / Counter Torque for Reduction<br />
Screw, for Matrix 5.5<br />
03.632.025 Counter Torque for Reduction Screws,<br />
for Matrix 5.5<br />
03.632.029 Holding Crown for Reduction Screws,<br />
for Matrix 5.5<br />
03.632.026 Rod Pusher / Counter Torque for Reduction<br />
Screws, for Matrix 5.5<br />
03.632.030 Tab Remover for Reduction Screws,<br />
for Matrix 5.5<br />
<strong>MATRIX</strong> <strong>Spine</strong> <strong>System</strong> <strong>–</strong> <strong>Degenerative</strong> Technique Guide <strong>Synthes</strong> 77
Biomaterial Implants<br />
To facilitate fusion, bone graft is often applied in the lateral<br />
gutters. A suitable bone graft substitute (e.g. chronOS, DBX)<br />
may be used by itself or in combination with autograft.<br />
<strong>The</strong> construct shown is complemented with chronOS Strip<br />
precast, which optimally integrates with patient anatomy<br />
and implanted hardware. Perfusion of Strip with bone<br />
marrow aspirate provides a favorable environment for bony<br />
ingrowth.<br />
chronOS Strip, precast, sterile<br />
07.801.200.02S 47 mm18 mm3 mm<br />
pack of 2 implants<br />
Volume of bone marrow or blood: 5 <strong>–</strong>10 cc<br />
78 <strong>Synthes</strong> <strong>MATRIX</strong> <strong>Spine</strong> <strong>System</strong> <strong>–</strong> <strong>Degenerative</strong> Technique Guide<br />
length thickness length thickness
Ö036.001.185öACcä<br />
All technique guides are available as PDF files at<br />
www.synthes.com/lit<br />
0123<br />
036.001.185 version AC 09/2012 50147645 © <strong>Synthes</strong>, Inc. or its affiliates Subject to modifications <strong>Synthes</strong> and Stardrive are trademarks of <strong>Synthes</strong>, Inc. or its affiliates