

Magazines for All | Download in PDF - Ken Gilbert
Magazines for All | Download in PDF - Ken Gilbert
Magazines for All | Download in PDF - Ken Gilbert

Create successful ePaper yourself
Turn your PDF publications into a flip-book with our unique Google optimized e-Paper software.
EDITORIAL<br />
By John Owens<br />
Learner’sPERMIT<br />
C’mon, take<br />
the controls<br />
Yes, I know, you can just<br />
open the box, charge the battery, slip<br />
<strong>in</strong> a memory card, and start shoot<strong>in</strong>g<br />
pictures. Impressive pictures. Today’s<br />
DSLRs are that good.<br />
But I guarantee you even better<br />
photos if you change just a few of<br />
your DSLR’s fresh-out-of-the-box<br />
default sett<strong>in</strong>gs. Here are some that<br />
our editors always switch be<strong>for</strong>e fir<strong>in</strong>g<br />
even a s<strong>in</strong>gle shot with a new camera:<br />
•Forget Auto ISO.<br />
Set it to ISO 400. That’s a good allaround<br />
sensitivity and, as test results<br />
from the Pop Photo Lab prove,<br />
virtually every DSLR gets great image<br />
quality at this sett<strong>in</strong>g. If you have<br />
to go higher <strong>in</strong> low light, or lower<br />
<strong>in</strong> bright light, you are, as Technical<br />
Editor Philip Ryan po<strong>in</strong>ts out, “just a<br />
few clicks away <strong>in</strong> either direction.”<br />
Why not just leave it to the camera?<br />
Auto ISO is likely to set it too high<br />
<strong>in</strong> normal conditions, and not go<br />
far enough <strong>in</strong> extreme cases. With<br />
most cameras, the Auto range is<br />
ISO 200–800. Yet you can typically<br />
manually dial the ISO up to ISO 1600<br />
or beyond <strong>for</strong> low-light work, and<br />
down to 100, where the image quality<br />
usually is the best of all.<br />
•Control the flash.<br />
Auto Flash is the default sett<strong>in</strong>g,<br />
and it’s soooo po<strong>in</strong>t-and-shoot. You<br />
didn’t buy a DLSR <strong>for</strong> snapshots with<br />
brightly lit, obviously flashed subjects<br />
and completely lost black backgrounds.<br />
Instead, do what Senior Editor Dan<br />
Richards does: Go <strong>in</strong>to the menus<br />
and set it to Fill Flash. This means<br />
you’ll have flash whenever you want<br />
it—just pop up the pop-up flash. “I<br />
also set the flash compensation to –1<br />
EV,” says Richards. This gives you a<br />
burst of light that doesn’t overpower<br />
the ambient light <strong>in</strong> the frame. You<br />
can, <strong>for</strong> <strong>in</strong>stance, brighten up a face<br />
without blow<strong>in</strong>g out the subject and<br />
<strong>for</strong>gett<strong>in</strong>g about the light <strong>in</strong> the rest<br />
of the image. The result looks more<br />
natural and better exposed.<br />
•Don’t be normal.<br />
Do you shoot JPEGs? If so, check<br />
the default sett<strong>in</strong>g <strong>for</strong> image size. If<br />
it isn’t on the highest-quality JPEG,<br />
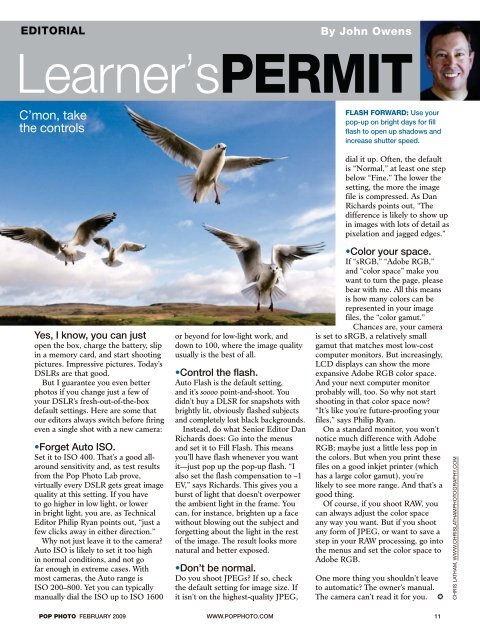
FLASH FORWARD: Use your<br />
pop-up on bright days <strong>for</strong> fill<br />
flash to open up shadows and<br />
<strong>in</strong>crease shutter speed.<br />
dial it up. Often, the default<br />
is “Normal,” at least one step<br />
below “F<strong>in</strong>e.” The lower the<br />
sett<strong>in</strong>g, the more the image<br />
file is compressed. As Dan<br />
Richards po<strong>in</strong>ts out, “The<br />
difference is likely to show up<br />
<strong>in</strong> images with lots of detail as<br />
pixelation and jagged edges.”<br />
•Color your space.<br />
If “sRGB,” “Adobe RGB,”<br />
and “color space” make you<br />
want to turn the page, please<br />
bear with me. <strong>All</strong> this means<br />
is how many colors can be<br />
represented <strong>in</strong> your image<br />
files, the “color gamut.”<br />
Chances are, your camera<br />
is set to sRGB, a relatively small<br />
gamut that matches most low-cost<br />
computer monitors. But <strong>in</strong>creas<strong>in</strong>gly,<br />
LCD displays can show the more<br />
expansive Adobe RGB color space.<br />
And your next computer monitor<br />
probably will, too. So why not start<br />
shoot<strong>in</strong>g <strong>in</strong> that color space now?<br />
“It’s like you’re future-proof<strong>in</strong>g your<br />
files,” says Philip Ryan.<br />
On a standard monitor, you won’t<br />
notice much difference with Adobe<br />
RGB; maybe just a little less pop <strong>in</strong><br />
the colors. But when you pr<strong>in</strong>t these<br />
files on a good <strong>in</strong>kjet pr<strong>in</strong>ter (which<br />
has a large color gamut), you’re<br />
likely to see more range. And that’s a<br />
good th<strong>in</strong>g.<br />
Of course, if you shoot RAW, you<br />
can always adjust the color space<br />
any way you want. But if you shoot<br />
any <strong>for</strong>m of JPEG, or want to save a<br />
step <strong>in</strong> your RAW process<strong>in</strong>g, go <strong>in</strong>to<br />
the menus and set the color space to<br />
Adobe RGB.<br />
One more th<strong>in</strong>g you shouldn’t leave<br />
to automatic? The owner’s manual.<br />
The camera can’t read it <strong>for</strong> you.<br />
POP PHOTO FEBRUARY 2009 WWW.POPPHOTO.COM 11<br />
CHRIS LATHAM, WWW.CHRISLATHAMPHOTOGRAPHY.COM


