
You also want an ePaper? Increase the reach of your titles
YUMPU automatically turns print PDFs into web optimized ePapers that Google loves.
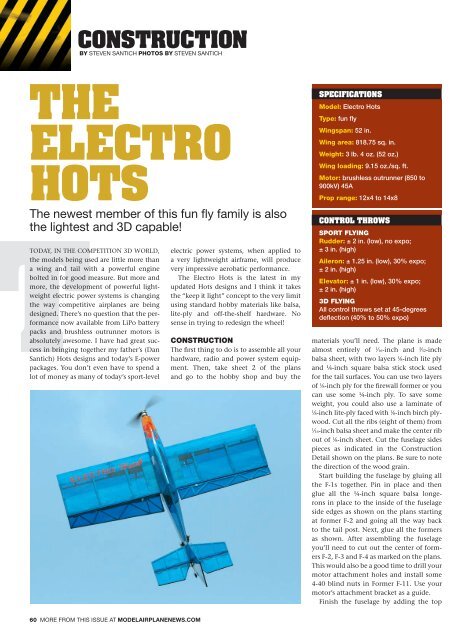
consTrucTion<br />
by STEvEn SAnTIcH photos by STEvEn SAnTIcH<br />
The<br />
elecTro<br />
hoTs<br />
The newest member of this fun fly family is also<br />
<strong>the</strong> lightest and 3D capable!<br />
Today, in The compeTiTion 3d world,<br />
<strong>the</strong> models being used are little more than<br />
a wing and tail with a powerful engine<br />
bolted in for good measure. But more and<br />
more, <strong>the</strong> development of powerful lightweight<br />
electric power systems is changing<br />
<strong>the</strong> way competitive airplanes are being<br />
designed. There’s no question that <strong>the</strong> performance<br />
now available from lipo battery<br />
packs and brushless outrunner motors is<br />
absolutely awesome. i have had great success<br />
in bringing toge<strong>the</strong>r my fa<strong>the</strong>r’s (dan<br />
Santich) <strong>hots</strong> designs and today’s e-power<br />
packages. you don’t even have to spend a<br />
lot of money as many of today’s sport-level<br />
60 MORE FROM THIS ISSUE AT MODELAIRPLANENEWS.COM<br />
electric power systems, when applied to<br />
a very lightweight airframe, will produce<br />
very impressive aerobatic performance.<br />
The <strong>electro</strong> <strong>hots</strong> is <strong>the</strong> latest in my<br />
updated <strong>hots</strong> designs and i think it takes<br />
<strong>the</strong> “keep it light” concept to <strong>the</strong> very limit<br />
using standard hobby materials like balsa,<br />
lite-ply and off-<strong>the</strong>-shelf hardware. no<br />
sense in trying to redesign <strong>the</strong> wheel!<br />
ConstruCtion<br />
The first thing to do is to assemble all your<br />
hardware, radio and power system equipment.<br />
Then, take sheet 2 of <strong>the</strong> plans<br />
and go to <strong>the</strong> hobby shop and buy <strong>the</strong><br />
specificaTions<br />
Model: Electro Hots<br />
type: fun fly<br />
Wingspan: 52 in.<br />
Wing area: 818.75 sq. in.<br />
Weight: 3 lb. 4 oz. (52 oz.)<br />
Wing loading: 9.15 oz./sq. ft.<br />
Motor: brushless outrunner (850 to<br />
900kV) 45A<br />
prop range: 12x4 to 14x8<br />
conTrol Throws<br />
sport Flying<br />
Rudder: ± 2 in. (low), no expo;<br />
± 3 in. (high)<br />
Aileron: ± 1.25 in. (low), 30% expo;<br />
± 2 in. (high)<br />
Elevator: ± 1 in. (low), 30% expo;<br />
± 2 in. (high)<br />
3D Flying<br />
All control throws set at 45-degrees<br />
deflection (40% to 50% expo)<br />
materials you’ll need. The plane is made<br />
almost entirely of 1 ⁄16-inch and 3 ⁄32-inch<br />
balsa sheet, with two layers 1 ⁄8-inch lite ply<br />
and ¼-inch square balsa stick stock used<br />
for <strong>the</strong> tail surfaces. you can use two layers<br />
of 1 ⁄8-inch ply for <strong>the</strong> firewall former or you<br />
can use some ¼-inch ply. To save some<br />
weight, you could also use a laminate of<br />
1 ⁄8-inch lite-ply faced with 1 ⁄8-inch birch plywood.<br />
cut all <strong>the</strong> ribs (eight of <strong>the</strong>m) from<br />
1 ⁄16-inch balsa sheet and make <strong>the</strong> center rib<br />
out of 1 ⁄8-inch sheet. cut <strong>the</strong> fuselage sides<br />
pieces as indicated in <strong>the</strong> <strong>construction</strong><br />
detail shown on <strong>the</strong> plans. Be sure to note<br />
<strong>the</strong> direction of <strong>the</strong> wood grain.<br />
Start building <strong>the</strong> fuselage by gluing all<br />
<strong>the</strong> F-1s toge<strong>the</strong>r. pin in place and <strong>the</strong>n<br />
glue all <strong>the</strong> ¼-inch square balsa longerons<br />
in place to <strong>the</strong> inside of <strong>the</strong> fuselage<br />
side edges as shown on <strong>the</strong> plans starting<br />
at former F-2 and going all <strong>the</strong> way back<br />
to <strong>the</strong> tail post. next, glue all <strong>the</strong> formers<br />
as shown. after assembling <strong>the</strong> fuselage<br />
you’ll need to cut out <strong>the</strong> center of formers<br />
F-2, F-3 and F-4 as marked on <strong>the</strong> plans.<br />
This would also be a good time to drill your<br />
motor attachment holes and install some<br />
4-40 blind nuts in Former F-11. Use your<br />
motor’s attachment bracket as a guide.<br />
Finish <strong>the</strong> fuselage by adding <strong>the</strong> top