Using Your TV - Haier.com
Using Your TV - Haier.com
Using Your TV - Haier.com

Create successful ePaper yourself
Turn your PDF publications into a flip-book with our unique Google optimized e-Paper software.
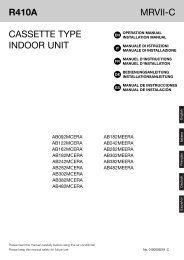
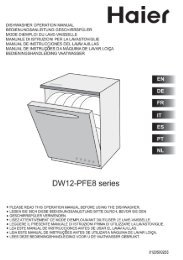
LE42H5000<br />
LE47H5000<br />
LE55H5000<br />
Please READ this manual carefully before<br />
operatingyour <strong>TV</strong>, and retain it for future<br />
reference.
Contents<br />
Safety Warnings 2<br />
Wel<strong>com</strong>e ............................................................... 2<br />
Important Information ........................................ 2<br />
Important Safety Instructions 3<br />
About <strong>Your</strong> LED LCD <strong>TV</strong> 5<br />
Installing the Stand ........................................... 5<br />
Wall Mounting Installation..................................6<br />
Front Control Panel..............................................7<br />
Back panel connections.......................................8<br />
Get to Know <strong>Your</strong> Remote Control...................... 9<br />
External Equipment Connections .................... 10<br />
Power source.........................................................................10<br />
Connecting to an Antenna or Cable Connection ....10<br />
Connecting to HDMI Device............................................11<br />
Connecting to an AV Device............................................12<br />
Connecting to an Audio Device .....................................13<br />
Connecting to a PC .............................................................13<br />
Basic Receiving and Playing Operations<br />
14<br />
Switching ON/OFF the <strong>TV</strong> set .........................................14<br />
Choose the Input source ..................................................14<br />
Tuning <strong>Your</strong> <strong>TV</strong> ................................................... 14<br />
Color System .........................................................................14<br />
Sound System .......................................................................14<br />
Channel Edit ..........................................................................15<br />
Fine Tune ................................................................................15<br />
Manual Search ......................................................................15<br />
Auto Search ...........................................................................15<br />
<strong>Using</strong> <strong>Your</strong> <strong>TV</strong> ..................................................... 16<br />
How to Select the <strong>TV</strong> Program .......................................16<br />
How to Adjust Volume .......................................................16<br />
Adjusting Picture Settings ................................ 16<br />
Changing the Picture Setting .........................................16<br />
If the <strong>TV</strong> is currently in the 2D mode ................ 17<br />
If the <strong>TV</strong> is currently in the 3D mode ................ 17<br />
Adjusting Sound Setting ................................... 17<br />
Changing the Sound Setting ..........................................17<br />
Setting Functions .............................................. 18<br />
EN-1 LED Backlit Flat <strong>TV</strong> instruction Manual<br />
Contents<br />
Cloud Functions 18<br />
Cloud Functions ...................................................................18<br />
All Apps ...................................................................................19<br />
Local File Browser ................................................................19<br />
Browser ...................................................................................19<br />
Settings ...................................................................................20<br />
You Tube .................................................................................21<br />
Twitter .....................................................................................21<br />
Facebook ................................................................................22<br />
Net FileBrowser .................................................. 22<br />
Maintenance 22<br />
Troubleshooting 22<br />
Specification 23<br />
Format 23
Safety Warnings<br />
Wel<strong>com</strong>e<br />
Thanks for buying this 47"/55" LED Backlit Flat <strong>TV</strong>. This guide will help you to set up and begin using your <strong>TV</strong>.<br />
Firstly, check the contents of your box with the parts checklist below:<br />
• 42"/ 47"/ 55"LED Backlit Flat <strong>TV</strong><br />
• Remote control<br />
• AAA battery ×2<br />
• Instruction Manual<br />
• <strong>TV</strong> Stand<br />
• 8Xscrews for 42"model ; 8x screws for 47" model(Plastic Tray×2,only for 47");<br />
• AV adaptor<br />
• 3D glasses ×6<br />
Now you can get started!<br />
Important Information<br />
READ ALL INSTRUCTIONS BEFORE USE AND KEEP FOR FUTURE REFERENCE.<br />
WARNING<br />
RISK OF ELECTRIC SHOCK<br />
DO NOT OPEN<br />
WARNING<br />
TO REDUCE THE RISK OF ELECTRIC SHOCK DO NOT REMOVE COVER (OR BACK). NO<br />
USER SERVICEABLE PARTS INSIDE. REFER TO QUALIFIED SERVICE PERSONNEL.<br />
*To avoid electric hazards, it is strongly suggested that the back cover not be opened, as<br />
there is no any accessory inside the casing.<br />
*If necessary, please contact authorized after-sales services.<br />
could result in serious injury by high voltage.<br />
*An exclamation mark in a triangle: Major part or accessory of which technical<br />
must be followed if it<br />
is to be replaced.<br />
Safety Warnings<br />
WARNING: To avoid fire or electric hazards, never place your television receiver in an area with heavy<br />
moisture. Attention should be paid to avoid accidental scratches or impacts onto the screen.<br />
The ventilation should not be impeded by covering the ventilation openings with items, such<br />
as newspaper, table-cloths, curtains, etc.<br />
CAUTION: ▲ The main plug is used as disconnect device which shall remain readily operable.<br />
▲ Please read this manual carefully before using your television and keep this manual in a<br />
good place for future reference.<br />
▲ To achieve the best performance of your television, read this User‘s Manual carefully and<br />
properly store it for future reference.<br />
▲ Information of screen displays and figures in the User’s Manual may vary due to technical<br />
innovations.<br />
▲ Unauthorized disassembly of this product is prohibited.<br />
WARNING To prevent the spread of fire,keep candles or other open flames away from this product at all<br />
times.<br />
LED Backlit Flat <strong>TV</strong> Instruction Manual EN-2<br />
En
Important Safety Instructionss<br />
Important Safety Instructions<br />
EN-3 LED Backlit Flat <strong>TV</strong> Instruction Manual
Important Safety Instructionss<br />
LED Backlit Flat <strong>TV</strong> Instruction Manual EN-4<br />
En
About your LED LCD <strong>TV</strong><br />
About <strong>Your</strong> LED LCD <strong>TV</strong><br />
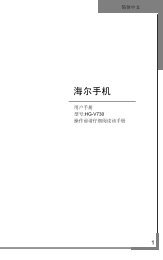
Installing the Stand<br />
EN-5 LED Backlit Flat <strong>TV</strong> Instruction Manual<br />
<br />
Step 1 : Connect the guide stand to the stand using<br />
4 screws(M 4X8) as shown.<br />
Step 2 : Remove 4 EA screws on back of <strong>TV</strong> as shown<br />
in picture.<br />
Step 3: Put the stand base on the slot of display<br />
bottom; Finally x 4 screws(M 4X12) in accessory to<br />
the right position as shown in picture.<br />
Step 4: Stand assembly is nished.<br />
screws<br />
hole
Wall Mounting Installation<br />
Preparing before installing Wall-Mount.<br />
To install a wall-mount from another manufactuer,use the Holder-Ring.<br />
42" model standard screw : M6<br />
47" model standard screw : M6<br />
55" model standard screw : M6<br />
About your LED LCD <strong>TV</strong><br />
Installing Wall-Mount kit<br />
The wall mount kit (Sold separately) allow you to mount the <strong>TV</strong> on the wall.<br />
For detailed information on installing the wall mount see the instructions provided with the wall mount.<br />
Contact a techinical assistance when installing the wall mont bracket.<strong>Haier</strong> Electronics is not responsible<br />
for any damage to the product or injury to yourself or others if you elect to install the <strong>TV</strong> on yor own.<br />
LED Backlit Flat <strong>TV</strong> Instruction Manual EN-6<br />
En
Front Control Panel<br />
Front Control Panel<br />
1 SOURCE<br />
Press this key to open/close signal source<br />
options menu.<br />
2 MENU<br />
Menu display. Press to access the on-screen<br />
menu display.<br />
3 VOL+/- Press to increase and decrease the volume.<br />
EN-7 LED Backlit Flat <strong>TV</strong> Instruction Manual<br />
SOURCE<br />
MENU<br />
VOL+<br />
VOL-<br />
CH+<br />
CH-<br />
POWE R<br />
4 CH+/- <strong>TV</strong> channel up and down.<br />
5 POWER Press to turn the <strong>TV</strong> on and off.
Back panel connections<br />
1 LAN input<br />
2 ANT IN input<br />
3 PC Video IN input<br />
4 PC Audio IN input<br />
5 COMPONENT IN input<br />
6 AV IN input<br />
7 USB input<br />
Back Panel Connections<br />
8 AV OUT output<br />
9 DIGITAL AUDIO OUT (OPTICAL) output<br />
0 HDMI 1 IN/HDMI 2 IN input<br />
DIGITAL AUDIO<br />
USB<br />
HDMI 2 IN HDMI 1 IN<br />
LED Backlit Flat <strong>TV</strong> Instruction Manual EN-8<br />
En
Remote Control<br />
Get to Know <strong>Your</strong> Remote Control<br />
When using the remote control, aim it towards the remote sensor on the <strong>TV</strong>.<br />
EN-9 LED Backlit Flat <strong>TV</strong> Instruction Manual<br />
1 Turn the <strong>TV</strong> on and off.<br />
2 Quick button switch to <strong>TV</strong> source.<br />
3 sleep button.<br />
4 Press to directly access to channels.<br />
5 Display the channel list on the screen.<br />
6 Adjust the Volume.<br />
7 Quick button for 3D functions.<br />
8 Quick button for Sound Mode function.<br />
9 Displays the main on- screen menu.<br />
0 No available.<br />
A Turn previous.<br />
Selects the on-screen menu items and changes the values on the<br />
B<br />
menu.<br />
C Turn next.<br />
D Function button (just reference the OSD).<br />
E Play/Pause button (only for USB).<br />
F Fast Reverse (only for USB).<br />
G Enter setting interface.<br />
H Hotel Lock.<br />
I Press to jump back and forth between two channels.<br />
J Cut off the sound temporarily.<br />
K Change Channels.<br />
L Quick button for Cloud functions.<br />
M Select the Picture Mode.<br />
N APPS@<strong>TV</strong>(<strong>TV</strong>-APPS homepage).<br />
O Returns to the previous menu.<br />
P OK button.<br />
Q Exit the menu.<br />
R No available.<br />
S Fast Forword (only for USB).
External Equipment Connections<br />
Power source<br />
To use AC Power Supply<br />
Use the AC polarized line cord provided for operation on<br />
AC. Insert the AC cord plug into a standard polarized AC<br />
outlet.<br />
Note<br />
▲ Never connect the AC line cord plug to other than<br />
the specified voltage. Use the attached power cord<br />
only.<br />
▲ If the polarized AC cord does not fit into a nonpolarized<br />
AC outlet, do not attempt to file or cut<br />
the blade. It is the user’s responsibility to have an<br />
electrician replace the obsolete outlet.<br />
▲ If you cause a static discharge when touching the<br />
unit and the unit fails to function, simply unplug<br />
the unit from the AC outlet and plug it back in. The<br />
unit should return to normal operation.<br />
Connecting to an<br />
Antenna or Cable<br />
Connection<br />
External Equipment Connections<br />
Over-the-air <strong>TV</strong> reception quality will depend on your<br />
antenna type, antenna location and antenna positioning.<br />
or<br />
VHF/UHF Antenna<br />
Cable Television<br />
Network<br />
Note<br />
▲ To<br />
improve the picture quality in a poor signal<br />
area, please purchase a signal amplifier and install<br />
properly.<br />
▲ If the antenna needs to be split for two <strong>TV</strong>’s, install<br />
a “2-Way Signal Splitter” .<br />
▲ When you move or swivel the <strong>TV</strong> with Antenna<br />
cable tightly connected, there is high risk antenna<br />
jack on <strong>TV</strong> will be broken off.<br />
LED Backlit Flat <strong>TV</strong> Instruction Manual EN-10<br />
En
External Equipment Connections<br />
Choose <strong>Your</strong> Connection<br />
There are several ways to connect your television, depending on the <strong>com</strong>ponents you want to connect and the quality<br />
of the signal you want to achieve. The following are examples of some different ways to connect your <strong>TV</strong> with different<br />
input sources.<br />
Connecting to HDMI Device<br />
<strong>Using</strong> an HDMI or HDMI/DVI Cable: HD connection(up to 1080p)<br />
We re<strong>com</strong>mend using the HDMI connection for the best quality HD picture.<br />
Available devices: DVD player, Blu-ray player, HD cable box, HD satellite receiver(STB).<br />
HDMI IN PC AUDIO IN<br />
EN-11 LED Backlit Flat <strong>TV</strong> Instruction Manual<br />
BD/DVD player/<br />
HD cable/Sat.box<br />
HDMI OUT<br />
A When using an HDMI/DVI cable connection, you must use the HDMI IN jack for video. A DVD player, Blu-ray<br />
player,HD cable box,HD satellite receiver(STB), cable box,or STB satellite receiver may require a DVI-HDMI(DVI to<br />
HDMI)cable or DVI-HDMI(DVI to HDMI)adapter.You must use the PC/DVI AUDIO IN jack for audio.<br />
B The picture may not display normally(if at all)or the audio may not work if you connect an external device that uses<br />
an older version of HDMI mode to the <strong>TV</strong>. If such a problem occurs, ask the manufacturer of the external device<br />
C<br />
about the HDMI version and, if out of date,request an upgrade.<br />
Be sure to purchase a certified HDMI cable, Otherwise, the picture may not display or a connection error may occur.<br />
DVI OUT
Connecting to an AV Device<br />
<strong>Using</strong> a Component(up to 1080p) or an Audio/Video Cable<br />
Available devices: DVD player,Blu-ray player,cable box,STB satellite receiver,VCR<br />
Note<br />
▲<br />
For better picture quality, the Component connection is re<strong>com</strong>mended over the A/V connection.<br />
AV OUT: Connects to the audio input jacks on your amplifier/home theater<br />
A<br />
When connecting, use the appropriate connector (included with your <strong>TV</strong>).<br />
External Equipment Connections<br />
B When you connecte an audio amplifier to the AV OUT jacks: Decrease the volume of the <strong>TV</strong> and adjust the volume<br />
level with the Amplifier’s volume control.<br />
AV OUT<br />
LED Backlit Flat <strong>TV</strong> Instruction Manual EN-12<br />
En
External Equipment Connections<br />
Connecting to an Audio Device<br />
<strong>Using</strong> an Optical(Digital) or Audio(Analog) Cable Connection<br />
Available devices: Digital Audio System, Amplifier, Home Theater.<br />
When you connect a Digital Audio Syetem to the DIGITAL AUDIO OUT (OPTICAL) jack: Decrease the volume of both <strong>TV</strong><br />
and the system.<br />
Connecting to a PC<br />
DIGITAL AUDIO<br />
OUT (OPTICAL)<br />
<strong>Using</strong> an HDMI cable or HDMI to DVI Cable / a D-Sub Cable<br />
EN-13 LED Backlit Flat <strong>TV</strong> Instruction Manual<br />
HDMI OUT<br />
DVI OUT
Note<br />
▲<br />
<strong>Your</strong> PC may not support an HDMI connection.<br />
Basic Receiving and<br />
Playing Operations<br />
Switching ON/OFF the<br />
<strong>TV</strong> set<br />
In the manual, the OSD (on screen display) may be<br />
different from your <strong>TV</strong>’s because it is just an example to<br />
help you with the <strong>TV</strong> operation.<br />
Switching ON/OFF the <strong>TV</strong> set<br />
First, connect power cord correctly and the power<br />
A indicator will light.<br />
B Press POWER on the remote control.<br />
C If you want to exchange to standing by status,please<br />
press down POWER on the remote control<br />
D Disconnect the power supply or unplug the<br />
television if it is intended to <strong>com</strong>pletely cease the<br />
television performance.<br />
Choose the Input source<br />
Use to select <strong>TV</strong> or an external input source such as<br />
a DVD player/Blu-ray player/cable box/STB satellite<br />
receiver.<br />
A Press SOURCE button to enter the Input Source<br />
menu and then use 6 button to select the desired<br />
external input source (<strong>TV</strong>, AV, YPBPR, PC, HDMI1,<br />
HDMI2).<br />
B Press OK button to confirm .<br />
Tuning <strong>Your</strong> <strong>TV</strong><br />
Basic Receiving and Playing Operations<br />
Display Tuning menu by pressing SOURCE button then<br />
use 6 button to select the source of <strong>TV</strong> .<br />
A Press MENU button and then use 34button to<br />
select Tuning menu. press OK to enter.<br />
B Press 6 button to select the desired items, press<br />
OK to enter its submenu.<br />
Color System<br />
A Press MENU button , Press 34 button to select<br />
Tuning, press OK to enter its submenu.<br />
B Press 6 button to select Color System,<br />
Press34button to select PAL/NTSC/SECAM/AUTO.<br />
C Press RETURN button to return to the previous<br />
menu, press EXIT button to exit the menu screen.<br />
Sound System<br />
A Press MENU button , Press 34 button to select<br />
Tuning, press OK to enter its submenu.<br />
B Press 6 button to select Sound System,<br />
Press34button to select DK/I/BG/M.<br />
LED Backlit Flat <strong>TV</strong> Instruction Manual EN-14<br />
En
Basic Receiving and Playing Operations<br />
C Press RETURN button to return to the previous<br />
menu, press EXIT button to exit the menu screen.<br />
Channel Edit<br />
You can add a label to a channel to make it easier to find.<br />
A Press MENU button and then use 34button to<br />
select Tuning menu. press OK to enter its submenu.<br />
B Press6button<br />
to select the Channel Edit, press<br />
OK to enter its submenu.<br />
C Press 6 button to select the channel you want to<br />
edit . Press the GREEN button on the remote control,<br />
Choose the other Channels to Exchange, Press OK<br />
Confirm Exchange. If select the RED button ,the<br />
channel with a check icon is a skipped channel. Press<br />
OK button to display "please Input Channel Name",<br />
Select OK or Cancel. Press EXIT button to return to<br />
the previous menu.<br />
Fine Tune<br />
A Press MENU button and then use34button to<br />
select Tuning menu. press OK to enter its submenu.<br />
B Press 6 button to select Fine Tune, Press OK<br />
button on the remote to enter its submenu.<br />
C Press 34 button to select your desired Frequency.<br />
EN-15 LED Backlit Flat <strong>TV</strong> Instruction Manual<br />
D Press EXIT button to exit menu screen.<br />
Manual Search<br />
A Press MENU button and then use34button to<br />
select Tuning menu. press OK to enter its submenu.<br />
B Press 6 button to select Manual Search , press<br />
OK to enter its submenu.<br />
C Press34button<br />
to adjust the Frequency.<br />
D Press MENU button to return to the previous menu,<br />
press EXIT button to exit the menu screen.<br />
Auto Search<br />
A Press MENU button and then use34button to<br />
select Tuning menu. press OK to enter its submenu.<br />
B Press 6 button to select Auto Search, Press OK<br />
button on the remote to start to scan.<br />
C Press MENU button to return to the previous<br />
menu, press EXIT button to exit the menu screen.<br />
All channels now available will be automatically preset in<br />
older .After the search has finished, the firet program<br />
number will display on the screen.<br />
This search automatically adds only the active channels<br />
in your area to the <strong>TV</strong>'s memory.<br />
It deletes any channels on which there is no broadcast or<br />
a poor signal.<br />
The channels found are automatically saved.
<strong>Using</strong> <strong>Your</strong> <strong>TV</strong><br />
How to Select the <strong>TV</strong> Program<br />
A <strong>Using</strong> Program number button Enter the channel<br />
number with the number keypad on the remote<br />
control.<br />
B <strong>Using</strong> CH∧/CH∨ button.<br />
Press the CH∧/CH∨button to select a channel<br />
number.<br />
How to Adjust Volume<br />
Press button on the remote control or the keypad<br />
on the <strong>TV</strong> to adjust the volume level.<br />
Adjusting Picture<br />
Settings<br />
Changing the Picture Setting<br />
A Press MENU button.then press34button to select<br />
Picture , press OK button to enter.<br />
B Press6button<br />
to select the item which requires to<br />
be adjusted.<br />
C Press34<br />
button to adjust the selected item.<br />
D<br />
When you are satisfied with your choice, press the<br />
EXIT button to return to normal viewing or press<br />
RETURN button to return to the previous menu.<br />
Basic Receiving and Playing Operations<br />
Y Picture Mode<br />
This will select the picture mode. Select Standard/<br />
Vivid/Soft/User, according to the program.<br />
Y Brightness<br />
This will adjust the light output of the <strong>com</strong>plete<br />
picture, which will mainly affect the darker areas of<br />
the picture.<br />
Y Contrast<br />
This will adjust the intensity of bright parts in the<br />
picture but keep the dark parts unchanged.<br />
Y Color<br />
This will adjust the saturation level of the colors to suit<br />
your personal preference.<br />
Y Sharpness<br />
This will adjust the sharpness of fine details in the<br />
picture.<br />
Y Color temperature<br />
Press34 button to set Color temperature as<br />
Standard, Cool, Warm.<br />
This will increase or decrease Warm (red) and Cool<br />
(blue) colors to suit personal preferences.Select Cool<br />
to give the white color a blue tint, Standard to give<br />
the white color a natural tint, Warm to give the white<br />
color a red tint.<br />
Y Aspect Ratio<br />
Press 34 button to set Advanced Ratio as<br />
Panorama, Cinema, Zoom, JUST SCAN, FULL<br />
SCREEN, 4:3.<br />
Y DNR<br />
Press 34 button to set DNR as AUTO, High, Off,<br />
Low, Medium.<br />
Y Color Management<br />
Press34 button to set Colour Management as<br />
Auto, On, Off.<br />
Y 3D Setting<br />
Ensure you read and understand the following safety<br />
information before using the <strong>TV</strong>'s 3D function.<br />
LED Backlit Flat <strong>TV</strong> Instruction Manual EN-16<br />
En
Basic Receiving and Playing Operations<br />
Note<br />
▲ Some people may experience dis<strong>com</strong>fort, such as<br />
dizziness, nausea and headaches, while viewing<br />
3D <strong>TV</strong>. If you experience any such symptom, stop<br />
watching 3D <strong>TV</strong>, remove the 3D glasses and have<br />
a rest.<br />
▲ Watching 3D images for an extended period of<br />
time may cause eye strain. If you feel that your<br />
eyes are be<strong>com</strong>ing strained, stop watching 3D <strong>TV</strong>,<br />
remove your 3D glasses and have a rest.<br />
▲ Do not allow children under 6 years old to view<br />
3D images. A responsible adult should frequently<br />
check on children who are using the 3D function.<br />
If there are any reports of tired eyes, headaches,<br />
dizziness or nausea, stop the child from watching<br />
3D <strong>TV</strong> and have a rest.<br />
▲ Do not use the 3D glasses for other purposes<br />
(such as general spectacles, sunglasses, protective<br />
glasses etc.)<br />
▲ Do not use the 3D function or 3D glasses while<br />
walking or moving around. If you use the 3D<br />
function or 3D glasses while walking or moving<br />
around you may run into objects, trip and/or fall<br />
and injure yourself.<br />
▲ Do not drop, exert pressure on or step on the 3D<br />
glasses.<br />
▲ Do not use the 3D glasses if they are cracked or<br />
broken.<br />
If the <strong>TV</strong> is currently in 2D mode,<br />
A Press the 3D switch key on the remote to display the<br />
prompt menu.<br />
B Press34button.<br />
You can then select a<br />
corresponding 3D mode.<br />
If the <strong>TV</strong> is currently in 3D mode,<br />
A Press the 3D switch key on the remote to display<br />
the prompt menu.<br />
B Press34button<br />
to select 3D Mode off/2D>3D<br />
setup.<br />
Note<br />
▲ When you watch a 3D <strong>TV</strong> programme, please wear<br />
3D glasses.<br />
EN-17 LED Backlit Flat <strong>TV</strong> Instruction Manual<br />
▲ The <strong>TV</strong> doesn’t store the 3D mode settings, so if<br />
you switch it off, it will return to 2D mode when<br />
turned back on again.<br />
▲ In USB mode, there are various modes of 3D video<br />
sources. With USB signals, the 3D switch key only<br />
functions when playing a film. The <strong>TV</strong> will exit<br />
3D mode when the film finished or when you<br />
manually exit 3D mode.<br />
Adjusting Sound<br />
Setting<br />
Changing the Sound Setting<br />
A Press MENU button.<br />
B Press34button<br />
to select Sound , press OK button<br />
to enter.<br />
C Press6button<br />
to select the item which require to<br />
be adjusted.<br />
D Press34button<br />
to adjust the selection item.<br />
E<br />
When you are satisfied with your choice, press the<br />
EXIT button to return to normal viewing or press<br />
RETURN button to return to the previous menu.<br />
Y Sound Mode<br />
This sound setting can be adjusted to suit your<br />
personal preference . Select Standard/Music/Movie/<br />
News/User according to the program.<br />
Y Treble<br />
Adjust to increase or decrease higher-pitched sounds.<br />
Y Bass<br />
Adjust to increase or decrease lower-pitched sounds.
Y Balance<br />
Adjust to emphasize left or right speaker balance.<br />
Y SubWoofer<br />
Adjust to increase or decrease subwoofer-pitched<br />
sounds.<br />
Y Surround<br />
The surround sound feature expands<br />
the audio listening field wider and deeper to create<br />
exceptional sound quality from the <strong>TV</strong>'s speakers.<br />
Y Dialog Clarity<br />
Press34button to set AVL as On or Off.( When<br />
Surround is set on, it's will appearance.)<br />
Y Bass Boost<br />
Press34button to set the SPDIF as On or Off.( When<br />
Surround is set on, it's will appearance.)<br />
Setting Functions<br />
A Press MENU button.<br />
B Press34<br />
button to select Setting, press OK button<br />
to enter.<br />
C Press6button<br />
to select the item which require to be<br />
adjusted.<br />
D Press34button<br />
to adjust the selected item.<br />
E<br />
When you are satisfied with your choice, press the<br />
EXIT button to return to normal viewing or press<br />
RETURN button to return to the previous menu.<br />
Y Menu Time<br />
Press34button to select the number of minutes: To<br />
select 5s,10s, 15s, 30s, 60s.<br />
Y Startup Select<br />
Press6button to select the Startup Select,<br />
Basic Receiving and Playing Operations<br />
Press34button to select Last Viewed /Navigator /<br />
Select Source.<br />
Press6button to select Select Port, press 34to<br />
select <strong>TV</strong>/AV/YPbPr/PC/HDMI1/HDMI2.<br />
Y Reset<br />
Press34button to select OK or Cancel to Reset<br />
Factory Set.<br />
Y DNLP<br />
Press34button to select On/Off to auto regulation<br />
contrast or brightness.<br />
Y OPC<br />
Press34button to select On/Off to set OPC.<br />
Cloud Functions<br />
Cloud Functions<br />
A Press button to enter Cloud interface.<br />
B Press634button<br />
to select the icon which you<br />
required. Press OK to enter.<br />
C When you are satisfied with your choice,press<br />
RETURN button to return to the previous menu.<br />
Press<br />
D MENU button in this interface of Cloud stair<br />
menu, the OSD will display Wallpaper, Manage apps<br />
and System settings. You can press6button and<br />
press OK button to select it.<br />
LED Backlit Flat <strong>TV</strong> Instruction Manual EN-18<br />
En
Basic Receiving and Playing Operations<br />
E If you want to Exit Cloud functions, press Exit<br />
button.<br />
All Apps<br />
A Press button to enter Cloud interface.<br />
B Press634button<br />
to select ALL Apps. Press OK<br />
to enter.<br />
C Press634button<br />
to select the item which<br />
require to be adjusted.<br />
The ALL Apps contions all functions of Cloud, you<br />
can enter this submenu for example Settings by ALL<br />
Apps.<br />
D When you are satisfied with your choice,press<br />
RETURN button to return to the previous menu.<br />
Local FileBrowser<br />
A Press button to enter Cloud interface.<br />
B Press634button<br />
to select Local FileBrowser.<br />
Press OK to enter.<br />
C Press6button<br />
to select the USB STORAGE-<br />
SANDISK. Press the corresponding key on the<br />
remote control to call out the prompt menu. (See<br />
Picture below).<br />
EN-19 LED Backlit Flat <strong>TV</strong> Instruction Manual<br />
D<br />
•<br />
Photo: *. jpg, png etc.<br />
• Music: *. Mp3(8-320kbps; WMA(32-192kbps);<br />
AAC(16-576kbps) etc.<br />
•<br />
Movie:<br />
MPEG4: *. avi files in accordance with Div*4. x/5. x<br />
Protocol;<br />
MPEG2: some *. mpeg files;<br />
MPEG1: *. dat and some *. mpeg files;<br />
RealVideo ect.<br />
• Text: *. Txt.<br />
When you are satisfied with your choice,press<br />
RETURN button to return to the previous menu.<br />
Browser<br />
A Press button to enter Cloud interface.<br />
B Press634button<br />
to select the icon which you<br />
required. Press OK to enter.<br />
C Press the corresponding key on the remote control<br />
to call out the prompt menu. (See Picture below).<br />
D When you are satisfied with your choice,press<br />
RETURN button to return to the previous menu.
Settings<br />
A Press button to enter Cloud interface.<br />
B Press 634button to select Settings. Press OK<br />
to enter.<br />
C Press6button<br />
to select the item which require to<br />
be adjusted.<br />
Connecting to a Wired Network<br />
A Press 6button to select Ethernet, press OK to<br />
enter.<br />
B Press 6 button to select DHCP item, then<br />
press Save button, it will automatically finished.<br />
You can set up your <strong>TV</strong> to access the Internet through<br />
your local area network (LAN) using a wired or<br />
wireless connection.<br />
Connecting to a Wired Network. You can attach your<br />
<strong>TV</strong> to your LAN using a cable (cable not included) in<br />
three ways:<br />
• You can attach your <strong>TV</strong> to your LAN by connecting<br />
the LAN port on the back of your <strong>TV</strong> to an external<br />
modem using a Cat 5 cable. See the diagram below:<br />
<br />
<br />
<br />
LAN<br />
<br />
<br />
<br />
• You can attach your <strong>TV</strong> to your LAN by connecting<br />
the LAN port on the back of your <strong>TV</strong> to a router.<br />
which is connected to an external modem. Use a Cat<br />
5 cable for the connection. See the diagram below:<br />
LAN<br />
Basic Receiving and Playing Operations<br />
<br />
<br />
<br />
<br />
<br />
<br />
<br />
<br />
• Depending on how your network is configured,<br />
you may be able to attach your <strong>TV</strong> to your LAN by<br />
connecting the LAN port on the back of your <strong>TV</strong><br />
directly to a network wall outlet using a Cat 5 cable.<br />
See the diagram below. Note that the wall outlet is<br />
attached to a modem or router elsewhere in your<br />
house.<br />
<br />
Note<br />
<br />
<br />
The terminals (the position of the port and the<br />
type) of the external device may be different<br />
depending on the manufacturer.<br />
If the IP address allocation by the DHCP server<br />
has failed, turn the external modem off, turn it<br />
on again after at least 10 seconds and then try<br />
again.<br />
For the connections between the external<br />
modem and the router, refer to the owner’s<br />
manual of the corresponding product.<br />
You can connect the <strong>TV</strong> to the LAN directly<br />
without connecting it through a router.<br />
You cannot use a manual-connection-type ADSL<br />
modem because it does not support DHCP. You<br />
have to use an automatic connection-type ADSL<br />
modem.<br />
Connecting to a Wireless Network<br />
A Press 6button to select WI-Fi, press OK to<br />
enter, To see available networks, turn Wi-Fi On.<br />
B Press 6 button to select Wireless Setting<br />
item,press OK button to enter.<br />
C Press 6 button to select the network you need<br />
LED Backlit Flat <strong>TV</strong> Instruction Manual EN-20<br />
LAN<br />
En
Basic Receiving and Playing Operations<br />
and press OK button to enter.<br />
D Press 6 button to select the Network security<br />
key and press OK button to enter .<br />
E Enter the password if necessary. Select OK to<br />
confirm.<br />
To connect your <strong>TV</strong> to your wireless network, you<br />
need a wireless router or modem.<br />
Note<br />
<br />
<br />
<br />
<br />
▲ To use a wireless network, your <strong>TV</strong> must be<br />
connected to a wireless router. If the wireless<br />
router supports DHCP, your <strong>TV</strong> can use a DHCP<br />
or static IP address to connect to the wireless<br />
network.<br />
▲ If the wireless router allows you to turn the Ping<br />
connection function on/off, turn it on.<br />
▲ Select a channel for the wireless router that is not<br />
currently being used. If the channel set for the<br />
wireless router is currently being used by another<br />
device nearby, this will result in interference and<br />
<strong>com</strong>munications may fail.<br />
▲ This series include build-in Wi-Fi dongle, but <strong>Haier</strong><br />
reserves the right to make changes without further<br />
notice to any products herein to improve reliability,<br />
function or design.<br />
Y DEVICE<br />
EN-21 LED Backlit Flat <strong>TV</strong> Instruction Manual<br />
Press 6button to select Storage or Apps. When<br />
select Storage, Press OK to enter, It's will display<br />
informations of USB. When you select Apps, press OK<br />
to enter and press 4button, then press6button to<br />
select the item which you required.<br />
Y PERSONAL<br />
Press 6button to select Security/<br />
Language&input / Backup&reset. Press OK and<br />
press4 to enter. Press6button to select the item<br />
which require to be adjusted.<br />
Y SYSTEM<br />
Press 6button to select Date & Time/<br />
About Device. Press OK and press4to enter.<br />
Press6button to select the item which require to<br />
be adjusted.<br />
You Tube<br />
A Press button to enter Cloud interface.<br />
B Press634button<br />
to select the icon which you<br />
required. Press OK to enter.<br />
C Press6button<br />
to select the item which require to<br />
be adjusted.<br />
D<br />
When you are satisfied with your choice,press<br />
RETURN button to return to the previous menu.<br />
Twitter<br />
A Press button to enter Cloud interface.
B Press634button<br />
to select the icon which you<br />
required. Press OK to enter.<br />
C Press6button<br />
to select the item which require to<br />
be adjusted.<br />
D When you are satisfied with your choice,press<br />
RETURN button to return to the previous menu.<br />
Facebook<br />
A Press button to enter Cloud interface.<br />
B Press634button<br />
to select the icon which you<br />
required. Press OK to enter.<br />
C Press6button<br />
to select the item which require to<br />
be adjusted.<br />
D When you are satisfied with your choice,press<br />
RETURN button to return to the previous menu.<br />
Net FileBrowser<br />
Net File Browser is a standard that allows various<br />
consumer electronic devices to<br />
share connect with each other across a standard home<br />
network.This would allow a device such as a Net File<br />
Browser <strong>com</strong>patible television to play music or view<br />
videos or photos stored on a desktop <strong>com</strong>puter or other<br />
<strong>com</strong>patible device.<br />
A Press button to enter Cloud interface.<br />
B Press 34button to select APPS, Press OK button to<br />
enter.<br />
C Press 634button to select Net File Browser,<br />
then press OK button to play it.<br />
Maintenance<br />
Maintenance<br />
Early malfunctions can be prevented. Careful and regular<br />
cleaning can extend the amount of time you will have<br />
your new <strong>TV</strong>. Be sure to turn the power off and unplug<br />
the power cord before you begin any cleaning.<br />
Cleaning the Screen<br />
Maintenance/Troubleshooting<br />
A Here’s a great way to keep the dust off your screen<br />
for a while. Wet a soft cloth in a mixture of lukewarm<br />
water and a little fabric softener or dish washing<br />
detergent. Wring the cloth until it’s almost dry, and<br />
then use it to wipe the screen.<br />
B Make sure the excess water is off the screen, and<br />
then let it air-dry before you turn on your <strong>TV</strong>.<br />
Cleaning the Cabinet<br />
To remove dirt or dust, wipe the cabinet with a soft, dry,<br />
lint-free cloth. Please be sure not to use a wet cloth.<br />
Extended Absence<br />
If you expect to leave your <strong>TV</strong> dormant for a long time<br />
(such as a vacation), it’s a good idea to unplug the power<br />
cord to protect against possible damage from lightning<br />
or power surges.<br />
Troubleshooting<br />
For the sake of time and cost, it is strongly<br />
re<strong>com</strong>mended that you checkout the problem by<br />
yourself according to the instructions listed hereunder<br />
before contacting the after-sales service for technical<br />
assistance.<br />
Problem Possible remedies<br />
No<br />
picture,<br />
no sound<br />
Turn on the power supply; Properly<br />
plug the<strong>TV</strong> setto the powersocket;<br />
Check to see if the power cable of other<br />
appliance is plugged in the <strong>TV</strong> set. Make<br />
sure that the power cable of the <strong>TV</strong> set<br />
is properly connected.<br />
Problem Possible remedies<br />
Good<br />
picture,<br />
no sound<br />
Failure of<br />
remote<br />
controller<br />
Depress the volume button;<br />
Check out the audio frequency input signals.<br />
Check to see if the remote controller<br />
display receiving window are blocked<br />
by other objects and if batteries are<br />
properly loaded.<br />
LED Backlit Flat <strong>TV</strong> Instruction Manual EN-22<br />
En
Specification/Format<br />
No color,<br />
weak color<br />
or poor<br />
picture<br />
Excessive<br />
brightness<br />
or darkness<br />
Picture<br />
too big or<br />
small<br />
One<br />
speaker<br />
failure<br />
Slight<br />
sound<br />
from<br />
display<br />
Note<br />
Designate the item of color from the<br />
Picture menu and depress the volume<br />
button; Keep the display and VCR<br />
separate a reasonable space; Activate<br />
some functions to store picture<br />
brightness; Make sure that the display<br />
and signal source are available and<br />
turned on.<br />
Adjust brightness or contrast.<br />
Adjust the setup of sizes.<br />
Balance the sound in the menu.<br />
It is a normal phenomenon.<br />
▲ Do not leave the television with static picture in an<br />
extended period as it may result in residual image<br />
on your television screen.<br />
Note<br />
▲ Production of the screen requires high and precision<br />
technologies. However, there might be some<br />
dark or bright (red, blue or green) spots, or some<br />
anomalistic stripes or spots. This is not defect. If the<br />
<strong>TV</strong> set is used in an area 2,400 meters above the sea<br />
level where the air pressure is below 750hpa, the<br />
picture on the screen maybe affected and a muffled<br />
sound might be produced. These phenomena<br />
might happen in the area 1,500 meters above the<br />
sea level. This is resulted from difference between<br />
air pressures inside and outside the display. This is<br />
not a defect covered by the limited warranty.<br />
Specification<br />
Basic specification and parameter<br />
Power 100-240V~ 50/60Hz<br />
EN-23 LED Backlit Flat <strong>TV</strong> Instruction Manual<br />
Color System PAL, NTSC, SECAM, AUTO<br />
Video Input USB,AV, Component, HDMI or PC,<br />
Environmental<br />
condition<br />
Operating temperature range:<br />
+5°C - +35°C Operating<br />
humidity range: 20%-80%<br />
Storage Temperature:<br />
-15°C~+45°C<br />
Storage Humidity: 5%-90%,<br />
non-condensing<br />
If the storage temperature is<br />
lower than 0 °C, please first<br />
lays the machine aside after<br />
in the operating temperature<br />
environment carries on restores<br />
2 hours, then electrifies the use<br />
again, protects your television<br />
not to receive the damage.<br />
Product main size (contain stand)<br />
MODEL<br />
Power<br />
Consumption<br />
Net Size(LxWxH)<br />
Net<br />
Weight<br />
LE42H5000 120W 961x222x613mm 15.5Kg<br />
LE47H5000 130W 1070x222x676mm 18.5Kg<br />
LE55H5000 160W 1243x280x773mm 27Kg<br />
Note<br />
▲ Design and specifications are subject to change<br />
without notice. The dimension in this manual is a<br />
approximation.<br />
Format<br />
Re<strong>com</strong>mendatory HD<strong>TV</strong>/<br />
SD<strong>TV</strong>(YPbPr/YCbCr)format<br />
Sequence<br />
Number<br />
Format<br />
Refresh<br />
Frequency (Hz)<br />
1 480i/480p 60<br />
2 576i/576p 50
3 720p 50/60<br />
4 1080i/1080p 50/60<br />
Re<strong>com</strong>mendation PC connection<br />
input format<br />
sequence<br />
number<br />
Format<br />
H-Frequency<br />
(KHz)<br />
V-Frequency<br />
(Hz)<br />
1 640*480@60Hz 31.5 60<br />
2 800*600@60Hz 37.88 60<br />
3<br />
1024*768@60Hz<br />
(Re<strong>com</strong>mendatory)<br />
48.36 60<br />
Re<strong>com</strong>mendation DVI connection<br />
input format<br />
Sequence<br />
Number<br />
Resolution Refresh Frequency (Hz)<br />
1 640*480 60<br />
2 800*600 60<br />
3 1024*768 60<br />
Re<strong>com</strong>mendation HDMI<br />
connection input format<br />
Sequence<br />
Number<br />
Format Refresh Frequency (Hz)<br />
1 480i/480p 60<br />
2 576i/576p 50<br />
3 720p 50/60<br />
4 1080i/1080p 50/60<br />
Format<br />
LED Backlit Flat <strong>TV</strong> Instruction Manual EN-24<br />
En