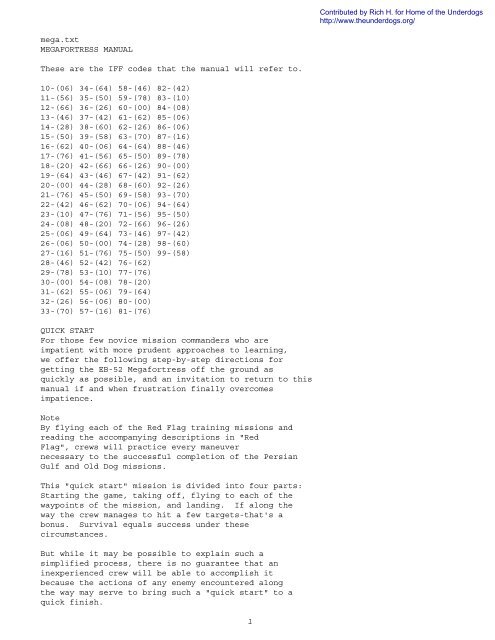
mega.txt MEGAFORTRESS MANUAL These are the IFF codes that ...
mega.txt MEGAFORTRESS MANUAL These are the IFF codes that ...
mega.txt MEGAFORTRESS MANUAL These are the IFF codes that ...

You also want an ePaper? Increase the reach of your titles
YUMPU automatically turns print PDFs into web optimized ePapers that Google loves.
<strong>mega</strong>.<strong>txt</strong><br />
<strong>MEGAFORTRESS</strong> <strong>MANUAL</strong><br />
<strong>These</strong> <strong>are</strong> <strong>the</strong> <strong>IFF</strong> <strong>codes</strong> <strong>that</strong> <strong>the</strong> manual will refer to.<br />
10-(06) 34-(64) 58-(46) 82-(42)<br />
11-(56) 35-(50) 59-(78) 83-(10)<br />
12-(66) 36-(26) 60-(00) 84-(08)<br />
13-(46) 37-(42) 61-(62) 85-(06)<br />
14-(28) 38-(60) 62-(26) 86-(06)<br />
15-(50) 39-(58) 63-(70) 87-(16)<br />
16-(62) 40-(06) 64-(64) 88-(46)<br />
17-(76) 41-(56) 65-(50) 89-(78)<br />
18-(20) 42-(66) 66-(26) 90-(00)<br />
19-(64) 43-(46) 67-(42) 91-(62)<br />
20-(00) 44-(28) 68-(60) 92-(26)<br />
21-(76) 45-(50) 69-(58) 93-(70)<br />
22-(42) 46-(62) 70-(06) 94-(64)<br />
23-(10) 47-(76) 71-(56) 95-(50)<br />
24-(08) 48-(20) 72-(66) 96-(26)<br />
25-(06) 49-(64) 73-(46) 97-(42)<br />
26-(06) 50-(00) 74-(28) 98-(60)<br />
27-(16) 51-(76) 75-(50) 99-(58)<br />
28-(46) 52-(42) 76-(62)<br />
29-(78) 53-(10) 77-(76)<br />
30-(00) 54-(08) 78-(20)<br />
31-(62) 55-(06) 79-(64)<br />
32-(26) 56-(06) 80-(00)<br />
33-(70) 57-(16) 81-(76)<br />
QUICK START<br />
For those few novice mission commanders who <strong>are</strong><br />
impatient with more prudent approaches to learning,<br />
we offer <strong>the</strong> following step-by-step directions for<br />
getting <strong>the</strong> EB-52 Megafortress off <strong>the</strong> ground as<br />
quickly as possible, and an invitation to return to this<br />
manual if and when frustration finally overcomes<br />
impatience.<br />
Note<br />
By flying each of <strong>the</strong> Red Flag training missions and<br />
reading <strong>the</strong> accompanying descriptions in "Red<br />
Flag", crews will practice every maneuver<br />
necessary to <strong>the</strong> successful completion of <strong>the</strong> Persian<br />
Gulf and Old Dog missions.<br />
This "quick start" mission is divided into four parts:<br />
Starting <strong>the</strong> game, taking off, flying to each of <strong>the</strong><br />
waypoints of <strong>the</strong> mission, and landing. If along <strong>the</strong><br />
way <strong>the</strong> crew manages to hit a few targets-<strong>that</strong>'s a<br />
bonus. Survival equals success under <strong>the</strong>se<br />
circumstances.<br />
But while it may be possible to explain such a<br />
simplified process, <strong>the</strong>re is no guarantee <strong>that</strong> an<br />
inexperienced crew will be able to accomplish it<br />
because <strong>the</strong> actions of any enemy encountered along<br />
<strong>the</strong> way may serve to bring such a "quick start" to a<br />
quick finish.<br />
1
STARTING <strong>MEGAFORTRESS</strong><br />
1) Install <strong>the</strong> program on a hard disk, following <strong>the</strong><br />
directions provided in <strong>the</strong> separate piece.<br />
2) Load <strong>the</strong> program, again following <strong>the</strong> directions<br />
provided.<br />
3) Take time to learn how to make selections by<br />
via mouse or keyboard. (It is highly recommended<br />
<strong>that</strong> a mouse be used to operate <strong>the</strong> EB-52<br />
Megafortress.).<br />
4) Register for your mission in one of <strong>the</strong> following<br />
ways:<br />
a) Select an active pilot in <strong>the</strong> registration<br />
screen and choose SELECT.<br />
b) Select <strong>the</strong> name of a pilot you want to<br />
replace, select REPLACE, and type in <strong>the</strong> name of<br />
your pilot. Tap .<br />
5) Select MISSIONS on <strong>the</strong> Main Menu.<br />
6) Choose SELECT on <strong>the</strong> Mission Selection pop-up<br />
menu.<br />
7) Select <strong>the</strong> geographic <strong>are</strong>a in which you want to<br />
fly your mission-Red Flag (Nevada) Persian Gulf, or<br />
Flight of <strong>the</strong> Old Dog-and <strong>the</strong>n choose SELECT. (It<br />
is highly recommended <strong>that</strong> new crew members begin<br />
with <strong>the</strong> Red Flag missions.)<br />
8) Select a mission on <strong>the</strong> scrolling list (scroll <strong>the</strong> list<br />
with <strong>the</strong> up or down arrows on <strong>the</strong> side of <strong>the</strong> list) and<br />
choose SELECT.<br />
9) If you select a Red Flag training mission, make<br />
sure <strong>that</strong> <strong>the</strong> aircraft is filled to capacity with fuel by<br />
checking <strong>the</strong> Weight panel in <strong>the</strong> Loadout screen.<br />
Fuel plus any ordnance loaded should total<br />
192,000 lbs. If total weight is less, add fuel by<br />
selecting <strong>the</strong> "+" symbol next to <strong>the</strong> FUEL readout<br />
until <strong>the</strong> total stops increasing.<br />
10) Select DONE of <strong>the</strong> MODE menu in <strong>the</strong> Loadout<br />
screen.<br />
TAKEOFF<br />
1) Go to <strong>the</strong> copilot station by selecting <strong>the</strong> COPLT<br />
light in <strong>the</strong> interphone panel at <strong>the</strong> lower left corner<br />
of <strong>the</strong> pilot station.<br />
2) Turn on <strong>the</strong> two battery switches (<strong>the</strong> engines will<br />
not start without battery power).<br />
3) Return to <strong>the</strong> pilot station by selecting <strong>the</strong> PLT<br />
light in <strong>the</strong> interphone panel. .<br />
2
4) Select PRKNG BRAKE to set <strong>the</strong> parking brake.<br />
Its light will illuminate.<br />
5) Select <strong>the</strong> FLAPS l to extend flaps for takeoff.<br />
The percentage-extended hand will begin to move,<br />
extending <strong>the</strong> flaps in approximately 23 seconds.<br />
6) Switch <strong>the</strong> TAXI/LAND ratio switch at <strong>the</strong><br />
bottom of <strong>the</strong> screen to LAND.<br />
7) Select ALL, on <strong>the</strong> right side of <strong>the</strong> Pilot's<br />
instrument panel to turn on <strong>the</strong> engine-ready switches.<br />
All eight engine lights will illuminate.<br />
8) Switch <strong>the</strong> ENGINE START switch to C to ignite<br />
<strong>the</strong> starter cartridges. The engine will start, and <strong>the</strong><br />
PWR display will show 1%.<br />
9) Switch <strong>the</strong> ENGINE START back to F, to channel<br />
electrical power to <strong>the</strong> aircraft's systems during flight.<br />
10) Increase power in all engines to 100% by<br />
selecting "+," to <strong>the</strong> right of <strong>the</strong> PWR display.<br />
11) Select PRKNG BRAKE to release <strong>the</strong> parking<br />
brake.<br />
12) When <strong>the</strong> speed indicator to <strong>the</strong> left of <strong>the</strong> Pilot's<br />
EVS reads 200 kts, lift off by using <strong>the</strong> down arrow<br />
on <strong>the</strong> keyboard to pitch <strong>the</strong> nose of <strong>the</strong> aircraft up at<br />
an angle of 5%. The current pitch angle is displayed<br />
in <strong>the</strong> Artificial Horizon indicator, to <strong>the</strong> left of <strong>the</strong><br />
Pilot's EVS.<br />
13) Select "UP" on <strong>the</strong> GEAR panel to raise <strong>the</strong><br />
landing gear. (Gear will be damaged if extended at<br />
speeds exceeding 375 kts.)<br />
14) Select <strong>the</strong> FLAPS indicator dial to retract <strong>the</strong><br />
flaps. (Flaps will be damaged if extended at speeds<br />
exceeding 450 kts.)<br />
15) When <strong>the</strong> aircraft reaches an altitude of 1000<br />
feet, select <strong>the</strong> AP or autopilot light in <strong>the</strong> warning<br />
panel at <strong>the</strong> far left side of <strong>the</strong> pilot station. The<br />
automatic flight control system (FCS) will take<br />
control of <strong>the</strong> aircraft and direct it toward <strong>the</strong> first<br />
mission waypoint. (You can override <strong>the</strong> FCS at any<br />
time by steering manually. Use <strong>the</strong> left-and rightarrow<br />
keys to turn <strong>the</strong> aircraft left or right; use <strong>the</strong><br />
down-and up-arrow keys to climb or descend. When<br />
you release <strong>the</strong> keys, <strong>the</strong> FCS will reassume control.)<br />
16) Decrease power to 85% by selecting "-," to <strong>the</strong><br />
left of <strong>the</strong> PWR display.<br />
THE MISSION<br />
After you <strong>are</strong> airborne and en route to <strong>the</strong> first<br />
3
waypoint, you will have to deal with four types of<br />
events (aside from <strong>the</strong> final challenge of landing):<br />
inflight refueling (Persian Gulf and Flight of <strong>the</strong> Old<br />
Dog only), identification, enemy attack, and target<br />
destruction.<br />
INFLATE REFUELING<br />
In <strong>the</strong> Persian Gulf and Flight of <strong>the</strong> Old Dog<br />
missions, you will always need to replace <strong>the</strong> fuel use<br />
during take off in order to complete <strong>the</strong> mission.<br />
Please take a moment to refer to "Flight Procedures:<br />
Inflight Refueling."<br />
Note<br />
If you select one of <strong>the</strong> Red Flag training missions,<br />
you must add additional fuel during Loadout<br />
selection to complete <strong>the</strong> mission. Red Flag mission<br />
#4 is designed purely as an exercise in inflight<br />
refueling.<br />
IDENTIFICATION<br />
At some point during each mission, <strong>the</strong> aircraft will<br />
be contacted by friendly Air Traffic Control (ATC)<br />
and asked to identify itself. The message will appear<br />
in <strong>the</strong> Message Display Line at <strong>the</strong> bottom of <strong>the</strong><br />
screen. Identification is accomplished fro <strong>the</strong> Copilot<br />
station as follows:<br />
1) Switch <strong>the</strong> Transponder switch to STBY. .<br />
2) The first two digits on <strong>the</strong> transponder <strong>are</strong><br />
automatically adjusted to match <strong>the</strong> 2-digit code<br />
transmitted by ground control.<br />
3) The numbers transmitted to <strong>the</strong> EB-52 correspond<br />
to one of <strong>the</strong> 2-digit page numbers in this manual.<br />
Locate <strong>that</strong> page and note <strong>the</strong> 2-digit code in<br />
p<strong>are</strong>n<strong>the</strong>ses to <strong>the</strong> right of <strong>the</strong> page number.<br />
4) Enter <strong>the</strong> 2-digit code into <strong>the</strong> last two numbers of<br />
<strong>the</strong> transponder by selecting <strong>the</strong> arrows to <strong>the</strong> left of<br />
each number.<br />
5) Switch <strong>the</strong> transponder switch from STDBY to<br />
ON.<br />
6) Select <strong>the</strong> IDENT button. When <strong>the</strong> REPLY light<br />
flashes, identification has been correctly made.<br />
WARNING<br />
Failure to identify correctly will result in <strong>the</strong><br />
destruction of <strong>the</strong> aircraft by friendly fire.<br />
CAUTION<br />
The transponder should remain on as long as <strong>the</strong><br />
aircraft remains in friendly airspace, but be turned<br />
OFF before entering enemy territory. The set<br />
transmits UHF radio waves and will attract<br />
4
immediate attention from enemy ground installations.<br />
The UHF warning light on <strong>the</strong> pilot's screen<br />
illuminates when <strong>the</strong> transponder is on.<br />
ENEMY ATTACK<br />
Enemy attacks come ei<strong>the</strong>r from <strong>the</strong> ground or air,<br />
and you have three options in dealing with <strong>the</strong>m:<br />
1) Fly as low as possible, using features in <strong>the</strong> terrain<br />
to evade <strong>the</strong> pursuer.<br />
2) Evade or disrupt attacks using countermeasures<br />
available at <strong>the</strong> EW station. <strong>These</strong> include active<br />
jamming of enemy radars and infr<strong>are</strong>d tracking<br />
systems, dispensing chaff and fl<strong>are</strong>s to confuse enemy<br />
missiles, and disrupting enemy communications.<br />
Complete information on <strong>the</strong> use of <strong>the</strong>se defensive<br />
systems is included in "Electron Warf<strong>are</strong> Station."<br />
3) Counterattack using weapons available at <strong>the</strong> OW<br />
station. Enemy aircraft can be attacked, groundbased<br />
radars and missile installations eliminated,<br />
enemy airfields rendered unusable, and so on using<br />
<strong>the</strong> OW systems.<br />
Complete information on <strong>the</strong> use of <strong>the</strong>se offensive<br />
systems is included in "Offensive Weapons Station."<br />
TARGET DESTRUCTION<br />
Mission targets can include anything from buildings<br />
and bridges to enemy radars and airfield. Review <strong>the</strong><br />
targets at any time by going to <strong>the</strong> navigator station<br />
and changing <strong>the</strong> Mode Select Switch to NAV><br />
The preprogramming waypoints of each mission <strong>are</strong><br />
located at or near <strong>the</strong> mission targets. As you approach<br />
each waypoint, go to <strong>the</strong> OW station and search for<br />
<strong>the</strong> target by using <strong>the</strong> OW monitor ei<strong>the</strong>r in SCAN<br />
(for radar-emitting targets) or CAMERA (for<br />
buildings, bridges, etc.) mode.<br />
As described in "Enemy Attack" above, different<br />
targets require different weapons and delivery<br />
techniques.<br />
LANDING<br />
For a complete description of landing procedures,<br />
please refer to "Flight Procedures: Landing."<br />
STATIONS<br />
There <strong>are</strong> five crew stations and one external camera<br />
observation station in <strong>the</strong> aircraft, each with its own<br />
special instrument, displays, and functions. In<br />
addition, five common, or "multi-station" instruments<br />
<strong>are</strong> located at every station.<br />
5
MULTI-STATION INSTRUMENTS<br />
Clock<br />
. .<br />
1) GMT is Greenwich Mean Time.<br />
2) ETA is <strong>the</strong> aircraft's estimated time of arrival at<br />
<strong>the</strong> next waypoint at <strong>the</strong> current speed.<br />
3) START/RESET operated a stopwatch. This<br />
instrument can be particularly useful during bombing<br />
runs.<br />
Compass<br />
. .<br />
The compass displays magnetic direction and cannot<br />
be damaged.<br />
Message Display Line<br />
The bottom margin of <strong>the</strong> screen displays all<br />
messages transmitted by interphone between crew<br />
members, and all communication to <strong>the</strong> aircraft from<br />
ground controllers and airborne surveillance systems.<br />
Interphone Panel<br />
.<br />
Click any light on <strong>the</strong> Interphone Panel to go to one<br />
of <strong>the</strong> Megafortress stations.<br />
1) If a light is on and steady, it indicates <strong>the</strong> station<br />
currently show.<br />
2) If a light is flashing, its corresponding station<br />
requires attention.<br />
3) If <strong>the</strong> INTERPHONE switch at <strong>the</strong> copilot's<br />
station (please see "Copilot Station,") is<br />
turned off, <strong>the</strong> panel will not operate.<br />
Warning Panel<br />
.<br />
The warning panel is make up of four lights-one<br />
selector light and three warning lights.<br />
1) AP (autopilot): When <strong>the</strong> autopilot selector light<br />
is selected, <strong>the</strong> aircraft's digital automatic Flight<br />
Control System (FCS) automatically flies <strong>the</strong> aircraft<br />
along <strong>the</strong> programmed course of waypoints,<br />
Temporary waypoints, and altitudes set at <strong>the</strong><br />
navigator's station (please see "Navigator Station:<br />
MAP Panel,"). The FCS can be<br />
overridden manually at any time, but reassumes<br />
command immediately when manual control is<br />
relinquished.<br />
6
2) LA (low altitude): The LA warning light flashes<br />
when <strong>the</strong> airplane descends below <strong>the</strong> altitude set on<br />
<strong>the</strong> terrain avoidance computer (TAC), even if <strong>the</strong><br />
TAC is not on. (Please see "Pilot Station,".)<br />
3) ML )missile launch): <strong>the</strong> ML warning light<br />
flashes when an infr<strong>are</strong>d or radar-guided missile<br />
tracks <strong>the</strong> aircraft. The ML warning light is saved to<br />
<strong>the</strong> EW Officer's Missile Launch warning light.<br />
(Please see "EW Station,").<br />
4) RO (radar on): The RO warning light illuminates<br />
whenever <strong>the</strong> airplane's AN/APQ-166 active<br />
("attack") radar is on <strong>the</strong> OW Officer's station.<br />
CAUTION<br />
The active radar dramatically increases <strong>the</strong> radar<br />
cross section (RCS) of <strong>the</strong> aircraft (Please see<br />
"Stealth Modification,").<br />
PILOT STATION<br />
.<br />
The pilot is <strong>the</strong> aircraft commander, and is<br />
responsible for <strong>the</strong> issuance of instructions governing<br />
all phases of flight operation, especially including<br />
takeoff, flying <strong>the</strong> aircraft, inflight refueling, damage<br />
control, and landing.<br />
.<br />
CHAFF Button<br />
Select <strong>the</strong> CHAFF button to eject two chaff bundlesone<br />
from each wing. (Please see "Electronic Warf<strong>are</strong><br />
Station.")<br />
FUEL Light<br />
The fuel light flashes when <strong>the</strong> aircraft has enough<br />
fuel remaining for 10 minutes of flight at <strong>the</strong><br />
maximum power setting; <strong>the</strong> light stops flashing and<br />
burns steadily when <strong>the</strong>re is enough fuel remaining<br />
for 5 minutes of flight. (Please see "Fuel" under<br />
"Copilot Station".)<br />
DRS Light<br />
The DRS light illuminates when <strong>the</strong> bomb bay doors<br />
<strong>are</strong> opened. Flying with <strong>the</strong> bomb bay doors open<br />
increases RCS and slows <strong>the</strong> airplane. (Please see<br />
"OW Station: Master Bomb Control," this chapter,<br />
and "Stealth Modifications".)<br />
UHF Light<br />
The UHF light illuminates when UHF signals <strong>are</strong><br />
being generated by <strong>the</strong> aircraft. Such signals<br />
generally come from <strong>the</strong> Copilot's transponder.<br />
7
OIL Light<br />
The oil warning light illuminates when one or more of<br />
<strong>the</strong> engines is low on oil. The oil light generally<br />
indicates <strong>that</strong> engine trouble is about to occur, or is<br />
occurring.<br />
AIR REFUEL Panel (Please see "Inflight<br />
Refueling")<br />
C Light<br />
Select <strong>the</strong> "C" contact light to lock onto a refueling<br />
tanker's radar signal. The signal must be selected in<br />
<strong>the</strong> pilot EVS radar (please see "EVS," below) and<br />
<strong>the</strong> FCS (please see "Warning Pane: AP," above)<br />
must be on for <strong>the</strong> EB-52 to automatically redirect its<br />
fight path toward <strong>the</strong> tanker in preparation for<br />
rendezvous. (Please see "Inflight Refueling,", and try<br />
Red Flag training mission #4)<br />
RDY Light<br />
The ready light illuminates when <strong>the</strong> EB-52 has<br />
successfully rendezvoused with a refueling tanker.<br />
Fueling can begin.<br />
DRS Light<br />
Select <strong>the</strong> refueling DRS light to open <strong>the</strong> slipway<br />
doors and begin inflight refueling.<br />
System Alert Panel<br />
H<br />
The hydraulic system warning light flashes when <strong>the</strong><br />
aircraft hydraulic system in malfunctioning. (Please<br />
see "Copilot Station," this chapter, and "Damage<br />
Control".)<br />
E<br />
The electrical system warning light flashes when <strong>the</strong><br />
aircraft electrical system is malfunctioning. (Please<br />
see "Copilot Station," this chapter, and "Damage<br />
Control".)<br />
F<br />
The flight systems warning light flashes in response<br />
to a variety of flight-oriented problems. (Please see<br />
"TAXI/LAND Ratio Switch," this chapter, and<br />
"Damage Control")<br />
Digital Altimeter<br />
The digital indicator monitors <strong>the</strong> AN/APN-224 radar<br />
altimeter and registers altitude above ground level<br />
(AGL) in feet.<br />
Analog Altimeter<br />
8
The analog altitude indicator registers altitude above<br />
sea level. The black hand indicates 100s of feet; <strong>the</strong><br />
red hand indicates 1000s of feet.<br />
WARNING<br />
It is important to note <strong>the</strong> difference between <strong>the</strong> two<br />
altitude indicators. Generally <strong>the</strong> digital altimeter is<br />
<strong>the</strong> more important instrument of <strong>the</strong> two to <strong>the</strong> pilot,<br />
as it records <strong>the</strong> current distance between <strong>the</strong> aircraft<br />
and <strong>the</strong> ground. The analog indicator is useful in its<br />
graphic representation of changes in altitude.<br />
Artificial Horizon Indicator<br />
The lines on <strong>the</strong> Artificial Horizon indicate <strong>the</strong> degree<br />
of roll, from side to side' <strong>the</strong> numbers indicate <strong>the</strong><br />
degree of pitch, forward and back.<br />
EVS OFF/ON Switch<br />
The EVS OFF/ON switch must be turned on for any<br />
of <strong>the</strong> electro-optical viewing system (EVS) functions<br />
to operate.<br />
EVS RANGE/RDR mode switch<br />
1) In RDR mode, <strong>the</strong> pilot's EVS monitor displays<br />
information from ei<strong>the</strong>r <strong>the</strong> EW station's passive<br />
radar, or <strong>the</strong> OW station active radar if <strong>the</strong> OW radar<br />
is operating in "attack" mode. (Please see EW and<br />
OW stations.)<br />
2) In RANGE mode, <strong>the</strong> EVS presents a lowresolution<br />
display of <strong>the</strong> world ahead of<br />
Megafortress. Features include: .<br />
A) Low-resolution profile of <strong>the</strong> terrain between <strong>the</strong><br />
aircraft and a line 10, 20, or 40 miles distantdepending<br />
on <strong>the</strong> range currently set in <strong>the</strong> Radar<br />
panel at <strong>the</strong> Navigator's station.<br />
B) "Batwing" symbol representing <strong>the</strong> EB-52,<br />
showing its altitude relative to <strong>the</strong> horizon line.<br />
C) Two short lines on <strong>the</strong> right-hand margin of <strong>the</strong><br />
monitor, indication <strong>the</strong> lowest and highest levels of<br />
terrain between airplane and <strong>the</strong> horizon line. (<strong>These</strong><br />
<strong>are</strong> often toge<strong>the</strong>r at <strong>the</strong> bottom of <strong>the</strong> EVS,<br />
indication flat, featureless terrain.)<br />
D) Terrain Avoidance Computer (TAC) interface.<br />
The TAC can be turned on and off (by selecting <strong>the</strong><br />
word ON or OFF) and set to any altitude between 108<br />
and 1085 feet (by selecting <strong>the</strong> + or - sign). When <strong>the</strong><br />
TAC is turned on, <strong>the</strong> aircraft will maintain <strong>the</strong><br />
selected altitude AGL, overriding <strong>the</strong> programmed<br />
waypoint altitude if <strong>the</strong> autopilot is on, or<br />
automatically whenever manual control of <strong>the</strong><br />
airplane is relinquished. (Please see "Terrain<br />
9
Referenced Navigation,".)<br />
NOTE<br />
Whe<strong>the</strong>r or not <strong>the</strong> TAC is turned on, when<br />
something in <strong>the</strong> approaching terrain is less than 15<br />
miles away and higher than <strong>the</strong> altitude selected on<br />
<strong>the</strong> TAC, <strong>the</strong> Low Altitude (LA) warning light<br />
flashes.<br />
If <strong>the</strong> TAC is turned on, <strong>the</strong> airplane will fly up and<br />
over <strong>the</strong> obstruction unless overridden manually.<br />
WARNING<br />
The TAC, when presented with an abrupt vertical<br />
obstruction, will attempt to maintain <strong>the</strong> programmed<br />
altitude by putting <strong>the</strong> aircraft into a steep climb.<br />
Without sufficient power to maintain <strong>the</strong> climb, <strong>the</strong><br />
aircraft will stall. At <strong>the</strong> low altitudes maintained by<br />
<strong>the</strong> TAC, this would be extremely hazardous.<br />
PRKNG BRKE selector<br />
1) If <strong>the</strong> parking brake is on while <strong>the</strong> airplane is on<br />
<strong>the</strong> ground, <strong>the</strong> plane will not move.<br />
2) If <strong>the</strong> parking brake is on while <strong>the</strong> plane is<br />
airborne with landing fear down, <strong>the</strong> F (flight<br />
systems) warning light will flash.<br />
TAXI/LAND ratio switch<br />
The steering ration selector mechanically limits<br />
ground-based steering angles for two conditions: a<br />
taxi ratio allows <strong>the</strong> forward gear to be turned to a<br />
maximum angle of 55 degrees right or left of center during<br />
ground-based maneuvering; <strong>the</strong> second ration is used<br />
for takeoff and landing, restricting <strong>the</strong> turning angle<br />
to approximately 12 degrees left or right of center.<br />
1) If <strong>the</strong> switch is set to TAXI and speed is less than<br />
20 kts while <strong>the</strong> plane is on <strong>the</strong> ground, <strong>the</strong> plane can<br />
be steered with <strong>the</strong> same controls used to fly <strong>the</strong> plane<br />
in <strong>the</strong> air.<br />
2) If <strong>the</strong> switch is set to TAXI and speed exceeds 20<br />
kts while <strong>the</strong> plane is on <strong>the</strong> ground, <strong>the</strong> F(flight<br />
systems) warning light will flash and <strong>the</strong> course of <strong>the</strong><br />
plane will be extremely difficult to control.<br />
3) If <strong>the</strong> switch is set to LAND and speed is less than<br />
20 kts while <strong>the</strong> plane is on <strong>the</strong> ground, <strong>the</strong> F(flight<br />
systems) warning light will flash and <strong>the</strong> plane will<br />
not turn.<br />
In short, <strong>the</strong> TAXI/LAND ration switch should be set<br />
to LAND when taking off and landing, and to TAXI<br />
when <strong>the</strong> ground-based speed drops below 20 kts and<br />
maneuvering is necessary.<br />
GEAR UP/DN selector<br />
10
The GEAR UP/DN selector raises and lowers <strong>the</strong><br />
landing gear.<br />
1) If any engine drops to 10% power of less and he<br />
fear is NOT down, <strong>the</strong> engine's trouble light will flash<br />
until <strong>the</strong> engine is turned off.<br />
2) If <strong>the</strong> gear is down while <strong>the</strong> plane is in <strong>the</strong> air, <strong>the</strong><br />
plane's speed will be reduce and its RCS will be<br />
increased.<br />
3) If speed exceeds 400 kts with <strong>the</strong> landing gear<br />
down, <strong>the</strong> gear will be damaged.<br />
Engine Panel (right of EVS)<br />
The engine panel has controls for starting and<br />
stopping <strong>the</strong> engines, as well as increasing and<br />
decreasing <strong>the</strong>ir power. Lights corresponding to each<br />
engine indicate whe<strong>the</strong>r <strong>the</strong> engine is on, whe<strong>the</strong>r it is<br />
on fire, or whe<strong>the</strong>r some o<strong>the</strong>r trouble is affecting its<br />
performance. (Please also see "Damage Control".)<br />
For a complete description of <strong>the</strong> engine start<br />
procedure, please see "Flight Procedures,".<br />
ENGINE START C/F<br />
1) To turn <strong>the</strong> engines on, ei<strong>the</strong>r as a group or<br />
individually, <strong>the</strong> START switch must be in <strong>the</strong> F<br />
(flight) position.<br />
A) When <strong>the</strong> START switch is in <strong>the</strong><br />
F(flight)position, <strong>the</strong> engines' electrical systems <strong>are</strong><br />
turned on ei<strong>the</strong>r as a group by selecting ALL, or<br />
individually by selecting each engine's light.<br />
2) After <strong>the</strong> engines (or engine) have been turned on,<br />
<strong>the</strong> STAT switch must be moved to <strong>the</strong> C (cartridge)<br />
position in order to ignite <strong>the</strong> engines. Then <strong>the</strong> start<br />
switch should be returned to he F(flight) position.<br />
3) To restart an engine (or engines) in flight, <strong>the</strong><br />
above sequence must be repeated, but only for those<br />
particular engines. Do not use <strong>the</strong> ALL button except<br />
when all engines need to be started at <strong>the</strong> same time.<br />
4) When <strong>the</strong> start sequence is compete, <strong>the</strong> engines<br />
can be controlled individually by selecting one of <strong>the</strong><br />
throttle handles at <strong>the</strong> bottom right corner of <strong>the</strong><br />
instrument panel, or as a group by selecting ei<strong>the</strong>r <strong>the</strong><br />
plus or minus sign alongside <strong>the</strong> digital PWR display.<br />
CAUTION<br />
Selecting ALL switches all <strong>the</strong> engines to <strong>the</strong> state<br />
opposite <strong>the</strong> current state of engine 1. That is, if<br />
engine 1 is off, selecting ALL turns all of <strong>the</strong> engines<br />
on and vice versa.<br />
11
FIRE Lights<br />
The engine fire lights flash if one or more of <strong>the</strong><br />
engines is on fire, and stay lit if an engine is burnt<br />
out.<br />
WARNING<br />
Fire in one engine will spread to <strong>the</strong> o<strong>the</strong>r engine in<br />
<strong>the</strong> same nacelle, and to <strong>the</strong> next nacelle and so on if<br />
<strong>the</strong> engine is not turned off. For example, fire in<br />
engine 2 will spread to engine 1, and on to engines 3<br />
and 4 if not stopped. (Please see "Damage Control,".)<br />
TROUBLE Lights<br />
Trouble lights correspond to each engine. A flashing<br />
trouble light can indicate any number of problems,<br />
including oil leaks and damage beyond <strong>the</strong> diagnostic<br />
powers of <strong>the</strong> aircraft computers. Please see<br />
"Damage Control,".<br />
FLAPS<br />
1) Flaps <strong>are</strong> extended by selecting <strong>the</strong> FLAPS<br />
indicator.<br />
2) It takes 21 seconds for <strong>the</strong> flaps to extend or be<br />
retracted.<br />
3) If <strong>the</strong> aircraft is on <strong>the</strong> ground and power exceeds<br />
75% with <strong>the</strong> flaps RETRACTED, <strong>the</strong> F(flight<br />
systems) and engine trouble warning lights flash.<br />
4) If <strong>the</strong> aircraft attempts to take off without <strong>the</strong> flaps<br />
fully extended, takeoff requires a longer run and<br />
higher speed.<br />
AIR BRAKE<br />
1) When <strong>the</strong> airplane is in flight, selecting <strong>the</strong> air<br />
brake raises <strong>the</strong> wing spoilers on both wings, causing<br />
a dramatic decrease in speed.<br />
COPILOT STATION<br />
.<br />
The Copilot is <strong>the</strong> deputy aircraft commander and<br />
assists <strong>the</strong> pilot in <strong>the</strong> proper flight of <strong>the</strong> aircraft.<br />
Inasmuch as fuel, electrical, hydraulic, pressurization,<br />
communications, and o<strong>the</strong>r systems <strong>are</strong> controlled by<br />
<strong>the</strong> copilot, he also acts as flight engineer.<br />
HYDRAULIC CONTROL Panel<br />
Note<br />
Many of <strong>the</strong> EB-52's mechanical systems <strong>are</strong><br />
operated hydraulically, including <strong>the</strong> landing gear,<br />
brakes, ground steering, flaps, spoilers, CSRL,<br />
rudders, bomb bay doors, and inflight refueling<br />
12
doors. For a detailed description of <strong>the</strong> hydraulic<br />
system, please see "Megafortress Briefing:<br />
Hydraulic System,".<br />
.<br />
If engines 1,3,4,5,6 or 7 is off, its hydraulic pump is<br />
also off (engines 2 and 8 do not have hydraulic<br />
pumps.) this results in <strong>the</strong> following conditions:<br />
1) The PUMP OUT light goes ON.<br />
2) The COPLT light on <strong>the</strong> Interphone Panel flashes<br />
at all o<strong>the</strong>r stations.<br />
3) The "H" warning light flashes at <strong>the</strong> pilot's station.<br />
4) If an engines 1,4,5, or 7 cannot be restarted, <strong>the</strong>ir<br />
electric standby pumps can be turned on by selecting<br />
<strong>the</strong> corresponding STDBY switch.<br />
5) Pumps for engines 3 and 6 operate <strong>the</strong> inboard<br />
spoilers. If 3 and 6 <strong>are</strong> out, plane loses longitudinal<br />
roll capability. i.e.-it won't turn as fast.<br />
6) Pumps for engines 1 and 7 operate <strong>the</strong> outboard<br />
spoilers. If 1 and 7 <strong>are</strong> out, <strong>the</strong> plane loses more<br />
longitudinal roll capability.<br />
7) Pumps for engines 4 and 5 operate <strong>the</strong> landing<br />
gear and ground brakes. If 4 and 5 <strong>are</strong> out and <strong>the</strong>ir<br />
standby pumps cannot be turned on, emergency<br />
electrical backup power for <strong>the</strong> standby pumps may<br />
be available through <strong>the</strong> copilot's EVS operating in<br />
INT mode (see below). If supplying emergency<br />
power does not work, <strong>the</strong> pumps <strong>are</strong> damaged beyond<br />
repair.<br />
Rudder/Elevator Hydraulics<br />
Each of <strong>the</strong> two rudders on <strong>the</strong> plane's V-tail has its<br />
own system and backup.<br />
1) At least one must be turned on for <strong>the</strong> plane to<br />
turn or pitch up or down.<br />
2) If one rudder goes out due to excessive damage or<br />
<strong>the</strong> copilot turning it off, <strong>the</strong> plane gets harder to<br />
control.<br />
3) If both rudders <strong>are</strong> out-best of luck.<br />
Batteries<br />
Note<br />
Two electrical distribution buses supply power to <strong>the</strong><br />
left and right sides of <strong>the</strong> aircraft. Primary power is<br />
supplied by four engine-driven generators and<br />
constant-speed drives mounted on engines 1,3,5 and<br />
13
7. for a detailed description of <strong>the</strong> electrical system,<br />
please see "EVS: ELEC Button," below, and<br />
"Megafortress Briefing: Electrical System,".<br />
1) Both battery switches must be ON to start engines.<br />
2) After <strong>the</strong> engines have been started, battery<br />
switches should be turned OFF.<br />
3) If engines 1,3,5,and 7 begin to go out <strong>the</strong> load<br />
placed on <strong>the</strong> system may start to exceed available<br />
power, causing o<strong>the</strong>r systems to down in turn.<br />
Batteries must be turned ON to handle emergencypriority<br />
circuits only, but every effort must be make<br />
to conserve power; battery capacity is limited to 20<br />
minutes of emergency power.<br />
4) If engines 1,3,5, and 7 all <strong>are</strong> out, batteries must<br />
be turned ON to supply dc to essential emergency<br />
systems (please see "Damage Control,".<br />
LIGHT CONTROL Panel<br />
There <strong>are</strong> three exterior and one interior light switch<br />
on <strong>the</strong> LIGHT CONTROL panel.<br />
1) When <strong>the</strong> mission begins <strong>the</strong> interior DOME light<br />
is always ON. Turning off <strong>the</strong> DOME light turns <strong>the</strong><br />
crew compartment lights out.<br />
2) There <strong>are</strong> three LDNG/TAXI lights mounted on<br />
<strong>the</strong> plane: one halfway down each wing, and <strong>the</strong> third<br />
on <strong>the</strong> right forward landing gear. <strong>These</strong> light up <strong>the</strong><br />
runway ahead of <strong>the</strong> plane during landing and ground<br />
operations and aid air traffic control (ATC) in<br />
tracking <strong>the</strong> plane visually during takeoff and landing<br />
procedures.<br />
3) The plane's NAV lights consist of four red and<br />
green beacons on <strong>the</strong> plane's left and right wingtips<br />
and two rudders, and three white beacons: one on top<br />
of <strong>the</strong> fuselage and one to ei<strong>the</strong>r side of <strong>the</strong> bomb bay<br />
doors. They <strong>are</strong> visible from a great distance in clear<br />
wea<strong>the</strong>r and should be turned off in enemy airspace.<br />
4) Three ANTI-COLLISION lights, one on each side<br />
of <strong>the</strong> fuselage and one on <strong>the</strong> bottom of <strong>the</strong> fuselage,<br />
<strong>are</strong> used to safeguard against inflight collision. They<br />
<strong>are</strong> visible from a great distance in clear wea<strong>the</strong>r and<br />
should be turned off in enemy airspace.<br />
CABIN PRESSURE<br />
A wing leading-edge manifold is <strong>the</strong> source for <strong>the</strong><br />
airplane's bleed airsystem, which collects and routes<br />
high pressure hot air. This bleed air is <strong>the</strong> power<br />
source for inflight engine starting and <strong>the</strong> air source<br />
for heating, cooling, and pressurizing <strong>the</strong> crew<br />
compartment. A retractable ram airscoop located on<br />
<strong>the</strong> left side of <strong>the</strong> fuselage provides an emergency<br />
14
source of ram air for cooling and ventilation <strong>the</strong> crew<br />
compartment.<br />
1) At altitudes above 9,000 feet, cabin pressure<br />
switch must be turned to standard 7.45 PSI, or to 4.50<br />
PSI combat setting if severe changes in altitude <strong>are</strong><br />
expected during rapid maneuvering.<br />
2) If <strong>the</strong> cabin pressure system is damaged or turned<br />
off at altitudes above 9,000 feet, complaints from <strong>the</strong><br />
crew <strong>are</strong> broadcast on <strong>the</strong> interphone.<br />
3) Emergency cooling and ventilation can be<br />
provided by turning CABIN PRESSURE switch to<br />
RAM.<br />
INTERPHONE<br />
Interphone messages <strong>are</strong> broadcast via <strong>the</strong> Interphone<br />
panel at each station, and along <strong>the</strong> bottom edge of<br />
<strong>the</strong> display. Messages from <strong>the</strong> AFSACOM system<br />
(please see "MF Briefing,"), <strong>the</strong> command<br />
radio and liaison radio systems, and crew members,<br />
<strong>are</strong> routed through <strong>the</strong> interphone to every station in<br />
<strong>the</strong> message display line. A flashing light in <strong>the</strong><br />
Interphone Panel (please see "Multi-station<br />
Instruments,") indicates <strong>that</strong> its corresponding<br />
station requires attention.<br />
1) The interphone switch must be ON for <strong>the</strong><br />
message traffic to be routed to <strong>the</strong> Interphone panel,<br />
or to <strong>the</strong> bottom of <strong>the</strong> display.<br />
TRANSPONDER<br />
The AN/APX-64 <strong>IFF</strong> transponder is <strong>the</strong> airborne<br />
portion of a two-way link between <strong>the</strong> aircraft and<br />
ground radar installations. The ground radar station<br />
sends an interrogation signal which is received by <strong>the</strong><br />
aircraft; <strong>the</strong> aircraft transponder (reply system) replies<br />
with coded signals <strong>that</strong> <strong>are</strong> received on <strong>the</strong> ground<br />
and displayed on <strong>the</strong> radar scope as unique<br />
identification and altitude signals. In addition <strong>the</strong><br />
transponder contains provisions for transmission of<br />
an "identification of position" (IDENT) signal.<br />
WARNING<br />
Failure to identify <strong>the</strong> aircraft correctly when<br />
contacted by air traffic controllers will result in <strong>the</strong><br />
destruction of <strong>the</strong> aircraft by friendly fire.<br />
In <strong>the</strong> vicinity of <strong>the</strong> first waypoint or any o<strong>the</strong>r<br />
friendly radar site, <strong>the</strong> aircraft may be contacted by<br />
friendly ATC and identification requested.<br />
1) Switch <strong>the</strong> Transponder switch to STBY.<br />
2) The first two digits on <strong>the</strong> transponder <strong>are</strong><br />
automatically adjusted to match <strong>the</strong> 2-digit code<br />
15
transmitted by ground control.<br />
3) The numbers transmitted to <strong>the</strong> EB-52 correspond<br />
to one of <strong>the</strong> 2-digit page numbers in this manual.<br />
Locate <strong>that</strong> page and note <strong>the</strong> 2-digit code in<br />
p<strong>are</strong>n<strong>the</strong>ses to <strong>the</strong> right of <strong>the</strong> page number.<br />
5) Switch <strong>the</strong> transponder switch from STDBY to<br />
ON.<br />
6) Select <strong>the</strong> IDENT button. when <strong>the</strong> REPLY light<br />
flashes, identification has been correctly made.<br />
WARNING<br />
The transponder should remain on as long as <strong>the</strong><br />
aircraft remains in friendly airspace, but be turned<br />
OFF before entering enemy territory. The set<br />
transmits UHF radio waves and will attract<br />
immediate attention from enemy ground installations.<br />
The UHF warning light on <strong>the</strong> pilot's screen<br />
illuminates when <strong>the</strong> transponder is on.<br />
EVS<br />
The copilot's EVS operates in any of three modes:<br />
RDR Mode: In RDR mode, <strong>the</strong> copilot's EVS<br />
monitor displays information from ei<strong>the</strong>r <strong>the</strong> EW<br />
station's passive radar, or <strong>the</strong> OW station active radar<br />
if <strong>the</strong> OW radar is operating in "attack" mode.<br />
(Please see "EW" and "OW" stations, this chapter.)<br />
RNGE Mode: When <strong>the</strong> copilot EVS is in RNGE<br />
mode, it is saved to <strong>the</strong> pilot's EVS in RANGE mode.<br />
INT Mode: When <strong>the</strong> copilot EVS is in INT mode,<br />
it provides control over <strong>the</strong> internal electrical and fuel<br />
systems. In emergencies it is used to reset electrical<br />
and fuel systems. In emergencies it is used to reset<br />
electrical circuits and transfer fuel. (Please see<br />
"Damage Control,".)<br />
ELEC button<br />
.<br />
When <strong>the</strong> ELEC button at <strong>the</strong> bottom of <strong>the</strong> EVS is<br />
selected, <strong>the</strong> screen allows control of each main ac<br />
generator, <strong>the</strong> left and right bus circuits, and <strong>the</strong><br />
emergency dc power supply.<br />
1) If any of <strong>the</strong> circuits or generators needs to be<br />
reset for any reason, <strong>the</strong> COPLT lights on <strong>the</strong><br />
Interphone Panel flashes at all o<strong>the</strong>r stations.<br />
2) If any of <strong>the</strong> circuits or generators needs to be<br />
reset for any reason, <strong>the</strong> "E" warning light flashes at<br />
<strong>the</strong> pilot's station.<br />
16
3) If any of <strong>the</strong> main generator engines (1,3,5, or 7)<br />
is turned off, <strong>the</strong> corresponding status light in <strong>the</strong><br />
second row of <strong>the</strong> EVS reads "BKUP", and backup<br />
electrical power is supplied automatically.<br />
4) If any of <strong>the</strong> main generators' engines (1,3,5, or 7)<br />
is damaged, <strong>the</strong> corresponding status light in <strong>the</strong><br />
second row of <strong>the</strong> EVS reads "OUT" and <strong>the</strong><br />
generator must be RESET manually by selecting <strong>the</strong><br />
appropriate engine number in <strong>the</strong> third row of <strong>the</strong><br />
EVS.<br />
5) If engines 1 and 3 <strong>are</strong> damaged toge<strong>the</strong>r, <strong>the</strong>n<br />
A) Reset <strong>the</strong> LEFT BUS by selecting RESET in <strong>the</strong><br />
fourth row of <strong>the</strong> EVS.<br />
B) Reset <strong>the</strong> generators by selecting <strong>the</strong> appropriate<br />
engine numbers in <strong>the</strong> third row of <strong>the</strong> EVS.<br />
6) If engines 5 and 7 <strong>are</strong> damaged toge<strong>the</strong>r, <strong>the</strong>n<br />
A) Reset <strong>the</strong> RIGHT BUS by selecting RESET in <strong>the</strong><br />
fifth row of <strong>the</strong> EVS.<br />
B) Reset <strong>the</strong> generators by selecting <strong>the</strong> appropriate<br />
engine numbers in <strong>the</strong> third row of <strong>the</strong> EVS.<br />
7) If <strong>the</strong> electrical system fails and cannot be reset,<br />
<strong>the</strong> EMERG DC system should be turned ON by<br />
selecting EMERG from <strong>the</strong> sixth row of <strong>the</strong> EVS.<br />
(This procedure is especially important in supplying<br />
<strong>the</strong> hydraulic system backup pumps with power.<br />
Please see "Hydraulic control Panel," above, and<br />
"Damage Control,".)<br />
WARNING<br />
Emergency power will be exhausted in approximately<br />
20 minutes.<br />
FUEL button<br />
.<br />
When <strong>the</strong> FUEL button at <strong>the</strong> bottom of <strong>the</strong> copilot's<br />
EVS is selected, <strong>the</strong> screen permits control of <strong>the</strong><br />
aircraft's four main fuel tanks, two mounted outboard<br />
at each wingtip, and two internal wing tanks.<br />
Each of <strong>the</strong> four main tanks supplies <strong>the</strong> two engines<br />
closest to it: L TIP supplies engines 1 and 2, MID 1<br />
supplies engines 3 and 4, MID 2 supplies engines 5<br />
and 6, and R TIP supplies engines 7 and 8.<br />
1) If any of <strong>the</strong> fuel tanks is damaged and requires<br />
attention, <strong>the</strong> COPLT light on <strong>the</strong> Interphone Panel<br />
flashes at all o<strong>the</strong>r stations.<br />
2) If any of <strong>the</strong> fuel tanks is damaged, its STAT light<br />
17
turns from green to red.<br />
3) A damaged fuel tank leaks fuel at double <strong>the</strong> rate<br />
of normal fuel consumption. To avoid losing <strong>the</strong> fuel<br />
in a damaged tank, it is necessary to transfer its<br />
remaining fuel to <strong>the</strong> o<strong>the</strong>r, undamaged tanks. To<br />
transfer fuel:<br />
i) Select <strong>the</strong> XFER switch (<strong>the</strong> word OFF) next to <strong>the</strong><br />
damaged tank, The fuel will be transferred<br />
automatically.<br />
PROCEDURAL buttons<br />
When ei<strong>the</strong>r of <strong>the</strong> two PROCEDURAL arrow<br />
buttons at <strong>the</strong> bottom of <strong>the</strong> copilot's EVS is selected<br />
in turn, <strong>the</strong> screen displays checklists of procedures<br />
regarding operation of <strong>the</strong> aircraft.<br />
NAVIGATOR STATION<br />
.<br />
The Navigator must work continuously in insure<br />
successful completion of <strong>the</strong> mission. His duties<br />
include:<br />
1) complete route planing and plotting.<br />
2) Waypoint and temporary waypoint navigation.<br />
3) Preplanning of ordnance delivery action points<br />
and activity <strong>are</strong>as.<br />
4) Active flight direction during low-level combat<br />
maneuvering.<br />
Monitors<br />
The navigator's station has two EVS monitors - one<br />
large and one small - and operates in five modes:<br />
MAP, NAV, RADAR, TER, and STV. The aircraft's<br />
current altitude and speed <strong>are</strong> always displayed at <strong>the</strong><br />
top of <strong>the</strong> navigator's large monitor.<br />
.<br />
Coordinate System<br />
Locations on <strong>the</strong> EB-52 maps <strong>are</strong> charted according<br />
to a system of coordinates <strong>that</strong> can be used in a<br />
variety of applications, including navigation,<br />
bombing runs, escape, and evasion. Whenever<br />
reference is make in this manual to a location's<br />
coordinates, this is <strong>the</strong> system being used.<br />
The coordinate system follows a basic 2-axis<br />
structure. The X-axis runs horizontally (east-west),<br />
and <strong>the</strong> Y-axis runs vertically (north-south). Each<br />
map is permanently marked with a small white cross,<br />
18
epresenting <strong>the</strong> point at which <strong>the</strong> two axes intersect,<br />
or "coordinate 0,0". (The location of 0,0 varies from<br />
map to map).<br />
.<br />
o Positive Y-numbers represent miles north of<br />
coordinate 0,0.<br />
o Negative Y-numbers represent miles south of<br />
coordinate 0,0.<br />
o Positive X-numbers represent miles east of<br />
coordinate 0,0.<br />
o Negative x-numbers represent miles west of<br />
coordinate 0,0.<br />
o Coordinates <strong>are</strong> always given in <strong>the</strong> form X,Y.<br />
For example, on <strong>the</strong> Nevada map <strong>the</strong> city of Las<br />
Vegas has <strong>the</strong> coordinates +2,-139. This means <strong>that</strong><br />
Ls Vegas is 2 miles east and 139 mils south of<br />
coordinate 0,0.<br />
MAP Panel<br />
The MAP mode provides information about civilian<br />
and military features of <strong>the</strong> territory where <strong>the</strong><br />
mission takes place, and allows editing of <strong>the</strong> mission<br />
flight plan.<br />
.<br />
1) Map mode is entered by selecting any item in <strong>the</strong><br />
MAP panel in <strong>the</strong> upper right corner of <strong>the</strong> screen, or<br />
y changing <strong>the</strong> Mode Select switch to MAP.<br />
2) The CIV/MIL switch toggles <strong>the</strong> large display<br />
between maps of civilian and military locations.<br />
3) When <strong>the</strong> OFF/ON WAYPOINT switch is OFF,<br />
<strong>the</strong> CIV/MIL switch toggles <strong>the</strong> small monitor<br />
between databases of information about <strong>the</strong> civilian<br />
and military locations shown on <strong>the</strong> large display.<br />
.<br />
A) Databases displayed in <strong>the</strong> small monitor relate to<br />
<strong>the</strong> location currently selected in <strong>the</strong> large monitor.<br />
B) When CIV is selected <strong>the</strong> database provides<br />
political, population, and transportation information<br />
about selected locations on <strong>the</strong> map. Selecting<br />
BORDERS highlights <strong>the</strong> word and prints<br />
information about <strong>the</strong> currently selected border;<br />
selecting CITIES highlights <strong>the</strong> word and prints<br />
information about <strong>the</strong> currently selected city;<br />
selecting HIGHWAYS highlights <strong>the</strong> work and prints<br />
information about <strong>the</strong> currently selected road.<br />
C) When MIL is selected, <strong>the</strong> database provides<br />
information on military installations, including radar<br />
and missile sites and airbases. Selecting RADAR<br />
19
highlights <strong>the</strong> work and prints information about <strong>the</strong><br />
currently selected radar station; selecting MISSILES<br />
highlights <strong>the</strong> word and prints information about <strong>the</strong><br />
currently selected missile installation; selecting<br />
BASES highlights <strong>the</strong> work and prints information<br />
about <strong>the</strong> currently selected airbase.<br />
Click <strong>the</strong> right mouse button to cycle through <strong>the</strong><br />
currently highlighted list (Borders, Cities,<br />
Roads,Radar, Missiles, or Bases) in <strong>the</strong> small monitor<br />
(<strong>the</strong> OFF/ON WAYPOINT switch must be off).<br />
Highlight a new feature type by clicking on it in <strong>the</strong><br />
small monitor with <strong>the</strong> left mouse button.<br />
CAUTION<br />
The information presents information available to<br />
friendly intelligence sources. Undocumented<br />
installations and threats <strong>are</strong> likely to appear during<br />
missions.<br />
4) The OFF/ON WAYPOINT switch displays <strong>the</strong><br />
flightplan currently programmed into <strong>the</strong> aircraft's<br />
Flight Control System (FCS). The large monitor show<br />
<strong>the</strong> waypoints and light plan graphically on <strong>the</strong> map.<br />
The small monitor is used to compute distances, ETA<br />
and fuel requirements between waypoints, and to<br />
relocate waypoints if desired.<br />
A) When <strong>the</strong> OFF/ON WAYPOINT switch is ON,<br />
FCS flightplan information is available in ei<strong>the</strong>r<br />
DISPLAY or EDIT mode.<br />
5) The DISPLAY/EDIT FCS switch toggles <strong>the</strong> FCS<br />
between DISPLAY and EDIT modes.<br />
B) When <strong>the</strong> DISPLAY/EDIT FCS switch is set to<br />
DISPLAY and <strong>the</strong> WAYPOINT switch is ON:<br />
.<br />
i) The flight plan cannot be altered.<br />
ii) Distance and ETA from <strong>the</strong> aircraft's<br />
present position to any waypoint, or from any<br />
waypoint to ano<strong>the</strong>r can be computed in <strong>the</strong> small<br />
monitor by changing <strong>the</strong> waypoint number in <strong>the</strong><br />
"TO" box, and ei<strong>the</strong>r selecting PRESENT POSITION<br />
or changing <strong>the</strong> waypoint number in <strong>the</strong> FROM box.<br />
C) When <strong>the</strong> DISPLAY/EDIT FCS switch is set to<br />
EDIT and <strong>the</strong> WAYPOINT switch is ON:<br />
.<br />
i) Flight plan waypoints can be reset by<br />
selecting and dragging <strong>the</strong>m on <strong>the</strong> large monitor.<br />
ii) The coordinates of <strong>the</strong> currently selected<br />
waypoint <strong>are</strong> displayed between <strong>the</strong> EDIT<br />
WAYPOINT and EDIT ALTITUDES<br />
20
oxes. <strong>These</strong> coordinated change as <strong>the</strong> waypoint<br />
is moved on <strong>the</strong> large monitor.<br />
iii) Waypoint altitudes can be adjusted in<br />
<strong>the</strong> small monitor by adding to or subtracting<br />
from <strong>the</strong> selected waypoint' assigned altitude<br />
in <strong>the</strong> EDIT ALTITUDE box.<br />
iv) The original waypoint positions can be<br />
restored by selecting RESTORE WAYPOINTS.<br />
.<br />
NAV Mode<br />
When <strong>the</strong> Mode Select switch is set to NAV, <strong>the</strong> large<br />
monitor displays a list showing <strong>the</strong> coordinate<br />
locations of both of <strong>the</strong> EB-52 and its targets for <strong>the</strong><br />
current mission.<br />
RADAR Panel<br />
The RADAR mode display a high-resolution radar<br />
image of <strong>the</strong> landscape ahead of <strong>the</strong> aircraft in <strong>the</strong><br />
large monitor, and saves <strong>the</strong> small monitor to <strong>the</strong><br />
pilot's EVS display in RANGE mode.<br />
1) Radar mode is entered by selecting <strong>the</strong> 10, 20, or<br />
40 mile range button in <strong>the</strong> RADAR panel in <strong>the</strong><br />
upper right corner of <strong>the</strong> screen, or by changing <strong>the</strong><br />
Mode Select switch to RADAR.<br />
2) Current altitude is displayed at <strong>the</strong> base of <strong>the</strong><br />
large monitor along with a cross-shaped marker<br />
representing <strong>the</strong> aircraft.<br />
3) The direction of <strong>the</strong> next waypoint is identified by<br />
a single vertical white hashmark at <strong>the</strong> top of <strong>the</strong> large<br />
monitor, alongside <strong>the</strong> number of <strong>the</strong> waypoint.<br />
When <strong>the</strong> waypoint comes within range of <strong>the</strong> radar<br />
<strong>the</strong> symbol changes to a cross-shaped marker<br />
representing <strong>the</strong> waypoint, with <strong>the</strong> waypoint's<br />
programmed altitude displayed alongside.<br />
4) If <strong>the</strong> AP (autopilot) light is selected in <strong>the</strong><br />
warning panel, temporary waypoints can be set by<br />
selecting a point representing <strong>the</strong> desired new<br />
direction in <strong>the</strong> large monitor.<br />
A) Altitude for <strong>the</strong> temporary waypoint can be<br />
adjusted by holding down <strong>the</strong> mouse button as <strong>the</strong><br />
selection is made and moving <strong>the</strong> mouse up and<br />
down.<br />
B) When <strong>the</strong> selection is made, a single green<br />
vertical hashmark appears on <strong>the</strong> screen with <strong>the</strong> new<br />
altitude alongside, and <strong>the</strong> FCS steers <strong>the</strong> aircraft<br />
toward <strong>the</strong> temporary waypoint.<br />
21
C) When <strong>the</strong> waypoint is reached, <strong>the</strong> FCS steers <strong>the</strong><br />
aircraft back onto its programmed flightplan toward<br />
<strong>the</strong> next waypoint.<br />
5) In RADAR mode, <strong>the</strong> radar display in <strong>the</strong> small<br />
monitor operation is identical to pilot EVS in<br />
RANGE mode.<br />
.<br />
A) The TAC can be adjusted and turned on or off in<br />
<strong>the</strong> small monitor. Please see "Pilot Station," above,<br />
for a description of <strong>the</strong> TAC.<br />
TER Mode<br />
Enter TER mode with <strong>the</strong> Mode Select switch. The<br />
large monitor displays a white, fan-shaped graphic<br />
representation of <strong>the</strong> radar scanning pattern ahead of<br />
<strong>the</strong> aircraft.<br />
.<br />
1) The scale of <strong>the</strong> scanned <strong>are</strong>a represented<br />
increases as <strong>the</strong> range currently set in <strong>the</strong> RADAR<br />
panel - 10, 20, or 40 miles - is increased.<br />
STV Panel<br />
The STV mode displays an image generated by <strong>the</strong><br />
aircraft's AN/ASQ-151 steerable low-light level<br />
television (STV) unit. The STV provides a visual<br />
presentation of <strong>the</strong> <strong>are</strong>a ahead of <strong>the</strong> aircraft for lowlevel<br />
penetration during both day and night missions.<br />
1) STV mode is entered by selecting any item in <strong>the</strong><br />
STV panel to <strong>the</strong> right of <strong>the</strong> large monitor, or by<br />
changing <strong>the</strong> Mode Select switch to STV.<br />
2) Brightness of <strong>the</strong> image is adjusted by switching<br />
<strong>the</strong> BRIGHT selector knob.<br />
3) Azimuth and elevation of <strong>the</strong> view is controlled<br />
with <strong>the</strong> 4-way ADJUST switch. When both digital<br />
POSITION displays in <strong>the</strong> STV panel read zero, <strong>the</strong><br />
STV is oriented dead-ahead (this can be<br />
accomplished quickly by tapping "Z" on <strong>the</strong><br />
keyboard.)<br />
TIME Compression Panel<br />
Time warp is activated by selecting any of <strong>the</strong><br />
compression-factor buttons in <strong>the</strong> TIME panel above<br />
<strong>the</strong> right-hand corner of <strong>the</strong> small monitor, or by<br />
tapping keys 1-5. Each level of compression<br />
accelerates <strong>the</strong> speed of events at <strong>the</strong> factor selected.<br />
For example, selecting a compression factor of 5<br />
makes all mission events occur at five times <strong>the</strong><br />
normal rate of speed.<br />
22
1) Time compression will deactivate automatically if<br />
any external event (such as an attack) occurs, or is<br />
any internal emergency causes <strong>the</strong> interphone or<br />
warning panel to flash.<br />
ELECTRONIC WARFARE STATION<br />
The primary responsibility of <strong>the</strong> EW officer is <strong>the</strong><br />
utilization of <strong>the</strong> aircraft's advanced AN/ALQ-172<br />
and AN.ALQ-12 defensive systems to provide an<br />
active defense for <strong>the</strong> aircraft. He maintains a<br />
constant radar search for enemy aircraft and ground<br />
based-threats, employing electronic countermeasures,<br />
chaff, and fl<strong>are</strong>s to <strong>the</strong> optimum extent in defending<br />
<strong>the</strong> aircraft against ground-based or airborne<br />
electronic devices <strong>that</strong> pose a threat to <strong>the</strong> safety of<br />
<strong>the</strong> aircraft and <strong>the</strong> completion of its mission.<br />
.<br />
RADAR Panel<br />
The EW radar panel includes a small radar scope,<br />
four warning lights, and two range selector buttons<br />
bracketing a digital readout.<br />
1) The SEARCH warning light illuminates when <strong>the</strong><br />
aircraft senses an enemy radar searching for possible<br />
intruders - such as <strong>the</strong> EB -52.<br />
2) The TRACK warning light illuminates when an<br />
enemy radar is tracking <strong>the</strong> EB-52 and is trying to<br />
lock on.<br />
3) The LAUNCH warning light illuminates when an<br />
enemy radar has a lock on <strong>the</strong> EB-52 or launches a<br />
missile.<br />
4) The PROXIMITY warning light illuminates when<br />
a missile is within immediate striking distance of <strong>the</strong><br />
aircraft.<br />
5) The two RANGE buttons and digital readout<br />
below <strong>the</strong> radar scope <strong>are</strong> used to set <strong>the</strong> range at<br />
which <strong>the</strong> AN/ALQ-172 searches. (please see<br />
"Stealth Modifications: Passive & Active Radar,"<br />
Chapter 4, for a general explanation of <strong>the</strong> two types<br />
of radar used in <strong>the</strong> EB-52).<br />
.<br />
A) The small cross in <strong>the</strong> center of <strong>the</strong> radar scope<br />
marks <strong>the</strong> location of <strong>the</strong> EB-52 Megafortress.<br />
Quadrants above, to <strong>the</strong> left and right of , and below<br />
<strong>the</strong> center cross represent <strong>the</strong> <strong>are</strong>as in front of, to <strong>the</strong><br />
left and right of, and behind <strong>the</strong> aircraft.<br />
B) Selecting any object on <strong>the</strong> radar scope highlights<br />
it and prints a text identification of it, along with its<br />
range from <strong>the</strong> EB-52 Megafortress.<br />
23
i) Circle represents a search radar.<br />
ii) Diamond represents a SAM radar.<br />
iii) Inverted V (or "batwing") represents an airborne<br />
enemy fighter radar.<br />
iv) "A" represents anti-aircraft artillery.<br />
v) Dot represents anything else, including buildings,<br />
control towers, unidentified radar sources, etc.<br />
vi) Green circle surrounding a radar-emitting object<br />
represents <strong>the</strong> radar's range.<br />
C) four o<strong>the</strong>r monitors throughout <strong>the</strong> aircraft <strong>are</strong><br />
saved to <strong>the</strong> EW passive radar unless <strong>the</strong> OW station<br />
"attack" radar is operating:<br />
i) Large radar scope at this (EW) station, when<br />
operating in <strong>the</strong> RADAR DISPLAY MODE.<br />
ii) Pilot's EVS monitor, when operating in RDR<br />
mode.<br />
iii) Copilot's EVS monitor, when operating in RDR<br />
mode.<br />
iv) OW station EVS monitor, when operating in<br />
SCAN mode.<br />
Large Radar Scope<br />
The large scope operates ei<strong>the</strong>r in SIGNAL or<br />
RADAR display mode.<br />
1) Turn SIGNAL mode on by switching <strong>the</strong><br />
DISPLAY MODE switch to SIGNAL.<br />
.<br />
A) SIGNAL mode displays three signal lines on <strong>the</strong><br />
large scope:<br />
i) The top line represents <strong>the</strong> signal being generated<br />
by <strong>the</strong> radar-emitting object currently selected in <strong>the</strong><br />
small radar scope, or by <strong>the</strong> closest radar-emitting<br />
source. (An object can be selected by clicking<br />
directly on it in <strong>the</strong> small monitor.)<br />
ii) The middle line represents <strong>the</strong> signal being<br />
generated by <strong>the</strong> infr<strong>are</strong>d-seeking object currently<br />
selected in <strong>the</strong> small radar scope.<br />
iii) The bottom line represents any general<br />
communication (radio) signals detected by <strong>the</strong> radar.<br />
<strong>These</strong> include radio communications between enemy<br />
stations, and between <strong>the</strong> EB-52 and friendly stations.<br />
2) Turn RADAR mode on by switching <strong>the</strong><br />
DISPLAY MODE switch to RADAR.<br />
A) The large CRT is saved tot he EW's small radar<br />
scope when <strong>the</strong> DISPLY switch is set to RADAR.<br />
JAMMING Panel<br />
The JAMMING panel allows automatic and manual<br />
24
jamming of radar signals, and automatic jamming of<br />
infr<strong>are</strong>d and general communications signals.<br />
1) To jam a radar signal in AUTO mode:<br />
A) Select <strong>the</strong> target radar source in <strong>the</strong> small radar<br />
scope.<br />
B) Select and hold <strong>the</strong> JAM SIGNAL button in <strong>the</strong><br />
JAMMING panel until <strong>the</strong> TOP signal flattens into a<br />
straight line.<br />
2) To jam a radar signal in <strong>MANUAL</strong> mode:<br />
A) Set <strong>the</strong> DISPLAY MODE switch at <strong>the</strong> bottom<br />
right corner of <strong>the</strong> station display to SIGNAL.<br />
B) Select <strong>the</strong> target radar source in <strong>the</strong> small radar<br />
scope.<br />
C) Adjust <strong>the</strong> two frequency readouts until <strong>the</strong> TOP<br />
line in <strong>the</strong> large scope flattens into a straight line.<br />
3) To jam an infr<strong>are</strong>d signal:<br />
A) Select <strong>the</strong> target infr<strong>are</strong>d source in <strong>the</strong> small radar<br />
scope.<br />
B) Select <strong>the</strong> JAM IR button in <strong>the</strong> JAMMING panel<br />
until <strong>the</strong> MIDDLE signal flattens into a straight line.<br />
4) To jam general communications (radio) signals:<br />
A) Select <strong>the</strong> JAM COMM button in <strong>the</strong> JAMMING<br />
panel.<br />
CAUTION<br />
The radar jammer emits electromagnetic radiation,<br />
and <strong>the</strong> IR jammer emits laser radiation.<br />
Both <strong>are</strong> easily detected by <strong>the</strong> enemy. Use <strong>the</strong>n<br />
c<strong>are</strong>fully to avoid revealing <strong>the</strong> location of <strong>the</strong> EB-<br />
52. Please see "Strategy & Tactics: Defensive<br />
Tactics,".<br />
RLIR Panel<br />
The RLIR Panel controls <strong>the</strong> signals and automatic<br />
countermeasures programs generated by <strong>the</strong> aircraft's<br />
AN/AA-12 Rear Looking Infr<strong>are</strong>d (RLIR) system.<br />
The RLIR locates and identifies any IR-producing<br />
threat approaching from <strong>the</strong> rear quadrant of <strong>the</strong><br />
aircraft. Its range is 30 miles.<br />
1) Turn <strong>the</strong> RLIR switch ON to operate RLIR in<br />
search mode.<br />
2) WARNING light flashes when RLIR detects a<br />
heat-generating threat approaching <strong>the</strong> aircraft from<br />
<strong>the</strong> rear quadrant.<br />
3) Turn AUTO CHAFF switch ON to turn on RLIR<br />
and program an AN/ALQ-12 to deploy chaff bundles<br />
automatically when a radar-seeking missile is<br />
detected in <strong>the</strong> rear quadrant.<br />
25
4) Turn AUTO FLARE switch ON to turn on RLIR<br />
and program AN/ALQ-12 computer to deploy fl<strong>are</strong><br />
bundles automatically when an infr<strong>are</strong>d-seeking<br />
missile is detected in <strong>the</strong> rear quadrant.<br />
CHAFF/FLARE Manual Dispenser panel<br />
Four Lundy AN/AL-24 chaff dispensing systems <strong>are</strong><br />
located in each wing of <strong>the</strong> EB-52, with each<br />
dispenser holding 40 chaff packages. 6 AN/ALE-20<br />
Dynalectron-designed fl<strong>are</strong> ejectors <strong>are</strong> located on<br />
each side of <strong>the</strong> aft fuselage of <strong>the</strong> EB-52, with each<br />
ejector holding 16 AN/ALA-17 fl<strong>are</strong>s.<br />
1) Select L-CHAFF or R-CHAFF to manually<br />
dispense chaff packages from <strong>the</strong> left or right wings<br />
of <strong>the</strong> aircraft.<br />
2) Select L-FLARE or R-FLARE to manually<br />
dispense fl<strong>are</strong>s from <strong>the</strong> left or aft fuselage of <strong>the</strong><br />
aircraft.<br />
The number of chaff bundles and fl<strong>are</strong>s remaining is<br />
indicated below <strong>the</strong> CHAFF and FLARE buttons.<br />
OFFENSIVE WEAPONS STATION<br />
The OW Officer is responsible for using <strong>the</strong> fire<br />
control system to deliver air-to-ground ordnance and<br />
defend <strong>the</strong> aircraft against enemy fighters.<br />
The heart of <strong>the</strong> OW station fire control system is <strong>the</strong><br />
AN/APQ-166 Offensive Avionics System (OAS). Its<br />
computers have been modified in <strong>the</strong> EB-52 to<br />
interface with <strong>the</strong> FCS, <strong>the</strong> EW station's AN/ALQ-<br />
172, <strong>the</strong> AN/ASQ-151 STV, <strong>the</strong> aircraft's radar<br />
altimeter, and electrical, bleed air, and body hydraulic<br />
systems.<br />
EVS<br />
The OW EVS operates in four modes.<br />
1) SCAN uses <strong>the</strong> aircraft's passive radar to scan for<br />
radar-emitting sources. Refer to <strong>the</strong> EW Station<br />
description for details on <strong>the</strong> operation of this mode<br />
2) CAMERA uses <strong>the</strong> EVS as a viewing screen for<br />
TV images controlled by <strong>the</strong> CAMERA MODE Panel<br />
(see CAMERA MODE Panel, this section).<br />
3) ATTACK activates <strong>the</strong> aircraft's active search<br />
radar and displays it on all radar screens in <strong>the</strong><br />
aircraft (pilot, copilot, EW, and OW).<br />
A) The ATTACK active search radar signal is highly<br />
detectable by enemy radar stations.<br />
B) When <strong>the</strong> ATTACK radar is on, <strong>the</strong> "RO"<br />
26
warning light illuminates at all stations.<br />
C) The ATTACK radar returns signals from any<br />
imageable source (except terrain) within <strong>the</strong> range set<br />
in <strong>the</strong> RANGE readout at <strong>the</strong> bottom of <strong>the</strong> EVS.<br />
4) Select CONTROL to view a description of <strong>the</strong><br />
weapon currently selected in <strong>the</strong> WEAPON<br />
SELECT/LAUNCH panel.<br />
A) Some weapons can be armed in different modes<br />
by clicking directly on <strong>the</strong> mode names while <strong>the</strong><br />
EVS is in CONTROL mode.<br />
CAMERA MODE Panel<br />
The CAMERA panel controls <strong>the</strong> various cameras<br />
<strong>that</strong> send TV images to <strong>the</strong> EVS.<br />
1) The CAMERA button above <strong>the</strong> EVS must be<br />
selected for <strong>the</strong> CAMERA MODE panel controls to<br />
work.<br />
2) Turn <strong>the</strong> CAMERA mode selector switch to STV<br />
to show <strong>the</strong> picture currently being generated by <strong>the</strong><br />
AN/ASQ-151 STV system.<br />
A) Azimuth and elevation of <strong>the</strong> view i controlled<br />
with <strong>the</strong> 4-way CAMERA switch. When both digital<br />
displays to <strong>the</strong> right of <strong>the</strong> read zero, <strong>the</strong> STV is<br />
oriented dead-ahead. (This can be accomplished<br />
quickly by tapping "Z" on <strong>the</strong> keyboard.)<br />
B) Select <strong>the</strong> ZOOM increase/decrease buttons to<br />
zoom in or out with <strong>the</strong> STV.<br />
C) The camera in STV mode is used to target<br />
ordnance.<br />
3) Turn <strong>the</strong> CAMERA mode selector switch to<br />
GUIDANCE to see <strong>the</strong> missile camera view.<br />
A) A TV-guided weapon - such as <strong>the</strong> AGM-142 -<br />
must be selected for <strong>the</strong> GUIDANCE mode to<br />
operated with any o<strong>the</strong>r type of weapon selected, <strong>the</strong><br />
camera in GUIDANCE mode will display only static.<br />
MASTER BOMB CONTROL Panel<br />
The aircraft bomb bay doors operate as a single unit<br />
and can be opened and closed manually or<br />
automatically. While open, <strong>the</strong> aircraft's speed is<br />
reduced and RCS is increased.<br />
1) Set <strong>the</strong> AUTO/MNL switch to MNL to operate <strong>the</strong><br />
doors manually.<br />
A) When <strong>the</strong> bomb bay doors <strong>are</strong> operating<br />
manually, <strong>the</strong> correct sequence must be observed in<br />
order to release ordnance effectively and minimize<br />
27
RCS.<br />
i) Select and prep<strong>are</strong> ordnance (see<br />
WEAPON SELECT/LAUNCH Panel section)<br />
ii) Set UNLTCH/LATCH switch to<br />
UNLTCH><br />
iii) Set OPEN/CLOSE switch to OPEN.<br />
The doors take 5 seconds to open, at which point <strong>the</strong><br />
OPEN indicator light illuminates. Note also <strong>that</strong> <strong>the</strong><br />
DRS light on <strong>the</strong> Pilot's eyebrow panel illuminates<br />
while <strong>the</strong> doors <strong>are</strong> open.<br />
iv) Launch weapon(s).<br />
v) Set OPEN/CLOSE switch to CLOSE.<br />
The doors take 5 seconds to close, at which point <strong>the</strong><br />
OPEN indicator light goes off. Note also <strong>that</strong> <strong>the</strong><br />
DRS light on <strong>the</strong> Pilot's eyebrow panel goes off<br />
when <strong>the</strong> doors close.<br />
vi) Set UNLTCH/LATCH switch to<br />
LATCH.<br />
2) Set <strong>the</strong> AUTO/MNL switch to AUTO to operate<br />
<strong>the</strong> doors automatically.<br />
A) Select and prep<strong>are</strong> ordnance (see "WEAPON<br />
SELECT/LAUNCH Panel" below).<br />
B) Press LAUNCH button.<br />
i) The UNLTCH light comes on<br />
ii) The OPEN light illuminates after five seconds.<br />
iii) Weapon(s) launch.<br />
iv) The doors close automatically.<br />
v) The doors <strong>are</strong> latched automatically.<br />
WEAPON SELECT/LAUNCH Panel<br />
The WEAPON SELECT/LAUNCH panel includes a<br />
diagram of <strong>the</strong> EB-52's four main weapon loading<br />
<strong>are</strong>as, a listing of weapons currently loaded into <strong>the</strong><br />
currently selected weapon loading <strong>are</strong>a, and a<br />
LAUNCH button. Three steps must be complete in<br />
order to successfully strike a target: lock onto a<br />
target, select a weapon, and launch in order to strike<br />
<strong>the</strong>ir targets.<br />
Lock Onto Target<br />
Select a target using <strong>the</strong> SCAN,ATTACK or<br />
CAMERA mode of <strong>the</strong> EVS. The fire control<br />
computer will attempt to lock onto any object<br />
selected in <strong>the</strong> EVS in any of <strong>the</strong>se modes. Targets<br />
<strong>that</strong> do not generate a heat or radar signature - such as<br />
runaways, bridges, and hardened shelters-must be<br />
targeted using <strong>the</strong> CAMERA mode.<br />
CAUTION<br />
The lock must be maintained for <strong>the</strong> weapon to locate<br />
it target. If <strong>the</strong> lock is lost, it must be reestablished<br />
before <strong>the</strong> weapon is launched.<br />
28
Select Weapon<br />
1) Select <strong>the</strong> pylon or bomb bay containing <strong>the</strong><br />
weapon to be launched from <strong>the</strong> EB-52 diagram.<br />
2) Select <strong>the</strong> weapon to be launched from <strong>the</strong> list<br />
below <strong>the</strong> diagram.<br />
A) Weapons is red <strong>are</strong> not appropriate for <strong>the</strong><br />
currently selected target.<br />
B) Weapons in dark green <strong>are</strong> appropriate for <strong>the</strong><br />
currently selected target. ("Appropriate" means only<br />
<strong>that</strong> it is <strong>the</strong>oretically possible to hit <strong>the</strong> selected<br />
target with this weapon. Ordinary iron bombs - such<br />
as <strong>the</strong> MK-84- <strong>are</strong> always "appropriate" in <strong>the</strong>ory,<br />
even though <strong>the</strong> likelihood of hitting a target such as a<br />
MiG with one is highly questionable.)<br />
C) Weapon in bright green is <strong>the</strong> currently selected<br />
weapon.<br />
D) Weapons in gray have been used.<br />
3) Make any arming-mode changes necessary using<br />
<strong>the</strong> CONTROL mode of <strong>the</strong> EVS. If <strong>the</strong> ordnance is<br />
free-fall weapon, note <strong>the</strong> recommended STV vertical<br />
coordinate listed with <strong>the</strong> weapon information in<br />
CONTROL mode (<strong>the</strong> horizontal coordinate is<br />
always 0 (zero)). Please also see <strong>the</strong> targeting<br />
information for each weapon in Chapter 5,<br />
"Ordnance".)<br />
4) If <strong>the</strong> weapon is stored in one of <strong>the</strong> bomb bays,<br />
make sure <strong>the</strong> bomb bay doors <strong>are</strong> opened correctly<br />
during <strong>the</strong> launch sequence, ei<strong>the</strong>r through manual or<br />
automatic operation (refer to "MASTER BOMB<br />
CONTROL Panel," above).<br />
5) Use <strong>the</strong> "/" (backslash) key to make <strong>the</strong> computer<br />
choose <strong>the</strong> next appropriate weapon.<br />
Launch Weapon<br />
Before launching a weapon, make sure <strong>that</strong> <strong>the</strong> target<br />
is within <strong>the</strong> selected weapon's range, as specified in<br />
<strong>the</strong> CONTROL mode EVS, or in Chapter 5,<br />
"Ordnance".<br />
Radar and infr<strong>are</strong>d guided missiles (AIM-9R,<br />
AIM-120C, AGM-65G, AGM-136A, AGM-88A,<br />
AGM-84A, AGM-84E):<br />
1) Select LAUNCH><br />
2) If not operating in AUTO mode and weapon was<br />
stored in bomb bay, close bomb bay doors.<br />
TV guided missiles (AGM-130, AGM-142):<br />
29
1) Select LAUNCH.<br />
2) Switch CAMERA MODE from STV to<br />
GUIDANCE.<br />
3) After <strong>the</strong> missile is launched, use <strong>the</strong> EVS as <strong>the</strong><br />
missile's "EYE" to pilot <strong>the</strong> weapon to its target,<br />
flying <strong>the</strong> weapon to its target by clicking on <strong>the</strong><br />
camera direction arrows (use of <strong>the</strong> autopilot or TAC<br />
during this time is highly recommended).<br />
4) IF not operating in AUTO mode and weapon was<br />
stored in bomb bay, close bomb bay doors.<br />
Laser-guided glide bomb (Rockeye II):<br />
1) With <strong>the</strong> target selected in CAMERA mode, steer<br />
<strong>the</strong> aircraft so <strong>that</strong> <strong>the</strong> horizontal POSITION<br />
coordinate in <strong>the</strong> CAMERA panel reaches zero (0).<br />
This means <strong>that</strong> <strong>the</strong> aircraft is on course directly<br />
toward <strong>the</strong> target.<br />
2) Select LAUNCH. When <strong>the</strong> vertical coordinate<br />
reaches 12, <strong>the</strong> weapon's laser guidance system will<br />
launch <strong>the</strong> weapon automatically.<br />
3) If not operating in AUTO mode and weapon was<br />
stored in bomb bay, close bay doors.<br />
Free-fall ordnance (Dirandal, DAACM, MK-84):<br />
CAUTION<br />
To protect <strong>the</strong> aircraft from ground-blast, free-fall<br />
ordnance should not be released below 500 ft.<br />
1) With <strong>the</strong> target selected in CAMERA mode, steer<br />
<strong>the</strong> aircraft so <strong>that</strong> <strong>the</strong> horizontal POSITION<br />
coordinate in <strong>the</strong> CAMERA panel reaches zero (0).<br />
This means <strong>that</strong> <strong>the</strong> aircraft is on course directly<br />
toward <strong>the</strong> target.<br />
2) Adjust <strong>the</strong> aircraft's altitude in accordance with<br />
<strong>the</strong> weapon's delivery requirements. (Any altitude<br />
above 1000ft for <strong>the</strong> MK-84; 500 to 1000 ft for <strong>the</strong><br />
Durandal and DAACM.)<br />
3) Wait for <strong>the</strong> vertical POSITION coordinate in <strong>the</strong><br />
CAMERA panel to reach <strong>the</strong> number recommended<br />
for <strong>the</strong> weapon in <strong>the</strong> CONTROL mode of <strong>the</strong> EVS.<br />
4) Select LAUNCH><br />
5) If not operating in AUTO mode and weapon was<br />
stored in bomb bay, close bomb bay doors.<br />
AFT MINES Control Panel<br />
The tail of <strong>the</strong> EB-52 is equipped with an enclosed<br />
30
cannon <strong>that</strong> fires 12-inch flak canister rockets. <strong>These</strong><br />
<strong>are</strong> used to attack enemy fighters approaching from<br />
<strong>the</strong> rear quarter.<br />
Through its interface with <strong>the</strong> AN/ALQ-153 aft firecontrol<br />
radar, <strong>the</strong> AN/APQ-166 tracks both rocket<br />
and enemy fighter and transmits steering signals to<br />
<strong>the</strong> rockets. When <strong>the</strong> distance between <strong>the</strong> fighter<br />
and <strong>the</strong> rocket decreases to less <strong>that</strong> 200 yards, <strong>the</strong><br />
fire-control computer detonates <strong>the</strong> rocket.<br />
Maximum range is two miles.<br />
1) Select <strong>the</strong> LAUNCH button in <strong>the</strong> AFT MINES<br />
panel to launch and air mine.<br />
The EB-52 carries a maximum of 30 air mine rockets.<br />
The number remaining is listed in <strong>the</strong> AFT MINES<br />
control panel.<br />
JETTISON CONTROL Panel<br />
Should <strong>the</strong> aircraft be damaged yet still manage to<br />
return to home base, it is extremely unwise to<br />
continue carrying any left-over ordnance during<br />
landing approach and touchdown. At a safe distance<br />
from <strong>the</strong> airbase, excess ordnance should be<br />
jettisoned.<br />
1) Select <strong>the</strong> JETTISON button twice with a onesecond<br />
interval to deactivate and jettison all<br />
ordnance.<br />
EXTERNAL CAMERA<br />
The external camera station displays a view of <strong>the</strong><br />
EB-52 in <strong>the</strong> upper 3/4 of <strong>the</strong> display. The EB-52 is<br />
always in <strong>the</strong> center of <strong>the</strong> camera's view, except<br />
when <strong>the</strong> "Nose" or "Target" view buttons <strong>are</strong><br />
selected.<br />
In addition to <strong>the</strong> multi-station instruments, <strong>the</strong><br />
External Camera station has <strong>the</strong> following controls:<br />
4-Way switch<br />
Select <strong>the</strong> 4-way switch to <strong>the</strong> external camera in<br />
360_ arcs around <strong>the</strong> aircraft both horizontally and<br />
vertically.<br />
ZOOM IN/ZOOM OUT<br />
Select <strong>the</strong> ZOOM IN/ZOOM OUT buttons to move<br />
<strong>the</strong> camera closer to or far<strong>the</strong>r away from <strong>the</strong> aircraft.<br />
REMOTE view button<br />
Select <strong>the</strong> REMOTE button to allow <strong>the</strong> camera to<br />
move with complete freedom in observing <strong>the</strong><br />
aircraft.<br />
31
SLOT view button<br />
Select <strong>the</strong> SLOT button to restrict <strong>the</strong> camera to a<br />
cone-shaped <strong>are</strong>a immediately behind <strong>the</strong> aircraft.<br />
The camera can travel only 45 degrees to ei<strong>the</strong>r side<br />
of, or above or below <strong>the</strong> aircraft tail section.<br />
TARGET view button<br />
Select <strong>the</strong> TARGET button for a reverse-angle view<br />
from behind <strong>the</strong> currently selected target toward <strong>the</strong><br />
EB-52.<br />
NOSE view button<br />
Select <strong>the</strong> NOSE button for a view of a cone-shaped<br />
<strong>are</strong>a immediately ahead of <strong>the</strong> aircraft. In this view,<br />
<strong>the</strong> camera is mounted to <strong>the</strong> nose of <strong>the</strong> aircraft and<br />
can travel only 45 degrees to ei<strong>the</strong>r side of, or above or<br />
below <strong>the</strong> aircraft nose section.<br />
2 FLIGHT PROCEDURES<br />
CAUTION<br />
<strong>These</strong> procedures <strong>are</strong> for a crew inexperienced in <strong>the</strong><br />
operating of this aircraft. This manual provides <strong>the</strong><br />
best possible operating instructions under most<br />
circumstances, but is a poor excuse for sound<br />
judgment. Multiple emergencies, adverse wea<strong>the</strong>r,<br />
terrain, etc., will require modification of <strong>the</strong><br />
procedures.<br />
MISSION ASSIGNMENT<br />
1) Register for a mission in one of <strong>the</strong> following<br />
ways:<br />
a) Click on an active pilot in <strong>the</strong> registration panel<br />
monitor and click SELECT.<br />
b) Click <strong>the</strong> name of a pilot you want to replace,<br />
click REPLACE, and type in <strong>the</strong> new pilot's name.<br />
Tap <strong>the</strong> RETURN key to enter <strong>the</strong> new pilot's name.<br />
2) Click MISSIONS on <strong>the</strong> Main Menu panel.<br />
3) Click ASSIGN or SELECT on <strong>the</strong> Mission<br />
Selection pop-up menu.<br />
.<br />
SELECT gives <strong>the</strong> crew direct control of mission<br />
selection, including <strong>the</strong>ater, objectives and flight<br />
plan, and loadout.<br />
ASSIGN presents a mission chosen for <strong>the</strong> crew by<br />
Mission Control. Accept or reject <strong>the</strong> assigned<br />
mission by clicking ACCEPT or REJECT. If a<br />
mission is rejected, a new one is assigned, and so on.<br />
Choosing ACCEPT bypasses steps 4 and 5 below and<br />
32
takes you directly to <strong>the</strong> Loadout Screen.<br />
4) When <strong>the</strong> Mission Select panel and monitors<br />
appear, <strong>the</strong> small monitor shows a list of three<br />
<strong>the</strong>aters of operation - Red Flag (Nevada), Persian<br />
Gulf, and Flight of <strong>the</strong> Old Dog (Kamchatka<br />
Peninsula) - while <strong>the</strong> large monitor shows a map of<br />
<strong>the</strong> currently selected region. (Note: <strong>the</strong> switches at<br />
<strong>the</strong> top of <strong>the</strong> panel will not work until a <strong>the</strong>ater is<br />
selected.)<br />
Click <strong>the</strong> geographic <strong>are</strong>a in which you want to fly<br />
your mission and <strong>the</strong>n click SELECT.<br />
Mission Select Panel<br />
Three mode switches control <strong>the</strong> Mission Select<br />
panel:<br />
INFO/SELECT switches <strong>the</strong> small monitor between a<br />
database of information about <strong>the</strong> region and a listing<br />
of all missions available in <strong>that</strong> region.<br />
CIV/MIL switches <strong>the</strong> monitors between displays of<br />
civilian and military features and threats in <strong>the</strong> region.<br />
OFF/ON WAYPOINT shows you <strong>the</strong> flight plan and<br />
waypoints for <strong>the</strong> mission on <strong>the</strong> large monitor.<br />
(Waypoints cannot be changed at this point.)<br />
CAUTION<br />
Clicking SELECT at <strong>the</strong> bottom right corner of <strong>the</strong><br />
Mission Select panel selects <strong>the</strong> mission currently<br />
highlighted in <strong>the</strong> small monitor, WHETHER OR<br />
NOT <strong>the</strong> INFO/SELECT switch is set to SELECT.<br />
Click <strong>the</strong> right mouse button to cycle through <strong>the</strong><br />
currently highlighted list (Borders, Cities, Roads,<br />
Radar, Missiles, or Bases) in <strong>the</strong> small monitor (<strong>the</strong><br />
OFF/ON WAYPOINT switch must be off). Highlight<br />
a new feature type be clicking on it in <strong>the</strong> small<br />
monitor with <strong>the</strong> left mouse button.<br />
Note<br />
If <strong>the</strong> INFO/SELECT switch is set to INFO while <strong>the</strong><br />
WAYPOINT switch is ON, <strong>the</strong> distance in miles<br />
between waypoints can b e computed in <strong>the</strong> small<br />
monitor by changing <strong>the</strong> way point number computed<br />
in <strong>the</strong> small monitor by changing <strong>the</strong> waypoint<br />
number in <strong>the</strong> "TO" box, and <strong>the</strong> "FROM" box if<br />
PRESENT POS is not clicked, click on <strong>the</strong> "+" or "-"<br />
signs alongside each box to increase or decrease a<br />
waypoint number.<br />
Orders for <strong>the</strong> currently selected mission <strong>are</strong> printed<br />
below <strong>the</strong> Mission Select panel and monitors; scroll<br />
through <strong>the</strong>m by clicking <strong>the</strong> arrows below <strong>the</strong> small<br />
monitor. Read <strong>the</strong> mission orders c<strong>are</strong>fully, <strong>the</strong>n use<br />
33
<strong>the</strong> Mission Select panel databases and waypoint<br />
distance calculators to learn as much as possible<br />
about a mission before finally selecting it. This<br />
information will be of critical value during execution<br />
of <strong>the</strong> mission.<br />
5) If your mission will be ei<strong>the</strong>r in <strong>the</strong> Red Flag of<br />
Persian Gulf regions, select a mission on <strong>the</strong> scrolling<br />
list (scroll <strong>the</strong> list by clicking <strong>the</strong> up or down arrows<br />
to <strong>the</strong> right of <strong>the</strong> list) and click SELECT.<br />
If you select Flight of <strong>the</strong> Old Dog, take time to read<br />
about <strong>the</strong> mission in Chapter 6. Even is you decide<br />
not to do so, you may be able to complete <strong>the</strong> mission<br />
by reading Dale "Bear" Brown's novel Flight of <strong>the</strong><br />
Old Dog, <strong>the</strong> original story of this extraordinary<br />
adventure.<br />
Loadout Screen<br />
Take time to read "Offensive Strategy,"<br />
before preparing <strong>the</strong> mission loadout.<br />
The Loadout screen operates in four modes, and<br />
includes four panels and a pylon/bomb bay-selection<br />
diagram of <strong>the</strong> aircraft.<br />
Weight Panel<br />
The Weight panel always lists <strong>the</strong> weight of all<br />
ordnance currently loaded into <strong>the</strong> aircraft's two<br />
bomb bays and onto its two wing pylons, and <strong>the</strong><br />
weight of fuel in <strong>the</strong> aircraft's four main fuel tanks.<br />
Ordnance weight is adjusted by altering <strong>the</strong> weapons<br />
loadout and fuel weight is adjusted by clicking <strong>the</strong><br />
"+" and "-" signs to ei<strong>the</strong>r side of <strong>the</strong> readout. The<br />
aircraft is always preloaded with 50,000 lbs of fuel.<br />
Total fuel and ordnance loadout for <strong>the</strong> EB-52 cannot<br />
exceed 192,000 lbs.<br />
Mode Panel<br />
Click on a mode to select it.<br />
LIST MISSILES AVAILABLE changes <strong>the</strong><br />
Ordnance panel to a listing of all available ordnance,<br />
and <strong>the</strong> Weapons Select panel to a database of<br />
information about <strong>the</strong> weapon currently selected in<br />
<strong>the</strong> Ordnance panel.<br />
Click on <strong>the</strong> arrow in <strong>the</strong> right margin of <strong>the</strong><br />
Ordnance panel to scroll through <strong>the</strong> weapons; click<br />
on a weapon to select it and change <strong>the</strong> information in<br />
<strong>the</strong> Weapons Select panel.<br />
DISPLAY ORDNANCE LOADED changes <strong>the</strong><br />
Ordnance panel to a listing of weapons loaded at <strong>the</strong><br />
currently selected location on <strong>the</strong> pylon/bomb bayselection<br />
diagram. The Weapons Select panel now<br />
34
gives information only about weapons loaded at <strong>that</strong><br />
location, and lists <strong>the</strong> total quantity of <strong>the</strong> currently<br />
selected weapon on board <strong>the</strong> aircraft.<br />
Click on a bomb bay or pylon in <strong>the</strong> pylon/bomb bay<br />
selection diagram to list <strong>the</strong> weapons for <strong>that</strong><br />
location; click on a weapon to select it and change <strong>the</strong><br />
information in <strong>the</strong> Weapons Select panel.<br />
REMOVE A MISSILE also changes <strong>the</strong> Ordnance<br />
panel to a listing of weapons loaded at <strong>the</strong> currently<br />
selected location on <strong>the</strong> pylon bomb bay selection<br />
diagram. The Weapons Select panel now has a<br />
"YES" button <strong>that</strong> is used to remove <strong>the</strong> weapon<br />
currently selected in <strong>the</strong> Ordnance panel.<br />
Click "YES: in <strong>the</strong> Weapons Select panel to remove<br />
<strong>the</strong> currently selected weapon.<br />
LOAD A MISSILE also changes <strong>the</strong> Ordnance panel<br />
to a listing of weapons loaded at <strong>the</strong> currently<br />
selected location on <strong>the</strong> pylon/bomb bay-selection<br />
diagram. The Weapons Select panel "YES" button is<br />
used to load <strong>the</strong> currently selected weapon.<br />
Click on <strong>the</strong> arrows in <strong>the</strong> right margin of <strong>the</strong><br />
Weapons Select screen to review <strong>the</strong> information<br />
about each weapon; click "YES" to load <strong>the</strong> weapon<br />
currently listed in <strong>the</strong> Weapons Select panel.<br />
Note<br />
There must be a position available at <strong>the</strong> chosen<br />
location for <strong>the</strong> new weapon to load. Depending on<br />
<strong>the</strong> size of <strong>the</strong> weapon chosen, some empty positions<br />
may not accept it. For example, <strong>the</strong> AIM-120C is too<br />
long for all nine positions on a pylon to accept it. In<br />
its case, only six positions on each plan <strong>are</strong><br />
available.<br />
RESTORE DEFAULT ORDNANCE resets <strong>the</strong><br />
ordnance and fuel loadout to <strong>the</strong>ir original conditions.<br />
1) Adjust both <strong>the</strong> fuel and weapons loadouts for <strong>the</strong><br />
mission in <strong>the</strong> Loadout screen (please also see "Fuel<br />
Management" and "Ordnance".<br />
CAUTION<br />
Missions in <strong>the</strong> Persian Gulf require at least 40,000<br />
lbs of fuel to make it to waypoint 1 - <strong>the</strong> inflight<br />
refueling rendezvous point.<br />
Additional fuel beyond <strong>the</strong> preloaded amount must be<br />
loaded for each Red Flay mission; inflight refueling<br />
is available only in <strong>the</strong> Inflight Refueling training<br />
mission.<br />
2) Click DONE on <strong>the</strong> MODE menu to accept <strong>the</strong><br />
current loadout and begin <strong>the</strong> mission.<br />
35
PROCEDURES<br />
Caution<br />
<strong>These</strong> procedure <strong>are</strong> provided for crew reference<br />
only. t is highly recommended <strong>that</strong> crews take full<br />
advantage of <strong>the</strong> Red Flag training missions to<br />
practice fundamental operational procedures before<br />
attempting ei<strong>the</strong>r <strong>the</strong> Persian Gulf or Flight of <strong>the</strong><br />
Old Dog Missions.<br />
Note<br />
The use of keyboard "hot keys" can be extremely<br />
useful in <strong>the</strong>se procedures. Please see <strong>the</strong> separate<br />
"Installation & Reference" guide accompanying this<br />
manual for a complete list of available "hot keys".<br />
Note<br />
Basic startup procedures <strong>are</strong> also available from <strong>the</strong><br />
copilot EVS. Select <strong>the</strong> PROCEDURAL button and<br />
scroll through <strong>the</strong> screens by selecting <strong>the</strong> <br />
buttons.<br />
Preflight<br />
Copilot Checklist<br />
1) Batteries on.<br />
2) Rudder/Elevator Hydraulic switches ON.<br />
3) Landing/Taxi lights ON.<br />
4) Nav lights ON.<br />
5) Anti-collision lights ON.<br />
6) Interphone ON (default).<br />
7) Cabin pressure 7.45 psi<br />
Pilot Checklist<br />
1) Parking Brake ON (unless <strong>the</strong> aircraft must first<br />
taxi to <strong>the</strong> end of <strong>the</strong> runway).<br />
2) Taxi/Land Ratio switch set to Land (unless <strong>the</strong><br />
aircraft must first taxi to position).<br />
3) Flaps extended.<br />
Starting Engines<br />
Pilot Checklist<br />
(This procedure is also followed when restarting an<br />
individual engine in flight.)<br />
1) Engines ON. (Click <strong>the</strong> individual engine lights,<br />
or click ALL, on <strong>the</strong> right side of <strong>the</strong> Pilot's<br />
instrument panel, to turn on <strong>the</strong> engine switches on.<br />
The engine lights will illuminate.)<br />
2) ENGINE START switch to C. (Click <strong>the</strong><br />
ENGINE START switch to C to ignite <strong>the</strong> started<br />
cartridges. The engines will start, and <strong>the</strong> PWR<br />
display will show 1%)<br />
36
3) ENGINE START switch to F. (Click <strong>the</strong><br />
ENGINE START switch back to F to channel<br />
electrical power to <strong>the</strong> aircraft's systems during<br />
flight.)<br />
Copilot's Checklist<br />
1) (After engine start) Battery switch OFF.<br />
Taxi and Takeoff<br />
Pilot Checklist<br />
1) Increase power in all engines to 100% (15% to<br />
taxi only) by clicking "+," to <strong>the</strong> right of <strong>the</strong> PWR<br />
display.<br />
2) Parking Brake OFF (or as speed control while<br />
taxiing).<br />
3) At 170 knots, pull back on control column (press<br />
down-arrow key) until <strong>the</strong> artificial horizon indicator<br />
reads 6%.<br />
4) Retract landing gear immediately after takeoff.<br />
(Gear will be damaged if extended at speeds<br />
exceeding 375 kts.)<br />
5) RETRACT flaps when speed exceeds 200 kts.<br />
(Flaps will be damaged if extended at speeds<br />
exceeding 450 kts.)<br />
6) Decrease power to 80%.<br />
Flight Control<br />
1) To turn <strong>the</strong> aircraft to <strong>the</strong> left, press <strong>the</strong> left-arrow<br />
key to raise <strong>the</strong> left wing spoiler and elevate <strong>the</strong> right<br />
rear stabilator.<br />
2) To turn <strong>the</strong> aircraft to <strong>the</strong> right, press <strong>the</strong> rightarrow<br />
key to raise <strong>the</strong> right wing spoiler and elevate<br />
<strong>the</strong> left rear stabilator.<br />
3) To make <strong>the</strong> aircraft climb, or pitch up, press <strong>the</strong><br />
down-arrow key to elevate both stabilators.<br />
4) To make <strong>the</strong> aircraft descend, or pitch down, press<br />
<strong>the</strong> up-arrow key to lower <strong>the</strong> stabilators.<br />
5) To slow <strong>the</strong> aircraft down quickly, turn AIRBKE<br />
switch ON in flight to raise both sets of wing spoilers.<br />
6) Extend FLAPS if airspeed drops below 200 kts.<br />
Navigation<br />
Please see "Multi-Station Instruments" and<br />
"Navigator Station" and "Navigation" in for a<br />
complete description of <strong>the</strong> EB-52 navigation<br />
systems and controls.<br />
37
<strong>IFF</strong> Identification<br />
At some point during each mission-generally in <strong>the</strong><br />
vicinity of <strong>the</strong> first waypoint, though it may occur<br />
near any friendly radar site-<strong>the</strong> aircraft will be<br />
contacted by ground control and identification<br />
requested via <strong>IFF</strong> (Identification Friend or Foe)<br />
Transponder.<br />
WARNING<br />
Failure to correctly identify <strong>the</strong> aircraft will result in<br />
<strong>the</strong> destruction of <strong>the</strong> aircraft by friendly fire.<br />
WARNING<br />
Turn off <strong>the</strong> transponder in enemy territory to avoid<br />
unwanted attention.<br />
The copilot is responsible for <strong>the</strong> identification<br />
procedure. To identify:<br />
1) Switch <strong>the</strong> Transponder switch to STBY.<br />
2) The first two digits on <strong>the</strong> transponder <strong>are</strong><br />
automatically adjusted to match <strong>the</strong> 2-digit code<br />
transmitted by ground control.<br />
3) The numbers transmitted to <strong>the</strong> EB-52 correspond<br />
to one of <strong>the</strong> 2-digit page numbers in this manual.<br />
Locate <strong>that</strong> page and note <strong>the</strong> 2-digit code in<br />
p<strong>are</strong>n<strong>the</strong>ses to <strong>the</strong> right of <strong>the</strong> page number.<br />
4) Enter <strong>the</strong> 2-digit code into <strong>the</strong> last two numbers of<br />
<strong>the</strong> transponder by selecting <strong>the</strong> arrows tot he left of<br />
each number.<br />
5) Switch <strong>the</strong> transponder switch from STDBY to<br />
ON><br />
6) Select <strong>the</strong> IDENT button. When <strong>the</strong> REPLU light<br />
flashes, identification has been correctly made.<br />
WARNING<br />
The transponder should remain on as long as <strong>the</strong><br />
aircraft remains in friendly airspace, but be turned<br />
OFF before entering enemy territory. The set<br />
transmits UHF radio waves and will attract<br />
immediate attention from enemy ground installations,<br />
The UHF warning light on <strong>the</strong> pilot's screen<br />
illuminates when <strong>the</strong> transponder is on.<br />
Inflight Refueling<br />
1) With <strong>the</strong> Pilot EVS in RADAR mode and <strong>the</strong><br />
autopilot ON, fly toward <strong>the</strong> first waypoint.<br />
2) When <strong>the</strong> refueling tanker is detected by <strong>the</strong> EB-<br />
38
52's passive radar (<strong>the</strong> tanker appears on <strong>the</strong> monitor<br />
as a circle surrounding a large red block letter "T"),<br />
click on <strong>the</strong> tanker symbol to select it.<br />
3) Select <strong>the</strong> "C" light in <strong>the</strong> AIR REFUEL panel to<br />
lock onto <strong>the</strong> tanker.<br />
When <strong>the</strong> autopilot locks onto <strong>the</strong> tanker's location,<br />
<strong>the</strong> aircraft will automatically fly toward <strong>the</strong><br />
rendezvous.<br />
Note<br />
Refueling tankers generally operate between 9,000<br />
and 10,000 ft.<br />
WARNING<br />
A power setting of at least 85% should be maintained<br />
during closure to make sure <strong>that</strong> <strong>the</strong> EB-52 can<br />
overtake <strong>the</strong> tanker. Slower speeds may result n<br />
exhaustion of fuel supplies before rendezvous.<br />
WARNING<br />
Upon overtaking <strong>the</strong> tanker, <strong>the</strong> autopilot will<br />
automatically lower <strong>the</strong> engine power setting to 40%<br />
to prevent collision. After refueling , <strong>the</strong> pilot must<br />
reapply power. Reapplication of power is NOT an<br />
automatic function of <strong>the</strong> autopilot.<br />
4) When <strong>the</strong> RDY light in <strong>the</strong> AIR REFUEL panel<br />
illuminates, click <strong>the</strong> DRS light to open <strong>the</strong> refueling<br />
slipway doors. Refueling will begin immediately.<br />
5) When refueling is complete, separation will occur<br />
automatically and <strong>the</strong> EB-52 will resume its course<br />
toward <strong>the</strong> next waypoint.<br />
6) Reapply power to at least 75% (see warning,<br />
above).<br />
Landing Approach<br />
Note<br />
Runways for all EB-52 operations <strong>are</strong> oriented<br />
north/south, and approaches should be make from<br />
<strong>the</strong> south in a nor<strong>the</strong>rly direction, except under<br />
emergency conditions.<br />
If possible, a standard military approach should be<br />
executed.<br />
1) Heading north on <strong>the</strong> upwind leg of <strong>the</strong> lading<br />
pattern, pass directly over <strong>the</strong> airbase at an altitude of<br />
2,000 to 5,000ft.<br />
2) At a distance of 1-5 miles past <strong>the</strong> runway,<br />
execute a 90_ turn onto <strong>the</strong> crosswind leg.<br />
39
3) Fly 2-3 miles on <strong>the</strong> crosswind leg.<br />
4) Execute a 90_ turn onto <strong>the</strong> downwind leg.<br />
5) With a lateral distance of 2 miles between <strong>the</strong><br />
aircraft and <strong>the</strong> runway, fly at least 3 miles to <strong>the</strong><br />
south past <strong>the</strong> runway.<br />
6) During <strong>the</strong> downwind leg of <strong>the</strong> pattern, cut back<br />
on throttles and use <strong>the</strong> airbrakes to decrease speed to<br />
300 kts.<br />
7) During <strong>the</strong> downwind leg of <strong>the</strong> pattern, descend<br />
to 1000 ft.<br />
8) Execute a 90_ turn onto <strong>the</strong> base leg of <strong>the</strong><br />
landing pattern.<br />
9) Fly <strong>the</strong> same distance flown on <strong>the</strong> crosswind leg.<br />
10) Execute a 90_ turn and enter <strong>the</strong> approach leg<br />
toward <strong>the</strong> runway.<br />
.<br />
Landing<br />
During <strong>the</strong> approach leg of <strong>the</strong> landing pattern, <strong>the</strong><br />
aircraft would be lined up with <strong>the</strong> runway at a<br />
distance of 2-5 miles, at an elevation of<br />
approximately 1000 ft. Speed should be no greater<br />
than 300 kts.<br />
1) Using throttles and airbrakes, decrease speed to<br />
250 kts.<br />
2) Extend flaps.<br />
3) Lower landing gear.<br />
4) Switch TAXI/LAND switch to LAND.<br />
5) With <strong>the</strong> runway in view, begin descending,<br />
slowly decreasing power and speed so <strong>that</strong> final<br />
touchdown will be accomplished at no greater than<br />
250 kts. Use <strong>the</strong> airbrakes to reduce speed quickly.<br />
WARNING<br />
During landing, aircraft can have no more than 11 degrees<br />
of pitch, or 5 degrees of roll. To maintain <strong>the</strong>se parameters,<br />
please refer to <strong>the</strong> pilot's artificial horizon indicator<br />
frequently during landing.<br />
6) Touch down within <strong>the</strong> first third of <strong>the</strong> runway.<br />
7) If touchdown cannot be accomplished safely in <strong>the</strong><br />
fist third of <strong>the</strong> runway, immediately apply full<br />
power, climb away from <strong>the</strong> runway, and repeat <strong>the</strong><br />
40
approach and landing procedures.<br />
8) If touchdown is successfully accomplished,<br />
immediately select ALL, to <strong>the</strong> right of <strong>the</strong> PWR<br />
percentage display, to cut power to all engines.<br />
9) Select PRKNG BRKE to bring <strong>the</strong> aircraft to a<br />
complete stop.<br />
Emergency Landings<br />
It is possible to execute a no-gear belly landing in <strong>the</strong><br />
EB-52, given <strong>the</strong> following conditions:<br />
1) Final landing speed cannot exceed 130 kts.<br />
2) All remaining ordnance should be jettisoned<br />
before <strong>the</strong> attempt is made.<br />
Damage Control<br />
Damage results from incorrect operation of <strong>the</strong><br />
aircraft of from attack by enemy/friendly fire.<br />
In <strong>the</strong> first instance, ei<strong>the</strong>r <strong>the</strong> aircraft is flown into an<br />
obstruction(such as <strong>the</strong> ground or a mountain), or is<br />
flown at an airspeed unsuitable for <strong>the</strong> deployment of<br />
flaps (maximum speed 450 kts) or landing gear<br />
(maximum speed 375 kts.) In ei<strong>the</strong>r case, <strong>the</strong> crew is<br />
strongly directed to spend a few extra moments in <strong>the</strong><br />
early sections of this chapter learning about <strong>the</strong><br />
overall operation of <strong>the</strong> aircraft.<br />
However, damage resulting from weapons fire may be<br />
correctable by resetting specific systems or by using<br />
applicable backup systems. In <strong>the</strong> case of engine<br />
damage, <strong>the</strong> engine must be shut down to prevent <strong>the</strong><br />
start of fire, or, if a fire has already begun, to keep it<br />
from spreading. If a fuel tank is damaged and begins<br />
to leak, its remaining fuel can be saved by<br />
transferring it to ano<strong>the</strong>r tank.<br />
<strong>These</strong> options <strong>are</strong> available at <strong>the</strong> pilot and copilot<br />
stations. In particular, <strong>the</strong> electrical, hydraulic, and<br />
fuel systems have specific emergency repair and<br />
backup features designed to help <strong>the</strong> EB-52 survive a<br />
massive degree of damage and still accomplish its<br />
mission.<br />
WARNING<br />
If systems <strong>are</strong> damaged repeatedly, repairs may not<br />
be possible.<br />
Engine Damage<br />
A damaged engine may leak oil, sustain unspecified<br />
damage, or catch fire.<br />
Oil Leaks: If an engine begins to leak oil, <strong>the</strong> OIL<br />
41
warning light in <strong>the</strong> pilot's eyebrows panel<br />
illuminates, If <strong>the</strong> engine sustains fur<strong>the</strong>r damage, <strong>the</strong><br />
engine's trouble light will illuminate.<br />
Unspecified Damage: If an engine suffers damage<br />
beyond <strong>the</strong> normal diagnostic capabilities of <strong>the</strong><br />
aircraft computers, <strong>the</strong> afflicted engine's TROUBLE<br />
light illuminates. Remedy: Turn off <strong>the</strong> engine<br />
before fire develops.<br />
Fire: If an engine catches fire, its FIRE light will<br />
illuminate at <strong>the</strong> pilot station and a warning claxon<br />
will sound. Remedy: It is imperative <strong>that</strong> an engine<br />
on fire be turned off immediately, o<strong>the</strong>rwise <strong>the</strong> fire<br />
will spread.<br />
Fuel Tank Damage<br />
If one of <strong>the</strong> aircraft's four main fuel tanks is<br />
damaged, <strong>the</strong> copilot interphone light flashes.<br />
Primary concern should be given to saving <strong>the</strong> fuel<br />
supply in <strong>the</strong> damaged tank. Using <strong>the</strong> fuel system<br />
EVS at <strong>the</strong> copilot station transfer <strong>the</strong> remaining fuel<br />
to <strong>the</strong> o<strong>the</strong>r, undamaged tanks.<br />
Electrical System Damage<br />
If a component of <strong>the</strong> electric system is damaged, <strong>the</strong><br />
copilot interphone light and <strong>the</strong> pilot "E" warning<br />
light flash. Three possible courses of action <strong>are</strong><br />
available using <strong>the</strong> copilot's EVS:<br />
1) Check to see if one or more of <strong>the</strong> four main ac<br />
generators is out, and reset it by clicking its number.<br />
2) If a generator won't reset, reset its bus first and<br />
<strong>the</strong>n attempt to reset <strong>the</strong> generator. Generators 1 and<br />
2 operate via <strong>the</strong> left bus, and generators 3 and 4 via<br />
<strong>the</strong> right bus.<br />
3) If a bus cannot be reset, permanently disabling its<br />
generators, turn on <strong>the</strong> battery switches and <strong>the</strong>n turn<br />
on <strong>the</strong> EMERG DC power backup system.<br />
6 MISSIONS<br />
There <strong>are</strong> 31 mission flight plans on file in<br />
Megafortress' memory banks. Three geographic<br />
<strong>the</strong>aters <strong>are</strong> involved: <strong>the</strong> Red Flag training <strong>are</strong>a<br />
north of Las Vegas, Nevada; <strong>the</strong> countries northwest<br />
of <strong>the</strong> Persian Gulf; and <strong>the</strong> Kamchatka peninsula of<br />
<strong>the</strong> eastern Soviet Union. A map of each plan is<br />
included in a separate booklet accompanying this<br />
manual.<br />
Red Flag<br />
In order to train crews to handle <strong>the</strong> EB-52<br />
Megafortress successfully in combat, provision has<br />
been make to use <strong>the</strong> Nellis AFB bombing ranges in<br />
42
sou<strong>the</strong>rn Nevada. <strong>These</strong> <strong>are</strong> <strong>the</strong> ranges used during<br />
<strong>the</strong> "Red Flag" training exercises conducted by <strong>the</strong><br />
4440th Tactical Fighter Training Group of <strong>the</strong> USAF.<br />
It is highly recommended <strong>that</strong> crews take <strong>the</strong> time to<br />
fly each Red Flag training mission before venturing<br />
into <strong>the</strong> Persian Gulf or "Flight of <strong>the</strong> Old Dog"<br />
scenarios. The skills developed here will sp<strong>are</strong> you<br />
hours of frustration later.<br />
The TFTG has no aircraft of its own, no ranges, and<br />
few personnel. The TFTG is one small part of <strong>the</strong><br />
Tactical Fighter Weapons Center (TFWC), located at<br />
Nellis.<br />
The TFTG develops and schedules five "Red Flag"<br />
air combat support exercises per year, involving a<br />
number of Tactical Fighter Weapons Center (TFWC)<br />
units in each exercise. Although it is a small group in<br />
and of itself, <strong>the</strong> 4440th has operational control of a<br />
tremendous number of resources when <strong>the</strong>re's a Red<br />
Flag going on. <strong>These</strong> resources include:<br />
The 554th Operations Support Wing: To Red<br />
Flag, <strong>the</strong> most important section of <strong>the</strong> 554th is <strong>the</strong><br />
Range Group, charged with maintaining and<br />
operating <strong>the</strong> vast bombing ranges north of Nellis.<br />
The Adversary Threat Training Group: The<br />
4513th is <strong>the</strong> intelligence unit of <strong>the</strong> 57th Fighter<br />
Weapons Wing (FWW). The Aggressors get most<br />
<strong>the</strong> <strong>the</strong>ir up to date tactics and briefing information<br />
form <strong>the</strong> 4513th. The ATTG also helps develop <strong>the</strong><br />
Red Flag scenarios.<br />
Red Flag Missions<br />
1 Flight Procedures<br />
This mission exercises <strong>the</strong> crew's ability to handle<br />
some of <strong>the</strong> basic procedures outline in Chapter 2:<br />
takeoff, aircraft identification, flight control, and<br />
landing. No ordnance is loaded, and more than<br />
enough fuel is provided for <strong>the</strong> entire mission.<br />
The mission begins at <strong>the</strong> pilot station, with <strong>the</strong><br />
aircraft positioned at <strong>the</strong> end of <strong>the</strong> runway. Follow<br />
<strong>the</strong> takeoff procedures detailed to get <strong>the</strong> aircraft up<br />
and flying, and turn on <strong>the</strong> autopilot when <strong>the</strong> aircraft<br />
reaches an altitude of 1000+ feet.<br />
The aircraft flies to <strong>the</strong> first waypoint, where Air<br />
Traffic Control (ATC) requests identification.<br />
The aircraft <strong>the</strong>n proceeds to <strong>the</strong> second waypoint.<br />
During <strong>the</strong> remainder of <strong>the</strong> flight, controls in <strong>the</strong><br />
pilot and copilot stations should be explored. The<br />
following <strong>are</strong> suggested exercises:<br />
o Use <strong>the</strong> clock "ETA" function to check time to<br />
43
next waypoint.<br />
o Override <strong>the</strong> autopilot by using <strong>the</strong> keyboard.<br />
o Fly without using <strong>the</strong> autopilot.<br />
o Fly using <strong>the</strong> TAC. Experiment with different<br />
height settings.<br />
o Override <strong>the</strong> TAC using <strong>the</strong> keyboard.<br />
o Change <strong>the</strong> power setting if individual engine<br />
throttles and observe <strong>the</strong> effect on aircraft<br />
performance.<br />
o Turn off an engine and restart it in flight.<br />
o Test <strong>the</strong> airbrakes and lading gear as speed<br />
controls.<br />
o Comp<strong>are</strong> fuel consumption at very high and very<br />
low altitudes.<br />
o Experiment with <strong>the</strong> external camera. Check <strong>the</strong><br />
condition of navigation lights and landing gear<br />
comp<strong>are</strong>d to <strong>the</strong>ir controlling switches at <strong>the</strong> copilot<br />
and pilot stations.<br />
o Practice using <strong>the</strong> keyboard "Hot Keys."<br />
Finally, with <strong>the</strong> autopilot turned on, <strong>the</strong> aircraft<br />
returns to <strong>the</strong> third waypoint (Nellis AFB) and is<br />
cle<strong>are</strong>d to land.<br />
2 Navigation<br />
This mission will familiarize <strong>the</strong> crew with <strong>the</strong><br />
navigation systems aboard <strong>the</strong> EB-52. The mission<br />
begins in <strong>the</strong> same way at Mission 1 above with <strong>the</strong><br />
standard takeoff and identification procedures. After<br />
identification is made, make sure <strong>that</strong> <strong>the</strong> autopilot is<br />
turned on and proceed to <strong>the</strong> navigator's station.<br />
The Navigator Station has five modes. Read<br />
"Navigator Station" c<strong>are</strong>fully, and <strong>the</strong>n experiment<br />
with each mode in <strong>the</strong> following ways:<br />
Map Mode<br />
o With <strong>the</strong> FCS set to DISPLAY, use <strong>the</strong> small<br />
monitor to find information about time and distance<br />
to various waypoints.<br />
o With <strong>the</strong> FCS set to EDIT, use <strong>the</strong> small and large<br />
monitors to edit and restore waypoints.<br />
o With <strong>the</strong> WAYPOINT switch turned OFF, use <strong>the</strong><br />
small monitor to display data about selected points on<br />
<strong>the</strong> large monitor.<br />
Radar Mode<br />
o Experiment with <strong>the</strong> range settings.<br />
o Comp<strong>are</strong> <strong>the</strong> high-resolution radar image in <strong>the</strong><br />
large monitor with <strong>the</strong> low-resolution "TAC" image<br />
in <strong>the</strong> small monitor.<br />
o Experiment with temporary waypoints following<br />
<strong>the</strong> directions in "Navigator Station. It is possible<br />
to fly <strong>the</strong> aircraft exclusively from <strong>the</strong> Nav station<br />
44
at low altitudes, through mountains, etc.-by<br />
using temporary waypoints.<br />
STV Mode<br />
o Use <strong>the</strong> ADJUST switch to practice looking in one<br />
direction while flying in ano<strong>the</strong>r.<br />
3 Radar Evasion<br />
The goal of this mission is simply to fly from <strong>the</strong> first<br />
to <strong>the</strong> third waypoint without allowing <strong>the</strong> search<br />
radars to track you.<br />
Although it is possible to move <strong>the</strong> waypoints and<br />
avoid <strong>the</strong> radars altoge<strong>the</strong>r, or to jam every radar<br />
encountered, <strong>the</strong> idea is to learn how to evade radars<br />
when necessary.<br />
The mission begins in <strong>the</strong> same way as Mission 1<br />
above with <strong>the</strong> standard takeoff and identification<br />
procedures. After identification is made, try <strong>the</strong>se<br />
techniques:<br />
o Determine <strong>the</strong> effects of altitude on detection.<br />
Remember, <strong>the</strong> EB-52 can "see" a search radar long<br />
before being seen, or tracked, itself.<br />
o Attempt to thread <strong>the</strong> aircraft flight path through<br />
<strong>the</strong> radars, skimming <strong>the</strong> ranges at which it is likely to<br />
be detected.<br />
o When evasion fails, jam <strong>the</strong> search radar signal<br />
from <strong>the</strong> EW station.<br />
<strong>These</strong> skills <strong>are</strong> required for successful completion of<br />
any mission. Remember: The name of <strong>the</strong> game is<br />
EVASION.<br />
o During inflight refueling, use <strong>the</strong> external camera<br />
to observe <strong>the</strong> rendezvous. Use <strong>the</strong> TARGET view to<br />
watch from <strong>the</strong> tanker aircraft's point of view.<br />
5 1 MiG Evasion<br />
Evading a MiG requires different tactics from those<br />
employed in shooting one down. Because MiGs <strong>are</strong><br />
usually directed, or vectored to locations by Ground<br />
Control Intercept (GCI) facilities (enemy radar<br />
stations), <strong>the</strong> best way to evade <strong>the</strong>m is to evade<br />
enemy radars. In this mission, <strong>the</strong> goal is to lose a<br />
MiG <strong>that</strong> has been vectored to <strong>the</strong> EB-52's location.<br />
The difficult part of <strong>the</strong> task is knowing when <strong>the</strong><br />
MiG is out <strong>the</strong>re. Since. like <strong>the</strong> EB-52, <strong>the</strong>y<br />
generally fly with <strong>the</strong>ir passive radars running so as to<br />
avoid announcing <strong>the</strong>ir presence, it is necessary to<br />
turn <strong>the</strong> ATTACK active radar at <strong>the</strong> OW station on<br />
for brief periods to try to "paint" any enemy fighter<br />
<strong>that</strong> might be nearby. To lose an enemy fighter <strong>the</strong>re<br />
45
<strong>are</strong> only a few things a bomber can do.<br />
o Fly low and toward mountain or some o<strong>the</strong>r part<br />
of <strong>the</strong> terrain, trying to lose <strong>the</strong> aircraft's radar image<br />
against <strong>the</strong> larger object.<br />
o Turn off all external lights.<br />
o Make sure ATTACK radar is OFF.<br />
o Turn and try to lose him.<br />
A few observations:<br />
All enemy fighters use <strong>the</strong> same general techniques:<br />
<strong>the</strong>y pull in above and behind <strong>the</strong> EB-52, about 25<br />
miles out. <strong>the</strong>n <strong>the</strong>y fire a pair of radar-guided<br />
missiles. If those miss <strong>the</strong>y move in closer and fire a<br />
couple of IR-guided missiles. If <strong>the</strong>y miss again <strong>the</strong>y<br />
probably will have enough fuel left to try a pass with<br />
<strong>the</strong>ir guns. If <strong>the</strong>y still have fuel <strong>the</strong>y may make a<br />
circle and one more gun pass before giving up and<br />
heading back to base.<br />
Enemy fighter prefer visual sightings, avoiding use of<br />
<strong>the</strong>ir attack radars unless absolutely necessary. But if<br />
<strong>the</strong>y lose visual contact <strong>the</strong>y may be forced to turn on<br />
<strong>the</strong>ir radars and reveal <strong>the</strong>ir locations.<br />
If <strong>the</strong> EB-52 is being tailed by MiG, make sure <strong>the</strong><br />
EW station's rear-looking infr<strong>are</strong>d (RLIR) scanner is<br />
ON, and <strong>the</strong> AUTO CHAFF and AUTO FLARES<br />
switches turned ON.<br />
If <strong>the</strong> EW Officer is fast and manages to pick up an<br />
enemy missile on <strong>the</strong> radar, it is possible to jam its<br />
guidance system with ei<strong>the</strong>r <strong>the</strong> JAM SIGNAL or<br />
JAM IR buttons, depending on <strong>the</strong> type of missile<br />
fired. Of course, this makes it easier for <strong>the</strong> MiG t<br />
locate <strong>the</strong> aircraft.<br />
Finally, it is possible to turn out of <strong>the</strong> missile's way -<br />
depending on <strong>the</strong> speed and maneuverability of <strong>the</strong><br />
missile.<br />
6 2 MiG Evasion<br />
If one enemy fighter is easy to evade, try two.<br />
7 2 MiG Defense<br />
If it becomes impossible to evade an enemy fighter,<br />
<strong>the</strong> crew will need to blow him out of <strong>the</strong> sky. But<br />
remember: <strong>the</strong> ultimate mission is one in which <strong>the</strong><br />
enemy never sees <strong>the</strong> EB-52-just a trail of wrecked<br />
installations and equipment. This mission lets <strong>the</strong><br />
crew practice mounting an active defense against two<br />
MiGs, using air-to-air missiles, air mines, chaff, and<br />
fl<strong>are</strong>s.<br />
46
o Load <strong>the</strong> EB-52 with AIM-120C and AIM-9R<br />
missiles<br />
o Use <strong>the</strong> same tactics described in "1 MiG Evasion:<br />
above to counter <strong>the</strong> fighters' moves.<br />
o See "OW Station" to learn how to launch missiles<br />
and air mines against <strong>the</strong> enemy.<br />
8 3 MiG Defense<br />
If two enemy fighters <strong>are</strong> easy to shoot down, try<br />
three.<br />
9 Unopposed Bombing - 1<br />
This mission provides <strong>the</strong> crew with an opportunity<br />
to practice bombing runs, without any interference<br />
from <strong>the</strong> enemy. The aircraft is pre-loaded with an<br />
assortment of ordnance, but requires fueling before<br />
takeoff.<br />
Read "OW Station" and "Bombing Run" to prep<strong>are</strong><br />
for this mission.<br />
10 Unopposed Bombing - 2<br />
This mission provides <strong>the</strong> crew with an opportunity to<br />
practice bombing runs, without being intercepted by<br />
MiGs, surface-to air missiles (SAMs), or anti-aircraft<br />
artillery (AAA). Enemy search radars will be on <strong>the</strong><br />
lookout for <strong>the</strong> EB-52.<br />
The aircraft is pre-loaded with an assortment of<br />
ordnance, but requires fueling before takeoff (see<br />
"Loadout Screen," "Loadout," and "Ordnance".)<br />
Read "OW Station", and "Bombing Run", and<br />
practice radar evasion to prep<strong>are</strong> for this mission.<br />
11 Unopposed Bombing - 3<br />
This mission provides <strong>the</strong> crew with an opportunity to<br />
practice bombing runs, without being intercepted by<br />
MiGs, surface-to-air missiles (AMSs), or anti-aircraft<br />
artillery (AAA). Enemy search and SAM radars will<br />
be on <strong>the</strong> lookout for <strong>the</strong> EB-52.<br />
The aircraft is pre-loaded with an assortment of<br />
ordnance, but requires fueling before takeoff.<br />
12 Bombing - 1<br />
This mission provides <strong>the</strong> crew with an opportunity<br />
to practice bombing runs, without being intercepted<br />
by surface-to-air missiles (SAMs), or anti-aircraft<br />
artillery (AAA). Enemy MiGs will be on <strong>the</strong> lookout<br />
for <strong>the</strong> EB-52.<br />
The aircraft is pre-loaded with an assortment of<br />
ordnance, but requires fueling before takeoff (see<br />
"Loadout Screen").<br />
47
13 Bombing - 2<br />
This mission provides <strong>the</strong> crew with an opportunity to<br />
practice bombing runs under fire. Enemy MiGs,<br />
search radars, and SAM sites will be on <strong>the</strong> lookout<br />
for <strong>the</strong> EB-52.<br />
The aircraft is pre-loaded with an assortment of<br />
ordnance, but requires fueling before takeoff (see<br />
"Loadout Screen", "Loadout" and "Ordnance".)<br />
14 Full Bombing - 1<br />
This mission provides <strong>the</strong> crew with an opportunity to<br />
practice bombing runs fully armed and under fire.<br />
enemy MiGs, search radars, and SAM sites will be on<br />
<strong>the</strong> lookout for <strong>the</strong> EB-52. The target runaway is<br />
located at <strong>the</strong> 2nd waypoint.<br />
15 Full Bombing - 2<br />
This mission provides <strong>the</strong> crew with an opportunity to<br />
practice bombing runs fully armed and under fire.<br />
Enemy MiGs, search radars, and SAM sites will be<br />
on <strong>the</strong> lookout for <strong>the</strong> EB-52. The target runaway is<br />
located at <strong>the</strong> 3rd waypoint, requiring more evasion<br />
along <strong>the</strong> way <strong>the</strong>n in Full Bombing -1.<br />
16 Multiple Targets<br />
This mission provides three targets instead of one, as<br />
in <strong>the</strong> o<strong>the</strong>r practice bombing runs. The EB-52 is<br />
fully armed and under fire. Enemy MiGs, search<br />
radars, and SAM sites will be on <strong>the</strong> lookout for <strong>the</strong><br />
EB-52.<br />
.<br />
PERSIAN GULF<br />
By 1990, Iraq had <strong>the</strong> sixth largest military force in<br />
<strong>the</strong> whole world, with a reported 750,000 soldiers,<br />
1,400 combat aircraft, 3,000 anti-aircraft weapons,<br />
and 6,000 armored combat vehicles. Iraq also<br />
commanded a very sophisticated command and<br />
control network <strong>that</strong> tied all of <strong>the</strong>se weapons<br />
toge<strong>the</strong>r over an expanse of territory roughly <strong>the</strong> size<br />
of California.<br />
The 14 missions in Iraq and Kuwait follow<br />
Megafortress on a step-by-step campaign designed to<br />
neutralize <strong>the</strong> Iraqi war machine.<br />
The Megafortress arrived secretly by ship in <strong>the</strong><br />
region shortly after Christmas, 1990. With <strong>the</strong> B-1B<br />
bombers grounded due to congressional inquiries and<br />
debates over safety, cot-cutting, military spending and<br />
48
payload size make it a logical candidate to follow <strong>the</strong><br />
F-117As into Iraq.<br />
Megafortress begins working for <strong>the</strong> coalition by<br />
destroying a key fighter air base in northwest Iraq,<br />
and eliminating key command and communication<br />
centers. The Iraqis, trained by <strong>the</strong>ir eastern-bloc arms<br />
dealers, rely on <strong>the</strong> Soviet system of early warningground<br />
control intercept (EW-GCI) targeting.<br />
Ground based radar controllers provide fighters with<br />
<strong>the</strong> coordinates of intruders, "vectoring" <strong>the</strong> fighters<br />
to locations "of interest". Pilots <strong>are</strong> not trained to<br />
work independently of <strong>the</strong> system, as <strong>are</strong> <strong>the</strong> coalition<br />
pilots trained at Red Flag. When <strong>the</strong> centralized<br />
control centers for this GCI system <strong>are</strong> destroyed, <strong>the</strong><br />
Iraqi Air Defense Network is effectively blinded.<br />
Next, munitions supply facilities and a chemical<br />
weapons plant must be destroyed to prevent resupply<br />
of <strong>the</strong> Iraqi army in Kuwait. Mobile SCUD launchers<br />
located near <strong>the</strong> chemical plant <strong>are</strong> also hit by <strong>the</strong><br />
Megafortress.<br />
The war broadens, and coalition F-16s and Tornados<br />
begin to raid sou<strong>the</strong>rn Iraq. But crews <strong>are</strong> forced by<br />
cautious commanders to dodge a critical Iraqi air<br />
base. Megafortress is detailed to deliver a single<br />
devastating strike and eliminate <strong>the</strong> distraction. Iraq's<br />
primary communications center, <strong>the</strong> International<br />
Communications Center (ICC) in Baghdad, is<br />
hammered next by <strong>the</strong> big bomber, along with <strong>the</strong><br />
main power source for <strong>the</strong> capital city. <strong>the</strong> Iraqis <strong>are</strong><br />
cut off from <strong>the</strong> rest of <strong>the</strong> world.<br />
The Republican Guard forces in Kuwait <strong>are</strong> <strong>the</strong> finest<br />
troops in Iraq's army and must be neutralized before<br />
<strong>the</strong> country can be retaken. with its command center<br />
in sou<strong>the</strong>rn Iraq shut down, <strong>the</strong> Guard itself can be<br />
attacked without an unreasonable loss of life. Power<br />
generating facilities and transportation systems in <strong>the</strong><br />
<strong>are</strong>a <strong>are</strong> also destroyed.<br />
The sou<strong>the</strong>astern approaches to Baghdad <strong>are</strong> heavily<br />
guarded by enemy fighter aircraft, and must be dealt<br />
with in order to reach <strong>the</strong> industrial <strong>are</strong>as housing<br />
Iraqi biological weapons production.<br />
Although <strong>the</strong> exact biological agents being produced<br />
<strong>are</strong> unknown, <strong>the</strong>ir potential as weapons of war is far<br />
more diabolical even <strong>the</strong>n <strong>that</strong> of chemical weapons.<br />
With Iraqi command and control centers,<br />
communications systems, power sources, munitions<br />
supply centers and central air defense bases under<br />
control in central Iraq, <strong>the</strong> Megafortress turns its<br />
attention southward, toward Kuwait. A major<br />
Kuwaiti air base captured by <strong>the</strong> invading Iraqis is<br />
hit, and <strong>the</strong> Iraqi stronghold surrounding Basrah<br />
begins to feel <strong>the</strong> big bomber's iron fist pounding at<br />
<strong>the</strong> door. Basrah is <strong>the</strong> main Iraqi citadel on Kuwait's<br />
49
orders, and holds many of <strong>the</strong> keys to unlocking<br />
Iraq's stranglehold on it rich sou<strong>the</strong>rn neighbor. Air<br />
bases and <strong>the</strong> main supply routes into Kuwait <strong>are</strong> hit,<br />
and Iraq's budding nuclear weapons capability is<br />
damaged.<br />
Coalition commanders follow through on <strong>the</strong> nuclear<br />
plant attack by using <strong>the</strong> Megafortress to strike north<br />
again, smashing an enriched uranium production<br />
facility outside of Baghdad.<br />
As <strong>the</strong> Iraqi leaders face <strong>the</strong> truth - in private - about<br />
<strong>the</strong>ir situation, <strong>the</strong> Megafortress to strike north again,<br />
smashing an enriched uranium production facility<br />
outside of Baghdad.<br />
As <strong>the</strong> Iraqi leaders face <strong>the</strong> truth - in private - about<br />
<strong>the</strong>ir situation, <strong>the</strong> Megafortress is detailed to destroy<br />
<strong>the</strong> primary transportation facility in Baghdad.<br />
Saddam/Baghdad International airport and its support<br />
facilities <strong>are</strong> leveled. The military leadership is<br />
denied all but <strong>the</strong> most primitive means of escape.<br />
Megafortress is now sent to destroy <strong>the</strong> Iraq army's<br />
heavily-fortified central command complex in<br />
Baghdad. With its central command structure<br />
smashed, <strong>the</strong> remaining Iraqi forces in Kuwait <strong>are</strong><br />
completely cut off.<br />
In its final missions, Megafortress destroys <strong>the</strong><br />
remnants of Iraq's once-proud air force, and closes<br />
<strong>the</strong> enemy's remaining supply routes into Kuwait in<br />
preparation for <strong>the</strong> ground assault. Finally, it shuts<br />
down Kuwait International Airport. The Iraqis <strong>are</strong><br />
defeated, and <strong>the</strong> Megafortress once again slips away<br />
into <strong>the</strong> shadows of <strong>the</strong> USAF's top secret weapons<br />
programs.<br />
Mission details for <strong>the</strong> Persian Gulf and Flight of <strong>the</strong><br />
Old Dog <strong>are</strong> classified, and will be available only<br />
during mission assignment of <strong>the</strong> mission itself.<br />
Megafortress Extra Mission "Escape from Seattle"<br />
1) The scenario starts out at 31,000 ft heading East.<br />
2) Turn due West.<br />
3) Report in with <strong>the</strong> Transponder once, <strong>the</strong>n turn it off.<br />
4) Turn off all light, both internal and external.<br />
5) Put your radar in scan mode.<br />
6) Point nose at a -60 degree angle.<br />
7) Cut engines to 55%<br />
8) Set TAC at 108 ft, but don't turn it on yet.<br />
9) When altitude reaches 200 ft you'll get a message,<br />
"They've lost us on radar" <strong>the</strong>n turn on <strong>the</strong> TAC.<br />
Refueling from <strong>the</strong> tanker:<br />
1) Find <strong>the</strong> tanker on radar.<br />
2) Set altitude to 10,000 ft.<br />
50
3) Close <strong>the</strong> range as fast as possible.<br />
4) Do not report in with <strong>the</strong> transponder, instead lock<br />
an AMRAM onto <strong>the</strong> tanker.<br />
Generated by unregistered <strong>txt</strong>2pdf v.4.4 © SANFACE Softw<strong>are</strong> 2000<br />
51