354 268-21 - heidenhain
354 268-21 - heidenhain
354 268-21 - heidenhain

You also want an ePaper? Increase the reach of your titles
YUMPU automatically turns print PDFs into web optimized ePapers that Google loves.
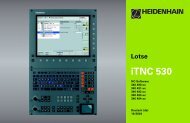
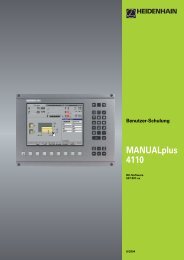
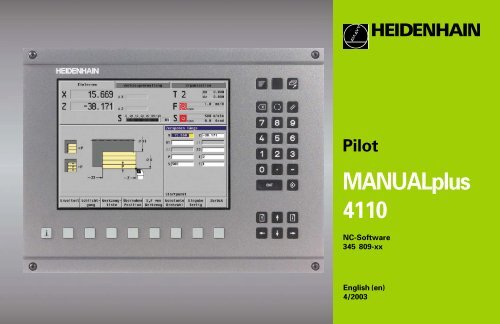
Pilot<br />
MANUALplus<br />
4110<br />
NC-Software<br />
345 809-xx<br />
English (en)<br />
4/2003
Keyboard Symbol<br />
Menu<br />
Call the “Main menu“ (Machine mode of operation)<br />
Switching key<br />
Switches the help graphics for internal/<br />
external machining<br />
Process<br />
Select a mode of operation<br />
Numbers (0 to 9)<br />
For entering values and selecting soft keys ...<br />
Minus<br />
For entering the algebraic sign<br />
Decimal point<br />
Enter<br />
Confirm the entered value<br />
Store<br />
Conclude data input and transfer values<br />
Keyboard Symbol<br />
Backspace<br />
Delete the character to the left of the cursor<br />
Clear<br />
Delete error messages<br />
Cursor keys<br />
Move the cursor in the indicated<br />
direction by one position (character,<br />
field, line, etc.)<br />
Page up, page down (PgUp/PgDn)<br />
Show the information on the previous/<br />
next screen page; toggle between<br />
two input windows<br />
Info<br />
Activate the error display or the<br />
PLC status display
The Pilot<br />
... is your concise programming guide for the HEIDENHAIN<br />
MANUALplus 4110 control. For more comprehensive information<br />
on operating the MANUALplus, refer to the User's<br />
Manual.<br />
Certain symbols are used in the Pilot to denote specific<br />
types of information:<br />
Important note!<br />
Warning: danger to the user or the machine!<br />
Chapter in the User's Manual where you will find<br />
more detailed information on the current topic.<br />
The information in this Pilot applies to the MANUALplus with<br />
the software number 345 809-xx (Release 6.4).<br />
Contents<br />
Operation of the MANUALplus .......................................... 4<br />
Setup ................................................................................. 5<br />
Tool Measurement ............................................................ 7<br />
Manual Operation .............................................................. 8<br />
Teach-In ............................................................................. 9<br />
Program Sequence ............................................................ 9<br />
Graphic Simulation ............................................................. 10<br />
Cycles ............................................................................... 11<br />
Workpiece blank ................................................................ 12<br />
Single Cuts ........................................................................ 13<br />
Area Clearance .................................................................. 16<br />
Recess Cycles .................................................................. 20<br />
Thread Cycles.................................................................... 26<br />
Undercut Cycles ................................................................ 29<br />
Drilling and Boring Cycles .................................................. 30<br />
Milling Cycles .................................................................... 34<br />
Drilling and Milling Patterns ............................................... 39<br />
DIN Cycle .......................................................................... 43<br />
ICP Programming .............................................................. 44<br />
DIN Programming .............................................................. 48<br />
Tool Management.............................................................. 109<br />
Create a Workpiece using Cycles...................................... 116<br />
Contents<br />
3
Control operation<br />
4<br />
Operation of the MANUALplus<br />
Operating modes<br />
The MANUALplus has three operating modes:<br />
Machine<br />
Tool Management<br />
Organization<br />
You can switch between the different operating modes using the<br />
Process key (sequence: Process key – select the required mode using<br />
the cursor keys – Process key).<br />
The Process key can only be used when the main menu of the<br />
current operating mode is active.<br />
Menu selection<br />
In the Machine and Tool Management modes of operation, the<br />
available menus are arranged in a 9-field window. To select a menu<br />
item, press the corresponding number key.<br />
Data input<br />
You can move the cursor to the desired input field with the “vertical“<br />
arrow keys. Use the right and left arrow keys to position the cursor<br />
within the input field to delete existing or add new characters.<br />
Entered or changed data will not be transferred to the control until<br />
you press “Input finished“ or “Save“. If you leave the input<br />
window with “Back“, all entries or changes you made will be<br />
lost.<br />
Error display<br />
Errors/message are signaled by the error symbol<br />
(on the left-hand side of the title bar). With the “Info“<br />
key you can open the error window and read the<br />
messages that have been recorded by the control.<br />
Clearing an error message<br />
You can clear one error message using “Backspace“.<br />
All error messages are canceled with<br />
“Clear“.
Setup<br />
Entering machine data (“Set S, F, T“)<br />
With “Set S, F, T“ you enter the machine data required for manual<br />
operation, as well as the maximum speed and tool angle.<br />
Note with driven tools:<br />
MANUALplus recognizes from the tool description whether a driven<br />
tool is used.<br />
If the active tool is a driven tool, the displayed spindle and machine<br />
tool data refer to the driven tool.<br />
Milling cutters always qualify as “driven tools“.<br />
After system start, MANUALplus assumes that the tool<br />
that was last used is still inserted in the tool holder. If this<br />
is not the case, you must inform the control of the tool<br />
change.<br />
At a “constant cutting speed“, MANUALplus calculates the<br />
spindle speed depending on the tool tip position. The smaller<br />
the diameter of the tip, the higher the spindle speed. The<br />
“maximum spindle speed D“, however, is never exceeded.<br />
Display fields for machine data<br />
Position display<br />
Display of the current distance between tool tip<br />
and workpiece datum in X and Z, or the current<br />
position of the C axis.<br />
Distance-to-go<br />
MANUALplus calculates the distance remaining<br />
from the current position to the target position of<br />
the active traversing command.<br />
Spindle utilization<br />
Utilization of the spindle motor<br />
T display<br />
T number of the inserted tool<br />
Tool compensation values<br />
F display<br />
Symbol for cycle status<br />
Upper field: programmed value<br />
Lower field: setting of override control and actual<br />
feed rate<br />
S display<br />
Symbol for spindle status<br />
Upper field: programmed value<br />
Lower field: setting of override control and actual<br />
spindle speed<br />
With position control (M19): spindle position<br />
Gear range (small number next to “S“)<br />
“S“ highlighted: S display is valid for the driven tool<br />
Setup<br />
5
6<br />
Setup<br />
Setting the axis values (defining workpiece datum)<br />
The workpiece datum can be defined in two different ways:<br />
“Touch“ the end face of the workpiece and use “Z=0” to define this<br />
position as the “workpiece zero point Z“.<br />
Enter the position of the tool (distance between tool and workpiece<br />
zero points) and confirm with “Save”.<br />
The graphic support window shows the distance between machine<br />
datum and workpiece datum (aka “displacement“).<br />
See “3.4 Machine Setup“.<br />
Setting the protection zone<br />
The protection zone can be defined in two different ways:<br />
Move the tool until it reaches the “protection zone“ and confirm with<br />
“Take over position”.<br />
Enter the coordinates at the position of the “protection zone“ (distance:<br />
workpiece datum to protection zone); confirm with “Save”.<br />
The graphic support window shows the distance<br />
between machine datum and protection zone.<br />
“–99999.000“ means: Protection zone monitoring is<br />
not active
Tool Measurement<br />
You can compare the dimensions of non-measured tools by comparing<br />
them with a measured tool.<br />
Sequence (example):<br />
1 Insert the reference tool and enter the T number in “Set S, F, T“.<br />
2 Turn an end face and define this coordinate as the workpiece zero<br />
point.<br />
3 Return to “Set S, F, T“, insert the tool to be measured and enter the<br />
associated T number.<br />
4 Activate “Measure tool”.<br />
5 Touch the end face with the tool, enter the value “0“ for the “measuring<br />
point coordinate Z“ (workpiece datum) and confirm with “Take<br />
over Z“. MANUALplus stores the tool dimension and deletes any<br />
exisiting compensation values for the tool.<br />
6 Touch the diameter with the tool. Enter this coordinate as the “measuring<br />
point coordinate X” and confirm with “Take over X“. MANUALplus<br />
stores the tool dimension and deletes any exisiting compensation<br />
values for the tool.<br />
7 If you are measuring a lathe or recessing tool, enter the cutting<br />
radius and confirm with ”Save radius”.<br />
You can only measure tools that have already been entered<br />
in the tool table.<br />
Tool Compensation<br />
1 Select ”X offset f. tool”, ”Z offset f. tool” or ”Special<br />
correction“ – the compensation value is<br />
shown in the distance-to-go display.<br />
2 Using the handwheel, move by the distance to be<br />
compensated.<br />
3 Press ”Save” to tranfer the compensation value.<br />
Deleting tool compensation values<br />
You can delete existing compensation values with<br />
the function keys ”Erase X offset”, ”Erase Z offset”<br />
and ”Delete special”.<br />
Tool Measurement<br />
7
Manual mode<br />
8<br />
Manual mode<br />
With manual workpiece machining, you move the axes with the<br />
handwheels or jog controls. You can also use cycles, for example, for<br />
machining complex contours. The paths of traverse and the cycles,<br />
however, are not stored.<br />
After switch-on and traversing the reference marks, MANUALplus is<br />
always in ”Manual“ mode. This mode remains active until you select<br />
”Teach-in” or ”Program run”. You can return to Manual mode with the<br />
”Menu“ key.<br />
Before you start machining, you should set the workpiece datum<br />
using ”Set axis values“ to ensure that the display shows the correct<br />
position.<br />
Tool change<br />
You need to enter the T number and check the tool parameters.<br />
Handwheel operation<br />
The Handwheel resolution selector switch on the machine operating<br />
panel enables you to set the traverse per handwheel increment.<br />
Jog operation (joystick)<br />
The feed rate is defined in ”Set S, F, T“ and the feed rate for rapid<br />
traverse in the parameter ”Machine parameters – Feeds“.<br />
Cycles<br />
When using cycles, you need to:<br />
Set the spindle speed<br />
Set the feed rate<br />
Insert tool, define T number and check tool data<br />
Approach cycle start point<br />
Select the cycle, define the parameters, and<br />
grapchically simulate the cycle execution<br />
Run the cycle
Teach-in (Cycle mode)<br />
In Teach-in mode you machine a workpiece step by step with<br />
cycles. MANUALplus ”memorizes“ how the workpiece was machined<br />
and stores the working steps in a cycle program.<br />
DIN macros are programmed in the DIN editor and then integrated in<br />
the DIN cycle.<br />
Program run<br />
In the machining mode, you use already-programmed cycle programs<br />
and DIN programs for parts production. You can check your programs<br />
befor running them using the ”Graphic simulation” function.<br />
Program execution<br />
With the function keys, you can determine whether a program is to be<br />
executed continuously, cycle by cycle, or block by block. Independent<br />
of this setting, program run will be interrupted immediately if you<br />
press ”Cycle stop”.<br />
Compensation: You can enter tool compensation values and additive<br />
corrections during program run (function key ”Tool/Add correct.”).<br />
Base blocks: The program-block display is switched to base blocks.<br />
The traversing and switching commands are now shown in ”DIN<br />
format“.<br />
MANUALplus starts program run from the<br />
cycle (or DIN block) that is highlighted.<br />
The starting position is not changed by a<br />
previous graphic simulation.<br />
DIN programs: When selecting the<br />
startup block, ensure that the machine run<br />
data (S, F, T) are set before the control<br />
reaches the first traversing command.<br />
Program<br />
Danger of collision!<br />
MANUALplus does not convert faulty cycles.<br />
It is therefore very important that you<br />
check whether a cycle program resulting in<br />
an error message can be run. Teach-in,<br />
9
Graphic simulation<br />
10<br />
Graphic simulation<br />
The graphic simulation feature enables you to check the machining<br />
sequence, the proportioning of cuts and the finished contour before<br />
actual machining.<br />
Graphical elements:<br />
Coordinate system: The workpiece datum serves as the origin of<br />
the coordinate system.<br />
Contours: At the beginning of a cycle simulation, the programmed<br />
contour is depicted in “cyan“.<br />
The light dot (small white square) represents the theoretical tool tip.<br />
Rapid traverse paths are shown as broken white lines.<br />
Feed paths are shown as continous green lines. They represent the<br />
path of the theoretical tool tip.<br />
Tool-tip (cutting edge): MANUALplus shows the “cutting edge“ of<br />
the tool as a continuous yellow line. This graphic display is based on<br />
the tool data. If the control does not have enough data on the tool, it<br />
can only represent the tool tip as a light dot.<br />
The area that is covered by the tool is shaded.<br />
Warnings<br />
MANUALplus displays warnings in the leftmost field of the function-key<br />
row.<br />
Extra functions:<br />
Track: Switch from “Wire frame“ to “Cutting<br />
path“ graphic.<br />
Slide: Switch from “Light dot“ to “Tool tip“ graphic.<br />
Process times (machining time): Switch to “Time<br />
calculation“.<br />
Face view: Switch to Face view if you have<br />
programmed drilling cycles or C-axis machining<br />
for the end face.<br />
Surface view: Switch to Surface view if you have<br />
programmed drilling cycles or C-axis machining for<br />
the lateral surface.<br />
Time Calculation<br />
During simulation, MANUALplus calculates the<br />
machining and idle machine times.<br />
If you are working with cycle programs, each cycle<br />
is shown in a separate line. With DIN programs, a<br />
separate line is inserted in the table for each new<br />
tool (i.e. for each tool call with T).
Cycles<br />
You must set the workpiece datum and check the tool data before you<br />
use cycles.<br />
Define the individual cycles as follows:<br />
Position the tool tip with the handwheels or jog keys to the cycle<br />
start point (only in Manual mode).<br />
Select and program the cycle.<br />
Run a graphic simulation of cycle execution.<br />
Execute the cycle.<br />
Save the cycle (only in Teach-in mode).<br />
In Teach-in mode<br />
the starting point X, Z and<br />
the machine data S, F and T<br />
need to be entered in the cycle description.<br />
In Manual mode, you must program these machinen dat<br />
before calling a cycle.<br />
MANUALplus does not store any cycles in Manual mode.<br />
Danger of collision!<br />
MANUALplus approaches the starting point before cycle execution<br />
diagonally in rapid traverse. If the tool cannot approach<br />
the starting point without collision, you must define an<br />
auxiliary position with the cycle “Rapid traverse positioning“.<br />
Cycle keys<br />
A programmed cycle will not be executed until you<br />
press the Cycle START button. You can interrupt a<br />
cycle at any time during execution with Cycle STOP.<br />
During a cycle interruption you can:<br />
Resume cycle execution with “Cycle START“. The<br />
control will always resume execution of the cycle<br />
at the point of interruption – even if you have<br />
moved the axes during the interruption.<br />
Move the axes with the jog keys or with the<br />
handwheels.<br />
Abort machining with the “Cancel“ function key.<br />
Cycles<br />
11
Workpiece blank<br />
12<br />
Blank Bar/Tube<br />
The cycle describes the workpiece blank and the setup used. This<br />
information is evaluated during the simulation.<br />
Information on cycle parameters:<br />
X: Outside diameter<br />
Z: Length (including transverse allowance and clamping range)<br />
I: Inside diameter for workpiece blank ”tube”<br />
K: Right edge (transverse allowance)<br />
B: Clamping range<br />
J: Type of clamping<br />
0: No clamping<br />
1: Outside clamping<br />
2: Inside clamping<br />
Workpiece blank contour ICP<br />
The cycle integrates the workpiece blank defined with ICP and describes<br />
the setup used. This information is evaluated during the simulation.<br />
Information on cycle parameters:<br />
X: Clamping diameter<br />
Z: Clamping position in Z<br />
B: Clamping range<br />
J: Type of clamping<br />
0: No clamping<br />
1: Outside clamping<br />
2: Inside clamping<br />
N: ICP contour number
Rapid traverse positioning<br />
Approach tool change point<br />
The tool approaches the “target point“ in rapid traverse.<br />
If you press the “T-Change approach“ function key , the tool moves to<br />
the tool change point in rapid traverse. MANUALplus then switches to<br />
the tool entered in “T“.<br />
The direction in which the tool approaches the target point –<br />
transversely, longitudinally or diagonally, depends on whether<br />
you enter the target coordinates in the X axis, in the Z axis, or<br />
in both X and Z.<br />
M functions<br />
Enter machine commands (M functions) and confirm them with “Input<br />
finished“. The function is executed after pressing “Cycle START“.<br />
See your machine manual for the meaning of the M functions.<br />
Longitudinal linear machining<br />
The tool moves from the “start point X, Z“ to the<br />
“target point Z2“ at the programmed feed rate.<br />
When the cycle is completed, the tool remains at<br />
the cycle end position.<br />
Contour linear longitudinal (“with return“)<br />
The tool approaches the workpiece, executes the<br />
longitudinal cut and returns to the “start point“ at<br />
the end of the cycle.<br />
Transverse linear machining<br />
The tool moves from the “start point X, Z“ to the<br />
“target point X2“ at the programmed feed rate.<br />
When the cycle is completed, the tool remains at<br />
the cycle end position.<br />
Contour linear traverse (“with return“)<br />
The tool approaches the workpiece, executes the<br />
transverse cut and returns to the “start point“ at the<br />
end of the cycle.<br />
Single cuts<br />
13
Single cuts<br />
14<br />
Linear machining at angle<br />
MANUALplus calculates the target position and moves the tool on a<br />
straight line from the “start point X, Z“ to the “target position“. When<br />
the cycle is completed, the tool remains at the cycle end position.<br />
Contour linear angle (“with return“)<br />
MANUALplus calculates the target position. The tool approaches the<br />
workpiece, executes the linear cut and returns to the “start point“ at<br />
the end of the cycle.<br />
Cutting radius compensation is effective in the “with<br />
return“ mode.<br />
Parameter combinations for defining the target point:<br />
see support graphics<br />
Circular machining<br />
(With the appropriate soft key, you can select whether<br />
the circular arc is to be machined clockwise or<br />
counterclockwise.)<br />
The tool moves in a circular arc from the “start point X, Z“ to the “end<br />
point contour X2, Z2“ at the programmed feed rate. When the cycle is<br />
completed, the tool remains at the cycle end position.<br />
Contour circular (“with return“)<br />
The tool approaches the workpiece, executes the circular cut and<br />
returns to the “start point“ at the end of the cycle.<br />
Cutting radius compensation is effective in the “with return“<br />
mode.
Chamfer<br />
The cycle produces a chamfer that is dimensioned relative to the<br />
corner of the workpiece contour. When the cycle is completed, the<br />
tool remains at the cycle end position.<br />
Contour chamfer (“with return“)<br />
In this cycle, the tool approaches the workpiece, machines the<br />
chamfer and returns to the “start point“ at the end of the cycle.<br />
Cutting radius compensation is effective in the “with<br />
return“ mode.<br />
The direction of tool traverse depends on the algebraic sign<br />
for the parameter “element position J“ (see Help graphic).<br />
Parameter combinations for defining the chamfer: see<br />
support graphics.<br />
Rounding<br />
The cycle produces a rounding arc that is dimensioned relative to the<br />
corner of the workpiece contour. When the cycle is completed, the<br />
tool remains at the cycle end position.<br />
Contour rounding (“with return“)<br />
In this cycle, the tool approaches the workpiece, machines the<br />
rounding arc and returns to the “start point“ at the end of the cycle.<br />
Cutting radius compensation is effective in the “with<br />
return“ mode.<br />
The direction of tool traverse depends on the algebraic sign<br />
for the parameter “element position J“ (see support<br />
graphics).<br />
Single cuts<br />
15
16<br />
Clearance cycle group<br />
Cut longitudinal<br />
Cut transverse<br />
Roughing (expanded): The cycle machines the defined area, taking<br />
the optional contour elements into account.<br />
Finishing (expanded): The cycle finishes the defined contour section,<br />
taking the optional contour elements into account.<br />
Information on cycle parameters:<br />
B: Chamfer or rounding at end of contour<br />
B>0: Rounding radius<br />
B
Plunge longitudinal<br />
Plunge transverse<br />
Roughing (expanded): The cycle machines the defined area, taking<br />
the optional contour elements into account.<br />
Finishing (expanded): The cycle finishes the defined contour section,<br />
taking the optional contour elements into account.<br />
Information on cycle parameters:<br />
R: Rounding (on both sides of the contour valley)<br />
B1, B2: Chamfer or rounding (B1 contour start; B2 contour end)<br />
B>0: Rounding radius<br />
B
18<br />
Clearance cycle group<br />
ICP longitudinal contour-parallel<br />
ICP transverse contour-parallel<br />
With ICP cycles, you define the machining parameters within the<br />
cycle description and specify the contour to be machined in an ICP<br />
macro.<br />
Roughing: The cycle machines the area defined by the “start point X,<br />
Z” and the “ICP contour N“ parallel to the contour.<br />
Finishing: The cycle finishes the contour area defined by “ICP contour N”.<br />
Danger of collision!<br />
If the setup and tip angles of the tool have not been defined,<br />
the tool plunge-cuts into descending contours at the programmed<br />
plunging angle.<br />
If the setup and tip angles of the tool have been defined,<br />
the tool plunge-cuts at the maximum possible angle. In this<br />
case, the resulting contour will not be completely finished<br />
and may need to be reworked.
ICP cutting longitudinal<br />
ICP cutting transverse<br />
With ICP cycles, you define the machining parameters within the cycle<br />
description and specify the contour to be machined in an ICP macro.<br />
Roughing: The cycle machines the area defined by the “start point X, Z”<br />
and the “ICP contour N”.<br />
Finishing: The cycle finishes the contour area defined by “ICP contour N”.<br />
Finishing: The steeper the tool plunges into the material, the<br />
greater the feed rate decrease (maximum: 50%).<br />
Danger of collision!<br />
If the setup and tip angles of the tool have not been defined,<br />
the tool plunge-cuts into descending contours at the programmed<br />
plunging angle.<br />
If the setup and tip angles of the tool have been defined, the<br />
tool plunge-cuts at the maximum possible angle. In this case,<br />
the resulting contour will not be completely finished and may<br />
need to be reworked.<br />
Clearance cycle group<br />
19
Recessing cycles<br />
20<br />
Recessing radial<br />
Recessing axial<br />
Recessing (expanded): The cycle machines the defined area, taking<br />
the optional contour elements into account.<br />
Finishing (expanded): The cycle finishes the defined contour section,<br />
taking the optional contour elements into account.<br />
Information on the cycle parameters:<br />
R: Rounding (on both sides of contour valley)<br />
B1, B2: Chamfer or rounding (B1 contour start; B2 contour end)<br />
B>0: Rounding radius<br />
B
ICP recessing radial<br />
ICP recessing axial<br />
With ICP cycles, you define the machining parameters within the<br />
cycle description and specify the contour to be machined in an ICP<br />
macro.<br />
Recessing: The cycle machines the area defined by the “start point X,<br />
Z” and the “ICP contour N”.<br />
Finishing: The cycle finishes the contour area defined by “ICP contour N”.<br />
Recessing:<br />
“Cutting width P” is defined: infeeds † P.<br />
“Cutting width P” is not defined:<br />
Infeeds † 0.8*cutting width of tool.<br />
Finishing: The tool returns to the ”start point X, Z” at the end<br />
of the cycle.<br />
Recessing cycles<br />
<strong>21</strong>
Recessing cycles<br />
22<br />
Recess turning radial<br />
Recess turning axial<br />
Recess turning (expanded): The cycle machines the defined area<br />
with alternating recessing and roughing motions, taking the optional<br />
contour elements into account.<br />
Recess turning – finishing (expanded): The cycle finishes the defined<br />
contour section, taking the optional contour elements into account.<br />
Information on the cycle parameters:<br />
O: Recess feed rate<br />
R: Rounding (on both sides of contour valley)<br />
B1, B2: Chamfer or rounding (B1 contour start; B2 contour end)<br />
B>0: Rounding radius<br />
B
ICP recess turning radial<br />
ICP recess turning axial<br />
With ICP cycles, you define the machining parameters within the<br />
cycle description and specify the contour to be machined in an ICP<br />
macro.<br />
Recess turning: The cycle machines the area defined by the “start point<br />
X, Z” and the “ICP contour N” with alternating recessing and roughing<br />
motions.<br />
Recess turning – finishing: The cycle finishes the contour area defined by<br />
“ICP contour N”. The cycle machines the material defined in “Oversizes I,<br />
K“.<br />
Recess turning: Which points need to be defined?<br />
Falling contours: Only the “start point X, Z“ – not the “contour<br />
beginning point X1, Z1“<br />
Rising contours: The “start point X, Z“ and the “contour beginning<br />
point X1, Z1“<br />
Finishing:<br />
The tool returns to the “start point X, Z” at the end of the<br />
cycle.<br />
In “Oversizes I, K“, define the material that is machined in the<br />
finishing cycle.<br />
Recessing cycles<br />
23
Recessing cycles<br />
24<br />
Undercut H<br />
This cycle machines a “Form H” undercut. The workpiece is approached<br />
at a safety clearance. If you do not enter a value for W, it will<br />
be calculated from K and R. The final point of the undercut is then<br />
located at the “final point contour”.<br />
Information on the cycle parameters:<br />
R: Undercut radius – default: no circular element<br />
W: Plunge angle – default: W is calculated<br />
Undercut K<br />
The resulting contour geometry depends on the tool that is used.<br />
Cycle run<br />
1 Pre-position at an angle of 45° to safety clearance above “corner point<br />
contour X1, Z1” in rapid traverse.<br />
2 Plunge-cut at an angle of 45° – the path of traverse is calculated from<br />
the parameter “undercut depth I”.<br />
3 Retract to “start point X, Z“ on same path.<br />
This cycle does not take any cutting radius compensation<br />
values into account.
Undercut U<br />
This cycle machines a “Form U” undercut.<br />
Information on the cycle parameters:<br />
X2: End point of end face – default: the end face is not finished<br />
I: Undercut diameter<br />
K: Undercut breadth – If the cutting breadth of the tool is not<br />
defined, the control assumes that the tool's cutting width<br />
equals K.<br />
B Chamfer or rounding<br />
B>0: Rounding radius<br />
B0: Rounding radius<br />
B
Threadcut cycle group<br />
26<br />
Thread cycle (longitudinal) – Expanded<br />
This cycle cuts a single- or multi-start thread. With the function key,<br />
you can determine whether an external or internal thread is to be<br />
machined. The thread starts at the “start point X“ and ends at the “end<br />
point Z2“ (without a thread run-in or run-out).<br />
Information on the cycle parameters:<br />
F1: Thread pitch (is evaluated for the feed rate)<br />
U: Thread depth – default:<br />
external threads: U=0.6134*F1<br />
internal threads: U=–0.5413*F1<br />
I: 1st cutting depth – no input: I is calculated automatically<br />
from U and F1<br />
A: Feed angle – default: 30°; range: –60° < A < 60°<br />
A0: infeed on right thread flank<br />
J: Remaining cutting depth – default: 1/100 mm<br />
D: Number of grooves – default: 1 (= single-start thread)<br />
E: Incremental pitch (increases/reduces the pitch per revolution<br />
by E) – default: 0<br />
“Cycle STOP“ only becomes effective<br />
at the end of a thread cut.<br />
The feed rate and spindle speed overrides<br />
are disabled during execution of<br />
the cycle.<br />
The function “Last cut” can be activated<br />
at the end of the cycle. The last<br />
thread cut is repeated, allowing<br />
handwheel compensation.
Regroove (longitudinal) thread<br />
With this cycle, you can repair a single-start thread. Since you have<br />
already unclamped the workpiece, MANUALplus needs to know the<br />
exact position of the thread.<br />
Cycle run<br />
1 Pre-position threading tool so that tip is at center of thread groove.<br />
2 Transfer the tool position and the spindle angle with “Take over<br />
position”.<br />
3 Manually move the tool out of the thread groove.<br />
4 Position tool to “start point X, Z”.<br />
5 Start cycle with “Input finished”, then press the “Cycle START”<br />
button.<br />
Information on the cycle parameters:<br />
C: Measured angle (spindle angle)<br />
ZC: Measured position (tool position)<br />
F1: Thread pitch (is evaluated for the feed rate)<br />
U Thread depth – default:<br />
external threads: U=0.6134*F1<br />
internal threads: U=–0.5413*F1<br />
I: 1st cutting depth<br />
I
Threadcut cycle group<br />
28<br />
Tapered thread<br />
API thread<br />
This cycle cuts a single- or multi-start tapered/API thread. With the<br />
function key, you can determine whether an external or internal<br />
thread is to be machined. The thread starts at the “start point X“ and<br />
ends at the “end point Z2“ (without an thread run-in or run-out). With<br />
an API thread, the thread depth is decreased at the thread runout.<br />
Information on the cycle parameters:<br />
F1: Thread pitch (is evaluated for the feed rate)<br />
U: Thread depth – no input:<br />
external threads: U=0.6134*F1<br />
internal threads: U=–0.5413*F1<br />
I: 1st cutting depth – no input: I is calculated automatically from<br />
U and F1<br />
A: Feed angle – default: 30°; range: –60° < A < 60°<br />
A0: infeed on right thread flank<br />
J: Remaining cutting depth – no input: 1/100 mm<br />
D: Number of grooves – default: 1 (= single-start thread)<br />
E: Incremental pitch (increases/reduces the pitch per revolution<br />
by E) – default: 0<br />
”Cycle STOP” only becomes effective at the end of a thread cut.<br />
The feed rate and spindle speed overrides are disabled<br />
during execution of the cycle.<br />
The function ”Last cut” can be activated at the end of the<br />
cycle. This function repeats the last thread cut, allowing<br />
handwheel compensation.<br />
Tapered thread<br />
API thread
Undercut cycles<br />
28<br />
Thread undercut DIN 76<br />
Undercut DIN 509 E<br />
Undercut DIN 509 F<br />
These cycles execute an undercut, and can also machine a cylinder<br />
start chamfer, the adjoining cyclinder and the adjoining end face.<br />
Undercut parameters that are not defined are automatically calculated<br />
from the standard table.<br />
Thread undercut: If you enter an “undercut oversize P”, the undercut<br />
cycle will be divided into pre-turning and finish-turning. “P“ is the<br />
longitudinal oversize. The transverse oversize is preset to 0.1 mm.<br />
Information on the cycle parameters:<br />
FP: Thread pitch (with thread undercut) – default: FP is determined<br />
from the diameter<br />
E: Feed reduction (for plunge-cutting) – default: feed rate F<br />
R: Undercut radius – default: value from standard table.<br />
The undercut radius is executed on both sides of the undercut.<br />
B: Cylinder 1st cut length– default: no chamfer machined at start<br />
of cylinder<br />
WB: 1st cut angle – default: 45 °<br />
RB: 1st cut radius– default: no chamfer radius is machined<br />
All parameters that you enter will be accounted for – even if the<br />
standard table prescribes other values.<br />
Example: Thread undercut DIN 76
30<br />
Drilling and boring cycles<br />
Drilling axial<br />
Drilling radial<br />
This cycle drills a hole on the end face/lateral surface of the workpiece.<br />
Information on the cycle parameters:<br />
C: Spindle angle (C-axis position) – default: current spindle position<br />
Z1/X1: Start point drill – no input: drilling will start from position Z/X<br />
E Dwell time (for chip breaking at end of hole) –<br />
default: 0<br />
AB Drilling lengths – default: 0<br />
V: Drilling variants – default: 0<br />
0: Without feed reduction<br />
1: Reduction for drilling through<br />
2: Reduction for spot drilling<br />
3: Reduction for spot drilling and drilling through<br />
If you program both “AB” and “V”, the feed rate is reduced<br />
for spot and through drilling (reduction factor: 50%).<br />
MANUALplus uses the tool parameter “driven tool” to determine<br />
whether the programmed spindle speed and feed rate<br />
apply to the spindle or the driven tool.<br />
Drilling axial<br />
Drilling radial
Deep-drilling (pecking) axial<br />
Deep-drilling (pecking) radial<br />
The bore hole on the end face/cylindrical surface is drilled in several<br />
passes. After each pass, the drill retracts and, after a dwell time,<br />
advances again to the first pecking depth, minus the safety distance.<br />
Information on the cycle parameters:<br />
C: Spindle angle (C-axis position) – default: current spindle position<br />
Z1/X1: Start point drill – no input: drilling will start from position Z/X<br />
P: 1st hole depth – no input:<br />
hole will be drilled in one pass<br />
IB: Hole depth reduction value – default: 0<br />
JB: Minimum hole depth – default: 1/10 of P<br />
B: Return length – default: retract to “start point”<br />
E Dwell time – default: 0<br />
AB Drilling lengths – default: 0<br />
V: Drilling variants – default: 0<br />
0: Without feed reduction<br />
1: Reduction for drilling through<br />
2: Reduction for spot drilling<br />
3: Reduction for spot drilling and drilling through<br />
If you program both “AB” and “V”, the feed rate is reduced<br />
for spot and through drilling (reduction factor: 50%).<br />
MANUALplus uses the tool parameter “driven tool” to determine<br />
whether the programmed spindle speed and feed<br />
rate apply to the spindle or the driven tool.<br />
Deep-drilling axial<br />
Deep-drilling radial<br />
Drilling and boring cycles<br />
31
32<br />
Drilling and boring cycles<br />
Tapping axial<br />
Tapping radial<br />
With this cycle, you can tap a thread into a bore hole on the end face/<br />
lateral surface of a workpiece. The tapping tool requires a certain<br />
overrun at the start of thread which is defined in the parameter “slop.<br />
length B“ to reach the programmed spindle speed and feed rate.<br />
Information on the cycle parameters:<br />
C: Spindle angle (C-axis position) – default: current spindle position<br />
F1: Thread pitch (is evaluated for the feed rate) – default: thread pitch of<br />
the tool<br />
B: Run-in length<br />
Default: 2 * thread pitch F1<br />
SR: Return speed – Default: same spindle speed as for tapping<br />
MANUALplus uses the tool parameter “driven tool” to determine<br />
whether the programmed spindle speed and feed rate<br />
apply to the spindle or the driven tool.<br />
Tapping axial<br />
Tapping radial
Thread milling axial<br />
This cycle mills a thread into an exisiting bore hole.<br />
The tool is positioned to the “thread end point“ within the bore hole.<br />
The tool then approaches with the “approach radius R,“ mills the<br />
thread in a 360° revolution, advancing by the “thread pitch F“. The<br />
cycle then retracts the tool and returns it to the start point.<br />
Information on the cycle parameters:<br />
C: Spindle angle (C-axis position)<br />
Z1: Start point thread– default: Start point Z<br />
Z2: End point thread<br />
I: Internal thread diameter<br />
R: Approach radius – default: (I – cutter diameter)/2<br />
F1: Thread pitch<br />
J: Thread direction – default: 0<br />
J=0: Right<br />
J=1: Left<br />
H: Cutting direction – default: 0<br />
H=0: Up-cut milling<br />
H=1: Down-cut milling<br />
Drilling and boring cycles<br />
33
Rapid traverse positioning<br />
This cycle switches on the C axis, and positions the spindle (C axis) and<br />
the tool.<br />
Information on the cycle parameters:<br />
X2, Z2: End point<br />
C2: Final angle<br />
A subsequent manual milling cycle switches off the C axis.<br />
“Rapid traverse positioning“ is is only required in the Manual<br />
mode.<br />
Groove axial<br />
Groove radial<br />
This cycle creates a groove on the end face/lateral surface of a<br />
workpiece. The groove width equals the cutter diameter.<br />
Information on the cycle parameters:<br />
C: Spindle angle (C-axis position) – default: current spindle angle<br />
Z1/X1: Upper edge of milling – default: Start point Z/X<br />
Z2/X2: Lower edge of milling<br />
P: Plunging depth – default: total depth in one infeed<br />
FZ: Infeed – default: active feed rate Groove axial<br />
Milling cycles<br />
33
Milling cycles<br />
34<br />
Figure axial<br />
Figure radial<br />
Depending on the parameters, the cycle either mills a contour or roughs/<br />
finishes a pocket on the end face/lateral surface.<br />
You can define the following contours:<br />
Rectangle (Q=4, LB)<br />
Square (Q=4, L=B)<br />
Circle (Q=0, RE>0, L and B: no entry)<br />
Triangle or polygon (Q=3 or Q>4, L>0)<br />
Information on the cycle parameters:<br />
U: Overlap factor<br />
No entry: Contour milling<br />
U>0: Pocket milling – (minimum) overlap of the milling paths<br />
= U*cutter diameter<br />
H: Cutting direction – default: 0<br />
H=0: Up-cut milling<br />
H=1: Down-cut milling<br />
J: Contour milling:<br />
J=0: On the contour<br />
J=1: Inside<br />
J=2: Outside<br />
Pocket milling:<br />
J=0: From the inside out<br />
J=1: From the outside in<br />
O: Milling procedure (only for pocket milling) – default: 0<br />
O=0: Roughing<br />
O=1: Finishing<br />
Figure axial<br />
Figure radial
ICP figure axial<br />
ICP figure radial<br />
Depending on the parameters, the cycle either mills a contour or roughs/<br />
finishes a pocket on the end face/lateral surface.<br />
Information on the cycle parameters:<br />
U: Overlap factor<br />
No entry: Contour milling<br />
U>0: Pocket milling – (minimum) overlap of the milling<br />
paths = U*cutter diameter<br />
H: Cutting direction – default: 0<br />
H=0: Up-cut milling<br />
H=1: Down-cut milling<br />
J: Contour milling:<br />
J=0: On the contour<br />
J=1: Inside<br />
J=2: Outside<br />
Pocket milling:<br />
J=0: From the inside out<br />
J=1: From the outside in<br />
O: Milling procedure (only for pocket milling) – default: 0<br />
O=0: Roughing<br />
O=1: Finishing<br />
ICP figure axial<br />
ICP figure radial<br />
Milling cycles<br />
35
Milling cycles<br />
36<br />
Face milling<br />
Depending on the parameters, the cycle mills on the end face:<br />
One or two surfaces (Q=1 or Q=2, B>0)<br />
One rectangle (Q=4, LB)<br />
One square (Q=4, L=B)<br />
One triangle or polygon (Q=3 or Q>4, L>0)<br />
One circle (Q=0, RE>0, L and B: no entry)<br />
For one or two surfaces, “B“ defines the remaining thickness (the<br />
material which remains). For an even number of surfaces you can<br />
program “B“ instead of “V“.<br />
Information on the cycle parameters:<br />
B: Width across flats<br />
When Q=1, Q=2: B is the remaining thickness<br />
Rectangle: Rectangle width<br />
Square, polygon (Q‡4): B is the width across flats<br />
Circle: no entry<br />
A: Angle to the X axis – default: 0<br />
Polygon (Q>2): Position of the figure<br />
Circle: no entry<br />
H: Cutting direction – default: 0<br />
H=0: Up-cut milling<br />
H=1: Down-cut milling<br />
J: Uni-/bidirectional<br />
J=0: Unidirectional<br />
J=1: Bidirectional<br />
O: Roughing/finishing – default: 0<br />
O=0: Roughing<br />
O=1: Finishing
Helical groove milling<br />
The cycle mills a helical groove from “Z1“ to “Z2“. “C1“ defines the<br />
position of the groove beginning. Use “P“ and “K“ to define a ramp at<br />
the beginning and end of the groove. The groove width equals the<br />
cutter diameter.<br />
The first downfeed is carried out with “I“ – MANUALplus calculates the<br />
subsequent downfeedings as follows:<br />
Current downfeed = I * (1 – (n–1) * E)<br />
n: nth downfeeding<br />
The downfeed is reduced step-by-step to >= 0.5 mm. After that each<br />
downfeed is 0.5 mm.<br />
Information on the cycle parameters:<br />
C1: Start angle<br />
X1: Diameter<br />
Z1, Z2: Start point/end point groove<br />
F1: Pitch<br />
P, K: Approach length, run-out length<br />
U: Groove depth<br />
I: Maximum downfeed<br />
E: Cutting depth reduction<br />
Milling cycles<br />
37
Pattern linear axial<br />
The function “Pattern linear axial“ can be activated in drilling cycles<br />
(drilling, pecking, tapping) and milling cycles (groove, ICP contour) to<br />
machine a hole or milling pattern arranged at regular spacing in a<br />
straight line on the end face.<br />
You describe the “Pattern start point/end point“ and the individual<br />
pattern positions with the following parameter combinations:<br />
Pattern start point:<br />
X1, C1 or<br />
XK, YK<br />
Pattern positions:<br />
Ii, Ji and Q<br />
I, J and Q<br />
Hole pattern: MANUALplus generates the commands M12<br />
and M13 (tighten/release shoe brake) under the following<br />
conditions: the drilling/pecking tool must be “driven“ (Parameter<br />
“Tool driven H“) and the “Turning direction MD“ must<br />
be defined.<br />
ICP milling contours: When the contour start point is not the<br />
coordinate system origin, the distance “contour start point –<br />
coordinate system origin“ is added to the pattern position.<br />
Drilling and milling patterns<br />
39
40<br />
Drilling and milling patterns<br />
Pattern circular axial<br />
The function “Pattern circular axial“ can be activated in drilling cycles<br />
(drilling, pecking, tapping) and milling cycles (groove, ICP contour) to<br />
machine a hole or milling pattern arranged at regular spacing on a<br />
circle or circular arc on the end face.<br />
You describe the center point of the circular arc and the individual pattern<br />
positions with the following parameter combinations:<br />
XM, CM<br />
XK, YK<br />
Hole pattern: MANUALplus generates the commands M12<br />
and M13 (tighten/release shoe brake) under the following<br />
conditions: the drilling/pecking tool must be “driven“ (Parameter<br />
“Tool driven H“) and the “Turning direction MD“ must be<br />
defined.<br />
ICP milling contours: When the contour start point is not the<br />
coordinate system origin, the distance “contour start point –<br />
coordinate system origin“ is added to the pattern position.
Pattern linear radial<br />
The function “Pattern linear radial“ can be activated in drilling cycles<br />
(drilling, pecking, tapping) and milling cycles (groove, ICP contour) to<br />
machine a hole or milling pattern arranged at regular spacing in a straight<br />
line on the cyclindrical surface.<br />
Information on the cycle parameters:<br />
C: Spindle angle – default: current spindle position<br />
Z1, C1: Start point pattern – default: “start point Z“ is used as the<br />
starting point for the pattern<br />
ZE: End point pattern – default: Z1 is used as the end point<br />
Wi: Angle increment (pattern distance) – default: The holes/millings<br />
are arranged on the cylindrical surface at regular spacing<br />
ICP milling contours: When the contour start point is not the<br />
coordinate system origin, the distance “contour start point –<br />
coordinate system origin“ is added to the pattern position.<br />
Drilling and milling patterns<br />
41
42<br />
Drilling and milling patterns<br />
Pattern circular radial<br />
The function “Pattern circular radial“ can be activated in drilling cycles<br />
(drilling, pecking, tapping) and milling cycles (groove, ICP contour) to<br />
machine a hole or milling pattern arranged at regular spacing on a circle<br />
or circular arc on the cylindrical surface.<br />
Information on the cycle parameters:<br />
C: Spindle angle (C-axis position) – default: current spindle position<br />
ZM,CM: Center of pattern<br />
A: Angle of 1st hole (spindle angle) – default: 0°<br />
Wi: Angle increment (pattern distance) – default: The holes/millings<br />
are arranged on the cylindircal surface at regular spacing<br />
ICP milling contours: When the contour start point is not the<br />
coordinate system origin, the distance “contour start point –<br />
coordinate system origin“ is added to the pattern position.
DIN Cycle<br />
You only need to define the number of the DIN macro in the input<br />
window.<br />
The machine data that are programmed in the cycle (in Manual mode:<br />
the currently active machine data) become effective as soon as you<br />
start cycle execution. You can change the machine data (S, F, T) at any<br />
time by editing the DIN macro.<br />
In this cycle, no start point is defined. Please keep in mind that<br />
the tool moves on a diagonal path from the current position to<br />
the first position that is programmed in the DIN macro.<br />
DIN-Zyklus<br />
43
ICP Programming<br />
44<br />
ICP Programming<br />
After calling an IPC cycle, you can activate the ICP editor with the<br />
function key “Edit ICP“.<br />
Programming and adding to ICP contours<br />
You program an ICP contour by entering the contour elements one<br />
after the other in the correct sequence. Form elements (chamfers,<br />
roundings, undercuts) can be entered as part of the contour or can be<br />
“superimposed“ when the basic contour is finished. The transition to<br />
the next contour element is determined with the “Tangential transition“<br />
function key.<br />
If you extend an ICP contour, the new element is “joined onto“ the<br />
last contour element. A small box indicates the last contour element<br />
when the ICP contour is displayed but is not being edited.<br />
Each unsolved contour element is identified by a small symbol below<br />
the graphics window.<br />
Contour direction: ICP cycles rough and finish in the contour direction.<br />
You change the contour direction with “Turn contour“.<br />
Changing a contour element<br />
Select the element you wish to change and press “Change element“. The<br />
data is then prepared for editing.<br />
If a contour contains “unsolved“ contour elements, you cannot change<br />
the “solved“ elements. You can, however, set or delete the “tangential<br />
transition“ for the element located directly before the unsolved contour<br />
area.<br />
If the element to be changed is an unsolved element, the<br />
associated symbol is marked “selected“.<br />
The element type and the direction of rotation of a circular<br />
arc cannot be changed.<br />
Soft keys Symbol<br />
Select “Superpositioning“<br />
Tangential transition<br />
from linear to circular element<br />
Tangential transition<br />
from circular to circular element or<br />
linear element (rotation direction<br />
see symbol)<br />
Colors in the contour graphics<br />
Yellow: For solved elements<br />
Gray: For unsolved, depictable elements<br />
Red: Selected solution, selected<br />
element, selected corner<br />
Blue: Remaining contour
ICP Contour Elements<br />
Line entry: First select the direction with the corresponding menu<br />
symbol and then enter the contour element dimensions. For a line in<br />
an angle, refer to the help graphics for the direction of the angle.<br />
Circular element entry: Select the direction of rotation and the type of<br />
dimensioning with the corresponding menu symbols. MANUALplus<br />
also requires an indication for the end point, either by entering:<br />
the midpoint,<br />
the radius, or<br />
the midpoint and the radius<br />
End face and lateral surface contours: Dimensioning is either<br />
Cartesian or polar. The setting of the “Polar“ function key is the<br />
determining factor. You can enter Cartesian coordinates as absolute or<br />
incremental values.<br />
The start point of the contour is defined when you<br />
describe the first contour element.<br />
The end point of the contour is determined by the target<br />
point of the last contour element.<br />
The contour element is finished at a special feed rate.<br />
MANUALplus automatically calculates all missing<br />
coordinates, points of intersection, center points, etc., that<br />
can be derived mathematically.<br />
You can enter contour coordinates as absolute or incremental<br />
values.<br />
If you call the “Selection of ICP contours“, MANUALplus<br />
displays – depending on the cycle – only ICP contours for<br />
the turning contour, end face or lateral surface.<br />
Call lines menu<br />
Call arcs menu<br />
ICP Programming<br />
45
ICP Programming<br />
46<br />
Chamfer<br />
Rounding<br />
The corner point is defined by “XS, ZS”. You need only enter the “chamfer<br />
width B”/”rounding radius B”.<br />
Turning contours: If the first element of the ICP contour is a chamfer/<br />
rounding, it is necessary to specify the position of the chamfer/<br />
rounding with “J”.<br />
Parameters<br />
XS, ZS: Contour corner point<br />
B: Chamfer width / rounding radius<br />
J: Element position<br />
J = 1: Transverse element in +X direction<br />
J=–1: Transverse element in –X direction<br />
J = 2: Longitudinal element in +Z direction<br />
J=–2: Longitudinal element in –Z direction<br />
F: Special feed<br />
Chamfer/rounding for turning contours<br />
Chamfer/rounding for end face and lateral surface<br />
contours
Thread undercut DIN 76<br />
Undercut DIN 509 E<br />
Undercut DIN 509 F<br />
An “undercut” consists of a longitudinal element, an undercut and a<br />
transverse element. You can start the undercut definition with either the<br />
longitudinal or the transverse element.<br />
Thread undercut: the diameter of the longitudinal element represents the<br />
thread diameter (or, with internal threads, the core diameter).<br />
Parameters that are not defined are automatically calculated from the<br />
standard table. Also for a thread undercut:<br />
“FP“ is calculated from “XS“<br />
“I, K, W, and R“ are calculated from “FP“<br />
Parameters (depending on the type of the undercut)<br />
XS, ZS: Start point of the undercut<br />
X, Z: End point of the undercut<br />
FP: Thread pitch<br />
I: Undercut diameter – default: value from the standard table<br />
K: Undercut length – default: value from the standard table<br />
W: Undercut angle – default: value from the standard table<br />
R: Undercut radius – default: value from the standard table<br />
P: Transverse depth– default: value from the standard table<br />
A: Transverse angle– default: value from the standard table<br />
U: Finishing oversize– default: no finishing oversize<br />
J: Element position– default: 1<br />
J=1: Undercut begins with longitudinal<br />
element<br />
J=–1: Undercut begins with transverse<br />
element<br />
F: Special feed<br />
The “element position J” cannot be entered<br />
when superimposing the undercut<br />
and cannot be changed when programming<br />
changes to ICP contours.<br />
If you are programming an internal thread,<br />
it is advisable to preset the “FP” since the<br />
diameter of the longitudinal element is not<br />
the thread diameter. If you have<br />
MANUALplus calculate the thread pitch automatically,<br />
slight deviations may occur.<br />
ICP Programming<br />
47
Overview of G Commands<br />
48<br />
DIN Programming<br />
Rohteilbeschreibung Seite<br />
G20 Futterteil Zylinder/Rohr 51<br />
G<strong>21</strong> Rohteilkontur 51<br />
Tool positioning without machining Page<br />
G0 Rapid traverse positioning 52<br />
G14 Approach tool change point 52<br />
Simple linear and circular paths Page<br />
G1 Linear path 53<br />
G2 Circular path – increm. center point coordinates 54<br />
G3 Circular path – increm. center point coordinates 54<br />
G12 Circular path – absolute center coordinates 54<br />
G13 Circular path – absolute center coordinates 54<br />
Feed rate, spindle speed Page<br />
G26 Speed limitation for spindle 55<br />
G126 Speed limitation for driven tool 55<br />
G64 Interrupted (intermittent) feed 55<br />
G94 Constant feed 55<br />
G95 Feed per revolution 55<br />
G195 Feed per revolution of driven tool 55<br />
G96 Constant cutting speed 55<br />
Feed rate, spindle speed Page<br />
G196 Constant cutting speed for driven tool 55<br />
G97 Spindle speed (in rev/min) 55<br />
G197 Spindle speed (in rev/min) for driven tool 55<br />
Tool-tip /milling cutter radius compensation (TRC/MCRC) Page<br />
G40 Switch off TRC/CRC 56<br />
G41 Switch on TRC/CRC 56<br />
G42 Switch on TRC/CRC 56<br />
Tool compensation Page<br />
G148 Change cutter compensation 56<br />
G149 Additive correction 57<br />
G150 Compensate right tool tip 57<br />
G151 Compensate left tool tip 57<br />
Zero point displacement Page<br />
G51 Zero point displacement 58<br />
G56 Additive zero point displacement 58<br />
G59 Absolute zero point displacement 59<br />
Oversizes Page<br />
G57 Paraxial oversize 60<br />
G58 Contour-parallel oversize 60<br />
Clearance cycle group Page<br />
G80 End of cycle 61<br />
G81 Longitudinal roughing 61<br />
G82 Transverse roughing 61<br />
G817 Longitudinal contour roughing 62
Clearance cycle group Page<br />
G818 Longitudinal contour roughing 62<br />
G819 Longitudinal contour roughing with recessing 63<br />
G827 Transverse contour roughing 62<br />
G828 Transverse contour roughing 62<br />
G829 Transverse contour roughing with recessing 63<br />
G83 Simple contour repeat cycle 64<br />
G836 Contour-parallel roughing 65<br />
G87 Line with radius 66<br />
G88 Line with chamfer 66<br />
G89 Contour finishing cycle 67<br />
Grooving cycles Page<br />
G86 Simple recessing cycle 68<br />
G861 Axial contour cutting 69<br />
G862 Radial contour cutting 69<br />
G863 Axial contour finishing cut 71<br />
G864 Radial contour finishing cut 71<br />
G865 Simple axial cutting cycle 70<br />
G866 Simple radial cutting cycle 70<br />
G867 Axial finishing cut 71<br />
G868 Radial finishing cut 71<br />
Recess-turning cycle group Page<br />
G811 Simple axial recess-turning cycle 72<br />
G815 Axial recess-turning cycle 73<br />
G8<strong>21</strong> Simple radial recess-turning cycle 72<br />
G825 Radial recess-turning cycle 73<br />
Threadcut cycle group Page<br />
G31 Universal thread cycle 74<br />
G32 Simple thread cycle 75<br />
G33 Individual thread cut 76<br />
G35 Metric ISO thread 77<br />
G350 Simple longitudinal single-start thread 78<br />
G351 Extended longitudinal multi-start thread 78<br />
G352 Tapered API thread 79<br />
G353 Tapered thread 80<br />
G799 Axial thread milling 90<br />
Undercut cycles, cut-off cycle Page<br />
G25 Undercut contour (DIN509 E, DIN509 F, DIN76) 81<br />
G85 Undercut cycle (DIN509 E, DIN509 F, DIN76) 82<br />
G851 Undercut with cylinder machining DIN 509 E 83<br />
G852 Undercut with cylinder machining DIN 509 F 83<br />
G853 Undercut with cylinder machining DIN 76 83<br />
G856 Undercut form U 84<br />
G857 Undercut form H 85<br />
G858 Undercut form K 85<br />
G859 Cut-off cycle 86<br />
Drilling cycles Page<br />
G36 Tapping cycle 89<br />
G71 Drilling cycle 87<br />
G74 Pecking cycle 88<br />
G799 Axial thread milling 90<br />
Overview of G Commands<br />
49
50<br />
Overview of G Commands<br />
End-face machining Page<br />
G100 End-face rapid traverse 91<br />
G101 End-face linear path 92<br />
G102 End-face circular arc 93<br />
G103 End-face circular arc 93<br />
G304 Figure definition end-face complete circle 97<br />
G305 Figure definition end-face rectangle 97<br />
G307 Figure definition end-face polygon 98<br />
G791 End-face linear groove 94<br />
G793 End-face contour milling cycle 95<br />
G797 End-face surface milling 96<br />
G799 Axial thread milling 90<br />
Lateral-surface machining Page<br />
G120 Lateral-surface reference diameter 99<br />
G110 Lateral-surface rapid traverse 99<br />
G111 Lateral-surface linear path 100<br />
G112 Lateral-surface circular arc 101<br />
G113 Lateral-surface circular arc 101<br />
G314 Figure definition lateral-surface complete circle 104<br />
G315 Figure definition lateral-surface rectangle 105<br />
G317 Figure definition lateral-surface polygon 105<br />
G792 Lateral-surface linear groove 102<br />
G794 Lateral-surface contour milling cycle 103<br />
G798 Helical groove milling 104<br />
Drilling and milling patterns Page<br />
G743 Linear pattern on end face 106<br />
G744 Linear pattern on lateral surface 106<br />
G745 Circular pattern on end face 107<br />
G746 Circular pattern on lateral surface 108<br />
Other G Functions Page<br />
G4 Dwell time 57<br />
G60 Deactivate protection zone 57<br />
See the User's Manual<br />
G9 Block precision stop<br />
G152 Datum shift (C axis)<br />
G153 Standardizing the C axis<br />
G193 Feed rate per tooth<br />
G204 Wait for moment
Chuck part, cylinder/tube G20<br />
G20 describes the workpiece blank and the setup used. This<br />
information is evaluated during the simulation.<br />
Parameters<br />
X: Diameter<br />
Z: Length (including transverse allowance and clamping range)<br />
K: Right edge (transverse allowance)<br />
I: nside diameter for workpiece blank ”cylinder.”<br />
B: Clamping range<br />
J: Type of clamping<br />
0: No clamping<br />
1: Outside clamping<br />
2: Inside clamping<br />
Workpiece blank contour G<strong>21</strong><br />
G<strong>21</strong> describes the setup used. The workpiece blank is described with<br />
G1, G2/3 and G12/13 commands that follow immediately after G<strong>21</strong>. G80<br />
concludes the contour description.<br />
This information is evaluated during the simulation.<br />
Parameters<br />
X: Clamping diameter<br />
Z: Clamping position in Z<br />
B: Clamping range<br />
J: Type of clamping<br />
0: No clamping<br />
1: Outside clamping<br />
2: Inside clamping<br />
Definition of Workpiece Blank<br />
51
Tool positioning<br />
without machining<br />
52<br />
Rapid traverse G0<br />
The tool moves at rapid traverse along the shortest path to the target<br />
point.<br />
Parameters<br />
X, Z: Target point (X diameter)<br />
G0 is also used in contour descriptions for defining the start point.<br />
Tool change point G14<br />
The slide moves in rapid traverse to the tool change point. In setup<br />
mode, define permanent coordinates for the tool change.<br />
Parameters<br />
Q: Sequence – default: 0<br />
0: Diagonal path of traverse<br />
1: First in X axis, then in Z<br />
2: First in Z axis, then in X<br />
3: X axis only<br />
4: Z axis only
Linear path G1<br />
The tool moves linearly at the feed rate to the “end point“.<br />
Parameters<br />
X, Z: End point (X diameter)<br />
A: Angle (angular direction): see graphic support window<br />
B: Chamfer/rounding<br />
B left undefined: angential transition<br />
B=0: Nontangential transition<br />
B>0: Rounding radius<br />
B
Simple Linear and<br />
Circular Paths<br />
54<br />
Circular path<br />
G2, G3 – incremental midpoint dimensions<br />
G12, G13 – absolute midpoint dimensions<br />
The tool moves in a circular arc at the feed rate to the “end point“.<br />
Parameters<br />
X, Z: End point (X diameter)<br />
R: Radius<br />
Q: Point of intersection – default: Q=0<br />
B: Chamfer/rounding<br />
B left undefined: Tangential transition<br />
B=0: Nontangential transition<br />
B>0: Rounding radius<br />
B
Speed limitation for spindle G26/<br />
driven tool G126<br />
G26/G126 limits the speed. A speed limitation remains in effect until a<br />
new value is programmed for G26/G126.<br />
Parameters<br />
S: (Maximum) speed<br />
The speed limitation remains in effect even after concluding<br />
the DIN program and exiting “program run“.<br />
If the speed programmed is greater than the speed set in<br />
the machine parameter “General parameters for spindle – absolute<br />
maximum speed“, then the speed limit of this parameter<br />
takes effect.<br />
Interrupted (intermittent) feed G64<br />
G64 interrupts the programmed feed for a short period of time. The<br />
function remains in effect until you program G64 without parameter<br />
definitions.<br />
Parameters<br />
E: Pause duration – range: 0.01 s < E < 999 s<br />
F: Feed duration – range: 0.01 s < E < 999 s<br />
Feed rate constant G94 (minute feed)<br />
G94 defines the feed rate independent of drive.<br />
Parameters<br />
F: Feed rate in mm/min or inch/min<br />
Feed per revolution G95/G195<br />
G95/G195 defines the feed rate as a function of drive.<br />
G95: Referred to main spindle<br />
G195: Referred to spindle 1 (driven tool)<br />
Parameters<br />
F: Feed rate in mm/revolution or inch/revolution<br />
Constant cutting speed G96/G196<br />
G96/G196 defines a constant cutting speed.<br />
G96: The speed of the main spindle is dependent on<br />
the X position of the tool tip.<br />
G196: The speed of spindle 1 (driven tool) is dependent<br />
on the diameter of the tool.<br />
Parameters<br />
S: Cutting speed in m/min or ft/min<br />
Spindle speed G97 / G197<br />
G97: Constant speed for the main spindle<br />
G197: Constant speed for spindle 1 (driven tool)<br />
Parameters<br />
S: Speed in revolutions per minute<br />
Feed rate, spindle speed<br />
55
Tool-tip and milling cutter<br />
radius compensation<br />
56<br />
Tool-tip and milling cutter radius compensation (TRC,<br />
MCRC) G40, G41, G42<br />
G40: Switch off TRC/MCRC<br />
TRC/MCRC remains in effect until a block with G40 is reached.<br />
The block containing G40, or the block after G40 muct contain a linear<br />
path of traverse (G14 is not permissible).<br />
G41/G42: Switch on TRC/MCRC<br />
A linear path of traverse (G0/G1) must be programmed in or after the<br />
block containing G41/G42.<br />
TRC/MCRC is taken into account from the next path of traverse.<br />
G41: TRC/MCRC with direction of traverse to the left of the contour –<br />
inside machining (with direction of traverse in –Z)<br />
G42: TRC/MCRC with direction of traverse to the right of the contour –<br />
outside machining (with direction of traverse in –Z)<br />
(Changing the) cutter compensation G148<br />
With “O“ you can define which wear compensation values are to be<br />
taken into account.<br />
DX and DZ become effective after program start and after a T command.<br />
Parameters<br />
O: Selection – default: 0<br />
O=0: DX, DZ active<br />
O=1: DS, DZ active<br />
O=2: DX, DS active<br />
Some recessing and roughing cycles as well<br />
as the milling cycles already include the<br />
TRC/MCRC calls. You must therefore ensure<br />
that TRC/MCRC is disabled before you call<br />
these cycles. The commands G40, G41, G42<br />
must not be used within the cycles.<br />
The recessing cycles G861 to G868 and recess-turning<br />
cycles G81x and G82x automatically<br />
take the “correct“ wear compensation<br />
into account.
Additive correction G149<br />
To activate the additive correction function, program G149 followed by a<br />
“D number“ (for example: G149 D901). “G149 D900“ resets the additive<br />
correction function.<br />
Additive corrections are effective from the block in which G149 is<br />
programmed and remain effective until<br />
the next “G149 D900“<br />
the next tool change<br />
the end of program.<br />
Parameters<br />
D: Additive correction – default: D900 – Range: 900 to 916<br />
Compensate right tool tip G150<br />
Compensate left tool tip G151<br />
With recessing tools, the “tool orientation“ function defines whether the<br />
tool reference point is set at the left or the right side of the tool tip.<br />
G150: Reference point at right of tool tip<br />
G151: Reference point at left of tool tip<br />
G150/G151 is effective from the block in which it is programmed and<br />
remains effective until<br />
the next tool change<br />
the end of program.<br />
Dwell time G4<br />
MANUALplus interrupts the program run for the<br />
programmed length of time before executing the next<br />
program block. If G4 is programmed together with a<br />
path of traverse in the same block, the dwell time<br />
only becomes effective after the path of traverse has<br />
been executed.<br />
Parameters<br />
F: Dwell time – Range: 0 s < F < 999 s<br />
Deactivate protection zone G60<br />
The function G60 cancels a programmed monitoring<br />
of the protection zone. G60 is only effective in the<br />
block in which it is programmed.<br />
Corrections,<br />
other G Functions<br />
57
Zero point displacement<br />
58<br />
Zero point displacement G51<br />
G51 displaces the workpiece datum by “Z“ (or “X“). The displacement is<br />
referenced to the workpiece datum (setup operation: “Setting axis<br />
values“).<br />
Even if you shift the datum several times with G51, the displacement is<br />
always referenced to the workpiece datum from the setup mode.<br />
A workpiece datum defined with G51 remains in effect up to the end of<br />
program or until it is canceled by another zero point displacement.<br />
Parameters<br />
X, Z: Displacement (X as diameter)<br />
Additive zero point displacement G56<br />
G56 displaces the workpiece datum by “Z“ (or “X“). The displacement is<br />
referenced to the currently active workpiece datum.<br />
If you shift the workpiece datum several times with G56, the displacement<br />
is added to the currently active datum.<br />
Parameters<br />
X, Z: Displacement (X as diameter)<br />
G51 and G59 each cancel additive zero point displacements.
Absolute zero point displacement G59<br />
G59 sets the workpiece datum to “X, Z“. The new datum is valid to the<br />
end of program.<br />
Parameters<br />
X, Z: Displacement (X as diameter)<br />
G59 cancels all previous zero point displacements (with G51,<br />
G56 or G59).<br />
Zero point displacement<br />
59
Oversizes<br />
60<br />
Axis-parallel (paraxial) oversize G57<br />
G57 defines different oversizes for X and Z. G57 must be programmed<br />
before the cycle in which the oversize is to be taken into consideration.<br />
The following cycles take the oversizes into consideration:<br />
Roughing cycles: G81, G817, G818, G819, G82, G827, G828, G829, G83<br />
Recess and recess-turning cycles: G81x, G82x, G86x<br />
Cycles G81, G82 and G83 do not delete the oversizes after cycle<br />
completion. For the other cycles, the oversizes are not valid after cycle<br />
completion.<br />
Parameters<br />
X / Z: Oversize in X / Z (X as diameter)<br />
Contour-parallel oversize (equidistant) G58<br />
G58 defines a contour-parallel oversize. G58 must be programmed<br />
before the cycle in which the oversize is to be taken into consideration.<br />
A negative oversize is permitted with Cycle G89.<br />
The following cycles take the oversize into consideration:<br />
Roughing cycles: G817, G818, G819, G827, G828, G829, G83<br />
Recess and recess-turning cycles: G81x, G82x, G86x<br />
Cycle G83 does not delete the oversizes after cycle completion.<br />
Parameters<br />
P: Oversize
End of cycle G80<br />
G80 concludes the contour description after roughing, recess, undercut<br />
and milling cycles. A block with G80 must not contain any other commands.<br />
Longitudinal roughing cycle G81<br />
Transverse roughing cycle G82<br />
G81/G82 machines (roughs) the contour area described by the current<br />
tool position and “X, Z“. If you wish to machine an oblique cut, you<br />
must define the angle with I and K.<br />
Parameters<br />
X/Z: Starting point/end point of the contour (X diameter value)<br />
I/K: Offset/maximum infeed<br />
I/K>0: Machine contour line<br />
I/K
62<br />
Clearance cycle group<br />
Longitudinal contour roughing G817 / G818<br />
Transverse contour roughing G827 / G828<br />
G817/G818 and G827/G828 machine (rough) the contour area described<br />
by the current tool position and the data defined in the subsequent<br />
blocks – without plunge-cutting.<br />
Tool position at end of cycle:<br />
For G817/G827: at cycle starting point and last retraction coordinate<br />
For G818/G828: at cycle starting point<br />
Parameters<br />
X/Z: Cutting limit (X as diameter value)<br />
P: Maximum approach – Maximum infeed distance<br />
H: Type of departure – default: 1<br />
0: Machine contour outline after each pass<br />
1: Retract at 45°; machine contour outline after last pass<br />
2: Retract at 45° – do not machine contour outline<br />
I, K: Oversizes – default: 0<br />
Descending contour elements will not be machined.<br />
Cutter radius compensation: is carried out<br />
Oversizes: G57/G58 oversizes are taken into consideration<br />
if I and K are not given in the cycle. The oversizes are<br />
deleted upon cycle completion.<br />
In the parameter “Active Parameters – Machining – Safety<br />
distances“, you can change the safety distance which is<br />
taken into account after each pass.<br />
Example: Longitudinal roughing cycle G817<br />
Example: Transverse roughing cycle G828
Longitudinal contour roughing with recessing G819<br />
Transverse contour roughing with recessing G829<br />
G819/G829 machines (roughs) the contour area described by the tool<br />
position and the subsequent blocks – with plunge-cutting.<br />
Tool position at the end of cycle: cycle starting point.<br />
Parameters<br />
X/Z: Cutting limit (X as diameter value)<br />
P: Maximum approach – Maximum infeed distance<br />
E: Infeed<br />
E=0: Descending contours are not machined<br />
No input: Feed rate is reduced as a function of approach<br />
angle – maximum feed rate reduction: 50%.<br />
H: Type of departure – default: 1<br />
0: Machine contour outline after each pass<br />
1: Retract at 45°; machine contour outline after last pass<br />
2: Retract at 45° – do not machine contour outline<br />
I/K: Oversizes – default: 0<br />
Cutter radius compensation: is carried out<br />
Oversizes: G57/G58 oversizes are taken into consideration if I<br />
and K are not given in the cycle. The oversizes are<br />
deleted upon cycle completion.<br />
In the parameter “Active Parameters – Machining – Safety<br />
distances“, you can change the safety distance which is<br />
taken into account after each pass.<br />
Example: Longitudinal roughing cycle G819<br />
Danger of collision!<br />
If the setup and tip angles of the tool have<br />
not been defined, the tool plunge-cuts at<br />
the plunging angle.<br />
If the setup and tip angles have been<br />
defined, the tool plunge-cuts at the<br />
maximum possible angle. In this case, the<br />
resulting contour will not be completely<br />
finished and may need to be reworked.<br />
Clearance cycle group<br />
63
64<br />
Clearance cycle group<br />
Simple contour repeat cycle G83<br />
G83 carries out the functions programmed in the following blocks more<br />
than once. The following blocks contain simple traverses or cycles<br />
without contour description. G80 ends the machining cycle.<br />
G83 starts the cycle execution from the current tool position. Before<br />
each pass, the tool advances by the infeed distance defined in I and K.<br />
Machining is executed as defined in the blocks after G83, taking the<br />
distance from the tool position to the contour start point as an “oversize“.<br />
G83 repeats this operation until the “start point“ is reached.<br />
Tool position at end of cycle: cycle starting point<br />
G83 must not be nested, not even by calling subprograms.<br />
Parameters<br />
X, Z: Start point (X as diameter)<br />
I/K: Maximum approach (enter I and K without sign)<br />
No tool-tip radius compensation is carried out – you can<br />
program cutter radius compensation separately with G41/<br />
G42 and switch it off again with G40.<br />
Oversizes: G57 oversizes are taken into consideration. A<br />
G58 oversize is taken into account if TRC is active. The<br />
oversizes remain in effect even after the end of cycle.<br />
Danger of collision!<br />
After each pass, the tool returns on a diagonal<br />
path before it advances to the next pass.<br />
Program an additional path at rapid traverse<br />
if there is any danger that the tool could collide<br />
with the workpiece.
Contour-parallel roughing G836<br />
G836 machines (roughs) workpiece sections parallel to the contour. “X,<br />
Z“ define the contour start point, the subsequent blocks describe the<br />
contour area. G80 ends the contour description.<br />
Tool position at end of cycle: cycle starting point.<br />
Parameters<br />
X, Z: Start point (X as diameter)<br />
P: Maximum approach – Maximum infeed distance<br />
I/K: Oversizes – default: 0<br />
Q: Longitudinal or transverse machining – default: 0<br />
0: Longitudinal machining<br />
1: Transverse machining<br />
Cutter radius compensation: is carried out<br />
Oversizes: G57/G58 oversizes are taken into consideration<br />
if I and K are not given in the cycle. The oversizes are<br />
deleted upon cycle completion.<br />
In the parameter “Active Parameters – Machining – Safety<br />
distances“, you can change the safety distance which is<br />
taken into account after each pass.<br />
Clearance cycle group<br />
65
66<br />
Clearance cycle group<br />
Line with radius G87<br />
G87 machines transition radii at orthogonal, paraxial inside and outside<br />
corners.<br />
A preceding longitudinal or transverse element is machined if the tool is<br />
located at the X or Z coordinate of the corner before the cycle is executed.<br />
Parameters<br />
X, Z: Corner point (X as diameter)<br />
B: Radius<br />
E: Reduced feed rate – default: active feed rate<br />
Cutter radius compensation: is carried out<br />
Oversizes: are not considered<br />
Line with chamfer G88<br />
G88 machines chamfers at orthogonal, paraxial inside and outside<br />
corners.<br />
A preceding longitudinal or transverse element is machined if the tool<br />
is located at the X or Z coordinate of the corner before the cycle is<br />
executed.<br />
Parameters<br />
X, Z: Corner point (X as diameter)<br />
B: Chamfer width<br />
E: Reduced feed rate – default: active feed rate<br />
Cutter radius compensation: is carried out<br />
Oversizes: are not considered
Contour finishing cycle G89<br />
G89 finishes the contour area described in the blocks following the<br />
cycle call.<br />
With TRC: G41/G42 in the block after G89 switches TRC on and defines<br />
whether the tool moves to the left or the right of the contour (with regard<br />
to the direction of the contour).<br />
G41: To the right of the contour<br />
G42: To the left of the contour<br />
TRC is automatically disabled at the end of cycle.<br />
Without TRC: Do not define G41/G42 in the block after G89.<br />
Parameters<br />
B: Chamfer/rounding (at the beginning of a contour section)<br />
B>0: Rounding radius<br />
B0: Tool retracts by K<br />
J: Element position (when the contour section begins with a<br />
chamfer/rounding) – default: 1; Reference element:<br />
J = 1: Transverse element in +X direction<br />
J=–1: Transverse element in –X direction<br />
J = 2: Longitudinal element in +Z direction<br />
J=–2: Longitudinal element in –Z direction<br />
Oversizes: A G58 oversize is taken into consideration if I is not<br />
given in the cycle. The oversizes are deleted after cycle<br />
completion.<br />
Clearance cycle group<br />
67
Recessing cycle<br />
68<br />
Simple recessing cycle G86<br />
G86 machines simple radial and axial recesses with chamfers.<br />
MANUALplus determines the position of the recess from the “tool<br />
orientation“.<br />
A programmed oversize is taken into account during rough-machining. In<br />
the second step, the recess is finish-machined. The “Dwell time E“ is<br />
only taken into account during the finish-machining.<br />
G86 machines chamfers at the sides of the recess. If you do not wish<br />
MANUALplus to cut the chamfers, you must position the tool at a<br />
sufficient distance from the workpiece. Calculate the starting position as<br />
follows:<br />
XS = XK + 2 * (1.3 – b)<br />
XS: Start position (diameter value)<br />
XK: Contour diameter<br />
b: Chamfer width<br />
Tool position at end of cycle:<br />
Radial recess: X – start position; Z – last recess position<br />
Axial recess: X – last recess position; Z – start position<br />
Parameters<br />
X, Z: Target point (X as diameter)<br />
I, K: Oversize/width of recess<br />
Radial recess: I = oversize; K = recess width<br />
Axial recess: I = recess width; K = oversize<br />
If you do not enter a recess width, a recessing stroke results<br />
(recess width = tool width).<br />
E: Dwell time (for chip breaking) – default: length of time for one<br />
revolution<br />
Cutter radius compensation: is not carried out<br />
Oversizes: are not considered
Axial contour cutting G861<br />
Radial contour cutting G862<br />
G861/G862 recesses the contour area described by the tool position and<br />
the subsequent blocks.<br />
Tool position at end of cycle: cycle starting point.<br />
Parameters<br />
P: Cutting width<br />
I, K: Oversizes – default: 0<br />
Q: Roughing/finishing<br />
Q=0: Roughing only<br />
Q=1: Roughing and finishing<br />
E: Finishing feed rate – default: active feed rate<br />
Calculating the proportioning of cuts<br />
“Cutting width P“ is defined: infeeds † P<br />
“Cutting width P“ is not defined: infeeds † 0.8 * cutting<br />
width of the tool<br />
Cutter radius compensation: is carried out<br />
Oversizes: G57/G58 oversizes are taken into consideration<br />
if I and K are not given in the cycle. The oversizes are<br />
deleted upon cycle completion.<br />
Recessing cycle<br />
69
Recessing cycle<br />
70<br />
Simple axial cutting cycle G865<br />
Simple radial cutting cycle G866<br />
G865/G866 recesses the rectangle described by the tool position and<br />
base corner “X, Z“.<br />
Tool position at end of cycle: cycle starting point.<br />
Parameters<br />
X, Z: Target point (X as diameter)<br />
P: Cutting width<br />
I, K: Oversizes – default: 0<br />
Q: Roughing/finishing<br />
Q=0: Roughing only<br />
Q=1: Roughing and finishing<br />
E: Finishing feed rate/dwell time<br />
for Q=0: Dwell time (for chip breaking) – default: length of time<br />
for two revolutions<br />
for Q=1: finishing feed rate – default: active feed rate<br />
Calculating the proportioning of cuts<br />
“Cutting width P“ is defined: infeeds † P<br />
“Cutting width P“ is not defined: infeeds † 0.8 * cutting<br />
width of the tool<br />
Cutter radius compensation: is carried out<br />
Oversizes: G57/G58 oversizes are taken into consideration<br />
if I and K are not given in the cycle. The oversizes are deleted<br />
upon cycle completion.
Axial contour finishing cut G863<br />
Radial contour finishing cut G864<br />
G863/G864 finishes the contour area described by the blocks following<br />
the cycle call.<br />
Tool position at end of cycle: cycle starting point.<br />
Parameters<br />
E: Finishing feed rate<br />
Cutter radius compensation: is carried out<br />
Axial finishing cut G867<br />
Radial finishing cut G868<br />
G867/G868 finishes the contour area described by the tool position and<br />
“X, Z“.<br />
Tool position at end of cycle: cycle starting point.<br />
Parameters<br />
X, Z: Target point (X as diameter)<br />
E: Finishing feed rate – no input: active feed rate<br />
Cutter radius compensation: is carried out<br />
Example: Contour finishing cut G863<br />
Example: Finishing cut G868<br />
Recessing cycle<br />
71
Recessing cycle<br />
72<br />
Simple axial recess-turning cycle G811<br />
Simple radial recess-turning cycle G8<strong>21</strong><br />
G811/G8<strong>21</strong> machines (recesses) the rectangle described by the tool<br />
position and “X, Z“.<br />
Tool position at end of cycle: cycle starting point.<br />
Parameters<br />
X, Z: Target point (X as diameter)<br />
P: (Maximum) plunging depth<br />
I, K: Oversize in X, Z – default: 0<br />
Q: Roughing/finishing<br />
Q=0: Roughing only<br />
Q=1: Roughing and finishing<br />
Q=2: Finishing only<br />
U: Turning operation unidirectional – default: 0<br />
U=0: Turning operation bidirectional<br />
U=1: Turning operation unidirectional<br />
G811: in the direction of the main spindle<br />
G8<strong>21</strong>: MANUALplus machines in the direction of the tool position<br />
– “target point X“<br />
B: Offset width – default: 0<br />
O: Recessing feed rate – default: active feed rate<br />
E: Finishing feed rate– default: active feed rate<br />
Cutter radius compensation: is carried out<br />
Oversizes: G57/G58 oversizes are taken<br />
into consideration if I and K are not given<br />
in the cycle. The oversizes are deleted<br />
upon cycle completion.<br />
When Q=2, use “I, K“ to define the<br />
material to be machined during finishing.
Axial recess-turning cycle G815<br />
Radial recess-turning cycle G825<br />
G815/G825 machines (recesses) the contour section defined by the tool<br />
position and the contour description in the following blocks.<br />
Tool position at end of cycle: cycle starting point.<br />
Parameters<br />
X, Z: Cutting limitation (X as diameter)<br />
P: (Maximum) plunging depth<br />
I, K: Oversize in X, Z – default: 0<br />
Q: Roughing/finishing<br />
Q=0: Roughing only<br />
Q=1: Roughing and finishing<br />
Q=2: Finishing only<br />
U: Turning operation unidirectional – default: 0<br />
U=0: Turning operation bidirectional<br />
U=1: Turning operation unidirectional<br />
G815: in the direction of the main spindle<br />
G825: MANUALplus machines in the direction of the tool<br />
position – “target point X“<br />
B: Offset width – default: 0<br />
O: Recessing feed rate – default: active feed rate<br />
E: Finishing feed rate– default: active feed rate<br />
Cutter radius compensation: is carried out<br />
Oversizes: G57/G58 oversizes are taken<br />
into consideration if I and K are not given<br />
in the cycle. The oversizes are deleted<br />
upon cycle completion.<br />
When Q=2, use “I, K“ to define the<br />
material to be machined during finishing.<br />
Recessing cycle<br />
73
Threadcut cycle group<br />
74<br />
Universal thread cycle G31<br />
(with and without contour description)<br />
G31 cuts threads in any desired direction and position. You can chain<br />
several threads. If you program the “final point X, Z”, the thread starts<br />
at the current tool position and ends at “X, Z”. If you do not define the<br />
“end point X, Z”, G31 will expect the following blocks to contain the<br />
contour elements on which the thread is to be machined (contour<br />
description). You can define up to 6 contour elements. G80 ends the<br />
contour definition.<br />
The infeeds in “type of infeed V=0 or V=1” are calculated on the basis<br />
of U and I. With “types of infeed V=2 or V=3”, the infeeds are calculated<br />
from speed and “thread pitch F”.<br />
Parameters<br />
X, Z: End point of thread (X diameter)<br />
F: Thread pitch<br />
U: Thread depth<br />
U>0: Internal thread<br />
U
Simple thread cycle G32<br />
G32 cuts a simple thread in any desired direction and position (longitudinal,<br />
tapered or transverse thread; internal or external thread). The<br />
thread starts at the current tool position and ends at “X, Z”.<br />
Parameters<br />
X, Z: End point of thread (X diameter)<br />
F: Thread pitch<br />
U: Thread depth<br />
U>0: Internal thread<br />
U
Threadcut cycle group<br />
76<br />
Individual thread cut G33<br />
G33 cuts threads in any desired direction and position (longitudinal,<br />
tapered or transverse threads; internal or external threads).<br />
The thread starts at the current tool position and ends at “X, Z”.<br />
Parameters<br />
X, Z: End point of thread (X diameter)<br />
F: Thread pitch<br />
B: Slop. length – default : 0<br />
P: Overflow length – default : 0<br />
C: Starting angle (if the thread start is defined relative to a contour<br />
element which is not rotationally symmetrical) – default: 0<br />
Q: Number of spindle – default: 0 (main spindle)<br />
H: Reference direction for spindle pitch – default: 3<br />
H=0: Feed in Z axis (for longitudinal and tapered threads up to a<br />
maximum angle of +45°/–45° to the Z axis)<br />
H=1: Feed in X axis (for transverse and tapered threads up to a<br />
maximum angle of +45°/–45° to the X axis)<br />
H=3: Path feed<br />
E: Variable pitch (increases/reduces the pitch per revolution by E) –<br />
default: 0<br />
“Cycle STOP“ only becomes effective at the end of a thread cut.<br />
The feed rate and spindle speed overrides are disabled during<br />
execution of the cycle.
Metric ISO thread G35<br />
With G35, you can cut internal and external longitudinal threads. From<br />
the tool position relative to the final point of the thread, MANUALplus<br />
automatically determines whether an internal or external thread is to be<br />
cut.<br />
Parameters<br />
X, Z: End point of thread (X diameter)<br />
F: Thread pitch – default: value from standard table<br />
I: Maximum infeed – default: I is calculated from the thread pitch<br />
and the speed<br />
Q: Number of air cuts after the last cut – default: 0<br />
B: Remainder cut – default: 0<br />
B=0: Division of the last cut into 1/2, 1/4, 1/8, 1/8 cut.<br />
B=1: No remaining cut division<br />
“Cycle STOP” only becomes effective at the end of a thread cut.<br />
The feed rate and spindle speed overrides are disabled during<br />
execution of the cycle.<br />
If you are programming an internal thread, it is advisable to<br />
preset “F” since the diameter of the longitudinal element is not<br />
the thread diameter. If you have MANUALplus calculate the<br />
thread pitch automatically, slight deviations may occur.<br />
Threadcut cycle group<br />
77
Threadcut cycle group<br />
78<br />
Simple longitudinal single-start thread G350<br />
Extended longitudinal multi-start thread G351<br />
With G350/G351, you can cut internal and external longitudinal threads.<br />
The thread starts at the tool position and ends at “Z“.<br />
Parameters<br />
Z: Final point of thread<br />
F: Thread pitch<br />
U: Thread depth<br />
U>0: Internal thread<br />
U0: Infeed from right thread flank<br />
A
Tapered API thread G352<br />
This cycle cuts a tapered single- or multi-start API thread.The depth of<br />
thread increases at the overrun at the end of thread. The thread<br />
begins at “XS, ZS“ and ends at “X, Z“.<br />
Parameters<br />
XS,ZS: Starting point of thread (XS as diameter)<br />
X, Z: End point of thread (X as diameter)<br />
F: Thread pitch<br />
U: Thread depth<br />
U>0: Internal thread<br />
U0: Infeed from right thread flank<br />
A
Threadcut cycle group<br />
80<br />
Tapered thread G353<br />
This cycle cuts a tapered single- or multi-start thread. The thread<br />
begins at “XS, ZS“ and ends at “X, Z“.<br />
Parameters<br />
XS,ZS: Starting point of thread (XS as diameter)<br />
X, Z: End point of thread (X as diameter)<br />
F: Thread pitch<br />
U: Thread depth<br />
U>0: Internal thread<br />
U0: Infeed from right thread flank<br />
A
Undercut contour G25<br />
The function G25 enables you to machine various undercuts. These form<br />
elements can then be integrated in roughing or finishing cycles.<br />
If you do not define the following parameters, MANUALplus determines<br />
the values from the diameter or, for undercuts according to DIN 76, from<br />
the thread pitch given in the standard table:<br />
DIN 509 E: I, K, W, R<br />
DIN 509 F: I, K, W, R, P, A<br />
DIN 76: I, K, W, R<br />
Parameters<br />
H: Type of undercut – default: 0<br />
0, 5: DIN 509 E<br />
6: DIN 509 F<br />
7: DIN 76<br />
I: Undercut depth – default: value from standard table<br />
K: Undercut width – default: value from standard table<br />
R: Radius – default: value from standard table<br />
P: Transverse depth – default: value from standard table<br />
W: Undercut angle – default: value from standard table<br />
A: Transverse angle – default: value from standard table<br />
FP: Thread pitch – default: is calculated from thread diameter<br />
U: Grinding oversize – default: 0<br />
E: Reduced feed (the undercut will be performed at the feed<br />
rate E) – default: active feed rate<br />
If you define the parameters, the undercut<br />
is machined to the defined dimensions.<br />
If you are programming an internal thread, it<br />
is advisable to preset the “FP” since the<br />
diameter of the longitudinal element is not<br />
the thread diameter. If you have<br />
MANUALplus calculate the thread pitch automatically,<br />
slight deviations may occur.<br />
Undercut cycles<br />
79
Undercut cycles<br />
80<br />
Undercut cycle G85<br />
With the function G85, you can machine undercuts according to DIN 509<br />
E, DIN 509 F and DIN 76 (thread undercut). “K“ defines the type of<br />
undercut.<br />
See the table for the undercut parameters.<br />
The adjoining cylinder is machined if the tool is positioned at the cylinder<br />
diameter (“X“) “in front of“ the cylinder.<br />
Parameters<br />
X, Z: Target point (X as diameter)<br />
I: Grinding oversize/depth<br />
DIN 509 E, F: wear oversize – default: 0<br />
DIN 76: undercut depth<br />
K: Undercut length and type<br />
K left undefined: DIN 509 E<br />
K=0: DIN 509 F<br />
K>0: undercut length for DIN 76<br />
E: Reduced feed rate (for performing the undercut) – default: active<br />
feed rate<br />
Undercut angle for undercuts according to DIN 509 E and F: 15°<br />
Transverse angle for an undercut according to DIN 509 F: 8°<br />
Cutter radius compensation: is not carried out<br />
Oversizes: are not considered<br />
Undercut according to DIN 509 E<br />
Diameter I K R<br />
< 18 0.25 2 0.6<br />
> 18 - 80 0.35 2.5 0.6<br />
> 80 0.45 4 1<br />
Undercut according to DIN 509 F<br />
Diameter I K R P<br />
< 18 0.25 2 0.6 0.1<br />
> 18 - 80 0.35 2.5 0.6 0.2<br />
> 80 0.45 4 1 0.3<br />
I = undercut depth<br />
K = undercut length<br />
R = undercut radius<br />
P = transverse depth
Undercut DIN509 E with cylinder machining G851<br />
Undercut DIN509 F with cylinder machining G852<br />
Undercut DIN76 with cylinder machining G853<br />
G851/G852/G853 execute an undercut, and can also machine a<br />
cylinder start chamfer, the adjoining cylinder and the adjoining end<br />
face.<br />
Meaning of the NC blocks after cycle call (example G851):<br />
N.. G851 I.. K.. W... /Cycle call with parameters<br />
N.. G0 X.. Z.. /Corner of start chamfer<br />
N.. G1 Z.. /Undercut corner<br />
N.. G1 X.. /Final point of end face<br />
N.. G80 /End of contour description<br />
Parameters<br />
I: G851, G852: Undercut depth – default: value from standard table<br />
G853: Undercut diameter – default: value from standard table<br />
K: Undercut length – default: value from standard table<br />
W: Undercut angle – default: value from standard table<br />
R: Undercut radius – default: value from standard table<br />
P: Transverse depth – default: value from standard table<br />
A: Transverse angle – default: value from standard table<br />
B: Cylinder 1st cut length – default: no chamfer at start of cylinder<br />
RB: 1st cut radius – default: no chamfer radius<br />
WB: 1st cut angle – angle at which chamfer is machined: default: 45°<br />
E: Reduced feed (the undercut will be performed at the feed<br />
rate E) – default: active feed rate<br />
H: Departure type – default: 0<br />
H=0: Tool returns to start point<br />
H=1: Tool remains at final point of end face<br />
Example G851<br />
U: Finishing oversize (in area of the cylinder) –<br />
default: no finishing oversize<br />
FP: Thread pitch<br />
P: Oversize (if you enter “P”, the undercut cycle<br />
will be divided into rough-machining and finishmachining.<br />
The value programmed for “P” is<br />
then accounted for as a longitudinal oversize.<br />
The transverse oversize is preset to 0.1 mm.)<br />
Cutter radius compensation: is carried out<br />
Oversizes: are not considered<br />
Undercut cycles<br />
81
Undercut cycles<br />
82<br />
Undercut Form U G856<br />
G856 machines a “Form U“ undercut, finishes the adjoining end face and<br />
machines a chamfer/rounding.<br />
Tool position at end of cycle: cycle starting point<br />
Meaning of the NC blocks after G856:<br />
N.. G856 I.. K.. ... /Cycle call with parameters<br />
N.. G0 X.. Z.. /Undercut corner<br />
N.. G1 X.. /Final point of end face<br />
N.. G80 /End of contour description<br />
Parameters<br />
I: Undercut diameter (diameter value)<br />
K: Undercut width – If the cutting width of the tool is not defined,<br />
the control assumes that the tool's cutting width equals K.<br />
B: Chamfer/rounding<br />
B>0: Rounding radius<br />
B
Undercut Form H G857<br />
G857 machines a “Form H“ undercut. If you do not enter W, it will be<br />
calculated on the basis of K and R. The final point of the undercut is then<br />
located at the corner point of the contour.<br />
Tool position at end of cycle: cycle starting point<br />
Parameters<br />
X, Z: Corner point of the contour (X as diameter)<br />
K: Undercut length<br />
R: Undercut radius – default: no circular element<br />
W: Plunge angle – default: W is calculated<br />
Cutter radius compensation: is carried out<br />
Oversizes: are not considered<br />
Undercut Form K G858<br />
G858 machines a “Form K“ undercut. A linear cut is made at an angle of<br />
45°.<br />
Tool position at end of cycle: cycle starting point<br />
Parameters<br />
X, Z: Corner point of the contour (X as diameter)<br />
I: Undercut depth<br />
Cutter radius compensation: is not carried out<br />
Oversizes: are not considered<br />
Undercut cycles<br />
83
Cut-off cycle<br />
84<br />
Cut-off cycle G859<br />
Cycle G859 cuts off the lathe part. If programmed, a chamfer or rounding<br />
is also machined. At the end of the cycle, the tool returns to the start<br />
point along a paraxial path.<br />
Parameters<br />
X: Cut-off diameter<br />
Z: Cut-off position<br />
I: Diameter feed reduction – default: no reduction<br />
XE: Inside diameter (pipe)<br />
E: Reduced feed rate – default: active feed rate<br />
B: Chamfer/rounding<br />
B>0: Rounding radius<br />
B
Simple drilling cycle G71<br />
G71 is used for axial and radial drillings. With stationary tools, the axial<br />
hole must lie in the turning center.<br />
The control starts execution of the cycle at the current tool and spindle<br />
position.<br />
Depending on “X/Z“, G71 decides whether a radial or axial drill hole<br />
will be machined.<br />
Parameters<br />
X: Final point hole for axial drilling (X as diameter value)<br />
Z: Final point hole for radial drilling<br />
A: Drilling lengths – default: 0<br />
E: Dwell time (for chip breaking at end of hole) – default: 0<br />
V: Drill variants (feed rate reduction: 50%)<br />
0: Without feed rate reduction<br />
1: Feed rate reduction for through drilling<br />
2: Feed rate reduction for spot drilling<br />
3: Feed rate reduction for spot and through drilling<br />
K: Drilling depth (radial drillings: radius) – default: is calculated<br />
Drilling cycles<br />
87
88<br />
Drilling cycles<br />
Deep-hole pecking cycle G74<br />
G74 is used for axial and radial drillings. With stationary tools, the axial<br />
hole must lie in the turning center. The hole is drilled in several passes.<br />
The control starts execution of the cycle at the current tool and<br />
spindle position.<br />
Depending on “X/Z“, G74 decides whether a radial or axial drill hole<br />
will be machined.<br />
Parameters<br />
X: Final point hole for axial drilling (X as diameter value)<br />
Z: Final point hole for radial drilling<br />
R: Safety distance – default: Value from “Active Parameters –<br />
Machining – Safety distances“<br />
P: 1st drilling depth – default: Drill in one operation<br />
I: Reduction value – default: 0<br />
B: Return distance – default: Retract to“starting point of hole“<br />
J: Minimum hole depth – default: 1/10 of P<br />
A: Drilling lengths – default: 0<br />
E: Dwell time (for chip breaking at end of hole) – default: 0<br />
V: Drill variants (feed rate reduction: 50%)<br />
0: Without feed rate reduction<br />
1: Feed rate reduction for through drilling<br />
2: Feed rate reduction for spot drilling<br />
3: Feed rate reduction for spot and through drilling<br />
K: Drilling depth (radial drillings: radius) – default: is calculated
Thread tapping cycle G36<br />
G36 can be used for axial and radial threads. With stationary tools, the<br />
axial thread must lie in the turning center.<br />
Depending on “X/Z“, G36 decides whether a radial or axial drill hole<br />
will be machined.<br />
Parameters<br />
X: Final point hole for axial thread tapping (X as diameter value)<br />
Z: End point of thread with radial machining<br />
F: Feed per revolution – Thread pitch<br />
B: Run-in length – default: 2 * thread pitch F1<br />
Q: Number of spindle<br />
Q=0: For stationary tool (spindle)<br />
Q=1: For driven tool (auxiliary spindle)<br />
H: Reference direction – default: 0<br />
reference direction for spindle pitch:<br />
H=0: Feed rate on Z axis<br />
H=1: Feed rate on X axis<br />
S: Retraction speed – default: Same spindle speed as for tapping<br />
K: Drilling depth (radial drillings: radius) – default: is calculated<br />
Drilling cycles<br />
89
90<br />
Drilling cycles<br />
Thread milling cycle G799<br />
G799 mills a thread into an existing bore hole.<br />
Position the tool in center of the bore hole before calling G799. The cycle<br />
positions the tool within the bore hole at the “thread end point“. The tool<br />
then approaches with the “approach radius R“, mills the thread in a 360°<br />
revolution, advancing by the “thread pitch F“. The cycle then retracts the<br />
tool and returns it to the start point.<br />
Parameters<br />
Z: Thread starting point<br />
K: Thread depth<br />
R: Approach radius – default: (I – cutter diameter)/2<br />
F: Thread pitch<br />
I: Inside thread diameter<br />
H: Cutting direction – default: 0<br />
H=0: Up-cut milling<br />
H=1: Down-cut milling<br />
J: Thread direction – default: 0<br />
J=0: Right<br />
J=1: Left
Contour starting point/End-face rapid traverse G100<br />
Geometry: G100 defines the starting point of an end-face contour.<br />
Parameters<br />
X, C: Target point (diameter), end angle – angle direction: see<br />
support graphics<br />
XK,YK: Target point (Cartesian coordinates)<br />
Machining: The tool moves at rapid traverse along the shortest path<br />
to the target point.<br />
Parameters<br />
X, C: Target point (diameter), end angle – angle direction: see<br />
support graphics<br />
XK,YK: Target point (Cartesian coordinates)<br />
Z: Target point – default: current Z position<br />
Danger of collision!<br />
With G100 the tool moves in a linear motion – even if you only<br />
program “C“. Use G110 to position the workpiece at a certain<br />
angle.<br />
End-face machining<br />
91
92<br />
End-face machining<br />
End-face linear path cycle G101<br />
Geometry: G101 defines a path on an end-face contour.<br />
Parameters<br />
X: Target point (X as diameter value)<br />
C: Target angle – angle direction: see support graphics<br />
XK, YK: Target point (Cartesian coordinates)<br />
A: Angle to the positive XK axis<br />
Q: Point of intersection – default: Q=0<br />
Q=0: Near point of intersection<br />
Q=1: Remote point of intersection<br />
B: Chamfer/rounding<br />
B left undefined: Tangential transition<br />
B=0: Non-tangential transition<br />
B>0: Rounding radius<br />
B
End-face circular arc cycle G102/G103<br />
Geometry: G102/G103 defines a circular arc on an end-face contour.<br />
Parameters<br />
X: Target point (X as diameter value)<br />
C: Target angle – angle direction: see support graphics<br />
XK, YK: Target point (Cartesian coordinates)<br />
R: Radius<br />
I, J: Center point (in Cartesian coordinates)<br />
Q: Point of intersection – default: Q=0<br />
Q=0: Near point of intersection<br />
Q=1: Remote point of intersection<br />
B: Chamfer/rounding<br />
B left undefined: Tangential transition<br />
B=0: Non-tangential transition<br />
B>0: Rounding radius<br />
B
94<br />
End-face machining<br />
End-face linear groove cycle G791<br />
G791 mills a groove from the current tool position to the end point.<br />
Tilt the spindle to the desired angle before calling G791.<br />
Parameters<br />
X, C: Diameter, target angle – end point of the groove (polar<br />
coordinates)<br />
XK, YK: End point of the groove (Cartesian coordinates)<br />
K: Groove length – referenced to the center of the cutter<br />
A: Groove angle – reference: see support graphics<br />
Z: Lower edge of milling<br />
J: Milling depth – default: begin milling at the current tool position<br />
P: Maximum infeed – default: total depth in one infeed<br />
F: Infeed rate (for depth infeed) – default: active feed rate
End-face contour milling cycle G793<br />
G793 mills figures or “free contours“ on the end-face.<br />
The figure or “free contour“ to be milled follows G793:<br />
Figure: G304 – circle, G305 – rectangle or G307 – polygon followed<br />
by G80.<br />
Free contour: G100 – Start point free contour; contour description<br />
with G101 to G103; G80 – end of contour description<br />
Parameters<br />
Z, ZE: Upper edge of milling, lower edge of milling<br />
P: Maximum infeed– default: One infeed<br />
U: Overlap factor – default: 0<br />
U=0: contour milling<br />
U>0: (minimum) overlapping = U*cutter diameter<br />
R: Approach radius (radius of approach/depart arcs) – default: 0<br />
R=0: Contour element is approached directly – followed by<br />
vertical depth-infeeding<br />
R>0: Cutter moves in approach/depart arcs<br />
R
96<br />
End-face machining<br />
End-face surface milling cycle G797<br />
Depending on “Q“, G797 mills surface, a polygon or the figure defined in<br />
the command after G797.<br />
If “Q=0“, one of the following figures is programmed in the next command,<br />
followed by a G80:<br />
G304 – Circle<br />
G305 – Rectangle<br />
G307 – Polygon<br />
A polygon defined with G797 (Q>0) is in the center. A figure defined in<br />
the next command may also be positioned off-center.<br />
Parameters<br />
X: Border diameter<br />
Z, ZE: Reference edge, lower edge of milling<br />
B: Width across flats – not applicable when Q=0<br />
when Q=1: B is the remaining thickness<br />
when Q ‡ 2: B is the width across flats<br />
V: Edge length – not applicable when Q=0<br />
R: Chamfer/rounding – not applicable when Q=0<br />
R0: Rounding radius<br />
A: Inclination angle (reference: see support graphics) – not<br />
applicable when Q=0<br />
Q: Number of surfaces (0 † Q † 127) – default: 0<br />
Q=0: Figure description follows G797<br />
Q=1: One surface<br />
Q=2: Two surfaces offset by 180°<br />
Q=3: Triangle<br />
Q=4: Rectangle, square<br />
Q>4: Polygon<br />
P: Maximum infeed – default: in one infeed<br />
U: Overlap factor – (minimum) overlapping =<br />
U*cutter diameter – default: 0.5<br />
I, K: Contour-parallel oversize, in infeed direction<br />
F: Infeed rate (for depth infeed) – default:<br />
active feed rate<br />
E: Reduced feed rate for circular elements –<br />
default: current feed rate<br />
H: Cutting direction – default: 0<br />
H=0: Up-cut milling<br />
H=1: Down-cut milling<br />
O: Roughing/finishing – default: 0<br />
O=0: Roughing<br />
O=1: Finishing<br />
J: Uni-/bidirectional (when Q=1 or Q=2)<br />
J=0: Unidirectional<br />
J=1: Bidirectional
Figure definition end-face complete circle G304<br />
G304 defines a complete circle on an end face. Program this figure<br />
together with G793 or G797.<br />
Parameters<br />
XK, YK: Center point<br />
R: Circle radius<br />
Figure definition end-face rectangle G305<br />
G305 defines a rectangle on an end face. Program this figure together<br />
with G793 or G797.<br />
Parameters<br />
XK, YK: Center point<br />
A: Angle – Reference: see support graphics<br />
K: Rectangle length<br />
B: Rectangle height<br />
R: Chamfer/rounding<br />
R0: Rounding radius<br />
End-face machining<br />
97
98<br />
End-face machining<br />
Figure definition end-face polygon G307<br />
G307 defines a polygon on an end face. Program this figure together<br />
with G793 or G797.<br />
Parameters<br />
XK, YK: Center point<br />
Q: Number of edges (3 † Q † 127)<br />
A: Angle – Reference: see support graphics<br />
K: Width across flats(KW)/length<br />
K0: Edge length<br />
R: Chamfer/rounding<br />
R0: Rounding radius
Reference diameters G120<br />
G120 determines the reference diameter of the “unrolled surface<br />
area“. Program G120 if you use “CY“ with G110 to G113. G120 is modal.<br />
Parameter<br />
X: Diameter<br />
Contour start point/Lateral-surface rapid traverse G110<br />
Geometry: G110 defines the starting point of a lateral-surface contour.<br />
Parameters<br />
Z, C: Target point, target angle<br />
CY: Target point as length value<br />
Machining: The tool moves at rapid traverse along the shortest path to<br />
the target point.<br />
Parameters<br />
Z, C: Target point, target angle<br />
CY: Target point as length value<br />
X: Target point (diameter) – default: current X position<br />
Lateral-surface machining<br />
99
Lateral-surface machining<br />
100<br />
Lateral-surface linear path cycle G111<br />
Geometry: G111 defines a path on a lateral-surface contour.<br />
Parameters<br />
Z, C: Target point, target angle – angle direction: see support graphics<br />
CY: Target point as length value<br />
A: Angle of inclination – Reference: see support graphics<br />
Q: Point of intersection – default: Q=0<br />
Q=0: Near point of intersection<br />
Q=1: Remote point of intersection<br />
B: Chamfer/rounding<br />
B left undefined: Tangential transition<br />
B=0: Non-tangential transition<br />
B>0: Rounding radius<br />
B
Lateral-surface circular arc cycle G112/G113<br />
Geometry: G112/G113 defines a circular arc on an lateral-surface<br />
contour.<br />
Parameters<br />
Z, C: Target point, target angle – angle direction: see support graphics<br />
CY: Target point as length value (Reference: G120 reference diameter)<br />
R: Radius<br />
K, J: Center point (J as length value)<br />
W: Angel center point – angle direction: see support graphics<br />
Q: Point of intersection – default: Q=0<br />
Q=0: Near point of intersection<br />
Q=1: Remote point of intersection<br />
B: Chamfer/rounding<br />
B left undefined: Tangential transition<br />
B=0: Non-tangential transition<br />
B>0: Rounding radius<br />
B
Lateral-surface machining<br />
102<br />
Lateral-surface linear groove G792<br />
G792 mills a groove from the current tool position to the end point.<br />
Tilt the spindle to the desired angle before calling G792.<br />
Parameters<br />
Z, C: Target point, target angle<br />
K: Groove length – referenced to the center of the cutter<br />
A: Groove angle – reference: see support graphics<br />
Z: Milling surface (diameter)<br />
J: Milling depth – default: begin milling at the current tool position<br />
P: Maximum infeed – default: total depth in one infeed<br />
F: Infeed rate (for depth infeed) – default: active feed rate
Lateral-surface contour milling cycle G794<br />
G794 mills figures or “free contours“ on the lateral-surface.<br />
The figure or “free contour“ to be milled follows G794:<br />
Figure: G314 – circle, G315 – rectangle or G317 – polygon followed<br />
by G80.<br />
Free contour: G110 – Start point free contour; contour description<br />
with G111 to G113; G80 – end of contour description<br />
Parameters<br />
X, XE: Upper milling edge (diameter), milling surface<br />
P: Maximum infeed – default: One infeed<br />
U: Overlap factor – default: 0<br />
U=0: Contour milling<br />
U>0: (Minimum) overlapping = U*cutter diameter<br />
R: Approach radius (radius of approach/depart arcs) – default: 0<br />
R=0: Contour element is approached directly<br />
R>0: Cutter moves in approach/depart arcs<br />
R
Lateral-surface machining<br />
104<br />
Helical groove milling G798<br />
G798 mills a helical groove from the current tool position to the “Target<br />
point X,Z“. “Start angle C“ defines the position of the groove beginning.<br />
Parameters<br />
X: Target point (diameter value) – default: current X position<br />
Z: Groove target point<br />
C: Start angle – default: 0<br />
F: Pitch<br />
P, K: Approach length, runout length – default: 0<br />
U: Groove depth<br />
I: Maximum downfeed – default: no downfeed<br />
E: Reduction value for downfeed reduction – default: 1<br />
Figure definition lateral-surface complete circle G314<br />
G314 defines a complete circle on a lateral surface. Program this figure<br />
together with G794.<br />
Parameters<br />
Z, C: Center point, angle of the center point<br />
CY: Center point as length value<br />
R: Circle radius
Figure definition lateral-surface rectangle G315<br />
G315 defines a rectangle on a lateral surface. Program this figure<br />
together with G794.<br />
Parameters<br />
Z, C: Center point, angle of the center point<br />
CY: Center point as length value<br />
A: Angle – reference: see support graphics<br />
K: Rectangle length<br />
B: Rectangle width (height)<br />
R: Chamfer/rounding<br />
R0: Rounding radius<br />
Figure definition lateral-surface polygon G317<br />
G317 defines a polygon on a lateral surface. Program this figure together<br />
with G794.<br />
Parameters<br />
Z, C: Center point, angle of the center point<br />
CY: Center point as length value<br />
Q: Number of edges (3 † Q † 127)<br />
A: Angle – reference: see support graphics<br />
K: Width across flats (KW)/length<br />
K0: Edge length<br />
R: Chamfer/rounding<br />
R0: Rounding radius<br />
Lateral-surface machining<br />
105
Drilling and milling patterns<br />
106<br />
Linear pattern on end face G743<br />
With Cycle G743, you can machine drilling or milling patterns on the end<br />
face. If you do not enter “ZE“, the drilling/milling cycle or figure description<br />
from the next NC block is used – drilling cycle G71, G74, G36 or<br />
figure G304, G305, G307 (milling).<br />
Parameters<br />
XK, YK: Starting point of pattern (Cartesian coordinates)<br />
Z, ZE: Start point/final point for drilling and milling<br />
X, C: Diameter, starting angle (polar coordinates)<br />
A: Pattern angle<br />
I, J; Ii, Ji: End point of pattern; hole spacing<br />
R, Fi: Pattern length, distance to next position<br />
Q: Number of bore holes or figures – default: 1<br />
Linear pattern on lateral surface G744<br />
With Cycle G744, you can machine drilling or milling patterns in which the<br />
bore holes are arranged at a regular spacing in a straight line on the<br />
lateral surface. If you do not enter “XE“, the drilling/milling cycle or figure<br />
description from the next NC block is used – drilling cycle G71, G74, G36<br />
or figure G314, G315, G317 (milling).<br />
Parameters<br />
Z, C: Start point, final angle (polar coordinates)<br />
X, XE: Start point/final point for drilling and milling (diameter)<br />
ZE, W: End point, end angle of pattern<br />
Wi: Angle increment – distance to next position<br />
Q: Number of bore holes or figures – default: 1
Circular pattern on end face G745<br />
With Cycle G745, you can machine drilling or milling patterns in which<br />
the bore holes are arranged at a regular spacing on a circular arc on<br />
the end face. If you do not enter “ZE“, the drilling/milling cycle or<br />
figure description from the next NC block is used – drilling cycle G71,<br />
G74, G36 or figure G304, G305, G307 (milling).<br />
Parameters<br />
XK, YK: Midpoint of pattern (Cartesian coordinates)<br />
Z, ZE: Start point/final point for drilling and milling<br />
X, C: Diameter, angle – midpoint pattern (polar coordinates)<br />
K: Pattern diameter – default: the current X position is transferred<br />
A, W: Starting/final angle – position of first/last hole/figure<br />
Wi: Final angle – distance to next position<br />
Q: Number of bore holes or figures – default: 1<br />
V: Direction of rotation (input is necessary only if W is defined) –<br />
default: 0<br />
Location of the holes/figures:<br />
V=0: On the longer arc<br />
V=1: Clockwise, starting at A<br />
V=2: Counterclockwise, starting at A<br />
Drilling and milling patterns<br />
107
Drilling and milling patterns<br />
108<br />
Circular pattern on lateral surface G746<br />
With Cycle G746, you can machine drilling or figure patterns in which the<br />
bore holes are arranged at a regular spacing on a circular arc on the<br />
lateral surface. If you do not enter “XE“, the drilling/milling cycle or figure<br />
description from the next NC block is used – drilling cycle G71, G74, G36<br />
or figure G314, G315, G317 (milling).<br />
Parameters<br />
Z, C: Midpoint, angle (midpoint of pattern in polar coordinates)<br />
X, XE: Start point/final point for drilling and milling (diameter)<br />
K: Pattern diameter<br />
A, W: Starting/final angle<br />
Wi: Angle increment – distance to next position<br />
Q: Number of bore holes or figures – default: 1<br />
V: Direction of rotation (input is necessary only if W is defined) –<br />
default: 0<br />
Location of the holes/figures:<br />
V=0: On the longer arc<br />
V=1: Clockwise, starting at A<br />
V=2: Counterclockwise, starting at A
Tool Management<br />
MANUALplus differentiates between the following tool types:<br />
Lathes<br />
Recessing tools<br />
Threading tools<br />
Drills<br />
Tapping tools<br />
Millers (cutters)<br />
See the list at right to allocate individual tools to the tool types.<br />
Information regarding tool data<br />
The datum for determining the “Setup dimensions X, Z“ is based on<br />
the characteristic shape of each tool. The graphic support window describes<br />
the reference-point position for the selected tool type.<br />
Tool orientation: Determines the position of the tool tip, setup angle<br />
direction, reference-point position, etc.<br />
Driven tool: Determines whether the main spindle or a driven tool is<br />
turning to drill the centered bore hole.<br />
If the direction of rotation is defined, M3/M4 is automatically generated<br />
for the spindle or for the secondary spindle.<br />
Tool parameters whose identification letters are shown in gray<br />
can be entered optionally. MANUALplus uses these parameters<br />
when specific cycle parameters are not entered, when<br />
plunging angles or feed rates need to be calculated, etc.<br />
With driven tools, the cutting data always refer to the<br />
auxiliary spindle.<br />
Lathes<br />
Roughing tools<br />
Finishing tools<br />
Fine finishing tools<br />
Copying tools<br />
Button tools<br />
Recessing tools<br />
Plunging tools<br />
Undercutting tools<br />
Cutting-off tools<br />
Parting tools<br />
Threading tools<br />
All kinds of threading tools except tapping tools<br />
Drilling Tools<br />
Center drills<br />
Spot drills<br />
Twist drills<br />
Reversible carbide tip drills<br />
Counterborers and countersinkers<br />
Reamers<br />
Tapping tools<br />
All kinds of tapping tools<br />
Milling tools<br />
Slot (groove) cutting tools<br />
End milling tools<br />
Thread milling tools<br />
Tool Management<br />
109
Lathe tools<br />
110<br />
Lathe tools<br />
Tool parameters<br />
X, Z: Setup dimensions<br />
R: Cutting radius<br />
WO: Tool orientation (number shown in graphic support window)<br />
A: Setup angle – range: 0°† A † 180°<br />
B: Tip angle – range: 0° † B † 180°<br />
DX, DZ: Wear compensation<br />
Q: (Reference to) tool text<br />
MD: Direction of rotation (3=M3; 4=M4) default: not assigned<br />
TS: Cutting speed – default: not defined<br />
TF: Feed rate – default: not defined<br />
PT: Tool life – default: not defined<br />
RT: Rem. dwell: Remaining tool life (display field)<br />
PZ: Number of units – default: not defined<br />
RZ: Remaining pieces (display field)<br />
The direction of the setup angle depends on the tool orientation.<br />
The figure at top right illustrates how goose-necked<br />
roughing or finishing tools for longitudinal machining with<br />
WO= 1, 3, 5, 7 are dimensioned.<br />
Facing tools<br />
Facing tools are defined in the same way as those for longitudinal<br />
turning. The figure below explains the dimensioning of facing tools<br />
with tool orientation WO=1 and WO=7.<br />
Continued<br />
X B<br />
Z<br />
R<br />
A<br />
B<br />
A R<br />
X<br />
WO = 1 WO = 7<br />
Z
Neutral tools<br />
The tool orientation values WO=2, 4, 6, 8 are used for “neutral“ tools.<br />
Neutral means the cutting edge is perpendicular to the X or Z axis. For<br />
the dimensions of neutral tools: see figure at upper right.<br />
Button tools<br />
Tip angle “B=0” identifies the tool as a button tool. The “reference<br />
point” for determining the “Setup dimensions X, Z” of button tools<br />
depends on the tool orientation. See figure at bottom right for the<br />
dimensioning of button tools with “WO=1” and “WO=2”.<br />
X<br />
X<br />
R<br />
A<br />
B<br />
Z<br />
WO = 2 WO = 8<br />
Z<br />
X<br />
R<br />
X<br />
WO = 1 WO = 2<br />
A<br />
Z<br />
B<br />
Z<br />
Lathe tools<br />
111
Recessing tools<br />
112<br />
Recessing tools<br />
Tool parameters<br />
X, Z: Setup dimensions<br />
R: Cutting radius<br />
WO: Tool orientation (number shown in graphic support window)<br />
K: Cutting width<br />
DX, DZ: Wear compensation<br />
DS: Special compensation<br />
Q: (Reference to) tool text<br />
MD: Direction of rotation (3=M3; 4=M4) default: not assigned<br />
TS: Cutting speed – default: not defined<br />
TF: Feed rate – default: not defined<br />
PT: Tool life – default: not defined<br />
RT: Rem. dwell: Remaining tool life (display field)<br />
PZ: Number of units – default: not defined<br />
RZ: Remaining pieces (display field)<br />
With recessing tools, you define the position of the reference<br />
point with “WO”.<br />
“DX and DZ” compensate for wear on the two sides of the<br />
tool tip that lie next to the “reference point”. “DS” compensates<br />
for wear on the third side of the tool tip (see figure at<br />
bottom right).<br />
“K” is evaluated if the corresponding parameter is not defined<br />
in the recessing cycle.<br />
DS<br />
DX<br />
DZ<br />
DZ<br />
WO = 3 WO = 1<br />
DX<br />
DS
Threading tools<br />
Tool parameters<br />
X, Z: Setup dimensions<br />
WO: Tool orientation (number shown in graphic support window)<br />
DX, DZ: Wear compensation<br />
Q: (Reference to) tool text<br />
MD: Direction of rotation (3=M3; 4=M4) default: not assigned<br />
tools<br />
TS: Spindle speed (cutting speed is not permitted with threading<br />
tools) – Default: not defined<br />
PT: Tool life – default: not defined<br />
RT: Rem. dwell: Remaining tool life (display field)<br />
PZ: Number of units – default: not defined<br />
RZ: Remaining pieces (display field) Threading<br />
113
Drilling tools<br />
114<br />
Drilling tools<br />
Tapping tools<br />
Tool parameters<br />
X, Z: Setup dimensions<br />
WO: Tool orientation (number shown in graphic support window)<br />
I: Hole diameter / thread diameter<br />
B: Tip angle – range: 0°
Milling tools<br />
Tool parameters<br />
X, Z: Setup dimensions<br />
I: Cutter diameter<br />
WO: Tool orientation (number shown in graphic support window)<br />
K: Number of teeth<br />
DX/DZ: Wear compensation<br />
Q: (Reference to) tool text<br />
MD: Direction of rotation (3=M3; 4=M4) default: not assigned<br />
TS: Cutting speed – default: not defined<br />
TF: Feed rate per tooth – default: not defined<br />
PT: Tool life – default: not defined<br />
RT: Rem. dwell: Remaining tool life (display field)<br />
PZ: Number of units – default: not defined<br />
RZ: Remaining pieces (display field)<br />
When milling with “constant cutting speed”,<br />
MANUALplus calculates the spindle speed<br />
from the “cutter diameter I”.<br />
The “Number of teeth K“ is evaluated in<br />
“G913 Feed rate per tooth“.<br />
I is necessary to show the tool tip in graphic<br />
simulation.<br />
Milling tools<br />
115
Workpiece Generation<br />
116<br />
Create a Workpiece using Cycles<br />
This section explains the steps necessary to machine<br />
a workpiece. This machining operation is performed<br />
in “Teach-in“ mode. This has the advantage<br />
that, once you have machined the first workpiece,<br />
you have a complete cycle program that can be repeated<br />
any time.<br />
The generated cycle program can be used in the “Program”<br />
mode for the production of further units.<br />
Process<br />
Clamp workpiece<br />
Enter and check tool data<br />
Set up the machine<br />
Define the workpiece datum with<br />
“Set axis values “<br />
Determine the tool dimensions<br />
Switch to “Teach-in“ mode<br />
Machine the workpiece cycle by cycle<br />
For further information, see: “9.1 Cycle<br />
Programming“<br />
Entering tool data<br />
In the “Tool Management” mode, you set up a database (T number) for<br />
each tool. You also define the tool orientation, and depending on the tool<br />
type, various other parameters (setup and tool-tip angle, cutter width,<br />
etc.) . A “tool description” is assigned to each tool.<br />
Check the data if the tools have already been entered.<br />
1. Select the Tool Management mode of operation<br />
Press the Process key<br />
Place the cursor on ”Tool management”<br />
Press the Process key again<br />
2. Enter the tool<br />
Look for a free space in the tool list<br />
Switch to tool input menu with “Add”<br />
Select tool type<br />
Enter tool data – except setup dimensions<br />
Enter or assign tool text<br />
Store data with “Save”<br />
3. Return to Machine mode<br />
Press the Process key<br />
Place the cursor on ”Machine”<br />
Press the Process key again
Setting the workpiece datum<br />
1. Machine the end face<br />
Use a measured tool<br />
Enter machine data in ”Set T, S, F”<br />
Use handwheels and jog controls to<br />
machine the end face<br />
2. Set workpiece datum<br />
Select ”Setup”<br />
Select ”Set axis values”<br />
Touch end face with tool tip<br />
Press ”Z=0” to accept position as<br />
datum<br />
3. Return to main menu<br />
Press the Menu key<br />
Measuring tools<br />
1. Insert the tool to be measured<br />
2. Enter the tool number<br />
Select ”Set T, S, F”<br />
Enter the tool number<br />
Press ”Save”<br />
3. Measure the tool<br />
Activate ”Measure tool”<br />
Touch the diameter, then retract<br />
Measure diameter and enter value as the ”Measuring<br />
point coordinate X”<br />
Touch the end face and enter ”0” for the ”Measuring point<br />
coordinate Z”<br />
4. Return to main menu<br />
Press the Menu key<br />
5. Repeat these steps for all tools<br />
Workpiece Generation<br />
117
Workpiece Generation<br />
118<br />
Creating a cycle program<br />
1. Call Teach-in (cycle programming)<br />
Select “Teach-in“<br />
2. Set the program number<br />
Activate the “program list“<br />
Enter the number of the cycle program<br />
Press “Select“to transfer the number of the cycle program<br />
Switch to the alphabetic keyboard using the “Change text“ key<br />
Enter the name of the cycle program<br />
Confirm your entry with “Save“<br />
3. For each cycle<br />
Activate “Add cycle“<br />
Select your cycle<br />
Enter the cycle parameters<br />
Accept the parameters with “Input finished“<br />
Check the cycle execution using graphic simulation<br />
Execute the cycle<br />
Store the cycle with “Save“<br />
4. Return to the main menu<br />
Press the Menu key
Cycle Overview<br />
Workpiece blank Page<br />
Blank bar/tube 12<br />
Workpiece blank contour ICP 12<br />
Single cuts Page<br />
Rapid traverse positioning 13<br />
Approach tool change point 13<br />
Longitudinal/transverse linear machining 13<br />
Linear machining at angle 14<br />
Circular machining 14<br />
Chamfer 15<br />
Rounding 15<br />
M Function 13<br />
Roughing cycles longitudinal/transverse Page<br />
Cut longitudinal/transverse 16<br />
Plunge longitudinal/transverse 17<br />
ICP contour parallel longitudinal/transverse 18<br />
ICP cutting longitudinal/transverse 19<br />
Recessing cycles Page<br />
Radial/axial recessing 20<br />
Radial/axial ICP recessing <strong>21</strong><br />
Radial/axial recess turning 22<br />
Radial/axial ICP recess turning 23<br />
Undercut H 24<br />
Undercut K 24<br />
Undercut U 25<br />
Cut-off 25<br />
Thread and undercut cycles Page<br />
Thread cycle 26<br />
Thread regrooving 27<br />
Tapered thread 28<br />
API thread 28<br />
Undercut DIN 76 29<br />
Undercut DIN 509 E 29<br />
Undercut DIN 509 F 29<br />
Drilling cycles Page<br />
Axial/radial drilling cycle 30<br />
Axial/radial pecking cycle 31<br />
Axial/radial tapping cycle 32<br />
Axial thread milling cycle 33<br />
Milling cycles Page<br />
Rapid traverse positioning 34<br />
Axial/radial groove milling 34<br />
Axial/radial figure milling 35<br />
Axial/radial ICP contour milling 36<br />
End-face milling 37<br />
Helical groove milling 38<br />
Hole patterns Page<br />
End-face linear pattern 39<br />
End-face circular pattern 40<br />
Lateral-surface linear pattern 41<br />
Lateral-surface circular pattern 42<br />
DIN cycle Page<br />
DIN cycle 43