Installing Canon EOS Rebel G Logic Board
Installing Canon EOS Rebel G Logic Board
Installing Canon EOS Rebel G Logic Board

Create successful ePaper yourself
Turn your PDF publications into a flip-book with our unique Google optimized e-Paper software.
<strong>Installing</strong> <strong>Canon</strong> <strong>EOS</strong> <strong>Rebel</strong> G <strong>Logic</strong> <strong>Board</strong><br />
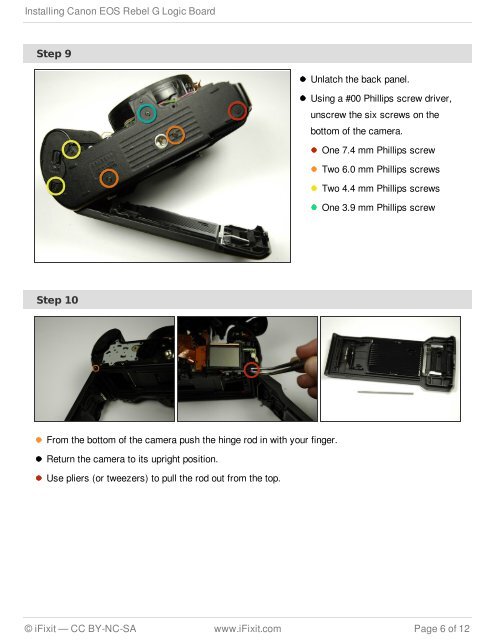
Step 9<br />
Step 10<br />
From the bottom of the camera push the hinge rod in with your finger.<br />
Return the camera to its upright position.<br />
Use pliers (or tweezers) to pull the rod out from the top.<br />
Unlatch the back panel.<br />
Using a #00 Phillips screw driver,<br />
unscrew the six screws on the<br />
bottom of the camera.<br />
One 7.4 mm Phillips screw<br />
Two 6.0 mm Phillips screws<br />
Two 4.4 mm Phillips screws<br />
One 3.9 mm Phillips screw<br />
© iFixit — CC BY-NC-SA www.iFixit.com Page 6 of 12