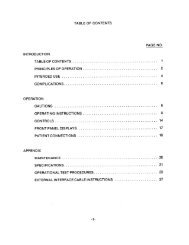
Pleur-Evac Operation Manual - Clinical Engineering
Pleur-Evac Operation Manual - Clinical Engineering
Pleur-Evac Operation Manual - Clinical Engineering

Create successful ePaper yourself
Turn your PDF publications into a flip-book with our unique Google optimized e-Paper software.
Deknatel Product Group<br />
SURGICAL PRODUCTS<br />
PLEUR=EVAC@<br />
D’ ’<br />
ONE SINGLE USE UNIT DO NOT RESTERILIZE<br />
STERILE: Contents sterile unless package has been opened or damaged.<br />
CAUTION: Federal (USA) law restricts this device to sale by or on the order of a physician.<br />
PRODUCT DESCRIPTION<br />
The <strong>Pleur</strong>-evac@ SaharaTM Chest Drainage<br />
System is provided as a sterile, non-pyrogenic unit<br />
intended for single patient use. By attaching the<br />
<strong>Pleur</strong>-evac Sahara Autotransfusion Bag, the<br />
<strong>Pleur</strong>-evac Sahara Chest Drainage System serves<br />
as a collection/reinfusion system for autologous<br />
WARNINGS DISPOSAL<br />
blood. These instructions will address the set-up<br />
and operation of the <strong>Pleur</strong>-evac Sahara Chest<br />
Drainage System and the Autotransfusion Bag.<br />
L<br />
INDICATIONS FOR USE<br />
The <strong>Pleur</strong>-evac Sahara Chest Drainage System<br />
is indicated:<br />
+ To evacuate air and/or fluid from the chest<br />
cavity or mediastinum<br />
+ To help prevent air and/or fluid from<br />
reaccumulating in the chest cavity or<br />
mediastinum<br />
+ To help re-establish and maintain normal<br />
intrathoracic pressure gradients<br />
+ To facilitate complete lung re-expansion to<br />
restore normal breathing dynamics<br />
1. The collected contents of the <strong>Pleur</strong>-evac<br />
Sahara Chest Drainage System should not be<br />
used for reinfusion.<br />
2. Chest tubes should not be clamped except<br />
when changing <strong>Pleur</strong>-evac Sahara System. In<br />
the event of an air leak, clamping chest tubes<br />
could lead to a tension pneumothorax.<br />
3. Stripping of the thoracic tubing must be done<br />
with the thoracic tubing clamp open. Stripping<br />
with the clamps closed can result in the build-up<br />
of excessive positive pressure.<br />
CAUTIONS<br />
Keep the <strong>Pleur</strong>-evac Sahara System below the<br />
patient’s chest level at all times.<br />
Avoid loops in the patient tubing.<br />
Caution should be used when the possibility<br />
exists for exposure to blood or body fluids.<br />
Follow hospital policy regarding the use of<br />
protective wear.<br />
The clamp on the patient tube should be placed<br />
away from the patient, avoiding accidental<br />
clo&re.<br />
Use only a standard luer slip tip syringe to fill the<br />
Air Leak Meter. NO NEEDLE IS REQUIRED.<br />
SET UP INSTRUCTIONS<br />
If suction is prescribed, follow steps 1 through 5. If suction is not required, follow steps 1 and 2 only.<br />
1. CONNECTTOTHE PATIENTTHORACIC CATHETER<br />
Connect the patient tube, which is the long tube<br />
from the collection chamber, to the patient’s<br />
thoracic catheter. One way seal is now established<br />
for patient protection. (Figure 1)<br />
NOTE: A CONNECTOR is provided at the<br />
end of the patient tube for easy connection<br />
Needleless<br />
to the thoracic catheter. This connector Suc$f~ Port jjection Site<br />
is capped to maintain good aseptic<br />
R<br />
technique during set-up. DISCARD cap<br />
on patient tubing after set-up.<br />
2. FOR AIR LEAK DIAGNOSTICS<br />
Using a standard luer slip tip syringe,<br />
inject sterile water or saline into the<br />
Patient Air Leak Meter through the<br />
needleless injection site on the top of the<br />
unit. Fill to the 4Occ “Fill” line. (Figure 1)<br />
CAUTION: use only a standard luer slip Air’<br />
_<br />
tip syringe to fill the Air Leak Meter.<br />
HGURE 1<br />
NO NEEDLE IS REQUIRED.<br />
Patient<br />
Tube<br />
4. SUCTION CONTROL - A dial to set<br />
the suction control setting is located on the<br />
upper left side of the unit. NO WATER IS<br />
NEEDED IN THE SUCTION CONTROL<br />
CHAMBER. To set the suction control<br />
setting, rotate the dial until the red stripe<br />
appears in the semi-circular window at the<br />
prescribed suction level and clicks into<br />
place. Suction can be set at -10, -15, -20,<br />
-30 and -4Ocm of water. Fi ure 2 shows the<br />
suction control dial set at -sOcm<br />
of water.<br />
The unit is set at -2Ocm of water when<br />
opened.<br />
5. SUCTION SOURCE - Increase<br />
suction source until the orange float appears<br />
in the suction control indicator window. The<br />
setting of the suction control dial determines<br />
the approximate amount of suction imposed<br />
regardless of the amount of source suction -<br />
as long as the orange float appears in the<br />
indicator window. Figure 3 shows the<br />
suction control dial set at -2Ocm of water<br />
and the float valve in the indicator window.<br />
3. CONNECTTO SUCTION SOURCE<br />
Connect the suction source to the suction port..<br />
NOTE: Source suction must be capable of<br />
delivering a minimum of 16 liters per minute<br />
(Figure 1)<br />
(LPM) air flow.<br />
CODE NUMBER<br />
S-l 1 OOA<br />
lllllllllllllHllllllllllllllllllllllllllllllllllllllllllllllllllllllllllll<br />
*tH196Sl<br />
Ill 11111111111111111111 I I Ill<br />
458248<br />
The <strong>Pleur</strong>-evac Sahara Chest Drainage<br />
System should be handled and disposed of in<br />
accordance with all applicable local, state and<br />
federal regulations including, without limitation,<br />
those pertaining to human health and safety<br />
and the environment.<br />
TO OPEN PACKAGE<br />
Grasp the bottom edge of flap and pull<br />
up toward sterile opening.<br />
Pull flap back pushing the wrapped unit<br />
out of bag. OR...Completely remove<br />
the breather strip. Push the wrapped<br />
unit out of the bag using aseptic<br />
w<br />
IOOAlT<br />
/Dry Suction Control<br />
/ Dry Suction Control
A. SUCTION CONTROL CHAMBER<br />
A-l SUCTION DIAL<br />
The suction level is determined by the position of<br />
the red stripe in the semi-circular<br />
!&ion control<br />
window. Rotate the dial to adjust the desired<br />
suction level.<br />
A-2 SUCTION INDICATOR<br />
When suction is applied and the orange float<br />
appears in the suction indicator window, the<br />
suction imposed is determined by the dial setting<br />
(red stripe). As long as the float appears in the<br />
window, the unit is operating at the suction setting<br />
that appears in the suction control window.<br />
NOTE: In the presence of a large air leak air flow<br />
through the <strong>Pleur</strong>-evac Sahara System may be<br />
increased by increasing suction source, WITHOUT<br />
increasing imposed negativity. It is not necessary<br />
to change the suction setting on the <strong>Pleur</strong>-evac<br />
Sahara System.<br />
Check the unit periodically to ensure that adequate<br />
suction is being applied to the unit and that the<br />
orange float remains in the suction indicator<br />
window.<br />
NOTE: If suction setting is changed from a<br />
HIGHER level to a LOWER level, the patient<br />
negativity on the patient side of the seal may<br />
remain at the higher level unless the negativity is<br />
relieved. Use high negativity relief valve to reduce<br />
negativity to desired level. (See B-4)<br />
GRAVITY DRAINAGE<br />
If gravity drainage is prescribed, the suction port<br />
should remain UNCAPPED and free of<br />
OBSTRUCTIONS, to allow air to exit and minimize<br />
possibility of tension pneumothorax.<br />
A-3 NEGATIVE PRESSURE INDICATOR<br />
Negative pressure exists in the collection chamber<br />
when the picture of a palm tree can be seen in the<br />
indicator window. During gravity drainage, the<br />
indicator may intermittently indicate a negative<br />
pressure in the collection chamber with patient<br />
respiration. During suction drainage, the pressure<br />
indicator should indicate a negative pressure<br />
continuously.<br />
CAUTION: If the negative pressure indicator<br />
does not show the picture of a palm tree as<br />
described, 1) check patient connections for<br />
leaks, 2) check tubing connections on the unit.<br />
If all connections are secure and the picture of<br />
a palm tree does not appear, replace the unit.<br />
The negative pressure indicator does not<br />
confirm drainage tube patency. Routinely<br />
check the drainage tube patency.<br />
Ei-3<br />
b-2<br />
B. ONE-WAY SEAL<br />
A check valve provides the one-way seal which<br />
allows air to exit from the pleural space while<br />
retarding the reverse flow of air. Water is not<br />
required to achieve this one-way seal.<br />
NOTE: The fluid in the patient air leak meter is<br />
used for air leak detection and is not a water seal.<br />
B-l AIR LEAK DIAGNOSTICS - If air leak<br />
diagnostics are desired, the PATIENT AIR LEAK<br />
METER must be filled with water to the fill range.<br />
The patient air leak meter indicates the approximate<br />
degree of air leak from the chest cavity. Observe<br />
bubbling in the columns of the patient air leak meter.<br />
The meter is labeled from LOW (1) to HIGH (7).<br />
The higher the numbered column through which the<br />
bubbling occurs, the greater the degree of air leak.<br />
B-2 NEEDLELESS INJECTION SITE - Sterile<br />
water or saline can be injected into the Air Leak<br />
Meter through the NEEDLELESS INJECTION SITE<br />
using a standard luer slip tip syringe.<br />
CAUTION: Use only a standard luer slip tip<br />
syringe to fill the Air Leak Meter. NO NEEDLE IS<br />
REQUIRED.<br />
B-3 POSITIVE PRESSURE RELIEF VALVE opens<br />
with increases in positive pressure, preventing<br />
pressure accumulation.<br />
WARNING: Do not obstruct the positive<br />
pressure relief valve.<br />
B-4 FILTERED HIGH NEGATIVITY RELIEF VALVE<br />
is provided to vent excessive negativity. Depress<br />
button to relieve negativity; filtered air will enter the unit.<br />
WARNING: Stripping or milking of the thoracic<br />
tubing can cause excessive negativity. Use the<br />
high negativity relief valve to restore negativity<br />
to prescribed levels.<br />
CAUTION: If suction is not operative, or if<br />
operating on gravity drainage, depressing the<br />
High Negative Relief Valve can reduce negative<br />
pressure within the Collection Chamber to zero<br />
(atmosphere) with the resulting possibility of a<br />
pneumothorax.<br />
CAUTION: The <strong>Pleur</strong>-evac Sahara System has<br />
an automatic high negative pressure relief valve<br />
to limit the negative pressure to approximately<br />
40cm of water.<br />
B:4<br />
R<br />
A-3<br />
c. COLLECTION CHAMBER<br />
C-l THE COLLECTION CHAMBER has a<br />
capacity of 2000~~. The collection chamber is<br />
calibrated in 2cc increments up to 5Occ and<br />
5cc increments up to 500~~. Over 5OOcc,<br />
calibrations are in 1 Occ increments. Fluids<br />
overflow from one compartment to the next.<br />
When reading the collection chamber<br />
calibrations, please note that there may be a<br />
decrease in original volume of the first<br />
compartment after fluids spill over into the<br />
next. (This may be attributed to surface<br />
tension “build-up”.) The actual volume of the<br />
previous compartment(s) should therefore be<br />
checked if accuracy of the total reading is<br />
critical.<br />
When drainage reaches 2OOOcc, the unit is<br />
filled to capacity. Replace the unit. When<br />
changing the unit, maximum speed can be<br />
achieved by making ready a new unit and<br />
following the set-up and operating instructions.<br />
D. OTHER FEATURES<br />
A carrying handle is provided for ease of<br />
patient ambulation or transport of the unit.<br />
Marking surfaces are for making notations.<br />
Use pen or pencil.<br />
Two hangers are provided to hang the <strong>Pleur</strong>evac<br />
Sahara from a bed, O.R. stand or<br />
stretcher.<br />
An attached floorstand swings out to stabilize<br />
the Sahara Unit when it is set on the floor. The<br />
floorstand contains an automatic locking<br />
mechanism that locks the floorstand in the<br />
open position. To close, press the locking tab<br />
and rotate the floorstand.<br />
Autotransfusion connectors (red and blue) are<br />
provided in the patient tube. See instructions<br />
for autotransfusion use. A self-sealing<br />
sampling port is provided in the connector for<br />
taking samples of patient drainage. Use an 18<br />
gauge (or smaller) needle, attached to a<br />
syringe, for withdrawing samples.
PRODUCT DESCRIPTION<br />
The <strong>Pleur</strong>-evac Sahara Chest Drainage<br />
System offers the option of adding a bag for<br />
autotransfusion use. A <strong>Pleur</strong>-evac Sahara<br />
Autotransfusion Bag is used for<br />
autotransfusion.<br />
The <strong>Pleur</strong>-evac Sahara Autotransfusion Bag<br />
contains a 200 micron filter for filtration of<br />
particulates from shed blood. Attached to the<br />
Autotransfusion Bag are two tubes, one for<br />
collecting the shed blood into the bag, the<br />
other for connection to the <strong>Pleur</strong>-evac Sahara<br />
System. This bag may be used as the initial<br />
collection bag by attaching it to a <strong>Pleur</strong>-evac<br />
Sahara System that contains connectors for<br />
this purpose. It may also be used as a<br />
replacement bag after a bag is removed from a<br />
<strong>Pleur</strong>-evac Sahara System.<br />
INDICATIONS FOR USE<br />
The <strong>Pleur</strong>-evac Sahara Autotransfusion Bag is<br />
a sterile, non-pyrogenic, single use device<br />
used for collection and reinfusion of autologous<br />
blood from the thoracic cavity when attached to<br />
a <strong>Pleur</strong>-evac Sahara System.<br />
CONTRAINDICATIONS<br />
WARNINGS<br />
Pericardial, mediastinal, or systemic infections<br />
Pulmonary and respiratory infection or<br />
infestation<br />
1. A microaggregate filter must be used during<br />
reinfusion. A new microaggregate filter must be<br />
used with each new autotransfusion bag.<br />
Presence of malignant neoplasms<br />
Coagulopathies<br />
Suspected thoraco-abdominal injuries with<br />
possible enteric contamination<br />
Impaired renal function<br />
2.<br />
3<br />
Only reinfuse blood that has been collected in<br />
the flexible Autotransfusion Bag.<br />
Blood collected in the <strong>Pleur</strong>-evac Sahara<br />
System must not be reinfused.<br />
lntrao erative thoracic or mediastinal cavity 4. If all air is not removed from the system prior to<br />
use o Ptopical<br />
thrombin, microfibrillar<br />
hemostatic agents or povidone-iodine<br />
antiseptic gels or solutions and non I.V.<br />
compatible antibiotics<br />
ADVERSE REACTIONS<br />
The following complications have been known to<br />
occur during autotransfusion:<br />
+ Blood trauma<br />
+ Coagulopathies<br />
+ Particulate or air embolism<br />
5.<br />
6.<br />
reinfusion, air embolism may result.<br />
Carefully monitor the patient line when pressure<br />
reinfusing to prevent the infusion of air. Clamp<br />
the line when the drip chamber empties.<br />
Do not perform continuous reinfusion unless a<br />
minimum of 5Occ of blood remains in the bag<br />
after the reinfusion system, including<br />
microaggregate filter, has been primed with<br />
blood or sterile saline.<br />
CAUTIONS<br />
1. Pressure cuff infusion pressure should not<br />
exceed 150mm Hg.<br />
2. Blood collected in the Autotransfusion Bag<br />
must be reinfused within 6 hours of the<br />
beginning of collection.<br />
ANTICOAGULANTS<br />
Anticoagulants may be used at the discretion of the<br />
physician. Add anticoagulant using an 18 gauge (or<br />
smaller) needle through the self-sealing injection<br />
site in the connector.<br />
;<br />
SET UP INSTRUCTIONS<br />
Careful attention to the instructions and the use of aseptic technique<br />
is necessary in order to maintain sterility.’<br />
I. TO ADD AUTOTRANSFUSION BAG<br />
Obtain and unwrap the <strong>Pleur</strong>-evac Sahara<br />
Autotransfusion Bag.<br />
Close the two clamps on the top of the<br />
Autotransfusion Bag.<br />
Align the bottom leg and the lever of the<br />
adaptor with their mating receptacles on<br />
Ill,<br />
1.<br />
2.<br />
TO DISCONTINUE AUTOTRANSFUSION<br />
COLLECTION AND RESUME DRAINAGE<br />
IN SYSTEM<br />
Use the high negativity relief valve on the <strong>Pleur</strong>evac<br />
Sahara System to reduce excessive<br />
negativity.<br />
Close the clamp on the patient tube and both<br />
clamps on the Autotransfusion Bag.<br />
4.<br />
the <strong>Pleur</strong>-evac Sahara System. Insert with<br />
a downward motion until the lever “clicks”<br />
into position. The Autotransfusion Bag<br />
should be firmly attached to the <strong>Pleur</strong>-evac<br />
Sahara System.<br />
Close the clamp on the patient tube and<br />
milk blood from tubing into the <strong>Pleur</strong>-evac<br />
Sahara System.<br />
<strong>Pleur</strong>-evac SAHARA System<br />
Plewevac SAHARA<br />
3.<br />
4.<br />
;:<br />
Separate the red connectors on the patient tube<br />
and the blue connectors on the connector tube.<br />
Connect together the red and blue connectors on<br />
the Autotransfusion Bag. joining the patient tube<br />
(red connector) to the short <strong>Pleur</strong>-evac Sahara<br />
tube (blue connector).<br />
Open clamp on patient tube.<br />
Patient drainage will now be collected in the<br />
<strong>Pleur</strong>-evac Sahara System.<br />
5.<br />
6.<br />
7.<br />
8.<br />
9.<br />
Separate the red and blue connectors on<br />
the patient tube.<br />
Remove the red protective cap from the<br />
collection tube on the Autotransfusion Bag.<br />
Connect this tube, using the red<br />
connectors, to the patient tube.<br />
Remove the blue protective cap from the<br />
connection tube on the Autotransfusion<br />
Bag. Connect this tube, using the blue<br />
connectors, to the short <strong>Pleur</strong>-evac Sahara<br />
tube.<br />
OPEN ALL CLAMPS. Make sure all<br />
connections are secure. The<br />
autotransfusion system is now operational.<br />
If prescribed, anticoagulants may be added<br />
as directed by the physician.<br />
(see ANTICOAGULANTS).<br />
II. COLLECTION<br />
Blood collected in the Autotransfusion Bag<br />
must be reinfused within 6 hours of the<br />
beginning of collection. For reinfusion of the<br />
collected blood, a decision is made to:<br />
+ Discontinue autotransfusion collection and<br />
prepare the bag for reinfusion. Complete<br />
chest drainage with the <strong>Pleur</strong>-evac Sahara<br />
System or,<br />
+ Add another Autotransfusion Bag and<br />
continue autotransfusion collection; or,<br />
+ Leave the autotransfusion bag attached<br />
and perform continuous reinfusion.<br />
8.<br />
9.<br />
Remove the Autotransfusion Bag from <strong>Pleur</strong>-evac<br />
Sahara System by depressing the lever and lifting<br />
up the Autotransfusion Bag.<br />
Prepare the Autotransfusion Bag for reinfusion.<br />
<strong>Pleur</strong>-evac SAHARA System<br />
with attached Autotransfusion Sag
IV. TO CHANGE AUTOTRANSFUSION<br />
BAG<br />
1. Use the high negativity relief valve on the <strong>Pleur</strong>evac<br />
Sahara System to reduce excessive<br />
negativity.<br />
2. Obtain and unwrap the new <strong>Pleur</strong>-evac Sahara<br />
Autotransfusion Bag.<br />
3. Close the two clamps on the top of the new<br />
Autotransfusion Bag.<br />
4. Close the clamp on the patient tube and both<br />
clamps on the existing Autotransfusion Bag.<br />
5. Separate the red connectors on the patient tube<br />
and the blue connectors on the connector tube.<br />
6. Remove the red protective cap from the<br />
collection tube on the Autotransfusion Bag.<br />
Connect this tube, using the red connectors, to<br />
the patient tube.<br />
7. Remove the blue protective cap from the<br />
connection tube on the Autotransfusion Bag.<br />
Connect this tube, using the blue connectors, to<br />
the short <strong>Pleur</strong>-evac Sahara Tube.<br />
8. Remove the existing Autotransfusion Bag from<br />
the <strong>Pleur</strong>-evac Sahara System by pressing the<br />
lever and lifl the Autotransfusion Bag up until it is<br />
free of the <strong>Pleur</strong>-evac Sahara System.<br />
9. Attach the new Autotransfusion Bag to the <strong>Pleur</strong>evac<br />
Sahara System. Align the bottom leg and<br />
the lever of the adaptorwith their mating<br />
receptacles on the <strong>Pleur</strong>-evac Sahara System.<br />
Insert with a downward motion until the lever<br />
“clicks” into position. The Autotransfusion Bag<br />
should be firmly attached to the <strong>Pleur</strong>-evac<br />
Sahara System.<br />
10. OPEN ALL CLAMPS.<br />
Deknatel Product Group<br />
600 Airport Road<br />
Fall River, MA 02720 U.S.A.<br />
I-800-367-7874<br />
SET UP INSTRUCTIONS<br />
Careful attention to the instructions and the use of aseptic technique<br />
is necessary in order to maintain sterility.<br />
V.<br />
PREPARING FOR GRAVITY OR<br />
PRESSURE CUFF REINFUSION<br />
1. Remove the adaptor bracket from the wire frame<br />
by twisting it slightly to disengage the bottom and<br />
then unhook the top.<br />
2. Slide the Autotransfusion Bag off the wire support<br />
frame. Make sure the red and blue connectors on<br />
the top of the unit are secure. Ensure the clamps<br />
are closed.<br />
3. Invert the bag so the spike port points upwards.<br />
Remove the protective cap.<br />
4. Insert a microaggregate filter into the spike port<br />
using a constant twisting motion. Attach infusion<br />
set. Follow manufacturer’s directions for attaching.<br />
5. <strong>Evac</strong>uate residual air from the bag. Open the<br />
infusion set clamp, keeping the unit inverted, and<br />
carefully squeeze all the air from the bag through<br />
the filter and drip chamber assembly.<br />
6. With infusion set clamps open and keeping the bag<br />
inverted, gently squeeze the Autotransfusion Bag,<br />
allowing blood to slowly prime the filter. Continue<br />
squeezing until the filter is saturated with blood and<br />
the drip chamber is half full. Close the clamp on<br />
the infusion line.<br />
7. Invert the Autotransfusion Bag and suspend from<br />
an I.V. pole using the plastic strap.<br />
8. Open the infusion set clamp and carefully flush the<br />
administration line to remove air.<br />
Autotransfusion Bag<br />
m<br />
,bF--- Spike Port<br />
Blue Cap -+<br />
Copyright 1999 Genzyme Surgical Products Corp.<br />
<strong>Pleur</strong>-eva@ and <strong>Pleur</strong>-evac Sahara and design are<br />
registered trademarks of Genzyme Surgical<br />
Products Corp.<br />
Printed in the U.S.A.<br />
144114-0899<br />
VI.<br />
1. Set up a blood compatible I.V. pump.<br />
2. Obtain a microaggregate filter and<br />
administration set for use with that pump.<br />
3. Prime the filter, drip chamber and<br />
administration set with normal saline.<br />
Remove the bag of normal saline.<br />
4. Remove the blue protective cap from the<br />
Autotransfusion Bag, and spike the bag with<br />
the blood filter.<br />
5. Use an I.V. pump to prime the filter, drip<br />
chamber and infusion line with blood.<br />
6. If needed, depress the high negativity relief<br />
valve on the top of the <strong>Pleur</strong>-evac Sahara<br />
System to relieve excessive negativity.<br />
7. Make sure infusion line is filled with blood<br />
and contains no air. Attach to the patient’s<br />
I.V. catheter. Make sure all connections<br />
are secure.<br />
8. Set infusion rate as ordered by physician.<br />
9. Attach the <strong>Pleur</strong>-evac Sahara System and<br />
Autotransfusion Bag to bed rail using<br />
hangers.<br />
VII. REINFUSION<br />
1.<br />
2.<br />
CONTlNirOUS REINFUSION<br />
Attach the distal end of infusion set<br />
assembly to appropriate patient line.<br />
Infuse blood according to approved<br />
hospital procedure, using gravity or<br />
pressure reinfusion.<br />
US. Patent Numbers 4,443,220,4,544,370;<br />
4550,749; 4,698,060; 4,715,856; 4,747,844;<br />
4,784,642; 4,889,531; 5,026,358; 5,300,050<br />
Other patents pending. Corresponding patents<br />
and patents pending in foreign countries.