Rack mounting instructions
Rack mounting instructions
Rack mounting instructions
Create successful ePaper yourself
Turn your PDF publications into a flip-book with our unique Google optimized e-Paper software.
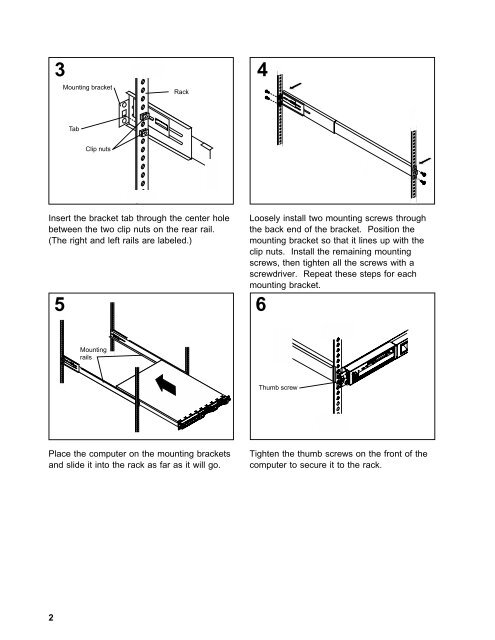
3<br />
Mounting bracket<br />
Tab<br />
Clip nuts<br />
<strong>Rack</strong><br />
Insert the bracket tab through the center hole<br />
between the two clip nuts on the rear rail.<br />
(The right and left rails are labeled.)<br />
5<br />
Mounting<br />
rails<br />
Place the computer on the <strong>mounting</strong> brackets<br />
and slide it into the rack as far as it will go.<br />
2<br />
4<br />
Loosely install two <strong>mounting</strong> screws through<br />
the back end of the bracket. Position the<br />
<strong>mounting</strong> bracket so that it lines up with the<br />
clip nuts. Install the remaining <strong>mounting</strong><br />
screws, then tighten all the screws with a<br />
screwdriver. Repeat these steps for each<br />
<strong>mounting</strong> bracket.<br />
6<br />
Thumb screw<br />
Tighten the thumb screws on the front of the<br />
computer to secure it to the rack.


