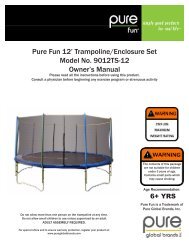
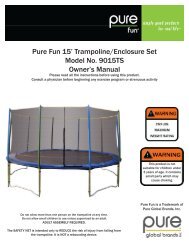
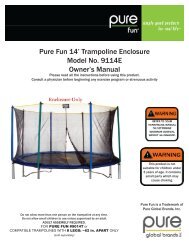
Pure Fun 12' Trampoline/Enclosure Set Model No. 9012TS Owner's ...
Pure Fun 12' Trampoline/Enclosure Set Model No. 9012TS Owner's ...
Pure Fun 12' Trampoline/Enclosure Set Model No. 9012TS Owner's ...

Create successful ePaper yourself
Turn your PDF publications into a flip-book with our unique Google optimized e-Paper software.
TO DISASSEMBLE AND/OR MOVE<br />
IN WINDY CONDITIONS - In severe wind conditions, the trampoline can be blown about. If<br />
you expect windy weather conditions, the trampoline should be moved to a sheltered area or disassembled.<br />
To ensure security in normal weather conditions, at least four (4) tie downs should be used.<br />
Secure the trampoline frame to the ground. You can purchase an ANCHOR KIT for your trampoline<br />
from <strong>Pure</strong> <strong>Fun</strong>, by visiting us on the web at www.pureglobalbrands.com or by calling 866-498-5269.<br />
MOVING THE TRAMPOLINE - When moving the trampoline, a minimum of three people<br />
are required. All connecting points on the top rails should be securely and tightly wrapped with<br />
weather resistant tape, such as duct tape. This will keep the frame intact during the move and prevent<br />
the connector points from dislocating and separating. When moving, lift the trampoline slightly off the<br />
ground and keep it horizontal to the ground. Never drag the trampoline. For any type of other move,<br />
you should disassemble the trampoline. After any move please conduct a full safety inspection.<br />
TO DISASSEMBLE:<br />
ADULTS REQUIRED – A rubber mallet (not included) is required to disassemble some parts of the<br />
trampoline.<br />
1. Unattach the <strong>Enclosure</strong> Netting by unclasping the net bottom, and then releasing the hoops at the<br />
top. Fold and store the net neatly where it will not be damaged or torn.<br />
2. Remove the <strong>Enclosure</strong> hardware (Steel Jigs, Spacers, etc.) attaching the poles to the trampoline.<br />
Store this hardware in a resealable zippered plastic bag for later reassembly. Remove and store the<br />
poles in a dry, safe location where they will not present a tripping hazard or become damaged.<br />
3. The Leg Extension (#6) and T-section assemblies (#4) are very tight and do not disassemble easily.<br />
We suggest you use a lubricant before beginning disassembly, specifically on the areas where<br />
the T-section and Leg Extension come together. You should lightly lubricate the visible joint by the<br />
flanged end of the Leg Extension, and apply a small amount of lubricant down the tube of the Leg<br />
Extension. After applying lubrication, make sure to clean excess lubricant from any exterior<br />
surfaces using a degreasing agent. Making sure there is no lubricant/grease on the Leg<br />
extension exterior or the striking surface on the top rail, firmly grip or clamp the Leg Extension and<br />
use a rubber mallet hit the top rail (#3) as shown to the right to disassemble this part.<br />
Before reassembly or storage, any remaining lubricant must be fully cleaned with a degreasing agent<br />
to ensure that the metal does not become damaged and that proper reassembly is achieved. (See<br />
diagram 3.)<br />
4. Do NOT disassemble the T-section (#4) and the top rail (#3); you can keep it as it is. It is not necessary<br />
and it will make re-assembly easier. (See diagram 4)<br />
3. 4.