

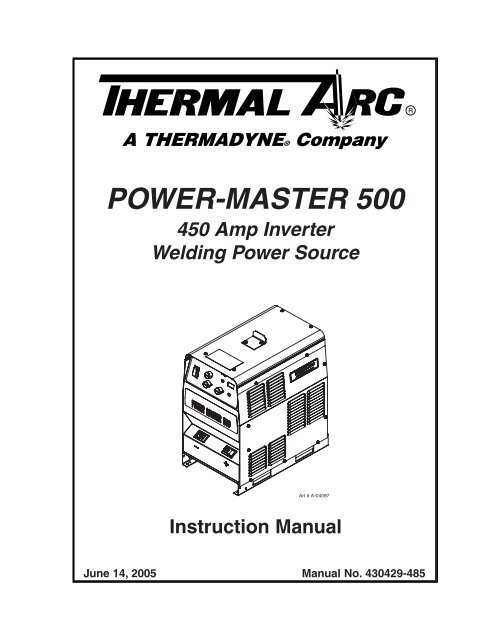
POWER-MASTER 500 - Victor Technologies
POWER-MASTER 500 - Victor Technologies
POWER-MASTER 500 - Victor Technologies

Create successful ePaper yourself
Turn your PDF publications into a flip-book with our unique Google optimized e-Paper software.
<strong>POWER</strong>-<strong>MASTER</strong> <strong>500</strong><br />
450 Amp Inverter<br />
Welding Power Source<br />
Art # A-04097<br />
Instruction Manual<br />
June 14, 2005 Manual No. 430429-485
WARNINGS<br />
Read and understand this entire Manual and your employer’s safety practices before installing, operating,<br />
or servicing the equipment.<br />
While the information contained in this Manual represents the Manufacturer's best judgement, the<br />
Manufacturer assumes no liability for its use.<br />
450 Amp Inverter Welding Power Supply<br />
Power-Master <strong>500</strong><br />
Instruction Manual Number 430429-485, for Spec Number 100060<br />
Published by:<br />
Thermal Dynamics Corporation<br />
82 Benning Street<br />
West Lebanon, New Hampshire, USA 03784<br />
(603) 298-5711<br />
www.thermal-dynamics.com<br />
Copyright 2001 by<br />
Thermal Dynamics Corporation<br />
All rights reserved.<br />
Reproduction of this work, in whole or in part, without written permission of the<br />
publisher is prohibited.<br />
The publisher does not assume and hereby disclaims any liability to any party for any<br />
loss or damage caused by any error or omission in this Manual, whether such error<br />
results from negligence, accident, or any other cause.<br />
Printed in the United States of America<br />
Publication Date: October 22, 2004<br />
Revision Date: June 14, 2005<br />
Record the following information for Warranty purposes:<br />
Where Purchased: _______________________________________<br />
Purchase Date: _______________________________________<br />
Equipment Serial #: _______________________________________
TABLE OF CONTENTS<br />
SECTION 1:<br />
ARC WELDING SAFETY INSTRUCTIONS AND WARNINGS .......................................... 1-1<br />
PRINCIPAL SAFETY STANDARDS ..................................................................... 1-5<br />
PRECAUTIONS DE SECURITE EN SOUDAGE A L’ARC .................................... 1-6<br />
PRINCIPALES NORMES DE SECURITE .......................................................... 1-10<br />
DECLARATION OF CONFORMITY ................................................................... 1-11<br />
LIMITED WARRANTY ........................................................................................ 1-12<br />
SECTION 2:<br />
INTRODUCTION .............................................................................................................. 2-1<br />
2.01 How To Use This Manual .............................................................................. 2-1<br />
2.02 Equipment Identification ............................................................................... 2-1<br />
2.03 Receipt Of Equipment .................................................................................. 2-1<br />
2.04 Symbol Chart ............................................................................................... 2-2<br />
2.05 General ........................................................................................................ 2-3<br />
2.06 Specifications ............................................................................................... 2-4<br />
2.07 Standard Features ....................................................................................... 2-5<br />
2.08 Description of Controls and Features ........................................................... 2-6<br />
SECTION 3:<br />
INSTALLATION ................................................................................................................. 3-1<br />
3.01 Location ....................................................................................................... 3-1<br />
3.02 Voltage Changeover ..................................................................................... 3-1<br />
3.03 Connecting Welding Machine to Line Voltage ............................................... 3-2<br />
3.04 Connection Instructions ................................................................................ 3-2<br />
3.05 Grounding .................................................................................................... 3-3<br />
3.06 Welding Leads ............................................................................................. 3-4<br />
3.07 Configuration Settings .................................................................................. 3-5<br />
SECTION 4:<br />
OPERATION ..................................................................................................................... 4-1<br />
4.01 General ........................................................................................................ 4-1<br />
4.02 GTAW ........................................................................................................... 4-1<br />
4.03 SMAW .......................................................................................................... 4-1<br />
4.04 CAG ............................................................................................................. 4-2<br />
4.05 GMAW ......................................................................................................... 4-2
TABLE TABLE OF CONTENTS OF CONTENTS (continued)<br />
SECTION 5:<br />
SERVICE .......................................................................................................................... 5-1<br />
5.01 General Maintenance ................................................................................... 5-1<br />
5.02 Basic Troubleshooting Guide ........................................................................ 5-1<br />
5.03 Troubleshooting Guide ................................................................................. 5-2<br />
SECTION 6:<br />
PARTS LIST ...................................................................................................................... 6-1<br />
6.01 Equipment Identification ............................................................................... 6-1<br />
6.02 How To Use This Parts List........................................................................... 6-1<br />
6.03 External Panels and Labels .......................................................................... 6-2<br />
6.04 Base Parts ................................................................................................... 6-3<br />
6.05 Front Panel Parts ......................................................................................... 6-4<br />
6.06 Rear Panel Parts .......................................................................................... 6-5<br />
6.07 Center Chassis Parts ................................................................................... 6-6<br />
6.08 PC Board Parts ............................................................................................ 6-8<br />
APPENDIX 1: GENERAL INFORMATION ................................................................................. A-1<br />
APPENDIX 2: SCHEMATIC DIAGRAM ...................................................................................... A-2<br />
APPENDIX 3: CONNECTION DIAGRAM 1 OF 2 ...................................................................... A-4<br />
APPENDIX 4: CONNECTION DIAGRAM 2 OF 2 ...................................................................... A-6
SECTION 1:<br />
ARC WELDING SAFETY INSTRUCTIONS AND WARNINGS<br />
HAVE ALL INSTALLATION, OPERATION, MAINTENANCE,<br />
AND REPAIR WORK PERFORMED ONLY BY QUALIFIED<br />
PEOPLE.<br />
WARNING<br />
ELECTRIC SHOCK can kill.<br />
Touching live electrical parts can cause fatal<br />
shocks or severe burns. The electrode and work<br />
circuit is electrically live whenever the output is<br />
on. The input power circuit and machine internal<br />
circuits are also live when power is on. In<br />
semiautomatic or automatic wire welding, the<br />
wire, wire reel, drive roll housing, and all metal<br />
parts touching the welding wire are electrically<br />
live. Incorrectly installed or improperly grounded<br />
equipment is a hazard.<br />
1. Do not touch live electrical parts.<br />
2. Wear dry, hole-free insulating gloves and body<br />
protection.<br />
3. Insulate yourself from work and ground using<br />
dry insulating mats or covers.<br />
WARNING<br />
PROTECT YOURSELF AND OTHERS FROM POSSIBLE SERIOUS INJURY OR DEATH. KEEP CHILDREN AWAY. PACEMAKER<br />
WEARERS KEEP AWAY UNTIL CONSULTING YOUR DOCTOR. DO NOT LOSE THESE INSTRUCTIONS. READ OPERATING/<br />
INSTRUCTION MANUAL BEFORE INSTALLING, OPERATING OR SERVICING THIS EQUIPMENT.<br />
Welding products and welding processes can cause serious injury or death, or damage to other equipment or property, if the operator<br />
does not strictly observe all safety rules and take precautionary actions.<br />
Safe practices have developed from past experience in the use of welding and cutting. These practices must be learned through<br />
study and training before using this equipment. Anyone not having extensive training in welding and cutting practices should not<br />
attempt to weld. Certain of the practices apply to equipment connected to power lines; other practices apply to engine driven equipment.<br />
Safe practices are outlined in the American National Standard Z49.1 entitled: SAFETY IN WELDING AND CUTTING. This publication<br />
and other guides to what you should learn before operating this equipment are listed at the end of these safety precautions.<br />
4. Disconnect input power or stop engine before<br />
installing or servicing this equipment. Lock input<br />
power disconnect switch open, or remove<br />
line fuses so power cannot be turned on accidentally.<br />
5. Properly install and ground this equipment according<br />
to its Owner’s Manual and national,<br />
state, and local codes.<br />
6. Turn off all equipment when not in use. Disconnect<br />
power to equipment if it will be left unattended<br />
or out of service.<br />
7. Use fully insulated electrode holders. Never dip<br />
holder in water to cool it or lay it down on the<br />
ground or the work surface. Do not touch holders<br />
connected to two welding machines at the<br />
same time or touch other people with the holder<br />
or electrode.<br />
8. Do not use worn, damaged, undersized, or<br />
poorly spliced cables.<br />
9. Do not wrap cables around your body.<br />
10. Ground the workpiece to a good electrical<br />
(earth) ground.<br />
11. Do not touch electrode while in contact with the<br />
work (ground) circuit.<br />
12. Use only well-maintained equipment. Repair or<br />
replace damaged parts at once.<br />
DATE: October 11, 2004 1-1 GENERAL INFORMATION
13. In confined spaces or damp locations, do not<br />
use a welder with AC output unless it is<br />
equipped with a voltage reducer. Use equipment<br />
with DC output.<br />
14. Wear a safety harness to prevent falling if working<br />
above floor level.<br />
15. Keep all panels and covers securely in place.<br />
WARNING<br />
ARC RAYS can burn eyes and skin; NOISE can<br />
damage hearing.<br />
Arc rays from the welding process produce intense<br />
heat and strong ultraviolet rays that can<br />
burn eyes and skin. Noise from some processes<br />
can damage hearing.<br />
1. Wear a welding helmet fitted with a proper<br />
shade of filter (see ANSI Z49.1 listed in Safety<br />
Standards) to protect your face and eyes when<br />
welding or watching.<br />
2. Wear approved safety glasses. Side shields recommended.<br />
3. Use protective screens or barriers to protect others<br />
from flash and glare; warn others not to<br />
watch the arc.<br />
4. Wear protective clothing made from durable,<br />
flame-resistant material (wool and leather) and<br />
foot protection.<br />
5. Use approved ear plugs or ear muffs if noise<br />
level is high.<br />
WARNING<br />
FUMES AND GASES can be hazardous to your<br />
health.<br />
Welding produces fumes and gases. Breathing<br />
these fumes and gases can be hazardous to your<br />
health.<br />
1. Keep your head out of the fumes. Do not breath<br />
the fumes.<br />
2. If inside, ventilate the area and/or use exhaust<br />
at the arc to remove welding fumes and gases.<br />
3. If ventilation is poor, use an approved air-supplied<br />
respirator.<br />
4. Read the Material Safety Data Sheets (MSDSs)<br />
and the manufacturer’s instruction for metals,<br />
consumables, coatings, and cleaners.<br />
Eye protection filter shade selector for welding or cutting<br />
(goggles or helmet), from AWS A6.2-73.<br />
Welding or cutting Electrode Size Filter Welding or cutting Electrode Size Filter<br />
Torch soldering 2 Gas metal-arc<br />
Torch brazing 3 or 4 Non-ferrous base metal All 11<br />
Oxygen Cutting Ferrous base metal All 12<br />
Light Under 1 in., 25 mm 3 or 4 Gas tungsten arc welding All 12<br />
Heavy 1 to 6 in., 25-150 mm 4 or 5 (TIG) All 12<br />
Medium Over 6 in., 150 mm 5 or 6 Atomic hydrogen welding All 12<br />
Gas welding Carbon arc welding All 12<br />
Light Under 1/8 in., 3 mm 4 or 5 Plasma arc welding<br />
Heavy 1/8 to 1/2 in., 3-12 mm 5 or 6 Carbon arc air gouging<br />
Medium Over 1/2 in., 12 mm 6 or 8 Light 12<br />
Shielded metal-arc Under 5/32 in., 4 mm 10 Heavy 14<br />
5/32 to 1/4 in., 12 Plasma arc cutting<br />
Over 1/4 in., 6.4 mm 14 Light Under 300 Amp 9<br />
Heavy 300 to 400 Amp 12<br />
Medium Over 400 Amp 14<br />
GENERAL INFORMATION 1-2 DATE: October 11, 2004
5. Work in a confined space only if it is well ventilated,<br />
or while wearing an air-supplied respirator.<br />
Shielding gases used for welding can displace<br />
air causing injury or death. Be sure the<br />
breathing air is safe.<br />
6. Do not weld in locations near degreasing, cleaning,<br />
or spraying operations. The heat and rays<br />
of the arc can react with vapors to form highly<br />
toxic and irritating gases.<br />
7. Do not weld on coated metals, such as galvanized,<br />
lead, or cadmium plated steel, unless the<br />
coating is removed from the weld area, the area<br />
is well ventilated, and if necessary, while wearing<br />
an air-supplied respirator. The coatings and<br />
any metals containing these elements can give<br />
off toxic fumes if welded.<br />
WARNING<br />
WELDING can cause fire or explosion.<br />
Sparks and spatter fly off from the welding arc.<br />
The flying sparks and hot metal, weld spatter,<br />
hot workpiece, and hot equipment can cause fires<br />
and burns. Accidental contact of electrode or<br />
welding wire to metal objects can cause sparks,<br />
overheating, or fire.<br />
1. Protect yourself and others from flying sparks<br />
and hot metal.<br />
2. Do not weld where flying sparks can strike flammable<br />
material.<br />
3. Remove all flammables within 35 ft (10.7 m) of<br />
the welding arc. If this is not possible, tightly<br />
cover them with approved covers.<br />
4. Be alert that welding sparks and hot materials<br />
from welding can easily go through small cracks<br />
and openings to adjacent areas.<br />
5. Watch for fire, and keep a fire extinguisher<br />
nearby.<br />
6. Be aware that welding on a ceiling, floor, bulkhead,<br />
or partition can cause fire on the hidden<br />
side.<br />
7. Do not weld on closed containers such as tanks<br />
or drums.<br />
8. Connect work cable to the work as close to the<br />
welding area as practical to prevent welding current<br />
from traveling long, possibly unknown paths<br />
and causing electric shock and fire hazards.<br />
9. Do not use welder to thaw frozen pipes.<br />
10. Remove stick electrode from holder or cut off<br />
welding wire at contact tip when not in use.<br />
WARNING<br />
FLYING SPARKS AND HOT METAL can<br />
cause injury.<br />
Chipping and grinding cause flying metal. As<br />
welds cool, they can throw off slag.<br />
1. Wear approved face shield or safety goggles.<br />
Side shields recommended.<br />
2. Wear proper body protection to protect skin.<br />
WARNING<br />
CYLINDERS can explode if damaged.<br />
Shielding gas cylinders contain gas under high<br />
pressure. If damaged, a cylinder can explode.<br />
Since gas cylinders are normally part of the welding<br />
process, be sure to treat them carefully.<br />
1. Protect compressed gas cylinders from excessive<br />
heat, mechanical shocks, and arcs.<br />
2. Install and secure cylinders in an upright position<br />
by chaining them to a stationary support<br />
or equipment cylinder rack to prevent falling<br />
or tipping.<br />
3. Keep cylinders away from any welding or other<br />
electrical circuits.<br />
4. Never allow a welding electrode to touch any<br />
cylinder.<br />
DATE: October 11, 2004 1-3 GENERAL INFORMATION
5. Use only correct shielding gas cylinders, regulators,<br />
hoses, and fittings designed for the specific<br />
application; maintain them and associated<br />
parts in good condition.<br />
6. Turn face away from valve outlet when opening<br />
cylinder valve.<br />
7. Keep protective cap in place over valve except<br />
when cylinder is in use or connected for use.<br />
8. Read and follow instructions on compressed gas<br />
cylinders, associated equipment, and CGA publication<br />
P-1 listed in Safety Standards.<br />
Engines can be dangerous.<br />
WARNING<br />
WARNING<br />
ENGINE EXHAUST GASES can kill.<br />
Engines produce harmful exhaust gases.<br />
1. Use equipment outside in open, well-ventilated<br />
areas.<br />
2. If used in a closed area, vent engine exhaust outside<br />
and away from any building air intakes.<br />
WARNING<br />
ENGINE FUEL can cause fire or<br />
explosion.<br />
Engine fuel is highly flammable.<br />
1. Stop engine before checking or adding fuel.<br />
2. Do not add fuel while smoking or if unit is near<br />
any sparks or open flames.<br />
3. Allow engine to cool before fueling. If possible,<br />
check and add fuel to cold engine before beginning<br />
job.<br />
4. Do not overfill tank — allow room for fuel to<br />
expand.<br />
5. Do not spill fuel. If fuel is spilled, clean up before<br />
starting engine.<br />
WARNING<br />
MOVING PARTS can cause injury.<br />
Moving parts, such as fans, rotors, and belts can cut<br />
fingers and hands and catch loose clothing.<br />
1. Keep all doors, panels, covers, and guards<br />
closed and securely in place.<br />
2. Stop engine before installing or connecting unit.<br />
3. Have only qualified people remove guards or<br />
covers for maintenance and troubleshooting as<br />
necessary.<br />
4. To prevent accidental starting during servicing,<br />
disconnect negative (-) battery cable from battery.<br />
5. Keep hands, hair, loose clothing, and tools away<br />
from moving parts.<br />
6. Reinstall panels or guards and close doors when<br />
servicing is finished and before starting engine.<br />
WARNING<br />
SPARKS can cause BATTERY GASES TO EX-<br />
PLODE; BATTERY ACID can burn eyes and<br />
skin.<br />
Batteries contain acid and generate explosive gases.<br />
1. Always wear a face shield when working on a<br />
battery.<br />
2. Stop engine before disconnecting or connecting<br />
battery cables.<br />
3. Do not allow tools to cause sparks when working<br />
on a battery.<br />
4. Do not use welder to charge batteries or jump<br />
start vehicles.<br />
5. Observe correct polarity (+ and –) on batteries.<br />
GENERAL INFORMATION 1-4 DATE: October 11, 2004
WARNING<br />
STEAM AND PRESSURIZED HOT COOL-<br />
ANT can burn face, eyes, and skin.<br />
The coolant in the radiator can be very hot and<br />
under pressure.<br />
1. Do not remove radiator cap when engine is hot.<br />
Allow engine to cool.<br />
2. Wear gloves and put a rag over cap area when<br />
removing cap.<br />
3. Allow pressure to escape before completely removing<br />
cap.<br />
WARNING<br />
This product, when used for welding or cutting,<br />
produces fumes or gases which contain chemicals<br />
know to the State of California to cause birth<br />
defects and, in some cases, cancer. (California<br />
Health & Safety code Sec. 25249.5 et seq.)<br />
NOTE<br />
Considerations About Welding And The Effects<br />
of Low Frequency Electric and Magnetic Fields<br />
The following is a quotation from the General Conclusions<br />
Section of the U.S. Congress, Office of Technology<br />
Assessment, Biological Effects of Power Frequency<br />
Electric & Magnetic Fields - Background Paper, OTA-<br />
BP-E-63 (Washington, DC: U.S.<br />
Government Printing Office, May 1989): “...there is now<br />
a very large volume of scientific findings based on experiments<br />
at the cellular level and from studies with<br />
animals and people which clearly establish that low<br />
frequency magnetic fields and interact with, and produce<br />
changes in, biological systems. While most of this<br />
work is of very high quality, the results are complex.<br />
Current scientific understanding does not yet allow us<br />
to interpret the evidence in a single coherent framework.<br />
Even more frustrating, it does not yet allow us<br />
to draw definite conclusions about questions of possible<br />
risk or to offer clear science-based advice on strategies<br />
to minimize or avoid potential risks.”<br />
To reduce magnetic fields in the workplace, use the following<br />
procedures.<br />
1. Keep cables close together by twisting or taping<br />
them.<br />
2. Arrange cables to one side and away from the<br />
operator.<br />
3. Do not coil or drape cable around the body.<br />
4. Keep welding power source and cables as far<br />
away from body as practical.<br />
ABOUT PACEMAKERS:<br />
The above procedures are among those also normally<br />
recommended for pacemaker wearers.<br />
Consult your doctor for complete information.<br />
PRINCIPAL SAFETY STANDARDS<br />
Safety in Welding and Cutting, ANSI Standard Z49.1,<br />
from American Welding Society, 550 N.W. LeJeune Rd.,<br />
Miami, FL 33126.<br />
Safety and Health Standards, OSHA 29 CFR 1910, from<br />
Superintendent of Documents, U.S. Government Printing<br />
Office, Washington, D.C. 20402.<br />
Recommended Safe Practices for the Preparation for<br />
Welding and Cutting of Containers That Have Held<br />
Hazardous Substances, American Welding Society<br />
Standard AWS F4.1, from American Welding Society,<br />
550 N.W. LeJeune Rd., Miami, FL 33126.<br />
National Electrical Code, NFPA Standard 70, from National<br />
Fire Protection Association, Batterymarch Park,<br />
Quincy, MA 02269.<br />
Safe Handling of Compressed Gases in Cylinders, CGA<br />
Pamphlet P-1, from Compressed Gas Association, 1235<br />
Jefferson Davis Highway, Suite 501, Arlington, VA<br />
22202.<br />
Code for Safety in Welding and Cutting, CSA Standard<br />
W117.2, from Canadian Standards Association, Standards<br />
Sales, 178 Rexdale Boulevard, Rexdale, Ontario,<br />
Canada M9W 1R3.<br />
Safe Practices for Occupation and Educational Eye and<br />
Face Protection, ANSI Standard Z87.1, from American<br />
National Standards Institute, 1430 Broadway, New<br />
York, NY 10018.<br />
Cutting and Welding Processes, NFPA Standard 51B,<br />
from National Fire Protection Association,<br />
Batterymarch Park, Quincy, MA 02269.<br />
DATE: October 11, 2004 1-5 GENERAL INFORMATION
PRECAUTIONS DE SECURITE EN SOUDAGE A L’ARC<br />
LE SOUDAGE A L’ARC EST DANGEREUX<br />
MISE EN GARDE<br />
PROTEGEZ-VOUS, AINSI QUE LES AUTRES, CONTRE LES BLESSURES GRAVES POSSIBLES OU LA MORT. NE LAISSEZ<br />
PAS LES ENFANTS S’APPROCHER, NI LES PORTEURS DE STIMULATEUR CARDIAQUE (A MOINS QU’ILS N’AIENT CONSULTE<br />
UN MEDECIN). CONSERVEZ CES INSTRUCTIONS. LISEZ LE MANUEL D’OPERATION OU LES INSTRUCTIONS AVANT<br />
D’INSTALLER, UTILISER OU ENTRETENIR CET EQUIPEMENT.<br />
Les produits et procédés de soudage peuvent sauser des blessures graves ou la mort, de même que des dommages<br />
au reste du matériel et à la propriété, si l’utilisateur n’adhère pas strictement à toutes les règles de sécurité et ne<br />
prend pas les précautions nécessaires.<br />
En soudage et coupage, des pratiques sécuritaires se sont développées suite à l’expérience passée. Ces pratiques<br />
doivent être apprises par étude ou entraînement avant d’utiliser l’equipement. Toute personne n’ayant<br />
pas suivi un entraînement intensif en soudage et coupage ne devrait pas tenter de souder. Certaines pratiques<br />
concernent les équipements raccordés aux lignes d’alimentation alors que d’autres s’adressent aux groupes<br />
électrogènes.<br />
La norme Z49.1 de l’American National Standard, intitulée “SAFETY IN WELDING AND CUTTING” présente<br />
les pratiques sécuritaires à suivre. Ce document ainsi que d’autres guides que vous devriez connaître avant<br />
d’utiliser cet équipement sont présentés à la fin de ces instructions de sécurité.<br />
SEULES DES PERSONNES QUALIFIEES DOIVENT<br />
FAIRE DES TRAVAUX D’INSTALLATION, DE REPA-<br />
RATION, D’ENTRETIEN ET D’ESSAI.<br />
AVERTISSEMENT<br />
L’ELECTROCUTION PEUT ETRE<br />
MORTELLE.<br />
Une décharge électrique peut tuer ou brûler<br />
gravement. L’électrode et le circuit de soudage<br />
sont sous tension dès la mise en circuit. Le circuit<br />
d’alimentation et les circuits internes de<br />
l’équipement sont aussi sous tension dès la mise<br />
en marche. En soudage automatique ou semiautomatique<br />
avec fil, ce dernier, le rouleau ou la<br />
bobine de fil, le logement des galets<br />
d’entrainement et toutes les pièces métalliques<br />
en contact avec le fil de soudage sont sous tension.<br />
Un équipement inadéquatement installé ou<br />
inadéquatement mis à la terre est dangereux.<br />
1. Ne touchez pas à des pièces sous tension.<br />
2. Portez des gants et des vêtements isolants, secs<br />
et non troués.<br />
3 Isolez-vous de la pièce à souder et de la mise à<br />
la terre au moyen de tapis isolants ou autres.<br />
4. Déconnectez la prise d’alimentation de<br />
l’équipement ou arrêtez le moteur avant de<br />
l’installer ou d’en faire l’entretien. Bloquez le<br />
commutateur en circuit ouvert ou enlevez les<br />
fusibles de l’alimentation afin d’éviter une mise<br />
en marche accidentelle.<br />
5. Veuillez à installer cet équipement et à le mettre<br />
à la terre selon le manuel d’utilisation et les<br />
codes nationaux, provinciaux et locaux<br />
applicables.<br />
6. Arrêtez tout équipement après usage. Coupez<br />
l’alimentation de l’équipement s’il est hors<br />
d’usage ou inutilisé.<br />
7. N’utilisez que des porte-électrodes bien isolés.<br />
Ne jamais plonger les porte-électrodes dans<br />
l’eau pour les refroidir. Ne jamais les laisser<br />
traîner par terre ou sur les pièces à souder. Ne<br />
touchez pas aux porte-électrodes raccordés à<br />
deux sources de courant en même temps. Ne<br />
jamais toucher quelqu’un d’autre avec<br />
l’électrode ou le porte-électrode.<br />
GENERAL INFORMATION 1-6 DATE: October 11, 2004
8. N’utilisez pas de câbles électriques usés,<br />
endommagés, mal épissés ou de section trop petite.<br />
9. N’enroulez pas de câbles électriques autour de<br />
votre corps.<br />
10. N’utilisez qu’une bonne prise de masse pour la<br />
mise à la terre de la pièce à souder.<br />
11. Ne touchez pas à l’électrode lorsqu’en contact<br />
avec le circuit de soudage (terre).<br />
12. N’utilisez que des équipements en bon état.<br />
Réparez ou remplacez aussitôt les pièces<br />
endommagées.<br />
13. Dans des espaces confinés ou mouillés,<br />
n’utilisez pas de source de courant alternatif, à<br />
moins qu’il soit muni d’un réducteur de tension.<br />
Utilisez plutôt une source de courant<br />
continu.<br />
14. Portez un harnais de sécurité si vous travaillez<br />
en hauteur.<br />
15. Fermez solidement tous les panneaux et les<br />
capots.<br />
Opération de coupage<br />
ou soudage<br />
Dimension d'électrode ou<br />
Epiasseur de métal ou<br />
Intensité de courant<br />
Nuance de<br />
filtre oculaire<br />
AVERTISSEMENT<br />
LE RAYONNEMENT DE L’ARC PEUT<br />
BRÛLER LES YEUX ET LA PEAU; LE BRUIT<br />
PEUT ENDOMMAGER L’OUIE.<br />
L’arc de soudage produit une chaleur et des rayons<br />
ultraviolets intenses, susceptibles de brûler<br />
les yeux et la peau. Le bruit causé par certains<br />
procédés peut endommager l’ouïe.<br />
1. Portez une casque de soudeur avec filtre<br />
oculaire de nuance appropriée (consultez la<br />
norme ANSI Z49 indiquée ci-après) pour vous<br />
protéger le visage et les yeux lorsque vous<br />
soudez ou que vous observez l’exécution d’une<br />
soudure.<br />
2. Portez des lunettes de sécurité approuvées. Des<br />
écrans latéraux sont recommandés.<br />
SELECTION DES NUANCES DE FILTRES OCULAIRS POUR LA PROTECTION<br />
DES YEUX EN COUPAGE ET SOUDAGE (selon AWS á 8.2-73)<br />
3. Entourez l’aire de soudage de rideaux ou de<br />
cloisons pour protéger les autres des coups d’arc<br />
ou de l’éblouissement; avertissez les<br />
observateurs de ne pas regarder l’arc.<br />
4. Portez des vêtements en matériaux ignifuges et<br />
durables (laine et cuir) et des chaussures de<br />
sécurité.<br />
Opération de coupage<br />
ou soudage<br />
Dimension d'électrode ou<br />
Epiasseur de métal ou<br />
Intensité de courant<br />
Nuance de<br />
filtre oculaire<br />
Brassage tendre<br />
au chalumeau<br />
toutes conditions 2<br />
Soudage á l'arc sous gaz<br />
avec fil plein (GMAW)<br />
Brassage fort<br />
au chalumeau<br />
toutes conditions 3 ou 4 métaux non-ferreux toutes conditions 11<br />
Oxycoupage métaux ferreux toutes conditions 12<br />
mince moins de 1 po. (25 mm) 2 ou 3<br />
Soudage á l'arc sous gaz avec<br />
électrode de tungstène (GTAW)<br />
toutes conditions 12<br />
moyen de 1 á 6 po. (25 á 150 mm) 4 ou 5<br />
Soudage á l'hydrogène<br />
atomique (AHW)<br />
toutes conditions 12<br />
épais plus de 6 po. (150 mm) 5 ou 6<br />
Soudage á l'arc avec<br />
électrode de carbone (CAW)<br />
toutes conditions 12<br />
Soudage aux gaz Soudage á l'arc Plasma (PAW) toutes dimensions 12<br />
mince moins de 1/8 po. (3 mm) 4 ou 5<br />
Gougeage Air-Arc avec<br />
électrode de carbone<br />
moyen de 1/8 á 1/2 po. (3 á 12 mm) 5 ou 6 mince 12<br />
épais<br />
Soudage á l'arc avec<br />
plus de 1/2 po. (12 mm) 6 ou 8 épais 14<br />
électrode enrobees<br />
(SMAW)<br />
moins de 5/32 po. (4 mm) 10 Coupage á l'arc Plasma (PAC)<br />
5/32 á 1/4 po. (4 á 6.4 mm) 12 mince moins de 300 amperès 9<br />
plus de 1/4 po. (6.4 mm) 14 moyen de 300 á 400 amperès 12<br />
épais plus de 400 amperès 14<br />
DATE: October 11, 2004 1-7 GENERAL INFORMATION
5. Portez un casque antibruit ou des bouchons<br />
d’oreille approuvés lorsque le niveau de bruit<br />
est élevé.<br />
AVERTISSEMENT<br />
LES VAPEURS ET LES FUMEES SONT<br />
DANGEREUSES POUR LA SANTE.<br />
Le soudage dégage des vapeurs et des fumées<br />
dangereuses à respirer.<br />
1. Eloignez la tête des fumées pour éviter de les<br />
respirer.<br />
2. A l’intérieur, assurez-vous que l’aire de soudage<br />
est bien ventilée ou que les fumées et les vapeurs<br />
sont aspirées à l’arc.<br />
3. Si la ventilation est inadequate, portez un<br />
respirateur à adduction d’air approuvé.<br />
4. Lisez les fiches signalétiques et les consignes du<br />
fabricant relatives aux métaux, aux produits<br />
consummables, aux revêtements et aux produits<br />
nettoyants.<br />
5. Ne travaillez dans un espace confiné que s’il<br />
est bien ventilé; sinon, portez un respirateur à<br />
adduction d’air. Les gaz protecteurs de soudage<br />
peuvent déplacer l’oxygène de l’air et ainsi<br />
causer des malaises ou la mort. Assurez-vous<br />
que l’air est propre à la respiration.<br />
6. Ne soudez pas à proximité d’opérations de<br />
dégraissage, de nettoyage ou de pulvérisation.<br />
La chaleur et les rayons de l’arc peuvent réagir<br />
avec des vapeurs et former des gaz hautement<br />
toxiques et irritants.<br />
7. Ne soudez des tôles galvanisées ou plaquées<br />
au plomb ou au cadmium que si les zones à<br />
souder ont été grattées à fond, que si l’espace<br />
est bien ventilé; si nécessaire portez un<br />
respirateur à adduction d’air. Car ces<br />
revêtements et tout métal qui contient ces<br />
éléments peuvent dégager des fumées toxiques<br />
au moment du soudage.<br />
AVERTISSEMENT<br />
LE SOUDAGE PEUT CAUSER UN<br />
INCENDIE OU UNE EXPLOSION<br />
L’arc produit des étincellies et des projections.<br />
Les particules volantes, le métal chaud, les projections<br />
de soudure et l’équipement surchauffé<br />
peuvent causer un incendie et des brûlures. Le<br />
contact accidentel de l’électrode ou du filélectrode<br />
avec un objet métallique peut provoquer<br />
des étincelles, un échauffement ou un incendie.<br />
1. Protégez-vous, ainsi que les autres, contre les<br />
étincelles et du métal chaud.<br />
2. Ne soudez pas dans un endroit où des particules<br />
volantes ou des projections peuvent atteindre<br />
des matériaux inflammables.<br />
3. Enlevez toutes matières inflammables dans un<br />
rayon de 10, 7 mètres autour de l’arc, ou<br />
couvrez-les soigneusement avec des bâches<br />
approuvées.<br />
4. Méfiez-vous des projections brulantes de<br />
soudage susceptibles de pénétrer dans des aires<br />
adjacentes par de petites ouvertures ou fissures.<br />
5. Méfiez-vous des incendies et gardez un<br />
extincteur à portée de la main.<br />
6. N’oubliez pas qu’une soudure réalisée sur un<br />
plafond, un plancher, une cloison ou une paroi<br />
peut enflammer l’autre côté.<br />
7. Ne soudez pas un récipient fermé, tel un<br />
réservoir ou un baril.<br />
8. Connectez le câble de soudage le plus près possible<br />
de la zone de soudage pour empêcher le<br />
courant de suivre un long parcours inconnu, et<br />
prévenir ainsi les risques d’électrocution et<br />
d’incendie.<br />
9. Ne dégelez pas les tuyaux avec un source de<br />
courant.<br />
10. Otez l’électrode du porte-électrode ou coupez<br />
le fil au tube-contact lorsqu’inutilisé après le<br />
soudage.<br />
11. Portez des vêtements protecteurs non huileux,<br />
tels des gants en cuir, une chemise épaisse, un<br />
pantalon revers, des bottines de sécurité et un<br />
casque.<br />
GENERAL INFORMATION 1-8 DATE: October 11, 2004
AVERTISSEMENT<br />
LES ETINCELLES ET LES PROJECTIONS<br />
BRULANTES PEUVENT CAUSER DES<br />
BLESSURES.<br />
Le piquage et le meulage produisent des<br />
particules métalliques volantes. En refroidissant,<br />
la soudure peut projeter du éclats de laitier.<br />
1. Portez un écran facial ou des lunettes<br />
protectrices approuvées. Des écrans latéraux<br />
sont recommandés.<br />
2. Portez des vêtements appropriés pour protéger<br />
la peau.<br />
AVERTISSEMENT<br />
LES BOUTEILLES ENDOMMAGEES<br />
PEUVENT EXPLOSER<br />
Les bouteilles contiennent des gaz protecteurs<br />
sous haute pression. Des bouteilles endommagées<br />
peuvent exploser. Comme les bouteilles font<br />
normalement partie du procédé de soudage,<br />
traitez-les avec soin.<br />
1. Protégez les bouteilles de gaz comprimé contre<br />
les sources de chaleur intense, les chocs et les<br />
arcs de soudage.<br />
2. Enchainez verticalement les bouteilles à un support<br />
ou à un cadre fixe pour les empêcher de<br />
tomber ou d’être renversées.<br />
3. Eloignez les bouteilles de tout circuit électrique<br />
ou de tout soudage.<br />
4. Empêchez tout contact entre une bouteille et une<br />
électrode de soudage.<br />
5. N’utilisez que des bouteilles de gaz protecteur,<br />
des détendeurs, des boyauxs et des raccords<br />
conçus pour chaque application spécifique; ces<br />
équipements et les pièces connexes doivent être<br />
maintenus en bon état.<br />
6. Ne placez pas le visage face à l’ouverture du<br />
robinet de la bouteille lors de son ouverture.<br />
7. Laissez en place le chapeau de bouteille sauf si<br />
en utilisation ou lorsque raccordé pour<br />
utilisation.<br />
8. Lisez et respectez les consignes relatives aux<br />
bouteilles de gaz comprimé et aux équipements<br />
connexes, ainsi que la publication P-1 de la<br />
CGA, identifiée dans la liste de documents cidessous.<br />
AVERTISSEMENT<br />
LES MOTEURS PEUVENT ETRE<br />
DANGEREUX<br />
LES GAZ D’ECHAPPEMENT DES<br />
MOTEURS PEUVENT ETRE MORTELS.<br />
Les moteurs produisent des gaz d’échappement nocifs.<br />
1. Utilisez l’équipement à l’extérieur dans des<br />
aires ouvertes et bien ventilées.<br />
2. Si vous utilisez ces équipements dans un endroit<br />
confiné, les fumées d’échappement doivent être<br />
envoyées à l’extérieur, loin des prises d’air du<br />
bâtiment.<br />
AVERTISSEMENT<br />
LE CARBURANT PEUR CAUSER UN<br />
INCENDIE OU UNE EXPLOSION.<br />
Le carburant est hautement inflammable.<br />
1. Arrêtez le moteur avant de vérifier le niveau e<br />
carburant ou de faire le plein.<br />
2. Ne faites pas le plein en fumant ou proche d’une<br />
source d’étincelles ou d’une flamme nue.<br />
3. Si c’est possible, laissez le moteur refroidir<br />
avant de faire le plein de carburant ou d’en<br />
vérifier le niveau au début du soudage.<br />
4. Ne faites pas le plein de carburant à ras bord:<br />
prévoyez de l’espace pour son expansion.<br />
5. Faites attention de ne pas renverser de<br />
carburant. Nettoyez tout carburant renversé<br />
avant de faire démarrer le moteur.<br />
DATE: October 11, 2004 1-9 GENERAL INFORMATION
AVERTISSEMENT<br />
DES PIECES EN MOUVEMENT PEUVENT<br />
CAUSER DES BLESSURES.<br />
Des pièces en mouvement, tels des ventilateurs,<br />
des rotors et des courroies peuvent couper doigts<br />
et mains, ou accrocher des vêtements amples.<br />
1. Assurez-vous que les portes, les panneaux, les<br />
capots et les protecteurs soient bien fermés.<br />
2. Avant d’installer ou de connecter un système,<br />
arrêtez le moteur.<br />
3. Seules des personnes qualifiées doivent<br />
démonter des protecteurs ou des capots pour<br />
faire l’entretien ou le dépannage nécessaire.<br />
4. Pour empêcher un démarrage accidentel pendant<br />
l’entretien, débranchez le câble<br />
d’accumulateur à la borne négative.<br />
5. N’approchez pas les mains ou les cheveux de<br />
pièces en mouvement; elles peuvent aussi<br />
accrocher des vêtements amples et des outils.<br />
6. Réinstallez les capots ou les protecteurs et<br />
fermez les portes après des travaux d’entretien<br />
et avant de faire démarrer le moteur.<br />
AVERTISSEMENT<br />
DES ETINCELLES PEUVENT FAIRE<br />
EXPLOSER UN ACCUMULATEUR;<br />
L’ELECTROLYTE D’UN ACCUMU-<br />
LATEUR PEUT BRULER LA PEAU ET LES<br />
YEUX.<br />
Les accumulateurs contiennent de l’électrolyte<br />
acide et dégagent des vapeurs explosives.<br />
1. Portez toujours un écran facial en travaillant sur<br />
un accumu-lateur.<br />
2. Arrêtez le moteur avant de connecter ou de<br />
déconnecter des câbles d’accumulateur.<br />
3. N’utilisez que des outils anti-étincelles pour<br />
travailler sur un accumulateur.<br />
4. N’utilisez pas une source de courant de soudage<br />
pour charger un accumulateur ou survolter<br />
momentanément un véhicule.<br />
5. Utilisez la polarité correcte (+ et –) de<br />
l’accumulateur.<br />
AVERTISSEMENT<br />
LA VAPEUR ET LE LIQUIDE DE<br />
REFROIDISSEMENT BRULANT SOUS<br />
PRESSION PEUVENT BRULER LA PEAU<br />
ET LES YEUX.<br />
Le liquide de refroidissement d’un radiateur peut<br />
être brûlant et sous pression.<br />
1. N’ôtez pas le bouchon de radiateur tant que le<br />
moteur n’est pas refroidi.<br />
2. Mettez des gants et posez un torchon sur le<br />
bouchon pour l’ôter.<br />
3. Laissez la pression s’échapper avant d’ôter<br />
complètement le bouchon.<br />
PRINCIPALES NORMES DE<br />
SECURITE<br />
Safety in Welding and Cutting, norme ANSI Z49.1, American<br />
Welding Society, 550 N.W. LeJeune Rd., Miami, FL 33128.<br />
Safety and Health Standards, OSHA 29 CFR 1910, Superintendent<br />
of Documents, U.S. Government Printing Office, Washington, D.C.<br />
20402.<br />
Recommended Safe Practices for the Preparation for Welding<br />
and Cutting of Containers That Have Held Hazardous Substances,<br />
norme AWS F4.1, American Welding Society, 550 N.W. LeJeune<br />
Rd., Miami, FL 33128.<br />
National Electrical Code, norme 70 NFPA, National Fire Protection<br />
Association, Batterymarch Park, Quincy, MA 02269.<br />
Safe Handling of Compressed Gases in Cylinders, document P-<br />
1, Compressed Gas Association, 1235 Jefferson Davis Highway,<br />
Suite 501, Arlington, VA 22202.<br />
Code for Safety in Welding and Cutting, norme CSA W117.2<br />
Association canadienne de normalisation, Standards Sales, 276<br />
Rexdale Boulevard, Rexdale, Ontario, Canada M9W 1R3.<br />
Safe Practices for Occupation and Educational Eye and Face<br />
Protection, norme ANSI Z87.1, American National Standards<br />
Institute, 1430 Broadway, New York, NY 10018.<br />
Cutting and Welding Processes, norme 51B NFPA, National Fire<br />
Protection Association, Batterymarch Park, Quincy, MA 02269.<br />
GENERAL INFORMATION 1-10 DATE: October 11, 2004
DECLARATION OF CONFORMITY<br />
Manufacturer: Thermadyne Corporation<br />
Address: 82 Benning Street<br />
West Lebanon, New Hampshire 03784<br />
USA<br />
The equipment described in this manual conforms to all applicable aspects and regulations of the ‘Low<br />
Voltage Directive’ (European Council Directive 73/23/EEC as amended by Council Directive 93/68/EEC)<br />
and to the National legislation for the enforcement of this Directive.<br />
The equipment described in this manual conforms to all applicable aspects and regulations of the “EMC<br />
Directive” (European Council Directive 89/336/EEC) and to the National legislation for the enforcement of<br />
this Directive.<br />
Serial numbers are unique with each individual piece of equipment and details description, parts used to<br />
manufacture a unit and date of manufacture.<br />
National Standard and Technical Specifications<br />
The product is designed and manufactured to a number of standards and technical requirements. Among<br />
them are:<br />
CSA (Canadian Standards Association) standard C22.2 number 60 for Arc welding equipment.<br />
UL (Underwriters Laboratory) rating 94VO flammability testing for all printed-circuit boards used.<br />
CENELEC EN50199 EMC Product Standard for Arc Welding Equipment.<br />
ISO/IEC 60974-1 (BS 638-PT10) (EN 60 974-1) (EN50192) (EN<strong>500</strong>78) applicable to plasma cutting equipment<br />
and associated accessories.<br />
For environments with increased hazard of electrical shock, Power Supplies bearing the S mark conform to<br />
EN50192 when used in conjunction with hand torches with exposed cutting tips, if equipped with properly<br />
installed standoff guides.<br />
Extensive product design verification is conducted at the manufacturing facility as part of the routine<br />
design and manufacturing process. This is to ensure the product is safe, when used according to instructions<br />
in this manual and related industry standards, and performs as specified. Rigorous testing is incorporated<br />
into the manufacturing process to ensure the manufactured product meets or exceeds all design<br />
specifications.<br />
Thermal Dynamics has been manufacturing products for more than 30 years, and will continue to achieve excellence<br />
in our area of manufacture.<br />
Manufacturers responsible representative: Steve Ward<br />
Operations Director<br />
Thermadyne Europe<br />
Europa Building<br />
Chorley N Industrial Park<br />
Chorley, Lancashire,<br />
England PR6 7BX<br />
DATE: January 18, 2005 GENERAL INFORMATION
LIMITED WARRANTY<br />
LIMITED WARRANTY: Thermal Arc®, Inc., A Thermadyne Company, hereafter, “Thermal Arc” warrants to customers of<br />
itsauthorized distributors hereafter “Purchaser” that its products will be free of defects in workmanship or material. Should anyfailure<br />
to conform to this warranty appear within the time period applicable to the Thermal Arc products as stated below, Thermal Arc<br />
shall, upon notification thereof and substantiation that the product has been stored, installed, operated, and maintained in accordance<br />
with Thermal Arc’s specifications, instructions, recommendations and recognized standard industry practice, and not subject to<br />
misuse, repair, neglect, alteration, or accident, correct such defects by suitable repair or replacement, at Thermal Arc’s sole option,<br />
of any components or parts of the product determined by Thermal Arc to be defective.<br />
THERMAL ARC MAKES NO OTHER WARRANTY, EXPRESS OR IMPLIED. THIS WARRANTY IS EXCLUSIVE AND IN LIEU OF<br />
ALL OTHERS, INCLUDING, BUT NOT LIMITED TO ANY WARRANTY OF MERCHANTABILITY OR FITNESS FOR ANY<br />
PARTICULAR PURPOSE.<br />
LIMITATION OF LIABILITY: THERMAL ARC SHALL NOT UNDER ANY CIRCUMSTANCES BE LIABLE FOR SPECIAL, INDIRECT<br />
OR CONSEQUENTIAL DAMAGES, SUCH AS, BUT NOT LIMITED TO, LOST PROFITS AND BUSINESS INTERRUPTION. The<br />
remedies of the Purchaser set forth herein are exclusive and the liability of Thermal Arc with respect to any contract, or anything<br />
done in connection therewith such as the performance or breach thereof, or from the manufacture, sale, delivery, resale, or use of<br />
any goods covered by or furnished by Thermal Arc whether arising out of contract, negligence, strict tort, or under any warranty, or<br />
otherwise, shall not, except as expressly provided herein, exceed the price of the goods upon which such liability is based. No<br />
employee, agent, or representative of Thermal Arc is authorized to change this warranty in any way or grant any other warranty.<br />
PURCHASER’S RIGHTS UNDER THIS WARRANTY ARE VOID IF REPLACEMENT PARTS OR ACCESSORIES ARE USED WHICH<br />
IN THERMAL ARC’S SOLE JUDGEMENT MAY IMPAIR THE SAFETY OR PERFORMANCE OF ANY THERMAL ARC PRODUCT.<br />
PURCHASER’S RIGHTS UNDER THIS WARRANTY ARE VOID IF THE PRODUCT IS SOLD TO PURCHASER BY NON-<br />
AUTHORIZED PERSONS.<br />
The warranty is effective for the time stated below beginning on the date that the authorized distributor delivers the products to the<br />
Purchaser. Notwithstanding the foregoing, in no event shall the warranty period extend more than the time stated plus one year<br />
from the date Thermal Arc delivered the product to the authorized distributor.<br />
<strong>POWER</strong> SUPPLIES ALL OTHER<br />
<strong>POWER</strong> SUPPLIES<br />
LABOR<br />
MAIN <strong>POWER</strong> MAGNETICS (STATIC & ROTATING) 3 YEARS 3 YEAR<br />
ORIGINAL MAIN <strong>POWER</strong> RECTIFIER 3 YEARS 3 YEAR<br />
CONTROL PC BOARD<br />
ALL OTHER CIRCUITS AND COMPONENTS INCLUDING BUT<br />
3 YEARS 3 YEAR<br />
NOT LIMITED TO: CONTACTORS, RELAYS, SOLENOIDS, PUMPS,<br />
<strong>POWER</strong> SWITCHING SEMI-CONDUCTORS.<br />
ENGINES: ENGINES ARE NOT WARRANTED BY THERMAL ARC,<br />
ALTHOUGH MOST ARE WARRANTED BY THE ENGINE<br />
1 YEAR 1 YEAR<br />
MANUFACTURER. SEE THE ENGINE MANUFACTURE'S<br />
WARRANTY FOR DETAILS.<br />
CONSOLES, CONTROL EQUIPMENT, HEAT EXCHANGES<br />
ACCESSORY EQUIPMENT<br />
1 YEAR 1 YEAR<br />
NOTE: Dragster 85® excluded from this policy. Refer to Dragster 85 warranty in Dragster 85 Owner’s Manual.<br />
Warranty repairs or replacement claims under this limited warranty must be submitted to Thermal Arc by an authorized Thermal<br />
Arc repair facility within thirty (30) days of purchaser’s notice of any Warranty Claim. No transportation costs of any kind will be<br />
paid under this warranty. Transportation charges to send products to an authorized warranty repair facility shall be the responsibility<br />
of the Purchaser. All returned goods shall be at the Purchaser’s risk and expense. This warranty supersedes all previous Thermal<br />
Arc warranties. Thermal Arc® is a Registered Trademark of Thermadyne Industries Inc.<br />
GENERAL INFORMATION 1-12 DATE: October 11, 2004
SECTION 2:<br />
INTRODUCTION<br />
2.01 How To Use This Manual<br />
This Owner’s Manual only applies to specification<br />
numbers 100060. To ensure safe operation, read the entire<br />
manual, including the chapter on safety instructions and<br />
warnings. Throughout this manual, the words<br />
WARNING, CAUTION, and NOTE may appear. Pay<br />
particular attention to the information provided under<br />
these headings. These special annotations are easily<br />
recognized as follows:<br />
WARNING<br />
Warnings give information regarding possible<br />
personal injury. Warnings will be in bold type and<br />
boldly underlined and have a warning symbol.<br />
CAUTION<br />
Cautions refer to possible equipment damage.<br />
Cautions will be shown in bold type and<br />
underlined.<br />
NOTE<br />
Notes offer helpful information concerning certain<br />
operating procedures. Notes will be shown in italics.<br />
Electronic copies of this manual can also be downloaded<br />
at no charge in Acrobat PDF format by going to the Thermal<br />
Arc web site listed below and clicking on the Literature<br />
Library link:<br />
http://www.thermadyne.com/tai<br />
2.02 Equipment Identification<br />
The unit’s identification number (specification or part<br />
number), model, and serial number usually appear on a<br />
nameplate attached to the control panel. In some cases,<br />
the nameplate may be attached to the rear panel. Equipment<br />
which does not have a control panel such as gun<br />
and cable assemblies is identified only by the specification<br />
or part number printed on the shipping container.<br />
Record these numbers for future reference.<br />
2.03 Receipt Of Equipment<br />
When you receive the equipment, check it against the invoice<br />
to make sure it is complete and inspect the equipment<br />
for possible damage due to shipping. If there is any<br />
damage, notify the carrier immediately to file a claim.<br />
Furnish complete information concerning damage claims<br />
or shipping errors to:<br />
Thermadyne, Inc.<br />
Thermal Arc Order Department<br />
82 Benning Street<br />
West Lebanon, New Hampshire, USA 03784<br />
For more information, call (603) 298-5711.<br />
Include all equipment identification numbers as described<br />
above along with a full description of the parts in error.<br />
Move the equipment to the installation site before<br />
uncrating the unit. Use care to avoid damaging the equipment<br />
when using bars, hammers, etc., to uncrate the unit.<br />
WARNING:<br />
Do not use a welding power source for pipe thawing.<br />
This (or any) welding power source is neither designed<br />
nor intended to be used for thawing frozen pipes. Do not<br />
use it for this purpose.<br />
MANUAL 430429-485 2-1 INTRODUCTION
2.04 Symbol Chart<br />
Note that only some of these symbols will appear on your model.<br />
115V 15A<br />
On<br />
Off<br />
Dangerous Voltage<br />
Increase/Decrease<br />
Circuit Breaker<br />
AC Auxiliary Power<br />
Fuse<br />
Amperage<br />
Voltage<br />
Hertz (cycles/sec)<br />
Frequency<br />
Negative<br />
Positive<br />
Direct Current (DC)<br />
Protective Earth<br />
(Ground)<br />
Line<br />
Line Connection<br />
Auxiliary Power<br />
Receptacle Rating-<br />
Auxiliary Power<br />
X<br />
%<br />
V<br />
Single Phase<br />
Three Phase<br />
Three Phase Static<br />
Frequency Converter-<br />
Transformer-Rectifier<br />
Remote<br />
Duty Cycle<br />
Percentage<br />
Panel/Local<br />
Shielded Metal<br />
Arc Welding (SMAW)<br />
Gas Metal Arc<br />
Welding (GMAW)<br />
Gas Tungsten Arc<br />
Welding (GTAW)<br />
Air Carbon Arc<br />
Cutting (CAC-A)<br />
Constant Current<br />
Constant Voltage<br />
Or Constant Potential<br />
High Temperature<br />
Fault Indication<br />
Arc Force<br />
Touch Start (GTAW)<br />
Variable Inductance<br />
Voltage Input<br />
INTRODUCTION 2-2 MANUAL 430429-485<br />
t1<br />
t2<br />
t<br />
IPM<br />
t<br />
MPM<br />
Wire Feed Function<br />
Wire Feed Towards<br />
Workpiece With<br />
Output Voltage Off.<br />
Welding Gun<br />
Purging Of Gas<br />
Continuous Weld<br />
Mode<br />
Spot Weld Mode<br />
Spot Time<br />
Preflow Time<br />
Postflow Time<br />
2 Step Trigger<br />
Operation<br />
Press to initiate wirefeed and<br />
welding, release to stop.<br />
4 Step Trigger<br />
Operation<br />
Press and hold for preflow, release<br />
to start arc. Press to stop arc, and<br />
hold for preflow.<br />
Burnback Time<br />
Disturbance In<br />
Ground System<br />
Inches Per Minute<br />
Meters Per Minute<br />
Art # A-04130
2.05 General<br />
The Power-Master <strong>500</strong> is a primary inverter DC power<br />
source that can be used for constant voltage and constant<br />
current weld processes. The output is rated at 450 Amps/<br />
38 Volts at 100% duty cycle and 560 Amps/42.4 Volts at<br />
60% duty cycle. The power source also provides 24VAC<br />
and 120VAC auxiliary outputs both rated at 10 Amps.<br />
Controls are built into the power source for Gas Tungsten<br />
arc welding (GTAW), Shielded Metal arc welding<br />
(SMAW), Carbon arc gouging (CAG) and Gas Metal arc<br />
welding (GMAW). An ArcForce/Inductance control is<br />
also provided to allow adjustment of the arc stiffness or<br />
drive for SMAW and GMAW welding processes<br />
The graphs in Figure 2-1 show the output volt-amp characteristics<br />
of the power source.<br />
MANUAL 430429-485 2-3 INTRODUCTION<br />
Volts<br />
Volts<br />
Volts<br />
70<br />
60<br />
50<br />
40<br />
30<br />
20<br />
10<br />
70<br />
60<br />
50<br />
40<br />
30<br />
20<br />
10<br />
0<br />
0<br />
0<br />
0<br />
70<br />
60<br />
50<br />
40<br />
30<br />
20<br />
10<br />
0<br />
0<br />
VOLT-AMP CURVE FOR CC-SMAW MODE<br />
MIN.<br />
MAX. ARC FORCE<br />
MIN. ARC<br />
FORCE<br />
MAX.<br />
100 200 300 400 <strong>500</strong> 600 700<br />
Amps<br />
VOLT-AMP CURVE FOR CC-GTAW MODE<br />
MIN. MAX.<br />
100 200 300<br />
Amps<br />
400 <strong>500</strong> 600<br />
VOLT-AMP CURVE FOR CV-GMAW MODE<br />
MIN.<br />
MAX.<br />
100 200 300 400 <strong>500</strong> 600 700<br />
Amps<br />
Art # A-04120<br />
Figure 2-1 Power Source Volt-Amp Characteristics
2.06 Specifications<br />
14.9 in /<br />
378.5 mm<br />
25.5 in /<br />
64.7 cm<br />
Input Data<br />
Line Voltage Line Current kVA Eff. PF Output<br />
208 VAC/3 Phase 68 Amps 24.5 89% 0.83 450A/38V/100% Duty Cycle<br />
230 VAC/3 Phase 62 Amps 24.7 90% 0.82 450A/38V/100% Duty Cycle<br />
380 VAC/3 Phase 37 Amps 24.2 90% 0.84 450A/38V/100% Duty Cycle<br />
400 VAC/3 Phase 35 Amps 24.2 90% 0.84 450A/38V/100% Duty Cycle<br />
460 VAC/3 Phase 30 Amps 23.9 91% 0.84 450A/38V/100% Duty Cycle<br />
208 VAC/3 Phase 88 Amps 31.7 89% 0.88 560A/42.4/60% Duty Cycle<br />
230 VAC/3 Phase 82 Amps 32.7 89% 0.87 560A/42.4/60% Duty Cycle<br />
380 VAC/3 Phase 40 Amps 26.0 90% 0.84 480A/39.2/60% Duty Cycle<br />
400 VAC/3 Phase 43 Amps 29.8 91% 0.86 560A/42.4/60% Duty Cycle<br />
460 VAC/3 Phase 39 Amps 31.1 90% 0.88 560A/42.4/60% Duty Cycle<br />
Line Frequency: 50/60 HZ<br />
Out put Current Range: 5 – 560 Amps<br />
Out put Voltage Range: 10 – 44 Volts<br />
Maximum Output Current: 600 Amps<br />
Maximum Open Circuit Voltage (OCV): 70 Volts<br />
Operating Temperature Range: 0 – 40 C<br />
Input Line Variations: ± 10%<br />
Line Regulation: ± 1%<br />
Load Regulation: ± 1%<br />
Water Protection Class: IP23S<br />
26.8 in /<br />
68.0 cm<br />
Net Weight: 154 lbs / 70 kg<br />
Figure 2-2 Power Source Dimensions<br />
23.0 in / 58.4 cm<br />
22.5 in / 57.1 cm<br />
Art # A-04098<br />
INTRODUCTION 2-4 MANUAL 430429-485
2.07 Standard Features<br />
The power source has the following standard features:<br />
a. Short-Circuit Protection – The output of the power<br />
source can be short circuited in any of the modes of<br />
operation. This protection feature will instantly limit<br />
the output current to a safe value, to assure reliable<br />
operation of the power source.<br />
b. Output Overload Protection – The overload protection<br />
feature will limit the continuous weld current to<br />
the maximum value listed in the specifications for any<br />
of the modes of operation. The machine will continue<br />
to operate but the current will be limited to this maximum<br />
value.<br />
c. Cooling Fan Control – The cooling fans are designed<br />
to operate only when required. They will come on<br />
whenever the output contactor control of the machine<br />
is on. The fans will come on for several minutes when<br />
the machine is first turned on and will normally stay<br />
on for several minutes after the output contactor control<br />
has been switched off. The fans will turn off after<br />
several minutes of inactivity, to minimize the amount<br />
of dirt being drawn into the machine, as well as<br />
lengthen the life of the fans.<br />
d. Overtemperature Protection – If the machine overheats<br />
because of blocked air flow, excessive ambient<br />
temperatures, failed fan, or other cause, the<br />
overtemperature protection will disable the output of<br />
the power source until it has cooled down. If the<br />
overtemperature protection circuit operates, it will<br />
turn on the indicator light on the front panel and the<br />
fans should continue to run until the machine cools.<br />
The overtemperature circuit will reset itself automatically<br />
once the machine has cooled.<br />
e. Multi-Voltage Operation – The power source is designed<br />
to operate from a wide range of input line voltages<br />
as given in the specifications. The machine can<br />
be reconfigured for the different line voltages with a<br />
simple, rugged voltage changeover panel accessible<br />
from the rear panel of the machine (see Installation<br />
chapter for detailed instructions).<br />
f. Multi-Process Operation – The machine has built in<br />
electronic controls which have been optimized for<br />
most welding processes. The following controls are<br />
standard: GTAW with Lift Start, SMAW, CAG,<br />
GMAW/FCAW including the short-arc, globular and<br />
spray transfer modes. Each mode of operation has a<br />
dedicated electronic control which has been optimized<br />
for that particular process.<br />
MANUAL 430429-485 2-5 INTRODUCTION
2.08 Description of Controls and<br />
Features<br />
1<br />
10<br />
11<br />
Front Panel<br />
2<br />
Figure 2-3 Front Panel<br />
3<br />
4<br />
5<br />
6<br />
8<br />
7<br />
9<br />
12<br />
Art # A-04099<br />
1. Control Power ON/OFF Switch: This circuit breaker/<br />
switch activates the controls on the power source.<br />
When this switch is in the OFF position, the power<br />
source is in standby mode. There is still line voltage<br />
present internal to the machine, but the controls are<br />
not energized. In the ON position the control power<br />
is applied and the controls are energized. In the ON<br />
position the digital display should be on. This circuit<br />
breaker/switch also protects the auxiliary 24 VAC and<br />
120 VAC power in the case of an overload. If circuit<br />
breaker trips, determine cause of overload before resetting,<br />
allow breaker time to cool before resetting.<br />
2. Mode Select Switch: The mode select switch is a fourposition<br />
switch used to select the weld process. The<br />
four modes are as follows:<br />
GTAW mode: In this mode the power source operates<br />
in constant current mode with a lift arc starting<br />
circuit activated and arc force/inductance disabled.<br />
The lift arc circuit allows the arc to be<br />
initiated by momentarily touching the tungsten to<br />
the work and then lifting. The lift arc circuit limits<br />
the “touch” current to a low value and then<br />
switches to preset current after lifting. The lift arc<br />
feature can be disabled if desired to allow<br />
“scratch” starting by moving two jumpers internal<br />
to the machine on the main control board. (See<br />
configuration settings under Installation instructions<br />
chapter of this manual for an explanation of<br />
how to disable the lift arc feature)<br />
SMAW mode: In this mode the power source operates<br />
in constant current mode with the arc force<br />
control enabled.<br />
CAG mode: In this mode the power source operates<br />
in constant current mode with arc force/inductance<br />
control disabled.<br />
GMAW mode: In this mode the power source operates<br />
in constant voltage mode with the inductance<br />
control enabled. A Wire-Sharpening circuit<br />
is also active to help condition the end of the wire<br />
when the weld is complete to improve the arc start<br />
on the next weld. The Wire-Sharpening feature can<br />
be disabled if desired. (See configuration settings<br />
under Installation instructions chapter of this<br />
manual for an explanation of how to disable the<br />
Wire-Sharpening feature).<br />
3. Output Contactor Indicator: This green light will be<br />
ON whenever the output of the welding machine is<br />
energized.<br />
4. Output Contactor Switch: This switch is used to energize<br />
the output of the machine.<br />
5. Overtemp Indicator: This amber light will be ON<br />
whenever an overtemperature condition has been detected<br />
internal to the machine. This light will remain<br />
on with the fans running until the unit cools down. If<br />
this light is on, the output of the machine will be disabled.<br />
Once the machine cools down this light will go<br />
off and the overtemperature condition will automatically<br />
reset.<br />
INTRODUCTION 2-6 MANUAL 430429-485
6. Meter Display: The digital meter is used to preset the<br />
output voltage or current when the power source is<br />
not welding, and to display the actual amps or volts<br />
while welding. To preset output current (amps) for<br />
GTAW, SMAW or CAG, place meter Amps/Volts<br />
switch in the Amps position and adjust the main<br />
Amps/Volts control pot to the desired current. To preset<br />
output volts for GMAW, place the meter Amps/<br />
Volts switch in the Volts position and adjust the main<br />
Amps/Volts control pot. to the desired voltage. The<br />
meter will automatically switch over to actual amps<br />
or volts while welding, depending on the position of<br />
the meter Amps/Volts switch.<br />
7. Meter Amps/Volts Switch: This two-position toggle<br />
switch is used to select whether the digital meter will<br />
display amps or volts. To preset weld amperage for<br />
GTAW, SMAW or CAG, place this switch in the AMPS<br />
position. To preset weld voltage for GMAW, place this<br />
switch in the VOLTS mode. After an arc has been initiated,<br />
this switch allows either actual weld amps or<br />
weld volts to be displayed on the meter.<br />
8. Remote/Local Switch: The remote/local toggle switch<br />
is used to select either front panel control of output<br />
amps/volts (LOCAL mode), or remote control of output<br />
amps/volts through the 19 pin or 14 pin receptacles<br />
located on the rear panel (REMOTE mode). For<br />
GTAW mode, the maximum output current must be<br />
preset by the front panel Amps/Volts control pot. For<br />
all other modes, the remote control is full output of<br />
the machine.<br />
9. Amps/Volts Control: This control pot. sets the output<br />
amps or volts depending on the weld process.<br />
Clockwise is increasing output. For all modes except<br />
GTAW, this control is only active when the LOCAL/<br />
REMOTE switch is in the LOCAL mode. For GTAW<br />
this control pot. is used to set the maximum weld current<br />
available to a foot pedal or hand control. To preset<br />
maximum output for GTAW, place the LOCAL/<br />
REMOTE switch in the LOCAL mode and set the<br />
maximum desired amperage on the digital meter. (The<br />
meter amps/volts switch must be in the amps position).<br />
Place the LOCAL/REMOTE switch in the RE-<br />
MOTE mode to activate foot pedal control.<br />
10. Arc Force/Inductance Control: This control pot. is active<br />
for SMAW (Stick) and GMAW (Mig). In SMAW<br />
mode, this pot. controls the amount of arc force or dig<br />
that the arc has. Maximum arc force is full clockwise,<br />
full counter-clockwise is zero arc force. In GMAW<br />
mode, this becomes an inductance control. Maximum<br />
inductance is full clockwise. Higher inductance settings<br />
make the arc “softer” with less spatter. Lower<br />
inductance settings give a stronger “driving” arc. The<br />
inductance should be set according to the type of wire<br />
and gas and desired arc characteristics desired. Generally,<br />
the inductance control can be set at mid-range<br />
as a good starting point.<br />
11. Output Negative Terminal: Connection point for<br />
negative welding lead.<br />
12. Output Positive Terminal: Connection point for positive<br />
welding lead.<br />
MANUAL 430429-485 2-7 INTRODUCTION
Rear Panel<br />
Figure 2–4 Rear Panel<br />
13<br />
14<br />
15<br />
16<br />
17<br />
Art # A-04101<br />
13. 14 Pin Receptacle: This receptacle allows the power<br />
source to interface with wire feeders, and remote controls<br />
such as a foot pedal. This receptacle provides auxiliary<br />
power, contactor control for energizing the output<br />
of the power source, and remote output control.<br />
The pinout is as follows:<br />
A) 24 VAC auxiliary power high side<br />
B) 24 VAC Contactor circuit, (closure between pin A<br />
and pin B will energize output).<br />
C) Remote control maximum (top side of remote pot.)<br />
D) Control circuit common<br />
E) Remote control in (wiper of remote pot., 0 to 10<br />
Volts). CV mode: 0 to 10 Volts gives 10 – 44 Volts<br />
of output. CC mode: 0 to 10 Volts gives 5 – 560<br />
Amps of output.<br />
F) Scaled output current signal Ifb = 100 Amps/Volt<br />
G) 24/115 VAC neutral<br />
H) Output voltage signal: 10 Volts/Volt<br />
I) 115 VAC auxiliary power high side<br />
J) 115 VAC Contactor circuit, (closure between pin I<br />
and pin J will energize output).<br />
K) Chassis ground<br />
L) N/C<br />
M) N/C<br />
N) N/C<br />
14. 19 Pin Receptacle: This receptacle allows the power<br />
source to interface with wire feeders, and remote controls<br />
such as a foot pedal. This receptacle provides auxiliary<br />
power, contactor control for energizing the output<br />
of the power source, and remote output control.<br />
The pinout is as follows:<br />
A) Contactor circuit (+15 Volts)<br />
B) Contactor circuit in, (closure between pin A and<br />
pin B will energize output).<br />
C) Scaled output voltage signal: Vfb = 10 Arc Volts/<br />
Volt<br />
D) 24 VAC auxiliary power high side<br />
E) 115 VAC auxiliary power high side<br />
F) 24/115 VAC neutral<br />
G) Chassis ground<br />
H) Remote control maximum (top side of remote pot.)<br />
J) Remote control in (wiper of remote pot., 0 to 10<br />
Volts).CV Mode: 0 to 10 Volts gives 0 – 44 Volts of<br />
output. CC Mode: 0 to 10 Volts gives 0 – 560 Amps<br />
of output.<br />
K) Remote control minimum (bottom side of remote<br />
pot.)<br />
L) Control circuit common<br />
M) Arc Established = +12 Volts<br />
N) Control circuit common<br />
P) 24 VAC auxiliary power high side (same as pin D)<br />
R) 24/115 VAC neutral (same as pin E)<br />
S) N/C<br />
T) N/C<br />
INTRODUCTION 2-8 MANUAL 430429-485
U) Scaled output current signal: Ifb = 100 Amps/Volt<br />
V) N/C<br />
If a remote control is plugged into both the 14 pin<br />
and 19 pin receptacles the device plugged into the 19<br />
pin receptacle will have control over the output current<br />
or voltage. Either device can control the output<br />
contactor circuit.<br />
15. Duplex: This receptacle can provide up to 10 amps of<br />
120 VAC auxiliary power for powering wire feeders,<br />
water circulators, etc.<br />
16. Fuse: This fuse protects the control transformer in the<br />
power source. If the fuse opens it should be replaced<br />
with a like amperage and voltage, (20 amps, 600VAC).<br />
17. Input Power Access: This opening provides access to<br />
the input terminal block for the input cable. See installation<br />
chapter of this manual for detailed instructions.<br />
MANUAL 430429-485 2-9 INTRODUCTION
INTRODUCTION 2-10 MANUAL 430429-485
3.01 Location<br />
SECTION 3:<br />
INSTALLATION<br />
Adequate air circulation is needed at all times in order to<br />
assure proper operation. Provide a minimum of 12 inches<br />
(305 mm) of free airspace on all sides of the unit. Make<br />
sure that the ventilator openings are not obstructed. Ventilation<br />
air flow is from rear to side.<br />
3.02 Voltage Changeover<br />
For proper operation and to prevent damage to the machine,<br />
the voltage changeover must be set according to<br />
the incoming AC line voltage. Remove the left side panel<br />
of the machine to gain access to the voltage changeover<br />
board. Set the links to agree with one of the four available<br />
voltage settings. (See Figures 3-1 through 3-4).<br />
The four settings are:<br />
200 VAC<br />
230 VAC<br />
400 VAC<br />
460 VAC<br />
1. Check the name plate of the machine for proper<br />
line voltage.<br />
2. Move the voltage links by loosening the nuts securing<br />
the links in place. For 200 and 230 VAC<br />
settings place the two links in the 200/230V positions.<br />
For 400 and 460 VAC settings place the two<br />
links directly on top of each other in the 400/460V<br />
position. See figures 3-1 through 3-4. Make sure<br />
that the connections are properly tightened.<br />
DANGER<br />
ELECTRIC SHOCK CAN KILL.<br />
Open the main wall disconnect switch or breaker,<br />
before removing any covers or access panels on the<br />
welding machine. Live voltage is still present even<br />
with the front panel control switch OFF. Wait at<br />
least three full minutes after power has been removed<br />
before removing any covers or access panels<br />
to allow adequate time for internal capacitors<br />
to discharge.<br />
MANUAL 430429-485 3-1 INSTALLATION<br />
E4<br />
E2<br />
E4<br />
400<br />
460<br />
400<br />
460<br />
E2 E3<br />
E4<br />
200<br />
230<br />
E2<br />
E1<br />
E3<br />
400<br />
230 460<br />
200 VOLT CONNECTION<br />
Figure 3-1<br />
E1<br />
200<br />
230 VOLT CONNECTION<br />
200<br />
230<br />
E3<br />
E1<br />
Figure 3-2<br />
400 VOLT CONNECTION<br />
E4 E1<br />
200<br />
230<br />
E2<br />
200<br />
230<br />
E3<br />
200<br />
230<br />
Figure 3-3<br />
230<br />
460 VOLT CONNECTION<br />
Figure 3-4<br />
400<br />
460<br />
460<br />
200 400<br />
Art # A-04083<br />
Art # A-04084<br />
Art # A-04085<br />
Art # A-04086
3.03 Connecting Welding Machine<br />
to Line Voltage<br />
The input power should be connected to the unit through<br />
a fused disconnect switch, or other suitable disconnecting<br />
means furnished by the user. Access is provided in<br />
the rear panel of the machine for the entry of the input<br />
conductors.<br />
DANGER:<br />
ELECTRIC SHOCK CAN KILL.<br />
Open the disconnect switch, or breaker, and determine<br />
that no voltage is present, before connecting<br />
wires between welding machine and power supply.<br />
CAUTION:<br />
The method of installation, conductor size, and<br />
overcurrent protection shall conform to the requirements<br />
of the local electrical code, the National Electrical<br />
Code, or other national codes, as applicable.<br />
All installation wiring and machine reconnection<br />
shall be done by qualified persons.<br />
Table 3-1 provides minimal information for selection of<br />
line conductors, fuses, and the equipment grounding conductor.<br />
This information is from the National Electrical<br />
Code NFPA 70-1981 Edition. Install this equipment per<br />
the latest edition, available from the National Fire Protection<br />
Association, Batterymarch Park, Quincy, MA<br />
02269.<br />
Line<br />
Volts<br />
Rated Line<br />
Amps<br />
3.04 Connection Instructions<br />
1. Remove left side panel to gain access to the input<br />
terminal block and ground screw.<br />
2. Connect the three phase power line to the terminal<br />
block as shown in Figure 3-5.<br />
3. Connect the power system safety ground to the<br />
the screw labeled PE GROUND located on the<br />
base of the machine near the input terminal block<br />
as shown in Figure 3-5.<br />
4. Replace side panel.<br />
CUSTOMER<br />
INPUT<br />
LINES<br />
Approx. Line Fuse<br />
Size Amps Copper Line Wire Size*<br />
FRAME GROUND<br />
INSTALLATION 3-2 MANUAL 430429-485<br />
L1<br />
L2<br />
L3<br />
Figure 3-5 Input Terminal Block<br />
WARNING:<br />
Art # A-04100<br />
Never connect the safety ground screw to one of the<br />
three line phases. This would represent a serious electrical<br />
shock hazard. The wiring to this machine<br />
should be performed by a qualified person only.<br />
Copper Gounding<br />
Conductor Min. Size<br />
200 88 100 No. 6 (16 mm 2 ) No. 6 (16 mm 2 )<br />
230 82 100 No. 6 (16 mm 2 ) No. 6 (16 mm 2 )<br />
400 43 60 No. 10 (6 mm 2 ) No. 10 (6 mm 2 )<br />
460 39 60 No. 10 (6 mm 2 ) No. 10 (6 mm 2 )<br />
Table 3-1 Recommended Wire and Fuse Size Table<br />
*Conductor size shall be modified as required for line voltage and ambient temperature. Sizes listed are based on 90°<br />
conductor insulation, designated as FEP, FEPB, RHH, and THHN.
3.05 Grounding<br />
The frame of this welding machine should be grounded<br />
for personnel safety, and to assure operation of the<br />
overcurrent protection. The grounding method, and the<br />
equipment grounding conductor size and type shall conform<br />
to local and national codes.<br />
For the National Electrical Code, the equipment grounding<br />
conductor shall be green, green with a yellow stripe,<br />
or bare.<br />
If flexible power cable is used, use a cable assembly which<br />
includes the equipment grounding conductor. If metallic<br />
armored cable or conduit is used, the metal sheathing or<br />
conduit must be effectively grounded per local and national<br />
codes.<br />
Figure 3-6 Ground Stud Location<br />
Rubber-tire mounted equipment shall be grounded to conform<br />
to local and national codes. The grounding assists<br />
in providing protection against line voltage electrical<br />
shock and static shock. The grounding serves to discharge<br />
the static electric charge which tends to build up on rubber-tire<br />
mounted equipment. This static charge can cause<br />
painful shock and lead to the erroneous conclusion that<br />
an electrical fault exists in the equipment.<br />
If a system ground is not available, consult the electrical<br />
code enforcement body for instructions. The welding machine<br />
should be connected to an adequate driven ground<br />
rod, or to a water pipe that enters the ground not more<br />
than 10 feet (3 meters) from the machine.<br />
The equipment grounding conductor size is listed in Table<br />
3-1 as a guide if no local or national code is applicable.<br />
Attach the equipment grounding conductor to the stud<br />
provided on the yoke panel. Determine that the ground<br />
wire size is adequate before the machine is operated.<br />
Art # A-04093<br />
VOLTAGE<br />
CHANGEOVER<br />
BOARD<br />
INPUT <strong>POWER</strong><br />
TERMINAL<br />
BLOCK<br />
GROUND<br />
STUD<br />
MANUAL 430429-485 3-3 INSTALLATION
3.06 Welding Leads<br />
Connect the welding leads to the output bus bar terminals<br />
of the power source. Selection of the proper size of<br />
welding leads should be based upon both the rated<br />
ampacity of the wire as well as the voltage drop on the<br />
cable. When considering voltage drop, the entire loop<br />
(electrode plus work lead) must be considered.<br />
Avg. Welding<br />
Amps<br />
50 Feet (15.2 m) 100 Feet (30.5 m) 150 Feet (45.7 m) 200 Feet (61.0 m) 250 Feet (76.2 m)<br />
100 #4 (20 mm 2 ) #4 (20 mm 2 ) #2 (35 mm 2 ) #1 (50 mm 2 ) #1 (50 mm 2 )<br />
150 #3 (25 mm 2 ) #3 (25 mm 2 ) #1 (50 mm 2 ) #1/0 (50 mm 2 ) #2/0 (70 mm 2 )<br />
200 #2 (35 mm 2 ) #2 (35mm2) #1/0 (50 mm 2 ) #2/0 (70 mm 2 ) #3/0 (95 mm 2 )<br />
250 #1 (50 mm 2 ) #1 (50 mm 2 ) #2/0 (70 mm 2 ) #3/0 (95 mm 2 ) #4/0 (120 mm 2 )<br />
300 #1/0 (50 mm 2 ) #1/0 (50 mm 2 ) #3/0 (95 mm 2 ) #4/0 (120 mm 2 )<br />
350 #2/0 (70 mm 2 ) #2/0 (70 mm 2 ) #4/0 (120 mm 2 )<br />
400 #3/0 (95 mm 2 ) #3/0 (95 mm 2 ) #4/0 (120 mm 2 )<br />
450 #3/0 (95 mm 2 ) #3/0 (95 mm 2 ) #4/0 (120 mm 2 )<br />
<strong>500</strong> #4/0 (120 mm 2 ) #4/0 (120 mm 2 )<br />
550 #4/0 (120 mm 2 ) #4/0 (120 mm 2 )<br />
600 #4/0 (120 mm 2 ) #4/0 (120 mm 2 )<br />
Refer to Table 3-2 as a basic guideline to the required copper<br />
cable sizes.<br />
As a general rule, the welding cables should be kept as<br />
short as possible and placed close together. Try to avoid<br />
coiling up the cables if possible. A damaged or frayed<br />
cable should not be used, and all connections must be<br />
properly tightened.<br />
TOTAL LENGTH OF LEAD CIRCUIT IN FEET AND METERS<br />
(ELECTRODE LEAD PLUS WORK LEAD)<br />
2 - #2/0<br />
2 - (70 mm 2 )<br />
2 - #2/0<br />
2 - (70 mm 2 )<br />
2 - #3/0<br />
2 - (95 mm 2 )<br />
2 - #2/0<br />
2 -(70 mm 2 )<br />
2 - #2/0<br />
2 - (70 mm 2 )<br />
2 - #3/0<br />
2 - (95 mm 2 )<br />
2 - #3/0<br />
2 - (95 mm 2 )<br />
2 - #4/0<br />
2 - (120 mm 2 )<br />
2 - #4/0<br />
2 - (120 mm 2 )<br />
2 - #2/0<br />
2 - (70 mm 2 )<br />
2 - #2/0<br />
2 - (70 mm 2 )<br />
2 - #3/0<br />
2 - (95 mm 2 )<br />
2 - #3/0<br />
2 - (95 mm 2 )<br />
2 - #4/0<br />
2 - (120 mm 2 )<br />
2 - #4/0<br />
2 - (120 mm 2 )<br />
2 - #4/0<br />
2 - (120 mm 2 )<br />
NOTE: Lead size shown is for 194°F (90°C) cable insulation, 86°F (30°C) ambient, and not over 4.5 volts lead drop.<br />
Table 3-2 Lead Circuit Lengths by Welding Amps<br />
INSTALLATION 3-4 MANUAL 430429-485
3.07 Configuration Settings<br />
A. Lift-Arc GTAW<br />
The power source is configured from the factory with the<br />
Lift-Arc starting circuit active for GTAW. This feature<br />
should be disabled if an external high voltage arc starter<br />
is being used to start the arc. To disable the lift arc feature<br />
proceed as follows:<br />
1. Turn off the power to the power source at the main<br />
disconnect.<br />
Figure 3-7 Main Control Board<br />
2. Remove the top panel to gain access to the main<br />
control board (see Figure 3-7).<br />
3. To disable Lift-Arc place jumper plugs JP1 and<br />
JP2 if the OFF position (pins 2 to 3 shorted).<br />
4. To re-enable Lift-Arc place jumper plugs JP1 and<br />
JP2 back in the ON position (1 to 2 shorted).<br />
5. Replace the top panel.<br />
Art # A-04090<br />
MANUAL 430429-485 3-5 INSTALLATION
B. Wire-Sharpening for GMAW<br />
The power source is configured from the factory with the<br />
Wire-Sharpening circuit active for GMAW. This feature<br />
improves arc starting by reducing the size of the ball on<br />
the wire at the end of the weld. To disable this feature<br />
proceed as follows:<br />
1. Turn off the power to the power source at the main<br />
disconnect.<br />
2. Remove the top and side panels to gain access to<br />
the display board. (see Figure 3-8).<br />
Figure 3-8 Wire-Sharpening jumper plug<br />
3. Remove the knobs and hardware from the front<br />
panel to allow removal of the display board.<br />
4. To disable Wire-Sharpening place jumper plug JP1<br />
in the OFF position (pins 3 to 4 shorted).<br />
5. To re-enable Wire-Sharpening place jumper plug<br />
JP1 back in the ON position (pins 1 to 2 shorted).<br />
6. Replace board and panels.<br />
Art # A-04105<br />
INSTALLATION 3-6 MANUAL 430429-485<br />
JP1
4.01 General<br />
SECTION 4:<br />
OPERATION<br />
Read and understand the safety instructions at the beginning<br />
of this manual prior to operating this machine.<br />
WARNING:<br />
Be sure to put on proper protective clothing and<br />
eye safeguards (welding coat, apron, gloves, and<br />
welding helmet, with proper lenses installed). See<br />
Safety Instructions and Warnings chapter included<br />
in this manual. Neglect of these precautions may<br />
result in personal injury.<br />
WARNING:<br />
Make all connections to the power source including<br />
electrode and work cables, as well as remote<br />
control cables, with the power source turned off.<br />
These connections could be electrically live with<br />
the power switch ON.<br />
The Operation chapter of this manual is intended as a<br />
guideline to the operation of the Power-Master <strong>500</strong>.<br />
4.02 GTAW (Gas Tungsten Arc<br />
Welding)<br />
1. Connect the work lead to the positive terminal<br />
and the torch to the negative terminal of the power<br />
source (normal connection for DCEN).<br />
2. Provide suitable shielding gas connections and<br />
controls to the torch. The power source does not<br />
provide connections for the shielding gas.<br />
3. Select the proper tungsten size and type for the<br />
job.<br />
4. If a foot pedal or torch control is being used, connect<br />
to the 14 or 19 pin remote receptacle on the<br />
rear of the power source.<br />
5. Turn the control power switch ON, located on the<br />
front panel of the power source. The digital display<br />
on the power source should be activated.<br />
6. Set the front panel mode switch to GTAW.<br />
7. Preset the weld amperage using the front panel<br />
AMPS/VOLTS control, by placing the meter<br />
amps/volts switch in the amps position, and the<br />
LOCAL/REMOTE switch in the LOCAL position.<br />
8. If a foot pedal or torch amperage control is being<br />
used, place the local/remote switch in the remote<br />
position (after presetting the maximum desired<br />
amperage). The digital meter will now display the<br />
foot/torch control amperage. Until the foot pedal<br />
is pressed, the meter will display the minimum<br />
amperage.<br />
9. If a remote control is not being used, it will be<br />
necessary to turn the output contactor ON/OFF<br />
switch to the ON position to energize the output<br />
of the machine. Open circuit voltage will now be<br />
present on the output terminals of the power<br />
source.<br />
10. Gently rest the torch cup on the workpiece.<br />
11. Press the foot pedal or torch switch to energize<br />
the output, if being used.<br />
12. Rock the torch until the tungsten briefly touches<br />
the workpiece. This will initiate the “LIFT-ARC”<br />
feature. Lift or rock the tungsten back off of the<br />
work to initiate the arc. During the time the tungsten<br />
is touching the work, the power source will<br />
automatically limit the weld current to around 20<br />
amps. Once the arc is initiated, the weld amperage<br />
will change to the preset value (or foot pedal<br />
value). To minimize heating of the end of the tungsten,<br />
it should be left in contact with the workpiece<br />
only briefly.<br />
13. To end the weld, release the foot pedal or turn off<br />
torch switch if being used. Turn off shielding gas<br />
supply.<br />
4.03 SMAW (Shielded Metal Arc<br />
Welding)<br />
1. Connect the welding leads to the output terminals<br />
of the power source. Normally the work lead<br />
should connect to the negative lead and the electrode<br />
holder to the positive terminal (DCEP or<br />
reverse polarity).<br />
2. If a remote control is being used, connect to the<br />
14 or 19 pin remote receptacle on the rear of the<br />
power source.<br />
3. Turn the control power switch ON, located on the<br />
front panel of the power source. The digital display<br />
on the power source should be activated.<br />
4. Set the front panel mode switch to SMAW.<br />
MANUAL 430429-485 4-1 OPERATION
5. Preset the weld amperage using the front panel<br />
amps/volts control, by placing the meter amps/<br />
volts switch in the amps position, and the local/<br />
remote switch in the local position.<br />
6. If a remote control is being used, place the local/<br />
remote switch in the remote position. The remote<br />
control will have full control of the output of the<br />
power source from minimum to maximum.<br />
7. Set the arc force control to the desired setting. Fully<br />
counter-clockwise is off, full clockwise is maximum.<br />
Higher arc force settings will give the arc<br />
more “dig” or “drive” by increasing the short circuit<br />
current available.<br />
8. Energize the output of the power source with either<br />
the front panel output contactor ON/OFF<br />
switch or by the switch on the remote control if<br />
one is being used. Open circuit voltage will now<br />
be present on the output terminals of the power<br />
source.<br />
9. The power source is now ready to weld.<br />
4.04 CAG (Carbon Arc Gouging)<br />
1. Connect the welding leads to the output terminals<br />
of the power source. Normally the work lead<br />
should connect to the negative lead and the electrode<br />
holder to the positive terminal (DCEP or<br />
reverse polarity).<br />
2. If a remote control is being used, connect to the<br />
14 or 19 pin remote receptacle on the rear of the<br />
power source.<br />
3. Turn the control power switch ON, located on the<br />
front panel of the power source. The digital display<br />
on the power source should be activated.<br />
4. Set the front panel mode switch to CAG.<br />
5. Preset the weld amperage using the front panel<br />
amps/volts control, by placing the meter amps/<br />
volts switch in the amps position, and the local/<br />
remote switch in the local position.<br />
6. If a remote control is being used, place the local/<br />
remote switch in the remote position. The remote<br />
control will have full control of the output of the<br />
power source from minimum to maximum.<br />
7. Energize the output of the power source with either<br />
the front panel output contactor ON/OFF<br />
switch or by the switch on the remote control if<br />
one is being used. There will now be open circuit<br />
voltage present on the output terminals of the<br />
power source.<br />
8. The power source is now ready to arc gouge.<br />
NOTE<br />
For CAG mode, the arc force/inductance control is<br />
not active. The optimum arc characteristics are built<br />
into the power source.<br />
4.05 GMAW (Gas Metal Arc Welding)<br />
1. Connect the wire feeder to the power source. Connect<br />
the control cable to the 19-pin receptacle or<br />
the 14-pin receptacle on the rear of the power<br />
source. Connect the electrode cable from the wire<br />
feeder to the output terminal of the power source<br />
(normally positive for DCEP). Connect the other<br />
output terminal of the power source to the<br />
workpiece.<br />
2. Turn the control power switch ON, located on the<br />
front panel of the power source. The digital display<br />
on the power source should be activated.<br />
3. Set the front panel mode switch to GMAW.<br />
4. Preset the weld voltage using the front panel<br />
amps/volts control, by placing the meter amps/<br />
volts switch in the volts position, and the local/<br />
remote switch in the local position.<br />
5 If the wire feeder has remote voltage control, place<br />
the local/remote switch on the front of the power<br />
source in the remote position. This will allow the<br />
wire feeder to control the preset voltage of the<br />
power source.<br />
6. Set the inductance control to the desired inductance<br />
setting. Full clockwise is maximum inductance.<br />
Higher inductance settings make the arc<br />
“softer” with less spatter. Lower inductance settings<br />
give a stronger “driving” arc. The inductance<br />
should be set according to the type of wire and<br />
gas and desired arc characteristics desired. Generally,<br />
the inductance control can be set at midrange<br />
as a good starting point.<br />
NOTE<br />
The inductance control is primarily used for the<br />
short-circuiting transfer mode of MIG welding. For<br />
globular or spray transfer modes the inductance<br />
control has minimal effect.<br />
7. The power source is now ready to weld.<br />
8. To end the weld, release the torch switch while<br />
holding the torch in place at the end of the weld.<br />
This will allow the wire sharpening circuit in the<br />
power source to condition the end of the wire for<br />
the next weld. The wire sharpening circuit will<br />
tend to leave a very small ball on the end of the<br />
wire, thus making the next start easier.<br />
OPERATION 4-2 MANUAL 430429-485
SECTION 5:<br />
SERVICE<br />
5.01 General Maintenance<br />
If this equipment does not operate properly, stop work<br />
immediately and investigate the cause of the malfunction.<br />
Maintenance work must be performed by an experienced,<br />
qualified person only. Any electrical work must<br />
be performed by an electrician or other person properly<br />
trained in servicing electrical equipment. Do not permit<br />
untrained persons to inspect, clean or repair this equipment.<br />
Use only recommended replacement parts when<br />
servicing this machine.<br />
DANGER:<br />
HIGH VOLTAGE is present internally even with<br />
the control power switch in the OFF position. Before<br />
inspecting, cleaning, or servicing disconnect<br />
and lock out input power to the power source.<br />
Periodically clean the inside of the welding power source<br />
by using clean dry compressed air of not over 25 psi as<br />
normal preventive maintenance. At the time of the cleaning,<br />
a full inspection of the welding machine and setup<br />
should be performed. Check warning labels on the machine<br />
for readability; replace if necessary. Check input<br />
and output connections as well as frame ground connections<br />
to the machine to insure that they are tight and the<br />
wires are not frayed or overheated. Inspect internal wiring<br />
of machine for loose or frayed connections; tighten or<br />
repair as necessary. It would also be advisable to check<br />
connections to wire feeders, fixtures, etc., at this time. Any<br />
damaged cables or hoses should be replaced.<br />
5.02 Basic Troubleshooting Guide<br />
A. Scope:<br />
The troubleshooting guide is intended to be used by qualified<br />
service technicians. The troubleshooting guide contains<br />
information which can be used to diagnose and correct<br />
unsatisfactory operation or failure of the various<br />
components of the power source.<br />
B. Safety:<br />
To ensure safe operation and service, read this entire<br />
manual before attempting to service or repair this machine.<br />
The service technician may be asked to check voltage<br />
levels while the machine is turned ON; to assure<br />
safety, use care and follow all instructions accordingly!<br />
C. Troubleshooting Hints:<br />
Examine connections for proper assembly and contact<br />
before replacing a component. Wire lugs should be in tight<br />
contact with the lead’s conductor and should be crimped<br />
to the lead’s insulation. The mating surfaces of the connection<br />
should be clean and free of oxidation. Faulty connections<br />
or wiring problems are often the cause of an<br />
equipment malfunction!<br />
Do not pull on wires to disassemble connections. Firmly<br />
grasp each lug or connector when disconnecting. Pulling<br />
on wires for disassembly can damage the integrity of the<br />
connection and cause future malfunctions.<br />
Prior to disassembly or servicing of the machine, note<br />
the wiring and connections in the machine. Reassembling<br />
should place the wires in the same location and routing<br />
as received from the factory. Keep wires and leads away<br />
from hot parts and sharp objects.<br />
All signals referenced in the following troubleshooting<br />
guide can be measured with a digital multimeter (DMM).<br />
Art # A-04147<br />
MANUAL 430429-485 5-1 SERVICE<br />
OL<br />
VR COM A<br />
+ _<br />
Digital Multimeter<br />
WARNING:<br />
Disconnect the power source from the input power<br />
source before carrying out any service or repair<br />
work. Hazardous voltages can be present in the<br />
machine whenever input power is connected.<br />
WARNING:<br />
ALL SERVICE SHOULD BE PERFORMED BY<br />
TRAINED PERSONNEL ONLY.
5.03 Troubleshooting Guide<br />
This guide should be used as an aid to determine the cause<br />
of a system malfunction or failure. It should be remembered<br />
that in most welding situations there can be a large<br />
number of variables which can affect the overall system<br />
performance. These variables often include several pieces<br />
of equipment, interconnect cables, weld cables, shielding<br />
gas systems, grounding, consummable wire or electrodes,<br />
part preparation, etc. It is important to check all<br />
aspects of the welding system and environment when<br />
troubleshooting a problem or malfunction.<br />
Explanation of front panel lights:<br />
OUTPUT CONTACTOR ON – GREEN<br />
This light indicates that either the OUTPUT CONTAC-<br />
TOR switch on the front panel is on, or the remote GUN<br />
SWITCH is on via either the 14 pin or 19 pin remote receptacle.<br />
Whenever this green light is on, the machine<br />
should be producing output.<br />
OVERTEMPERATURE – AMBER<br />
This light indicates that the machine has overheated and<br />
shut itself off. When this light is on, the machine will be<br />
disabled and not produce any output. After the machine<br />
has cooled, this light will automatically turn off and the<br />
machine will no longer be disabled.<br />
The following guide lists several potential problems and<br />
lists a number of items to check or possible causes.<br />
DANGER:<br />
ELECTRIC SHOCK CAN KILL<br />
Open the main wall disconnect switch or breaker,<br />
before removing any covers or access panels on the<br />
welding machine. Live voltage is still present even<br />
with the front panel control switch OFF. Wait at<br />
least three full minutes after power has been removed<br />
before removing any covers or access panels<br />
to allow adequate time for internal capacitors<br />
to discharge.<br />
1. Unit is completely inoperative – digital display is<br />
off, fans are off, no output.<br />
A. Check for blown input fuse or fuses.<br />
B. Check to make sure that voltage setting on changeover<br />
board is correct<br />
1) Check all of the LINKS to make sure they are<br />
set right.<br />
2) Check fuse on the rear panel.<br />
C. Check wiring to the input terminal block and ground<br />
screw.<br />
D. Is front panel CONTROL <strong>POWER</strong> switch/circuit<br />
breaker ON?<br />
E. With CONTROL <strong>POWER</strong> switch ON and power applied<br />
to the machine check for 120 VAC power on the<br />
rear duplex.<br />
F. Check the following internal to the machine.<br />
1) All connections to the control boards.<br />
2) Wiring to the small control transformer mounted underneath<br />
the control board.<br />
G. Possible defective circuit breaker switch on front panel.<br />
H. Possible defective main control board.<br />
I. Possible defective display board.<br />
2. Machine blows input fuse as soon as power is<br />
applied.<br />
A. Check wiring to input terminal block and ground screw.<br />
B. Check to make sure that voltage setting on changeover<br />
board is correct.<br />
1) Check the LINKS to make sure they are set<br />
right.<br />
2) Check fuse on the rear panel.<br />
C. Check internal wiring to terminal block, input rectifier,<br />
IGBTs, contactors and changeover board.<br />
D. Possible defective input rectifier module and/or suppressors.<br />
(See how to check the input rectifier module below).<br />
E. Possible defective IGBT modules. (See how to check<br />
IGBT module below).<br />
F. Possible defective capacitor board/s.<br />
SERVICE 5-2 MANUAL 430429-485
3. Machine powers up but fans do not run.<br />
A. Fans should normally run when the machine is first<br />
powered up or whenever the OUTPUT CONTACTOR<br />
is ON.<br />
B. With CONTROL <strong>POWER</strong> switch ON check for 120<br />
VAC power on the rear duplex.<br />
C. Check wiring to all three fans.<br />
D. Check wiring to main control board – J9.<br />
E. Possible defective main control board.<br />
F. Possible defective fan/s.<br />
4. CONTROL <strong>POWER</strong> circuit breaker trips off.<br />
A. Check for shorts or overload on either rear duplex, 14<br />
pin receptacle or 19 pin receptacle and cables.<br />
B. Check for internal short circuit, check wiring to both<br />
contactors, all three fans and to main control board – J9.<br />
C. Check internal wiring to rear duplex, amphenol board<br />
and small control transformer.<br />
D. Possible defective front panel circuit breaker.<br />
E. Possible defective small control transformer or aux.<br />
transformer.<br />
5. Machine powers up but no output or incorrect<br />
output.<br />
A. Check for open circuit voltage (see how to test open circuit<br />
voltage below).<br />
B. Check for shorted output diode (see how to check output<br />
diodes below).<br />
C. Check front panel controls:<br />
1) Adjust ranges:<br />
To check the output adjust range make sure that<br />
the REMOTE/LOCAL control is set to local.<br />
For GTAW, SMAW and CAG modes the Meter<br />
Amps/Volts switch must be in the AMPS position.<br />
For GMAW mode, the switch must be<br />
in the VOLTS position.<br />
a) GTAW range: 5 - 560 (AMPS display)<br />
b) SMAW range: 5 - 560 (AMPS display)<br />
c) CAG range: 5 - 560 (AMPS display)<br />
d) GMAW range: 0 - 44.0 (VOLTS display)<br />
2) CONTACTOR control:<br />
Whenever the CONTACTOR switch is ON the<br />
indicator LED should also be on. Anytime the<br />
CONTACTOR is on, there should be open circuit<br />
voltage present on the output terminals of<br />
the power source. Open circuit voltage should<br />
be approximately 50 - 70 volts for all operating<br />
modes of the power source except GMAW. For<br />
checking open circuit voltage in GMAW mode,<br />
use an external CONTACTOR control.<br />
NOTE:<br />
For load testing the machine or welding in GMAW<br />
mode it will be necessary to use an external CON-<br />
TACTOR signal, otherwise the machine will NOT<br />
produce the correct output voltage.<br />
D. Possible defective main control board.<br />
E. Possible defective IGBT or input rectifier module (See<br />
how to check these parts below).<br />
F. Check internal wiring to control board and current<br />
sensor.<br />
G. Possible defective current sensor.<br />
MANUAL 430429-485 5-3 SERVICE
6. How to check the input rectifier module.<br />
A. See Figure 5-1 and/or Appendix 3 Connection Diagram.<br />
B. Check all six internal diodes as follows with diode checker<br />
on digital VOM (all should read in the range of 0.3 to<br />
0.6 volts).<br />
1) Positive meter lead on AC terminal A(1), negative<br />
meter lead on (+) terminal D(4).<br />
2) Positive meter lead on AC terminal B(2), negative<br />
meter lead on (+) terminal D(4).<br />
3) Positive meter lead on AC terminal C(3), negative<br />
meter lead on (+) terminal D(4).<br />
4) Positive meter lead on (–) terminal F(5), negative<br />
meter lead on AC terminal A(1).<br />
5) Positive meter lead on (–) terminal F(5), negative<br />
meter lead on AC terminal B(2).<br />
6) Positive meter lead on (–) terminal F(5), negative<br />
meter lead on AC terminal C(3).<br />
Capacitor BD<br />
Top IGBT<br />
Input Rectifier<br />
C2E1<br />
E2<br />
C1<br />
Bottom IGBT<br />
C2E1<br />
E2<br />
C1<br />
Capacitor BD<br />
Art # A-04091<br />
Figure 5-1 Input Rectifier IGBT Modules<br />
7. How to check the IGBT modules.<br />
A. Refer to Figure 5-1 and/or Appendix 3 Connection<br />
Diagram.<br />
B. Using diode checker on digital VOM make the following<br />
checks: (all should read in the range of 0.3 to 0.6<br />
volts).<br />
1) Top IGBT: Positive meter lead on terminal<br />
C2E1, negative meter lead on terminal C1.<br />
2) Top IGBT: Positive meter lead on terminal E2,<br />
negative meter lead on terminal C2E1.<br />
3) Bottom IGBT: Positive meter lead on terminal<br />
C2E1, negative meter lead on terminal C1.<br />
4) Bottom IGBT: Positive meter lead on terminal<br />
E2, negative meter lead on terminal C2E1.<br />
8. How to check the output diodes.<br />
A. Disconnect the weld cables from output terminals.<br />
B. With diode checker setting on VOM, measure across<br />
output terminals with positive meter lead on negative<br />
output terminal. Diode checker should indicate 0.2 to<br />
0.6 volts. If diode checker indicates short, then one or<br />
more of the output diodes is shorted.<br />
9. How to check output open circuit voltage.<br />
A. Disconnect the weld cables from output terminals.<br />
B. Place front panel mode switch in SMAW.<br />
C. Set to LOCAL mode and turn OUTPUT CONTAC-<br />
TOR switch ON.<br />
D. Measure output terminal voltage, should read approximately<br />
55 to 70 VDC.<br />
10. Erratic arc<br />
A. Check for loose or incorrect polarity connection to electrode<br />
and work.<br />
B. Check for good gas flow and correct mixture.<br />
C. Is wire feeding smoothly? Check feed rolls, liner, tip,<br />
nozzle, etc.<br />
D. Check welding wire for excess lubrication or improper<br />
cast.<br />
E. Is electronic inductance set correctly, see Operation<br />
chapter of manual.<br />
F. Check voltage and wire speed settings.<br />
G. Torch to work distance too great.<br />
H. Possible defective main control board.<br />
SERVICE 5-4 MANUAL 430429-485
SECTION 6:<br />
PARTS LIST<br />
6.01 Equipment Identification<br />
All identification numbers as described in the Introduction<br />
chapter must be furnished when ordering parts or<br />
making inquiries. This information is usually found on<br />
the nameplate attached to the equipment. Be sure to include<br />
any dash numbers following the Specification or<br />
Assembly numbers.<br />
6.02 How To Use This Parts List<br />
The Parts List is a combination of an illustration and a<br />
corresponding list of parts which contains a breakdown<br />
of the equipment into assemblies, subassemblies, and<br />
detail parts. All parts of the equipment are listed except<br />
for commercially available hardware, bulk items such as<br />
wire, cable, sleeving, tubing, etc., and permanently attached<br />
items which are soldered, riveted, or welded to<br />
other parts. The part descriptions may be indented to<br />
show part relationships.<br />
To determine the part number, description, quantity, or<br />
application of an item, simply locate the item in question<br />
from the illustration and refer to that item number in the<br />
corresponding Parts List.<br />
SPEC NUMBER<br />
100060<br />
PARTS LIST 6-1 MANUAL 430429-485
6.03 External Panels and Labels<br />
Item Qty Description Part Number<br />
1 1 Bracket Positioning 830348<br />
2 1 Label, Precautionary, Static 204036<br />
3 1 Label, Thermal Arc, 2X7 870087-001<br />
4 1 Label, Voltage Changeover 830963<br />
5 1 Label, Thermal Arc DC Welder 830200-001<br />
6 1 Panel, Power Master Left Side 830862<br />
7 1 Panel, Power Master Right Side 830861<br />
8 1 Panel, Power Master Top 830947<br />
6<br />
5<br />
4<br />
1<br />
2<br />
PARTS LIST 6-2 MANUAL 430429-485<br />
8<br />
7<br />
Art # A-04102<br />
3
6.04 Base Parts<br />
Item Qty. Description Part Number<br />
1 1 Base, Welder 830858<br />
2 1 Board, Changeover Assembly. 830941<br />
3 1 Bracket, Input Line Glastic 830966<br />
4 1 Choke, Filter Assembly. 830942<br />
5 3 Connector, 2/0-14 Block 830968<br />
6 3 Insulation, Input Line Glastic 830967<br />
7 1 Label, Danger Shock 830363<br />
8 1 Label, Frame Ground 830116<br />
9 3 Strap, 220/440 Volts CW811<br />
10 1 Transformer, Control Assembly. 830928<br />
6<br />
5<br />
7<br />
3<br />
8<br />
2<br />
9<br />
PARTS LIST 6-3 MANUAL 430429-485<br />
10<br />
1<br />
4<br />
Art # A-04094
6.05 Front Panel Parts<br />
Item Qty.Description Part Number<br />
1 1 Board, P.C., Non-Pulse Display 830906<br />
2 2 Busbar, Cable Stud 5CW-974<br />
3 2 Bushing, Insulator 5CW975<br />
4 2 Capacitor, .047MFD, W/Leads 368705-038<br />
5 1 Circuit, Breaker, 10A, 2 Pole 830362<br />
6 3 Knob, Control Black 406806-003<br />
7 1 Label, Power Master <strong>500</strong> 830946<br />
8 2 Nut, 1/2 - 13, Hex Flange 400614-001<br />
9 1 Overlay, Power Master Control 830954<br />
10 1 Panel, Power Master Front 830959<br />
11 4 Washer, Insulator, Cable Stud 5CW976A<br />
5<br />
6<br />
8<br />
Art # A-04103<br />
3<br />
2<br />
PARTS LIST 6-4 MANUAL 430429-485<br />
9<br />
7<br />
11<br />
4<br />
10<br />
1
6.06 Rear Panel Parts<br />
Item Qty. Description Part Number<br />
1 1 Board, PC, Amphenol 830427<br />
2 1 Fuse Holder 402151<br />
3 1 Fuse, Fast Acting, 20 Amp 405093-002<br />
4 1 Panel, Rear 830860<br />
5 1 Receptacle, Duplex, 3 Wire 402670<br />
4<br />
Art # A-04104<br />
PARTS LIST 6-5 MANUAL 430429-485<br />
3<br />
2<br />
5<br />
1
6.07 Center Chassis Parts<br />
Item Qty. Description Part Number<br />
1 2 Board, PC, Capacitor, Negative, “B” 830413<br />
2 2 Board, PC, Capacitor, Positive, “B” 830414<br />
3 1 Bracket, Fan Mounting 830806<br />
4 1 Bracket, Mounting 830898<br />
5 2 Bracket, Mounting Insulator 830916<br />
6 1 Busbar, Current Sensor 830918<br />
7 1 Busbar, Lower Secondary 830915<br />
8 2 Busbar, Output Diode 830917<br />
9 1 Busbar, Upper Secondary 830914<br />
10 1 Capacitor, Snubber 830372<br />
11 1 Contactor, 40 Amp, 2 Pole 406241-002<br />
12 3 Diode, Ultra Fast Recovery 830358<br />
13 2 Fan, Cooling, 6" 830353<br />
14 1 Fan, Transformer 830360<br />
15 1 Heatsink 830897<br />
16 1 Heatsink, Diode Output 830896<br />
17 2 IGBT Module Assembly 830962<br />
18 1 Insulator, Adhesive Backed, 3X4 830956<br />
19 2 Insulator, Nomex 830369<br />
20 4 Mount, Shock, Stud-Stud 830377<br />
21 1 Panel, Power Master Center 830859<br />
22 1 Rectifier, 3 Phase, 1600v, 100A 830911<br />
23 1 Sensor, Current 205018-001<br />
24 1 Snap Bushing, .125 Panel, 1.75 Hole 405362-002<br />
25 2 Spacer, .25 ID X .63 OD X .25 L, Brass 830330<br />
26 8 Spacer, Nylon, .38 OD X .195 ID X .25 L 830332<br />
27 8 Spacer, Nylon, .50 OD X .22 ID X .938 L 830286<br />
28 3 Suppressor, 1350 V, 50 A, W/Lug 202258-006<br />
29 2 Thermostat Assembly. 830934<br />
30 1 Transformer, Current 830351<br />
31 1 Transformer, Inverter, Power 830912<br />
PARTS LIST 6-6 MANUAL 430429-485
26<br />
25<br />
19<br />
9<br />
1<br />
18<br />
27<br />
7<br />
6<br />
11<br />
30<br />
24<br />
23<br />
17<br />
2<br />
31<br />
28<br />
PARTS LIST 6-7 MANUAL 430429-485<br />
22<br />
8<br />
29<br />
15<br />
21<br />
5<br />
20<br />
14<br />
4<br />
12<br />
16<br />
10<br />
3<br />
Art # A-04095<br />
13
6.08 PC Board Parts<br />
Item Qty. Description Part Number<br />
1 1 Board, PCB, Control 830894<br />
2 1 Bracket, Mounting 830285<br />
3 2 Bracket, Resistor, 50W 830395<br />
4 2 Cable Tie Mount 406006<br />
5 1 Cable, Ribbon AY., 26 Pin, 13" 204038-002<br />
6 1 Cable, Ribbon AY., 16 Pin, 20" 204038-012<br />
7 1 Contactor, 30 Amp, 2 Pole 406240-002<br />
8 1 Harness, Wire, Current Sensor 830833<br />
9 1 Insulator, Adhesive Backed, 3X4 830956<br />
10 1 Panel, Upper Tray 830890<br />
11 1 Resistor, Wound 830394<br />
12 2 Resistor, Wirewound, 55W, 10 Ohm 830345<br />
13 2 Snap Bushing, .125 Panel, 1.75 Hole 405362-002<br />
14 10 Support Standoff 171086-002<br />
15 1 Transformer Control 830336<br />
9<br />
3<br />
10<br />
7<br />
11<br />
13<br />
1<br />
2<br />
PARTS LIST 6-8 MANUAL 430429-485<br />
8<br />
15<br />
6<br />
12<br />
4<br />
14<br />
5<br />
Art # A-04096
APPENDIX 1: GENERAL INFORMATION<br />
Note the model and specification number shown on the equipment nameplate.<br />
Locate these numbers in the model and specification number columns below.<br />
Use only those diagrams and instructions that are applicable.<br />
SPECIFICATION NUMBER MODEL SCHEMATIC AND CONNECTION DIAGRAM<br />
100060 <strong>POWER</strong><strong>MASTER</strong> <strong>500</strong> 830921<br />
830920<br />
MANUAL 430429-485 A-1 APPENDIX
Art # A-04106<br />
APPENDIX 2: SCHEMATIC DIAGRAM<br />
APPENDIX A-2 MANUAL 430429-485
Art # A-04106<br />
MANUAL 430429-485 A-3 APPENDIX
Art # A-04107<br />
APPENDIX 3: CONNECTION DIAGRAM 1 OF 2<br />
APPENDIX A-4 MANUAL 430429-485
Art # A-04107<br />
MANUAL 430429-485 A-5 APPENDIX
Art # A-04108<br />
APPENDIX 4: CONNECTION DIAGRAM 2 OF 2<br />
APPENDIX A-6 MANUAL 430429-485
Art # A-04108<br />
MANUAL 430429-485 A-7 APPENDIX


