
Create successful ePaper yourself
Turn your PDF publications into a flip-book with our unique Google optimized e-Paper software.
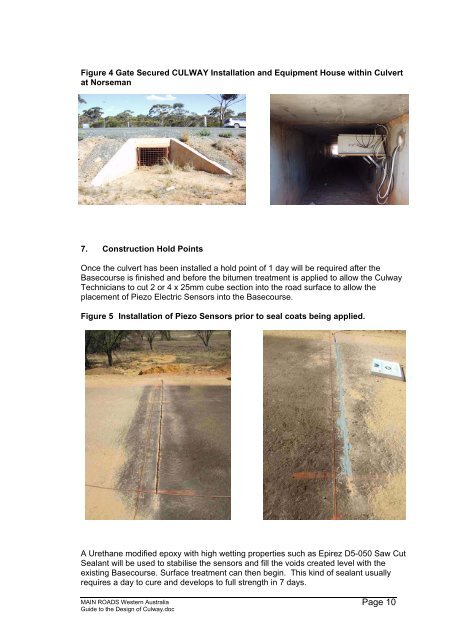
Figure 4 Gate Secured CULWAY Installation and Equipment House within Culvert<br />
at Norseman<br />
7. Construction Hold Points<br />
Once the culvert has been installed a hold point <strong>of</strong> 1 day will be required after the<br />
Basecourse is finished and before the bitumen treatment is applied <strong>to</strong> allow the <strong>Culway</strong><br />
Technicians <strong>to</strong> cut 2 or 4 x 25mm cube section in<strong>to</strong> the road surface <strong>to</strong> allow the<br />
placement <strong>of</strong> Piezo Electric Sensors in<strong>to</strong> the Basecourse.<br />
Figure 5 Installation <strong>of</strong> Piezo Sensors prior <strong>to</strong> seal coats being applied.<br />
A Urethane modified epoxy with high wetting properties such as Epirez D5-050 Saw Cut<br />
Sealant will be used <strong>to</strong> stabilise the sensors and fill the voids created level with the<br />
existing Basecourse. Surface treatment can then begin. This kind <strong>of</strong> sealant usually<br />
requires a day <strong>to</strong> cure and develops <strong>to</strong> full strength in 7 days.<br />
MAIN ROADS Western Australia<br />
<strong>Guide</strong> <strong>to</strong> the <strong>Design</strong> <strong>of</strong> <strong>Culway</strong>.doc<br />
Page 10