Troubleshooting Guide - ETO Doors
Troubleshooting Guide - ETO Doors
Troubleshooting Guide - ETO Doors

Create successful ePaper yourself
Turn your PDF publications into a flip-book with our unique Google optimized e-Paper software.
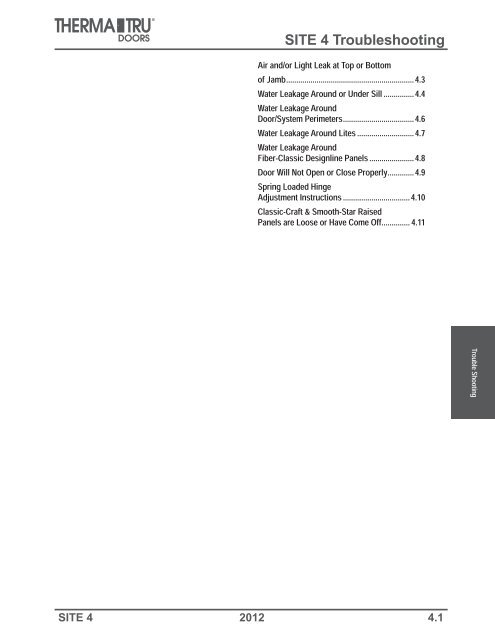
SITE 4 <strong>Troubleshooting</strong><br />
Air and/or Light Leak at Top or Bottom<br />
of Jamb ...............................................................4.3<br />
Water Leakage Around or Under Sill ...............4.4<br />
Water Door/System Leakage Perimeters Around ...................................4.6<br />
Water Leakage Around Lites ............................4.7<br />
Water Fiber-Classic Leakage Designline Around Panels ......................4.8<br />
Door Will Not Open or Close Properly .............4.9<br />
Spring Adjustment Loaded Instructions Hinge .................................4.10<br />
Classic-Craft Panels are Loose & Smooth-Star or Have Come Raised Off. .............4.11<br />
SITE 4 2012 4.1<br />
Trouble Shooting
Trouble Shooting<br />
4.2 2012 SITE 4
Air and/or Light<br />
Leak at Top or Bottom of Jamb<br />
PROBLEM: Air and/or light leak at top or bottom of jamb.<br />
Cause Solution Refer to…<br />
Weatherstrip missing.<br />
Weatherstrip painted.<br />
Weatherstrip cracked, torn or<br />
damaged.<br />
Bottom corner seal pads<br />
missing or removed.<br />
Door loose in frame, with<br />
excessive in-and-out<br />
movement when latched.<br />
Door not meeting weatherstrip<br />
evenly when it closes, hitting<br />
the top or bottom first.<br />
Replace weatherstrip.<br />
Site 5 - Weatherstrip<br />
Replacement<br />
Replace pads. SHOP 4 - Frame<br />
Assembly for Basic Fixed<br />
Sills<br />
Adjust strike plate for tighter<br />
fit.<br />
Realign, reshim, readjust<br />
lockside jamb so door<br />
meets weatherstrip evenly<br />
from top to bottom.<br />
SITE 1 - Pre-hung Unit<br />
Installation for Adjustable<br />
Sills<br />
SITE 1 Corner<br />
Seal Pad Instructions<br />
SITE 1 - Pre-hung<br />
Unit Installation<br />
SITE 1 - Pre-hung<br />
Unit Installation<br />
SITE 4 2012 4.3<br />
Trouble Shooting
Trouble Shooting<br />
Water Leakage Around or Under Sill<br />
PROBLEM: Water leakage around or under sill.<br />
Cause Solution Refer to…<br />
Door not meeting weatherstrip<br />
evenly when it closes, hitting<br />
the top to bottom first.<br />
Damaged or painted<br />
weatherstrip.<br />
Improper/insufficient sealant<br />
and/or sealant breakdown<br />
between sill and subfloor.<br />
Broken seal where the sill<br />
meets the jamb.<br />
Sill humped or depressed<br />
beyond range of door<br />
bottom’s sealing capacity.<br />
Humped sill.<br />
Damaged sill saddle causing<br />
door bottom bulb seal to<br />
bunch up and wrinkle when<br />
the unit closes.<br />
Realign, reshim, readjust<br />
lockside jamb so door<br />
meets weatherstrip evenly<br />
from top to bottom.<br />
Replace weatherstrip.<br />
Reseal under sill using<br />
Elastomeric and Polyurethane<br />
sealant.<br />
Remove corner seal pad, pull<br />
out weatherstrip at bottom, and<br />
place a bead of Elastomeric and<br />
Polyurethane sealant along<br />
entire joint where jamb and sill<br />
meet. Replace weatherstrip<br />
and reapply corner seal pad.<br />
Anchor sill to draw down<br />
straight by drilling pilot<br />
holes and securing with<br />
galvanized screws.<br />
Replace any wrinkled/torn<br />
door bottom.<br />
Shim jamb legs up to allow<br />
sill to straighten. Reseal with<br />
Elastomeric and Polyurethane<br />
sealant under sill and anchor<br />
sill in place.<br />
Replace the saddle and<br />
screw down.<br />
SITE 1 - Pre-hung<br />
Unit Installation<br />
SITE 5 - Weatherstrip<br />
Replacement<br />
SITE 1 - Pre-hung<br />
Unit Installation<br />
SITE 1 - Pre-hung<br />
Unit Installation<br />
SITE 5 - Adjustable Sill<br />
Threshold Replacement<br />
4.4 2012 SITE 4
PROBLEM: Water leakage around or under sill.<br />
Water Leakage Around or Under Sill<br />
Cause Solution Refer to…<br />
Damaged door bottom.<br />
Door sagging out of square in<br />
frame.<br />
Jamb out of alignment.<br />
Jamb out of square to door.<br />
Replace door bottom,<br />
sealing first.<br />
Make sure LONG hinge<br />
screws provided are<br />
properly installed in the top<br />
hinge through the jamb to<br />
the stud.<br />
If jamb is twisted along length<br />
of the members, straighten it<br />
by reshimming to eliminate<br />
the twist and maintain an even<br />
head margin.<br />
Usually caused by plumb<br />
frame members sitting on<br />
unlevel floor/sill area. Free<br />
lowest jamb leg and shim it up<br />
to level the sill and maintain<br />
an even head margin.<br />
Shim under sill if necessary.<br />
SHOP 3 - Door<br />
Bottom installation<br />
SITE 1 - Pre-hung<br />
Unit Installation<br />
SITE 1 - Pre-hung<br />
Unit Installation<br />
SITE 4 2012 4.5<br />
Trouble Shooting
Trouble Shooting<br />
Water Leakage Around Door/System Perimeters<br />
PROBLEM: Water leakage around door/system perimeters.<br />
Cause Solution Refer to…<br />
Door not meeting weatherstrip<br />
evenly when it closes, hitting<br />
the top or bottom first.<br />
Improper/incomplete seal<br />
and/or sealant breakdown<br />
around or on top of unit.<br />
Improper/incomplete seal<br />
and/or breakdown around<br />
fixed unit sidelites where they<br />
meet the jamb.<br />
Realign, reshim, readjust<br />
lockside jamb so door<br />
meets weatherstrip evenly<br />
from top to bottom.<br />
Properly flash and/or seal with<br />
Elastomeric or Polyurethane<br />
sealant around brickmold.<br />
Reseal with Elastomeric and<br />
Polyurethane sealant to restore<br />
system integrity.<br />
SITE 1 - Pre-hung<br />
Unit Installation<br />
SITE 1 - Pre-hung<br />
Unit Installation<br />
4.6 2012 SITE 4
PROBLEM: Water leakage around lites.<br />
Loose lites.<br />
Water Leakage Around Lites<br />
Cause Solution Refer to…<br />
Door face-to-lite frame seal<br />
breakdown.<br />
Glass-to-lite frame seal<br />
breakdown.<br />
Tighten doorlite screws.<br />
Apply sealing tape around<br />
inside perimeter of interior<br />
frame if required.<br />
Seal with Elastomeric and<br />
Polyurethane sealant around lite<br />
perimeter and/or paint or repaint<br />
the perimeter to form a paint seal.<br />
Replace doorlite.<br />
SHOP 3 - Doorlite and<br />
Panel Installation<br />
SHOP 3 - Doorlite and<br />
Panel Installation<br />
SITE 4 2012 4.7<br />
Trouble Shooting
Trouble Shooting<br />
Water Leakage Around<br />
Fiber-Classic Designline Panels<br />
PROBLEM: Water leakage around Fiber-Classic Designline panels.<br />
Loose panels.<br />
Cause Solution Refer to…<br />
Door face-to-panel seal<br />
breakdown.<br />
Tighten screws.<br />
Apply sealing tape around<br />
inside perimeter of interior<br />
frame if required.<br />
Seal with Elastomeric and<br />
Polyurethane sealant around<br />
panel perimeter and /or paint or<br />
repaint the perimeter to form a<br />
paint seal.<br />
SHOP 3 - Doorlite and<br />
Panel Installation<br />
4.8 2012 SITE 4
Door Will Not Open or Close Properly<br />
PROBLEM: Door will not open or close properly.<br />
Cause Solution Refer to…<br />
Door not meeting weatherstrip<br />
evenly when it closes, hitting<br />
the top or bottom first.<br />
Adjustable strike plate not<br />
properly aligned.<br />
Door sagging out of square in<br />
frame (uneven head margin).<br />
Frame out of square (uneven<br />
sill/door bottom margin).<br />
Realign, reshim, readjust<br />
lockside jamb so the door<br />
meets the weatherstripping<br />
evenly from top to bottom.<br />
Realign adjustable strike plate.<br />
Make sure LONG hinge<br />
screws provided are properly<br />
installed in the top hinge<br />
through the jamb to the stud.<br />
Usually caused by plumb<br />
frame members sitting on<br />
unlevel floor/sill area. Free<br />
lowest jamb leg and shim it up<br />
to level the sill and maintain<br />
an even head margin.<br />
SITE 1- Pre-hung Unit<br />
Installation<br />
SITE 1- Pre-hung Unit<br />
Installation<br />
SITE 1 - Pre-hung Unit<br />
Installation<br />
SITE 4 2012 4.9<br />
Trouble Shooting
Trouble Shooting<br />
Spring Loaded Hinge<br />
Adjustment Instructions<br />
PROBLEM: Door does not have enough or too much force.<br />
Cause Solution Refer to…<br />
Hinge does not have enough<br />
force to close and latch the<br />
door.<br />
Too much force causes door<br />
to slam and make opening<br />
difficult.<br />
Remove cross pin. Insert 9/64”<br />
allen wrench in hex adjustment<br />
hole and turn until holes line up.<br />
Re-insert cross pin. Remove<br />
allen wrench and test closing<br />
action of door. Repeat if<br />
necessary. Over tightening may<br />
shorten the life of the hinge.<br />
Another hinge may be required.<br />
Replace one of the hinges with<br />
a standard hinge without<br />
adjustable tension.<br />
SITE 1- Installation<br />
Instructions.<br />
4.10 2012 SITE 4
Classic-Craft & Smooth-Star Raised<br />
Panels are Loose or Have Come Off.<br />
PROBLEM: Panels are not sticking - need to re-apply<br />
Cause Solution Refer to…<br />
Door face to panel adhesive<br />
tape breakdown.<br />
Reapply by removing panel.<br />
Clean panel and door with<br />
70% Isopropyl Alcohol, taking<br />
care to remove all old adhesive.<br />
Apply new adhesive tape.<br />
Apply adequate pressure.<br />
SHOP 3 -<br />
Doorlite and<br />
Panel Installation<br />
SITE 4 2012 4.11<br />
Trouble Shooting
Trouble Shooting<br />
4.12 2012 SITE 4