NavNet TZtouch Installation Checklist - Furuno USA
NavNet TZtouch Installation Checklist - Furuno USA
NavNet TZtouch Installation Checklist - Furuno USA
Create successful ePaper yourself
Turn your PDF publications into a flip-book with our unique Google optimized e-Paper software.
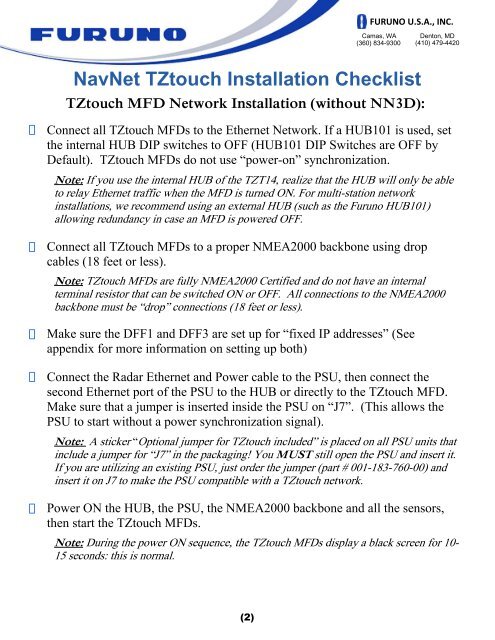
<strong>TZtouch</strong> MFD Network <strong>Installation</strong> (without NN3D):<br />
(2)<br />
FURUNO U.S.A., INC.<br />
Camas, WA<br />
(360) 834-9300<br />
<strong>NavNet</strong> <strong>TZtouch</strong> <strong>Installation</strong> <strong>Checklist</strong><br />
Denton, MD<br />
(410) 479-4420<br />
Connect all <strong>TZtouch</strong> MFDs to the Ethernet Network. If a HUB101 is used, set<br />
the internal HUB DIP switches to OFF (HUB101 DIP Switches are OFF by<br />
Default). <strong>TZtouch</strong> MFDs do not use “power-on” synchronization.<br />
Note: If you use the internal HUB of the TZT14, realize that the HUB will only be able<br />
to relay Ethernet traffic when the MFD is turned ON. For multi-station network<br />
installations, we recommend using an external HUB (such as the <strong>Furuno</strong> HUB101)<br />
allowing redundancy in case an MFD is powered OFF.<br />
Connect all <strong>TZtouch</strong> MFDs to a proper NMEA2000 backbone using drop<br />
cables (18 feet or less).<br />
Note: <strong>TZtouch</strong> MFDs are fully NMEA2000 Certified and do not have an internal<br />
terminal resistor that can be switched ON or OFF. All connections to the NMEA2000<br />
backbone must be “drop” connections (18 feet or less).<br />
Make sure the DFF1 and DFF3 are set up for “fixed IP addresses” (See<br />
appendix for more information on setting up both)<br />
Connect the Radar Ethernet and Power cable to the PSU, then connect the<br />
second Ethernet port of the PSU to the HUB or directly to the <strong>TZtouch</strong> MFD.<br />
Make sure that a jumper is inserted inside the PSU on “J7”. (This allows the<br />
PSU to start without a power synchronization signal).<br />
Note: A sticker “Optional jumper for <strong>TZtouch</strong> included” is placed on all PSU units that<br />
include a jumper for “J7” in the packaging! You MUST still open the PSU and insert it.<br />
If you are utilizing an existing PSU, just order the jumper (part # 001-183-760-00) and<br />
insert it on J7 to make the PSU compatible with a <strong>TZtouch</strong> network.<br />
Power ON the HUB, the PSU, the NMEA2000 backbone and all the sensors,<br />
then start the <strong>TZtouch</strong> MFDs.<br />
Note: During the power ON sequence, the <strong>TZtouch</strong> MFDs display a black screen for 10-<br />
15 seconds: this is normal.


