Layer 2-7 High Availability Deployment Guide - Force10 Networks
Layer 2-7 High Availability Deployment Guide - Force10 Networks
Layer 2-7 High Availability Deployment Guide - Force10 Networks

Create successful ePaper yourself
Turn your PDF publications into a flip-book with our unique Google optimized e-Paper software.
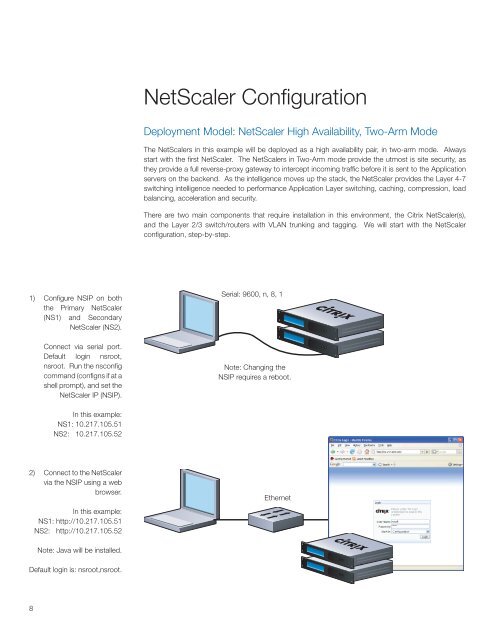
1) Configure NSIP on both<br />
the Primary NetScaler<br />
(NS1) and Secondary<br />
NetScaler (NS2).<br />
8<br />
Connect via serial port.<br />
Default login nsroot,<br />
nsroot. Run the nsconfig<br />
command (configns if at a<br />
shell prompt), and set the<br />
NetScaler IP (NSIP).<br />
In this example:<br />
NS1: 10.217.105.51<br />
NS2: 10.217.105.52<br />
2) Connect to the NetScaler<br />
via the NSIP using a web<br />
browser.<br />
In this example:<br />
NS1: http://10.217.105.51<br />
NS2: http://10.217.105.52<br />
Note: Java will be installed.<br />
Default login is: nsroot,nsroot.<br />
NetScaler Configuration<br />
<strong>Deployment</strong> Model: NetScaler <strong>High</strong> <strong>Availability</strong>, Two-Arm Mode<br />
The NetScalers in this example will be deployed as a high availability pair, in two-arm mode. Always<br />
start with the first NetScaler. The NetScalers in Two-Arm mode provide the utmost is site security, as<br />
they provide a full reverse-proxy gateway to intercept incoming traffic before it is sent to the Application<br />
servers on the backend. As the intelligence moves up the stack, the NetScaler provides the <strong>Layer</strong> 4-7<br />
switching intelligence needed to performance Application <strong>Layer</strong> switching, caching, compression, load<br />
balancing, acceleration and security.<br />
There are two main components that require installation in this environment, the Citrix NetScaler(s),<br />
and the <strong>Layer</strong> 2/3 switch/routers with VLAN trunking and tagging. We will start with the NetScaler<br />
configuration, step-by-step.<br />
Serial: 9600, n, 8, 1<br />
Note: Changing the<br />
NSIP requires a reboot.<br />
Ethernet