Custom Disk Image FAQ - General Dynamics Itronix
Custom Disk Image FAQ - General Dynamics Itronix
Custom Disk Image FAQ - General Dynamics Itronix

Create successful ePaper yourself
Turn your PDF publications into a flip-book with our unique Google optimized e-Paper software.
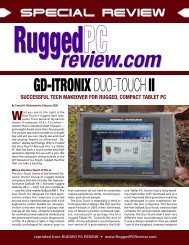
<strong>Image</strong> <strong>FAQ</strong><br />
Tips for Creating a <strong>Custom</strong> <strong>Disk</strong> <strong>Image</strong><br />
(from scratch or based upon the OEM factory image)<br />
February 19, 2009 – Copyright © 2008-2009 <strong>General</strong> <strong>Dynamics</strong> <strong>Itronix</strong><br />
Before wiping out or modifying the original OEM factory disk image, what should I do?........... 2<br />
What is the advantage of basing my custom disk image off of the original OEM factory disk<br />
image rather than creating a custom image from scratch?.............................................................. 2<br />
If I want to create my custom disk image based upon the original OEM factory image, what is<br />
recommended? ................................................................................................................................ 2<br />
If I want to create my own custom disk image from scratch, what is recommended? ................... 3<br />
Where can I find drivers and utilities for this computer? ............................................................... 4<br />
What types of installation files are included with the drivers and applications?............................ 4<br />
Where can I find silent install commands for the drivers? ............................................................. 4<br />
What is AHCI or IDE hard disk mode and how do I configure my hard disk to use it? ................ 4<br />
How do I install an AHCI driver if installing XP from a Windows XP Installation CD?.............. 5<br />
What are the different partitions on the OEM factory disk image?................................................ 5<br />
Why is there so much unallocated space on the OEM factory disk image?................................... 6<br />
How do I create a fingerprint partition if building my image from scratch?.................................. 6<br />
What if I want to base my custom image off of the factory image but I don’t want a Recovery<br />
Partition?......................................................................................................................................... 7<br />
What utilities and help files are included with this computer and how do I install them? ............. 8<br />
What are the contents of C:\IX used for and do I need them for a custom image that I build from<br />
scratch? ......................................................................................................................................... 12<br />
What is the Launch Button and how do I configure it? ................................................................ 14<br />
How do I add the option to turn off hard disks after 1 minute, and why would I want to?.......... 14<br />
How should I configure the COM ports?...................................................................................... 14<br />
How does Microsoft Windows activation occur with a custom image?....................................... 16<br />
What other best practices do you recommend when creating a custom image?........................... 16<br />
Where can I get more help? .......................................................................................................... 18<br />
APPENDIX A: <strong>General</strong> <strong>Dynamics</strong> <strong>Itronix</strong> Power Saver Utility (XP Only) ................................ 19<br />
APPENDIX B: Modifying Power Saver Defaults (XP Only) ...................................................... 24<br />
APPENDIX C: <strong>General</strong> <strong>Dynamics</strong> <strong>Itronix</strong> DynaPower Utility (Vista Only)............................... 24<br />
2009.02.19.GD8000 Copyright © 2008-2009 <strong>General</strong> <strong>Dynamics</strong> <strong>Itronix</strong> 1
Before wiping out or modifying the original OEM factory disk image, what<br />
should I do?<br />
• It is important to create a bootable Recovery DVD set of the original OEM factory image in<br />
case you need to restore that image for various reasons, such as image debugging (i.e.,<br />
comparing the behavior of a custom image with the factory image), copying driver files,<br />
starting over with creation of a custom image, etc.<br />
o To create a bootable Recovery DVD set, boot into Windows and run the Recovery Media<br />
Creation Wizard located on the Desktop.<br />
• In addition to making a Recovery DVD set, you should make a copy of the following folders<br />
which contain device drivers and other utilities:<br />
o C:\Drivers<br />
Contains device drivers and utilities specific for this computer<br />
o D:\WAN_SW<br />
Contain drivers for WWAN radio, if your machine is configured that way<br />
o C:\IX<br />
Contains various files used by applications and other configuration information (see later<br />
in this document for descriptions of the various files)<br />
What is the advantage of basing my custom disk image off of the original<br />
OEM factory disk image rather than creating a custom image from scratch?<br />
• Drivers and utility applications are pre-installed.<br />
• <strong>General</strong> <strong>Dynamics</strong> <strong>Itronix</strong> does not pre-install non-essential software on the factory image<br />
(such as software trial versions, ads, junkware, etc.)<br />
• The OEM factory disk image is thoroughly tested by our Quality group.<br />
• The hard drive contains a Recovery Partition (drive D:) and a utility (HDD Backup and<br />
Recovery Wizard) that allow you to save a copy of your customized drive C: image. If drive<br />
C: becomes corrupt in the field, the user can boot into the Recovery Partition and restore<br />
your customized drive C: image. You can also create a bootable recovery DVD set of your<br />
customized drive C: image using the Recovery Media Creation Wizard.<br />
• The Recovery Partition is configured with the Microsoft Windows Recovery Environment<br />
(WinRE) that can automatically help diagnose and recover from boot issues.<br />
If I want to create my custom disk image based upon the original OEM<br />
factory image, what is recommended?<br />
• Before modifying the original OEM factory disk image, create a bootable Recovery DVD set<br />
of the original factory image AND make a copy of device driver files and utilities as<br />
described in this document in the section “Before modifying or wiping out the original factory<br />
disk image, what should I do?”<br />
• We recommend that you keep the Recovery Partition and create a User Backup of your<br />
configured drive C: partition to allow users to recover in the field. Note: If you plan to use<br />
encryption on your hard disk, the Recovery Partition software may not work. For information<br />
2009.02.19.GD8000 Copyright © 2008-2009 <strong>General</strong> <strong>Dynamics</strong> <strong>Itronix</strong> 2
on removing the Recovery Partition, refer to the section “What if I want to base my custom<br />
image off of the factory image but I don’t want a Recovery Partition?”<br />
• Use the included device drivers. Newer drivers can be used but may not have been factory<br />
tested on the system.<br />
• Some utilities are not pre-installed on the original OEM factory image. For more details, refer<br />
to the section “What utilities and help files are included with this computer and how do I<br />
install them?”<br />
• Configure the Launch button as described in this document in the section “What is the<br />
Launch Button and how do I configure it?”<br />
• Take into account additional best practices described in the section “What other best<br />
practices do you recommend when creating a custom image?”<br />
If I want to create my own custom disk image from scratch, what is<br />
recommended?<br />
• Before wiping out the original OEM factory disk image, create a bootable Recovery DVD set<br />
of the original factory image AND make a copy of device driver files and utilities as<br />
described in this document in the section “Before modifying or wiping out the original factory<br />
disk image, what should I do?”<br />
• Configure the system to use either ACHI (for Serial ATA [SATA] disk drives) or IDE (for<br />
Parallel ATA [PATA] disk drives). Instructions can be found in this document in the section<br />
“What is ACHI or IDE hard disk mode and how do I configure my hard disk to use it?”<br />
• If using a Fingerprint reader, you may need to create a partition to support it after formatting<br />
the drive. Please refer to the section in this document “How do I create a fingerprint partition<br />
if building my image from scratch?”<br />
• If the computer will be used on a vehicle or office dock, it is recommend to build and/or test<br />
the image when connected to the dock. This is to allow the system to allocate resources and<br />
ports to support the dock.<br />
• Use the included device drivers. Newer drivers can be used but may not have been factory<br />
tested on the system.<br />
• Create a C:\IX directory and refer to the section in this document “What are the contents of<br />
C:\IX used for and do I need them for a custom image that I build from scratch?”<br />
• Add the option to Turn off hard disks After 1 minute and configure Power Options to use this<br />
setting as described in this document in the section “How do I add the option to turn off hard<br />
disks after 1 minute, and why would I want to?”<br />
• Configure COM port settings as described in this document in the section “How should I<br />
configure the COM ports?” This is particularly important if the computer will be used with a<br />
vehicle or office dock.<br />
• Install utilities and help files as described in this document in the sections “What utilities and<br />
help files are included with this computer and how do I install them?” NOTE: it is strongly<br />
recommended that the Battery Calibration utility be included in all disk images.<br />
• Configure the Launch button as described in this document in the section “What is the<br />
Launch Button and how do I configure it?”<br />
• Take into account additional best practices described in the section “What other best<br />
practices do you recommend when creating a custom image?”<br />
2009.02.19.GD8000 Copyright © 2008-2009 <strong>General</strong> <strong>Dynamics</strong> <strong>Itronix</strong> 3
Where can I find drivers and utilities for this computer?<br />
• Device driver files are located in C:\DRIVERS.<br />
• If unit is equipped with a Wireless Wide-Area Network (WWAN) radio, those driver files are<br />
located in D:\WAN_SW.<br />
• The same or updated drivers may be available at www.gd-itronix.com.<br />
• C:\IX contains various files used by applications and other configuration information. Refer<br />
to the section in this document “What are the contents of C:\IX used for and do I need them<br />
for a custom image that I build from scratch?”<br />
What types of installation files are included with the drivers and<br />
applications?<br />
• Some utilize an installable program (SETUP.EXE or INSTALL.EXE), while others are in the<br />
form of an installable component (.INF file).<br />
Where can I find silent install commands for the drivers?<br />
• The command file C:\IX\SETUP\InstallDrivers.cmd is used by the original OEM factory disk<br />
image and contains silent install scripts for most device drivers. You can look at this file to<br />
determine which command line options are used for silent installs for this image.<br />
• Note that many driver install files allow you to specify a “/?” or “/help” parameter from the<br />
command line. This may show what command line options are available, including silent<br />
install options if available.<br />
What is AHCI or IDE hard disk mode and how do I configure my hard disk<br />
to use it?<br />
• Before installing the Microsoft Windows OS on certain platforms, you need to decide<br />
whether the hard disk will be configured for IDE or AHCI mode.<br />
Platform Drive Type Supported Modes<br />
Duo-Touch II SATA IDE or AHCI (AHCI is default in BIOS)<br />
GD6000 SATA IDE or AHCI (AHCI is default in BIOS)<br />
GD8000 SATA IDE or AHCI (AHCI is default in BIOS)<br />
GoBook MR-1 PATA IDE only<br />
GoBook XR-1 SATA IDE only<br />
GoBook VR-2 SATA IDE or AHCI (AHCI is default in BIOS)<br />
• IDE is used with Parallel ATA (PATA) hard disk drives.<br />
• AHCI was developed to interface with Serial ATA (SATA) hard disk drives.<br />
• SATA drives can work with either IDE or AHCI. PATA drives can only work with IDE.<br />
• The ACHI or IDE mode is set in BIOS setup.<br />
• If you plan to use an image that does not have ACHI support, then you will want to set the<br />
2009.02.19.GD8000 Copyright © 2008-2009 <strong>General</strong> <strong>Dynamics</strong> <strong>Itronix</strong> 4
BIOS setup to use IDE mode.<br />
• If installing Windows XP from a CD or DVD, you will need to have the ACHI drivers available<br />
on floppy during the install process. The driver files can be found on the original factory<br />
image in the C:\Drivers directory. If using other installation methods, consult the<br />
documentation from Microsoft on adding the AHCI drivers. For Windows Vista, the drivers<br />
are included in the Vista install.<br />
How do I install an AHCI driver if installing XP from a Windows XP<br />
Installation CD?<br />
1. Copy all of the files in c:\Drivers\AHCI\Extracted_Drivers\Driver from the original factory<br />
image to a formatted Floppy <strong>Disk</strong>.<br />
2. You will need the I/O Controller Hub (ICH) version. To find this information, go into Device<br />
Manager and select IDE ATA/ATAPI controllers and make note of the I/O Controller Hub<br />
(ICH) version. For example on the GD6000 the description in device manager is “Intel<br />
ICH9M – E/M SATA AHCI Controller”<br />
3. Plug a USB floppy drive into the unit and insert the floppy disk created in step 1.<br />
4. Put the Microsoft Windows XP installation CD (supplied by you) into the ODD drive and turn<br />
the unit off.<br />
5. Boot the system to the Microsoft Windows XP installation CD.<br />
6. On the first blue Windows Setup screen, press F6 (There will be a prompt to “press F6 to<br />
install a third party SCSI or raid driver”).<br />
7. Windows will install some files, then it will prompt you to press S to select the driver to<br />
install.<br />
8. Scroll up and select the Intel SATA AHCI Controller<br />
9. Press Enter and it will install the drivers from the floppy. It will ask if you need to install<br />
additional drivers; if not, press Enter to continue with the XP install.<br />
Note: There is a known issue with Intel AHCI driver version 8.6.0.1007 on XP. It causes blue<br />
screens. We recommend using 8.5.0.1032 with XP.<br />
What are the different partitions on the OEM factory disk image?<br />
• Fingerprint Partition – If present, is used to store data from the fingerprint<br />
software/coprocessor.<br />
• OS Partition (drive C:) – Windows operating system<br />
• Recovery Partition (drive D:) – Contains recovery tools, image information, and a backup<br />
copy of drive C: from the original factory image. Can also be used to store a copy of a<br />
customized drive C: image.<br />
2009.02.19.GD8000 Copyright © 2008-2009 <strong>General</strong> <strong>Dynamics</strong> <strong>Itronix</strong> 5
Why is there so much unallocated space on the OEM factory disk image?<br />
• By default, about 67% of the hard disk is allocated to drive C:. The Recovery<br />
Partition/Backup Area (drive D:) is approximately the size required to contain a compressed<br />
backup copy of the original factory drive C: image. The rest of the space is unallocated.<br />
This is to allow the end-user a choice as to where the unused hard disk space should be<br />
allocated. This decision also affects the ability to create backups of the operating system<br />
partition (drive C:). As more applications and files are added to the operating system, the<br />
space required to create a backup image of the operating system partition increases.<br />
Allocating more space to the Recovery Partition, allows for the capture of an operating<br />
system which contains a larger amount of applications and files than the original factory<br />
installed image.<br />
• At first user boot, the “HDD Space Setup Wizard” allows the user to allocate the unallocated<br />
space. Allocation needs to be performed only once. There are 3 allocation choices to<br />
choose from:<br />
o Recommended – Allocates all unused hard disk space to the Recovery Partition.<br />
o <strong>Image</strong> Only – Allocates all unused hard disk space to the drive C:.<br />
o <strong>Custom</strong> – Allocation is split between both the Recovery Partition and drive C:.<br />
How do I create a fingerprint partition if building my image from scratch?<br />
• Below is a table indicating which platforms require a fingerprint partition.<br />
Platform<br />
Duo-Touch II<br />
GD6000<br />
GD8000<br />
GoBook MR-1<br />
GoBook XR-1<br />
GoBook VR-2<br />
Fingerprint Partition Required<br />
No<br />
No<br />
Yes (if your units have Fingerprint readers – if you have a mixed inventory of units, it is<br />
okay to have a fingerprint partition on all units)<br />
No<br />
Yes (if your units have Fingerprint readers – if you have a mixed inventory of units, it is<br />
okay to have a fingerprint partition on all units)<br />
No<br />
• To create the fingerprint partition<br />
1. NOTE: Do this before creating the drive C: partition.<br />
2. Create a primary partition that is of type 12. This must be done before creating the<br />
operating system partition. From a command prompt, run the Microsoft diskpart tool as<br />
follows:<br />
a. diskpart<br />
b. select disk 0<br />
c. create partition primary id=12<br />
d. exit<br />
2009.02.19.GD8000 Copyright © 2008-2009 <strong>General</strong> <strong>Dynamics</strong> <strong>Itronix</strong> 6
What if I want to base my custom image off of the factory image but I don’t<br />
want a Recovery Partition?<br />
• If you want to remove the Recovery Partition and associated software, refer to the following.<br />
A. Add/Remove programs<br />
If no recovery partition is desired, then it is recommended that a service called “Booter”, if<br />
installed, be removed from installed programs by using Add/Remove programs.<br />
B. Application Links Removal<br />
Ensure recovery partition tools links are removed.<br />
XP Operating System<br />
1. Navigate to “c:\Documents and Settings\All Users\Start Menu\Programs\Programs”. If a<br />
folder exists named “Mobile Computer Tools” explore this folder. Remove all of the<br />
following:<br />
a. Recovery Media Creation Wizard.lnk<br />
b. HDD Space Setup Wizard.lnk<br />
c. Hard <strong>Disk</strong> Backup and Recovery.lnk<br />
d. Backup and Recovery Help.lnk<br />
2. Navigate to “c:\Documents and Settings\All Users\Start<br />
Menu\Programs\Programs\Startup”. Remove all of the following:<br />
a. HDD Wizard.lnk<br />
b. Recovery CD Wizard.lnk<br />
Vista Operating System<br />
1. Navigate to “c:\ProgramData\Microsoft\Windows\Start Menu\Programs”. If a folder exists<br />
named “Mobile Computer Tools” explore this folder. Remove all of the following:<br />
a. Recovery Media Creation Wizard.lnk<br />
b. HDD Space Setup Wizard.lnk<br />
c. Hard <strong>Disk</strong> Backup and Recovery.lnk<br />
d. Backup and Recovery Help.lnk<br />
2. Navigate to “c:\ProgramData\Microsoft\Windows\Start Menu\Programs\Startup”. Remove<br />
all of the following:<br />
a. HDD Wizard.lnk<br />
b. Recovery CD Wizard.lnk<br />
2009.02.19.GD8000 Copyright © 2008-2009 <strong>General</strong> <strong>Dynamics</strong> <strong>Itronix</strong> 7
C. Recovery Partition Removal<br />
Before continuing ensure that there are no USB or PCMCIA removable external storage<br />
device(s) attached.<br />
1. Restart the computer. While booting, access the bios boot menu and select the “<strong>Disk</strong>-to-<br />
<strong>Disk</strong> Recovery” option.<br />
2. Boot into the recovery environment. When the recovery application appears press F8. A<br />
command-line environment will become available. After each command has been typed<br />
in press the . Execute the following command(s):<br />
a. cd /d x:<br />
b. <strong>Disk</strong>part<br />
c. Select disk 0<br />
d. List volume<br />
3. From the output identify the volume labeled “RECOVERY”.<br />
a. Select volume <br />
b. Delete volume<br />
4. From the output identify the volume associated with the operating system. This will have<br />
a type==”Partition”, a blank label, and a size that is larger than all other partitions listed.<br />
a. Select volume <br />
b. Extend<br />
c. Active<br />
d. Exit<br />
e. Exit<br />
5. Since changes have been made to the hard disk, the operating system will require a<br />
reboot. To see a graphical representation of the hard disk do the following:<br />
a. Start the Microsoft Windows <strong>Disk</strong> Management Tool<br />
b. Click Start->run then type compmgmt.msc and press return or click ok button. In the<br />
far left window pane under “Storage” left click “<strong>Disk</strong> Management”. <strong>Disk</strong> 0 is the hard<br />
disk drive. After running the above commands there should be only one partition that<br />
spans the entire hard disk drive.<br />
What utilities and help files are included with this computer and how do I<br />
install them?<br />
• Below is a list of software that comes with this computer. Most of these are pre-installed if<br />
you are using the original factory image. If building an image from scratch, you may<br />
optionally want to install this software – it is strongly recommended that you at least install<br />
the battery calibration application.<br />
• Note that driver locations below refer to the c:\driver folder on the original OEM factory<br />
image.<br />
Platform Software Name Description, Benefits and How to Install<br />
Duo Touch II<br />
GD6000<br />
GD8000<br />
GoBook MR-1<br />
GoBook XR-1<br />
GoBook VR-2<br />
Backup and Recovery<br />
Wizard<br />
Allows you to create a user backup of drive C: and store it in the<br />
Recovery Partition (drive D:). Also allows you to restore drive C:<br />
to the original factory image or to a user backup image that you<br />
previously created.<br />
Note: this software is already installed if basing your image on<br />
the original OEM factory image. If creating your disk image from<br />
scratch, refer to the section “Where can I get more help?”<br />
2009.02.19.GD8000 Copyright © 2008-2009 <strong>General</strong> <strong>Dynamics</strong> <strong>Itronix</strong> 8
Duo Touch II<br />
GD6000<br />
GD8000<br />
GoBook MR-1<br />
GoBook XR-1<br />
GoBook VR-2<br />
Duo Touch II<br />
GD6000<br />
GD8000<br />
GoBook MR-1<br />
GoBook XR-1<br />
GoBook VR-2<br />
Duo Touch II<br />
GD6000<br />
GD8000<br />
GoBook MR-1<br />
GoBook XR-1<br />
GoBook VR-2<br />
GD6000<br />
GD8000<br />
GoBook MR-1<br />
GoBook XR-1<br />
GoBook VR-2<br />
Duo Touch II<br />
GD6000<br />
GD8000<br />
GoBook MR-1<br />
GoBook XR-1<br />
GoBook VR-2<br />
Duo Touch II<br />
GD6000<br />
GD8000<br />
GoBook MR-1<br />
GoBook XR-1<br />
GoBook VR-2<br />
Booter<br />
HDD Space Setup<br />
Wizard<br />
Recovery Media<br />
Creation Wizard<br />
Power Saver (XP)<br />
Battery Calibration<br />
(XP)<br />
DynaPower with<br />
Battery Calibration<br />
(Vista)<br />
A service used in conjunction with the Backup and Recovery<br />
Wizard to access the recovery environment from within<br />
Windows.<br />
Note: this software is already installed if basing your image on<br />
the original OEM factory image. If creating your disk image from<br />
scratch, refer to the section “Where can I get more help?”<br />
After end-user setup, this program will ask you how much HDD<br />
space to allocate for the Recovery Partition (drive D:).<br />
Note: this software is already installed if basing your image on<br />
the original OEM factory image. If creating your disk image from<br />
scratch, refer to the section “Where can I get more help?”<br />
Allows you to burn bootable recovery DVDs of the original<br />
factory image or a user backup image.<br />
Note: this software is already installed if basing your image on<br />
the original OEM factory image. If creating your disk image from<br />
scratch, refer to the section “Where can I get more help?”<br />
Utility that allows you to turn off unused devices to save battery<br />
power. Allows you to customize your own power saving settings<br />
and themes.<br />
Note: This software is already installed if basing your image on<br />
the original OEM factory image.<br />
To install this software<br />
• Run c:\drivers\pwrsaver \setup.exe<br />
If using Power Saver, how do I customize the defaults so<br />
that they get loaded when the “Defaults” button is clicked in<br />
those applications?<br />
• See “APPENDIX B: Modifying Power Saver Defaults”<br />
Utility that allows you to recalibrate your batteries to make them<br />
more accurate.<br />
Strongly Recommended to help prevent battery memory<br />
effect. Also indicates battery wear at the end of a calibration<br />
cycle.<br />
Note: this software is already installed if basing your image on<br />
the original OEM factory image.<br />
To install this software<br />
• Run c:\drivers\batcal\setup.exe<br />
Utility that allows you to turn off unused devices to save battery<br />
power. Also allows you to recalibrate your batteries to make<br />
them more accurate.<br />
Strongly Recommended to help prevent battery memory<br />
effect.<br />
Note: this software is already installed if basing your image on<br />
the original OEM factory image.<br />
To install this software<br />
• Run c:\drivers\ixpower\setup.exe<br />
2009.02.19.GD8000 Copyright © 2008-2009 <strong>General</strong> <strong>Dynamics</strong> <strong>Itronix</strong> 9
Duo Touch II<br />
GD6000<br />
GD8000<br />
GoBook MR-1<br />
GoBook XR-1<br />
GoBook VR-2<br />
GD6000<br />
GD8000<br />
GoBook MR-1<br />
GoBook XR-1<br />
GoBook VR-2<br />
Help File<br />
Launch Button<br />
Manager<br />
Online help file that details the features, operation and<br />
maintenance of this computer.<br />
Note: this help file is already installed if basing your image on the<br />
original OEM factory image.<br />
To install help files<br />
1. For GD8000, create a link on your Desktop or elsewhere to<br />
point to the PDF help file(s) located in c:\drivers\help.<br />
2. For all other platforms:<br />
o Copy the help files from c:\drivers\help and put them in<br />
the c:\windows\help directory. There may be multiple<br />
help files for various languages<br />
o Create a link on your Desktop or elsewhere to point to<br />
the desired help file.<br />
This utility allows you to select what action occurs when the<br />
“Launch” button is pressed.<br />
To install this software:<br />
• For GD6000 and GoBook VR-2, run<br />
c:\drivers\LaunchManager\setup.exe<br />
• For GoBook MR-1, run c:\drivers\OSD_ITX\setup.exe<br />
• For GD8000 and GoBook XR-1, run<br />
c:\drivers\osd\setup.exe<br />
To configure this software:<br />
• Refer to the section “What is the Launch Button and how<br />
do I configure it?“<br />
GD8000 Safe Dock Safe Dock issues an Undock command to Windows XP if the<br />
computer is removed from the dock (for more information, refer<br />
to c:\drivers\safedock\readme.txt)<br />
Duo Touch II<br />
GD6000<br />
GD8000<br />
GoBook MR-1<br />
GoBook XR-1<br />
GoBook VR-2<br />
Touch Screen<br />
Calibration<br />
To install this software:<br />
• Run c:\drivers\safedock\setup.exe<br />
This utility allows you to calibrate your touchscreen for accuracy.<br />
To install this software:<br />
• For Duo Touch II, search under c:\drivers\touchscr for<br />
setup*.exe and run that program.<br />
• For GoBook MR-1, run c:\drivers\touchscr\setup.exe.<br />
• For GD6000 and GoBook VR-2, run<br />
c:\drivers\touchscreen\setup.exe<br />
• For GD8000, run c:\drivers\touchscreen\setup.exe<br />
• For GoBook XR-1, run c:\drivers\touchscreen\setup.exe<br />
To calibrate your touchscreen:<br />
• For Duo Touch II, select Start, Programs, TouchSet Touch<br />
Panel, TouchSet Utility.<br />
• For GD6000, GoBook XR-1 and GoBook VR-2, select<br />
Start, Programs, TouchKit, Configure Utility.<br />
• For GD8000, select Start, Programs, eGalaxTouch,<br />
Configure Utility, Tools.<br />
• For GoBook MR-1, select Start, Programs, PenMount<br />
Universal Driver, PenMount Control Panel. Note: you can<br />
enable advanced calibration mode by choosing the Tools<br />
tab, set the Advanced Calibration Mode to On, then choose<br />
OK. Re-open the application and choose the Calibration<br />
button. You will now be able to select Advanced<br />
Calibration.<br />
2009.02.19.GD8000 Copyright © 2008-2009 <strong>General</strong> <strong>Dynamics</strong> <strong>Itronix</strong> 10
Duo Touch II<br />
GD6000<br />
GD8000<br />
GoBook MR-1<br />
w/optional slice<br />
GoBook XR-1<br />
GoBook VR-2<br />
Duo Touch II<br />
GD6000<br />
GD8000<br />
GoBook MR-1<br />
GoBook XR-1<br />
GoBook VR-2<br />
Duo Touch II<br />
GD6000<br />
GD8000<br />
GoBook MR-1<br />
GoBook XR-1<br />
GoBook VR-2<br />
GD6000<br />
GD8000<br />
GD6000<br />
GoBook VR-2<br />
Duo Touch II<br />
GD8000<br />
GoBook MR-1<br />
GoBook XR-1<br />
TPM<br />
Navigator<br />
WWAN Radio<br />
WLAN Radio PROSet<br />
(XP Only)<br />
Bluetooth Broadcom<br />
Stack<br />
Bluetooth IVT Stack<br />
Software to interface with the TPM hardware module.<br />
To install this software<br />
1. Verify that that TPM is enabled in BIOS setup.<br />
2. Install the software files located under the c:\drivers\tpm<br />
folder. Note that software and/or driver installation files vary<br />
by platform.<br />
Diagnostic utility to verify your GPS functionality. Requires that<br />
your computer has the optional built-in GPS module.<br />
To run this software<br />
• Run c:\drivers\radio\leadtgps\misc\gps tools\Navigator.exe.<br />
Utility software to control and setup your Wireless Wide Area<br />
Network (WWAN) radio. Requires that your computer has the<br />
optional built-in WWAN radio.<br />
Note: this software is already installed if basing your image on<br />
the original OEM factory image.<br />
To install this software<br />
• Run setup.cmd or setup.exe that is located in the<br />
d:\wan_sw\ folder, where <br />
refers to the type of radio<br />
Utility to set connectivity and security settings for WLAN.<br />
Note: this software is not installed by default on original OEM<br />
factory image. Microsoft’s Zero Configuration Utility is the<br />
default.<br />
To install this software<br />
• Search the subdirectories under c:\drivers\radio\wlan\intel<br />
for Autorun.exe and run that program.<br />
Utility and Bluetooth Stack for XP and added onto the Microsoft<br />
stack for Vista. This utility allows you to search, connect, and set<br />
security for Bluetooth.<br />
To install this software<br />
• For GoBook VR-2, search the subdirectories under<br />
c:\drivers\radio\usi_bt for setup.exe and run that program.<br />
• For GD6000, search the subdirectories under<br />
c:\drivers\radio\bluetooth for setup.exe and run that<br />
program.<br />
Utility and Bluetooth Stack. This utility allows you to search,<br />
connect, and set security for Bluetooth.<br />
To install this software<br />
• For Duo-Touch II, search the subdirectories under<br />
c:\drivers\radio\billionton_bt for setup.exe and run that<br />
program.<br />
• For GD8000 search the subdirectories under<br />
c:\drivers\radio\bluetooth\bluegiga_csr for setup.exe and<br />
run that program.<br />
• For GoBook MR-1, search the subdirectories under<br />
c:\drivers\radio\ty_bt for setup.exe and run that program.<br />
• For GoBook XR-1, search the subdirectories under<br />
c:\drivers\radio\bg_bt for setup.exe and run that program.<br />
2009.02.19.GD8000 Copyright © 2008-2009 <strong>General</strong> <strong>Dynamics</strong> <strong>Itronix</strong> 11
What are the contents of C:\IX used for and do I need them for a custom<br />
image that I build from scratch?<br />
• The C:\IX folder contains setup scripts and tools used by the factory installed disk image for<br />
end-user setup. It also includes files used by various utilities. Note that the<br />
C:\DRIVERS\OriginalIXFolder is a copy of the C:\IX folder.<br />
Folder or File Name Description Needed for <strong>Custom</strong> <strong>Image</strong>?<br />
Fingerprint\ Folder<br />
MUI\ Folder<br />
Setup\ Folder<br />
Tools\ Folder<br />
Wallpaper\ Folder<br />
Acpimof.dll<br />
Allocate.exe<br />
Base.ver<br />
Contains IXINSTALL.VBS script<br />
installer for Fingerprint software install<br />
shortcut on the User Desktop<br />
Contains MUISETUP application and all<br />
language packs for the OS.<br />
Contains setup scripts for driver installs,<br />
registry settings and shortcuts to<br />
applications and help files.<br />
Contains troubleshooting and<br />
verifications tools. Tools will vary per<br />
platform.<br />
Contains GD-<strong>Itronix</strong> wallpaper for<br />
desktop backgrounds.<br />
Resource .DLL that allows access to<br />
additional WMI commands used by<br />
<strong>General</strong> <strong>Dynamics</strong> <strong>Itronix</strong> applications<br />
Application that notifies the user that<br />
they have unallocated disk space on<br />
their recovery partition and copies the<br />
HDD Space Wizard application and files<br />
to the C drive.<br />
Contains the image number that the<br />
currently installed image was built from.<br />
Sets the Base image number variable<br />
used by ixwmiver.exe<br />
Not required<br />
Not required<br />
Recommended<br />
Not required<br />
Not required<br />
Required for use with Battery Calibration,<br />
Power Saver (XP), DynaPower (Vista), and<br />
IXVER. The registry entry “Mof<strong>Image</strong>Path”<br />
under<br />
“HKEY_LOCAL_MACHINE\SYSTEM\Curre<br />
ntControlSet\Services\WmiAcpi” needs to<br />
contain the path of this .DLL (for example,<br />
“Mof<strong>Image</strong>Path”=”c:\ix\acipmof.dll”).<br />
Not required<br />
Not required<br />
Batcal.exe This is the Battery Calibration Utility Recommended for Battery Calibration<br />
Battery icon<br />
This is the Battery Tips icon that gets Not required<br />
used for help file shortcuts.<br />
CDxxxxxx.ver (where<br />
xxxxxx is the base<br />
part number of the<br />
<strong>General</strong> <strong>Dynamics</strong><br />
<strong>Itronix</strong> OEM factory<br />
disk image)<br />
This file is named the same as the<br />
image build number and contains the<br />
image build number and version<br />
information.<br />
Not required<br />
CFGSTR.txt<br />
This is the configuration string for this<br />
particular machine.<br />
Recommended for use with IXVER<br />
Desc.ver<br />
This is a description of the platform and<br />
image number of this machine. Sets the<br />
description variable used by<br />
ixwmiver.exe (used by IXVER.BAT)<br />
Recommended for use with IXVER<br />
2009.02.19.GD8000 Copyright © 2008-2009 <strong>General</strong> <strong>Dynamics</strong> <strong>Itronix</strong> 12
Find_recov,exe<br />
<strong>Image</strong>.ver<br />
InstallShortcuts.vbs<br />
Ixupload.ver<br />
IXVER.bat<br />
Ixwmiver.exe<br />
K1log.dll<br />
Utility used to find the recovery volume<br />
letter. Looks for volume label<br />
“RECOVERY”<br />
This file contains the currently installed<br />
image build number. Sets the image<br />
number variable used by ixwmiver.exe<br />
(used by IXVER.BAT)<br />
This vb script file checks for fingerprint<br />
scanner and touchscreen devices and<br />
copies shortcuts to the desktop for<br />
software installs and in some cases<br />
removes links or control applets.<br />
<strong>Image</strong> PXE Upload product number (for<br />
internal use only). Used by IXVER.bat.<br />
Utility to display the Model number,<br />
image number, BIOS version and other<br />
useful information. Used by <strong>General</strong><br />
<strong>Dynamics</strong> <strong>Itronix</strong> support personnel for<br />
troubleshooting. Calls the ixwmiver.exe<br />
program.<br />
Program that fetches data for<br />
IXVER.bat<br />
.dll file that is required for some of our<br />
custom applications that use custom<br />
WMI commands.<br />
Not required<br />
Not Required<br />
Not required<br />
Not required<br />
Recommended<br />
Required for use with IXVER<br />
Required for the Battery Calibration<br />
program (batcal.exe). Must be in the same<br />
directory as batcal.exe.<br />
Lang.bat Batch file to set the language variable Not required<br />
Lang.ver<br />
Sets language variable used by<br />
Recommended for use with IXVER<br />
ixwmiver.exe (used by IXVER.BAT)<br />
OS.ver<br />
Sets OS variable used by<br />
Recommended for use with IXVER<br />
ixwmiver.exe(used by IXVER.BAT)<br />
Platform.ver<br />
Sets the Platform variable used by Recommended for use with IXVER<br />
ixwmiver.exe(used by IXVER.BAT)<br />
RadioCfg.txt<br />
Used for radio configuration during enduser<br />
Not required<br />
setup.<br />
Recvmedia.cmd Copies links. Recovery Partition<br />
Wizards to “Mobile Computer Tools”,<br />
Startup folder, Desktop.<br />
Not required<br />
Setrestore.vbs Used in conjunction with setrestore.bat Not required<br />
to create restore point.<br />
Setrestore.bat Creates a restore point. Not required<br />
Showlog.exe<br />
Used to view log files created by Not required<br />
K1Log.dll<br />
Translate.cmd Defines paths (XP) for “Startup Folder” Not required<br />
and “Desktop Folder”.<br />
Updates.txt<br />
Pre-installed Windows Updates via our Not required<br />
server<br />
Winupd.txt Windows updates from network share Not required<br />
2009.02.19.GD8000 Copyright © 2008-2009 <strong>General</strong> <strong>Dynamics</strong> <strong>Itronix</strong> 13
What is the Launch Button and how do I configure it?<br />
• The application launch button is a special button (or buttons) on the computer that can be<br />
programmed to launch an application.<br />
• For information on the location of the button, refer to the online help file included with the<br />
computer.<br />
• For information on installing it, refer to the section “What utilities and help files are included<br />
with this computer and how do I install them?”<br />
• To configure the Launch Button:<br />
o For GD8000 and GoBook XR-1, left-click on the Launch Manager Button icon in the<br />
System Tray.<br />
o For GD6000 and GoBook VR-2, select Start, Programs, Launch Manager, Launch<br />
Manager.<br />
o For MR-1, go to Start, Programs, Mobile Computer Tools and run “Configure On Screen<br />
Display, C1, and C2 Settings”<br />
How do I add the option to turn off hard disks after 1 minute, and why<br />
would I want to?<br />
• It is recommended that the hard disk spin down timeout in Windows XP Power Options<br />
Properties be set to 1 minute. This setting provides maximum protection for the hard disk<br />
against drops and bumps when the computer is in motion.<br />
• By default, the lowest setting available in Windows XP Power Options Properties is 3<br />
minutes. To allow a disk spin down time of 1 minute, you need to set the following Registry<br />
key. After setting the key, you may need to restart the computer for changes to take effect:<br />
[HKEY_LOCAL_MACHINE\SOFTWARE\Microsoft\Windows\CurrentVersion\Controls<br />
Folder\PowerCfg]<br />
"<strong>Disk</strong>SpinDownMin"="1"<br />
How should I configure the COM ports?<br />
• When building your own disk image from scratch, the Operating System (OS) will randomly<br />
assign COM numbers to the serial ports. The table below lists how serial COM ports are<br />
configured on factory disk images. If docking stations will be used with an image built from<br />
scratch, it is recommended to connect to the dock and configure serial port COM numbers<br />
and/or the applications that will use them before duplicating the image<br />
• To change a serial COM port number:<br />
1. Open Device Manager.<br />
2. Under Ports (COM & LPT), open the desired COM port Properties.<br />
3. Go to the Port Settings tab and select the Advanced button.<br />
4. Use the drop down list to assign a COM number (the IRQ and I/O Range resources will<br />
stay the same).<br />
5. Reboot the computer.<br />
2009.02.19.GD8000 Copyright © 2008-2009 <strong>General</strong> <strong>Dynamics</strong> <strong>Itronix</strong> 14
Platform Notes<br />
GD6000 • COM1 - External serial port (and Docking station Serial Port 1)<br />
• COM2 - Docking station Serial Port 2 (recognized when on Dock)<br />
• COM3 - GPS<br />
• COM4 - Modem<br />
• COM5 - Touchscreen<br />
GD8000 • COM1 - External serial port (and Docking station Serial Port 1)<br />
• COM2 - Docking station Serial Port 2 (recognized when on Dock)<br />
• COM3 - GPS<br />
• COM4 - Modem<br />
• COM5 - Touchscreen<br />
Duo-Touch II • COM1 - Digitizer<br />
• COM2 - GPS<br />
• COM5 - Modem<br />
• Note for WinXP: When the Operating System installs, it detects the first available port<br />
as COM 5, but it should be COM 2. To fix this go to Device Manager, delete all the<br />
COM ports, and restart the computer. The COM ports will then be re-detected and<br />
installed correctly.<br />
GoBook MR-1 • COM1 - Docking station Serial Port 1<br />
• COM2 - GPS<br />
• COM3 - External serial port (if equipped with “Slice”)<br />
GoBook XR-1 • COM1 - External serial port (and Docking station Serial Port 1)<br />
• COM2 - Docking station Serial Port 2<br />
• COM3 - GPS<br />
• COM4 - Touchscreen<br />
• COM5 – Modem<br />
GoBook VR-2 • COM1 - External serial port (and Docking station Serial Port 1)<br />
• COM2 - Touchscreen<br />
• COM3 - GPS<br />
• COM4 - Modem<br />
• COM5 - Docking station Serial Port 2 (recognized when on Dock)<br />
2009.02.19.GD8000 Copyright © 2008-2009 <strong>General</strong> <strong>Dynamics</strong> <strong>Itronix</strong> 15
How does Microsoft Windows activation occur with a custom image?<br />
If you are…<br />
…basing your custom disk<br />
image off of the original<br />
<strong>General</strong> <strong>Dynamics</strong> <strong>Itronix</strong><br />
OEM factory image<br />
…creating a custom image<br />
from scratch<br />
Then…<br />
Microsoft Windows will automatically self-activate because the<br />
OEM factory image contains an SLP product key.<br />
Computers from <strong>General</strong> <strong>Dynamics</strong> <strong>Itronix</strong>, like computers from<br />
other large manufacturers, come with two different Microsoft<br />
Windows product keys: an SLP Product Key and a COA Product<br />
Key.<br />
o SLP Product Key – this key is integrated into the OEM factory<br />
disk image and allows self-activation of the OEM factory disk<br />
image. This means that the end-user does not need to activate<br />
Windows. It does this by tying the OEM factory disk image to<br />
the <strong>General</strong> <strong>Dynamics</strong> <strong>Itronix</strong> motherboard.<br />
o COA Product Key – this is the product key that appears on the<br />
sticker on the bottom of the computer. Its primary purpose is to<br />
visually indicate that the OEM computer has a valid Microsoft<br />
Windows license. Each computer has a unique COA Key. The<br />
COA Key is a valid product key, but its use is limited, especially<br />
since the OEM factory disk image will self-activate using the<br />
SLP Key. The COA Key can only be used to activate an OEM<br />
version of Windows (not a retail version). It can only be used to<br />
activate the version of Windows specified on the sticker (i.e.,<br />
Windows Vista). It can only be used to activate one computer.<br />
It requires manual activation over the phone.<br />
Refer to your Microsoft Volume Licensing or Enterprise Agreement<br />
for information on product keys and activation.<br />
Note: The product key on the OEM COA sticker on the bottom of<br />
the computer has limited value if creating a custom image from<br />
scratch. See information on the COA Key above.<br />
What other best practices do you recommend when creating a custom<br />
image?<br />
• Below are some additional best practices that you might find helpful. These are in addition to<br />
those mentioned above in:<br />
o If I want to create my custom disk image based upon the original OEM factory image,<br />
what is recommended?<br />
o If I want to create my own custom disk image from scratch, what is recommended?<br />
• Note: the information below refers primarily to Windows XP, although Windows Vista would<br />
be similar.<br />
2009.02.19.GD8000 Copyright © 2008-2009 <strong>General</strong> <strong>Dynamics</strong> <strong>Itronix</strong> 16
Best Practices for Configuring a <strong>Custom</strong> <strong>Disk</strong> <strong>Image</strong><br />
• Make sure that you are using the latest version of BIOS. Refer to the downloads section<br />
on www.gd-itronix.com<br />
• Run Chkdsk before and after building the image. You can run Chkdsk /F then reboot to<br />
Fix errors. Verify no bad sectors or errors before proceeding.<br />
• Configure disk image<br />
o Install Microsoft Windows (if building from scratch)<br />
o Load application software<br />
o Configure settings; see “Recommended Windows Settings” below.<br />
o etc.<br />
• Run Windows Update.<br />
• Update virus definitions and run Full Anti-virus and Anti-spyware scan.<br />
• Test each of the following multiple times and verify no issues:<br />
o Boot up.<br />
o Shutdown.<br />
o Restart.<br />
o Standby (both manually and inactivity).<br />
o<br />
o<br />
Hibernate (if enabled).<br />
Check the Windows Task Manager Performance tab for any abnormally high CPU<br />
usage.<br />
• Create XP Restore Point.<br />
• Delete C:\IX\IXSERNUM.VER as this number will not be applicable to machines you<br />
duplicate this image to.<br />
Before Duplicating Your <strong>Disk</strong> <strong>Image</strong><br />
• Run <strong>Disk</strong> Cleanup.<br />
• Clear Recent Documents.<br />
• Sort the All Programs menu by name.<br />
• Internet Explorer, Tools, Internet Options, Clear History. After this, do not use Run or IE.<br />
• Internet Explorer, Tools, Internet Options, Delete Files.<br />
• Delete files in C:\Temp and C:\Windows\Temp if necessary.<br />
• Empty Recycle bin.<br />
• Run defrag on HD<br />
• Run Chkdsk /F then reboot, verify no bad sectors or errors.<br />
• Reset Event Viewer, clear all events.<br />
Recommended Windows Settings<br />
Below are some settings that you might find helpful<br />
• To improve readability of fonts on the LCD display, use ClearType edge smoothing (set<br />
under Control Panel, Display, Appearance, Effects)<br />
• Put shortcut to Help file on Windows Desktop.<br />
• Set Power Option Properties.<br />
o For XP, if using the <strong>General</strong> <strong>Dynamics</strong> <strong>Itronix</strong> Power Saver utility, refer to<br />
“APPENDIX A: <strong>General</strong> <strong>Dynamics</strong> <strong>Itronix</strong> Power Saver“ and “APPENDIX B: Setting<br />
Power Saver Defaults.”<br />
o For Vista, if using the <strong>General</strong> <strong>Dynamics</strong> <strong>Itronix</strong> DynaPower utility, refer to<br />
“APPENDIX C: <strong>General</strong> <strong>Dynamics</strong> <strong>Itronix</strong> DynaPower Utility (Vista Only)”<br />
2009.02.19.GD8000 Copyright © 2008-2009 <strong>General</strong> <strong>Dynamics</strong> <strong>Itronix</strong> 17
• Set the power scheme to turn off the hard disks after 1 minute (refer to the section “How<br />
do I add the option to turn off hard disks after 1 minute, and why would I want to?” on<br />
why this is a good idea.<br />
• Use white Desktop Background and Windows Black (extra large) mouse pointer for best<br />
outdoor contrast.<br />
• Turn off Menu Hiding (MS Windows, Word, Outlook).<br />
• Unhide taskbar icons.<br />
• Avoid scheduling or setting up virus scans, spyware scans, indexing or defragmentation<br />
to run while on battery power.<br />
• Avoid or minimize using applications that keep the CPU busy a large percentage of the<br />
time, especially when running on battery power. To identify such programs, open Task<br />
Manager, Performance and watch the CPU Usage. It is okay if the processor usage is<br />
occasionally 100%, but if it is 100% most of the time, this may indicate a problem.<br />
• Avoid using screen savers that draw excessive current, especially “3D” screen savers.<br />
• For small displays:<br />
1. Set IE Text Size set to Larger.<br />
2. Adjust the font size for Windows objects via Control Panel, Display, Appearance,<br />
Advanced: select item from drop down list (window, active title bar, message box, 3D<br />
object, etc) then choose font size<br />
Where can I get more help?<br />
• Product information including features, operation, and maintenance can be accessed via the<br />
Help link for this product on the Windows Desktop.<br />
• The entire Help document or any part can be printed by choosing a heading and selecting<br />
the Print button.<br />
• For additional support, email ccc@gd-itronix.com or call 800-638-9270 (in USA and<br />
Canada). Outside of North America call +44 (0)24 7671 4800.<br />
2009.02.19.GD8000 Copyright © 2008-2009 <strong>General</strong> <strong>Dynamics</strong> <strong>Itronix</strong> 18
APPENDIX A: <strong>General</strong> <strong>Dynamics</strong> <strong>Itronix</strong> Power Saver Utility (XP Only)<br />
What is Power Saver?<br />
• Power Saver is an application designed to optimize and simplify your computer's power<br />
management. In addition to typical power management features, Power Saver provides the<br />
ability to control power to certain hardware devices, helping you to maximize power savings.<br />
Power Saver also provides a convenient way to keep the system awake or switch between<br />
normal power management and a maximum power savings mode.<br />
How is Power Saver Different than the built-in XP Power Management?<br />
• Power Saver provides the ability to easily turn on and off devices to save power and the<br />
ability to configure power plan switching when power changes. It also provides control for<br />
CPU throttling (CPU speed limit) to save power and thermal management control.<br />
System Tray Icon<br />
• The Power Saver icon is displayed in the Windows System Tray area. The Power Saver<br />
icon changes depending on the current profile, power source, and battery remaining. The<br />
gas gauge at the bottom of the icon indicates the battery life remaining.<br />
Currently Plugged In and using the "Plugged In: Office" profile.<br />
Currently on battery power and using the "On Battery: Normal" profile.<br />
Currently Plugged In and using the "Plugged In: Vehicle" profile.<br />
Currently on battery power and using the "On Battery: Max Life" profile.<br />
Currently Plugged In with Stay Awake enabled and using the Office or Vehicle profile.<br />
Currently on battery power with Stay Awake enabled and using the Normal or Max Life profile.<br />
2009.02.19.GD8000 Copyright © 2008-2009 <strong>General</strong> <strong>Dynamics</strong> <strong>Itronix</strong> 19
System Tray Menu<br />
• Depending upon which devices are in your system, the System Tray Menu options will look<br />
something like this. From here, you can immediately turn on and off devices to save power.<br />
You can set which profile to use when on battery or plugged in.<br />
How do I start Power Saver?<br />
• Power Saver starts automatically with Windows.<br />
Power Saver Profiles<br />
• Power Saver provides four profiles that you can configure for your specific needs.<br />
"On Battery" Profiles<br />
Normal - Use this profile if maximum power savings are not a necessity.<br />
Max Life - By default, this profile is set to help extend battery life. To save even more power, you can<br />
configure which devices are turned on and off for this profile. Note that you can use Ctrl+Space to toggle<br />
between Max Life and Normal battery profiles.<br />
"Plugged In" Profiles<br />
Office - This is the profile you would typically use when plugged into external power in a non-vehicle<br />
environment.<br />
Vehicle - By default, this profile is best for vehicle-based charging situations because of the following: It<br />
sets the hard drive idle time to 1 minute to help keep the hard drive spun down when not in use. When the hard<br />
disk is spun down, there is less chance that the hard drive can be damaged due to shock, vibration, or heat. By<br />
limiting CPU usage, it allows the battery to charge faster by diverting more power to the charging circuit and<br />
helps keep your unit cooler and within operating specifications in warm environmental conditions.<br />
2009.02.19.GD8000 Copyright © 2008-2009 <strong>General</strong> <strong>Dynamics</strong> <strong>Itronix</strong> 20
Power Saver Configuration<br />
• From the System Tray Menu, you can open the configuration screen to modify various<br />
power settings.<br />
2009.02.19.GD8000 Copyright © 2008-2009 <strong>General</strong> <strong>Dynamics</strong> <strong>Itronix</strong> 21
Advanced Settings Screen<br />
• This screen allows you to set which devices to power on or off for each profile. It also<br />
provides other settings to help you save power. You can access this screen by clicking the<br />
Advanced button on the Main Settings Screen.<br />
• Of special note on the Advanced Settings screen are the following.<br />
Devices - When switching profiles, automatically power on/off specified devices<br />
If checked, devices specified in the list to the right will automatically be powered on or off as specified<br />
whenever the power profile is switched (either by the user, or if changing from plugged-in to battery). This list<br />
allows you to select which components of the system are powered on for each profile. Un-checking a device<br />
will power it off and render it temporarily unusable by the system. Powering off devices that are not being used<br />
can greatly increase your battery life. Some devices, such as radios and USB, can draw considerable power.<br />
Notes: 1) The power state of the devices you specify here will override any device enable/disable settings in<br />
Windows Device Manager. 2) This feature may be disabled on some platforms if stealth mode is enabled in<br />
BIOS setup.<br />
2009.02.19.GD8000 Copyright © 2008-2009 <strong>General</strong> <strong>Dynamics</strong> <strong>Itronix</strong> 22
CPU Power Savings<br />
Specifies whether or not to use Aggressive power savings.<br />
Setting CPU Dynamic Throttle Policy Fan Throttle Tolerance***<br />
Aggressive checked<br />
Aggressive not<br />
checked<br />
ADAPTIVE* (Plugged In)<br />
DEGRADE** (battery)<br />
ADAPTIVE* (Plugged In & battery)<br />
0% (Plugged In & battery)<br />
100% (Plugged In) 80% (battery)<br />
* ADAPTIVE - Attempts to match the performance of the processor to the current demand. This policy will use<br />
both high and low voltage and frequency states. This policy will lower the performance of the processor to the<br />
lowest voltage available whenever there is insufficient demand to justify a higher voltage. This policy will<br />
engage processor clock throttling if the C3 state is not being utilized, and in response to thermal events.<br />
** DEGRADE - Does not allow the processor to use any high voltage performance states. This policy will<br />
engage processor clock throttling when the battery is below a certain threshold, if the C3 state is not being<br />
utilized, or in response to thermal events.<br />
*** Lower limit that the processor may be throttled down to prior to turning on system fans in response to a<br />
thermal event (%). For example, if this value is set to 80% then the processor cannot throttle down below<br />
80% before turning on the fan. The fan uses more power while cooling the CPU, throttling saves power while<br />
cooling the CPU.<br />
Thermal Management<br />
Can set to Aggressive, Normal or Moderate. The CPU will throttle sooner when on Aggressive.<br />
Typical Default Power Saver Settings<br />
Setting<br />
Battery<br />
Max Life<br />
Battery<br />
Normal<br />
(default)<br />
Plugged In<br />
Vehicle<br />
Plugged In<br />
Office<br />
(default)<br />
Main Screen<br />
Turn Off Display 15 15 15 15<br />
Stand By 15 15 15 15<br />
Hibernate 30 Never Never Never<br />
Max Brightness<br />
Slightly less than Max Max Max<br />
Max<br />
Hard Drive Idle After 1 min After 1 min After 1 min After 1 min<br />
CPU Speed Limit 50% 100% 50% 100%<br />
When I close the lid Stand By Stand By Stand By Stand By<br />
When I open the lid<br />
Do Nothing<br />
Do Nothing Do Nothing<br />
Do Nothing<br />
CPU Power Savings Aggressive Not Aggressive Aggressive Not Aggressive<br />
Advanced Screen<br />
When switching profiles, Unchecked Unchecked Unchecked Unchecked<br />
automatically power on/off<br />
specified devices.<br />
When I press the Power<br />
Stand By<br />
Button<br />
When I press the Sleep<br />
Stand By<br />
Button<br />
Thermal Management<br />
Normal<br />
2009.02.19.GD8000 Copyright © 2008-2009 <strong>General</strong> <strong>Dynamics</strong> <strong>Itronix</strong> 23
APPENDIX B: Modifying Power Saver Defaults (XP Only)<br />
To Modify Default Settings for <strong>General</strong> <strong>Dynamics</strong> Power Saver (XP Only)<br />
1. Open Power Saver and make set everything the way you want your defaults.<br />
2. Open Administrator Options panel from the Power Saver Advanced menu screen.<br />
3. Click the Export button which creates three files, the Admin_Normal.pow, the<br />
Admin_Optimized.pow and the admin_settings.xml.<br />
4. Exit Power Saver from the taskbar icon.<br />
5. Find the Admin_* files in the C:\Program Files\<strong>Itronix</strong>\Powersaver\Settings folder.<br />
6. Rename the old Default_Normal.pow, Default_Optimized.pow and default_settings.xml and<br />
save them.<br />
7. Now rename the Admin_Normal.pow, Admin_Optimized.pow and admin_settings.xml to<br />
Default_Normal.pow, Default_Optimized.pow and default_settings.pow respectively.<br />
8. Restart the Power Saver application.<br />
APPENDIX C: <strong>General</strong> <strong>Dynamics</strong> <strong>Itronix</strong> DynaPower Utility (Vista Only)<br />
What is DynaPower?<br />
• DynaPower is an application designed to optimize and simplify your computer's power<br />
management. In addition to typical power management features, DynaPower provides the<br />
ability to control power to certain hardware devices, helping you to maximize power savings.<br />
How is DynaPower Different than the built-in Vista Power Management?<br />
• DynaPower provides another view into the Microsoft Vista power plans. In addition,<br />
DynaPower provides additional capabilities in addition to what Vista provides, namely, the<br />
ability to easily turn on and off devices to save power, the ability to configure power plan<br />
switching when power changes, and an easier way to view power settings. DynaPower also<br />
provides the ability to re-calibrate your battery gas gauge to make it more accurate.<br />
System Tray Icon<br />
• The DynaPower icon is displayed in the Windows System Tray area. The Power Saver icon<br />
changes depending on the current profile and whether battery calibration is recommended.<br />
Currently using a Windows Vista Power Saver power plan.<br />
Currently using a Windows Vista Power Saver power plan. Battery calibration recommended.<br />
Currently using a Windows Vista Balanced power plan.<br />
Currently using a Windows Vista Balanced power plan. Battery calibration recommended.<br />
Currently using a Windows Vista High Performance power plan.<br />
Currently using a Windows Vista High Performance power plan. Battery calibration recommended.<br />
2009.02.19.GD8000 Copyright © 2008-2009 <strong>General</strong> <strong>Dynamics</strong> <strong>Itronix</strong> 24
System Tray Menu<br />
• The DynaPower System Tray Menu allows you to immediately power on or off devices to<br />
save power. It also allows you to automatically set which power plan to use when switching<br />
between battery and AC power.<br />
How do I start DynaPower?<br />
• DynaPower starts automatically with Windows.<br />
2009.02.19.GD8000 Copyright © 2008-2009 <strong>General</strong> <strong>Dynamics</strong> <strong>Itronix</strong> 25
DynaPower Grid<br />
• The DynaPower Grid window allows you to view and configure power plans side-by-side.<br />
This information can also be viewed using the Microsoft Power Options/Advanced Settings,<br />
although not in this convenient format.<br />
Battery Calibration<br />
• From the DynaPower System Tray Menu, you can initiate the battery calibration<br />
functionality. Re-calibrating the battery is recommended for accurate reporting of the<br />
remaining available power in the battery (the “gas gauge”). As with all rechargeable<br />
batteries the capacity of the battery decreases over time and use, creating errors in the gas<br />
gauge. Calibration aligns the gas gauge capacity with the physical capacity of the battery.<br />
Typical Default DynaPower Settings<br />
Additional<br />
Settings<br />
Require a<br />
password on<br />
wakeup<br />
Hard <strong>Disk</strong><br />
Balanced High<br />
Power Balanced High<br />
Power saver<br />
performance saver<br />
performance<br />
Battery Battery Battery AC AC AC<br />
Yes Yes Yes Yes Yes Yes<br />
2009.02.19.GD8000 Copyright © 2008-2009 <strong>General</strong> <strong>Dynamics</strong> <strong>Itronix</strong> 26
Turn off hard<br />
disk after<br />
Wireless<br />
Adapter<br />
Settings<br />
Power Saving<br />
Mode<br />
Balanced High<br />
Power Balanced High<br />
Power saver<br />
performance saver<br />
performance<br />
1 minute 1 minute 1 minute 1 minute 1 minute 1 minute<br />
Medium<br />
Power<br />
Saving<br />
Maximum<br />
Performance<br />
Maximum<br />
Power<br />
Saving<br />
Maximum<br />
Performance<br />
Maximum<br />
Performance<br />
Maximum<br />
Performance<br />
Sleep<br />
Sleep after 15 minutes 15 minutes 5 minutes 15 minutes Never 30 minutes<br />
Allow hybrid On On On On On On<br />
sleep<br />
Hibernate 1 hour 2 hours 30 minutes 18 hours 18 hours 18 hours<br />
after<br />
USB settings<br />
USB selective<br />
suspend<br />
setting<br />
Enabled Disabled Enabled Disabled Disabled Enabled<br />
Power<br />
buttons and<br />
lid<br />
Lid close<br />
action<br />
Power button<br />
action<br />
Lid Open<br />
Action<br />
Sleep button<br />
action<br />
Start menu<br />
power button<br />
PCI Express<br />
Link State<br />
Power<br />
Management<br />
Processor<br />
power<br />
management<br />
Minimum<br />
processor<br />
state<br />
Maximum<br />
processor<br />
state<br />
Sleep Sleep Sleep Sleep Sleep Sleep<br />
Sleep Sleep Sleep Sleep Sleep Sleep<br />
Do Nothing Do Nothing Do Nothing Do Nothing Do Nothing Do Nothing<br />
Sleep Sleep Sleep Sleep Sleep Sleep<br />
Sleep Sleep Sleep Sleep Sleep Sleep<br />
Maximum<br />
power<br />
savings<br />
Off<br />
Maximum<br />
power<br />
savings<br />
Moderate<br />
power<br />
savings<br />
5% 5% 5% 5% 100% 5%<br />
100% 100% 50% 100% 100% 50%<br />
Off<br />
Maximum<br />
power<br />
savings<br />
GD <strong>Itronix</strong><br />
Power<br />
Settings<br />
Smart Card Do Nothing Do Nothing Do Nothing Do Nothing Do Nothing Do Nothing<br />
Bluetooth Do Nothing Do Nothing Do Nothing Do Nothing Do Nothing Do Nothing<br />
Radio<br />
Thermal Normal Normal Normal Normal Normal Normal<br />
Control<br />
Firewire Do Nothing Do Nothing Do Nothing Do Nothing Do Nothing Do Nothing<br />
Wireless LAN Do Nothing Do Nothing Do Nothing Do Nothing Do Nothing Do Nothing<br />
GPS Do Nothing Do Nothing Do Nothing Do Nothing Do Nothing Do Nothing<br />
Fingerprint Do Nothing Do Nothing Do Nothing Do Nothing Do Nothing Do Nothing<br />
Reader<br />
Ethernet Do Nothing Do Nothing Do Nothing Do Nothing Do Nothing Do Nothing<br />
Wireless Do Nothing Do Nothing Do Nothing Do Nothing Do Nothing Do Nothing<br />
2009.02.19.GD8000 Copyright © 2008-2009 <strong>General</strong> <strong>Dynamics</strong> <strong>Itronix</strong> 27
WAN<br />
Search and<br />
Indexing<br />
Power<br />
Savings<br />
Mode<br />
Display<br />
Turn off<br />
display after<br />
Adaptive<br />
display<br />
Display<br />
brightness<br />
Multimedia<br />
settings<br />
When sharing<br />
media<br />
Battery<br />
Critical<br />
battery action<br />
Low battery<br />
level<br />
Critical<br />
battery level<br />
Low battery<br />
notification<br />
Low battery<br />
action<br />
ATI Graphics<br />
Power<br />
Settings<br />
ATI<br />
PowerPlay<br />
Settings (XR-<br />
1)<br />
Balanced High<br />
performance<br />
Balanced<br />
High<br />
Performance<br />
Power<br />
saver<br />
Power<br />
Saver<br />
Balanced<br />
High<br />
Performance<br />
High<br />
performance<br />
High<br />
Performance<br />
15 minutes Never 2 minutes 15 minutes Never Never<br />
On Off On On Off On<br />
60% 100% 40% 100% 100% 100%<br />
Allow the<br />
computer<br />
to sleep<br />
Prevent idling<br />
to sleep<br />
Allow the<br />
computer<br />
to sleep<br />
Prevent idling<br />
to sleep<br />
Allow the<br />
computer to<br />
enter away<br />
mode<br />
Power saver<br />
High<br />
Performance<br />
Prevent idling<br />
to sleep<br />
Hibernate Hibernate Hibernate Do Nothing Do Nothing Do Nothing<br />
10% 10% 10% 10% 10% 10%<br />
5% 5% 5% 5% 5% 5%<br />
On On On On On On<br />
Do Nothing Do Nothing Do Nothing Do Nothing Do Nothing Do Nothing<br />
Balanced<br />
Maximum<br />
Performance<br />
Maximum<br />
Battery<br />
Life<br />
Maximum<br />
Performance<br />
Maximum<br />
Performance<br />
Maximum<br />
Performance<br />
2009.02.19.GD8000 Copyright © 2008-2009 <strong>General</strong> <strong>Dynamics</strong> <strong>Itronix</strong> 28