USER MANUAL - Spot
USER MANUAL - Spot
USER MANUAL - Spot

Create successful ePaper yourself
Turn your PDF publications into a flip-book with our unique Google optimized e-Paper software.
<strong>USER</strong> <strong>MANUAL</strong>
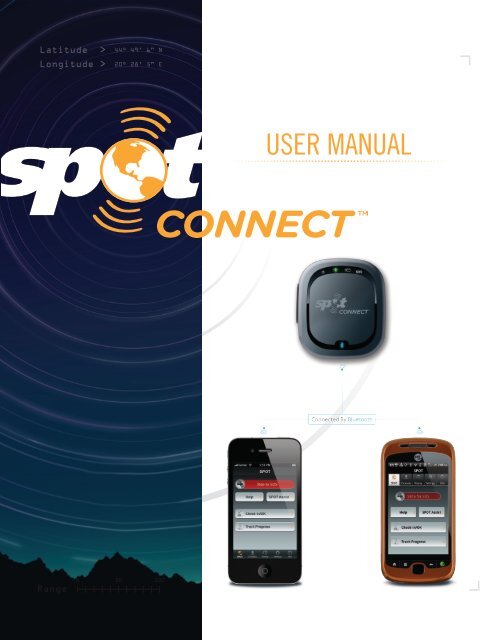
SPOT Connect <strong>USER</strong> <strong>MANUAL</strong><br />
2<br />
Table of Contents<br />
Welcome ............................................................3<br />
Getting Started ..................................................4<br />
Initial System Setup ..........................................7<br />
Using SPOT Connect ..........................................9<br />
Operation ..........................................................10<br />
Care and Support ..............................................14<br />
Warranty and FCC/IC Notice ..............................15
Welcome<br />
SPOT CONNECT <strong>USER</strong> <strong>MANUAL</strong><br />
3<br />
Today’s smartphones provide more options for staying in touch with<br />
friends and family than ever before. Unfortunately, this amazing variety<br />
of connections has always been dependent on the cellular network.<br />
Until now.<br />
SPOT Connect turns your smartphone into a satellite communicator by<br />
using the GPS satellite system to determine your location and global<br />
communication satellites to transmit that information to your contacts<br />
and emergency response personnel from virtually anywhere on the<br />
planet. You can update Twitter and Facebook, send short email and text<br />
messages, and in the case of a critical emergency, send an SOS message<br />
requesting emergency assistance.<br />
The SPOT Connect app runs on your smartphone and pairs with the<br />
SPOT Connect device via Bluetooth. Bluetooth is a short range wireless<br />
connectivity standard that allows electronic devices to communicate<br />
with one another, and pairing is simply establishing a link between two<br />
electronic devices. You can use the smartphone to operate all the modes<br />
of SPOT Connect and access optional features like Type & Send, which<br />
lets you send short emails, text messages, or post messages to social<br />
networking sites like Facebook.<br />
The SPOT Connect device receives location information from GPS<br />
satellites and, when instructed by the smartphone application,<br />
sends location information and short messages through a commercial<br />
satellite system. These satellites relay your message to your contacts<br />
or in case of an SOS message, to the GEOS International Emergency<br />
Response Coordination Center (IERCC). The SOS feature can also be<br />
activated directly with the button on the SPOT Connect device, should<br />
your smartphone<br />
stop functioning.<br />
The “Getting Started” and “Initial Setup/Test” sections of this User<br />
Manual step through all aspects of the setup, testing, and operation of<br />
the SPOT Connect device. Be sure to go through all setup actions<br />
in these sections prior to using SPOT Connect in the field.<br />
Update Twitter<br />
and Facebook<br />
Send short email email<br />
messages<br />
Send text text messages<br />
Download the SPOT the SPOT Connect<br />
app app and pair and your pair smartphone your<br />
Smartphone with SPOT Connect with SPOT via<br />
Bluetooth<br />
Connect via Bluetooth<br />
SPOT Connect links<br />
your your Smartphone smartphone to to<br />
communication<br />
satellites<br />
satellites<br />
Your Smartphone<br />
smartphone<br />
is is now a satellite<br />
communicator<br />
Send your GPS coordinates<br />
Send your GPS coordinates and<br />
and<br />
emergency<br />
emergency<br />
message<br />
message<br />
to GEOS<br />
to GEOS
SPOT CONNECT <strong>USER</strong> <strong>MANUAL</strong><br />
Getting Started 4<br />
FOLLOW THESE IMPORTANT GUIDELINES TO GET<br />
MAXIMUM RELIABILITY FROM SPOT CONNECT:<br />
Give SPOT Connect an unobstructed view of the sky to obtain<br />
a GPS signal and provide the most accurate location information.<br />
It is not reliable indoors, in a cave, or in very dense woods.<br />
Orient the SPOT Connect logo toward the sky to improve performance.<br />
Keep the SPOT Connect device within 30 feet of your mobile<br />
device to maintain a consistent Bluetooth connection.<br />
SPOT CONNECT DEVICE<br />
WHAT YOU NEED<br />
1. SPOT Connect Device.<br />
2. 2 AA Energizer® Ultimate Lithium 8x Batteries (L91) (included).<br />
INSTALL THE INCLUDED BATTERIES<br />
1. Loosen the screw holding the battery cover in place.<br />
2. Write down the ESN and Authentication Code for use during<br />
service activation.<br />
3. Install 2 AA Energizer® Ultimate Lithium 8x Batteries (L91).<br />
4. Replace cover, then tighten screw with a screwdriver or coin.<br />
It is important that you tighten the battery cover to keep<br />
SPOT Connect waterproof.<br />
5. To turn SPOT Connect on simply press and hold the ON/OFF button until<br />
the Power LED blinks green. SPOT Connect performs a self-diagnostic<br />
test every time it is powered on. To turn SPOT Connect off, press and hold<br />
the ON/OFF button until the Power LED starts blinking rapidly.<br />
6. If SPOT Connect’s self-test fails, the Power, GPS, and Message Sending<br />
LEDs simultaneously blink red.
Getting Started<br />
SPOT CONNECT <strong>USER</strong> <strong>MANUAL</strong><br />
5<br />
SPOT Connect uses LEDs to tell you what it’s doing. Take a moment<br />
to become familiar with these LEDs. Your SPOT Connect app will also<br />
display the current mode of the device and provide further detail about<br />
its operating status.<br />
GPS LED<br />
This LED is Green when SPOT<br />
Connect is providing the GPS fix<br />
to the smartphone and has 3 or<br />
more GPS satellites in view. It is<br />
red when SPOT Connect has less<br />
than 3 satellites in view (no GPS<br />
fix). Blinks for 15 seconds (green or<br />
red depending on GPS acquisition)<br />
when the smartphone provides the<br />
GPS fix and switching from GPS<br />
acquisition to message sending.<br />
MESSAGE SENDING LED<br />
This LED blinks green when a message<br />
is being sent. This LED blinks red when<br />
a casual message sending attempt<br />
has failed.<br />
SOS LED<br />
This LED blinks green every 3 seconds<br />
when in SOS mode, and blinks red<br />
every 3 seconds when SOS mode has<br />
been cancelled.<br />
POWER LED<br />
This LED blinks green every 3<br />
seconds when the SPOT Connect<br />
device is powered on, and blinks<br />
rapidly during the power off sequence.<br />
If SPOT Connect’s self-test fails,<br />
the Power, GPS, and Message<br />
Sending LEDs simultaneously blink red.<br />
Contact SPOT Customer service for<br />
troubleshooting help if this<br />
should occur.<br />
WIRELESS CONNECTION LED<br />
This LED blinks every 3 seconds<br />
when a wireless connection is<br />
established between the smartphone<br />
and the SPOT Connect device. The blue<br />
LED goes off if the SPOT Connect has not<br />
heard from the smartphone in 1 minute.<br />
The Wireless Connection LED blinks<br />
rapidly while the smartphone and SPOT<br />
Connect are being paired.
Getting Started<br />
SPOT CONNECT <strong>USER</strong> <strong>MANUAL</strong><br />
6<br />
SPOT ACCOUNT<br />
WHAT YOU NEED<br />
1. Internet access.<br />
2. Personal and Emergency contact information<br />
(names and phone numbers).<br />
3. SMS (Text) and e-mail contacts for messaging.<br />
Phone numbers for US/Canada customers require the<br />
carrier information (e.g., AT&T, Verizon, etc.).<br />
4. Credit card information.<br />
5. SPOT electronic serial number (ESN) and Authentication Code<br />
(located inside the battery compartment).<br />
ACCOUNT SETUP AND DEVICE ACTIVATION<br />
1. Log onto findmeSPOT.com, choose your country or language,<br />
and select the Activate Your SPOT tab.<br />
2. Login to your account if you are an existing customer,<br />
or create a new account if you are new to SPOT.<br />
3. Follow the online instructions to choose the SPOT Basic<br />
Service Plan to activate your SPOT Connect device.<br />
4. Select additional services, such as Track Progress<br />
or Type & Send bundle.<br />
SPOT CONNECT APP<br />
1. Go to the appropriate application marketplace for your smartphone/<br />
mobile device and search for “SPOT Connect”.<br />
2. Alternatively, findmeSPOT.com/app provides direct links to the<br />
appropriate apps for the different mobile platforms supported by<br />
SPOT Connect.<br />
3. Once the app is downloaded and installed, sign in with your SPOT<br />
account information (Note: You must first have activated your device at<br />
findmeSPOT.com with the SPOT Basic Service Plan).<br />
4. The app will pull the appropriate information about your account<br />
and device from the server and display a “Connecting to Device”<br />
notification while it searches for your SPOT Connect device.<br />
Once the app is installed you will see the SPOT<br />
Connect app icon in your smartphone home screen.<br />
After completing all three of the setup steps – powering on the device,<br />
activating the device, and installing the app – you are ready to pair your<br />
smartphone with your SPOT Connect device and complete the initial<br />
system test.<br />
5. You will be required to enter contact information for a primary and<br />
secondary SOS emergency contact. These can be updated at any time.<br />
These contacts cannot match your personal contact information in your<br />
SPOT Account.<br />
6. Create at least one contact group and add a contact to it.<br />
It is recommended to add your own name and email or phone number to<br />
a contact group for use during the initial system test.<br />
7. Create at least one Predefined message for use during the system test.<br />
8. Social Destinations – SPOT Connect can post messages to Facebook<br />
and Twitter, after you connect to them from your SPOT Account.<br />
More details on establishing these connections are available in<br />
the Initial System Setup/Test section.
Inital System Setup/Test<br />
SPOT CONNECT <strong>USER</strong> <strong>MANUAL</strong><br />
7<br />
PAIRING<br />
CONNECTING/DISCONNECTING<br />
1. Make sure your smartphone has a cellular or Wi-Fi connection during<br />
the initial device pairing process.<br />
2. Navigate to the Bluetooth Menu on your smartphone and turn on the<br />
Bluetooth if it is not already.<br />
3. From Off Mode, place the SPOT Connect device in Pairing Mode by<br />
holding down on the ON/OFF button until the Power LED comes on and the<br />
blue Wireless Connection LED begins blinking. Your SPOT Connect is now<br />
discoverable by your smartphone.<br />
4. With your SPOT Connect now in Pairing Mode, scan for Bluetooth<br />
devices if needed by your smartphone’s Operating System (OS). One of<br />
the Bluetooth devices listed should be ‘SPOTConnect’ with the last three<br />
digits of your unit’s ESN at the end. Pair with this device by pressing its<br />
name.<br />
5. Depending on your smartphone’s OS, if the pairing process was<br />
successful you will see your SPOT Connect device listed as ‘Paired but<br />
not connected’ or ‘Connected’. Either of these statuses next to your SPOT<br />
Connect device in the Bluetooth Menu indicates that you have paired<br />
successfully. If your smartphone still lists your device as ‘Not Paired’,<br />
please repeat Steps 3 -5. If you continue to have trouble, please call<br />
Customer Care for assistance.<br />
6. Open the SPOT Connect app on your smartphone. When prompted by<br />
the app, please enter your SPOT Account’s username and password you<br />
created during the device activation process (NOTE: You must first have<br />
activated your device at findmeSPOT.com with the SPOT Basic Service<br />
Plan).<br />
7. If in Step 5 you saw ‘Paired but not connected’, you still need<br />
to establish a Bluetooth connection and the app will prompt you<br />
accordingly.<br />
8. The SPOT Connect app will take a few moments to sync with your SPOT<br />
Connect device for the first time while it checks your device registration<br />
and profile information.<br />
9. Once the sync is complete, you’re ready to begin using your SPOT<br />
Connect app and device.<br />
Once you have paired your SPOT Connect and smartphone, you should not<br />
need to go through the pairing process again for these devices.<br />
1. If you turn off either device, turn off your smartphone’s Bluetooth, or<br />
simply take one of the devices out of range of the other, all you need to<br />
do is reconnect. Once you initiate a SPOT Connect function, the device<br />
will stay in that mode regardless of Bluetooth connectivity.<br />
If you lose Bluetooth connectivity and wish to re-establish the link, make<br />
sure both your smartphone and the SPOT Connect device are turned on<br />
and next to each other. You can establish a Bluetooth connection between<br />
your smartphone and SPOT Connect regardless of what mode your SPOT<br />
Connect is in (Standby, Track Progress, SOS, etc.) as long as it is On.<br />
2. Navigate to the Bluetooth Menu on your smartphone and turn on the<br />
Bluetooth if it is not already.<br />
3. Depending on your smartphone’s OS, you may need to establish a<br />
Bluetooth connection via the SPOT Connect app. If this is the case, open<br />
the app and select your SPOT Connect device from the list of Paired<br />
Devices. If you can establish a Bluetooth connection via the Bluetooth<br />
Menu, select your SPOT Connect device from the list of available<br />
Bluetooth devices and then open the app.<br />
4. If you cannot reestablish a Bluetooth connection between your devices,<br />
make sure you have the two devices paired. In the Bluetooth Menu,<br />
if your SPOT Connect device is listed as ‘Not Paired’, repeat the pairing<br />
process above.<br />
INITIAL SYSTEM TEST<br />
After completing the previous steps it’s time to test the SPOT Connect<br />
device and the app before completing the system setup at your online<br />
SPOT Account.<br />
1. Go outside where SPOT Connect has an unobstructed view of the sky.<br />
2. With the SPOT Connect device turned on and paired to the smartphone,<br />
select Check-in/OK.<br />
Continued on next page
Inital System Setup/Test<br />
SPOT CONNECT <strong>USER</strong> <strong>MANUAL</strong><br />
8<br />
INITIAL SYSTEM TEST (continued)<br />
PREDEFINED MESSAGES<br />
3. Select the contact group which includes your own email or phone<br />
number, and select a Predefined message or create a custom<br />
Type & Send message. Note that if you choose to send a Type & Send<br />
message, this uses one of the 5 Free Trial messages included with the<br />
SPOT Basic Service.<br />
4. If you entered a Social Destination site during the account setup you<br />
can choose to have your message sent to Facebook or Twitter.<br />
Social destinations can also be linked via the Settings menu of the<br />
smartphone app.<br />
5. Send the Check-in/OK message from the smartphone app.<br />
6. Leave SPOT Connect in clear view of the sky during the test,<br />
which can take up to 20 minutes to complete.<br />
7. Verify that the message was received in the email account or SMS<br />
text number you entered during the device activation step.<br />
OPTIONAL SERVICES<br />
Several optional services can be enabled for use with your SPOT Connect<br />
device. These services require an additional service fee. Pricing details<br />
are available online.<br />
TRACK PROGRESS<br />
SPOT Connect sends your location automatically to allow contacts to<br />
track your progress in near real-time using Google Maps or SPOT<br />
Adventures, giving them a virtual breadcrumb trail of your adventure.<br />
TYPE & SEND<br />
Type a custom message on the smartphone for delivery over the satellite<br />
network to emergency personnel, your personal contacts, or selected<br />
social networks.<br />
SPOT ASSIST<br />
For non-emergency situations, SPOT Assist gives you access to<br />
professional roadside and maritime assistance providers to get you back<br />
on track fast when you need help. SPOT has partnered with Nation Safe<br />
Drivers and BoatUS Towing Services to provide assistance that you can<br />
summon from off the grid, unlike other roadside assistance programs<br />
which require cellular service. (See findmeSPOT.com for terms and<br />
coverage area).<br />
The fastest and most reliable way to send messages from the field is with<br />
Predefined messages. You can send an unlimited number of Predefined<br />
messages with the SPOT Basic Service. When you select a Predefined<br />
message, the SPOT Connect device does not actually communicate the<br />
details of the message over the satellite network, it merely sends a short<br />
instruction to the servers to send out the message. You can have up to<br />
14 Predefined messages in your account. Predefined messages can be<br />
appended to Check-in/OK, Help, or SOS messages. You can modify these<br />
messages from your smartphone, but only when you are on the cellular<br />
network or have internet access through a Wi-Fi connection.<br />
CONTACT GROUPS<br />
Establish up to 10 contact groups for easy selection when sending<br />
Check-in/OK messages. Each group can contain 50 contacts,<br />
and you can specify any combination of text/SMS messages or<br />
email for the contacts.<br />
At any one time, specific groups can be selected to receive messages<br />
from the field. This allows you to select different groups depending on<br />
where you are traveling and who you want to keep informed during a<br />
given adventure.<br />
NOTE: SMS messaging services are subject to international<br />
pricing terms. See findmeSPOT.com for details.<br />
ADDING CONTACTS FROM YOUR SMARTPHONE<br />
You can add contacts directly from your smartphone contact list to your<br />
SPOT Account only when your smartphone is on the cellular network or<br />
has internet access through a Wi-Fi connection.<br />
SOCIAL DESTINATIONS<br />
Because SPOT Connect can send messages out over the satellite network,<br />
popular social networking sites (Facebook and Twitter) can be updated<br />
from the field with SPOT Connect. The connection between the SPOT<br />
service and your accounts on the social destination sites is made in<br />
the SPOT Account online under the Share tab. You will need your login<br />
and password for these sites to establish the connection. You can post<br />
Predefined messages to these services or use the Type & Send function to<br />
post customized messages.
Using SPOT Connect<br />
SPOT CONNECT <strong>USER</strong> <strong>MANUAL</strong><br />
9<br />
STARTING YOUR ADVENTURE<br />
MESSAGE PRIORITY LEVEL<br />
SPOT recommends that you send and verify a Check-in/OK message<br />
before each trip. This also allows you to evaluate your entire messaging<br />
system, from the operational condition of the SPOT Connect device to the<br />
readiness of those in your contact groups.<br />
GPS ACQUISITION<br />
Under normal operation SPOT Connect obtains the GPS fix and provides<br />
this information to the smartphone. Turning off the GPS/location<br />
services feature in your smartphone will help minimize battery drain on<br />
your smartphone.<br />
REFERENCE POINTS<br />
A Reference Point is any point on the map other than your current<br />
location. By default, SPOT Connect uses your current location for all<br />
messages and actions, but you can use the SPOT Connect app to send<br />
messages and information associated with Reference Points.<br />
To establish a Reference Point, go to the Map View while in Track<br />
Progress mode and lift the corner of the map. You can select<br />
“Drop Pin” and move the pin to the desired location on the map.<br />
Each type of message you can send is assigned a priority level which<br />
governs which messages get sent or ignored in the event of multiple<br />
functions being activated at the same time.<br />
CRITICAL<br />
An SOS message is the highest priority message and is sent to the GEOS<br />
IERCC. It supersedes Urgent and Casual messages. Once in SOS mode all<br />
other message requests are ignored.<br />
URGENT<br />
Help/SPOT Assist messages are the second highest priority. SPOT Assist<br />
messages are sent to one or more professional service providers for<br />
non-emergency response.<br />
CASUAL<br />
Casual messages (Check-in/OK, Track Progress) go to a contact or social<br />
destination that you have set up in your SPOT account and are the lowest<br />
priority. They are terminated if higher priority messages are sent after a<br />
Casual message is initiated, and ignored if SPOT is already in Help<br />
or SOS mode.<br />
Tap the pin and you will have the option to either send the Reference<br />
Point location along with a Check-in/OK message, Delete Reference Point<br />
or Cancel to return back to the tracking screen.
Operation<br />
SPOT CONNECT <strong>USER</strong> <strong>MANUAL</strong><br />
10<br />
For life threatening or other critical emergency situations, use SOS<br />
to alert the GEOS IERCC. GEOS notifies the appropriate emergency<br />
responders based on your location– which may include Search & Rescue,<br />
U.S. Coast Guard, Civil Air Patrol, local police, highway patrol, your<br />
country’s embassy or consulate or other emergency response centers.<br />
MESSAGE CYCLE<br />
SPOT sends your emergency profile information and current GPS location<br />
to GEOS every 5 minutes until cancelled or until the batteries run out. If<br />
SPOT cannot get a GPS signal, it will still attempt to send your message<br />
without a GPS location. There is no test mode for this function. If you<br />
activate the SOS function, the GEOS IERCC will treat it as a<br />
real emergency.<br />
USING THE SOS FUNCTION<br />
The SOS function can be accessed from the SPOT Connect app or from<br />
the device itself.<br />
TO CANCEL<br />
• From the app<br />
You can cancel SOS from the app by sliding the SOS bar.<br />
• From the device<br />
Press and hold the SOS button until it blinks red.<br />
Let SPOT work until the SOS LED stops blinking red. The Message Sending<br />
LED will blink green, indicating it has sent the Cancel message. If an<br />
SOS message has already been transmitted, SPOT Connect will send 3<br />
Cancel SOS messages over a 15-20 minute period. If no SOS message<br />
was transmitted it will simply return to Standby mode after 15 seconds.<br />
When you select SOS, you disable Help, Check-in/OK, and Track Progress<br />
function modes and discontinue any casual or urgent messages in<br />
progress.<br />
• From the app<br />
Slide the SOS bar on the SPOT Connect app home screen.<br />
You will have the option to select a Predefined message or send a<br />
Type & Send custom message, providing additional details with the SOS.<br />
• From the Connect device<br />
If your smartphone or mobile device is inoperable, the SOS button on the<br />
SPOT Connect device can be used to send the basic SOS message with<br />
your GPS location. Press and hold the SOS button on the device until the<br />
SOS LED blinks green. If you return to the app on your smartphone you<br />
will see the status updated with the current function mode.<br />
Once your GPS location is obtained, SPOT sends your message and GPS<br />
location. The GPS LED and Message Sending LED will both blink green<br />
for approximately 15 seconds. The Message Sending LED continues to<br />
blink green until the next scheduled message to notify you that your most<br />
recent message was transmitted.<br />
If no GPS signal is found, the GPS LED will blink red. You should move to<br />
a location with a clearer view of the sky. For all subsequent messages,<br />
SPOT will keep looking for your GPS location for up to 4 minutes. If no GPS<br />
signal is found within 4 minutes, SPOT sends your message without GPS<br />
location, indicated by the GPS LED blinking red and the Message Sending<br />
LED blinking green for approximately 15 seconds.
Operation<br />
SPOT CONNECT <strong>USER</strong> <strong>MANUAL</strong><br />
11<br />
HELP/SPOT ASSIST<br />
A Help message notifies your contacts that you need assistance in a<br />
non-emergency situation. A SPOT Assist message notifies<br />
SPOT Assist dispatch centers of your location and that you need<br />
assistance. Professional service providers will be notified that you need<br />
help (SPOT Assist service subscription required).<br />
MESSAGE CYCLE<br />
SPOT sends your Help message every 5 minutes for one hour. If a GPS<br />
signal cannot be obtained SPOT will attempt to send the message with<br />
no location information.<br />
USING THE FUNCTION<br />
Help and SPOT Assist can only be activated from the SPOT Connect<br />
smartphone app. Select the appropriate button from the home screen<br />
and follow the on screen instructions for selecting a Predefined message<br />
or creating a unique Type & Send custom message.<br />
TO CANCEL<br />
Help messages can be cancelled from the SPOT Connect app,<br />
simply go to the Help message status page and select the Cancel option.<br />
CHECK-IN/OK<br />
The most common type of message sent from SPOT Connect, the<br />
Check-in/OK message is used to send Predefined or Type & Send custom<br />
messages to specific contact groups as well as to Facebook and Twitter.<br />
These destinations can be selected from the app for each individual<br />
message cycle is complete. The Check-in/OK message will not be sent if<br />
the GPS fix cannot be acquired.<br />
MESSAGE CYCLE<br />
These messages are sent 3 times within a 20 minute window of<br />
activating the function for redundancy. However, only one message<br />
will be delivered to your designated contacts.<br />
USING THE FUNCTION<br />
Select Check-in/OK from the SPOT Connect app home screen and follow<br />
subsequent directions for choosing a Predefined message or using a<br />
Type & Send message. You will also select which contact group to send<br />
your message to.<br />
Check-in/OK cannot be sent concurrently with Help, SPOT Assist or SOS<br />
messages. Check-in/OK messages can be sent while Track Progress is<br />
enabled, but will interrupt the Track Progress messages until the<br />
Check-in/OK message cycle is complete.<br />
TO CANCEL<br />
Check-in/OK messages can be cancelled from the SPOT Connect app,<br />
simply go to the Check-in/OK message status page and select the<br />
Cancel option. There is a 3 minute delay before another casual message<br />
can be sent.
Operation<br />
SPOT CONNECT <strong>USER</strong> <strong>MANUAL</strong><br />
12<br />
TRACK PROGRESS<br />
This optional service automatically updates your location on Google<br />
Maps allowing your contacts to track a virtual breadcrumb trail of<br />
your progress in near real-time. Alternatively you can share your location<br />
information at SPOT Adventures (spotadventures.com) or with a<br />
SPOT Shared Page you create from your SPOT Account.<br />
MESSAGE CYCLE<br />
Messages are sent every 10 minutes for 24 hours at a time or until<br />
cancelled. You can re-engage Track Progress any time to restart the 24<br />
hour clock. With each message SPOT will include your GPS location for<br />
the 2 previous track locations for a reliable breadcrumb trail. If a GPS<br />
signal is not obtained within 4 minutes, SPOT Connect will wait for the<br />
next message cycle and try again.<br />
USING THE FUNCTION<br />
Select Track Progress from the SPOT Connect app home screen.<br />
Any unsent Check-in/OK messages will be cancelled when you initiate<br />
Track Progress.<br />
Track Progress mode is disabled once SOS, Help, or SPOT Assist modes<br />
are activated. If a Check-in/OK message is sent while in Track Progress<br />
mode, the Track Progress mode is interrupted until the Check-In/OK<br />
message cycle is complete.<br />
TO CANCEL<br />
Track Progress can be cancelled from the SPOT Connect app, simply go to<br />
the Track Progress status page and select Stop.
Operation<br />
SPOT CONNECT <strong>USER</strong> <strong>MANUAL</strong><br />
13<br />
FUNCTION OVERVIEW<br />
FUNCTION<br />
SOS<br />
Help/SPOT Assist<br />
Check-In/OK<br />
Track Progress<br />
OPERATION<br />
- Messages scheduled every 5 minutes until cancelled (or batteries are<br />
depleted) with updated location to GEOS IERCC.<br />
- Message scheduled even if GPS location cannot be determined.<br />
- Overrides Check-in/OK, Help/SPOT Assist, and Track Progress.<br />
- Messages scheduled every 5 minutes for one hour with updated location<br />
to your friends and family, or SPOT Assist provider.<br />
- Message scheduled even if GPS location cannot be determined.<br />
- Overrides Check-In/OK and Track Progress.<br />
- Messages scheduled 3 times over 20 minutes for message delivery reliabilty.<br />
Only one message is actually delivered to contacts in your contact groups.<br />
- Message not sent if GPS location cannot be determined.<br />
- Suspends Track Progress until message is sent, then Track Progress<br />
resumes automatically.<br />
- Updated location and two previous locations scheduled for transmission<br />
to your account every 10 minutes for 24 hours.<br />
- Message not sent if GPS location cannot be determined.<br />
- Messages are sent to your SPOT Account where you can link them to a<br />
Shared Page or SPOT Adventures. Messages are not sent to contacts.
Care and Support<br />
SPOT CONNECT <strong>USER</strong> <strong>MANUAL</strong><br />
14<br />
SUPPORT<br />
For additional questions or support, visit findmeSPOT.com for answers<br />
to FAQ’s, training videos, and other information, or call<br />
• North American customers – 1.866.OK1.SPOT (1.866.651.7768)<br />
• European customers: Tel: +353 12 909 505<br />
MAINTENANCE<br />
BATTERY LIFE AND USAGE<br />
To obtain reliable performance use only AA Energizer Ultimate Lithium 8x<br />
batteries (L91). The Power LED on SPOT Connect will blink red when the<br />
batteries have less than 100 transmissions remaining. Colder conditions<br />
and extreme heat can impact battery life. Always carry extra batteries<br />
with you. Test your SPOT device before each trip by sending a<br />
Check-in/OK message.<br />
When utilizing new AA Energizer Ultimate Lithium 8x batteries (L91)<br />
you can anticipate the following battery life:<br />
COVERAGE<br />
SPOT works around the world, including virtually all of North America,<br />
Europe, Australia, and portions of South America, Northern Africa and<br />
Asia, as well as hundreds or thousands of miles off-shore of these<br />
areas. It is important that you check coverage for your destination<br />
before traveling. In Russia, GPS performance is limited (degraded) in<br />
accordance with Russian regulations regarding GPS accuracy for devices<br />
utilized in Russia. You can find coverage maps at findmespot.com<br />
CAUTIONS AND WARNINGS<br />
• Any changes or modifications not expressly approved by the<br />
grantee of this device could void the user’s authority to operate<br />
the equipment.<br />
• Danger of explosion if battery is incorrectly replaced. Replace only with<br />
the same or equivalent type recommended. Dispose of used batteries<br />
according to the manufacturer’s instructions.<br />
• Do not damage the Lithium battery. A damaged battery can cause<br />
an explosion or fire, and can result in personal injury and/or<br />
property damage.<br />
MODE<br />
Standby<br />
Standby<br />
SOS<br />
SOS<br />
Track Progress<br />
Track Progress<br />
Check-in/OK<br />
Type & Send (Max Length)<br />
Predefined Messages<br />
CONNECTED/NOT CONNECTED<br />
Not Connected<br />
Connected<br />
Not Connected<br />
Connected<br />
Not Connected<br />
Connected<br />
Connected<br />
Connected<br />
Connected<br />
BATTERY LIFE<br />
11 Days<br />
5 Days<br />
5 Days<br />
4 Days<br />
6 Days<br />
4.5 Days<br />
260 Messages<br />
180 Messages<br />
260 Messages<br />
All battery life estimates are based on the assumptions that Connect has a 100% clear view of the<br />
sky and is at room temperature.<br />
CLEANING<br />
Follow these general rules when cleaning the outside of your<br />
SPOT Connect device:<br />
• Make sure the power is OFF.<br />
• Use a damp, soft, lint-free cloth. Avoid excess moisture near buttons<br />
or openings.<br />
• Do not use aerosol sprays, solvents, alcohol or abrasives.<br />
• Do not attempt to open the SPOT case.<br />
OPERATING CONDITIONS AND CLIMATE<br />
• Operating temperatures: -13°F to +140°F (-25°C to 60°C)<br />
• Operating altitude: -328 ft to 21,320 ft (-100m to 6,500 m)<br />
• Humidity and Salt Fog rated<br />
• IPX7 Waterproof to 1M for 30 minutes<br />
• GPS Lat. Long. Datum format: WGS-84
Warranty and FCC/IC Notice<br />
SPOT CONNECT <strong>USER</strong> <strong>MANUAL</strong><br />
15<br />
WARRANTY INFORMATION<br />
FCC RF RADIATION EXPOSURE STATEMENT<br />
Your SPOT has a Limited Warranty for 12 months (24 months for<br />
European Customers) from the date of purchase against defects in<br />
materials and workmanship only. For full details regarding the Limited<br />
Warranty and warranty claim procedures, visit www.spotwarranty.com<br />
or www.findmeSPOT.com.<br />
EXCEPT AS PROVIDED ABOVE, THE PRODUCT IS SOLD “AS IS” WITHOUT ANY EXPRESS OR<br />
IMPLIED WARRANTIES FOR THE PRODUCT WHATSOEVER, INCLUDING, WITHOUT LIMITATION,<br />
ANY IMPLIED WARRANTIES REGARDING THE CONDITION, DESIGN, SPECIFICATIONS,<br />
WORKMANSHIP, MERCHANTABILITY OR FITNESS FOR A PARTICULAR PURPOSE OF THE<br />
PRODUCT, OR ANY WARRANTIES THAT THE PRODUCT IS FREE FROM LATENT DEFECTS OR<br />
DEFICIENCIES, OR THAT THE PRODUCT IS FREE FROM INFRINGEMENT OF ANY PATENT,<br />
TRADEMARK, COPYRIGHT OR PROPRIETARY RIGHT OF ANY THIRD PARTY AND SUCH<br />
WARRANTIES ARE HEREBY EXPRESSLY DISCLAIMED.<br />
THIS LIMITED WARRANTY PROVIDES THE SOLE AND EXCLUSIVE REMEDY FOR ANY DEFECTS<br />
IN THE PRODUCT. IN NO EVENT SHALL WE BE LIABLE FOR ANY INDIRECT, CONSEQUENTIAL,<br />
SPECIAL, INCIDENTAL OR PUNITIVE DAMAGES, WHETHER IN CONTRACT, TORT, NEGLIGENCE,<br />
STRICT LIABILITY OR OTHERWISE. OUR LIABILITY IS LIMITED TO THE AMOUNT YOU PAID<br />
FOR THE PRODUCT THAT IS THE SUBJECT OF A CLAIM. THE APPLICABILITY OF THE ABOVE<br />
LIMITATIONS AND EXCLUSIONS MAY VARY FROM STATE TO STATE, OR COUNTRY TO COUNTRY.<br />
FCC CERTIFICATIONS<br />
This equipment has been tested and found to comply with the limits<br />
for a class B digital device, pursuant to Part 15 of the FCC rules. These<br />
limits are designed to provide reasonable protection against harmful<br />
interference in a residential installation. This equipment generates, uses,<br />
and can radiate radio frequency energy and, if not installed and used<br />
in accordance with the instructions, may cause harmful interference to<br />
radio communications. However, there is no guarantee that interference<br />
will not occur in a particular installation.<br />
If this equipment does cause harmful interference to radio or television<br />
reception, which can be determined by turning the equipment off and on,<br />
the user is encouraged to try to correct the interference by one or more of<br />
the following measures:<br />
• Reorient or relocate the receiving antenna.<br />
• Increase the separation between the equipment and the receiver.<br />
• Connect the equipment into an outlet on a circuit different from that to<br />
which the receiver is connected.<br />
• Consult the dealer or an experienced radio/TV technician for help.<br />
This equipment complies with FCC RF radiation exposure limits set forth<br />
for an uncontrolled environment. This equipment should be installed and<br />
operated with a minimum distance of 20 cm between the radiator and<br />
your body.<br />
FCC/IC NOTICE<br />
This equipment has been tested and found to comply with the limits for<br />
a Class B digital device, pursuant to Part 15 of the FCC rules. Operation<br />
is subject to the following two conditions: (1) This device may not cause<br />
harmful interference, and (2) this device must accept any interference<br />
received, including interference that may cause undesired operation. This<br />
device complies with the requirements for radio astronomy site avoidance<br />
as specified by the Globalstar National Science Foundation agreement of<br />
2001. It is compliant with CFR 25.213.<br />
This device automatically adjusts to transmission frequency according to<br />
its location and is compliant with international regulatory requirements.<br />
This Class B digital apparatus complies with Canadian ICES-003.<br />
MODEL: SMTPH<br />
CERTIFICATIONS<br />
ROHS and WEEE compliant<br />
Certified to FCC and CE emissions, immunity, and safety regulations.<br />
Meets FCC Part 25 regulations, Canada type approval, CISPR Publication<br />
22 (1985 1st edition), RTTE Directive (1999/EC), and IEC 60950<br />
safety standard.<br />
© 2011 <strong>Spot</strong> LLC. All rights reserved. Visit us online at findmeSPOT.com. All SPOT products described herein are the products of <strong>Spot</strong> LLC,<br />
which is not affiliated in any manner with <strong>Spot</strong> Image of Toulouse, France or <strong>Spot</strong> Image Corporation of Chantilly, Virginia. Made in China.<br />
Revision 1.0, January, 2011