

ULTRA Plus+ 1500 Airless Paint Sprayer - Graco Inc.
ULTRA Plus+ 1500 Airless Paint Sprayer - Graco Inc.
ULTRA Plus+ 1500 Airless Paint Sprayer - Graco Inc.

Create successful ePaper yourself
Turn your PDF publications into a flip-book with our unique Google optimized e-Paper software.
Operation<br />
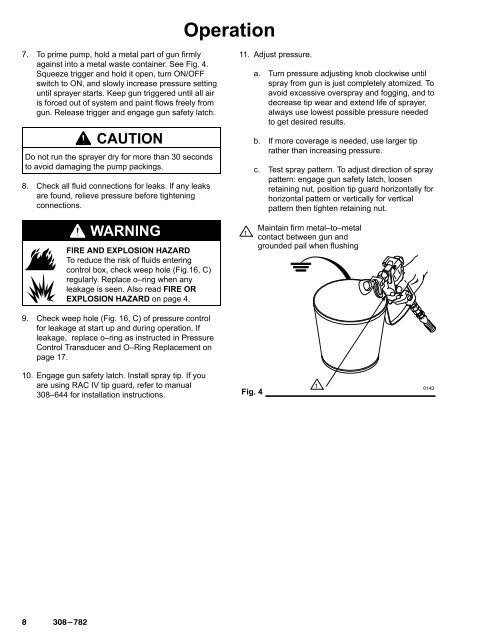
7. To prime pump, hold a metal part of gun firmly<br />
against into a metal waste container. See Fig. 4.<br />
Squeeze trigger and hold it open, turn ON/OFF<br />
switch to ON, and slowly increase pressure setting<br />
until sprayer starts. Keep gun triggered until all air<br />
is forced out of system and paint flows freely from<br />
gun. Release trigger and engage gun safety latch.<br />
CAUTION<br />
Do not run the sprayer dry for more than 30 seconds<br />
to avoid damaging the pump packings.<br />
8. Check all fluid connections for leaks. If any leaks<br />
are found, relieve pressure before tightening<br />
connections.<br />
11. Adjust pressure.<br />
a. Turn pressure adjusting knob clockwise until<br />
spray from gun is just completely atomized. To<br />
avoid excessive overspray and fogging, and to<br />
decrease tip wear and extend life of sprayer,<br />
always use lowest possible pressure needed<br />
to get desired results.<br />
b. If more coverage is needed, use larger tip<br />
rather than increasing pressure.<br />
c. Test spray pattern. To adjust direction of spray<br />
pattern: engage gun safety latch, loosen<br />
retaining nut, position tip guard horizontally for<br />
horizontal pattern or vertically for vertical<br />
pattern then tighten retaining nut.<br />
WARNING<br />
FIRE AND EXPLOSION HAZARD<br />
To reduce the risk of fluids entering<br />
control box, check weep hole (Fig.16, C)<br />
regularly. Replace o–ring when any<br />
leakage is seen. Also read FIRE OR<br />
EXPLOSION HAZARD on page 4.<br />
9. Check weep hole (Fig. 16, C) of pressure control<br />
for leakage at start up and during operation. If<br />
leakage, replace o–ring as instructed in Pressure<br />
Control Transducer and O–Ring Replacement on<br />
page 17.<br />
<br />
Maintain firm metal–to–metal<br />
contact between gun and<br />
grounded pail when flushing<br />
10. Engage gun safety latch. Install spray tip. If you<br />
are using RAC IV tip guard, refer to manual<br />
308–644 for installation instructions.<br />
Fig. 4


